
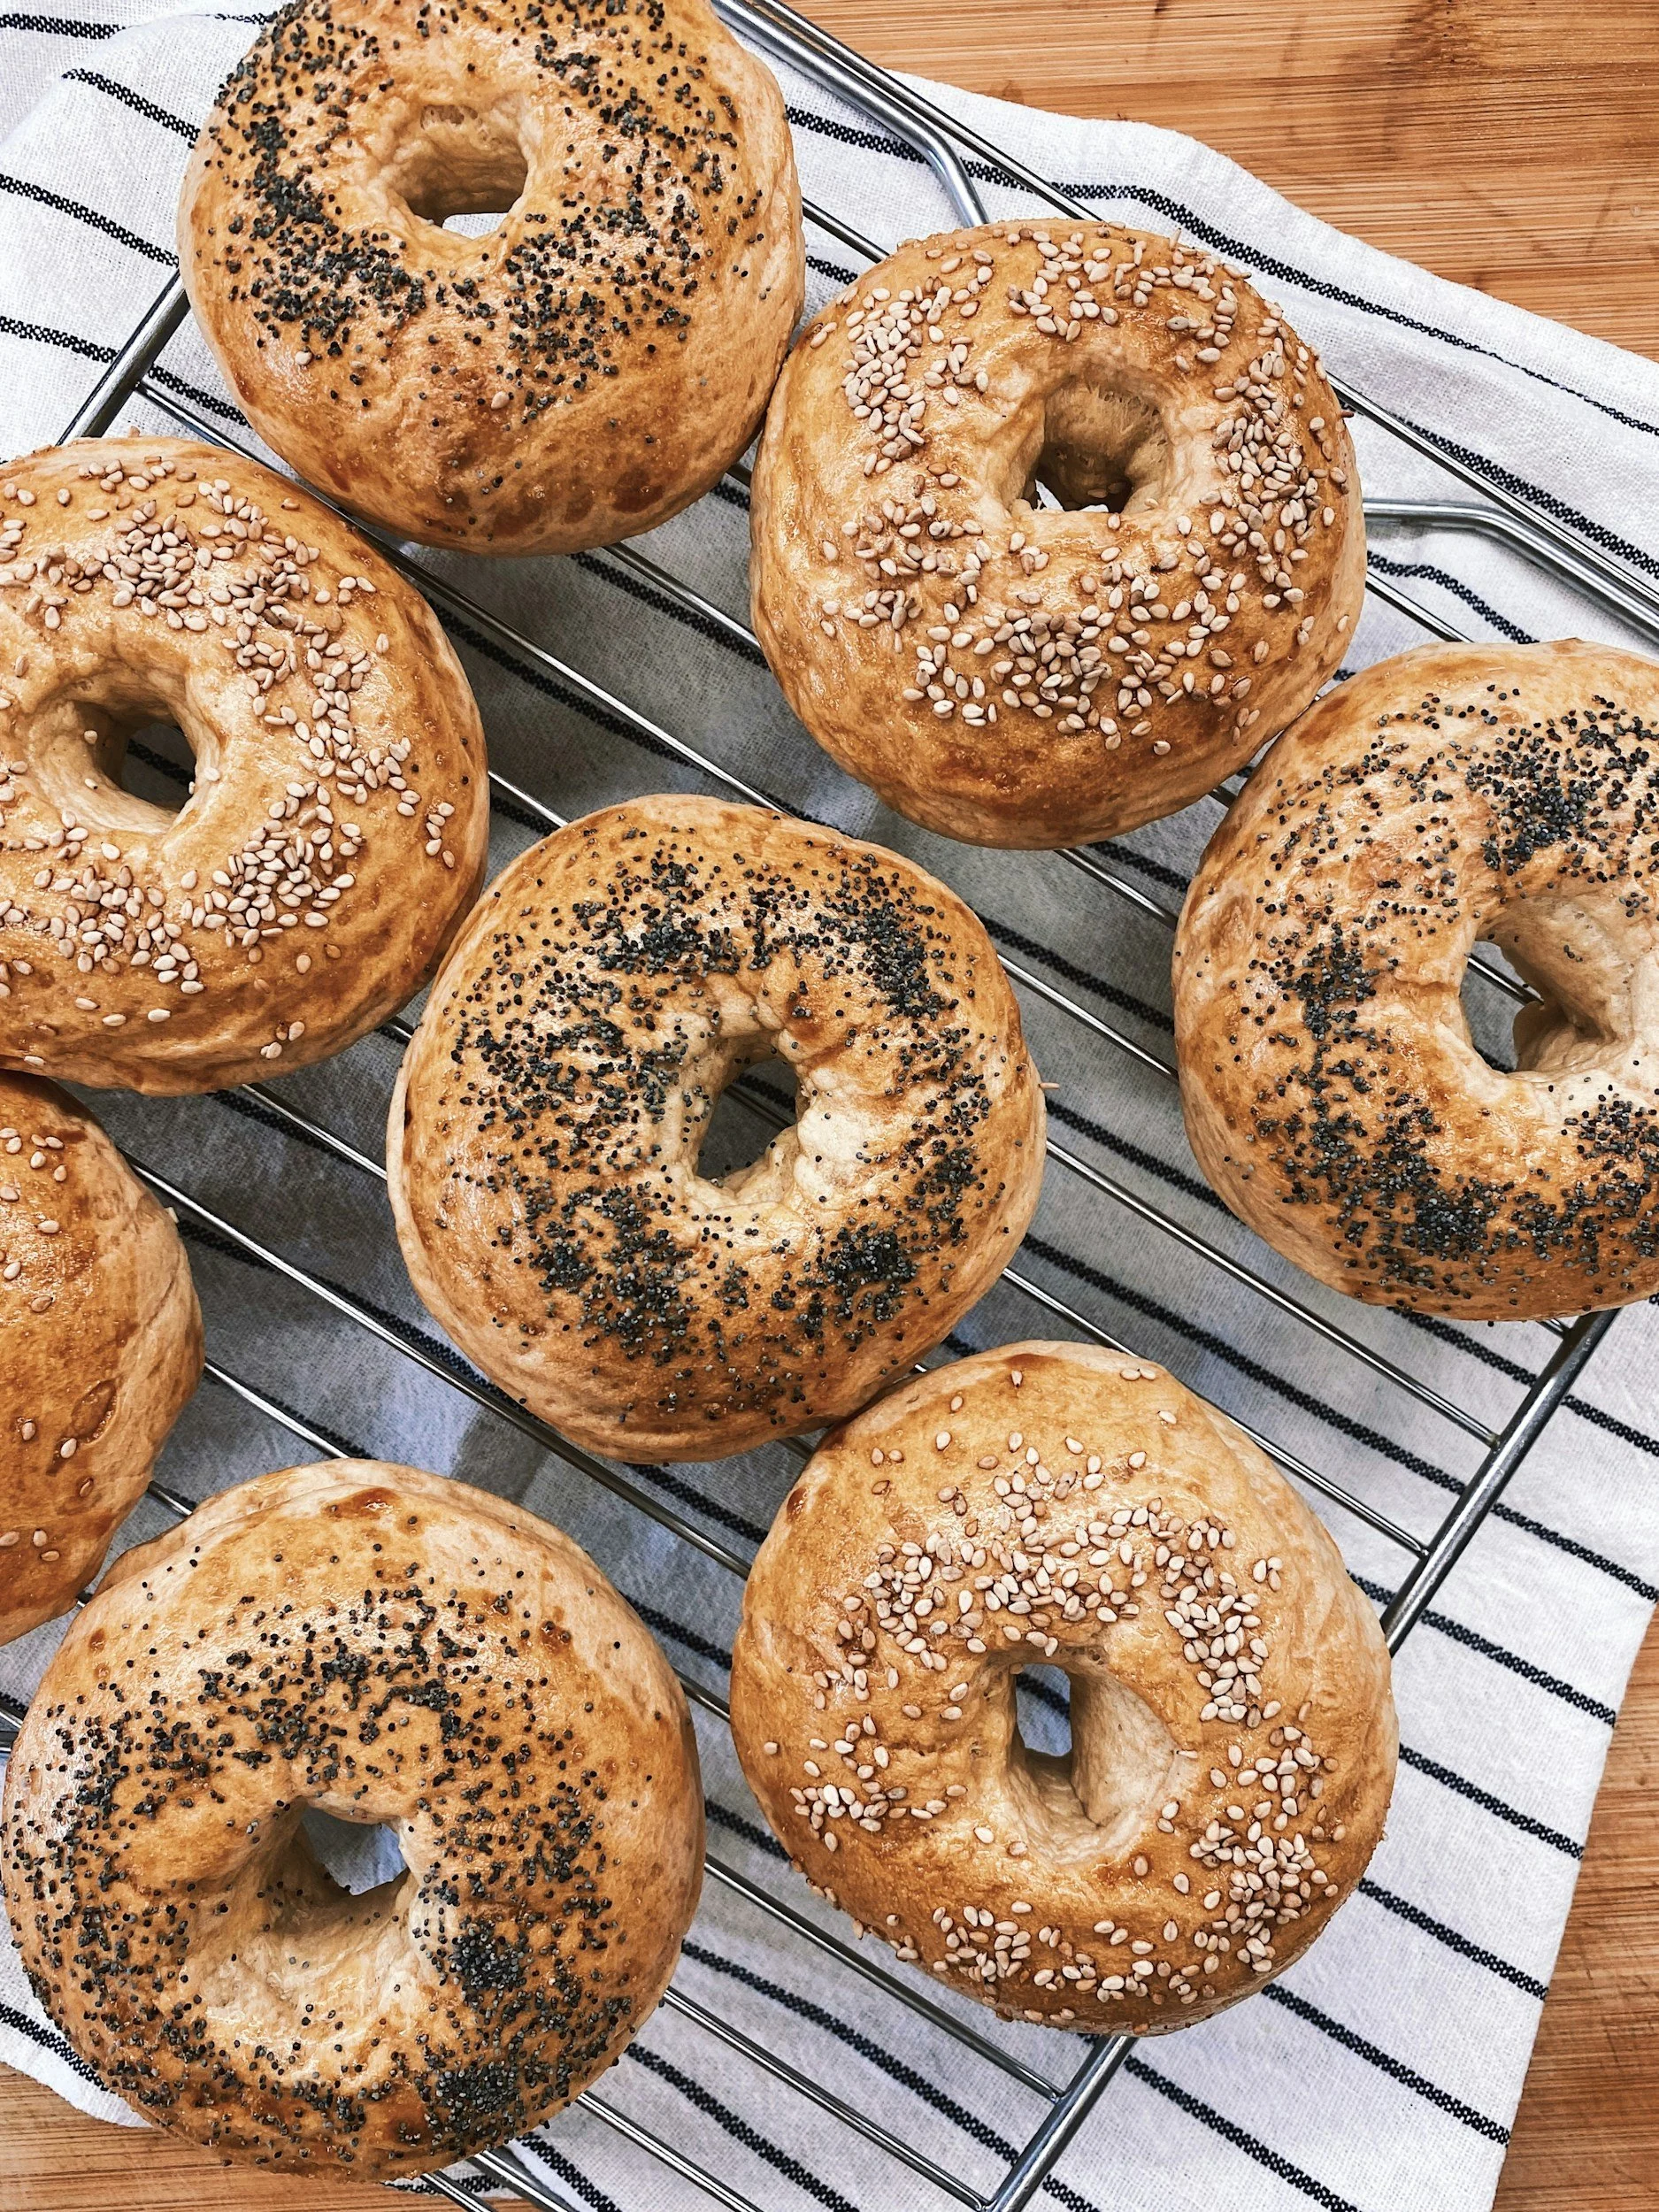
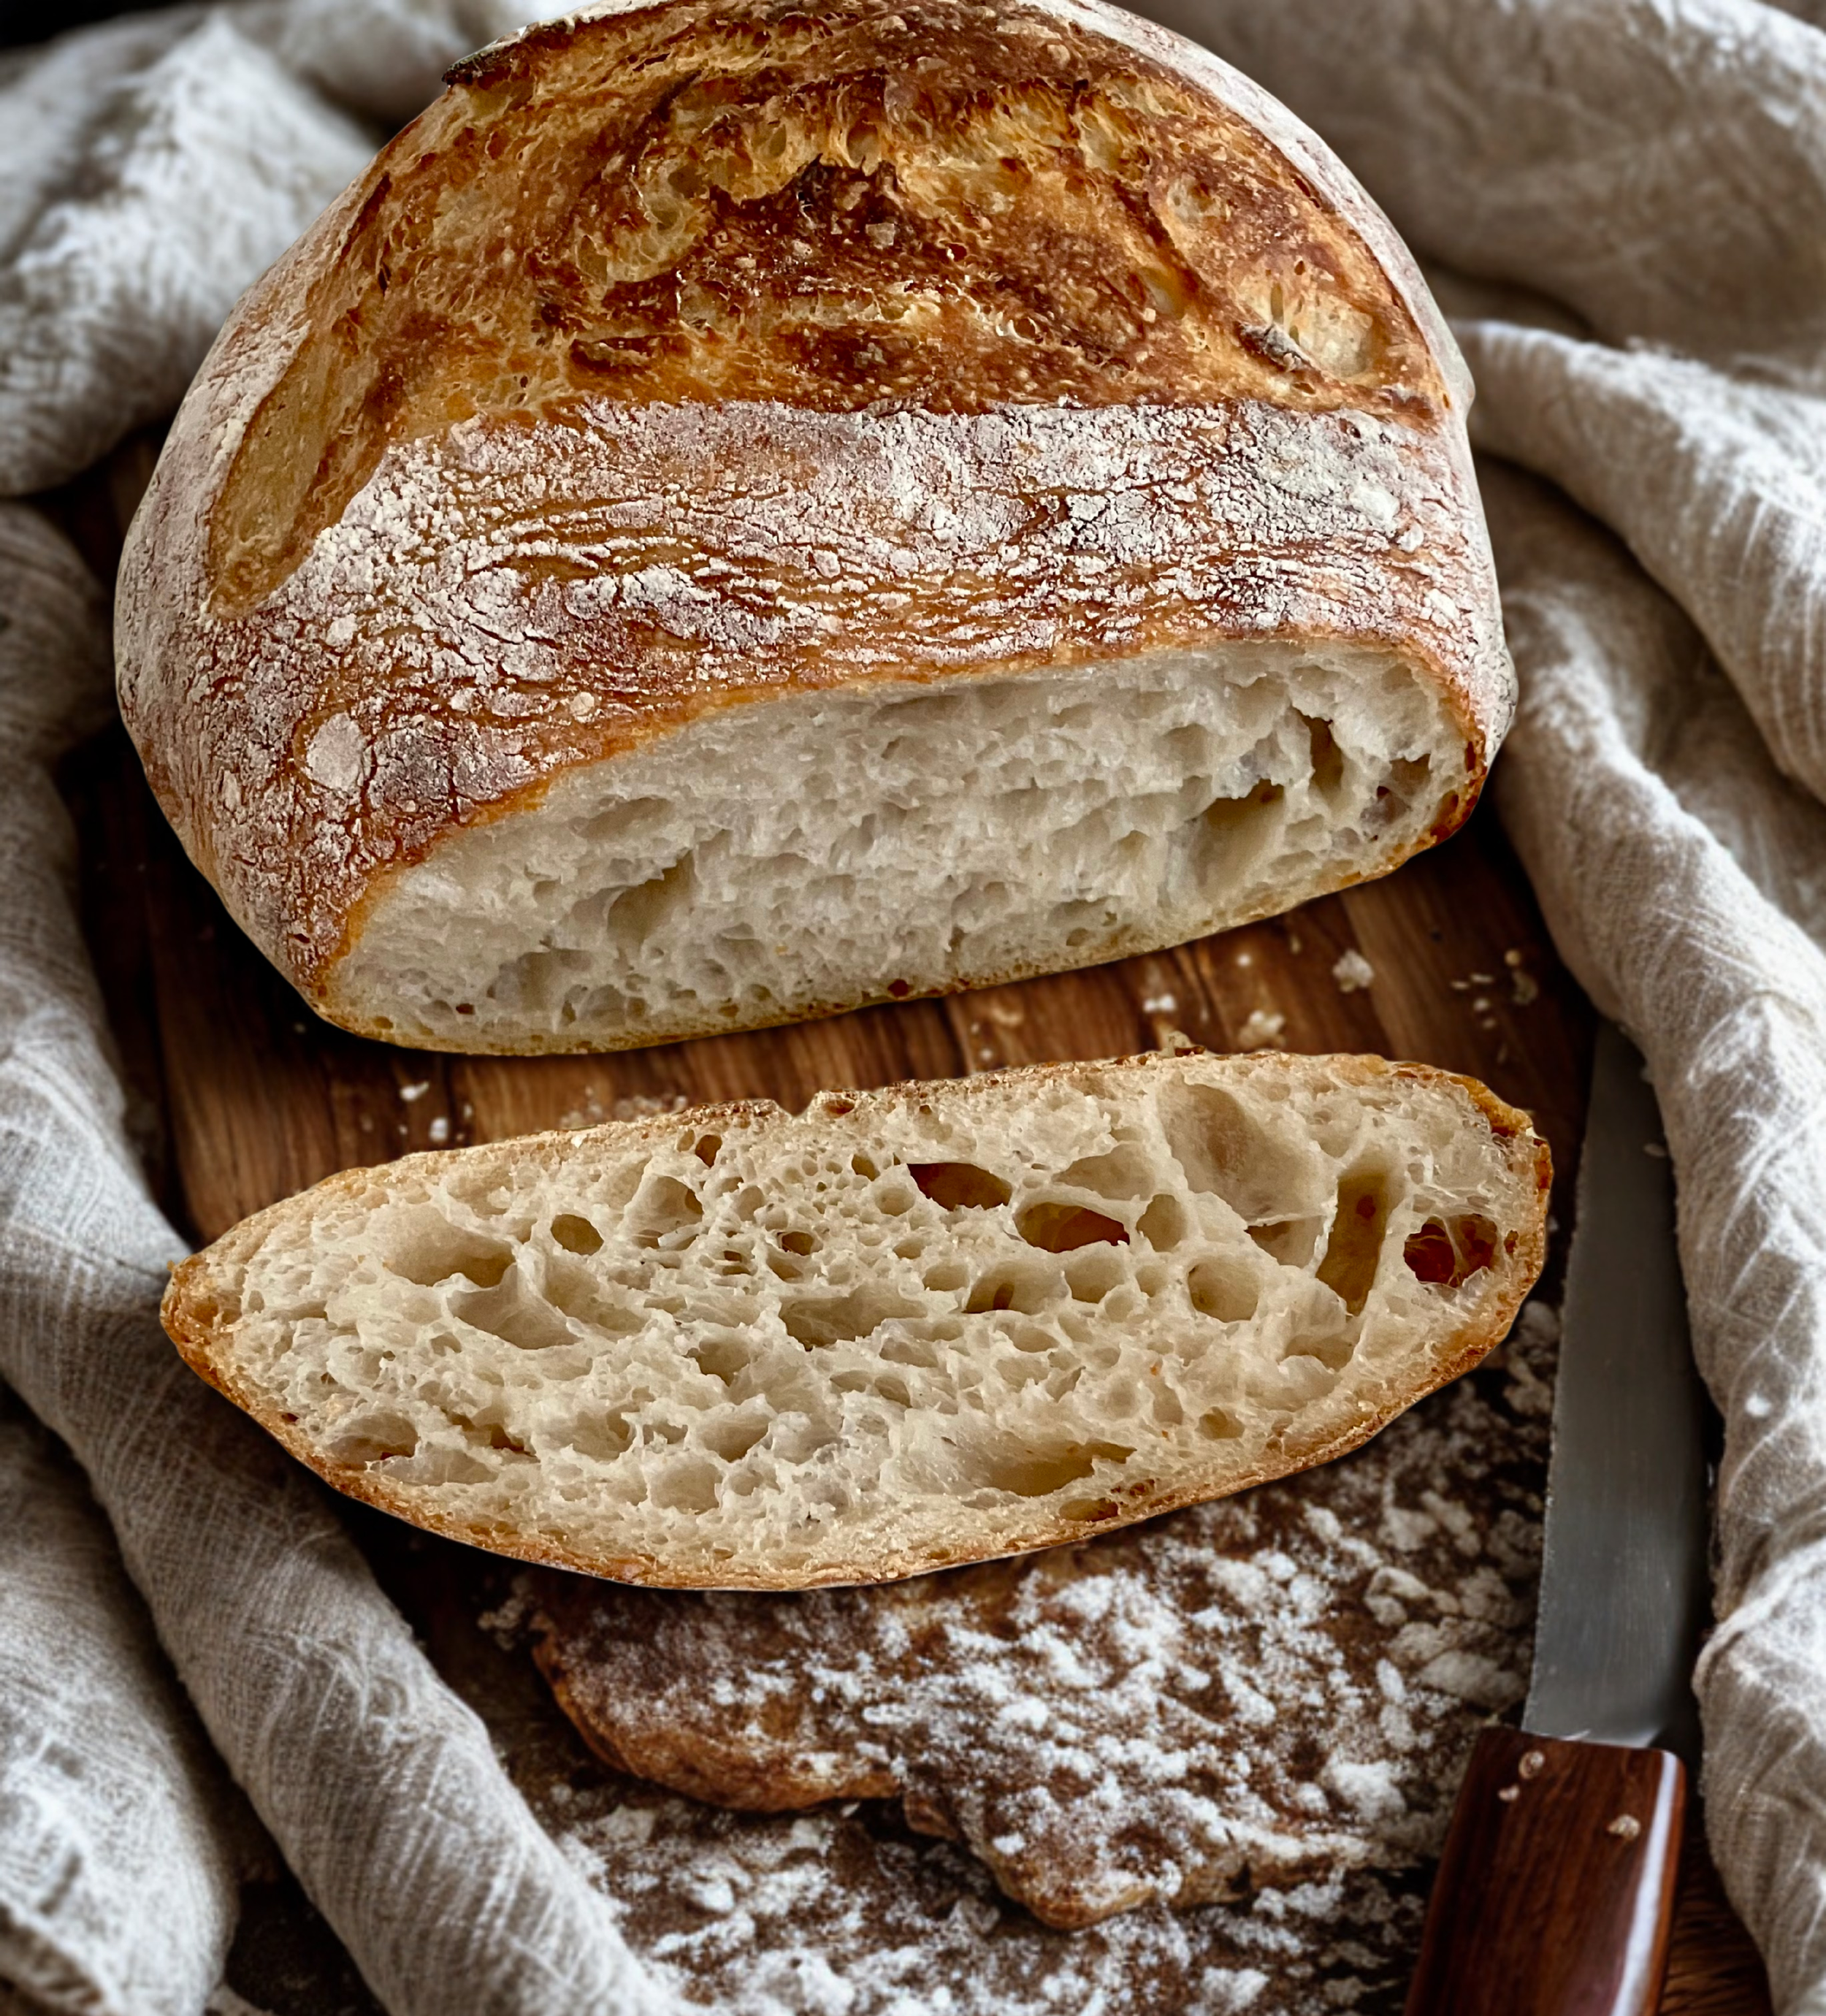
Foolproof Homemade Sourdough Bagels (Cold Ferment Method)
Have you ever wondered how to make big puffy homemade bagels that are similar to those from the bakery? Look no further! These homemade sourdough bagels are chewy, golden, and full of that classic bakery-style flavour with a NY style texture — made right in your own kitchen! This foolproof 5-ingredient sourdough bagel recipe is super easy. It uses active sourdough starter and simple pantry ingredients to create perfectly flavourful bagels, without commercial yeast. Whether you’re looking for a weekend baking project, a make-ahead breakfast, or a freezer-friendly staple, these sourdough bagels deliver reliable results and authentic texture every time.
As an Amazon Associate I earn from qualifying purchases.

This is simply the Best Sourdough Bagel Recipe (Step-by-Step)
*Last Updated: February 12, 2026
⭐⭐⭐⭐⭐ (4.9/4 based on taste tester reviews)
📖 Jump to Recipe | 💬 Jump to FAQs | 🖨️ Print Recipe
Active Time: 30 minutes | Fermentation: 24-72 hours | Bake: 25 minutes | Yield: 8-10 bagels | Serving Size: 1 bagel | Difficulty: Easy
How to Make Homemade Sourdough Bagels
This is simply the best homemade bagel recipe I've found! Its taken me months of work to develop and perfect this recipe. And after all that trial and error, I’m thrilled to share how to make homemade bagels from scratch (using your sourdough starter)!
What’s the secret to making these with only 5-ingredients? These naturally leavened bagels use no commercial yeast! These 5-ingredients sourdough bagels are simply the real deal: authentically chewy with a shiny, golden crust. They have that complex tangy flavour from 24-48 hours of cold fermentation. That irresistible sourdough tang we all know and love. Best of all, this recipe only requires 30 minutes of hands-on time—the rest is patiently waiting while the flavours develop. The best part, there’s no special equipment required to make these bagels! Find out more in the FAQs. Whether you're a sourdough beginner or experienced baker, you'll love how straightforward and forgiving this recipe is!
Why this recipe works:
No special equipment required (find out more in the FAQs)
Cold fermentation builds incredible flavour (traditional method!)
Just 5 ingredients (no special equipment needed)
30 minutes active time (fits any schedule)
Freezer-friendly (make ahead for weeks of breakfasts)
This recipe doubles and triples easily. Prep once, enjoy for weeks to come! (saves time)
Detailed photos and troubleshooting (foolproof results)

Why I created this recipe
I developed this recipe when I noticed that the bagels from the store had a long list of ingredients, most that I couldn’t recognize or pronounce. Being careful of what I feed my family, I didn’t like the fact that bagels from the store had so many ingredients, oftentimes additives and preservatives. So, I set out to learn how to make homemade bagels! I’ve worked, tested and re-worked this homemade bagel recipe for 6 months before landing on this version, that we simply ADORE!
In all of the variations that I’ve tried and tested these variables:
Different flours (All-purpose vs whole wheat vs blends with spelt vs millet flour and variations)
Boiling times (5 seconds vs 10 seconds vs 20 seconds or more)
Oven temperatures (400°F vs 425°F)
Different shaping methods (poke-and-stretch vs rope method). I can assure you the poke-and-stretch works MUCH better. ;)
When learning how to make bagels, I discovered that the secret is a combination of factors. The type of flour, the right boil time, a preheated oven set at the proper temperature, and the right shaping method. These small variations matter! For example, a 5 second boil time, and my homemade bagels were basically small round bread loaves. I tried increasing the boil time, and they were so tough we had trouble chewing them! I found the sweet spot to be at 10 seconds of boil time per side.
Since perfecting this recipe, these homemade bagels have become mine and my sons breakfast go-to for busy weekday mornings, especially when its a cream cheese bagel topped with sesame seeds. ;)
Perfect for: Weekend baking, meal prep, brunch, gift giving
Why You'll Love These Homemade Sourdough Bagels
✓ Authentic Chewy Texture: Just like bakery bagels with that signature dense, chewy crumb
✓ Incredible Tangy Flavour: Long cold fermentation develops complex sourdough taste
✓ Simple Ingredients: Just 5 basic ingredients you probably have on hand
✓ Flexible Timeline: Make the dough 1-2 days ahead, bake when convenient
✓ No Commercial Yeast: 100% naturally leavened with sourdough starter
✓ Customizable: Add your favorite toppings - everything bagel seasoning, sesame, poppy seeds
✓ Freezer-Friendly: Make a double batch and freeze for quick breakfasts
✓ Healthier Option: Sourdough fermentation makes nutrients more bioavailable and easier to digest
✓ Cost-Effective: Homemade bagels cost pennies compared to bakery prices
✓ Impressive: These look and taste like professional bakery bagels!

When I discovered how to make bagels, I discovered how increadibly satisfying it is to pull a tray of golden, perfectly shaped bagels from my oven. These sourdough bagels combine the best of both worlds: the authentic chewy texture and shiny crust of traditional New York-style bagels with the complex, tangy flavour that only sourdough can provide.
What makes these homemade bagels truly special is the long, cold fermentation period. While the dough rests in your refrigerator for 24-48 hours, the sourdough starter works its magic, developing layers of flavour that you simply can't get from quick recipes. The result is a bagel with depth, character, and that unmistakable sourdough tang that makes every bite memorable.
How to make these homemade sourdough bagels? The process is surprisingly straightforward. Mix the dough, let it ferment in the fridge (perfect for busy schedules!), shape into bagels, give them a quick boil, and bake. That brief boil in water is the secret to achieving that signature shiny, chewy crust that makes bagels so distinctive. Without it, you'd just have round bread - good, but not a true bagel.
These bagels are perfect for weekend baking projects, meal prep for the week ahead, or impressing guests at brunch. Make them plain and simple, or go wild with toppings like everything bagel seasoning, sesame seeds, poppy seeds, or even cinnamon sugar. Slice them fresh from the oven, smear with cream cheese, and you'll understand why homemade bagels are worth every minute of effort.
Whether you're an experienced sourdough baker or just starting your natural fermentation journey, learning how to make bagels is both achievable and rewarding. They freeze beautifully, making them a practical addition to your weekly routine. Once you taste the difference between homemade sourdough bagels and store-bought versions, there's no going back.
Why the Long Fermentation Matters:
The 24-48 hour cold fermentation isn't just for flavour - it actually transforms the bagel:
Breaks down gluten: Makes bagels easier to digest
Develops organic acids: Creates that characteristic sourdough tang
Improves texture: Longer fermentation = better crumb structure
Enhances nutrition: Makes minerals more bioavailable
Natural preservation: Sourdough naturally stays fresh longer
Ingredients for Homemade Sourdough Bagels
Dough Ingredients
1 1/4 cups (300ml) cold water
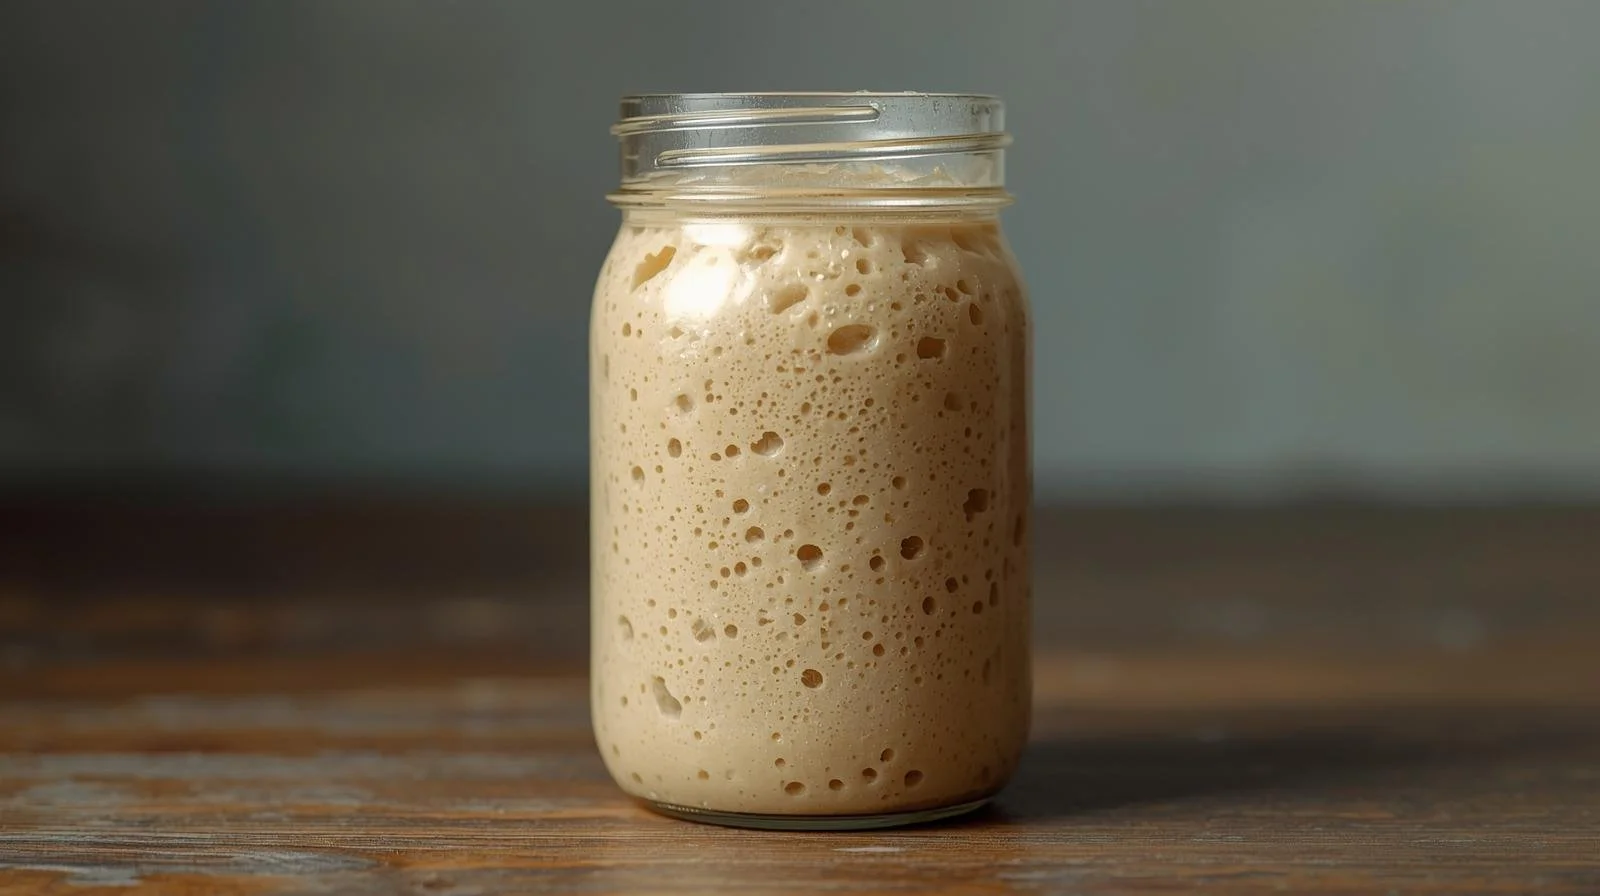
175g (3/4 cup) active, bubbly sourdough starter - fed 10-12 hours before using
3 tablespoons (40g) granulated sugar - helps with browning and flavour
2 teaspoons (12g) salt - I use kosher salt
3 cups (375g) all-purpose flour - bread flour also works for extra chew
For Boiling
Water - enough to fill a pot halfway
Here are two (optional) variations that can help you achieve the crust you’d like:
Want a shiny crust? Add: **1 tablespoon (15g) sugar or honey** (optional) - adds shine to crust
Dark and shiny crust? Add: **1 tablespoon (18g) baking soda** (optional) - creates darker, shinier crust
Optional Toppings
Everything bagel seasoning
Sesame seeds (white or black)
Poppy seeds
Dried minced onion
Dried minced garlic
Coarse salt
Cinnamon sugar (for sweet bagels)
Sharp cheddar cheese, shredded
Equipment Needed
Stand mixer with dough hook (or kneed by hand)
Large mixing bowl
Cotton tea towel (recommended) or plastic wrap
Bench scraper (Affiliate Link) or sharp knife
Baking sheet
Parchment paper
Medium to large pot for boiling
Slotted spoon or spider strainer
Wire cooling rack (Affiliate link)
Kitchen timer
Digital scale (Affiliate Link) (highly recommended)
Ingredient Notes & Substitutions
Sourdough Starter: Must be active and bubbly! Feed your starter roughly 10-12 hours before making bagels. It should have doubled in size and pass the float test (a spoonful floats in water). If your starter isn't active, your bagels won't rise properly.
Water Temperature: Use cold water, not warm. Cold water slows fermentation, which is what we want since the dough will ferment in the fridge for 24-48 hours.
Sugar: Granulated white sugar is traditional, but you can substitute with honey (use 2 tablespoons) or maple syrup. Sugar feeds the starter, adds flavour, and helps with browning. Don't omit!
Salt: Fine sea salt or table salt work best. Don't use coarse salt as it won't dissolve evenly. Salt strengthens gluten and controls fermentation rate.
Flour: All-purpose flour (10-12% protein) creates classic bagels. For extra chewy bagels, use bread flour (12-14% protein). Can substitute up to 1 cup with whole wheat flour for heartier bagels. Avoid cake or pastry flour (too soft).
Bread Flour vs. All-Purpose:
All-purpose: Softer, more tender bagels (still chewy!)
Bread flour: Extra chewy, denser texture (more traditional)
Can I Make These Gluten-Free? Unfortunately, no. Bagels require high-gluten flour to achieve their signature chewy texture. Gluten-free versions would be entirely different recipes.
How to Make Homemade Sourdough Bagels: Step-by-Step instructions
Step 1: Mix the Dough (10 minutes)
Add ingredients to your stand mixer bowl in this order:
1 1/4 cups cold water
175g active sourdough starter (it should float)
3 tablespoons sugar
2 teaspoons salt
3 cups all-purpose flour
Attach the dough hook to your stand mixer. Mix on low speed (speed 2) for 9 minutes until the dough is smooth, elastic, and pulls away from the sides of the bowl.
What to expect: After 3-4 minutes, you'll notice a dramatic change in texture. The dough will transform from shaggy and rough to smooth and stretchy.
Adjusting consistency:
Too dry/stiff? Add water 1 tablespoon at a time while mixing
Too sticky/wet? Add flour 1 tablespoon at a time while mixing
Perfect dough: Should be tacky but not sticky, smooth and elastic, passes the windowpane test
Don't have a stand mixer? Mix by hand in a large bowl until combined, then knead on a floured surface for 10-12 minutes until smooth and elastic.
Windowpane Test: Pinch off a small piece of dough and gently stretch it. If you can stretch it thin enough to see light through it without tearing, the gluten is properly developed.
Step 2: Cold Fermentation (24-48 hours)
Cover the bowl with a damp cotton tea towel or plastic wrap. Place in the refrigerator.
Fermentation timeline:
Minimum: 24 hours (good flavour, adequate rise)
Optimal: 36-42 hours (best flavour and texture)
Maximum: 48 hours (maximum tang, slightly denser)
What's happening: The cold temperature slows down fermentation dramatically. Your sourdough starter continues working slowly, developing complex flavours and breaking down gluten for better digestibility.
Visual cues: The dough should increase in size by about 50-75%. It won't double like warm-proofed dough, and that's completely normal!
Can I go longer than 48 hours? You can push it to 60-72 hours, but the flavour becomes increasingly sour and the dough may become more difficult to shape.
Step 3: Divide and Pre-Shape homemade bagels (10 minutes)
Remove the dough from the refrigerator. Let it sit at room temperature for 10-15 minutes (makes it easier to work with).
Lightly dust your work surface with flour.
Remove the dough from the fridge and divide:
For 8 regular bagels: Cut into 8 equal pieces (about 115g each)
For 10 smaller bagels: Cut into 10 pieces (about 90g each) - perfect for kids or portion control
How to divide: for 8 bagels
Pat dough into a ball shape
Cut in half with bench scraper
Cut each half in half (now you have 4 pieces)
Cut each quarter in half (now you have 8 pieces)
How to divide: for 10 bagels
Pat dough into a ball shape
Cut in half with a bench scraper
cut each half into 5 equal sized pieces
Shape into balls:
Take one piece of dough
Cup your hand over it on the work surface
Move your hand in small circles, creating tension
The dough will form a smooth, tight ball
Lightly dust each ball with flour
Repeat for all pieces
Rest: Cover shaped balls with a tea towel and let rest on the counter for 30 minutes.
Why this rest matters: This relaxes the gluten, making bagels easier to shape. Skip this and your bagels will spring back and be difficult to form.
Step 4: Shape the homemade Bagels (10 minutes)
After the 30-minute rest, it's time to create that iconic bagel shape!
Poke and Stretch Method
1. Take one dough ball
2. Poke your thumb or index finger straight through the center
3. Insert both thumbs into the hole
4. Gently stretch and rotate the dough, enlarging the hole
5. Keep stretching until the hole is about 2 inches (5cm) in diameter
6. The bagel should look oversized - this is intentional!
Important: Make the hole BIGGER than you think! The hole shrinks significantly during resting, boiling, and baking. If your hole is too small, it will close back up.
After shaping all bagels:
Place shaped bagels on a lightly floured surface
Cover with tea towel
Rest for 30 minutes at room temperature
What you'll see: The bagels will puff up slightly and the holes will shrink a bit. This is normal!
Pro tip: If the dough is springing back too much, let it rest another 10-15 minutes before trying again.
Step 5: Preheat Oven (While Bagels Rest)
While the shaped bagels rest for 30 minutes, preheat your oven to 425°F (220°C).
Position the oven rack in the center of the oven for even baking.
Line a large baking sheet (or two smaller ones) with parchment paper. Set aside.
Why preheat now? Timing is everything! Your oven needs to be fully hot when the bagels are ready to bake right after boiling.
Step 6: Boil the Bagels (5 minutes)
Fill a medium to large pot halfway with water. Bring to a rolling boil over high heat. When developing and testing this recipe, I learned that boil time is crucial when learning how to make bagels.
Optional additions to boiling water:
1 tablespoon brown sugar or honey (adds shine and slight sweetness). Adding these will add lots of sweetness to the bagels.
1 tablespoon baking soda (creates darker, shinier, more pretzel-like crust)
Boiling process:
Gently lower 1-2 bagels into the boiling water (don't overcrowd)
Boil for 10 seconds - the bagel should float immediately
Using a slotted spoon, flip the bagel over
Boil the second side for 10 seconds
Remove with slotted spoon, letting excess water drain
Place on parchment-lined baking sheet
Repeat with remaining bagels
Important timing notes:
Don't skip boiling! This step is what makes a bagel a bagel, not just round bread
10 seconds per side = chewy crust, softer interior (highly recommended)
30 seconds per side = very chewy, dense crust
Troubleshooting boiling:
Bagel sinks: Dough is underproofed or overworked - still bake it, but next time let ferment longer
Bagel falls apart: Too much flour on surface - use less flour when shaping
Hole closes: Make hole bigger next time during shaping
Step 7: Add Toppings (2 minutes)
Right after boiling, while still wet, is the perfect time to add toppings! The moisture helps toppings stick.
Classic topping options:
Everything bagel seasoning (most popular!)
Sesame seeds (toast first for extra flavour)
Poppy seeds
Coarse sea salt
Dried minced onion
Dried minced garlic
Combination of above
Sweet topping options:
Cinnamon sugar
Coarse sugar
To apply toppings:
Place toppings in a shallow bowl or plate
Immediately after boiling, while bagel is still wet, press the top into the topping
Or sprinkle toppings generously on top
Place on baking sheet topping-side up
How much topping? Don't be shy! Use more than you think - some will fall off during baking and transferring to a storage container.
Want plain bagels? Skip the toppings and bake as-is.
Step 8: Bake (20-25 minutes)
Place the baking sheet in the preheated 425°F (220°C) oven.
Bake for 20-25 minutes until the bagels are deep golden brown.
How to tell they're done:
Deep golden brown colour on top and sides
Toppings are toasted (but not burned)
The smell is incredible!
Sound hollow when tapped on the bottom
Timing guide:
20 minutes: Lighter golden colour, softer texture
23 minutes: Classic golden brown (recommended)
25 minutes: Deep golden, extra crispy crust
Oven differences: Every oven varies! Start checking at 20 minutes and add time as needed.
Rotate halfway? For even browning, rotate the baking sheet 180° at the 12-minute mark.
Multiple trays? Bake one tray at a time for best results, or switch positions halfway through if baking two trays.
Step 9: Cool (10-15 minutes)
Remove bagels from the oven. The smell will be incredible!
Let them cool on the baking sheet for 5 minutes - they're delicate when hot.
After 5 minutes, transfer bagels to a wire cooling rack. Let cool for at least another 10 minutes before slicing.
Can you eat them warm? Absolutely! Warm bagels are amazing. But let them cool at least 10-15 minutes so the interior sets properly.
Slicing tip: Use a serrated bread knife and cut with a gentle sawing motion to avoid squashing the bagel.
Listen for the crackle: As bagels cool, you might hear the crust crackling. This is the sound of perfectly baked bagels!
Tips for Perfect Homemade Sourdough Bagels
🥯 Use Active Starter: Your starter MUST be bubbly and active. If it's sluggish, your bagels won't rise. Feed your starter 10-12 hours before mixing dough and make sure it passes the float test.
⚖️ Weigh Your Ingredients: Use a kitchen scale for accuracy. Flour measurements can vary by 30g or more depending on how you scoop, which drastically affects dough consistency.
❄️ Cold Fermentation is Key: Don't rush this step! The 24-48 hour cold ferment develops flavour and improves texture. It's what makes these bagels special.
🕳️ Make Holes BIG: The hole should be 2 inches (5cm) in diameter when shaped. It will shrink significantly during resting, boiling, and baking. Too small and it closes completely!
💧 Don't Over-Boil: Just 10 seconds per side! Longer boiling = denser, chewier bagels
🌡️ Accurate Oven Temp: Use an oven thermometer. If your oven runs hot or cold, your bagels will overbake or underbake.
🧂 Season Generously: Use more toppings than you think! Some will fall off during baking. Press toppings gently into the wet surface after boiling.
⏰ Time the Process: Have your water boiling and oven preheated BEFORE you start boiling. Work quickly so bagels go from boiling to oven without delay.
📝 Keep Notes: Write down fermentation times and temperatures. Sourdough timing varies with kitchen temp and starter strength.
🧊 Freeze for Later: These freeze beautifully! Slice before freezing for easy toasting straight from frozen.
Frequently Asked Questions: How to make bagels
How many homemade bagels does this recipe make?
This recipe makes 8 regular-sized bagels or 10 smaller bagels (perfect for kids or portion control).
Each regular bagel weighs approximately 115g before baking. Smaller bagels weigh about 90g each.
Can I make homemade sourdough bagels without a stand mixer?
Yes! You can absolutely make these by hand:
Mix all ingredients in a large bowl with a wooden spoon until combined
Turn out onto a lightly floured surface
Knead by hand for 10-12 minutes until smooth, elastic, and passes the windowpane test. Your hands may get tired, but the result is just as good!
The stand mixer just makes the kneading easier and more consistent.
How long do I need to cold ferment sourdough bagels?
Minimum: 24 hours
Optimal: 36-42 hours
Maximum: 48 hours (up to 72 hours for very tangy bagels)
The longer the cold ferment, the:
More complex the flavour
More sour the taste
Easier the dough is to digest
Better the texture
Most bakers find 36-42 hours to be the sweet spot for flavour and texture.
Do sourdough bagels need to be boiled?
Yes - this step is essential! Boiling is what makes a bagel a bagel, not just round bread.
What boiling does:
Creates the signature shiny, chewy crust
This process gelatinizes the starches on the surface of the dough, giving bagels their distinctive crust texture
Sets the shape so bagels don't spread in the oven
Creates that distinct bagel texture
Without boiling, you'll have soft rolls with holes - not true bagels.
Why are my sourdough bagels dense?
Dense bagels are usually caused by:
Inactive starter: Starter wasn't bubbly and active before mixing
Under-fermented: Didn't ferment long enough (need minimum 24 hours)
Too much flour: Added too much during mixing or shaping
Over-boiled: Boiled longer than 10 seconds per side
Old flour: Using old flour with weak gluten
Solution: Make sure your starter is very active, ferment the full 24+ hours, and measure flour accurately.
Can I make sourdough bagels without sugar?
You can reduce the sugar, but don't omit it completely. Sugar serves several purposes:
Feeds the sourdough starter
Helps with browning in the oven
Balances the sour flavour
Contributes to texture
You can: Reduce to 1-2 tablespoons (from 3 tablespoons)
Don't: Omit entirely or bagels will be pale and very sour
Alternative: Replace sugar with 2 tablespoons honey or maple syrup.
How do I know when my sourdough starter is ready to use?
Your sourdough starter is ready when:
✓ Doubled or tripled in size since last feeding (4-12 hours ago)
✓ Full of bubbles throughout (not just on top)
✓ Passes the float test: Drop a spoonful in water - it should float
✓ Smells pleasantly sour and slightly yeasty (not like acetone or nail polish remover)
✓ Has a domed top with webbing when you look at the side of the jar
If your starter is sluggish, feed it and wait until it's at peak activity before making bagels.
Pro Tip: If your sourdough starter is weak and hasn’t been fed in a while, and want the best results possible? Feed it every 24 hours for 3-4 days before using it, making sure to leave it on the counter (don’t put tin the fridge). Feeding it regularly will increase its strength and improve your baking results.
What temperature should the water be for sourdough bagels?
Use cold water (straight from the tap, around 60-70°F/15-21°C).
Why cold water?
Slows fermentation during mixing
Prevents dough from fermenting too fast before refrigeration
Easier to control the fermentation timeline
Don't use warm water like you would for commercial yeast dough. The cold fermentation will do all the work!
Can I freeze sourdough bagels?
Absolutely! Sourdough bagels freeze beautifully for up to 3 months.
To freeze:
Cool bagels completely to room temperature
Slice the bagels before freezing (makes toasting easier)
Place in freezer bags, removing as much air as possible
Label with date
Freeze
To thaw and serve:
Toaster: Toast pre-cut bagels directly from frozen (add 1-2 minutes to normal time)
Oven: Wrap in foil, heat at 350°F for about 10 minutes
Room temp: Leave out 1-2 hours to thaw naturally
Pro tip: Freeze bagels individually first on a baking sheet, then transfer to bags. This prevents them from sticking together.
How long do sourdough bagels stay fresh?
Room temperature: 2-3 days in a paper bag or bread box
Refrigerator: 5-7 days in an airtight container (can make them slightly stale)
Freezer: 3 months in freezer bags
Best storage method:
Day 1-2: Room temperature in a bread box
Day 3+: Slice and freeze any you won't eat within 2 days
To refresh stale bagels:
Toast or heat in 350°F oven for 5 minutes. They'll taste freshly baked again!
What's the best flour for sourdough bagels?
Best options:
All-Purpose Flour (10-12% protein) - Creates classic chewy bagels with tender interior. Most accessible option.
Bread Flour (12-14% protein) - Creates extra chewy, denser bagels. More traditional New York-style texture.
Combination: 2 cups bread flour + 1 cup all-purpose for a middle ground
Don't use:
Cake flour or pastry flour (too soft, won't hold shape)
100% whole wheat (too dense and heavy)
Can use: Up to 1 cup whole wheat flour + 2 cups all-purpose for heartier bagels.
Why do I need to boil bagels before baking?
Boiling is the secret to authentic bagels! Here's what it does:
Creates the crust:
Forms that characteristic shiny, chewy exterior
Prevents bagels from spreading in the oven
Sets the texture:
Inside stays soft and chewy
Outside becomes dense and glossy
Creates the distinctive bagel "bite"
Without boiling: You'd have soft rolls with holes - not true bagels!
Fun fact: Montreal bagels are boiled in honey water, New York bagels in plain water or water with malt syrup.
Can I make sourdough bagels the same day?
It's possible but not recommended. The 24-48 hour cold ferment is what makes these bagels special!
If you must make same-day:
Use very active starter
Let dough ferment at room temp 6-8 hours until doubled
Shape and rest 30 minutes
Boil and bake as directed
Downsides:
Less developed flavour (won't taste as complex)
Less tangy (minimal sourdough flavour)
Potentially tougher texture
Misses the whole point of sourdough bagels!
Better option: Plan ahead! Mix dough Thursday, bake Saturday.
What if my bagel dough is too sticky?
During mixing:
- Add flour 1 tablespoon at a time until dough pulls away from bowl
- Bagel dough should be tacky but not sticky
- It should be firmer than bread dough
During shaping:
Dust work surface lightly with flour
Use just enough flour to prevent sticking
Too much flour makes dry, pale bagels
After refrigeration:
Let cold dough rest 10-15 minutes at room temp
It will be easier to handle when slightly warm
Is it too wet? Add 2-4 tablespoons flour total. Don't add too much or bagels will be dense.
Can I add ingredients like cheese or jalapeños to the dough?
Yes! You can add mix-ins, but timing matters:
Best method:
Add mix-ins during the last 1-2 minutes of mixing
Knead just until distributed
Good mix-ins:
Sharp cheddar cheese, shredded (1 cup)
Diced jalapeños (1/2 cup)
Dried cranberries (1/2 cup)
Chopped olives (1/2 cup)
Herbs (2 tablespoons dried or 1/4 cup fresh)
Don't add:
Very wet ingredients (will make dough too sticky)
Too many mix-ins (more than 1 cup total)
Note: Mix-ins can interfere with shaping and may fall out during boiling.
Why didn't my bagels rise during fermentation?
Common causes:
Inactive starter: Wasn't bubbly and active when you mixed the dough
Starter ratio too low: 175g may not be enough for some starters - try 200-225g
Too cold: Refrigerator was below 35°F - dough barely ferments
Not enough time: Give it the full 24-48 hours
Too much salt: Salt can inhibit fermentation
Solution: Make sure starter is at peak activity. Sourdough rises slower than commercial yeast - be patient!
Note: Cold-fermented dough only rises 50-75%, not double. This is normal!
What toppings work best on sourdough bagels?
Most Popular:
Everything bagel seasoning (sesame, poppy, onion, garlic, salt)
Sesame seeds (white, black, or mixed)
Poppy seeds
Coarse sea salt
Dried onion flakes
Dried granular garlic
Sweet options:
Cinnamon sugar
Coarse sugar
How to make toppings stick:
Apply right after boiling while bagels are still wet
Press toppings gently into surface
Use more than you think - some will fall off
Can I make sourdough bagels vegan?
Good news: This recipe is already vegan!
It contains:
Water
Sourdough starter (just flour and water)
Sugar
Salt
Flour
No eggs, dairy, or animal products.
Optional egg wash: Some recipes brush with egg wash for shine, but this isn't included in this recipe.
Do I have to use a dough hook or can I use the paddle attachment?
Only use the dough hook! Don’t use the paddle attachment
Why?:
Dough hook kneads and develops gluten properly
Paddle attachment just mixes - doesn't knead
Bagel dough is too stiff for the paddle
You risk damaging your mixer with the paddle on stiff dough
If you only have a paddle:
Mix until combined with paddle
Finish kneading by hand for 8-10 minutes
How do I reheat frozen bagels?
Best methods:
Toaster (easiest):
Slice bagels before freezing
Toast directly from frozen
Add 1-2 minutes to normal toasting time
Oven (best for whole bagels):**
- Wrap frozen bagel in foil
- Bake at 350°F (175°C) for 10-15 minutes
- Unwrap for last 2-3 minutes to crisp up
Microwave (I use this method all the time):
Microwave the whole (uncut) bagel for 20 seconds
Slice bagel with a serrated knife over a cutting board
Toast as you normally would
What's the difference between New York and Montreal-style bagels?
New York-Style (Similar to this Recipe):
Boiled in plain water or water with malt
Baked at moderate temp (425°F)
Larger, softer, fluffier
Topped with various seeds
Served with cream cheese
Montreal-Style:
Boiled in honey-sweetened water
Baked in wood-fired ovens
Smaller, denser, sweeter
Always hand-rolled with a hole
Crispy exterior, chewy interior
This recipe is closer to New York-style but with sourdough tang!

Can I use discard starter instead of active starter?
Not recommended. Bagels need the leavening power of active starter to rise properly.
Why active starter is better:
Contains live, active yeast
Provides leavening power
Creates better texture
Develops proper flavour
If you must use discard:
Use double the amount (350g instead of 175g)
Reduce water by 1/4 cup
Expect denser, less risen bagels
Ferment at room temp 8-12 hours, then refrigerate
Better option: Feed your discard 10-12 hours before making bagels so it becomes active!
Why are my bagels flat instead of puffy?
Common causes:
Over-fermented: Left in fridge too long (more than 72 hours)
Dough too wet: Added too much water during mixing
Holes too big: Over-stretched during shaping
Not enough gluten development: Didn't mix long enough (need full 9+ minutes)
Weak starter: Starter wasn't active enough
Solutions:
Don't ferment more than 48 hours for best rise
Make holes 2 inches but not bigger
Mix full 9 minutes to develop gluten
Use very active, bubbly starter
How do I prevent the hole from closing during baking?
This is the most common bagel problem!
Solutions:
1. Make holes BIGGER: 2-2.5 inches in diameter when shaping (they shrink 50%!)
2. Don't over-proof: After shaping, only rest 30 minutes
3. Boil properly: Full rolling boil, 10 seconds per side
4. Don't add too much flour: Excess flour makes dough tight and shrink-prone
5. Shape consistently: Use the poke-and-stretch method for even holes
Pro tip: After shaping, if holes look too small, gently stretch them again after the 30-minute rest.
How to make bagels: Troubleshooting Common Problems when making Homemade Bagels
Problem: Bagels are too dense and heavy
Causes & Solutions:
✗ Inactive starter → Use very active, bubbly starter at peak
✗ Under-fermented → Ferment minimum 24 hours, up to 48
✗ Too much flour → Weigh ingredients or use spoon-and-level method
✗ Over-boiled → Boil only 10 seconds per side, not longer
✗ Insufficient kneading → Mix full 9 minutes to develop gluten
Perfect bagels are chewy but not brick-like!
Problem: Bagels didn't rise much
Causes & Solutions:
✗ Weak starter → Feed starter and wait until doubled before using
✗ Too cold → Refrigerator temp below 35°F slows fermentation too much
✗ Not enough starter → Try using 200g instead of 175g
✗ Too much salt → Salt inhibits yeast - measure carefully
Note: Cold-fermented dough rises slower than room-temp dough. 50-75% increase is normal!
Problem: Bagels are pale and won't brown
Causes & Solutions:
✗ No sugar → Sugar helps with browning - don't omit
✗ Oven temp too low → Use oven thermometer to verify 425°F
✗ Under-baked → Bake full 20-25 minutes until deep golden
✗ Not enough sugar in boiling water → Add 1 tbsp sugar or honey
Perfect colour: Deep golden brown, not pale yellow or white
Problem: Bagels spread flat in the oven
Causes & Solutions:
✗ **Skipped boiling** → Must boil before baking!
✗ **Dough too wet** → Add more flour during mixing
✗ **Over-fermented** → Don't exceed 48-72 hours in fridge
✗ **Not enough gluten** → Mix full 9 minutes
Boiling sets the shape - never skip this step!
Problem: Toppings fell off during baking
Causes & Solutions:
✗ **Applied to dry bagel** → Apply toppings immediately after boiling while wet
✗ **Not enough topping** → Use generous amounts
✗ **Didn't press in** → Gently press toppings into wet surface
Timing is everything: Top right after boiling!
Problem: Bagels stuck to parchment paper
Causes & Solutions:
✗ **Too much moisture** → Let cool 5 minutes before trying to remove
✗ **Parchment too old** → Use fresh parchment paper
✗ **Cheese/sugar leaked** → Clean any drips from parchment
Tip: Use good quality parchment and don't rush cooling
Problem: Holes closed completely during baking
Causes & Solutions:
✗ **Holes too small** → Make holes 2+ inches when shaping
✗ **Over-proofed** → Only rest 30 minutes after shaping
✗ **Dough too tight** → Let dough relax longer between shaping
Remember: Holes shrink 50%+ during resting, boiling, and baking!
Problem: Bagels are tough and chewy (too much)
Causes & Solutions:
✗ Boiled too long → Stick to 10 seconds per side
✗ Too much bread flour → Use all-purpose or mix 50/50
✗ Over-baked → Reduce baking time slightly
✗ Too much kneading → Mix just 9 minutes, not longer
Goal: Chewy but tender, not rubber!
Recipe Variations
Everything Bagels
Most popular variation!
Topping mixture:
2 tablespoons sesame seeds
1 tablespoon poppy seeds
1 tablespoon dried minced onion
1 tablespoon dried minced garlic
1 tablespoon coarse salt
Mix all ingredients. Press freshly boiled bagels into mixture before baking, or sprinkle it on top of the freshly boiled bagels.
Cinnamon Raisin Bagels
Add to dough during last minute of mixing:
1 cup raisins
2 teaspoons cinnamon
Top with cinnamon sugar after boiling (2 tablespoons sugar + 1 teaspoon cinnamon).
Cheese Bagels
Add during last minute of mixing:
1 cup shredded sharp cheddar cheese
Or sprinkle shredded cheese on top after boiling.
Note: Cheese can leak during boiling and baking - this is normal!
Jalapeño Cheddar Bagels
Add during last minute of mixing:
1/2 cup diced pickled jalapeños (drained well and pat dry with a paper towel)
3/4 cup shredded cheddar cheese
Whole Wheat Sourdough Bagels
Replace 1 cup all-purpose flour with 1 cup whole wheat flour (use 2 cups all-purpose + 1 cup whole wheat).
Adjustments:
Add 2 tablespoons extra water
Expect denser, heartier texture
Fermentation: Whole wheat flour contains more nutrients, minerals, and enzymes (from the bran and germ) that feed yeast and bacteria. This leads to a faster fermentation. Because of this, the whole wheat doughs can over-proof quickly (yikes!). I recommend a shorter fermentation time. The exact time will be temperature dependant.
Mini Bagels
Cut dough into 12-16 pieces instead of 8-10.
Adjustments:
Make smaller balls and holes
Boil 8 seconds per side (instead of 10)
Bake 15-18 minutes (instead of 20-25)
Perfect for kids or appetizers!
Storage & Freezing Guide
Room Temperature Storage
Best for: Eating within 2-3 days
Store in:
Paper bag or bread box (allows some air circulation)
Loosely closed plastic bag (do NOT sealed tight)
Don't store in: Airtight container at room temp (creates moisture and makes bagels soggy. This environment also favours mold development)
Shelf life: 2-3 days at room temperature
Refrigerator Storage
Best for: Extending freshness to 5-7 days
Store in:
Airtight container or sealed plastic bag
Slice first for easy toasting
Downsides:
Can make bagels slightly stale faster
Refrigeration dries out bread
Shelf life: 5-7 days refrigerated
To refresh: Toast or warm in 350°F oven for 5 minutes
Freezer Storage (Recommended!)
Best for: Long-term storage up to 3 months
How to freeze:
Cool completely to room temperature
Slice before freezing (makes toasting easier)
Wrap options:
Individual: Wrap each half in plastic wrap
Batch: Place in freezer-safe bags with air removed
Label with date
Freeze up to 3 months
To thaw:
Toast from frozen: Best method! start with your normal toasting time and adjust based on personal toasting preference.
Oven: Wrap in foil, bake at 350°F for 5-10 minutes
Room temp: Let sit 1-2 hours to thaw naturally
Microwave: 20 seconds- max! The bagel will be hard if microwaved for more than 20 seconds
Pro tip: Flash freeze bagels on a baking sheet first (1 hour), then transfer to bags. This prevents them from sticking together.
Serving Suggestions
Classic Combinations
Traditional:
Plain cream cheese
Lox (smoked salmon), cream cheese, capers, red onion
Butter
Savoury:
Avocado, tomato, everything seasoning
Egg and cheese
Peanut butter or almond butter
Hummus and vegetables
Turkey, Swiss, lettuce, tomato
Sweet:
Cream cheese and jam
Cream cheese and honey
Honey
Butter
Nutella
Cinnamon cream cheese
Bagel Sandwich Ideas
Breakfast Sandwich: Fried egg, bacon, cheese, avocado
Lox Bagel: Cream cheese, smoked salmon, capers, red onion, dill
Veggie Bagel: Hummus, cucumber, tomato, sprouts, avocado
Turkey Club: Turkey, bacon, lettuce, tomato, mayo
Pizza Bagel: Marinara, mozzarella, pepperoni (toast until melted)
Why This Homemade Sourdough Bagel Recipe Works
The Science Behind Perfect Bagels: How to Make Sourdough Bagels
Cold Fermentation = Superior Flavour:
The 24-48 hour refrigeration allows beneficial bacteria to break down complex carbohydrates and develop organic acids. This creates the characteristic sourdough tang while also making the bagels easier to digest.
9-Minute Kneading = Perfect Texture:
This specific kneading time develops just the right amount of gluten. Too little and bagels fall apart; too much and they're tough. Nine minutes creates that perfect chewy-but-tender texture.
Brief Boiling = Signature Crust:
The 10-second boil gelatinizes the starches on the surface, creating a barrier that prevents spreading in the oven. This is what gives bagels their distinctive shiny, chewy crust and dense interior.
High Heat Baking = Golden Crust:
425°F is hot enough to create a deep golden crust without drying out the interior. Lower temps result in pale, soft bagels; higher temps burn the outside before cooking the inside.
Active Starter = Proper Rise:
Unlike commercial yeast which rises quickly, sourdough starter rises slowly and steadily. This creates better flavour development and superior texture.
Sugar Addition = Better Results:
Sugar feeds the starter, helps with browning (Maillard reaction), and balances the sour flavour. It's essential even though traditional bagels are only slightly sweet.
Proposed Sourdough Bagel Timeline
Thursday Morning:
Feed starter, leaving it on the counter until the evening (roughly 10-12 hours). This will activate your starter. Keep an eye on it because the room temperature will impact when the started will be active and ready to use.
Thursday Evening (5-10 minutes):
Mix dough
Cover and refrigerate
Friday - Saturday (Do nothing!):
Dough ferments in fridge
Flavours develop
Sunday Morning (1 hour active time):
Remove from fridge: 10 minutes
Divide and pre-shape: 10 minutes
Rest: 30 minutes
Shape bagels: 10 minutes
Rest: 30 minutes
Preheat oven: during the second rest time
Boil: 5-10 minutes
Bake: 20-25 minutes
Cool: 10-15 minutes
Total active time: About 1 hour
Total elapsed time: 2.5-3 days (mostly hands-off!)
When to Make These Sourdough Bagels
Perfect for:
✓ Weekend Brunch: Impress guests with fresh bagels and lox
✓ Meal Prep Sunday: Bake and freeze for the week
✓ Special Breakfast: Birthday mornings, Mother's Day, holidays
✓ Gift Giving: Bag up a few with cream cheese as a gift
✓ Using Up Starter: Great way to use active starter
✓ Camping/Vacations: Make ahead, freeze, bring for easy breakfasts
✓ Brunch Parties: Bagel bar with various spreads and toppings
✓ Any Time: These are good year-round!
Best Seasons:
Year-round! Bagels don't have a season
Especially satisfying on cold mornings with hot coffee

Recipe Card
Easy Sourdough Bagels Recipe
Yield: 8 bagels | Active: 30 min | Ferment: 24-48 hrs | Bake: 25 min
INGREDIENTS:
1 1/4 cups (300ml) cold water
175g (3/4 cup) active sourdough starter
3 tablespoons (40g) sugar
2 teaspoons (12g) salt
3 cups (375g) all-purpose flour
INSTRUCTIONS:
Mix all ingredients with dough hook on low 9 minutes until elastic
Cover and refrigerate 24-48 hours
Divide into 8 pieces, shape into balls, rest 30 minutes
Poke holes in center, stretch to 2 inches, rest 30 minutes
Preheat oven to 425°F
Boil bagels 10 seconds per side
Add toppings while wet
Bake 20-25 minutes until golden
Cool 10 minutes
STORAGE: Freeze up to 3 months
Did You Make This Recipe? I want to see it!
Leave a ⭐ star rating and comment below to let us know how your sourdough bagels turned out. Did you make any substitutions or additions? Share your tips and photos with us!
Share this recipe: Help others discover this delicious recipe by sharing it on Pinterest, Facebook, or Instagram. Tag us @Sageandsimplicity so we can see your beautiful creations!
📌 Pin it for later: Save this recipe to your Pinterest boards for easy access.
you might also like:


Easy Three Bean Vegetarian Chili Recipe (One Pot, Under $15)
This easy three-bean vegetarian chili recipe uses pantry staples and takes just 5 minutes prep. Hearty, healthy, and perfect for meal prep. Vegan-friendly!
📖 Jump to Recipe | 💬 Jump to FAQs | 🖨️ Print Recipe
Prep Time: 10 minutes | Cook Time: 1 hour | Total Time: 1 hour 10 minutes | Servings: 8-10 servings
Looking for an easy, budget-friendly vegetarian chili recipe? This hearty three-bean chili is made with simple pantry ingredients, requires zero chopping, and delivers maximum flavour with minimal effort. Perfect for meal prep, freezer meals, or feeding a crowd on busy weeknights!
Why this recipe works: Just dump everything in one pot and let it simmer. The frozen vegetables mean no prep work, and the three types of beans provide lots of plant-based protein per serving. Plus, it tastes even better the next day!
What is Three Bean Vegetarian Chili?
This three-bean vegetarian chili is a hearty, meatless chili made with three varieties of beans — black beans, kidney beans, and chickpeas—simmered with tomatoes, vegetables, and warming spices like chili powder and garlic. This protein-packed dish is a staple in vegetarian and vegan cooking.
Unlike traditional beef chili, vegetarian bean chili relies on beans as the primary protein source, making it naturally high in fiber, vitamins, and minerals. It's also naturally gluten-free and can easily be made vegan.
Why You'll Love This Vegetarian Chili Recipe
✓ Incredibly Easy: No chopping required! Just dump and simmer
✓ Budget-Friendly: Costs under $15 to make a huge batch
✓ High Protein: 15g of plant-based protein per serving
✓ Meal Prep Friendly: Freezes beautifully for up to 3 months
✓ Crowd-Pleaser: Even meat-eaters love this hearty chili
✓ Hands-Off Cooking: Set it and forget it for an hour
✓ Pantry Staples: Uses ingredients you probably already have
✓ Vegan-Adaptable: Skip the dairy toppings for a vegan meal
Ingredients for Three Bean Chili
What You'll Need:
1 can (16 oz) black beans, drained and rinsed
1 can (16oz) chickpeas, drained and rinsed
1 can (16 oz) red kidney beans, drained and rinsed
3 cans (28 oz each) diced tomatoes, with juice (fire-roasted for extra flavour!)
1 tablespoon garlic powder
1 tablespoon chili powder (use hot chili powder for extra heat)
1 bag frozen spaghetti mix vegetables (diced bell peppers, carrots, onions, celery)
Optional: ½ cup pumpkin puree (adds creaminess and nutrition)
Salt and black pepper, to taste
Ingredient Notes & Substitutions
Can I use dried beans instead of canned beans?
Yes! Use about 4-5 cups of cooked beans total (approximately 1½ cups dried beans). Soak overnight and cook until tender before using.
What are spaghetti mix vegetables?
This frozen vegetable blend that contains diced bell peppers, onions, carrots, and celery. Find it in the frozen vegetable section of the grocery store. Can't find it? Dice and use 2 celery, 2 large carottes, 1 medium onion, and 2 bell peppers.
Why add pumpkin puree to vegetarian chili?
Pumpkin puree adds body, creaminess, and a subtle sweetness that balances the tomato acidity. It's a secret ingredient that boosts nutrition (vitamin A, fiber) without changing the flavour. You can also use butternut squash puree.
Can I use fresh tomatoes?
Yes! Use about 10 cups of diced large fresh tomatoes. However, canned tomatoes are more consistent and often taste better in chili since they're picked at peak ripeness.
How to Make Three Bean Vegetarian Chili
Step 1: Combine All Ingredients
Add all ingredients to a large stockpot or Dutch oven—frozen vegetables, diced tomatoes (with their juice), drained and rinsed black beans, kidney beans, chickpeas, and spices, garlic powder, chili powder and salt and pepper to taste. If using pumpkin puree, add it now as well. No need to thaw the vegetables first!
Step 2: Simmer Low and Slow
Place the pot over medium-low heat and bring to a gentle simmer. Let the chili cook for 55-60 minutes, stirring occasionally (every 10 minutes or so). The long simmer time allows the flavors to meld beautifully and the vegetables to become tender.
Pro tip: If the chili seems too thick, add ½ cup of water or vegetable broth. If it's too thin, let it simmer uncovered to reduce.
Step 3: Taste and Adjust Seasonings
Season with salt and black pepper to taste. Start with ½ teaspoon salt and add more as needed. Want more heat? Add more chili powder, cayenne pepper, to the pot or hot sauce to individual bowls.
Step 4: Serve and Enjoy!
Ladle into bowls and top with your favorite chili toppings. This chili tastes even better the next day as the flavors continue to develop!
Expert Tips for the Best Vegetarian Chili
Drain and rinse your beans: This removes excess sodium and prevents a gummy texture
Don't skip the simmer time: Low and slow = maximum flavour development
Taste before serving: Chili needs proper seasoning — don't be shy with salt!
Add acidity if needed: A splash of apple cider vinegar or lime juice brightens flavours
Make it smoky: Add 1 tsp smoked paprika, a chipotle pepper in adobo or liquid smoke to the pot
Thicken it up: Mash some of the beans against the pot or remove 3-4 cups and blend well before stirring it back into the pot
Let it rest: Chili tastes better after sitting for 10-15 minutes off the heat
How Long Does Vegetarian Chili Take to Cook?
This three bean chili takes approximately 1 hour and 10 minutes total — 10 minutes hands-on prep time and 60 minutes of mostly hands-off cooking time. The slow simmer develops rich, deep flavors that make this chili taste like it's been cooking all day.
Active time: 10 minutes (just dump and stir!)
Passive time: 60 minutes (while it simmers)
What to Serve with Three Bean Chili
This vegetarian chili is a complete meal on its own, but here are some delicious sides and toppings:
Toppings:
Shredded cheddar cheese or vegan cheese
Sour cream or plain Greek yogurt (or vegan alternatives)
Diced avocado or guacamole
Sliced green onions or chives
Fresh cilantro
Pickled jalapeños
Crushed tortilla chips
Hot sauce or sriracha
Lime wedges
Side Dishes:
Cornbread or jalapeño cornbread
Rice (white rice, brown rice, or cilantro-lime rice)
Tortilla Chips with salsa
Sourdough Bread for dipping
Baked Sweet Potato topped with chili
Fresh Green Salad, with lime vinaigrette
Serving Ideas:
Chili bar: Set up a toppings bar and let everyone customize
Chili dogs: Serve over your favourite hot dogs
Chili nachos: Layer over tortilla chips with cheese
Chili mac: Mix with cooked elbow macaroni
Stuffed peppers: Use as filling for bell peppers
Baked potatoes: Load onto baked russet potatoes
How to Store and Reheat Three-Bean Chili
Refrigerator Storage:
Store cooled chili in an airtight container in the refrigerator for up to 5 days. The flavors actually improve after a day or two, making this perfect for meal prep!
Freezer Storage:
This chili freezes beautifully! Freeze in portion-sized containers or freezer bags for up to 3 months.
Freezing tips:
Let chili cool completely before freezing
Leave 1 inch of headspace in containers (chili expands when frozen)
Label with date and contents
Freeze flat in ziplock bags for easy stacking
Reheating Instructions:
Stovetop: Warm over medium-low heat, stirring occasionally, until heated through (about 10 minutes)
Microwave: Heat in 1-2 minute intervals, stirring between, until hot
From frozen: Thaw overnight in refrigerator, then reheat according to the above instructions.
Slow cooker: Reheat on low for 2-3 hours (great for potlucks!)
Is Three Bean Chili Healthy?
Yes! This vegetarian chili is incredibly nutritious and makes a healthy, balanced meal.
Health Benefits:
✓ High in plant-based protein from three types of beans
✓ Excellent source of fiber for digestive health
✓ Low in fat and naturally cholesterol-free
✓ Rich in antioxidants from tomatoes and beans
✓ Packed with vitamins and minerals (iron, potassium, folate)
✓ Heart-healthy and diabetes-friendly
✓ Naturally gluten-free (no wheat, barley, or rye)
✓ Can be made vegan by using vegan toppings
Recipe Card
Equipment Needed
Large Stock Pot or Dutch Oven
Long Wooden Spoon
Optional: Freezer Safe Storage Containers
Optional: Blender or hand blender
Ingredients:
1 can (16 oz) black beans, drained and rinsed
1 can (16 oz) red kidney beans, drained and rinsed
1 can (16oz) chickpeas, drained and rinsed
3 cans (28 oz each) diced tomatoes, with juice
1 tablespoon garlic powder
1 tablespoon chili powder
1 bag frozen spaghetti mix vegetables (bell peppers, onions, carrots, celery)
½ cup pumpkin puree (optional, but recommended)
Salt and black pepper to taste
Instructions:
Combine all ingredients in a large stockpot or Dutch oven. Add frozen vegetables (no need to thaw), diced tomatoes with juice, black beans, kidney beans, garlic powder, chili powder, and pumpkin puree if using.
Place over medium-low heat and bring to a gentle simmer.
Simmer for 55-60 minutes, stirring occasionally every 15 minutes to prevent sticking. The chili will thicken and the vegetables will become tender.
Season to taste with salt and black pepper. Start with ½ teaspoon of kosher salt and adjust as needed.
Serve hot with your favorite toppings like shredded cheese, sour cream, avocado, green onions, cilantro, and tortilla chips.
Notes:
Storage: Refrigerate up to 5 days or freeze up to 3 months
Meal prep friendly: Freezes beautifully in portion-sized containers
Naturally gluten-free and easily made vegan
Budget-friendly: Costs under $15 to make
Tastes better the next day as flavours continue to develop
Slow cooker option: Cook on low 4-6 hours or high 2-3 hours
Make it spicier: Add cayenne, jalapeños, or hot chili powder
Thicken if needed: Blend 3-4 cups of the chili and stir it back in
Variations and Customizations
Protein Additions:
Plant-based ground meat (Beyond, Impossible)
Cooked lentils (brown or green)
Quinoa (adds protein and texture)
TVP (textured vegetable protein)
Tempeh crumbled and sautéed
Spice Variations:
Smoky chili: Add 1 tsp smoked paprika + 1 chipotle in adobo
Cumin: Add 1-2 tsp ground cumin
Smokey: Add 1-2 tsp of liquid smoke
Fall spice: Add ½ tsp cinnamon + ¼ tsp nutmeg
Indian-inspired: Add 1 tsp garam masala + ½ tsp turmeric
Vegetable Boost:
Corn (1-2 cups fresh, frozen or canned)
Diced zucchini or yellow squash
Mushrooms (chopped, for meaty texture)
Sweet potato (diced, adds sweetness)
Butternut squash (cubed)
Spinach or kale (stir in at the end, once the heat has been turned off)
Make It Creamy:
Add ½ cup pumpkin puree (as suggested)
Blend 1-2 cups of chili and stir back in
Top with sour cream or Greek yogurt
Meal Prep and Batch Cooking
This three-bean chili is ideal for meal prep! Here's how to maximize your batch:
Meal Prep Strategy:
Make chili on Sunday for easy weeknight dinners
Portion into individual containers for grab-and-go lunches
Freeze half for quick future meals
Baked Russet potatoes or Sourdough Bread to serve alongside
Batch Cooking Tips:
Triple the recipe if you have one (or several) large stockpot
Use a slow cooker for hands-off cooking while you prep other meals
Label everything with date and reheating instructions
Frequently Asked Questions (FAQ)
Can I make this three bean chili in a slow cooker or Crock Pot?
Yes! This recipe is perfect for the slow cooker. Add all ingredients to your slow cooker and cook on low for 4-6 hours or high for 2-3 hours. No need to sauté anything first!
How can I make this chili spicier?
Add any of these: cayenne pepper (start with ¼ tsp), diced jalapeños, hot chili powder, chipotle peppers in adobo, red pepper flakes, straight into the pot. Another option is to add your favorite hot sauce to individual bowls. Taste and adjust as you go!
Can I make this chili less spicy for kids?
Use mild chili powder or reduce it to 1-2 teaspoons. You can also serve plain bowls for kids and let adults add hot sauce at the table.
What beans are best for vegetarian chili?
Black beans, kidney beans, and pinto beans are the classic trio, but you can use any combination. Try white beans (Great Northern, cannellini), chickpeas, or navy beans for variety.
Do I need to drain and rinse canned beans?
Yes, always! Draining and rinsing removes excess sodium and the thick liquid that can make chili gummy. Rinse under cold water until the water runs clear.
Can I use fresh vegetables instead of frozen?
Yes! Dice 1 large onion, 2 bell peppers, 2 carrots, and 2 celery stalks. Sauté in 1 tablespoon of oil for 5-7 minutes before adding the other ingredients.
Why is my chili watery?
Let it simmer longer uncovered to evaporate excess liquid. You can also mash some beans against the pot to naturally thicken it, or add a tablespoon of tomato paste or cornmeal.
Why is my chili bland?
Chili needs proper seasoning! Add more salt (chili typically needs 1-2 teaspoons total), chili powder, garlic powder, or cumin. A splash of vinegar or lime juice can also brighten flavors.
Can I double this recipe?
Absolutely! This recipe doubles or triples easily. Just use a larger pot and you may need to extend the simmer time by 10-15 minutes.
Is this chili vegan?
The base chili is vegan! Just use vegan toppings like dairy-free sour cream, vegan cheese, and avocado instead of dairy products.
Can I add meat to this recipe?
Yes, though it would no longer be vegetarian. Brown 1 pound of ground beef, ground chicken or turkey and add it with the other ingredients. You can also add cooked sausage.
What's the best pot for making chili?
A heavy-bottomed stockpot, Dutch oven, or large saucepan works best. The heavy bottom prevents scorching during the long simmer time.
Did You Make This Recipe? I want to see it!
Leave a ⭐ star rating and comment below to let us know how your three-bean chili turned out. Did you make any substitutions or additions? Share your tips and photos with us!
Share this recipe: Help others discover this delicious recipe by sharing it on Pinterest, Facebook, or Instagram. Tag us @Sageandsimplicity so we can see your beautiful creations!
📌 Pin it for later: Save this recipe to your Pinterest boards for easy access.
you might also like:

Easy Soft Gingerbread Cookies (with Fresh Ginger!)
These soft gingerbread cookies are made with ¾ cup of fresh ginger root — not powdered spice. The secret? A garlic press extracts all the flavorful juice without the fibrous texture. The dough rests for 24-72 hours, allowing the fresh ginger to infuse and the molasses flavor to deepen. The result is a chewy cookie with complex, warming spice that tastes nothing like store-bought. My kids request these several times a year, especially during fall and winter. With just 7 simple ingredients and a make-ahead method, these are the easiest holiday cookies you'll ever make.
As an Amazon Associate I earn from qualifying purchases.
⭐⭐⭐⭐⭐ (4.9/5 based on reader reviews)
📖 Jump to Recipe | 💬 Jump to FAQs | 🖨️ Print Recipe
Prep Time: 20 minutes | Chill Time: 24-72 hours | Total Time: 24+ hours | Yield: 20 cookies | Serving Size: 1 cookie | Difficulty: Easy

Easy Soft Gingerbread Cookies
Introduction
Once you taste cookies made with real ginger, there's no going back to powdered spices. These soft gingerbread cookies get their incredible flavour from fresh ginger root—¾ cup of it— pressed directly into the dough for intense, warming spice that can't be replicated with anything from a jar.
The secret to these cookies? Patience. Let that dough rest for at least 24 hours in the fridge. This slow cold fermentation deepens the molasses flavour and allows the fresh ginger to fully infuse the dough. The result is a cookie with complex, layered flavour that tastes like you spent hours in the kitchen—even though the actual hands-on time is minimal.
These are soft, chewy galettes that spread naturally as they bake, creating cookies with tender centers and slightly crisp edges. They're nothing like traditional gingerbread men (they’re far too soft for cookie cutters), but that's exactly what makes them special. These are the gingerbread cookies you want with your morning coffee or afternoon tea.
My kids—and their friends—ask me to make these several times a year, especially in the fall and winter when that warm ginger spice feels just right. They've also become a staple during the holidays in our house, filling the kitchen with the most incredible aroma as they bake.
Why You'll Love This Recipe
Fresh Ginger Makes All the Difference: Real ginger root delivers bright, zesty flavour that ground ginger simply can't match. The garlic press method extracts all the spicy juice without the fibrous texture.
Make-Ahead Friendly: Mix the dough today, bake anytime in the next three days. Perfect for holiday prep or when you want fresh-baked cookies without day-of stress.
Simple Ingredient List: Just seven real ingredients you probably have in your pantry. No specialty items required.
Minimal Cleanup: The garlic press trick means no grater to wash, no ginger bits all over your cutting board.
Kid-Approved: These have been tested and loved by multiple rounds of kids and their friends. That's the real stamp of approval.
Equipment Needed
Mixing bowl (affiliate link)
Electric mixer or stand mixer with paddle attachment (optional, can mix by hand)
Garlic press (essential for this recipe)
Measuring cups and spoons
Sifter or fine-mesh strainer
Parchment paper
Plastic wrap or airtight container
Sharp knife
Baking sheet (affiliate link)
Wire cooling rack (affiliate link)
Ingredients
½ cup salted butter, softened
¼ cup brown sugar, packed
1 large egg
¾ cup fresh ginger, peeled and cubed (about 4-5 inches of ginger root)
¾ cup molasses (not blackstrap)
1 tsp baking soda
2 cups all-purpose flour, sifted
Instructions
Step 1: In a mixing bowl, cream together the softened butter and brown sugar until light and fluffy, about 2 minutes. Add the egg and mix until fully combined.
Step 2: Using a garlic press, press the ginger cubes, one at a time, directly into the butter mixture, squeezing out all the juice and pulp. Small ginger pieces will fall into the dough—this is fine and adds texture. Continue until all ginger has been pressed. Discard the leftover ginger fibres once pressed.
Step 3: Add the molasses and baking soda. Mix until everything is fully incorporated and the mixture is smooth and glossy.
Step 4: Add the sifted flour and gently fold in with a spatula or wooden spoon until just combined. The dough will be soft and slightly sticky. Don't overmix or the cookies will be tough.
Step 5: Transfer the dough onto a large sheet of parchment paper. Shape it into a log about 2-3 inches in diameter. Wrap tightly in the parchment, then wrap again in plastic wrap or place in a sealed container. Refrigerate for 24-72 hours.
Step 6: When ready to bake, preheat your oven to 350°F (175°C). Line a baking sheet with parchment paper.
Step 7: Remove the dough log from the fridge. While the dough is still cold and firm, use a sharp knife to slice into 1-inch thick rounds. Work quickly—the dough becomes sticky as it warms up. If it starts getting soft, return to the fridge for 15 minutes.
Step 8: Place cookie rounds on the prepared baking sheet, spacing them about 2 inches apart. They will spread during baking.
Step 9: Bake for 10-12 minutes. The cookies will look slightly underdone in the center with set edges—this is what you want. They will continue to cook as they cool.
Step 10: Let the cookies cool on the baking sheet for 5 minutes to set, then carefully transfer to a wire rack to cool completely. They'll be very soft when warm but will firm up as they cool.
Recipe Notes & Tips
About the Fresh Ginger: Don't skip this or substitute ground ginger. The fresh ginger is what makes these cookies special. Look for ginger root that has smooth, tight skin and no wrinkles. Young ginger is less fibrous and easier to press.
The Garlic Press Method: This is a game-changer for working with fresh ginger. It extracts all the flavourful juice and leaves behind the tough fibers. If you don't have a garlic press, finely grate the ginger and squeeze it through cheesecloth to extract the juice.
Why the Long Chill? The 24-72 hour rest isn't just about easier slicing. The flavours meld and deepen during this time. The molasses becomes less sharp, the ginger infuses throughout, and the cookies develop a more complex taste. Cookies baked after 24 hours taste good. Cookies baked after 48-72 hours taste incredible.
Slice While Cold: This is critical. If the dough warms up, it becomes very sticky and difficult to slice cleanly. The butter softens and the dough will stick to your knife and hands. If it starts getting soft, pop it back in the fridge for 15 minutes.
Don't Overbake: These cookies will look slightly underdone when you pull them from the oven. That's correct. They firm up as they cool. Overbaking will give you dry, hard cookies instead of the soft, chewy texture you want. The edges should be set and slightly darker, but centers should still look soft.
Do Not Use Cookie Cutters: These are galettes (rustic, free-form cookies), not structural gingerbread. The high butter content makes them too soft to roll and cut into shapes. They spread naturally as they bake. Embrace the simple, rustic look.
Butter Temperature Matters: Softened butter should be room temperature—it should leave a slight indent when pressed but not be greasy or melted. If your butter is too soft, the cookies will spread too much.
Storage & Freezing
Refrigerator: Store cooled cookies in an airtight container in the fridge for up to 5 days. They actually get better on day 2-3 as the flavours continue to develop. Place parchment paper between layers if stacking.
Freezing Baked Cookies: Freeze baked cookies in a freezer-safe container or zip-top bag for up to 3 months. Layer with parchment paper to prevent sticking. Thaw at room temperature for 30 minutes before serving.
Freezing Unbaked Dough: You can freeze the unbaked dough log (wrapped tightly in plastic wrap and then aluminum foil) for up to 3 months. Slice and bake directly from frozen, adding 1-2 minutes to the baking time. No need to thaw.
Variations & Additions
Crystallized Ginger: Fold in ¼ cup of finely chopped crystallized ginger after adding the flour for extra ginger punch and chewy texture.
Maple Ginger Cookies: Replace half the molasses with pure maple syrup for a lighter, slightly less intense flavour with maple undertones.
Lemon Ginger Cookies: Add 1 tsp of fresh lemon zest with the ginger for bright, citrusy notes that cut through the richness.
Dark Chocolate Ginger: Fold in ½ cup of dark chocolate chips after adding the flour. The bittersweet chocolate pairs beautifully with fresh ginger and molasses.
Ginger Spice Cookies: Add ½ tsp cinnamon and ¼ tsp ground cloves for a more traditional spiced cookie flavour alongside the fresh ginger.
Serving Suggestions
These soft gingerbread cookies pair perfectly with:
Hot coffee or espresso (the bitterness balances the sweetness)
Hot black tea, such as Orange Pekoe or English Breakfast
Chai tea or spiced tea
Cold milk (classic combination)
Vanilla ice cream (make ice cream sandwiches!)
Hot apple cider
Whipped cream or cream cheese frosting for special occasions
Frequently Asked Questions
Can I use ground ginger instead of fresh?
You can, but the flavour won't be the same. Fresh ginger has a bright, zesty, almost citrusy quality that ground ginger lacks. If you must substitute, use 2 tablespoons of ground ginger. The cookies will taste more like traditional gingerbread and less vibrant.
What does fresh ginger taste like in cookies?
Fresh ginger has a warm, spicy flavour with a slight sweetness and bright, peppery notes. It's more complex than ground ginger—less dusty, more alive. The juice extracted from fresh ginger distributes evenly throughout the dough, giving every bite that warming spice.
Why do I need to wait 24-72 hours?
The long chill time allows the fresh ginger to infuse the dough and lets all the flavours develop and meld together. The molasses mellows, the spices bloom, and the texture improves. It also makes the dough much easier to slice. You can technically bake after just a few hours of chilling, but the flavour won't be as deep and complex.
My dough is too sticky to slice. Where did I do wrong?
You didn't do anything wrong—the dough just warmed up. This happens because of the high butter content. Put it back in the fridge for 15-20 minutes and try again. Always slice while the dough is very cold. Work quickly and clean your knife between cuts if needed.
Can I make these into gingerbread men?
No, these cookies are too soft to hold a cut shape. They spread as they bake because of the high butter content, which is what gives them their soft, chewy texture. If you want cut-out gingerbread cookies, you'll need a different recipe with less butter and more flour for structure.
How do I know when they're done baking?
The edges will be set and slightly darker brown, but the centers will still look soft and shiny—almost underdone. They should not be brown all over or firm to the touch. Remember, they continue cooking as they cool on the pan. When in doubt, underbake rather than overbake.
Can I double this recipe?
Absolutely. Make two separate logs and store them in the fridge. You can bake one now and save one for later, or bake both at once using extra baking sheets. The dough freezes beautifully, so feel free to make a double batch.
Do I need to use salted or unsalted butter?
This recipe calls for salted butter, which adds a subtle savoury note that balances the sweetness of the molasses and brown sugar. If you only have unsalted butter, add ¼ tsp of salt to the dough when you add the flour.
Why use a garlic press for ginger?
A garlic press extracts the flavourful juice and soft pulp from fresh ginger while leaving behind the tough, fibrous strings that can be unpleasant in baked goods. It's faster than grating, more efficient than mincing, and means no stringy bits in your cookies. Plus, cleanup is much easier than washing a grater.
My cookies spread too much. What happened?
Make sure your butter is softened but not melted or greasy when you start. Also, the dough must be cold when it goes into the oven. If the dough warmed up while you were slicing, pop the cut cookies in the fridge for 10 minutes before baking. Finally, make sure you're measuring flour correctly (spoon and level, don't pack).
Can I add chocolate chips?
You can fold in ½ cup of dark chocolate chips after adding the flour. Dark chocolate (60-70% cacao) pairs beautifully with fresh ginger and molasses. Milk chocolate will be too sweet.
Are these ginger galettes healthy?
No. These are a treat, not a health food. However, they do contain fresh ginger (which has anti-inflammatory properties) and molasses (which contains iron and calcium). They're made with real ingredients and no artificial flavours or preservatives. Enjoy them in moderation as part of a balanced diet.
What's the difference between gingerbread cookies and molasses cookies?
Molasses cookies typically use ground ginger (if any ginger at all) and focus on the deep, sweet molasses flavour. Gingerbread cookies have a stronger ginger presence and more warming spices. These cookies bridge both—they have robust molasses flavour but the fresh ginger makes them distinctly "gingerbread."
Why are my cookies hard instead of soft?
Most likely, they were overbaked. These cookies should look slightly underdone when you remove them from the oven. They firm up as they cool but should remain soft and chewy. Overbaking by even 2-3 minutes can make them hard. Try reducing baking time by 1-2 minutes next time.
Final Thoughts
These soft gingerbread cookies prove that simple ingredients can create extraordinary flavour. The fresh ginger makes all the difference, and the make-ahead nature means you can enjoy warm cookies without the stress of last-minute baking.
Whether you're baking for your family, holiday gatherings, or just because you're craving that warming ginger spice, this recipe delivers every time. The garlic press trick will change how you use fresh ginger in all your baking.
Did You Make This Recipe? I want to see it!
Leave a ⭐ star rating and comment below to let us know how your ginger galettes turned out. Did you make any substitutions or additions? Share your tips and photos with us!
Share this recipe: Help others discover this delicious recipe by sharing it on Pinterest, Facebook, or Instagram. Tag us @Sageandsimplicity so we can see your beautiful creations!
📌 Pin it for later: Save this recipe to your Pinterest boards for easy access.
You Might also like:


Dill & Chickpea Burger patties
chickpea patties
As an Amazon Associate I earn from qualifying purchases.
Last Edited: March 19, 2026
📖 Jump to Recipe | 💬 Jump to FAQs | 🖨️Print Recipe
Prep Time: 5 minutes | Chill Time: 30 minutes | Cook Time: 15 minutes | Total Time: roughly 1 hour | Yield: 8 patties | Difficulty: Easy

Introduction
There’s something wonderfully comforting about a meal that’s simple, wholesome, and endlessly adaptable—and these veggie patties check every one of those boxes. Crafted from everyday ingredients and brimming with natural flavour, they’ve become a quiet hero in my kitchen! Whether tucked into a bun, layered over greens, or enjoyed on their own with a favorite dip, they bring a gentle, satisfying warmth to any meal.
One of the things I love most about these patties is how beautifully they freeze. I often double the batch, sand freeze the rest for another day. When life gets busy (as it always does), there’s something reassuring about knowing a nourishing lunch or dinner is waiting in the freezer, ready to crisp up in just a few minutes. It’s meal prep made easy—and delicious.
Their versatility is truly a delight. You can season them boldly or keep them mild, fold in herbs from the garden, or add a touch of spice for extra personality. They play well with all sorts of toppings and sauces, making it easy to tailor each serving to your mood. My kids love them so much that they sometimes ask for these instead of meat burgers, which always makes me smile.
Wholesome ingredients are at the heart of this recipe, and that’s part of what keeps them in our regular rotation. They’re made of real, recognizable foods that leave you feeling nourished rather than weighed down. And if you’re cooking for a plant-based household, or simply want more vegan-friendly options, you can easily swap the eggs for a flax egg without sacrificing texture or flavour.
Whether you’re preparing them for busy weeknights, slipping them into lunchboxes, or serving them at an easygoing weekend gathering, these patties shine. Simple, nourishing, and budget friendly — Enjoy them fresh, freeze them for later, these are the patties you’ll want to have on hand!

why we love these patties:
Freeze well
Vegetarian Meal Option
Quick lunch idea
My kids love them!
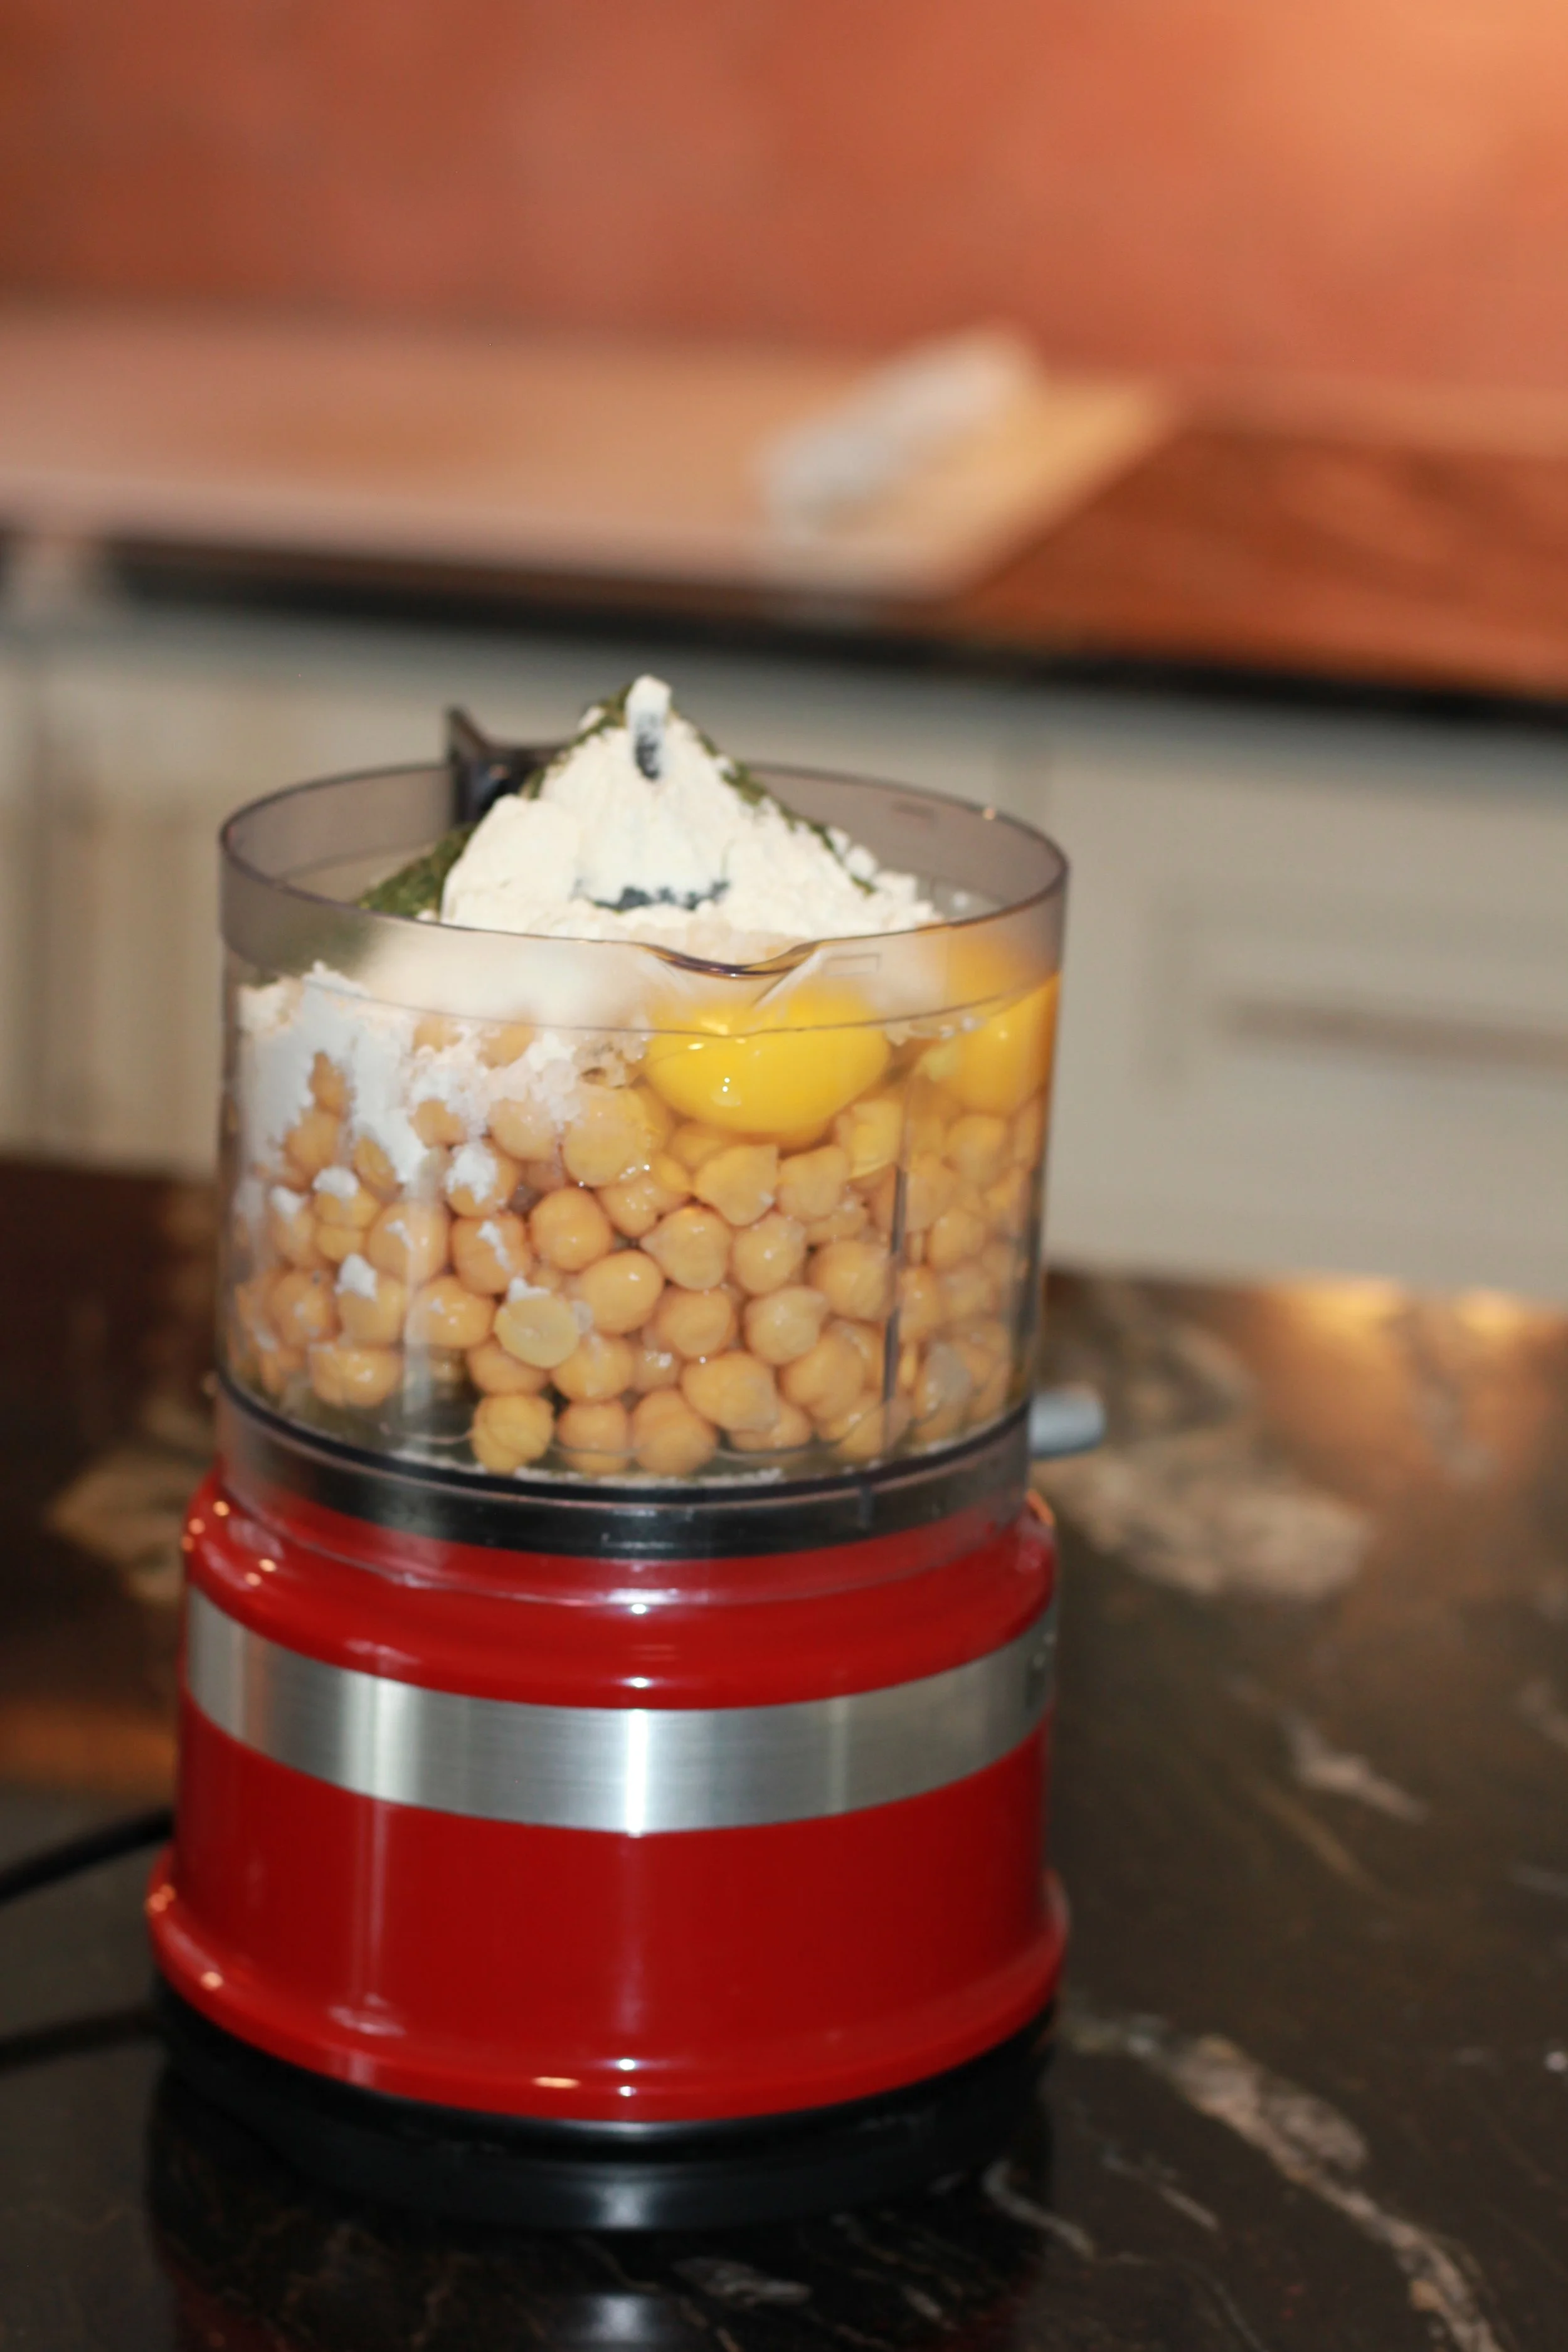
how to make Dill & Chickpea Patties
ingredients:
Chickpeas, 1 can
2 large eggs
1/2 cup all purpose flour
2 tsp dill, fresh or dried
1 tsp salt, I like using kosher salt
1 tsp garlic powder
equipment needed:
Food Processor (affiliate link)
frying pan (affiliate link)
Spatula (affiliate link)
Step-by-step guide to making these vegetarian patties
step 1:
In a food processor, add all ingredients in the listed order. Blend well.
step 2:
Put mixture in the fridge and let it rest a minimum of 30 minutes.
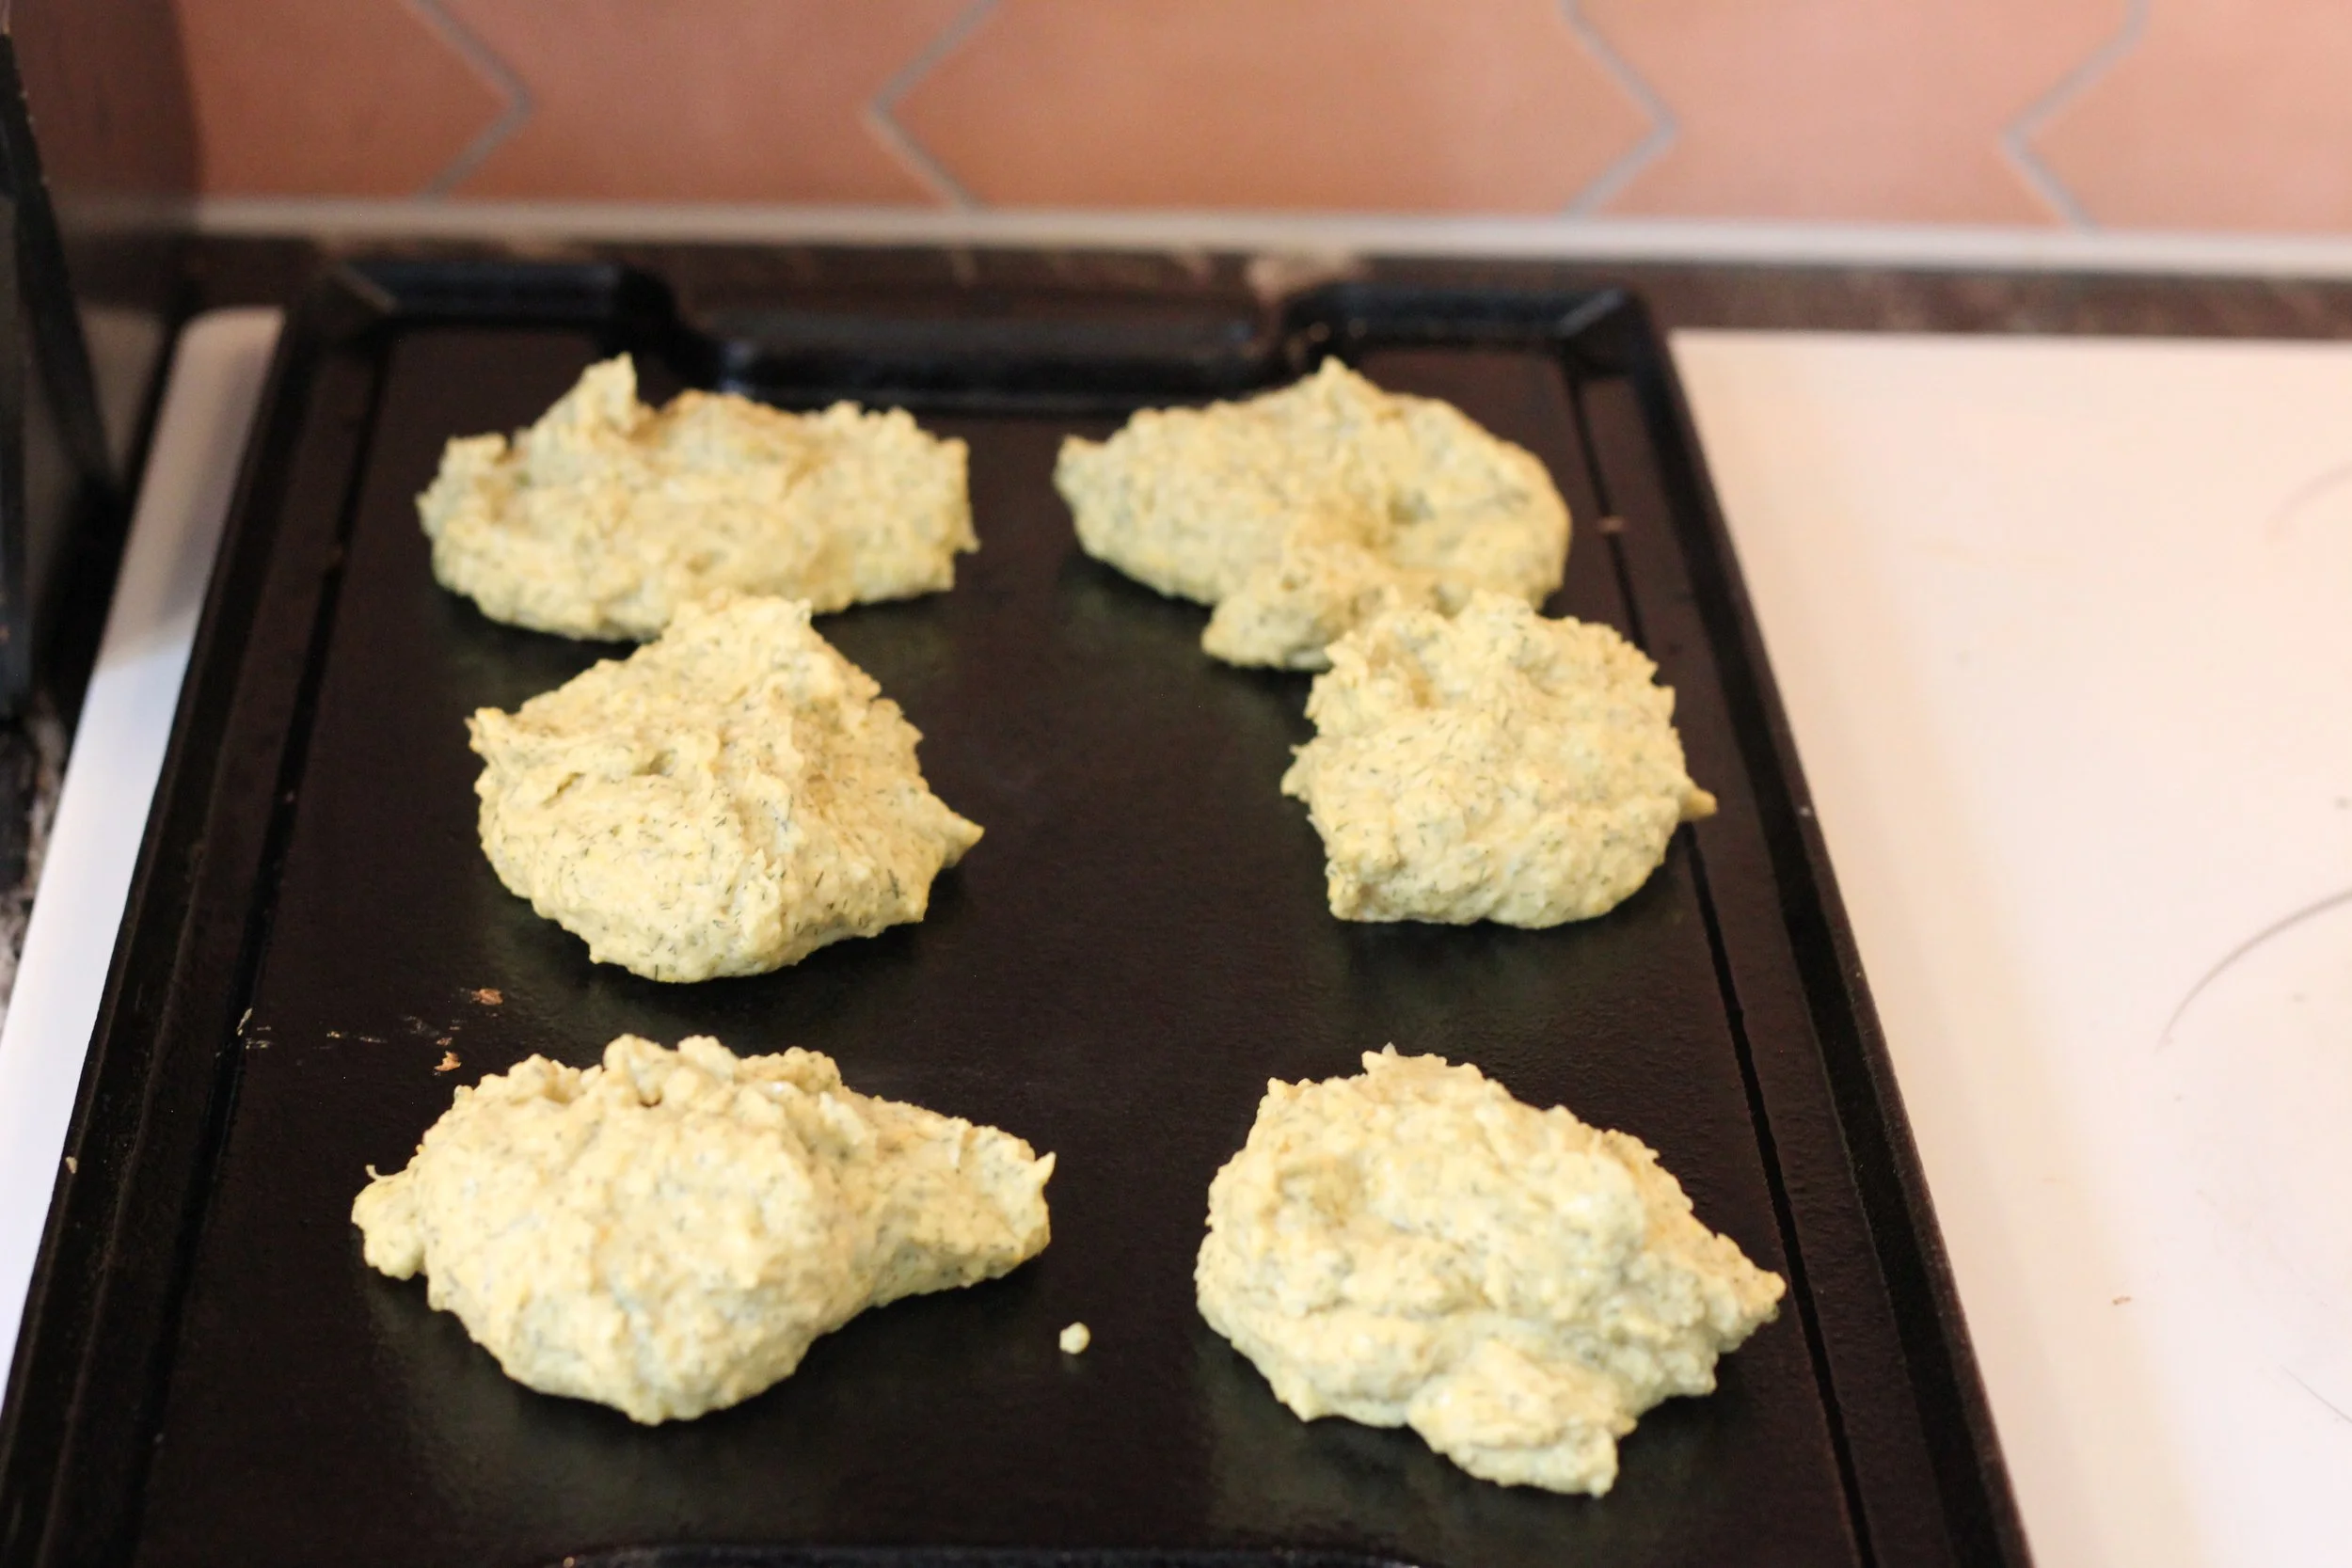
step 3:
Cook in a lightly oiled frying pan on the stovetop over medium heat. using a soup spoon, scoop one spoonful of the mixture. Flip the patty when the bottom side is cooked. flatten the burger, and cook the opposite side. flip once more top make sure the burger is fully cooked throughout.

step 4:
Serve on a burger bun with toppings you like, or with barley or rice.

Frequently Asked Questions:
The Mixture has a texture of peanut Butter. Is this normal?
Yes! This is the exact texture we're looking for after it comes out of the fridge.
Are these patties vegan?
No. These patties are not vegan, because of the eggs.
how do I make them vegan?
You can make them vegan by swapping out the eggs for flax eggs.
How do i make a flax egg?
In a cereal bowl, mix together 1 tbsp ground flax with 3 tbsp water, and let it rest for 5-10 minutes. The flax mixture will change consistency and become a flax egg. Use this instead of regular eggs in this recipe.
can I freeze these?
Yes! These patties freeze well for up to 3 months. Just be sure to put them in a freezer safe bag or container.
Pro tip: let them cool at room temperature before freezing. Then, separate each patty with parchment paper, making them easier to grab and thaw individually.
Troubleshooting
My mixture is thick and hard to stir:
Try adding a little bit of water and blending it again.
I’m out of eggs. What can I use instead?
Do you have grdoun flax? If so, try making a flax egg! Mix together 1 tbsp ground flax with 3 tbsp water and let it rest at room temperature for 5-10 minutes. Use this instead of an egg.
Other vegetarian recipes:
REcipe Card
Ingredients:
2 eggs, (flax-egg work too, if you’d like take make these vegan.)
1 cup of chickpeas
1/2 cup all purpose flour
2 tsp dill, fresh or dried
1 tsp salt, I like using kosher salt
1 tsp garlic powder
Instructions:
In a food processor, add all ingredients in the listed order, Mix well.
Put mixture in the fridge and let it rest a minimum of 30 minutes.
Cook in a lightly oiled frying pan on the stovetop over medium heat. using a soup spoon, scoop one spoonful of the mixture. Flip the patty when the bottom side is cooked. flatten the burger, and cook the opposite side. flip once more top make sure the burger is fully cooked throughout.
Serve on a burger bun with toppings you like, or with barley or rice.

Did you make this recipe? I want to see it!
Leave a ⭐ star rating and comment below to let us know how your ginger galettes turned out. Did you make any substitutions or additions? Share your tips and photos with us!
Share this recipe: Help others discover this delicious recipe by sharing it on Pinterest, Facebook, or Instagram. Tag us @Sageandsimplicity so we can see your beautiful creations!
📌 Pin it for later: Save this recipe to your Pinterest boards for easy access.
you might also like these recipes:


Easy Homemade Pizza Dough Recipe (Perfect Every Time!)
The Best Homemade Pizza Dough Recipe (Ready in 4 Hours)
Make authentic, bubbly pizza dough at home with this easy yeast-based recipe. From start to finish, you'll have perfectly hand-stretched pizza dough ready in just 4 hours – no overnight rise needed! This recipe makes 2 thick, airy pizzas or 3 thin, crispy pizzas that rival your favorite pizzeria.
Why this pizza dough recipe works
This recipe uses active dry yeast to create those signature air bubbles and chewy texture you love in restaurant-style pizza. Unlike complicated recipes that require overnight fermentation, this dough comes together quickly and is ready to bake in just 4 hours. The result is a pillowy, flavorful crust with the perfect amount of chew and those beautiful charred bubbles.
What can you make with this pizza dough?
This versatile recipe gives you options: divide the dough in half for 2 thick-crust, hand-tossed pizzas with a fluffy, bread-like texture, or split it into thirds for 3 thin-crust pizzas with crispy edges and a tender center. Perfect for pizza night when you're feeding a crowd or meal prepping for the week. Bonus, this dough freezes well!
How long does homemade pizza dough take?
Active time is just 15 minutes. The dough rises for about 3-4 hours. Total time from mixing bowl to oven: 4 hours. No special equipment needed – just your hands, a bowl, and a bit of patience.
Tips for bubbly, restaurant-quality pizza crust
The secret to those coveted air bubbles is proper fermentation and gentle hand-stretching. Don't use a rolling pin – it deflates the gas bubbles created by the yeast. Instead, gently stretch the dough from the center outward, letting gravity help you. A hot oven (450°F) and a pizza stone or baking steel will give you that crispy bottom and blistered, bubbly top.
Can you make pizza dough ahead of time?
Yes! This dough is flexible. Use it same-day after 4 hours. You can also freeze shaped dough balls for up to 3 months. Just thaw in the fridge overnight and bring to room temperature before stretching.
As an Amazon Associate I earn from qualifying purchases.
Last edited: March 19, 2026
⭐⭐⭐⭐⭐ (4.9/5 based on reader reviews)
📖 Jump to Recipe | 💬 Jump to FAQs | 🖨️ Print Recipe
Prep Time: 15 minutes | Rise Time: 2.5-3 hours | Total Time: 3 hours and 15 minutes | Yield: 2 thick crust pizzas or 3 thin crust pizzas | Difficulty: Easy
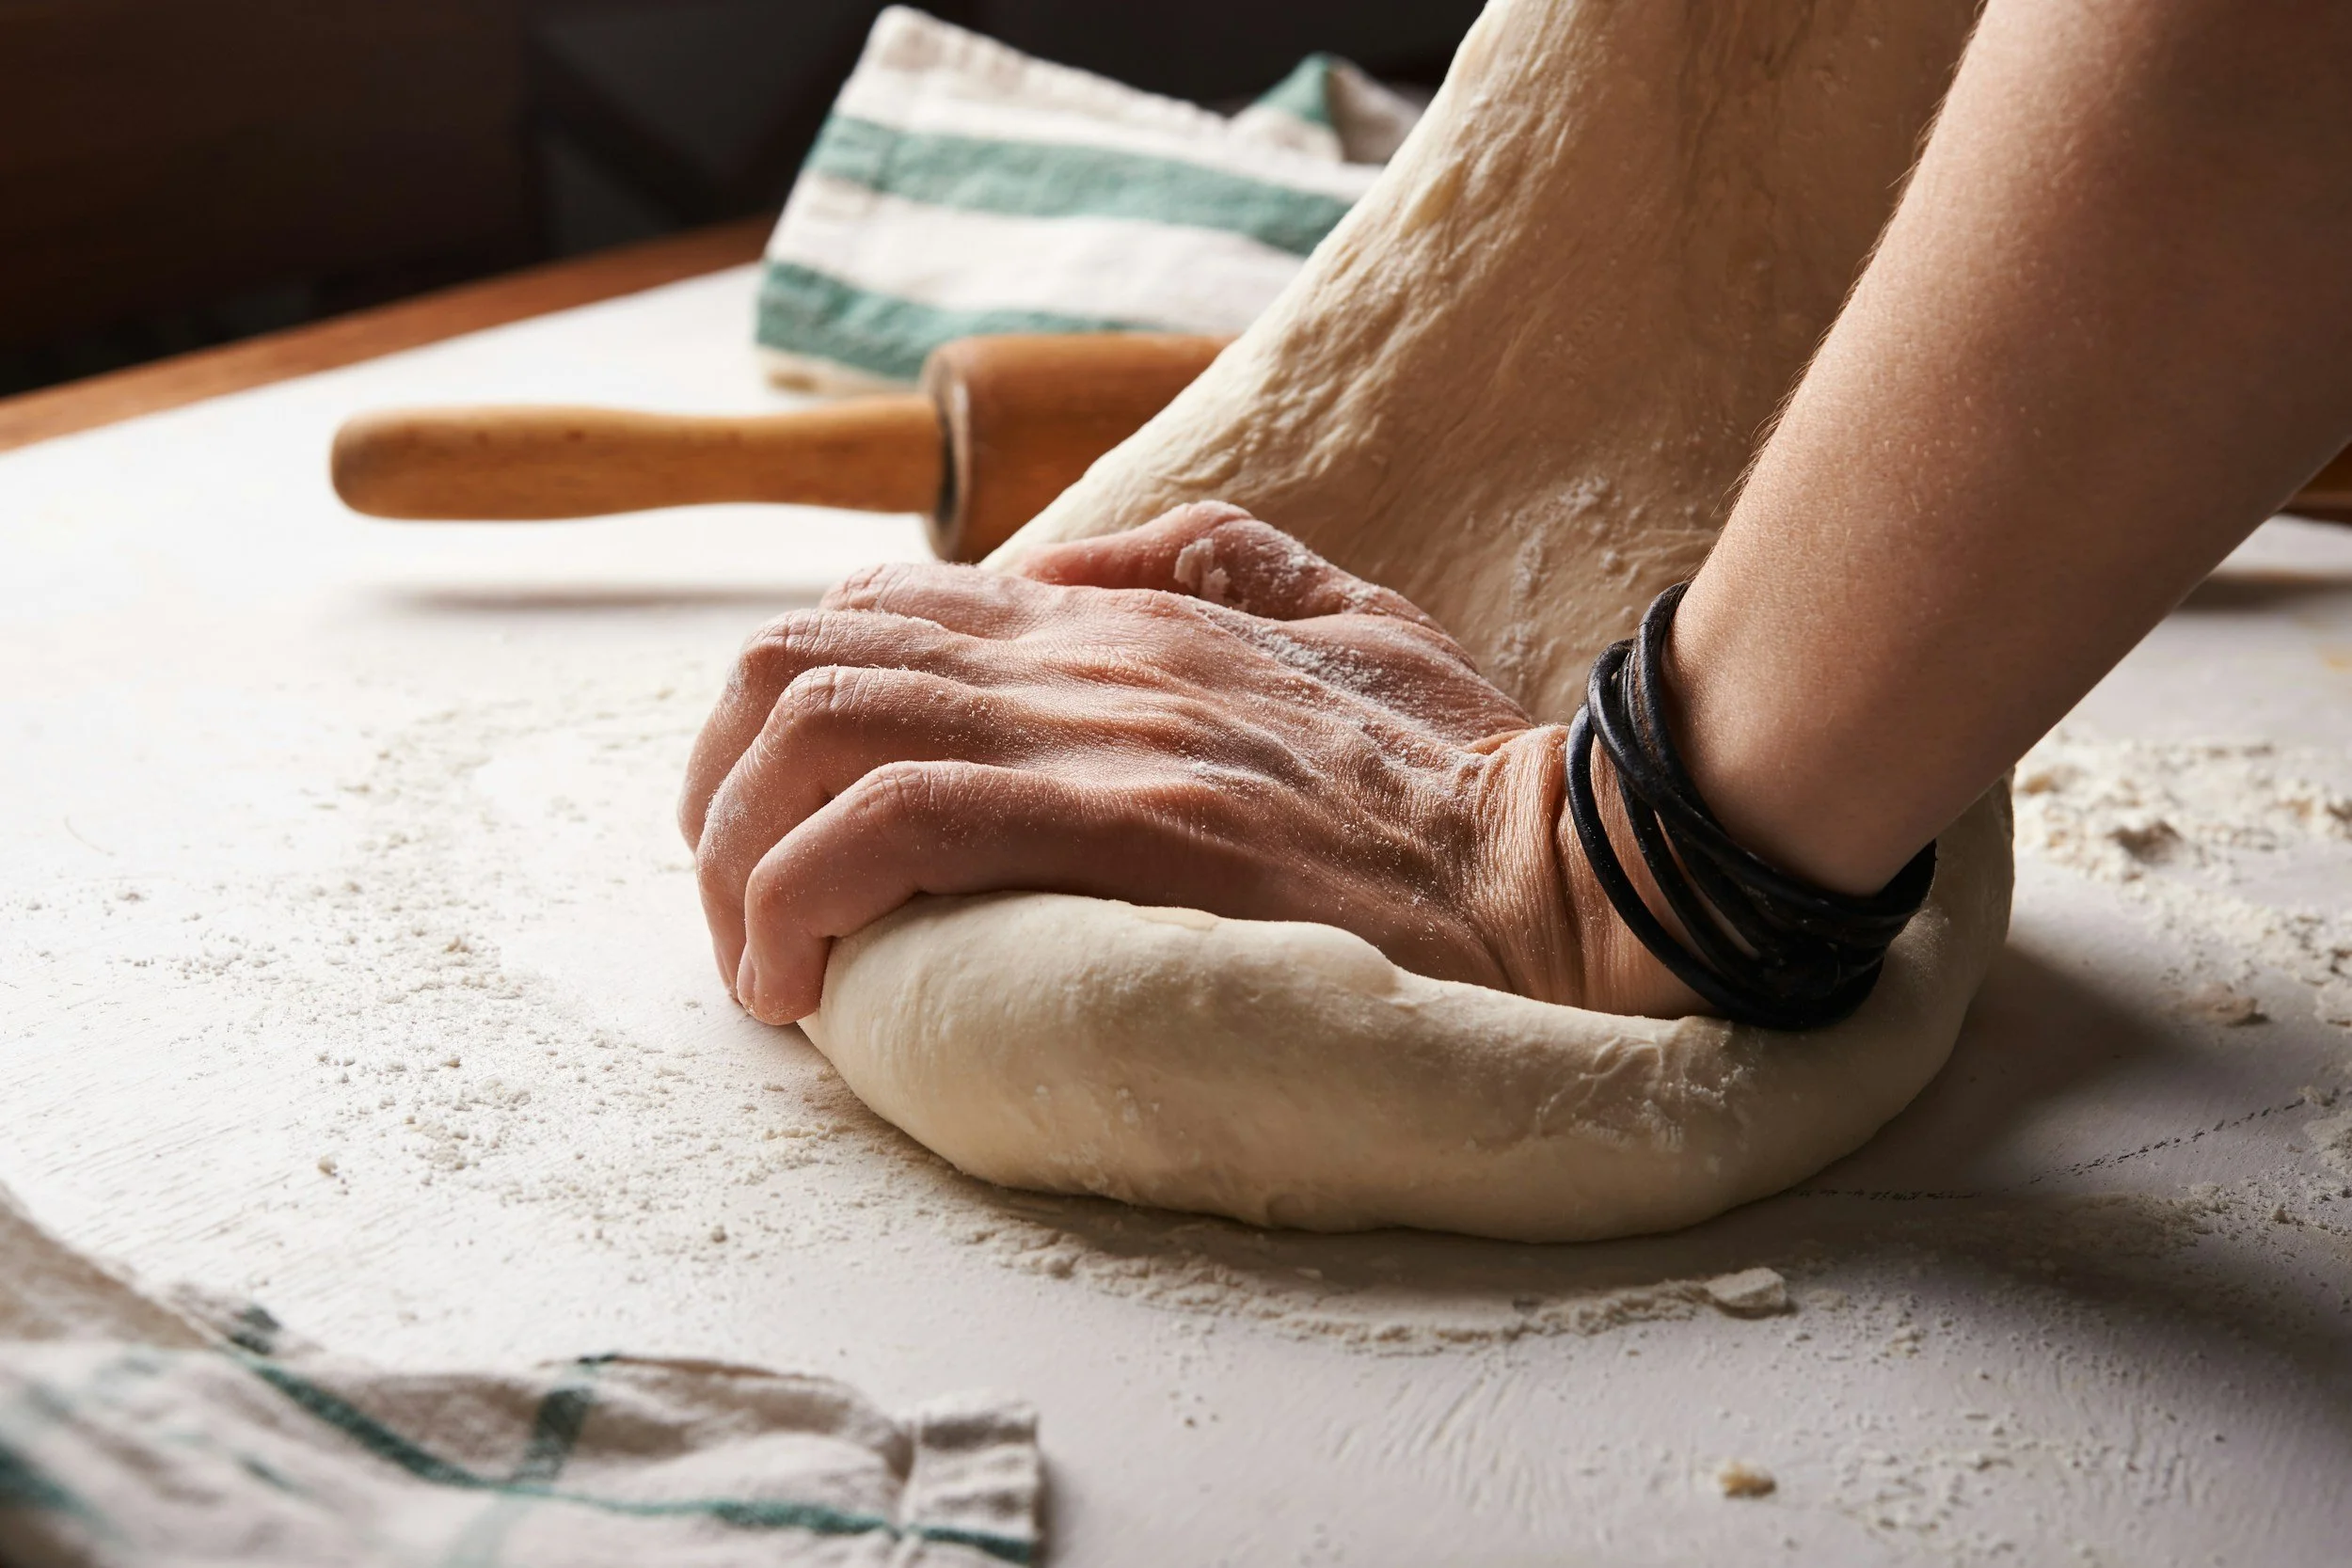
Why This Pizza Dough Recipe Works
This foolproof homemade pizza dough recipe uses just 5 simple ingredients you probably already have in your pantry. No special equipment needed—just a bowl, your hands, and a little time. The long, slow rise develops incredible flavour and creates that perfect chewy-yet-crispy texture you love from your favorite pizzeria.
Whether you're making Friday night pizza with the family or hosting a pizza party, this versatile dough works beautifully for thick, fluffy crusts or thin, crispy ones. Plus, it freezes perfectly for those nights when you need homemade pizza in a hurry!
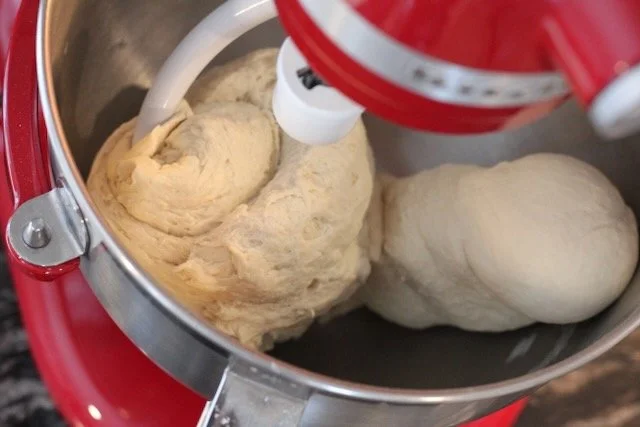
Ingredients You'll Need
Main Ingredients
2¼ cups cold water - cold water helps control the fermentation
2 teaspoons active dry yeast - or instant yeast
1½ teaspoons kosher salt - for flavour and gluten development
1 tablespoon extra virgin olive oil - adds flavour and helps with texture
5 cups all-purpose flour - plus extra for dusting
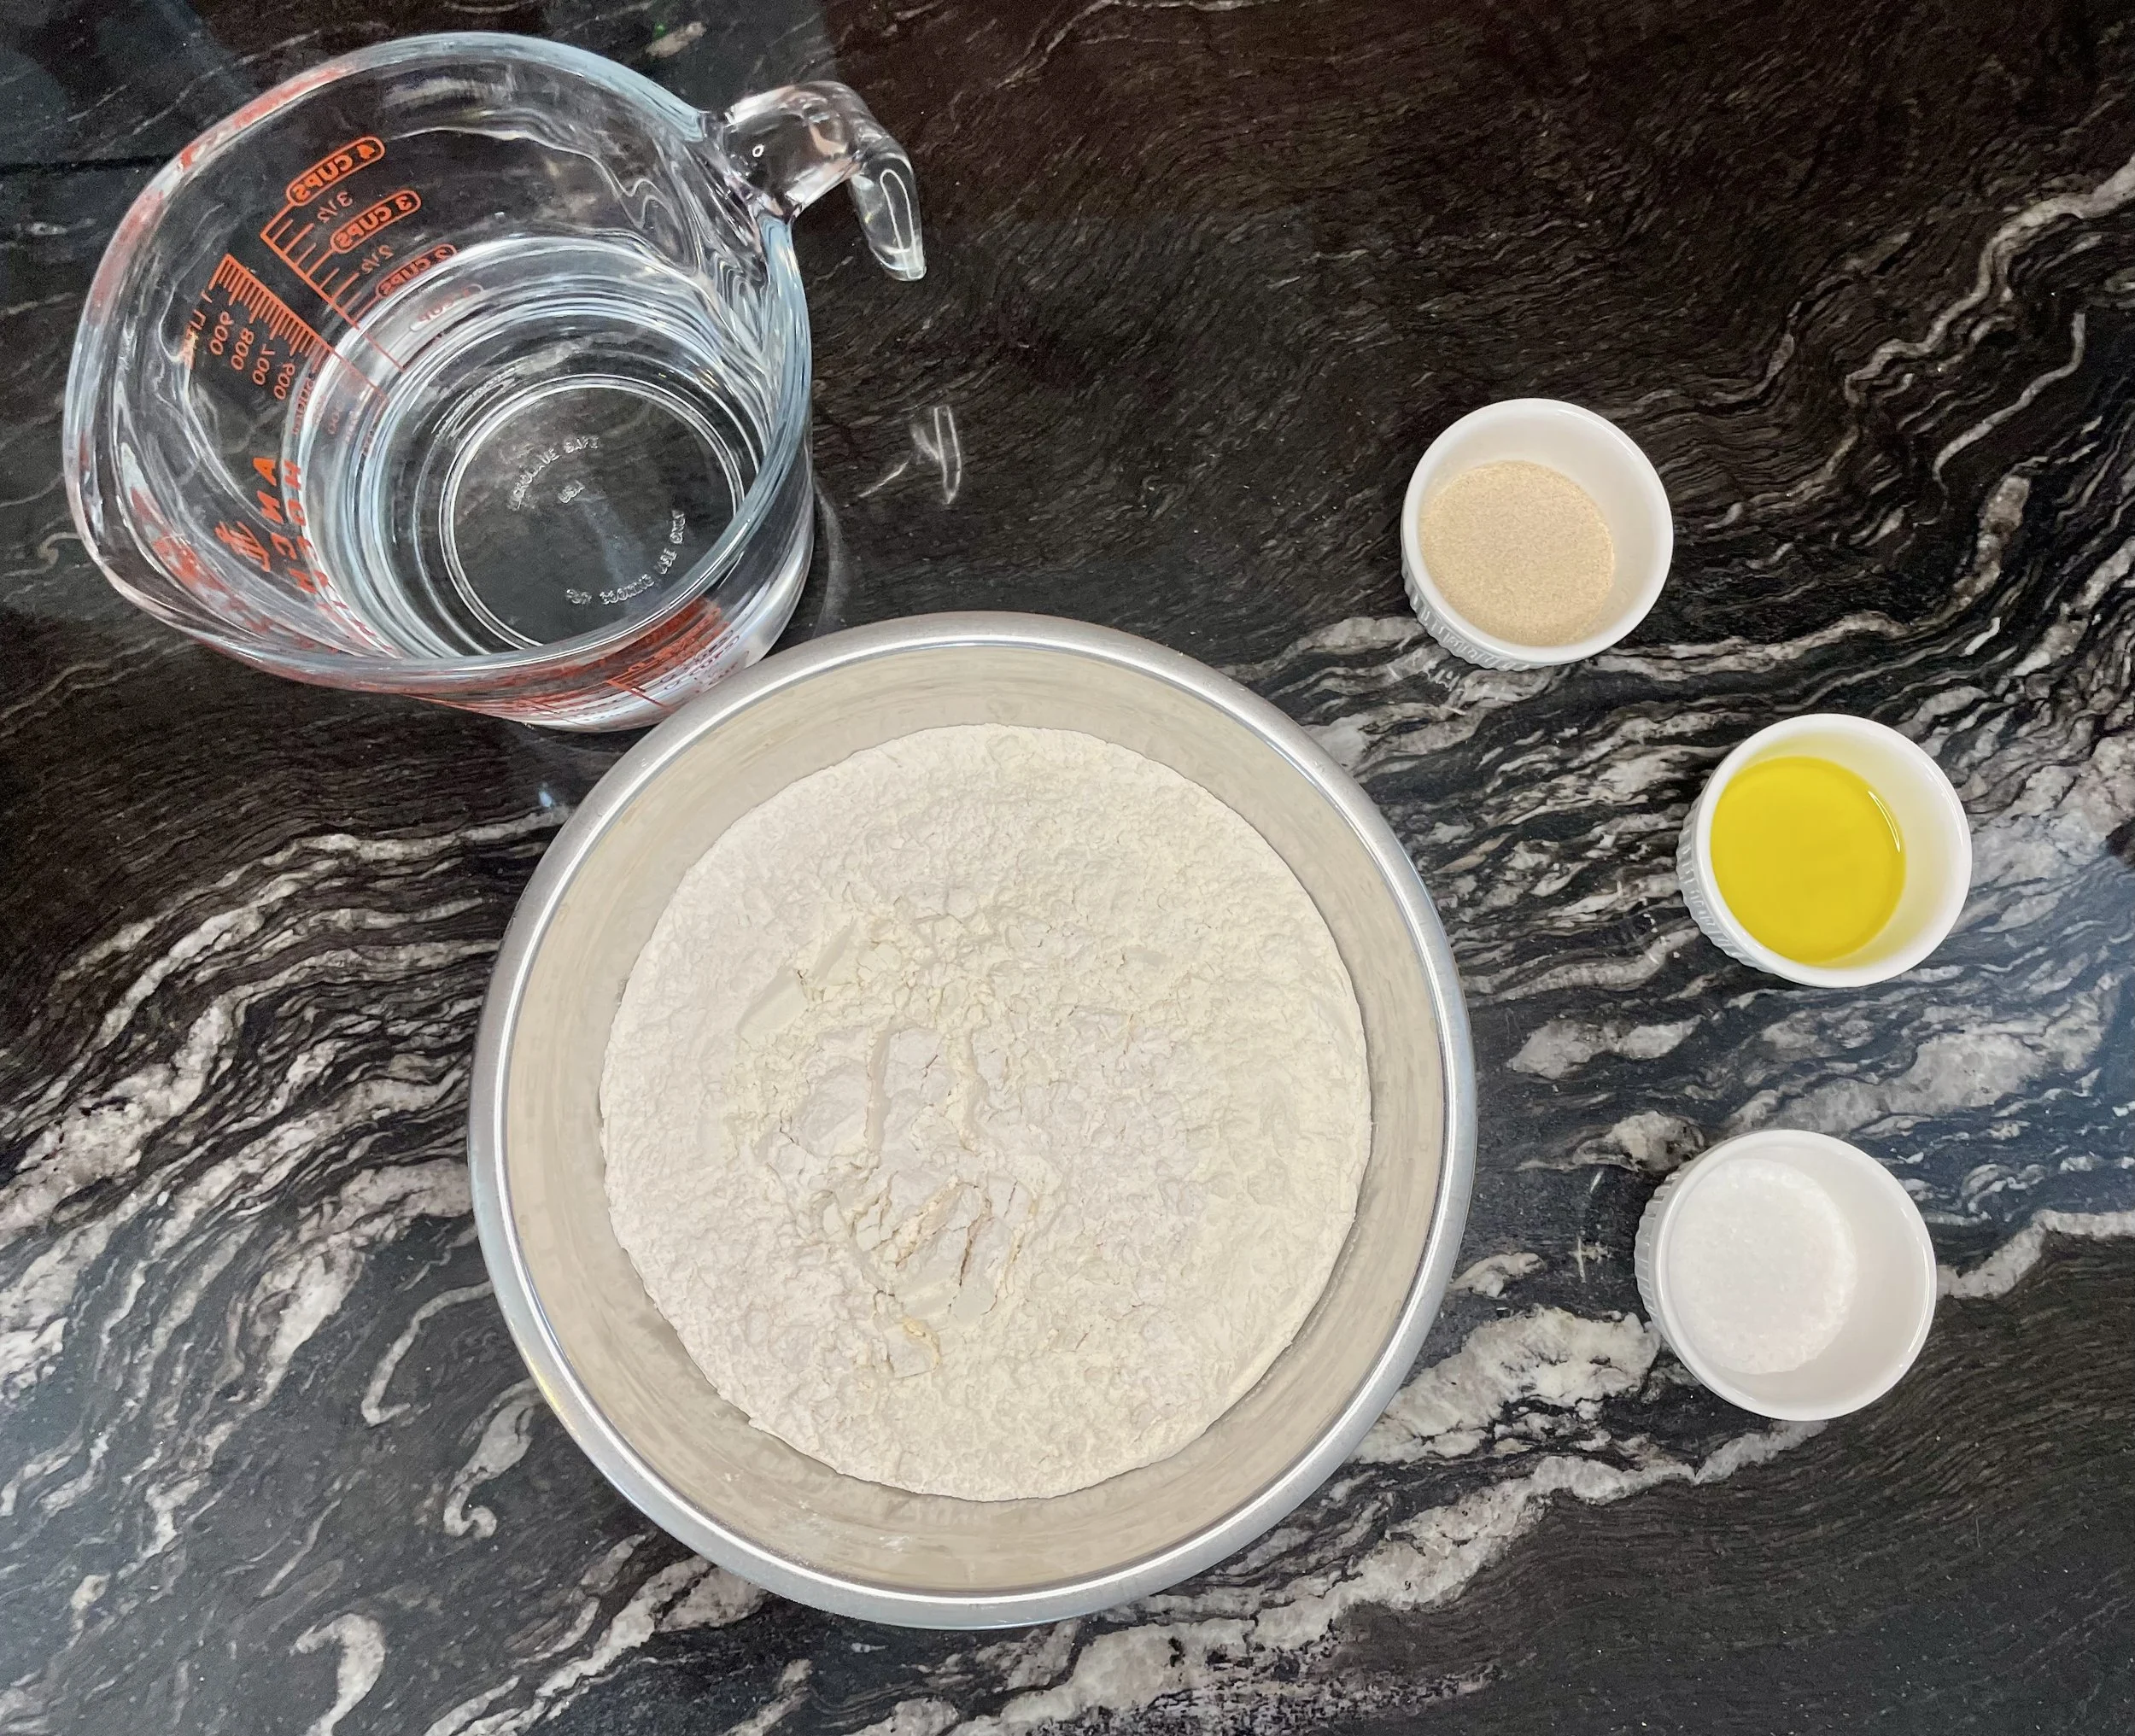
Kitchen Equipment
Large mixing bowl (affiliate link) or stand mixer with dough hook attachment
Measuring cups and spoons (affiliate link)
Tea towel or plastic wrap
Large bowl for rising
Warm place for proofing (oven with light on works perfectly)

How to Make Pizza Dough: Step-by-Step Instructions
Step 1: Combine the Ingredients
In a large mixing bowl or the bowl of your stand mixer fitted with the dough hook, add the ingredients in this exact order: cold water, yeast, salt, olive oil, and flour. The order matters because it helps the yeast activate properly without being shocked by direct contact with salt.
Step 2: Mix and Knead the Dough
Using a stand mixer: Mix on low speed until ingredients come together and knead at that same speed for 10 minutes. The dough should pull away from the sides of the bowl and become smooth and elastic.
Kneading by hand: Mix the ingredients with a wooden spoon until they form a shaggy dough. Turn out onto a lightly floured surface and knead for 12-15 minutes. Push the dough away with the heel of your hand, fold it back over itself, turn it a quarter turn, and repeat. The dough is ready when it becomes smooth, elastic, and soft to the touch. It should spring back when you poke it gently.
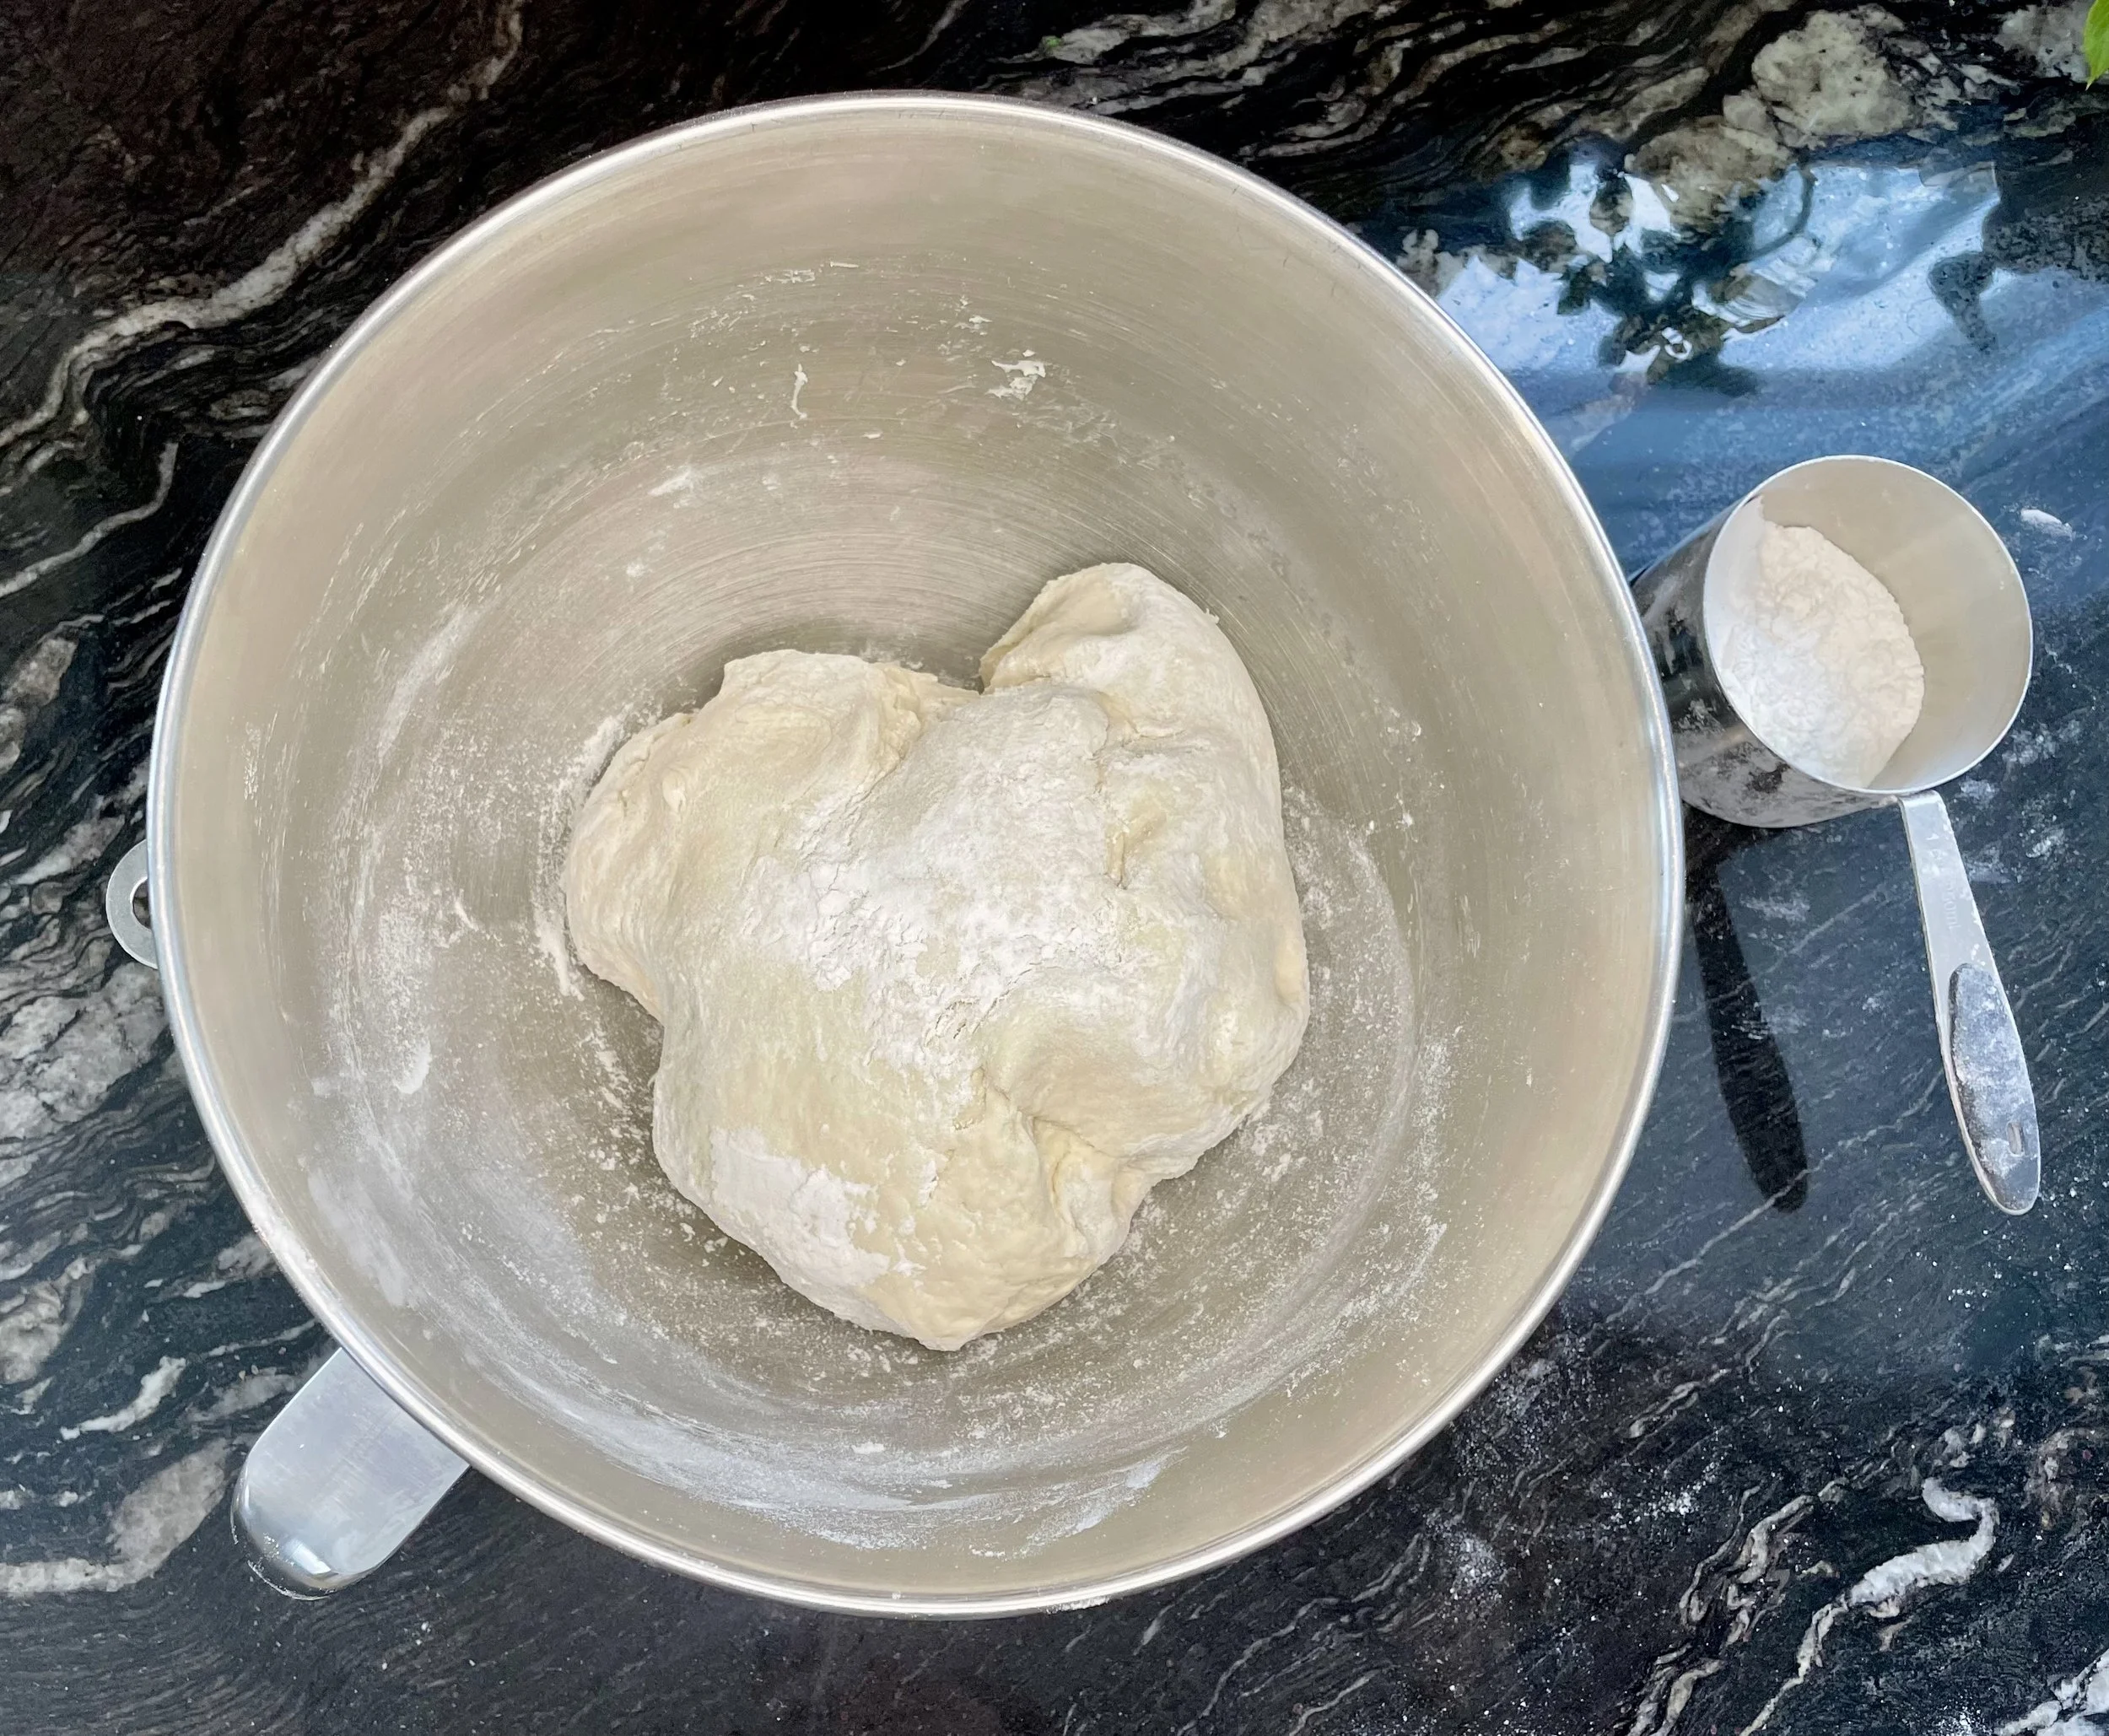
Step 3: Prepare for Rising
Lightly dust the dough ball with flour to prevent sticking. Place it in a large, lightly oiled mixing bowl. The bowl should be big enough to allow the dough to double in size.
Step 4: Let It Rise
Cover the bowl with a clean tea towel or plastic wrap. Place in a warm, draft-free spot—the oven with just the light turned on is ideal. Let the dough rise until it doubles in size, approximately 2.5 to 3 hours. The dough is ready when you press a finger into it and the indentation slowly springs back.
Step 5: Use or Store Your Dough
Once doubled, the dough is ready to use! Place on a floured countertop, and divide into 2 portions for thick crust pizzas or 3 portions for thin crust pizzas. Shape into balls, being careful not to puncture the air bubbles and gentle stretch it out by hand to fit your pizza pan. I don’t recommend the use of a rolling pin, because it flattens the dough and removed the air bubbles.
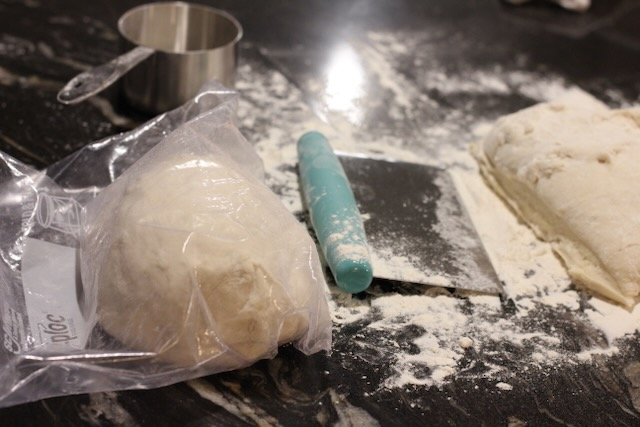
Pro Tips for Perfect Pizza Dough
Use cold water: Cold water slows down yeast activity, giving you better control over the rise and developing more complex flavours.
Don't rush the rise: The 2.5-3 hour rise time is crucial for flavour development. Faster isn't better with pizza dough!
The windowpane test: To check if you've kneaded enough, stretch a small piece of dough. If it stretches thin enough to see light through it without tearing, you're done kneading.
Proper kneading is key: Under-kneaded dough will be tough and dense. Over-kneaded dough becomes sticky and won't hold its shape. Look for smooth, elastic dough that springs back when poked.
Warm rising environment: Yeast loves warmth. An oven with just the light on maintains the perfect temperature (around 75-80°F).
Flour as needed: If your dough is too sticky, add flour one tablespoon at a time. If it's too dry, add water one teaspoon at a time.
Storage and Make-Ahead Instructions
Refrigerator: After the Doug has risen, you can refrigerate the dough in an airtight container for up to 3 days. The slow, cold fermentation actually improves the flavour! Bring to room temperature (about 30 minutes) before shaping, with emphasis on room temperature. Cold dough doesn’t like to be stretched.
Freezer: This dough freezes beautifully for up to 3 months. After the rise, divide into portions, shape into balls, and wrap each tightly in plastic wrap, then place in a freezer bag. Thaw overnight in the refrigerator, then bring to room temperature before using, with emphasis on room temperature. Cold dough doesn’t like to be stretched.
Make-Ahead: Prepare the dough the night before and let it rise slowly in the refrigerator overnight (8-12 hours). This cold fermentation creates incredible flavour and makes pizza night even easier!
How to Use Your Pizza Dough
Shaping Your Pizza
Let the dough rest at room temperature for 15-20 minutes before shaping
On a lightly floured surface, gently press the dough into a circle, or the shape of your pan.
Use your fingertips to push from the center outward, leaving a thicker edge for the crust
Stretch carefully, rotating as you go
For thin crust: roll with a rolling pin to your desired thickness
For thick crust: hand-stretch to about ½-inch (1 cm) thick
Baking Your Pizza
Preheat oven to 450°F (230°C) for at least 30 minutes
Baking sheet
Bake for 10-15 minutes until crust is golden and cheese is bubbly
For crispier crust, brush the edges with olive oil before baking

Variations and Flavour Ideas
Prosciutto and green olives: This is a household favourite of ours! The trick is to sprinkle granular garlic and basil over the toppings, just before baking it. Ours kids have come to expect this pizza every Friday night seeing Friday night, is pizza night at our house!
Garlic Herb Dough: Add 2 teaspoons Italian seasoning and 1 teaspoon garlic powder to the flour.
Whole Wheat Pizza Dough: Replace 2 cups of all-purpose flour with whole wheat flour for a nuttier, heartier crust.
Honey Wheat Dough: Add 1 tablespoon honey with the wet ingredients and use half whole wheat flour.
Sourdough Pizza Dough: Replace 1 cup of water and 1 cup of flour with active sourdough starter for tangy flavour.
Herbed Crust: Brush shaped dough with garlic butter and sprinkle with fresh herbs before adding toppings.
Parmesan Crust: Mix ¼ cup grated Parmesan into the dough for extra flavour.


Troubleshooting Common Pizza Dough Problems
Dough won't rise: Your yeast may be expired, or the water was too hot (which kills yeast) or too cold (which slows activation). Use water around 75-80°F for best results.
Dough is too sticky: Add flour, one tablespoon at a time, while kneading. Humidity can affect dough consistency.
Dough is tough and chewy: You may have added too much flour or didn't knead long enough. Proper kneading develops gluten for that perfect texture.
Dough shrinks when rolling: The dough needs more rest time. Let it relax for 10-15 minutes before trying again.
Frequently Asked Questions (FAQs)
Can I use instant yeast instead of active dry yeast?
Yes! Instant yeast and active dry yeast can be used interchangeably in this recipe with the same measurement (2 teaspoons). Instant yeast doesn't need to be activated in water first, so you can add all ingredients together. The rise time will be roughly the same.
How do I know when my pizza dough has risen enough?
The dough should double in size, which typically takes 2.5 to 3 hours in a warm environment. To test, gently press two fingers about half an inch into the dough. If the indentation slowly springs back but doesn't completely disappear, your dough is perfectly risen and ready to use.
Can I make pizza dough without a stand mixer?
Absolutely! This recipe works perfectly when kneaded by hand. It just requires a bit more arm work—knead for 12-15 minutes until the dough becomes smooth, elastic, and soft. Hand-kneading can actually give you better control and feel for the dough's texture.
Why is my pizza dough tough and not stretchy?
This usually happens for three reasons: not enough kneading (gluten didn't develop properly), too much flour added during kneading, or not letting the dough rest long enough. Make sure to knead for the full 12-15 minutes and let the dough relax for 10-15 minutes before shaping if it's resisting.
Can I freeze pizza dough?
Yes! Pizza dough freezes exceptionally well for up to 3 months. After the first rise, divide into portions, shape into balls, wrap tightly in plastic wrap, and place in freezer bags. Thaw in the refrigerator overnight, then bring to room temperature (30-60 minutes) before shaping and baking.
How long does homemade pizza dough last in the fridge?
Pizza dough will keep in the refrigerator for up to 3 days when stored in an airtight container or wrapped tightly in plastic wrap. In fact, the cold fermentation improves the flavour! Just remember to bring it to room temperature before shaping.
What's the best temperature for water when making pizza dough?
For this recipe using cold water, aim for around 60-70°F (15-21°C). Cold water gives you better control over the rise. If you were activating yeast separately, you'd want warmer water (105-115°F), but for this all-in-one method, cold water works best.
Can I use bread flour instead of all-purpose flour?
Yes! Bread flour has higher protein content, which creates more gluten and results in a chewier, more structured crust (like New York-style pizza). You can substitute bread flour 1:1 for all-purpose flour. You may need to add slightly more water as bread flour absorbs more liquid.
How thick should I roll out my pizza dough
For thin crust pizza: Roll to about ⅛ to ¼ inch thick. For thick crust pizza: Hand-stretch or roll to about ½ inch (1 cm) thick. The dough will puff up during baking, so account for that when deciding thickness. Thinner crusts get crispier; thicker crusts stay softer and chewier.
Why does my pizza dough keep shrinking back when I try to stretch it?
This happens when the gluten in the dough is too tight and hasn't had enough time to relax. Let the dough rest at room temperature for 10-15 minutes, covered with a tea towel. This allows the gluten to relax, making the dough much easier to stretch without springing back.
Can I add ingredients like garlic or herbs to the dough?
Definitely! You can mix in dried herbs (Italian seasoning, oregano, basil), garlic powder, grated Parmesan cheese, or even red pepper flakes. Add these dry ingredients with the flour. For fresh herbs or minced garlic, add them during the kneading process to distribute evenly throughout the dough.
Do I need to let the dough rise twice?
This recipe only requires one rise before using. However, if you punch down the dough and refrigerate it, you can let it come to room temperature and rise slightly again for even better flavour and texture. Professional pizzerias often use multiple rises for complex flavour development.
Recipe Card
Easy Homemade Pizza Dough
Difficulty: Easy
Prep Time: 15 minutes | Rise Time: 2.5-3 hours | Total Time: 3 hours 15 minutes
Yield: 2 thick crust pizzas or 3 thin crust pizzas
Equipment Needed:
Baking Sheet * https://amzn.to/4tIlO5t (As an Amazon Associate I earn from qualifying purchases that is of no extra cost to you)
Large mixing bowl or stand mixer with dough hook
Measuring cups and spoons
Large bowl for rising
Tea towel or plastic wrap
Warm place for proofing (oven with light on)
Ingredients:
2¼ cups cold water
2 teaspoons active dry yeast (or instant yeast)
1½ teaspoons kosher salt
1 tablespoon extra virgin olive oil
5 cups all-purpose flour (plus extra for dusting)
Instructions:
Add ingredients to bowl in order listed: water, yeast, salt, olive oil, flour
Stand mixer: Knead with dough hook for 15 minutes on medium speed
By hand: Mix until combined, then knead on floured surface for 12-15 minutes until smooth and elastic
Flour the dough ball and place in large floured bowl
Cover with tea towel and let rise in warm place (oven with light on) until doubled, 2.5-3 hours
Punch down, divide into 2 or 3 portions, and shape as desired
Top and bake at 450°F (230°C) for 10-15 minutes until golden
Storage:
Refrigerator: Up to 3 days in airtight container
Freezer: Up to 3 months wrapped tightly in plastic wrap

Did You Make This Recipe? I want to see it!
Leave a picture and ⭐ star rating and comment below to let us know how your pizza dough turned out. Did you make any substitutions or additions? Share your tips and photos with us!
Share this recipe: Help others discover this delicious recipe by sharing it on Pinterest, Facebook, or Instagram. Tag us @Sageandsimplicity so we can see your beautiful creations!
📌 Pin it for later: Save this recipe to your Pinterest boards for easy access.
You might also like:

Easy French Crepes Recipe: No Added Sugar (Sweet or Savoury!)
Classic French Crepes Recipe (No Added Sugar)
Learn how to make authentic French crepes at home with this simple, no sugar added recipe. These thin, delicate crepes are naturally lightly sweet and incredibly versatile – perfect for breakfast, brunch, or dessert.
What are French crepes?
French crepes are ultra-thin pancakes with delicate, lacy edges and a soft, pliable texture. Unlike thick American pancakes, crepes are meant to be thin and can be filled with both sweet and savory ingredients. This traditional recipe uses just basic pantry staples: flour, eggs, milk.
Why this No Added Sugar crepe recipe works
This recipe skips refined sugar entirely, letting the natural sweetness of milk and your chosen toppings shine through. The result is a lighter, more versatile crepe that works beautifully with fresh fruit, honey, jam, or savory fillings like ham and cheese. You can easily customize the sweetness level based on what you're serving them with.
How long does it take to make crepes?
You can make a batch of homemade French crepes in about 30 minutes from start to finish. The batter comes together in just 5 minutes, and each crepe cooks in under 2 minutes. This recipe makes approximately 12-15 thin crepes, perfect for feeding a family or meal prepping for the week.
Tips for perfect crepes every time
The key to restaurant-quality crepes at home is getting the right batter consistency (it should coat the back of a spoon), letting the batter rest for at least 15 minutes, and using a properly heated non-stick pan or crepe pan. With a little practice, you'll be flipping crepes like a pro.
As an Amazon Associate I earn from qualifying purchases.
⭐⭐⭐⭐⭐ (4.9/5 based on reader reviews)
📖 Jump to Recipe | 💬 Jump to FAQs | 🖨️ Print Recipe
Prep Time: 5 minutes | Cook Time: 15-20 minutes | Total Time: 20-25 minutes | Yield: 8-10 crepes

Easy French Crepes Recipe: No Added Sugar (Sweet or Savoury!)
Learn how to make authentic French crepes without added sugar—perfect for sweet or savoury fillings. This simple recipe creates delicate, golden crepes every time!
Why You'll Love This No-Sugar French Crepe Recipe
Weekend mornings deserve something special, and these French crepes without added sugar deliver exactly that. This versatile recipe creates thin, delicate crepes that work beautifully for both sweet breakfast treats and savoury brunch dishes.
The beauty of this no-added-sugar approach? You control the flavour. The batter's subtle vanilla and cinnamon create a warm base without committing you to sweet or savoury. Want a dessert crepe? Add fresh berries and maple syrup. Craving something hearty? Skip the vanilla and cinnamon, then fill with ham, cheese, and vegetables.
Ready to master French crepes? This straightforward recipe proves that restaurant-quality results are absolutely achievable at home.

French Crepes Recipe (No Added Sugar)
Prep Time: 5 minutes
Cook Time: 15-20 minutes
Total Time: 20-25 minutes
Yield: 8-10 crepes
Difficulty: Easy (Beginner-friendly)
Equipment:
Large mixing bowl (affiliate link), or standmixer with paddle attachment
crepe pan (affiliate link)
spatula (affiliate link)
Ingredients
2 large eggs
2 cups all-purpose flour
2 ½ cups milk, 2%
2 tbsp vanilla extract (optional, omit for savoury crepes)
½ tsp cinnamon, to taste (optional, omit for savoury crepes)
Butter, oil, or lard for greasing the pan
Directions
Make the batter: Whisk eggs, flour, and milk together until completely smooth with no lumps.
Add flavourings: Add vanilla and cinnamon (if using). Whisk until well incorporated. The batter should coat the whisk but flow smoothly off it.
Adjust consistency: If too thick, add milk one tablespoon at a time. If too thin, add flour one teaspoon at a time.
Heat your pan: Preheat a 10-inch skillet over medium-low heat. This temperature is key—too hot and crepes burn, too cool and they stick.
Grease lightly: Lightly grease the pan with butter, oil, or lard (lard works especially well with cast iron skillets). Use just enough to coat—excess causes crepes to slide around.
Pour and swirl: Ladle one scoop of batter into the center of the pan. Immediately tilt and swirl the pan in a circular motion to spread batter into a thin, even circle.
Cook first side: Let cook undisturbed until the crepe naturally releases from the pan, about 1-2 minutes. The underside should be golden brown.
Flip and finish: Flip carefully and cook the second side until golden, about 1 minute more.
Repeat: Continue with remaining batter, stacking finished crepes on a plate.
Pro Tips from Our Kitchen
No resting needed: Unlike some recipes, this batter works perfectly without a 30-minute rest period.
Best greasing fat: Through trial and error, lard works exceptionally well for greasing a cast iron skillet.
First crepe syndrome: Your first crepe might not be perfect—that's completely normal! It helps season the pan.
Keep crepes warm: Stack finished crepes on a plate and cover with a clean kitchen towel.

Sweet vs. Savoury: Endless Filling Ideas
Sweet Crepe Fillings
Fresh berries with whipped cream
Sliced bananas with Nutella
Maple syrup
Greek yogurt with honey and fruit
Peanut butter and sliced strawberries
Lemon juice and powdered sugar (classic!)
Savoury Crepe Fillings
Thinly sliced ham, asparagus, and shredded Gruyère cheese
Sautéed mushrooms with goat cheese and fresh thyme
Scrambled eggs, bacon, and cheddar
Smoked salmon, cream cheese, and dill
Spinach, feta, and sun-dried tomatoes
Remember: For savoury crepes, omit the vanilla and cinnamon from the batter.
Frequently Asked Questions
What makes this a no-added-sugar crepe recipe?
This recipe contains no added sugar in the batter—neither refined nor natural sweeteners. Any subtle sweetness comes naturally from the milk and optional vanilla extract. This gives you complete control over sweetness through your chosen toppings and fillings.
Do I need a special crepe pan to make French crepes?
No! A regular 10-inch skillet works perfectly. Cast iron skillets are excellent because they retain heat evenly, but any non-stick or well-seasoned pan will do. The key is even heat distribution, not specialized equipment.
Why is my crepe batter too thick or too thin?
Crepe batter should coat a whisk but flow smoothly. If too thick (doesn't spread easily in the pan), add milk, one tablespoon at a time. If too thin (spreads too much and the batter runs), whisk in flour, one teaspoon at a time until you reach the right consistency.
Can I make crepe batter ahead of time?
Yes! Crepe batter stores well in the refrigerator for up to 2 days. Whisk it briefly before using, as ingredients may separate. You can also freeze cooked crepes for up to 2 months—separate them with parchment paper and store in an airtight container.
How do I know when to flip a crepe?
The crepe is ready to flip when it naturally releases from the pan—you should be able to gently shake the pan and see the crepe move freely. The edges will look slightly dry, and the underside should be golden brown (peek gently with a spatula to check).
Why do my crepes stick to the pan?
Sticking usually happens when: (1) the pan isn't hot enough, (2) there's not enough grease, or (3) you're trying to flip too early. Make sure your pan is properly preheated, lightly greased, and wait until the crepe releases naturally before flipping.
What's the best way to grease a crepe pan?
Use a small amount of butter, oil, or lard on a paper towel to lightly coat the pan between crepes. Lard works especially well with cast iron. You want just enough to prevent sticking—excess grease makes crepes slide around.
How do I store leftover crepes?
Stack cooled crepes with parchment paper between each one, place in an airtight container, and refrigerate for up to 3 days. Reheat gently in a dry pan over low heat or in the microwave for 15-20 seconds.
Can I make these crepes dairy-free or gluten-free?
For dairy-free crepes, substitute the milk with unsweetened almond milk, oat milk, or another plant-based milk. For gluten-free, use a 1:1 gluten-free flour blend. Note that gluten-free crepes may be slightly more delicate when flipping.
What's the difference between crepes and pancakes?
Crepes are much thinner than pancakes and contain no leavening agents (no baking powder or baking soda). The batter is more liquid and spreads into a thin, delicate layer when swirled in the pan, while pancake batter is thicker and rises as it cooks.
Why This Recipe Works
This best easy French crepe recipe without sugar has become a weekend staple because it's:
✓ Simple: Just 5 basic ingredients (3 core + 2 optional flavourings)
✓ Versatile: Works for sweet breakfasts or savoury brunches
✓ Quick: No resting time required—mix and cook immediately
✓ Healthier: No added sugar means you control sweetness
✓ Crowd-pleasing: Everyone can customize their own crepes
Whether you're making a quiet Saturday morning breakfast or hosting a full brunch spread, these crepes bring people together around the table. The first few might be practice rounds (and that's perfectly okay!), but once you find your rhythm, you'll be flipping golden crepes like a pro.
Did You Make This Recipe? I want to see it!
Leave a picture and a ⭐ star rating and comment below to let us know how your muffins turned out. Did you make any substitutions or additions? Share your tips and photos with us!
Share this recipe: Help others discover this delicious recipe by sharing it on Pinterest, Facebook, or Instagram. Tag us @Sageandsimplicity so we can see your beautiful creations!
📌 Pin it for later: Save this recipe to your Pinterest boards for easy access.
You might also like:


Easy Banana Chocolate Chip Muffins Recipe (Moist & Delicious)
Easy and Moist Homemade Banana Chocolate Chip Muffins
As an Amazon Associate I earn from qualifying purchases.
Last edited: 19 March 2026
⭐⭐⭐⭐⭐ (4.9/5 based on reader reviews)
📖 Jump to Recipe | 💬 Jump to FAQs | 🖨️ Print Recipe
Prep Time: 10 minutes | Cook Time: 18-22 minutes | Total Time: 28-32 minutes | Yield: 12 muffins
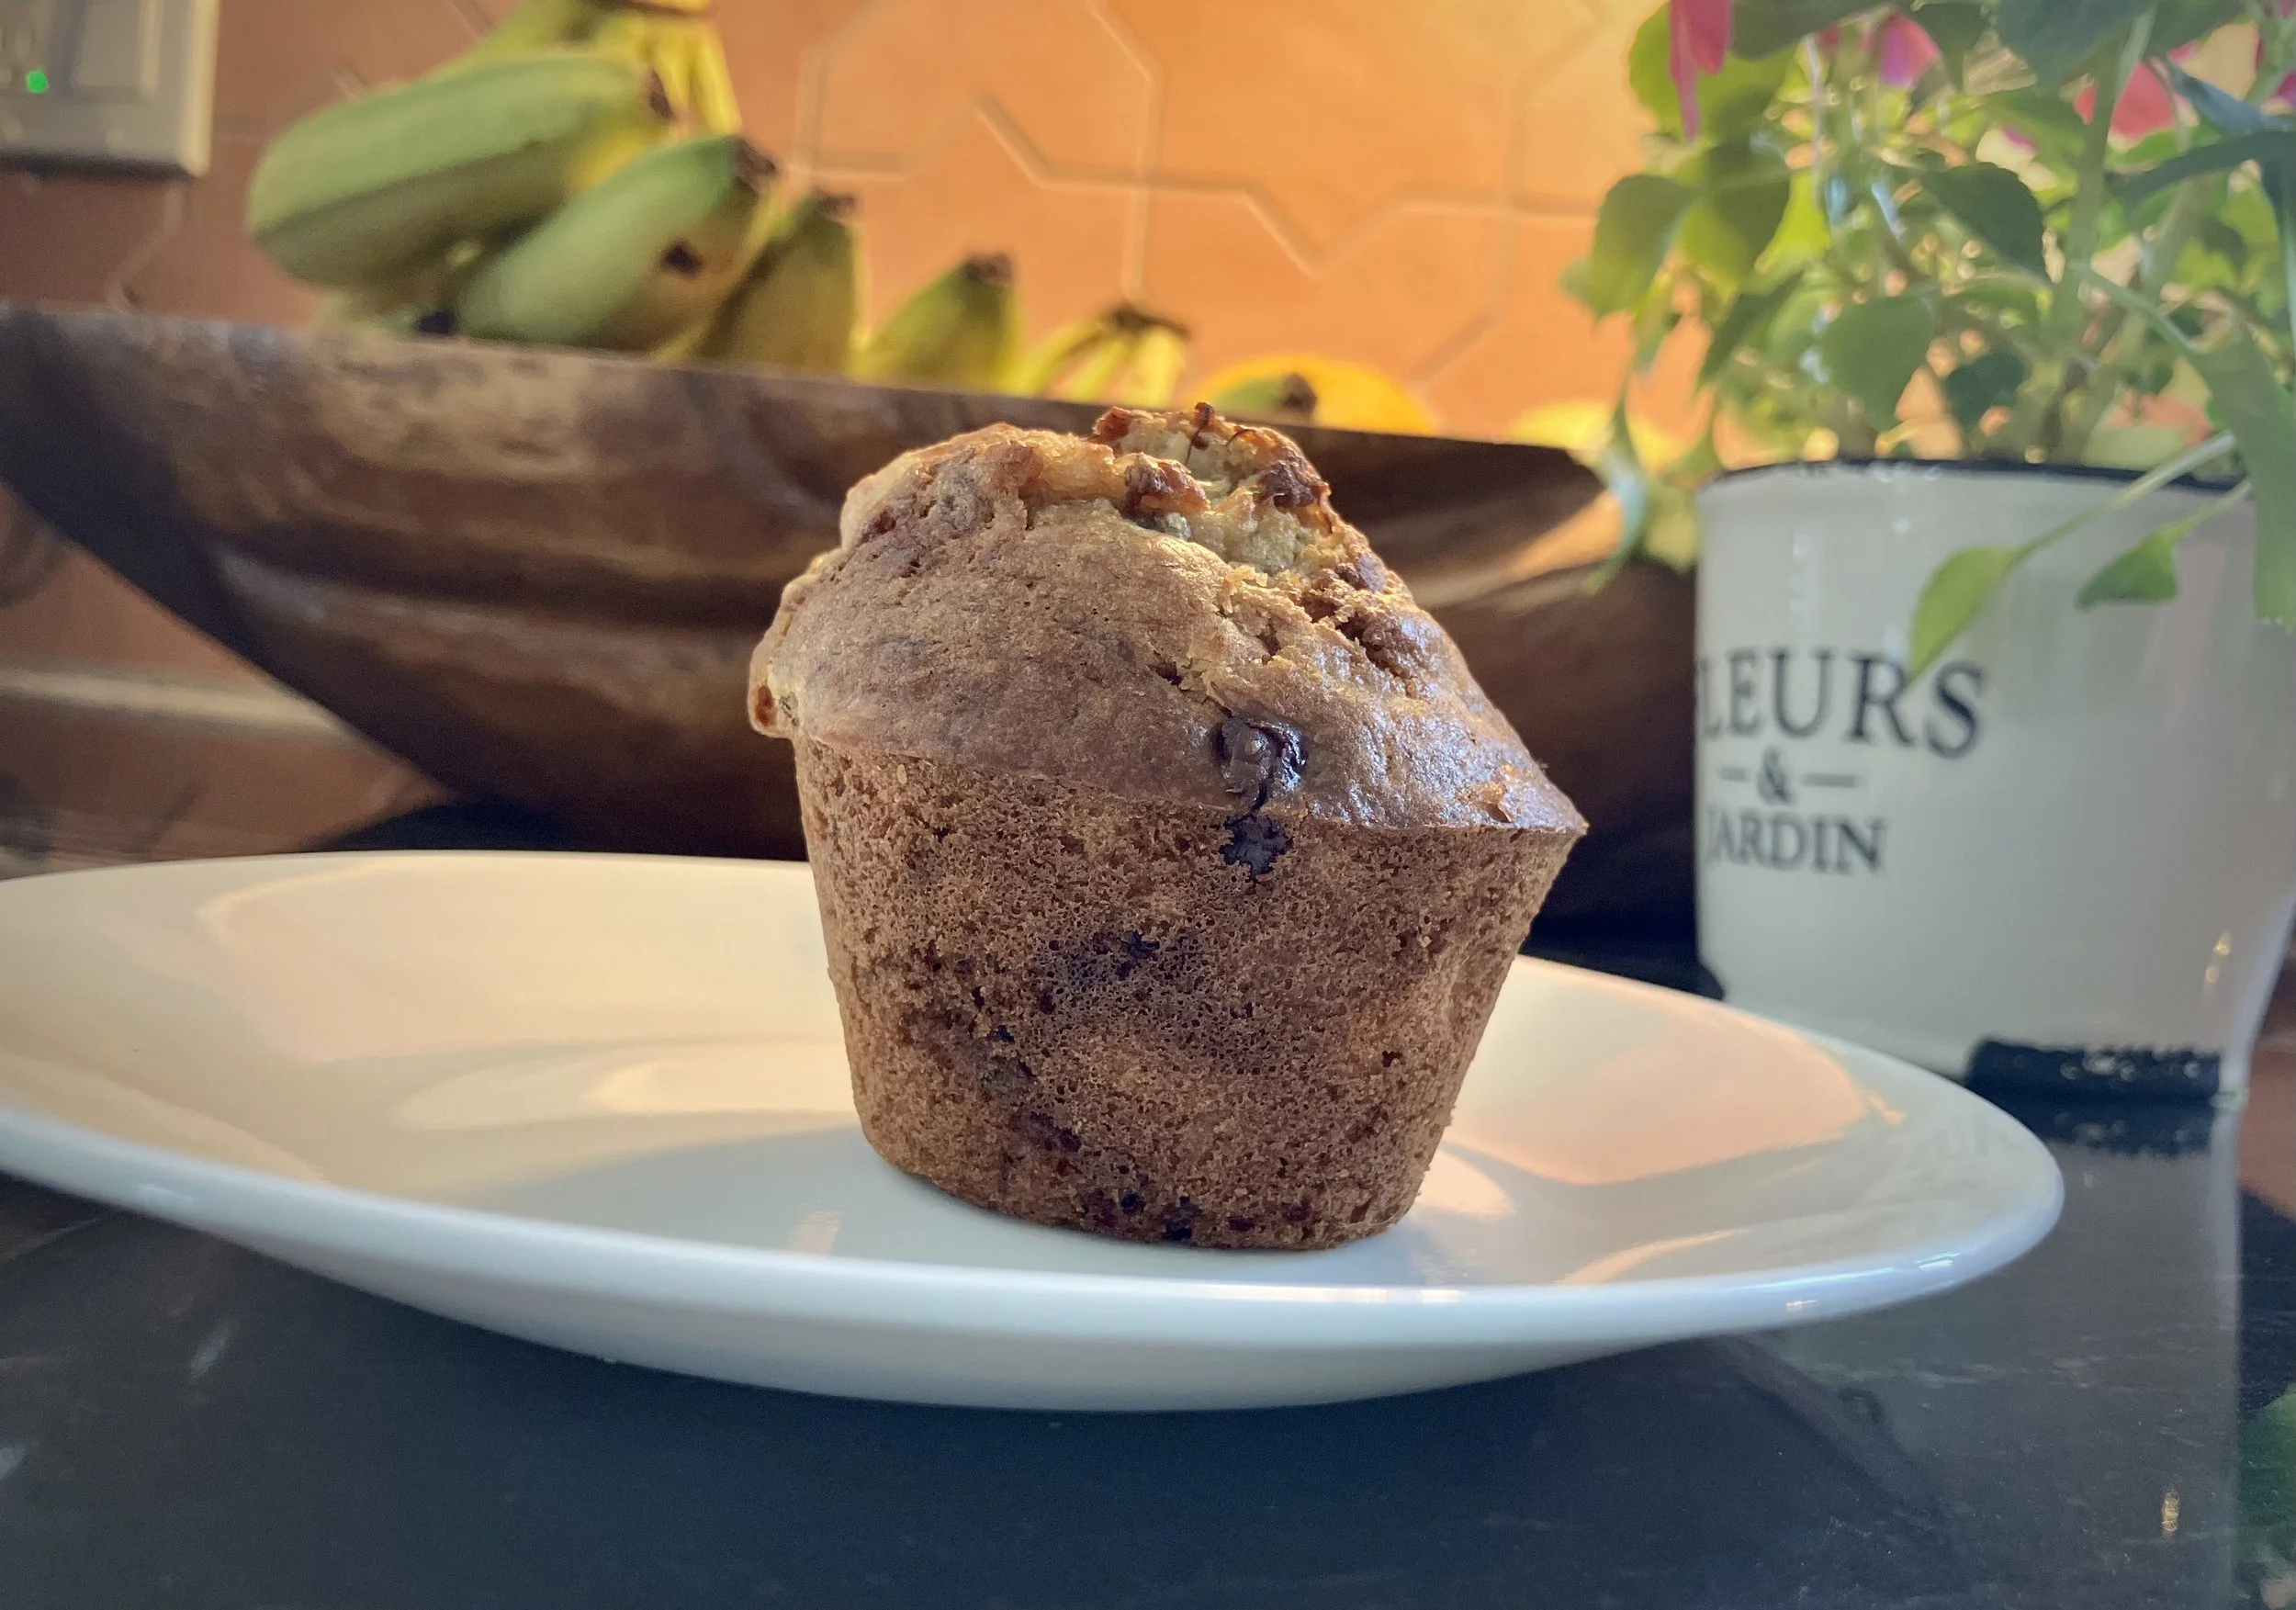
The Perfect Way to Use Overripe Bananas
There's something magical about the aroma of freshly baked banana chocolate chip muffins filling your kitchen. These moist, tender muffins combine the natural sweetness of ripe bananas with indulgent chocolate chips for a treat that's both wholesome and satisfying.
Whether you need a quick breakfast, a lunchbox snack, or an afternoon pick-me-up, this easy one-bowl banana chocolate chip muffin recipe delivers homemade comfort without all the dishes!
Why You'll Love This Banana Chocolate Chip Muffin Recipe
Naturally Sweet & Moist: Overripe bananas provide natural sweetness and moisture, meaning less added sugar and incredibly tender muffins.
Simple Ingredients: Made with everyday pantry staples—no special ingredients required.
Versatile & Convenient: Perfect for busy mornings, after-school snacks, or meal prep. These muffins freeze beautifully and taste freshly baked when warmed.
Family-Friendly: Easy enough for kids to help make, and a treat everyone will love.
Minimal Waste: The perfect solution for those speckled bananas sitting on your counter.
Banana Chocolate Chip Muffins
Ingredients
1 cup milk (whole, 2%, or your preferred dairy/non-dairy milk) / 240ml
1/2 cup oil (canola or vegetable oil recommended) / 120ml
1 teaspoon vanilla extract / 5ml
2 large eggs / ~100g
3 ripe bananas (preferably overripe with brown spots; previously frozen bananas work great) / ~300g
1/2 cup brown sugar (packed) / 100g
1 teaspoon baking soda / 5g
1/4 teaspoon salt (optional but recommended for flavor balance) / 1.5g
2 cups all-purpose flour / 250g
1/3 cup chocolate chips (semi-sweet or milk chocolate) / 60g
Ingredient Notes:
Bananas: The riper, the better! Brown, speckled bananas are sweeter and easier to mash. Frozen and thawed bananas work exceptionally well.
Oil: Keeps muffins moist. Canola, vegetable, or melted coconut oil all work.
Salt: While optional, a small amount of salt enhances the overall flavor and balances the sweetness.
Flour: Don't over-mix once flour is added to maintain a tender texture.
Equipnment NEeded:
large mixing bowl (affiliate link), or standmixer with paddle attachment
spatula (affiliate link)
measuring cups and spoons (affiliate link)
muffins pan (affiliate link)
muffin liners (affiliate link)
storage container or freezer safe bags
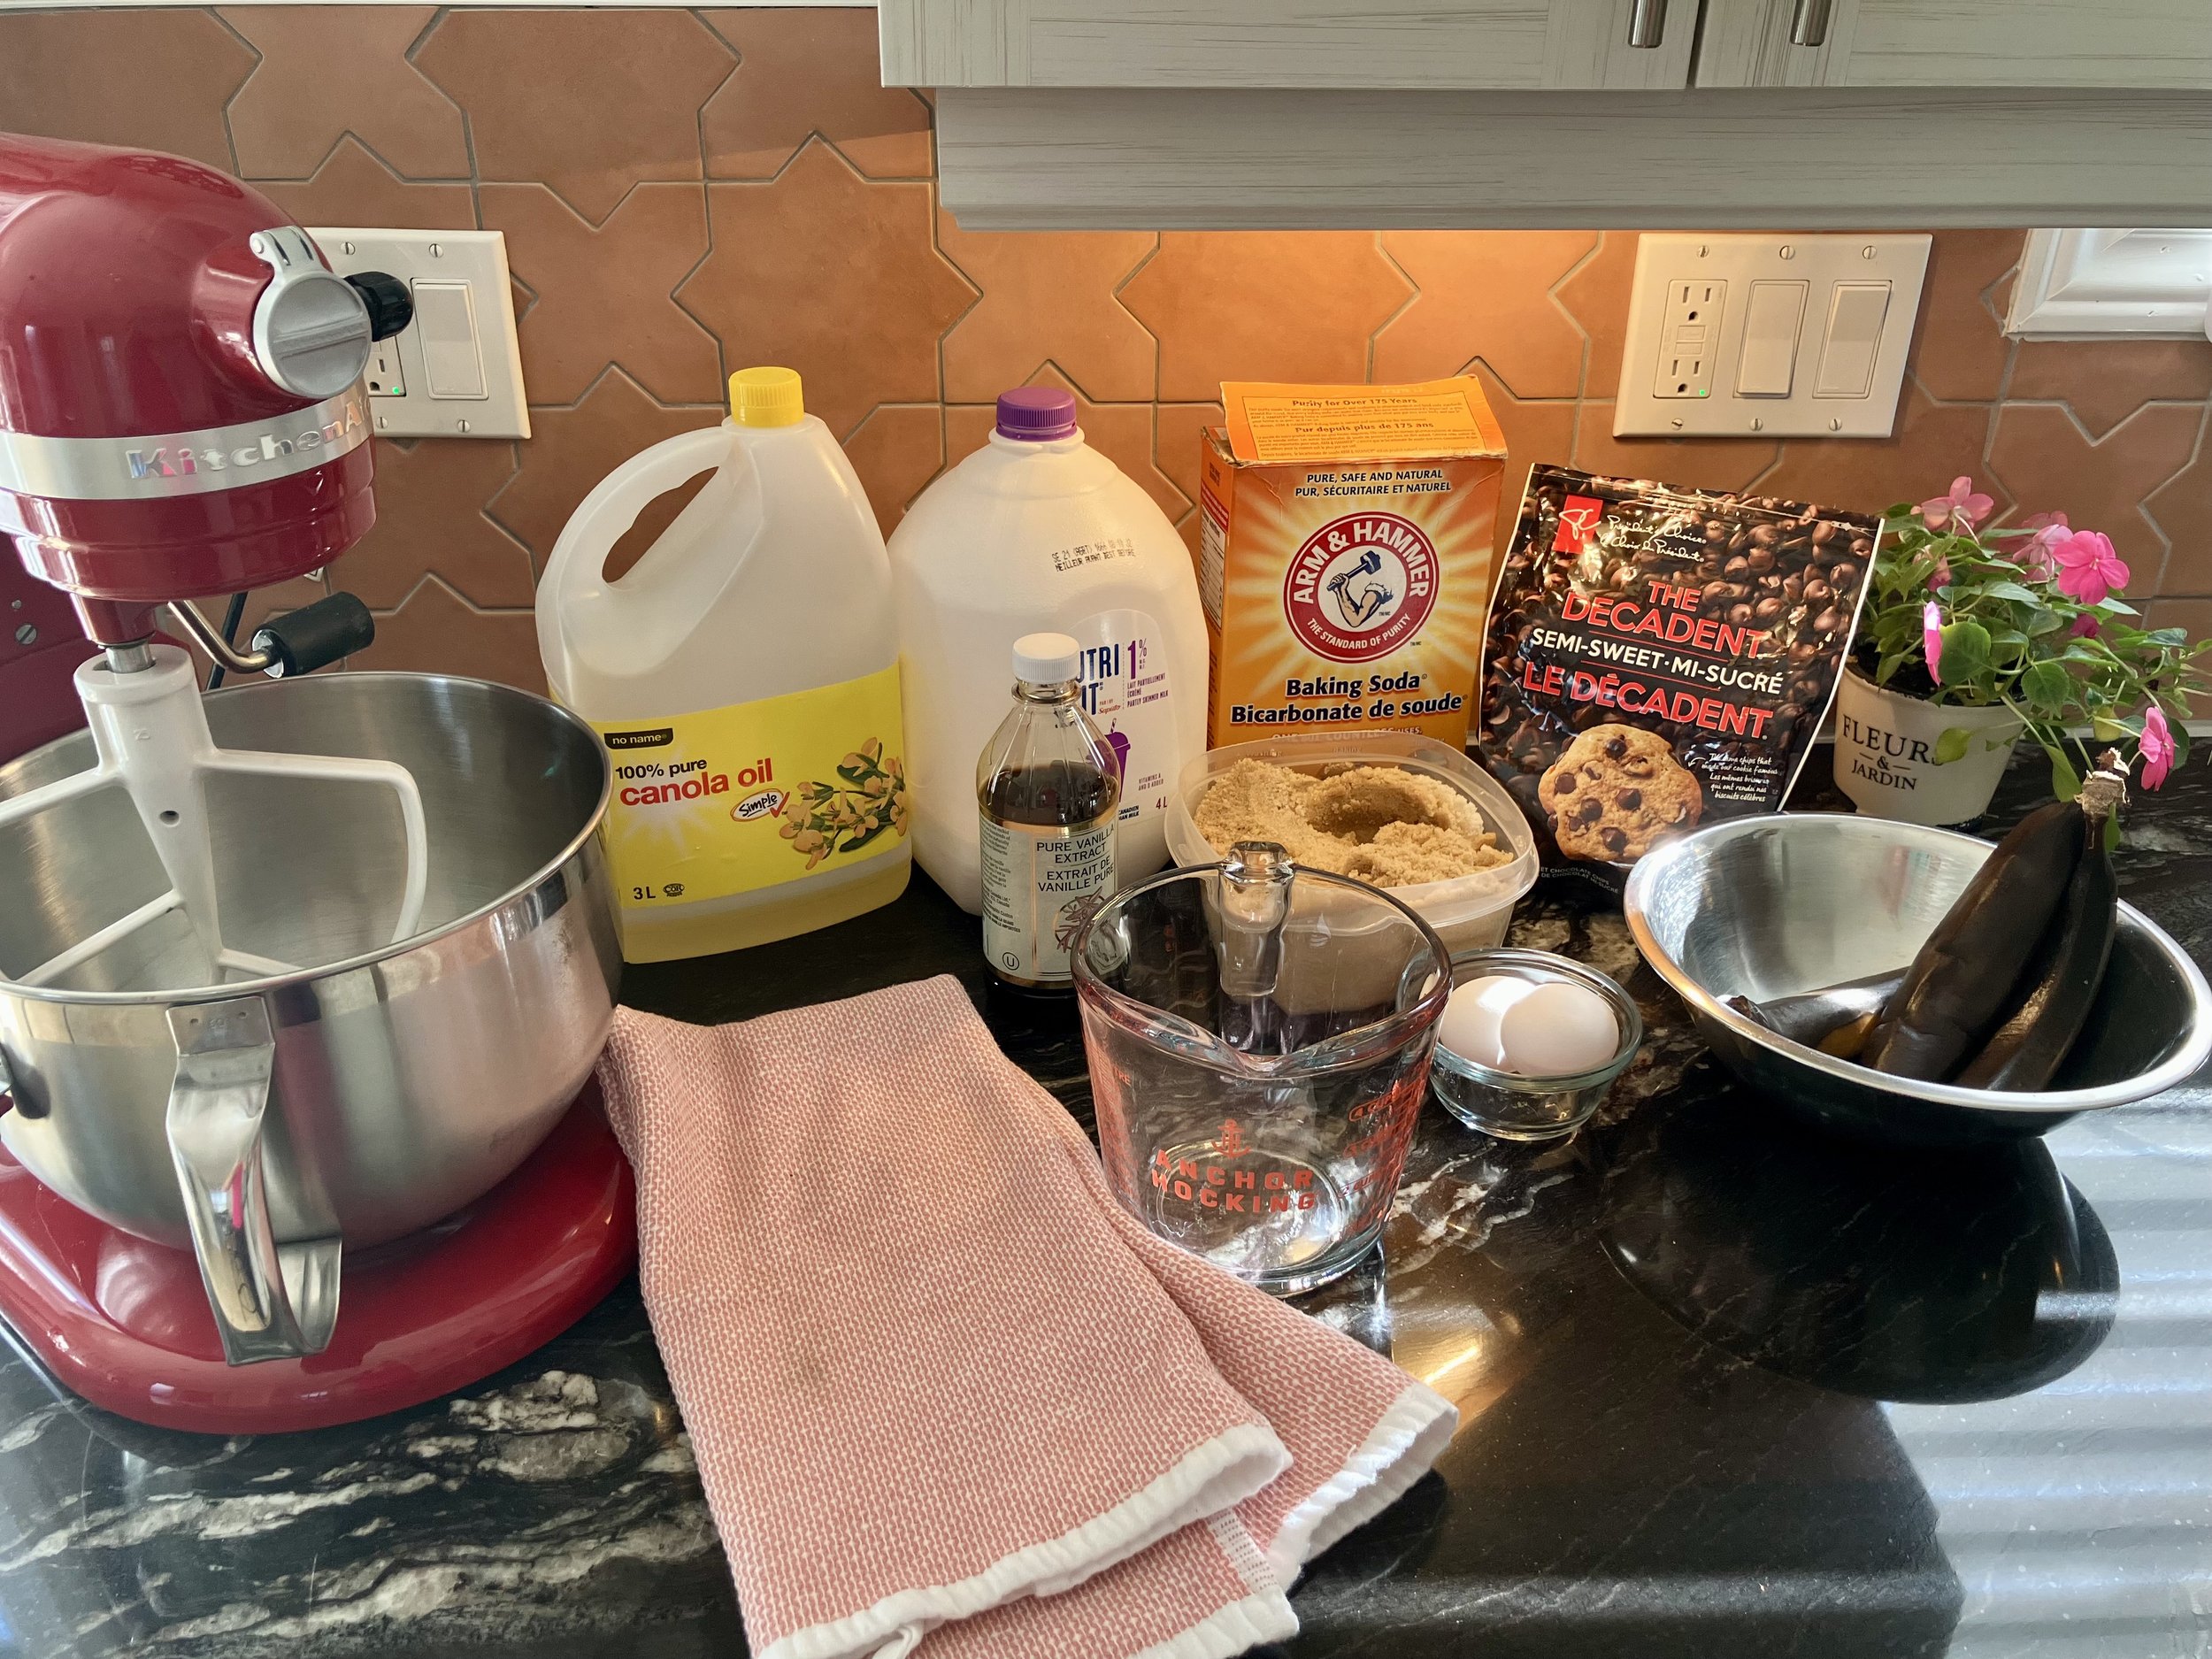
How to Make Banana Chocolate Chip Muffins: Step-by-Step Instructions
Prep Time: 10 minutes | Cook Time: 18-22 minutes | Total Time: 28-32 minutes | Yield: 12 regular muffins or 24 mini muffins | Servings: 12
Instructions:
Step 1: Preheat Your Oven Preheat oven to 350°F (175°C). Line a 12-cup muffin pan with paper liners or grease wells with cooking spray.
Step 2: Mash the Bananas In a large mixing bowl or stand mixer with the paddle attachement, add the 3 bananas (including any juices if using thawed frozen bananas). Mix or mash until the bananas are completely pureed and smooth.
Step 3: Add Eggs Add the 2 eggs to the mashed bananas and mix well until fully combined.
Step 4: Mix Wet Ingredients Add the vanilla extract, oil, and milk to the banana-egg mixture. Mix until all wet ingredients are well incorporated.
Step 5: Add Leavening and Sugar Add the baking soda, salt (if using), and brown sugar to the wet mixture. Mix thoroughly until the sugar is dissolved and everything is well combined.
Step 6: Incorporate Flour (Don't Over-Mix!) Add the 2 cups of all-purpose flour to the wet ingredients. Important: Mix gently until the flour is just incorporated. Small lumps are okay—over-mixing will result in tough, dense muffins. Stop mixing when you can still see a few streaks of flour.
Step 7: Fold in Chocolate Chips Gently fold the chocolate chips into the batter using a spatula. Use a light folding motion to distribute evenly without over-mixing.
Step 8: Fill Muffin Cups
For regular muffins: Use a 1/4 cup measuring cup or ice cream scoop to fill each muffin cup about 2/3 full.
For mini muffins: Use a 2 tablespoon measuring spoon to fill mini muffin cups.
Step 9: Bake Bake for 18-22 minutes for regular muffins (12-15 minutes for mini muffins), or until a toothpick inserted into the center comes out clean or with just a few moist crumbs. The tops should be golden brown and spring back when lightly touched.
Step 10: Cool Remove from oven and let muffins rest in the pan for 5 minutes, then transfer to a wire cooling rack. Serve warm or at room temperature.
Storage Instructions
Refrigerator: Store cooled muffins in an airtight container in the refrigerator for up to 5-7 days.
Freezer: Freeze muffins in a freezer-safe bag or container for up to 3 months. Thaw in the fridge or warm in the microwave for 15-20 seconds.
Freezing Batter: This recipe doubles well, and you can freeze the batter. Be sure to thaw out the batter in the fridge 1-2 days before using it. Baking as indicated in the above recipe.
Tips for the Best Banana Chocolate Chip Muffins
Use very ripe bananas: The browner and more speckled, the better. They're sweeter and easier to mash.
Don't over-mix: Once you add the flour, mix just until combined. Over-mixing develops gluten and creates tough, dense muffins.
Room temperature eggs: Let eggs come to room temperature for better mixing.
Customize your add-ins: Try adding 1/2 cup chopped walnuts, pecans, or a pinch of cinnamon for variety.
Test for doneness: Insert a toothpick into the center of a muffin. It should come out clean or with a few moist crumbs (not wet batter).
Fill cups consistently: Use a scoop or measuring cup for evenly sized muffins that bake uniformly.
Recipe Variations
Healthier version: Substitute half the all-purpose flour with whole wheat flour or oat flour
Extra moist: Add 1/4 cup Greek yogurt or sour cream
Vegan: Use flax eggs (2 tablespoons ground flaxseed + 6 tablespoons water) and non-dairy milk
Nut-free: Ensure chocolate chips are produced in a nut-free facility
Extra chocolate: There are two options here: Option 1: Increase chocolate chips to 1/2 cup. Option 2: Mix 2 tablespoons cocoa powder and coffee together. Add the cocoa and coffee mixture to the batter for a deep fudge taste we all know and love.
Troubleshooting Common Banana Muffin Problems
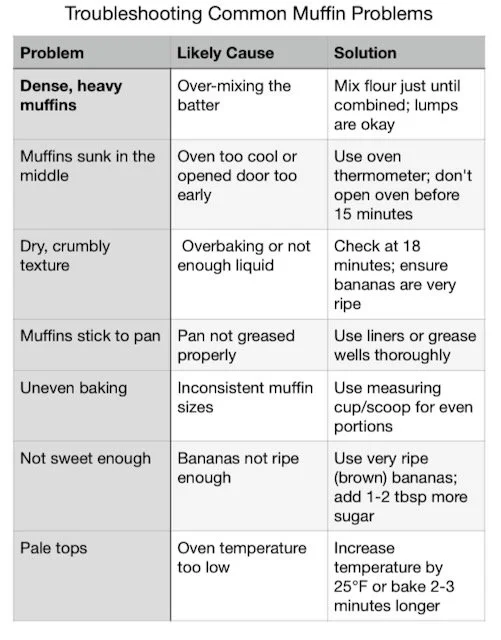
Frequently Asked Questions (FAQs)
Can I use frozen bananas for banana chocolate chip muffins?
Yes! Frozen bananas work excellently for this recipe. Thaw them completely and use all the liquid that accumulates—it adds extra moisture and flavor. The bananas will be very soft and easy to mash after thawing.
Why are my banana muffins dense and not fluffy?
The most common cause is over-mixing the batter after adding the flour. Mix only until the flour is just incorporated—a few lumps are fine. Over-mixing develops gluten, which makes muffins tough and dense instead of light and tender.
How ripe should bananas be for muffins?
The riper, the better! Look for bananas with lots of brown spots or even completely brown peels. Very ripe bananas are sweeter, easier to mash, and provide more banana flavor. If your bananas aren't ripe enough, you can speed up the process by placing them in a paper bag for 1-2 days.
Can I make banana chocolate chip muffins without eggs?
Yes, you can make egg-free banana muffins. Replace each egg with one of these options:
Option 1: 1 flax egg (1 tablespoon ground flaxseed + 3 tablespoons water, let sit 5 minutes)
Option 2: 1/4 cup unsweetened applesauce
Option 3: 1/4 cup mashed banana (in addition to the 3 bananas in the recipe)
How do I store banana muffins to keep them moist?
Store completely cooled muffins in an airtight container. Keep them in the refrigerator for 5- 7 days. For longer storage, freeze muffins in a freezer-safe bag for up to 3 months. To maintain moisture, you can place a paper towel in the container to absorb excess condensation.
Can I freeze banana chocolate chip muffins?
Absolutely! These muffins freeze beautifully. Cool completely, then place in a freezer-safe bag or container with parchment paper between layers. Freeze for up to 3 months. Thaw in the fridge the day before or microwave for 20-30 seconds for a warm, freshly-baked taste.
How long do banana chocolate chip muffins last?
At room temperature in an airtight container: 2-3 days.
In the refrigerator: 5-7 days.
In the freezer: up to 3 months.
Can I double this banana muffin recipe?
Yes! This recipe doubles easily. You can either bake all the muffins at once (using multiple pans) or freeze half the batter for later. Frozen batter can be baked directly from frozen—just add 3-5 extra minutes to the baking time.
What can I substitute for oil in banana muffins?
You can replace oil with:
Melted butter (for richer flavor)
Unsweetened applesauce (for a lower-fat option, though muffins will be slightly less moist)
Greek yogurt (reduces fat and adds protein)
Melted coconut oil
Why did my muffins sink in the middle?
Muffins can sink for several reasons:
Oven temperature too low (use an oven thermometer to verify)
Opening the oven door too early (wait at least 15 minutes)
Over-mixing the batter
Too much leavening (baking soda)
Underbaking
Can I make these muffins healthier?
Yes! Try these healthier swaps:
Replace half the all-purpose flour with whole wheat or oat flour
Reduce brown sugar to 1/3 cup
Add 1/4 cup Greek yogurt for protein
Use dark chocolate chips (higher in antioxidants)
Add ground flaxseed or chia seeds (1-2 tablespoons)
What size muffins does this recipe make?
This recipe yields:
12 regular-sized muffins (using a standard 12-cup muffin pan)
About 24 mini muffins (using a mini muffin pan)
About 6 jumbo muffins (bake for 25-30 minutes)
Can I add nuts to banana chocolate chip muffins?
Definitely! Chopped walnuts or pecans (1/2 to 3/4 cup) pair beautifully with banana and chocolate. Fold them in along with the chocolate chips. For nut allergies, these muffins are naturally nut-free without additions.
How do I know when banana muffins are done baking?
Muffins are done when:
A toothpick inserted in the center comes out clean or with a few moist crumbs
The tops are golden brown and spring back when gently pressed
They've baked for 18-22 minutes at 350°F
The edges are just starting to pull away from the pan
Can I use whole wheat flour instead of all-purpose flour?
Yes, but with adjustments. For best results, replace only half the all-purpose flour with whole wheat flour (1 cup of each). Using 100% whole wheat flour will make the muffins denser and heartier. You may also want to add an extra tablespoon of milk to compensate for whole wheat's higher absorption.
Why These Muffins Are More Than Just a Recipe
Banana chocolate chip muffins are about more than satisfying a sweet craving—they're about creating small moments of joy. They're simple enough for children to help stir together, quick enough for last-minute baking, and delicious enough to become a beloved family favorite.
The next time you spot those speckled bananas on your counter, don't let them go to waste! Transform them into something warm, delicious, and wholesome.
Happy baking!
Did You Make This Recipe? I want to see it!
Leave a picture and a ⭐ star rating and comment below to let us know how your muffins turned out. Did you make any substitutions or additions? Share your tips and photos with us!
Share this recipe: Help others discover this delicious recipe by sharing it on Pinterest, Facebook, or Instagram. Tag us @Sageandsimplicity so we can see your beautiful creations!
📌 Pin it for later: Save this recipe to your Pinterest boards for easy access when those overripe bananas appear on your counter.
Recipe Category: Breakfast, Snack, Dessert
Cuisine: American
Diet: Vegetarian
Skill Level: Beginner
Equipment Needed: Mixing bowl, muffin pan, measuring cups and spoons, fork, stand mixer (optional) or electric mixer (optional)
Related Searches: banana bread recipe, chocolate chip muffins, healthy breakfast muffins, banana oat muffins, easy muffin recipes, banana recipes, freezer breakfast ideas
You Might Also Like:

Split Pea Soup: The Ultimate Comfort Bowl for Cold Winter Days
Don't throw away that pork shoulder bone! This hearty split pea soup is my favorite way to use leftover pork drippings and bone broth. Whenever I roast a pork shoulder, I save the bone and drippings to make this rich, flavorful soup that's both wholesome and budget-friendly.
The secret is in the pork broth—boiling the bone creates a deep, savory base that store-bought broth just can't match. Combined with split peas, and simple vegetables. This soup is the ultimate cold-weather comfort food.
This recipe is perfect for busy families looking to stretch their grocery budget and reduce food waste. The soup freezes beautifully, so I often make a big batch and save portions for quick weeknight dinners. It's nutritious, satisfying, and uses ingredients you likely already have in your pantry.
Ready to transform your leftover pork into something delicious? Let's make split pea soup!
📖 Jump to Recipe | 💬 Jump to FAQs | 🖨️ Print Recipe
Prep Time: 10 minutes | Cook Time: 20 minutes | Total Time: 30 minutes

When winter settles in and the days feel a little longer and colder, this simple split pea soup becomes the kind of meal you crave on repeat. It’s warm, hearty, and deeply comforting in a way that feels familiar and reassuring. Made with humble ingredients and pantry staples, this soup is proof that comfort food doesn’t need to be complicated—or expensive—to be deeply satisfying.

One of the best things about this split pea soup recipe is how budget-friendly and flexible it is. Leftover pork drippings or pork broth bring rich, savoury depth, making this a smart and delicious way to stretch ingredients you already have. If you’re short on pork broth, there’s no stress here—just top it up with chicken broth or water. I would highly recommend adding bacon bits, if you have them on hand. This forgiving approach makes the recipe accessible, practical, and perfect for everyday cooking.
This soup also comes together effortlessly. Everything goes into one pot, simmers gently, and transforms with very little hands-on time. Frozen mirepoix does the heavy lifting, while split peas slowly soften and thicken the broth into a cozy, spoon-clinging texture. It’s the kind of recipe that fits beautifully into busy winter routines, whether you’re cooking after school or prepping meals ahead of time.

Parents especially love this recipe because it’s great for kids’ lunches—filling, nourishing, and easy to reheat. And the real win? Kids genuinely love it. The mild flavours, soft texture, and comforting warmth make this soup approachable even for picky eaters. Pair it with freshly toasted sourdough bread, and you’ve got a lunch or dinner that feels special without any extra effort.
If you’re looking for the ultimate winter comfort soup, this split pea soup checks every box: affordable, simple, cozy, and family-approved. It’s the kind of recipe you’ll return to all season long, especially on those cold days when you want something warm, familiar, and deeply satisfying simmering on the stove.

Why You’ll Love This Soup
Ultimate comfort food for cold winter months
Budget-friendly and made with pantry staples, and leftover porc drippings or broth
A great way to use leftover pork drippings or pork broth
One-pot, low-effort recipe
Kid-approved and perfect for school lunches
How to Make Split Pea Soup
ingredients:
½ bag frozen mirepoix
1 teaspoon granular garlic
1 tablespoon neutral oil (canola oil works well)
2 liters pork drippings or pork broth
If needed, supplement with chicken broth or water
½ cup split peas
Salt, to taste
Equipment needed:
Blender or food processor
large pot
wooden spoon
Step-by-Step guide to making split pea soup
step 1:
Add all ingredients to a large stock pot over medium-low heat.
step 2:
Cover the pot and bring the mixture to a gentle boil.
step 3:
Once boiling, reduce heat to a simmer, keeping the pot covered.
step 4:
Let simmer, stirring occasionally. Add broth or water if the soup becomes too thick.
Step 5:
Simmer for about 40 minutes, until the split peas are soft and tender.
Step 6:
Remove half the soup. Blend it, and pour it back in the soup. Stir, and serve warm.
Frequently asked questions
Can I make split pea soup without pork broth?
Yes. Use whatever pork drippings or broth you have and substitute the rest with chicken broth or water.
Pro tip: Add a handful of bacon bits, if you have them on hand. :)
Is split pea soup good for kids?
Absolutely! This mild, comforting soup is soft, filling, and kid-approved.
Is this soup freezer-friendly?
Yes. Let it cool completely, then freeze in airtight containers for up to 3 months.
Storage & Lunchbox Tips
Stores well in the fridge for up to 4 days
Thickens as it sits—add a splash of water when reheating
Perfect for thermos lunches on cold school days
REcipe CArd
Ingredients
½ bag frozen mirepoix
1 teaspoon granular garlic
1 tablespoon neutral oil (canola oil works well)
2 liters pork drippings or pork broth
If needed, supplement with chicken broth or water
½ cup split peas
Salt, to taste
How to Make Split Pea Soup
Add all ingredients to a large stock pot over medium-low heat.
Cover the pot and bring the mixture to a gentle boil.
Once boiling, reduce heat to a simmer, keeping the pot covered.
Stir occasionally and add water if the soup becomes too thick.
Simmer for about 40 minutes, until the split peas are soft and tender.
Let cool slightly, season with salt to taste.
Remove half the soup. Blend it, and pour it back in the soup. Stir, and serve warm.
Serving Suggestions
This split pea soup pairs beautifully with freshly toasted sourdough bread, making it a cozy, complete meal the whole family will enjoy.
Did you make this recipe? I want to see it!
Leave a picture and a ⭐ star rating and comment below to let us know how your muffins turned out. Did you make any substitutions or additions? Share your tips and photos with us!
Share this recipe: Help others discover this delicious recipe by sharing it on Pinterest, Facebook, or Instagram. Tag us @Sageandsimplicity so we can see your beautiful creations!
📌 Pin it for later: Save this recipe to your Pinterest boards for easy access.
You might also like:

Carrot Ginger Soup: A Budget-Friendly Family Favorite Kids Truly Love
This creamy carrot ginger soup is the perfect blend of naturally sweet carrots and warming fresh ginger. Made with simple, wholesome ingredients, it's an easy recipe that's both comforting and nutritious but doesn’t break the bank!
The fresh ginger adds a subtle spicy kick that balances the sweetness of the carrots beautifully. This soup is perfect for cold weather days, healthy meal prep, or whenever you need a cozy, satisfying bowl of comfort.
Ready to make this delicious carrot ginger soup? Let's get started!
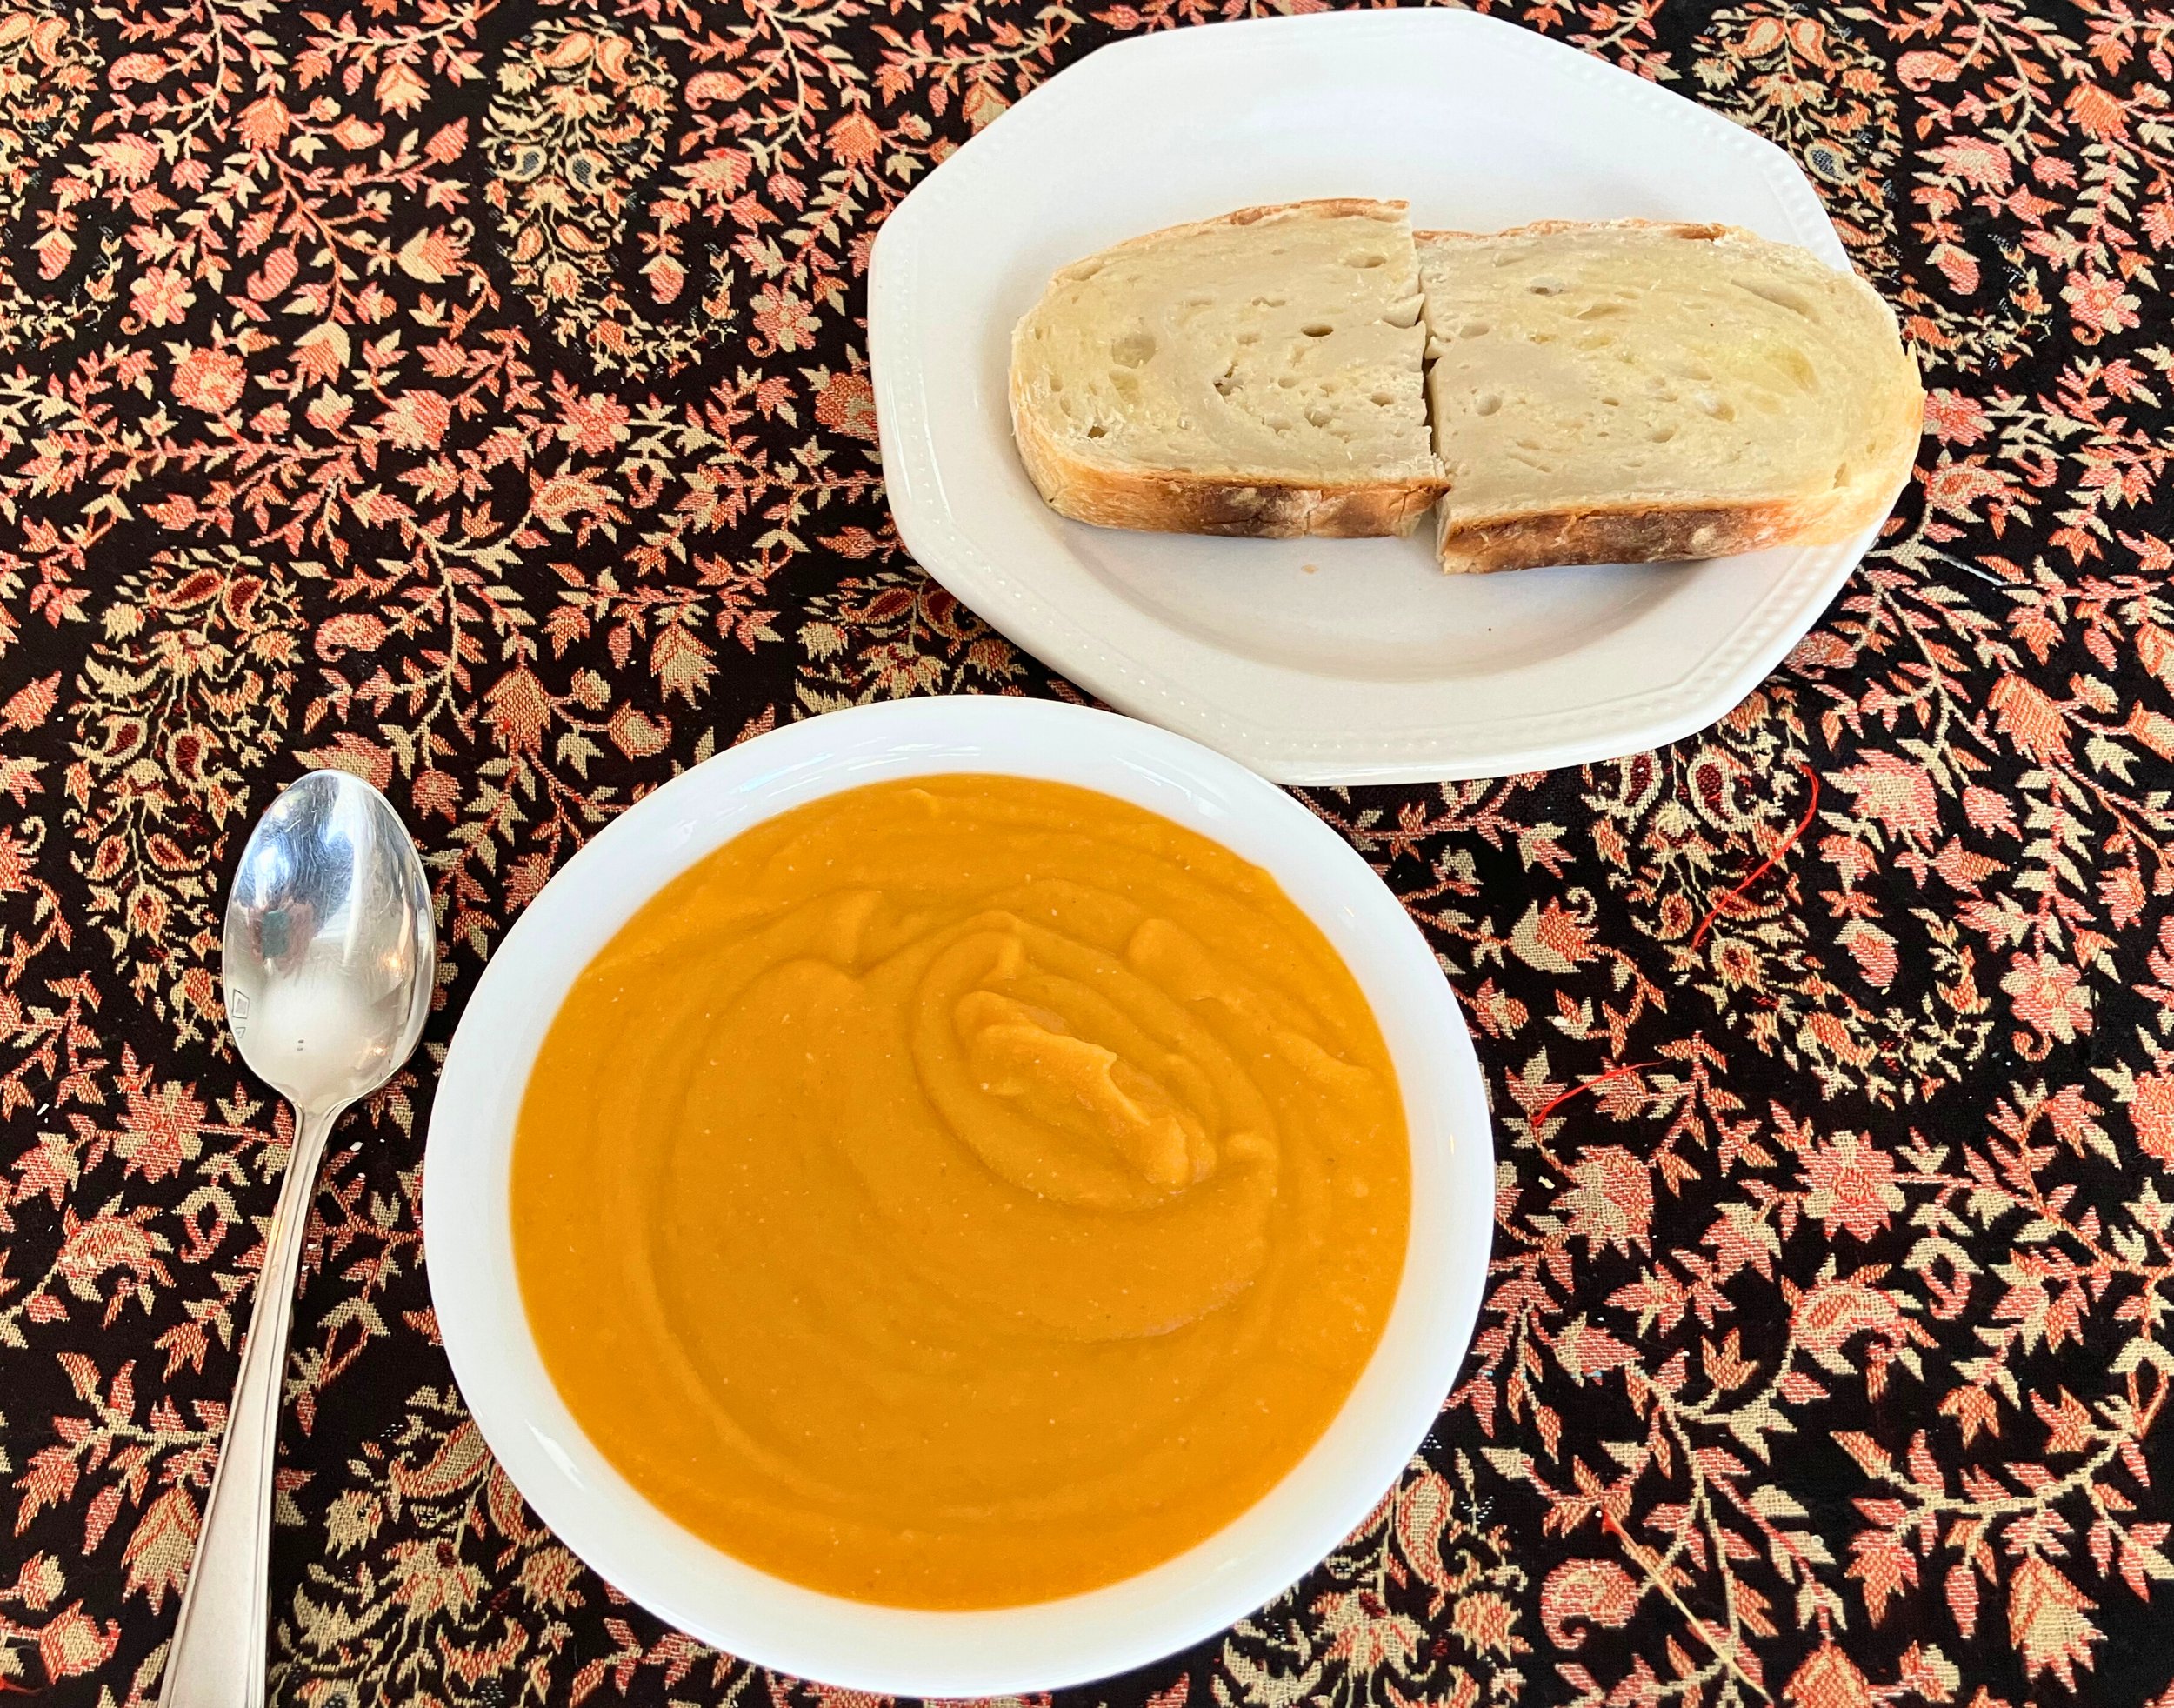
There’s something incredibly comforting about a pot of homemade soup simmering on the stove, especially when it’s simple, nourishing, and made with ingredients you likely already have on hand. This Carrot Ginger Soup recipe is one of those rare meals that checks every box: budget friendly, pantry-staple simple, and genuinely loved by kids. It’s smooth, mildly sweet, and warming without being spicy—making it a reliable go-to for busy weeknights and cozy lunches alike.
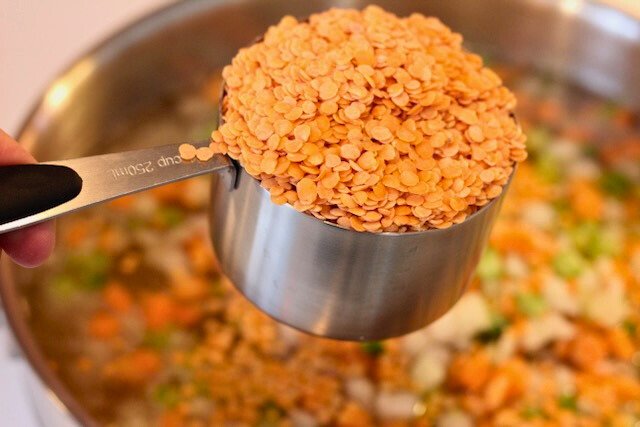
What makes this carrot ginger soup especially appealing is how accessible it is. With just a handful of vegetables, dried lentils, and broth, this recipe comes together without any fancy ingredients or complicated steps. Carrots and lentils are among the most affordable staples at the grocery store, yet they deliver incredible flavour and nutrition. If you’re looking for an inexpensive, healthy soup recipe that doesn’t feel like a compromise, this one is it.
Parents often ask for meals that work double duty, and this soup truly does. It’s thick, filling, and smooth—perfect for kids’ lunches, whether packed in a thermos for school or reheated at home. The natural sweetness of carrots combined with the warmth of ginger makes this soup especially appealing to younger palates. Best of all, many parents report the same happy surprise: kids don’t just tolerate this soup, they actually ask for it.
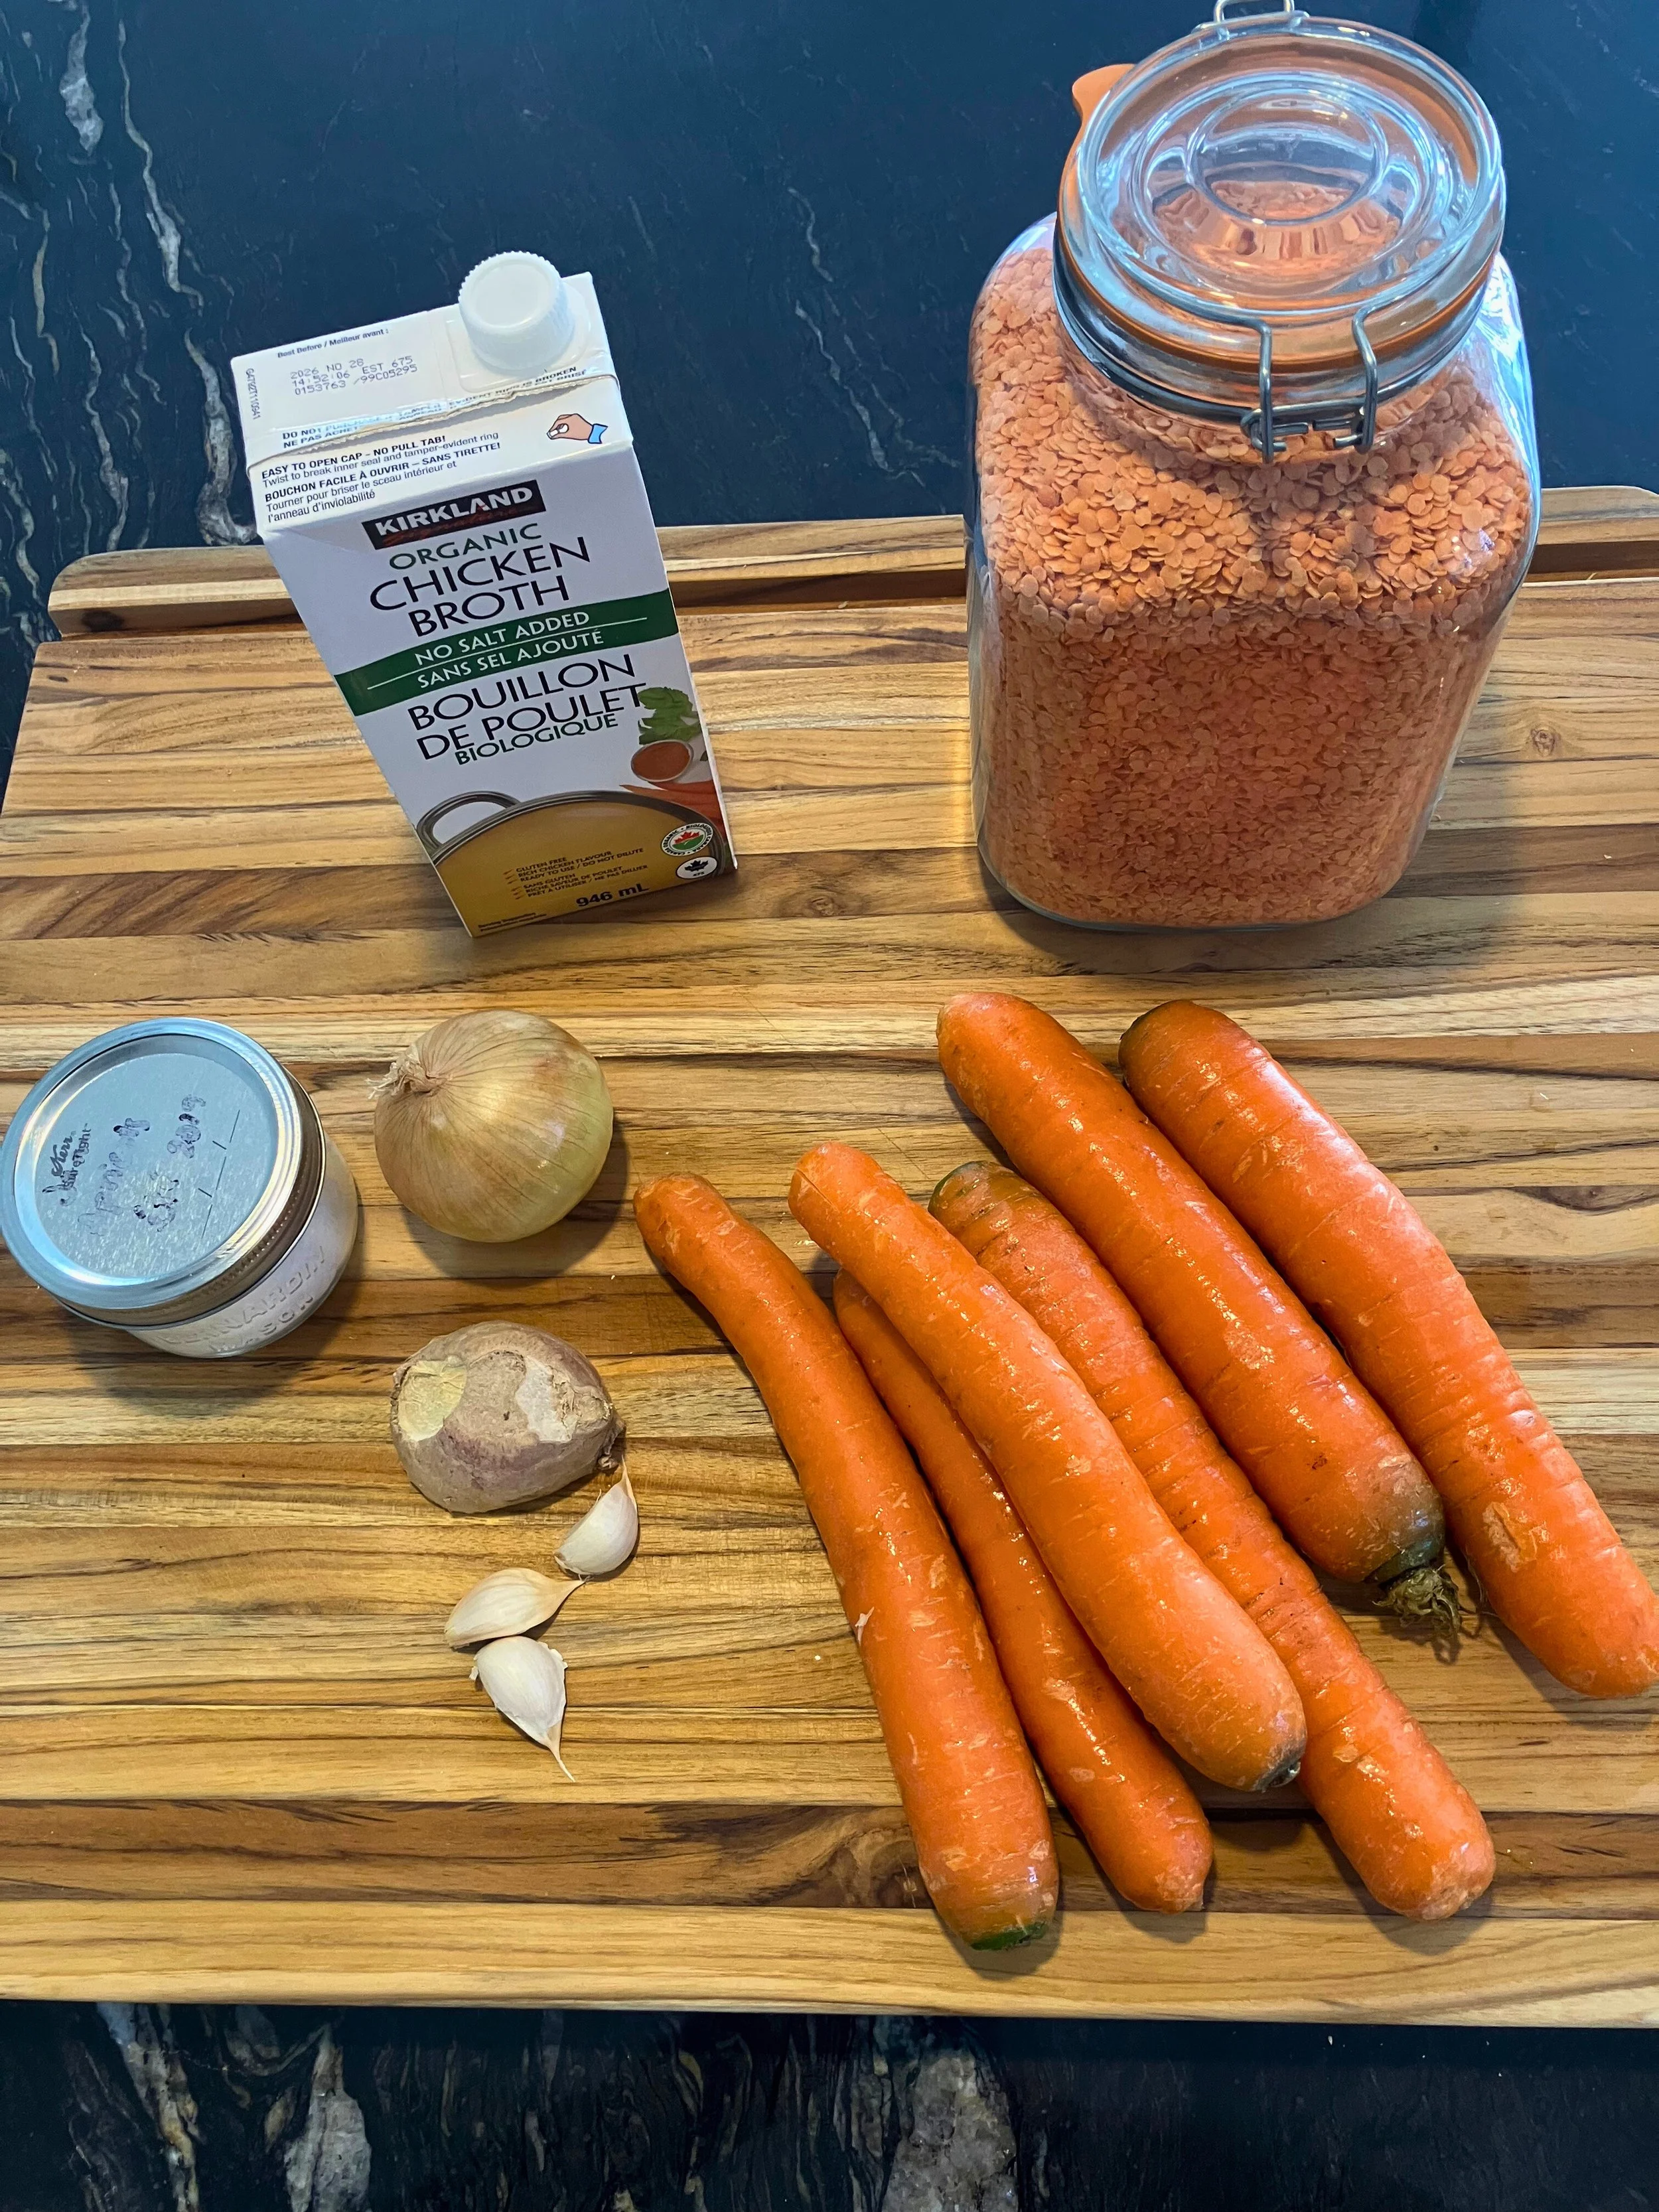
From a practical standpoint, this soup is forgiving and flexible. It doesn’t require precise chopping, exact timing, or constant attention. The red lentils dissolve naturally as they cook, creating a creamy texture without the need for dairy. Blending the soup and adding freshly pressed ginger at the end keeps the flavour bright and balanced, without overwhelming heat—another reason kids love it.
Served with toasted sourdough or warm, garlicky naan, this carrot ginger soup becomes a complete, satisfying meal that feels far more special than its cost suggests. Whether you’re cooking on a tight budget, planning school lunches, or simply looking for a family-friendly soup recipe, this is one you’ll come back to again and again.
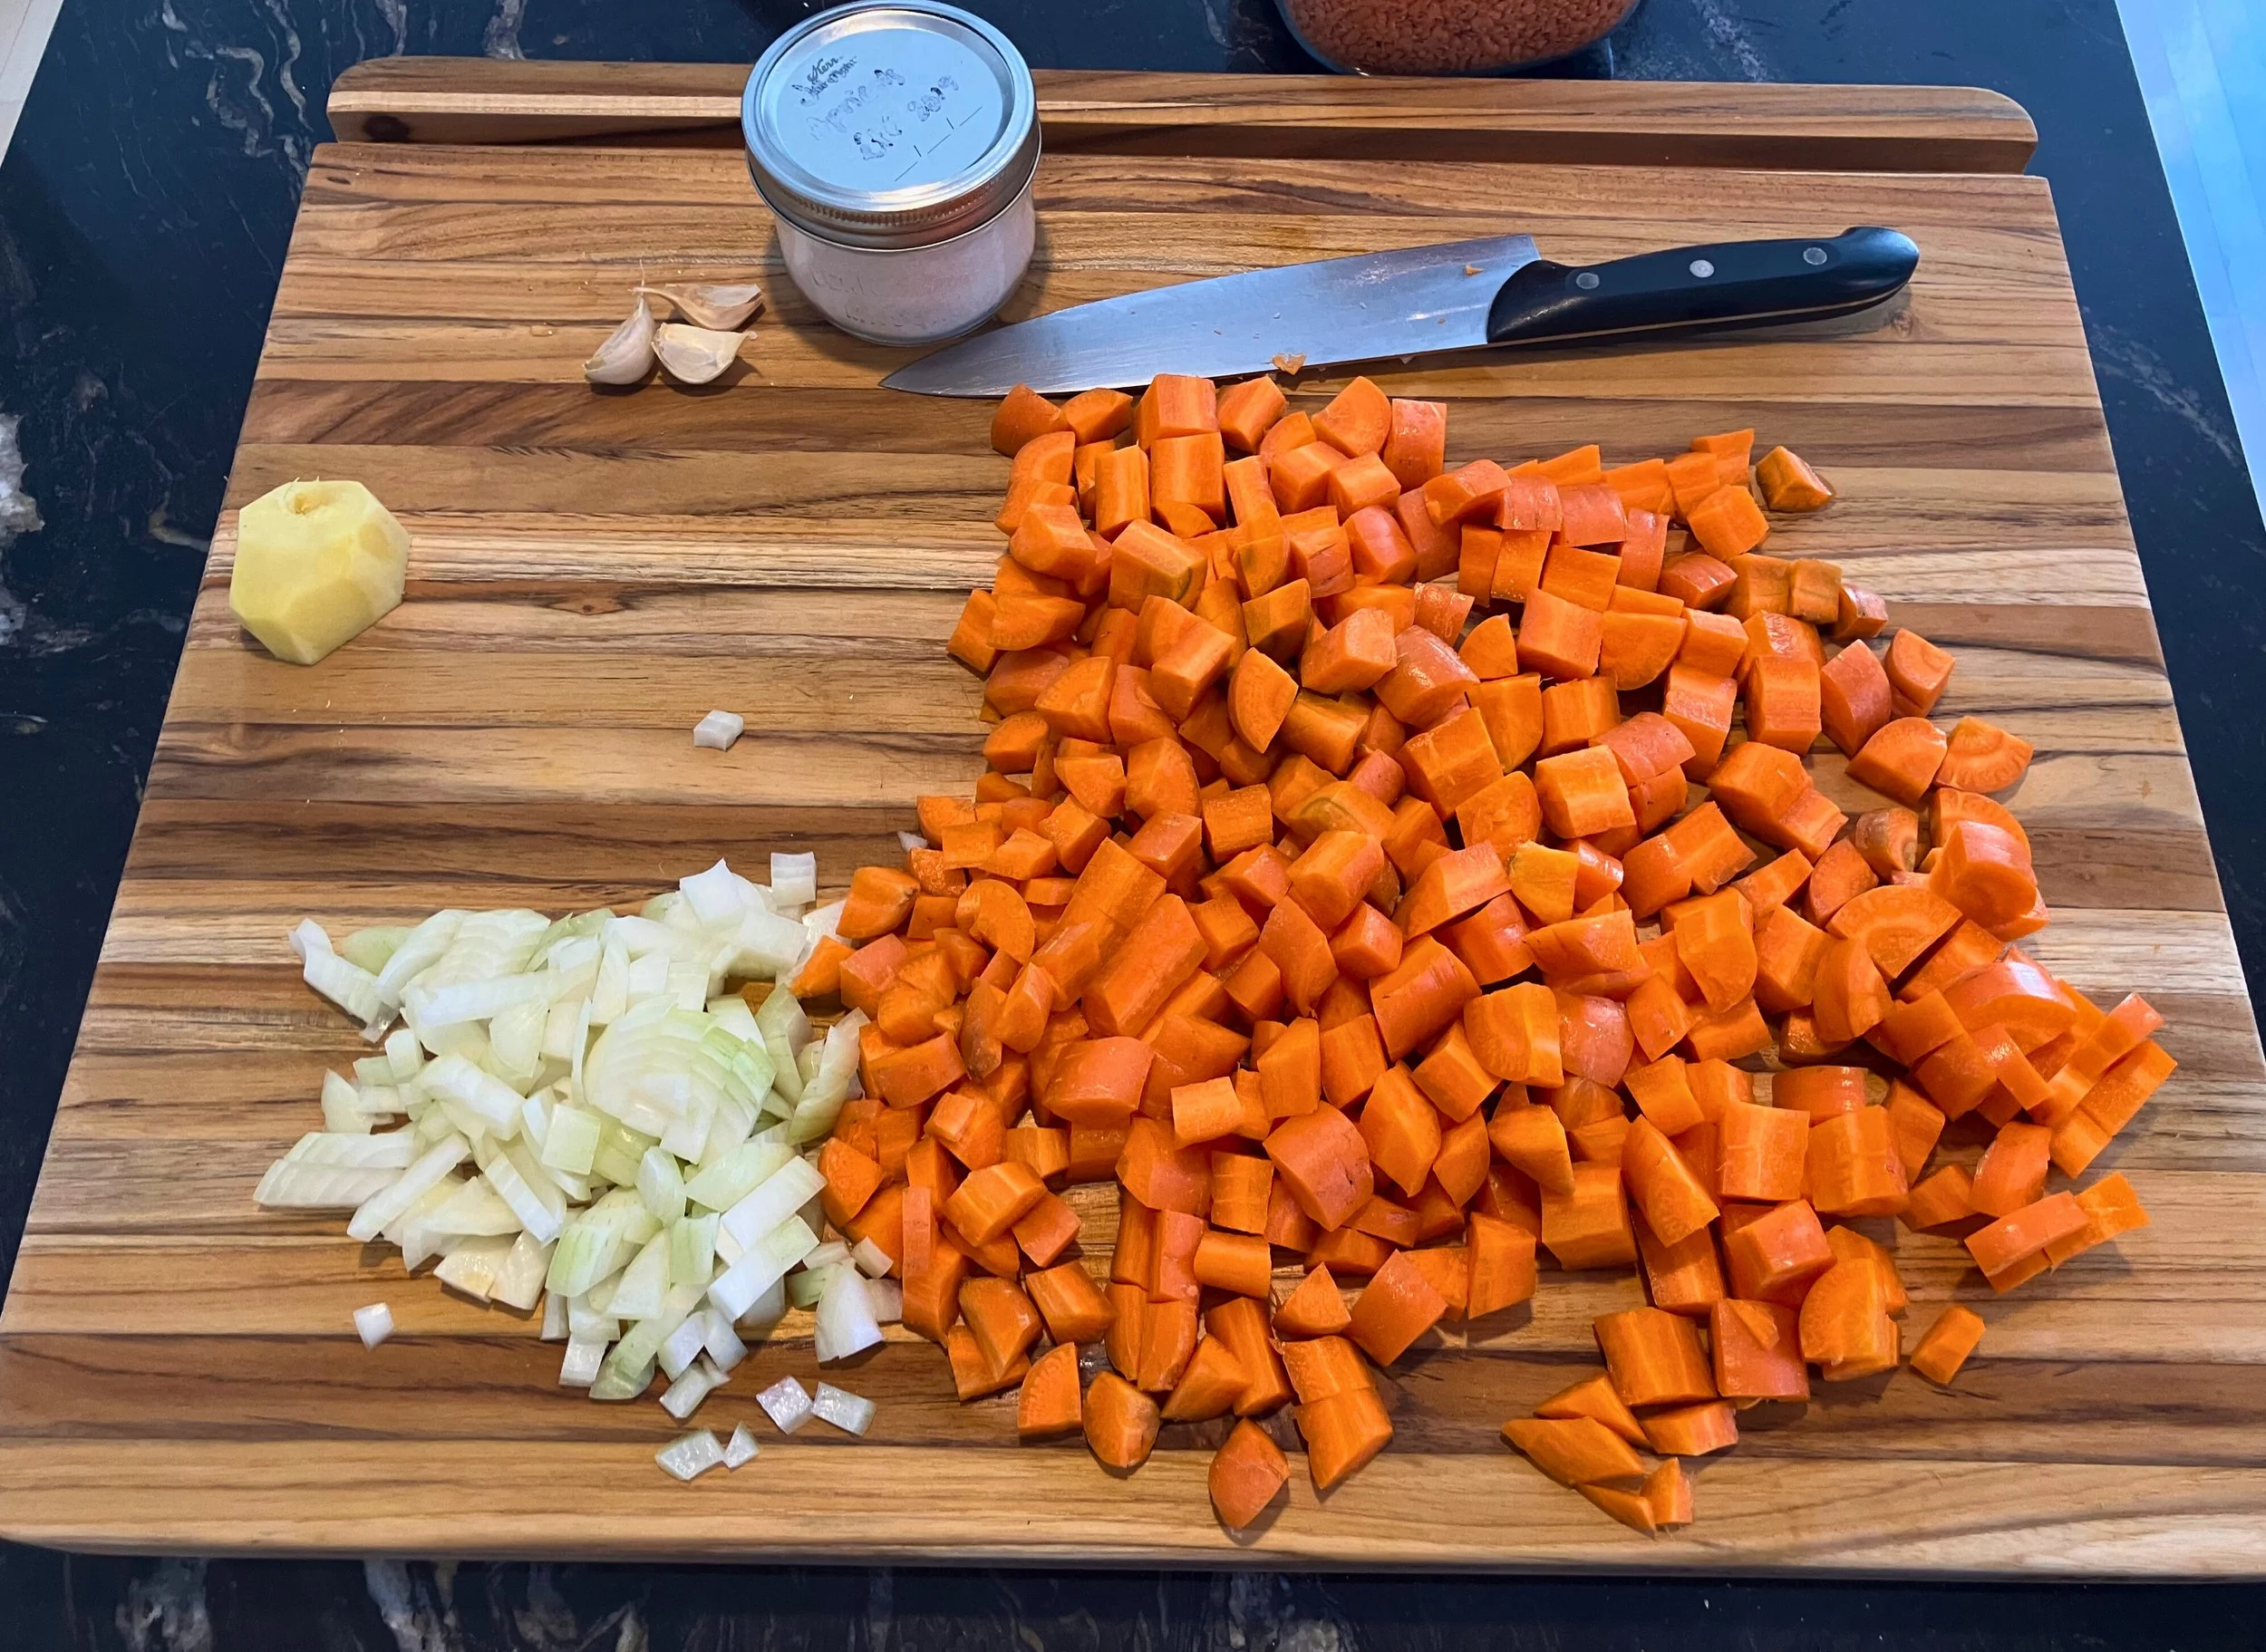
Carrot Ginger Soup Recipe (Budget-Friendly & Kid-Approved)
Why You’ll Love This Soup
Affordable, pantry-staple ingredients
Naturally creamy, without the dairy
Perfect for kids’ lunches and family dinners
Mild, comforting flavour that kids genuinely enjoy
Freezer-friendly and easy to reheat
REcipe Card
Ingredients
5 medium carrots, diced
1 onion, diced
3 garlic cloves, diced
1 tbsp neutral oil (canola oil works well)
2 L chicken broth
1 cups red lentils
Salt, to taste
½ cup fresh ginger, peeled and cut into 1 cm cubes
Instructions
Dice the carrots, onion, and garlic.
In a large stock pot over medium-low heat, allow the pot to warm, then add the oil. Let the oil heat for about 2 minutes.
Add the carrots, onion, and garlic. Cook until the carrots are tender, about 7–10 minutes, stirring occasionally.
Add the red lentils and chicken broth. Season with salt to taste.
Cover and bring the soup to a boil.
Reduce heat and simmer, stirring occasionally, until the lentils have dissolved and the soup thickens.
Blend the soup using an immersion blender until smooth.
Using a garlic press, press the ginger directly into the soup, allowing the juice to mix in. Discard the remaining fibrous ginger.
Stir well and serve warm.
Serving Suggestions
This soup pairs beautifully with freshly toasted sourdough breador garlicky naan for dipping. For kids’ lunches, pack it hot in a thermos—it stays warm and comforting for hours.
Storage & Lunchbox Tips
Store leftovers in the fridge for up to 4 days
Freeze in individual portions for quick meals
Ideal for school lunches due to its smooth, mess-free texture
How Do I Make Carrot Ginger Soup? Step-by-step guide
Step 1:
To make carrot ginger soup, start by dicing five medium carrots, one onion, and three cloves of garlic. Heat one tablespoon of neutral oil, such as canola oil, in a large stock pot over medium-low heat. Once the oil is warm, add the carrots, onion, and garlic. Cook for seven to ten minutes, stirring occasionally, until the carrots are tender.
Step 2:
Next, add two cups of red lentils and four liters of chicken broth to the pot. Season with salt to taste. Cover the pot and bring the soup to a boil. Once it starts boiling, reduce the heat and let it simmer. Stir occasionally and cook until the lentils dissolve and the soup thickens.
Step 3:
When the soup is fully cooked, blend it directly in the pot using an immersion blender until smooth and creamy. This creates a naturally thick soup without using cream or dairy.
Step 4:
To finish the soup, press fresh ginger into the pot using a garlic press. Use about half a cup of peeled ginger pieces. This step adds flavour without leaving fibrous bits in the soup. Discard the remaining ginger pulp, stir well, and serve.
Final thoughts:
Carrot ginger soup is budget friendly, easy to make with pantry staples, and kid-approved. It pairs well with toasted sourdough or naan and works perfectly for kids’ lunches or simple family dinners.
frequently asked questions
Is carrot ginger soup healthy?
Yes. Carrot ginger soup is healthy. It’s made with carrots, red lentils, garlic, and ginger, which provide fiber, protein, and natural vitamins. This soup is naturally dairy-free and filling, making it a nourishing option for family meals.
Is carrot ginger soup good for kids?
Yes. Carrot ginger soup is great for kids. It has a smooth texture and a naturally sweet flavour from carrots. The ginger adds warmth without being spicy, which is why many kids enjoy it and happily eat it for lunch or dinner.
Can I make carrot ginger soup ahead of time?
Yes, carrot ginger soup is perfect for making ahead. It stores well in the fridge for up to four days and freezes easily. This makes it ideal for meal prep, school lunches, and busy weeknights.
How do I store carrot ginger soup?
Store carrot ginger soup in an airtight container in the refrigerator for up to four days. For longer storage, freeze individual portions and reheat as needed.
Can carrot ginger soup be frozen?
Yes. carrot ginger soup freezes very well. Let it cool completely, then freeze in freezer-safe containers for up to three months. Thaw overnight in the fridge or reheat directly from frozen.
Is carrot ginger soup budget friendly?
Yes. carrot ginger soup is very budget friendly. It uses inexpensive pantry staples like carrots, lentils, onion, and broth, making it an affordable meal for families.
Does carrot ginger soup need cream?
No, carrot ginger soup does not need cream. The red lentils dissolve as they cook, creating a naturally creamy texture without dairy.
What goes well with carrot ginger soup?
Carrot ginger soup pairs well with toasted sourdough bread, naan, grilled cheese, or simple crackers. These sides make it a filling and kid-friendly meal.
Can I use an immersion blender for carrot ginger soup?
Yes. an immersion blender works best for carrot ginger soup. It blends the soup directly in the pot, making it smooth and easy with minimal cleanup.
final thoughts
This soup is amazing!
did you make this recipe? I want to see it!
Leave a picture and a ⭐ star rating and comment below to let us know how your muffins turned out. Did you make any substitutions or additions? Share your tips and photos with us!
Share this recipe: Help others discover this delicious recipe by sharing it on Pinterest, Facebook, or Instagram. Tag us @Sageandsimplicity so we can see your beautiful creations!
📌 Pin it for later: Save this recipe to your Pinterest boards for easy access.

Easy Lemony Red Lentil Soup Recipe | One-Pot Vegetable Soup
It all begins with an idea.
Last edited: 19 March, 2026
📖 Jump to Recipe | 💬 Jump to FAQs | 🖨️ Print Recipe
Prep Time: 5 minutes | Cook Time: 55 minutes | Total Time: 1 hour | Yield: 6-8 portions | Difficulty: Easy

Description
This easy one-pot red lentil soup is naturally creamy, packed with vegetables, and brightened with fresh lemon. Made with simple pantry staples and frozen vegetables, this healthy vegetable lentil soup is perfect for busy weeknights and meal prep. The red lentils break down during cooking to create a thick, velvety texture without any cream or blending required.
table of content:
Why You’ll Love This Recipe
What You’ll Need
How To Make: Step-by-Step Guide
Tips for Best Results
Suggestions & Variations
FAQs
Recipe Card
Final Thoughts
Why You'll Love This Red Lentil Soup Recipe
Simple & Convenient
One-pot recipe with minimal cleanup
Uses freezer and pantry staples
Hands-off cooking—just simmer and stir occasionally
No chopping required with frozen mirepoix (mixture of carrots, onions, and celery)
Healthy & Nutritious
High in plant-based protein from red lentils
Packed with vegetables and fiber
Naturally gluten-free
Low-fat and heart-healthy
Delicious Flavour
Naturally thick and creamy without dairy
Bright, fresh lemon flavour
Savoury vegetable base with hint of sweetness from squash
Comforting yet light and refreshing
Meal Prep Friendly
Makes 6-8 generous servings
Freezes beautifully for up to 3 months
Reheats well without losing flavour or texture
Tastes even better the next day

What you’ll need
Main Ingredients
750 g (1 bag) frozen mirepoix (onions, carrots, celery)
½ package frozen butternut squash purée (about 250g)
1 teaspoon dried thyme
1 teaspoon granulated garlic (or garlic powder)
1 can (28 fl oz / 796 ml) diced tomatoes
1 litre (4 cups) chicken broth or vegetable broth
1 litre (4 cups) water
2 cups (400g) red lentils, rinsed
Salt, to taste
Rind of 1 lemon (zested or peeled in strips)
Optional Toppings & Serving Suggestions
Freshly grated Parmesan cheese
Fresh cilantro or parsley, chopped
Toasted sourdough bread
Warm garlic naan bread
Drizzle of olive oil
Red pepper flakes for heat
Plain Greek yogurt or sour cream
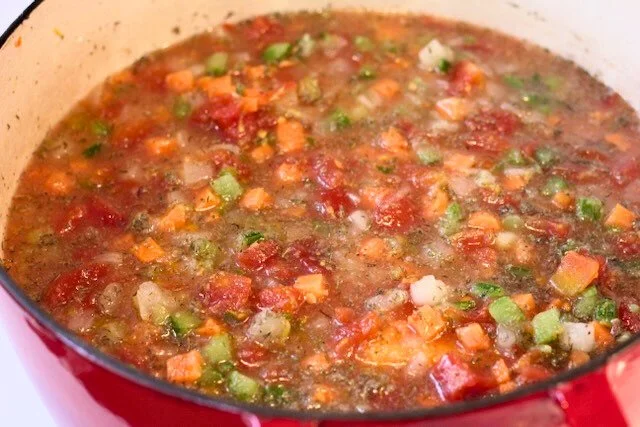
equipement list:
Large stock pot
wooden spoon
How to Make Lemony Red Lentil Soup: Step-by-step guide
Step 1: Combine Ingredients
Add frozen mirepoix, butternut squash purée, dried thyme, granulated garlic, diced tomatoes (with juices), chicken broth, water, and red lentils to a large stock pot or Dutch oven. Stir to combine. Reserve the lemon rind for later.
Step 2: Bring to a Boil
Place the pot over medium heat and bring the soup to a light boil. This takes about 10 minutes.
Step 3: Simmer the Soup
Once boiling, reduce heat to low. Let the soup simmer uncovered for 45-60 minutes, stirring occasionally every 10-15 minutes.
What happens during simmering:
The red lentils will completely break down and dissolve
The soup will naturally thicken to a creamy consistency
The flavours will meld together beautifully
The vegetables will become tender
Step 4: Add Lemon and Season
After simmering, stir in the lemon rind. Taste and add salt as needed (start with ½ teaspoon and adjust). Let the soup rest for 5 minutes to allow the lemon flavour to infuse.
Step 5: Serve
Ladle the hot soup into bowls and garnish with your favorite toppings. Serve with crusty bread for dipping.
Why Add Lemon Rind at the End?
Adding lemon rind at the end of cooking (rather than at the beginning) preserves its bright, fresh citrus aroma and essential oils. When lemon rind is cooked for too long, it can become bitter and lose its vibrant flavour. This technique infuses the soup with a gentle lemon essence that lifts all the other flavours without adding harsh acidity or overpowering the vegetables and lentils.
Pro Tip: Use a vegetable peeler to remove wide strips of lemon rind, avoiding the white pith. You can remove the strips before serving, or leave them in for a stronger lemon flavour.
Recipe Tips for the Best Lentil Soup
Choosing Your Lentils
Why red lentils? Red lentils (also called pink or orange lentils) cook quickly and break down completely, creating a naturally creamy texture. They're perfect for smooth, thick soups.
Can you use other lentils? Green or brown lentils will work but won't create the same creamy texture. They'll stay intact and give you a chunkier, more textured soup. If using green or brown lentils, you may want to blend part of the soup (I recommend half) for creaminess.
Making It Vegetarian/Vegan
Replace chicken broth with vegetable broth for a completely vegetarian and vegan-friendly soup. The flavour will be just as delicious.
Adjusting Consistency
Too thick? Add more broth or water, ¼ cup at a time, until you reach desired consistency
Too thin? Simmer uncovered for 10-15 more minutes to reduce and thicken, or add ¼ cup more red lentils and cook for 15 minutes
Storage & Meal Prep
Refrigerator: Store in an airtight container for up to 4-5 days. The soup will thicken as it sits—add a splash of water or broth when reheating.
Freezer: Freeze in portions for up to 3 months. Use freezer-safe containers or bags. Thaw overnight in the refrigerator and reheat on the stovetop.
Reheating:
Option 1: Warm on the stovetop over medium-low heat, stirring occasionally. Add liquid if needed.
Option 2: Microwave individual portions for 2-3 minutes, stirring halfway through.
What to Serve with Red Lentil Soup
This lemony lentil soup pairs beautifully with:
Breads & Grains
Crusty sourdough bread or baguette
Warm pita bread or garlic naan
Cornbread or focaccia
Buttery dinner rolls
Salads
Simple green salad with vinaigrette
Mediterranean chickpea salad
Cucumber and tomato salad
Arugula salad with lemon dressing
Proteins (if serving as a side)
Grilled chicken
Italian sausage
Some sort of white fish
Falafel

Nutritional Benefits of Red Lentil Soup
Red lentils are a nutritional powerhouse:
High in protein: About 18g protein per cup of cooked lentils
Rich in fiber: Supports digestive health and keeps you full
Packed with iron: Important for energy and blood health
Good source of folate: Essential B vitamin
Low in fat and calories: Perfect for healthy eating goals
This soup is naturally low in fat, high in fiber, and provides a complete nutritious meal when served with whole grain bread.
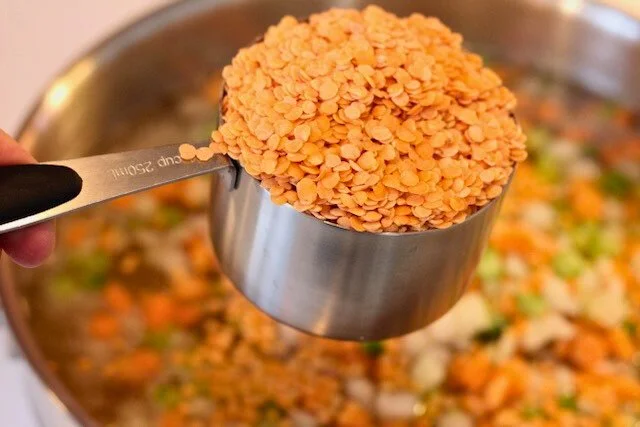
Recipe Variations & Substitutions
Spice It Up
Add ½ teaspoon cumin, ½ teaspoon coriander, ½ reed pepper flakes or ¼ teaspoon cayenne pepper for a warming, spiced version.
Add Greens
Stir in 2-3 cups fresh spinach or kale during the last 5 minutes of cooking for extra nutrients.
Make It Heartier
Add 1-2 diced potatoes or sweet potatoes at the beginning for a more filling soup.
Different Vegetables
No butternut squash? Use frozen sweet potato cubes, pumpkin purée, or skip it entirely—the soup will still be delicious.
Fresh Mirepoix
If you don't have frozen mirepoix, chop 1 large onion, 2 carrots, and 2 celery stalks.
Frequently Asked Questions (FAQ)
What is mirepoix and what if I don't have frozen mirepoix?
Mirepoix is a classic French combination of diced onions, carrots, and celery used as an aromatic base for soups, stews, and sauces. It's typically mixed in a 2:1:1 ratio (onions to carrots to celery). If you don't have frozen mirepoix, simply chop your own fresh vegetables: use 1 large onion (diced), 2 medium carrots (diced), and 2 celery stalks (diced). This equals about 3 cups total or approximately 400-450g. Sauté the fresh vegetables in 1 tablespoon olive oil, and 1/2 tsp of kosher salt for 3-5 minutes before adding the other ingredients for even better flavour.
Can I use fresh garlic instead of granular garlic?
Absolutely! You can substitute 3-4 cloves of fresh minced garlic for the 1 teaspoon of granular garlic. If using fresh garlic, add it at the beginning with the other vegetables when sautéing —just be careful not to burn it. Fresh garlic will give you a more pungent, vibrant garlic flavour, while granular garlic provides a milder, evenly distributed taste throughout the soup. I recommend granular, and only use fresh garlic if I don’t have granular garlic on hand.
Can I freeze lentil soup?
Yes! This red lentil soup freezes beautifully. Let it cool completely, then transfer to freezer-safe containers or bags. Freeze for up to 3 months. Thaw in the refrigerator overnight and reheat on the stovetop, adding a splash of water or broth if needed to thin it out.
Can I use green lentils instead of red lentils?
You can, but the texture will be different. Green or brown lentils hold their shape and won't break down like red lentils, so your soup will be chunkier rather than creamy. If you prefer a smooth soup with green lentils, blend half the soup after cooking. Green lentils also take longer to cook (45-60 minutes versus 20-30 for red).
Is this lentil soup vegan?
This recipe uses chicken broth, so it's not vegan. To make it vegan, simply substitute vegetable broth for the chicken broth. The flavour will be just as delicious, and you can boost the umami by adding 1 tablespoon soy sauce or miso paste.
How long does lentil soup last in the fridge?
Stored in an airtight container, this soup will keep for 4-5 days in the refrigerator. The soup thickens as it sits, so you may need to add a little water or broth when reheating. Always smell and visually inspect before eating refrigerated soup.
Why is my lentil soup bitter?
Bitterness in lentil soup can come from: (1) cooking lemon rind too long—add it at the end as instructed, (2) burned garlic or vegetables—make sure to use medium-low heat when simmering, or (3) old or rancid lentils—always use fresh lentils and store them in an airtight container. If your soup tastes bitter, try adding a pinch of sugar or a splash of lemon juice to balance it.
Do I need to soak red lentils before cooking?
No! Unlike beans, red lentils don't need to be soaked before cooking. Simply rinse them in a fine-mesh strainer to remove any debris, then add them directly to the pot. They cook quickly (20-30 minutes) and will dissolve into the soup, creating a creamy texture.
Can I make this soup in a slow cooker or Instant Pot?
Slow Cooker: Add all ingredients except lemon rind to your slow cooker. Cook on low for 6-8 hours or high for 3-4 hours. Stir in lemon rind before serving.
Instant Pot: Use the sauté function to warm the ingredients if desired, then add everything except lemon rind. Cook on high pressure for 15 minutes, then natural release for 10 minutes. Stir in lemon rind and season with salt.
How do I make this soup thicker?
This soup naturally thickens as it cooks because red lentils break down. If its been simmering for 1 hour and you want it even thicker: (1) simmer longer uncovered to evaporate more liquid, (2) add another ¼-½ cup red lentils and cook for 15 more minutes, (3) use an immersion blender to partially blend the soup, or (4) mash some of the soup against the side of the pot with a spoon.
How do I make this soup thinner?
If your soup is too thick, simply add more liquid. Stir in chicken broth, vegetable broth, or water ¼ cup at a time until you reach your desired consistency. The soup thickens significantly as it sits and cools, so you may need to thin it when reheating leftovers.
Can I add meat to this soup?
Absolutely! For a heartier soup, add: cooked shredded chicken in the last 10 minutes, browned Italian sausage at the beginning, or cooked bacon crumbled on top at the very end. If adding raw meat, brown it first in the pot before adding other ingredients.
What's the difference between lemon rind and lemon zest?
Lemon rind refers to strips of the yellow outer peel (removed with a vegetable peeler or knife), while lemon zest is the finely grated yellow peel. For this recipe, either works! Strips are easier to remove before serving, while zest disperses throughout the soup for more even flavour.
Is this soup gluten-free?
Yes! All the ingredients in this recipe are naturally gluten-free. Just make sure that ingredients havent come in cross-contact with grains during farming, harvesting and storage. Choosing brands that are labeled “gluten-free”, or “certified gluten-free” is the safest option to avoid contamination. Also make sure your broth is certified gluten-free (some brands add wheat-based additives). Serve with gluten-free bread, if needed.
Can I use fresh tomatoes instead of canned?
Yes, you can substitute 3-4 cups of diced fresh tomatoes for the canned tomatoes. However, canned tomatoes provide more concentrated flavour and consistent results. If using fresh, you may want to add 1 tablespoon tomato paste for extra depth.
Why is my soup foaming?
Lentils naturally produce some foam when cooking, especially at the beginning of boiling. This is normal and harmless—it's just starch and protein rising to the surface. Simply skim off the foam with a spoon if you'd like, or ignore it and stir it back in.
Recipe Card
Prep Time: 5 minutes | Cook Time: 55 minutes | Total Time: 60 minutes
Servings: 6-8 | Cuisine: Mediterranean-Inspired | Diet: Vegetarian, Gluten-Free
Ingredients:
750g frozen mirepoix
½ package frozen butternut squash purée
1 tsp dried thyme
1 tsp granulated garlic
1 can (28 oz) diced tomatoes
1 litre chicken or vegetable broth
1 litre water
2 cups red lentils, rinsed
Rind of 1 lemon
Salt, to taste
Instructions:
Add all ingredients except lemon rind to a large pot over medium heat
Bring to a light boil (about 5-10 minutes)
Reduce heat to low and simmer for 45-60 minutes, stirring occasionally. The soup will thicken and lentils will dissolve.
Stir in lemon rind and season with salt
Serve hot with bread or toppings of choice
Storage: Refrigerate up to 4-5 days or freeze up to 3 months.
Final Thoughts
This Easy Lemony Red Lentil Soup is the perfect recipe for anyone looking for a healthy, comforting, and flavourful meal that doesn't require hours in the kitchen. With just one pot, simple ingredients, and minimal effort, you can create a restaurant-quality soup that's perfect for meal prep, weeknight dinners, or feeding a crowd.
The combination of red lentils, vegetables, and fresh lemon creates a soup that's both nourishing and satisfying—creamy without cream, filling without being heavy, and bright without being acidic. Whether you're new to cooking with lentils or a seasoned soup maker, this recipe delivers warmth, balance, and ease in every bowl.

Did you make this recipe? I want to see it!
Leave a picture and a ⭐ star rating and comment below to let us know how your muffins turned out. Did you make any substitutions or additions? Share your tips and photos with us!
Share this recipe: Help others discover this delicious recipe by sharing it on Pinterest, Facebook, or Instagram. Tag us @Sageandsimplicity so we can see your beautiful creations!
📌 Pin it for later: Save this recipe to your Pinterest boards for easy access.
You might also like these recipes:

Gingery Lentil Cabbage Bowl
It all begins with an idea.
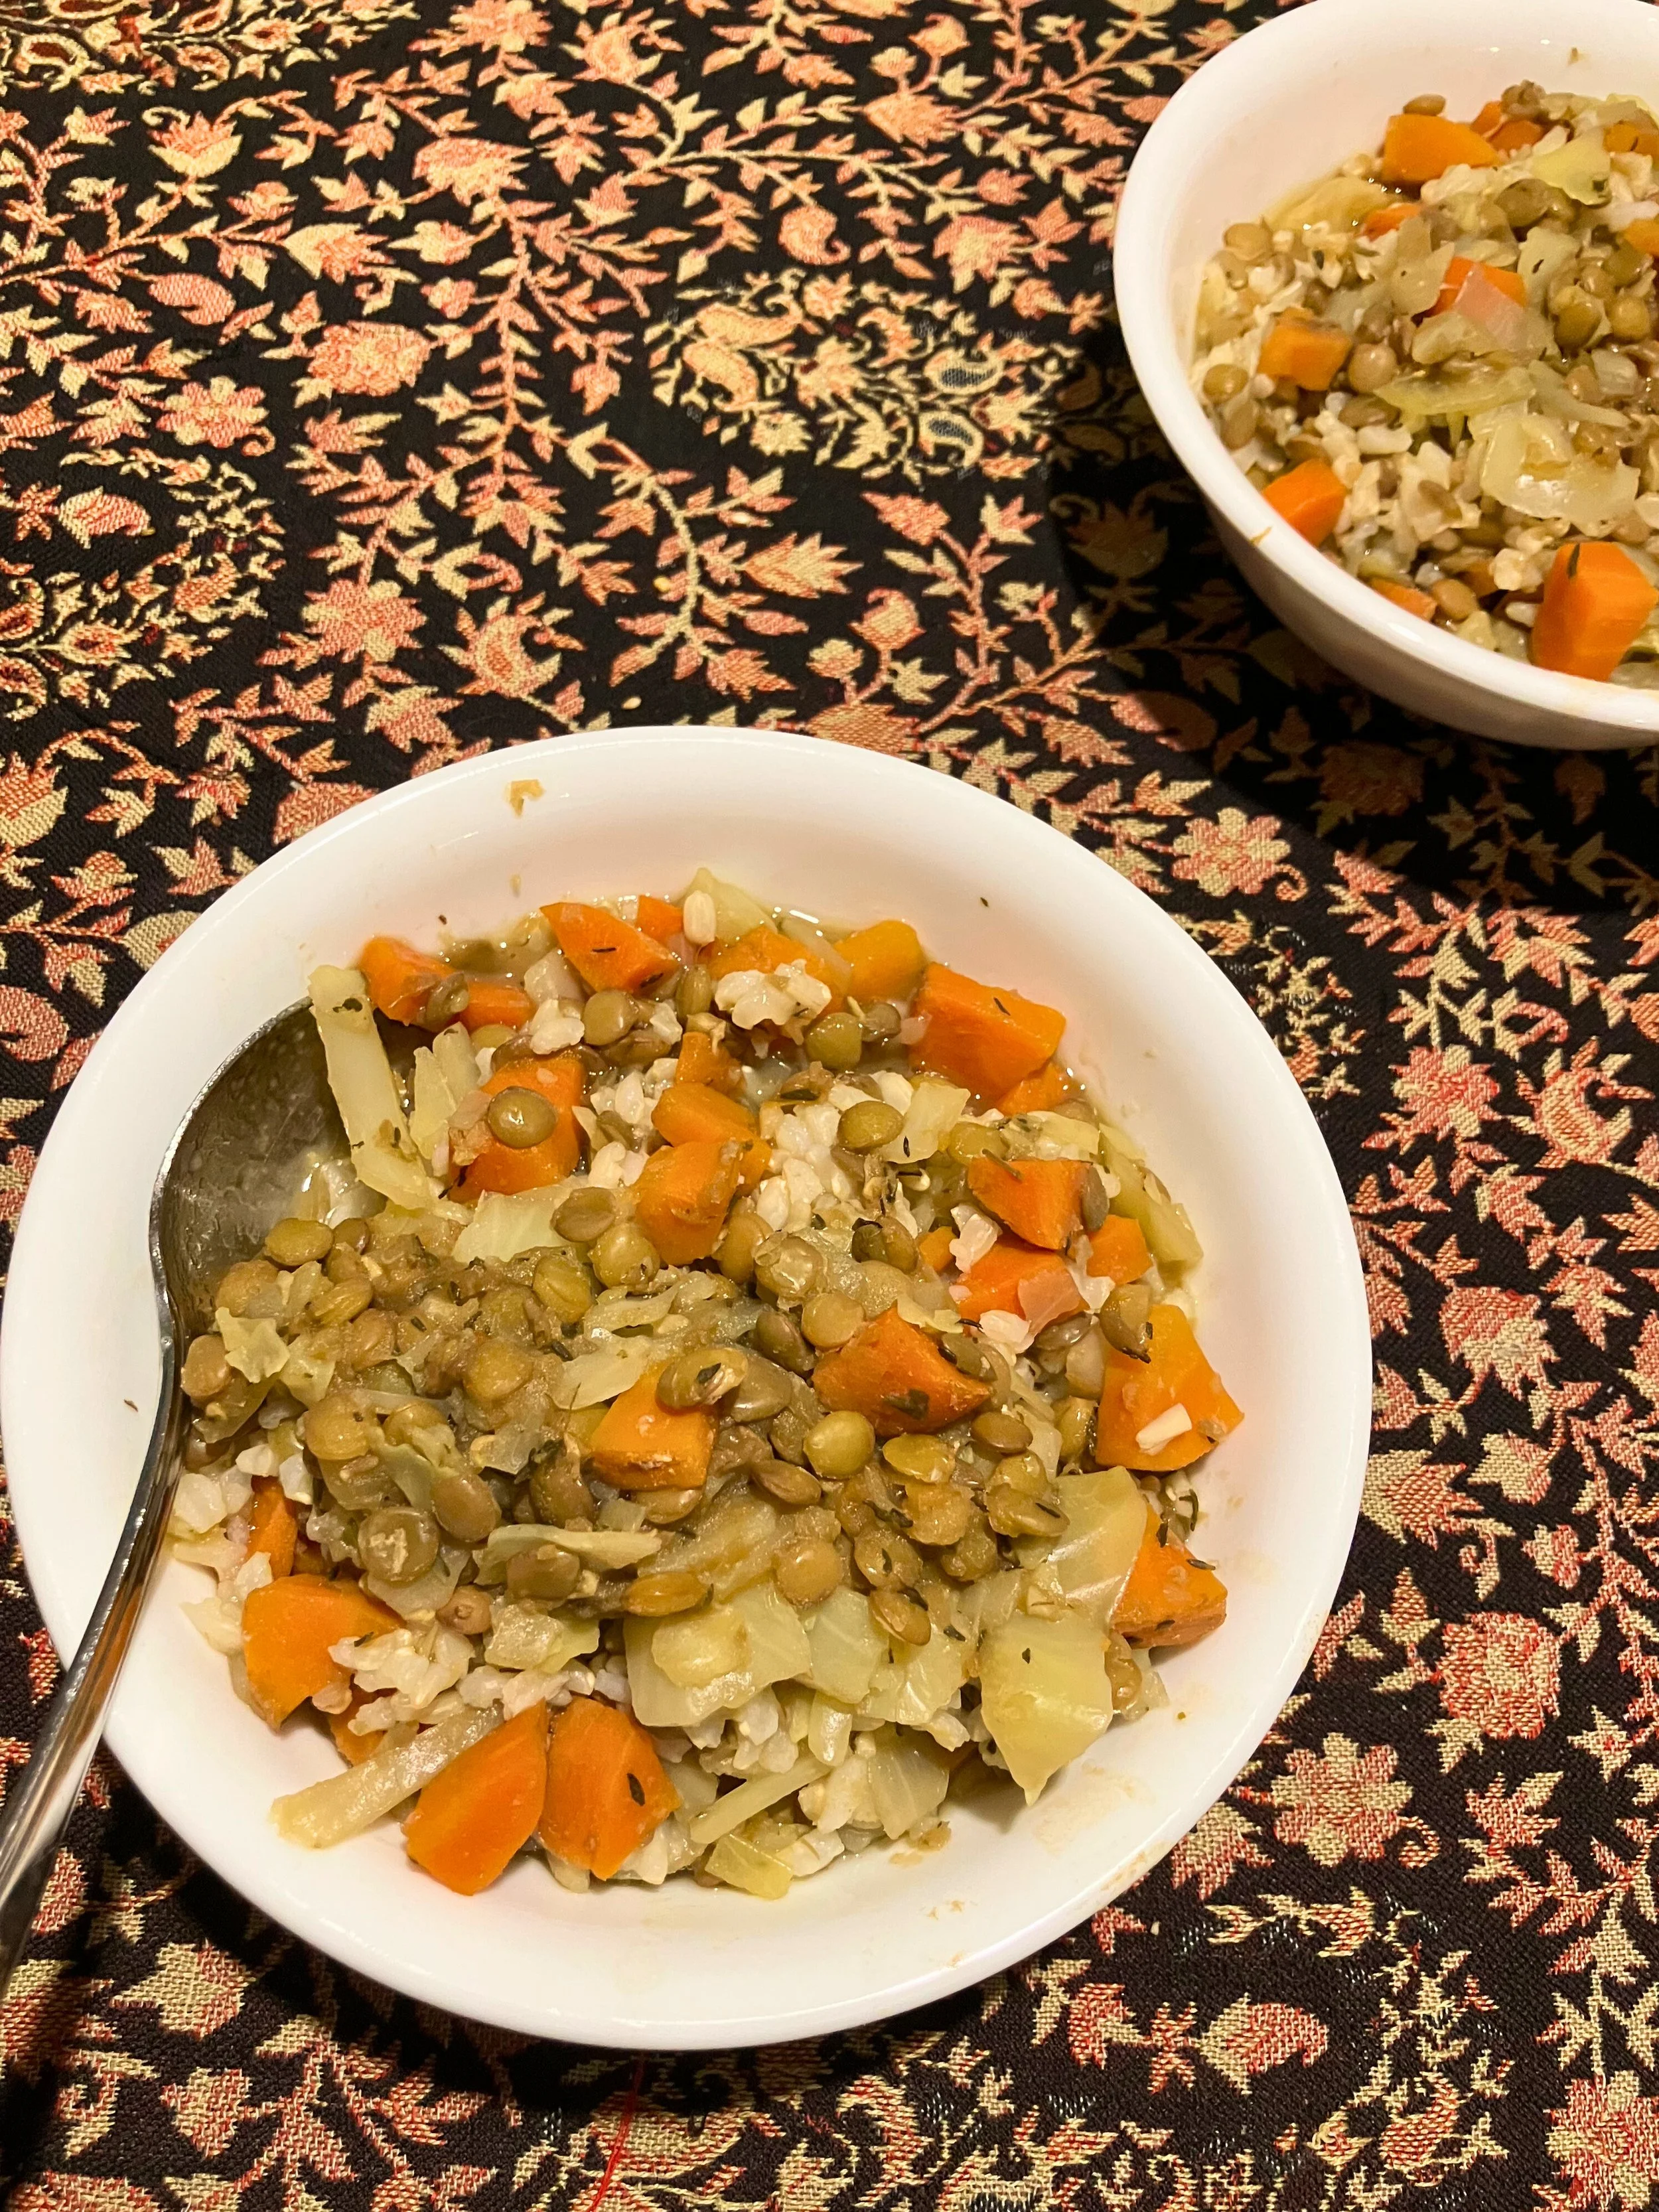
When winter temperatures drop, a warm, nourishing bowl meal can make all the difference. This Gingery Lentil Cabbage Bowl is a cozy, budget-friendly winter recipe made with simple ingredients like lentils, cabbage, carrots, and fresh ginger. It’s a one-pot dish that delivers comfort, flavour, and nutrition—perfect for anyone searching for an easy winter dinner idea that feels both hearty and wholesome.

This lentil cabbage bowl starts with diced carrots, cabbage, onion, and garlic simmered gently with green lentils, dried thyme, and beef broth. As everything cooks together, the lentils become tender while the vegetables soften and absorb the savoury broth. The result is a thick, spoonable mixture that’s deeply satisfying and naturally filling, making it an excellent option for cold-weather meals or make-ahead lunches.
Fresh ginger is what truly elevates this recipe. Added at the very end by pressing it directly into the cooked lentils, the ginger releases its bright, warming juice without leaving fibrous pieces behind. This simple step gives the dish a subtle zing and depth that balances the earthiness of the lentils and the sweetness of the carrots, creating a flavour profile that feels comforting yet vibrant.
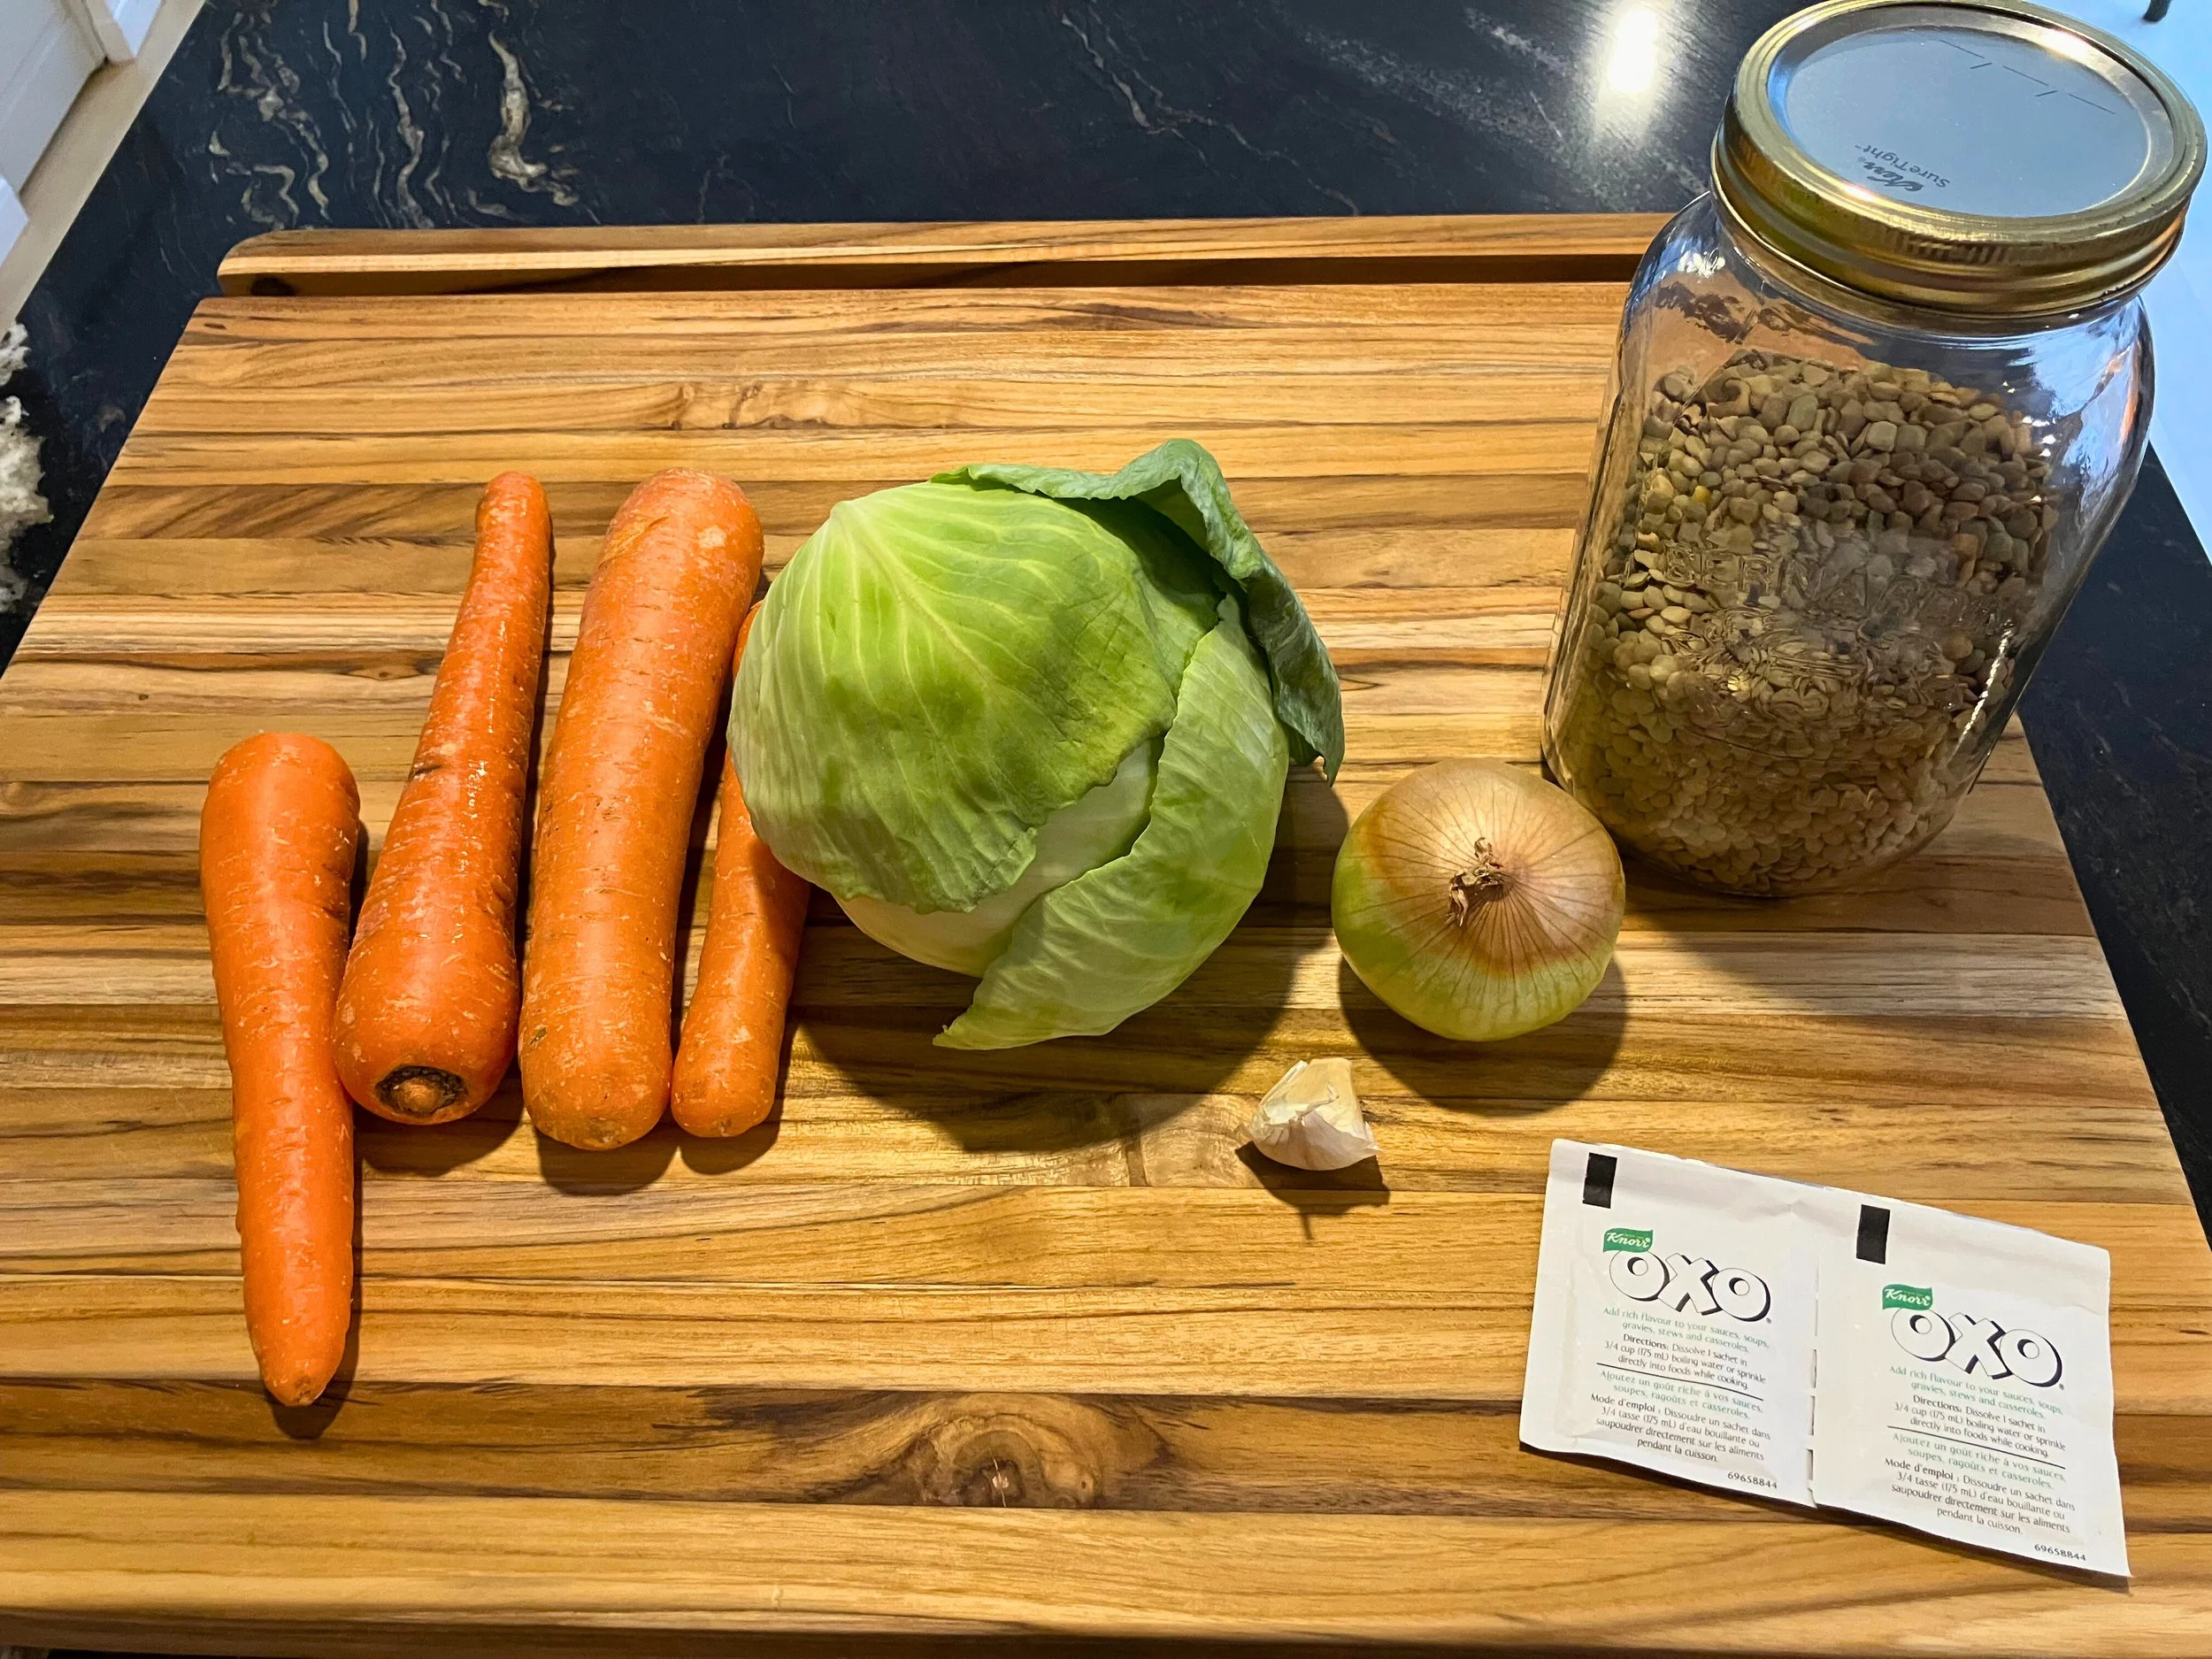
This gingery lentil cabbage bowl is incredibly versatile and pairs well with a variety of grains and breads. Serve it over rice for a classic, cozy bowl, or try it with barley for a heartier, nutty texture. It’s also delicious alongside sourdough bread or garlic naan bread, which are perfect for soaking up the flavourful broth. These serving options make it easy to customize based on what you have on hand.
If you’re looking for an easy winter lentil recipe that’s nourishing, affordable, and family-friendly, this dish is a reliable favorite. It comes together in about 30 minutes, reheats beautifully, and uses pantry staples you likely already have. Whether you’re searching for a comforting cabbage and lentil meal or a warming ginger-forward bowl for winter, this recipe is one you’ll want to keep in regular rotation.
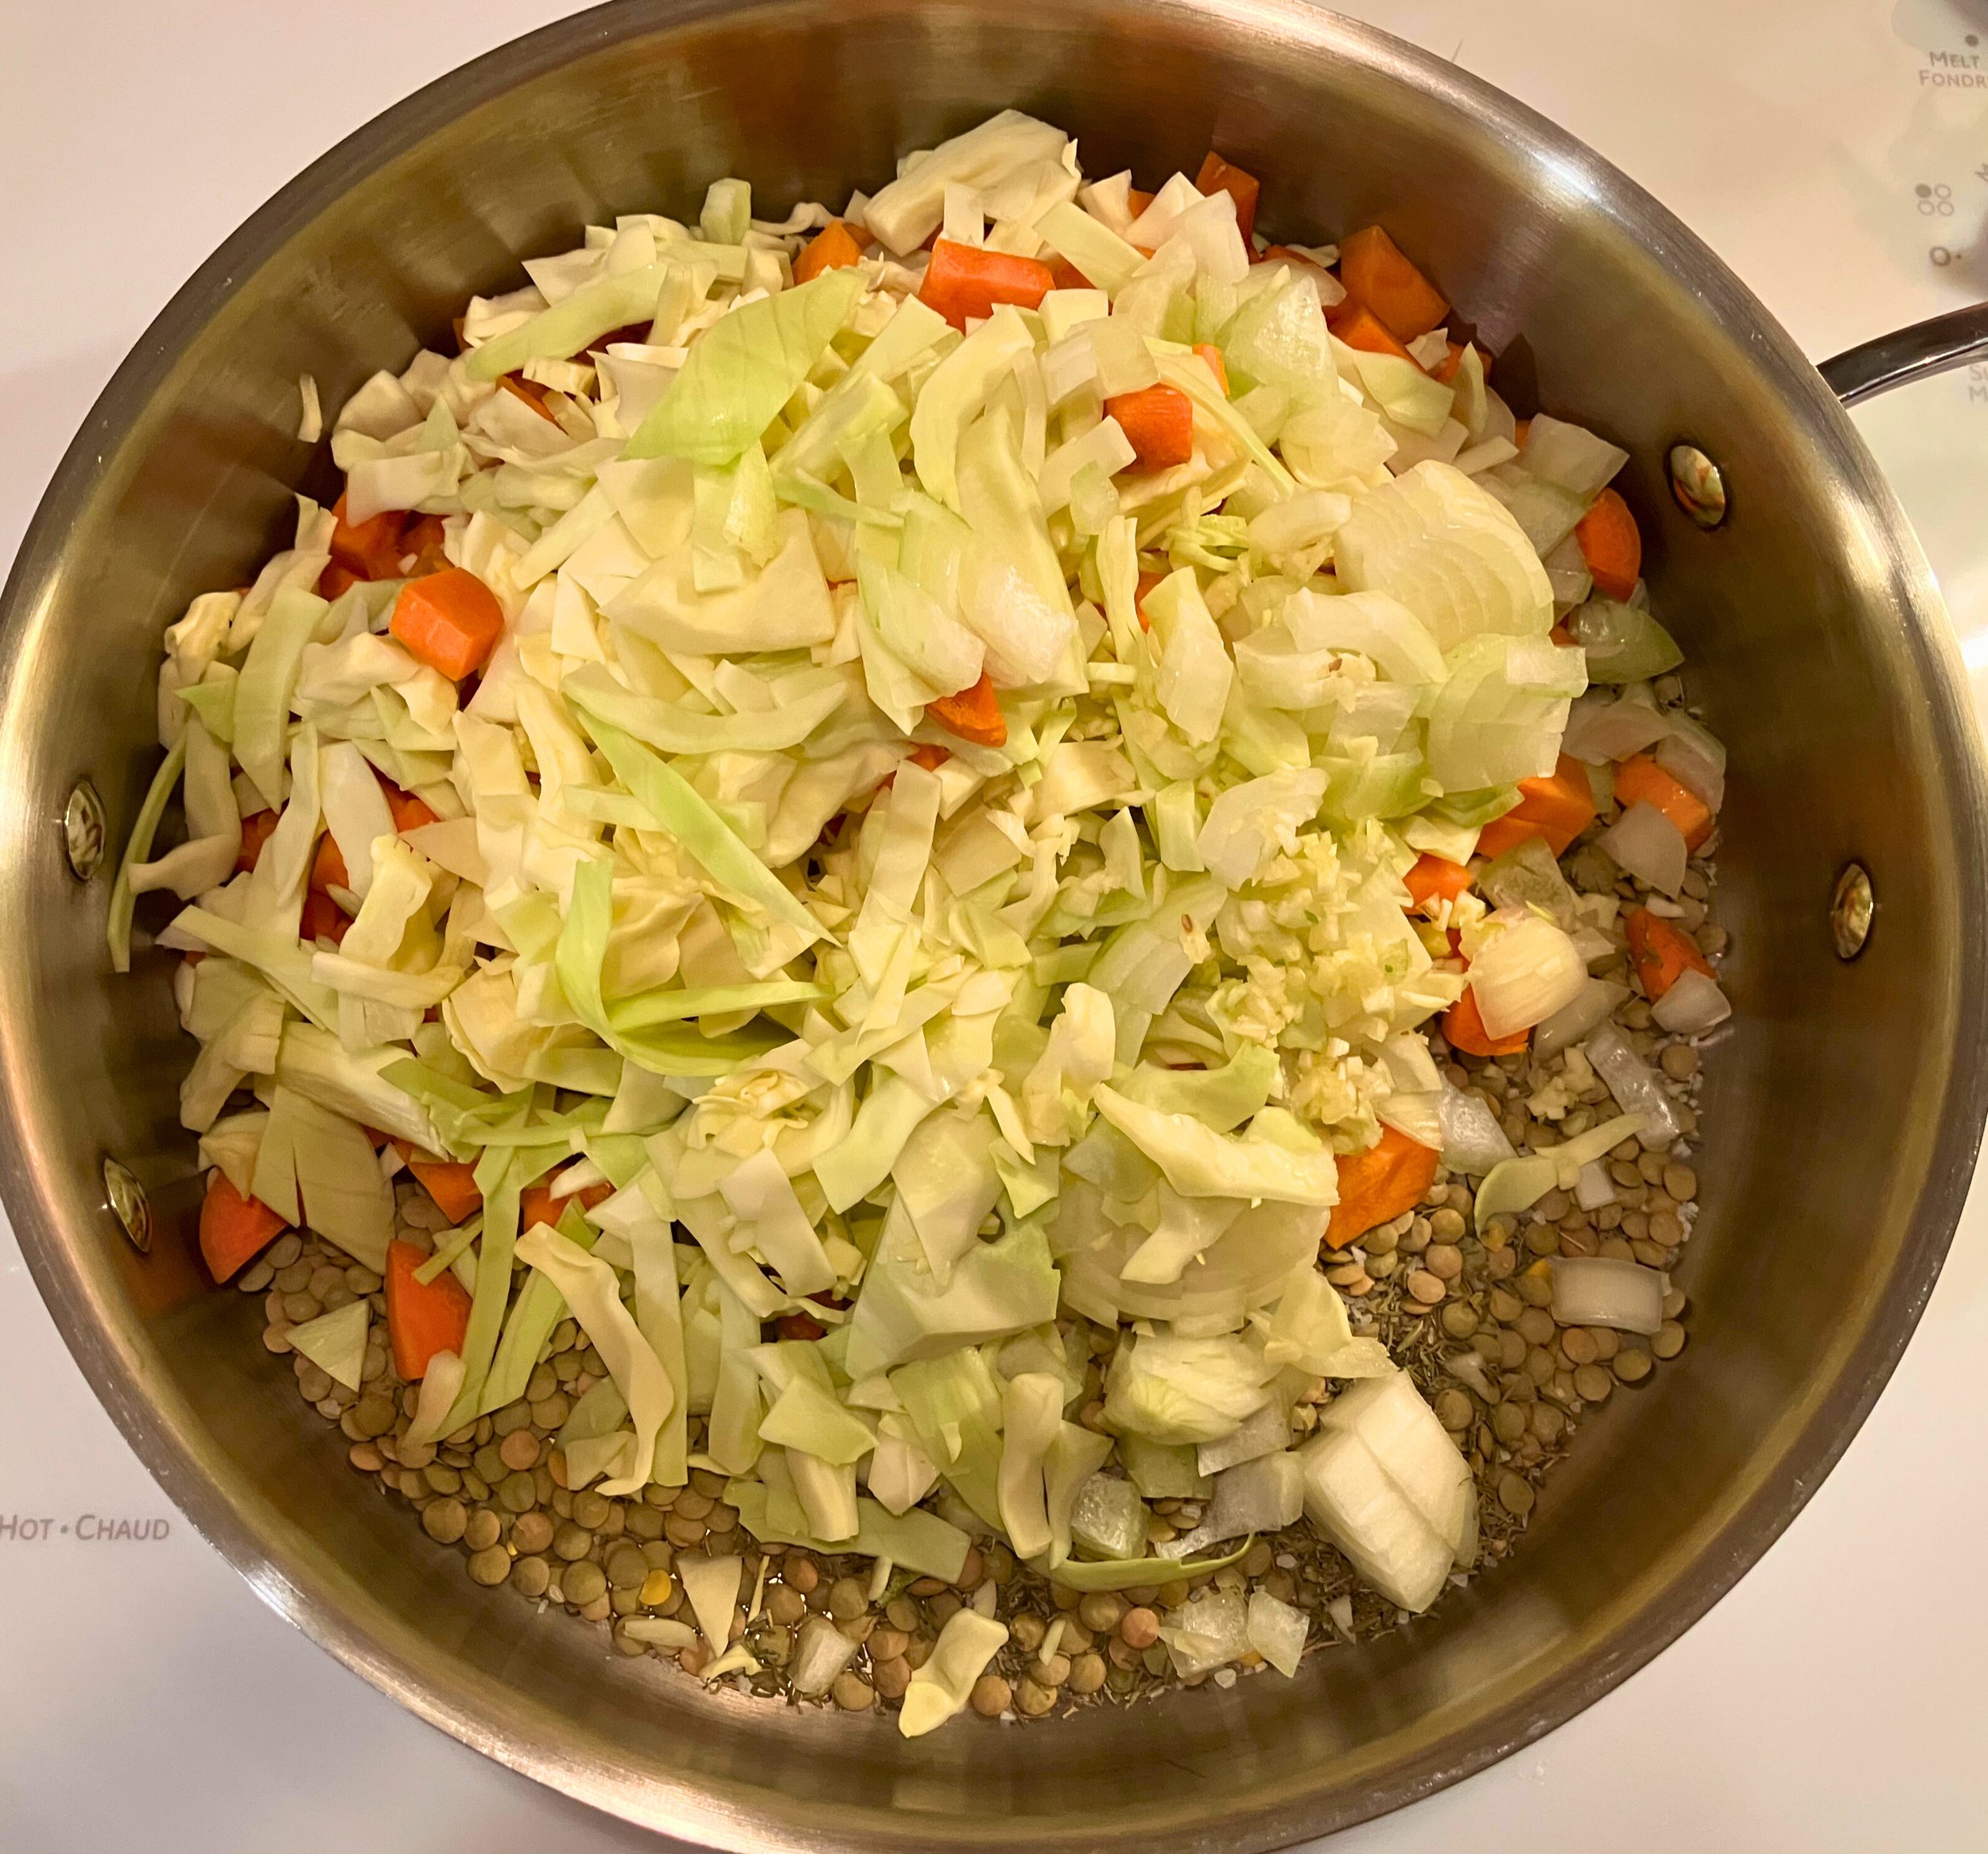
Gingery Lentil Cabbage Bowl (Easy One-Pot Winter Recipe)
When winter settles in, simple, nourishing meals become essential. This Gingery Lentil Cabbage Bowl is a cozy, one-pot winter recipe made with green lentils, cabbage, carrots, and fresh ginger. It’s budget-friendly, deeply comforting, and perfect for cold evenings when you want something warm without a lot of effort.
This recipe doubles as an easy weeknight dinner and a make-ahead meal. Everything simmers together in one skillet, creating rich flavour with minimal prep. Serve it over rice or barley, or enjoy it with sourdough or garlic naan for a satisfying winter bowl.
Why You’ll Love This Lentil Cabbage Bowl
Made in one pot with simple ingredients
Naturally filling and protein-rich from lentils
Cozy, warming flavours perfect for winter
Flexible serving options with grains or bread
Reheats well for leftovers
Ingredients for Gingery Lentil Cabbage Bowl:
4 carrots, diced (about 4 cups)
½ small cabbage, diced (about 4 cups)
½ medium onion, diced (about ½ cup)
2 cloves garlic, diced
1 cup dried green lentils
2 teaspoons dried thyme
1 teaspoon kosher salt
1 litre beef broth
1 tablespoon fresh ginger, peeled and cut into 1 cm pieces
equipment
large pot for the stovetop
wooden spoon
measuring cups and spoons
How Do You Make a Gingery Lentil Cabbage Bowl?
Step-by-Step Instructions
Chop the carrots, cabbage, onion, and garlic.
In a large skillet, combine the diced vegetables, lentils, garlic, thyme, salt, and beef broth.
Cover and cook over medium heat until the broth reaches a light boil.
Reduce heat to low, keep covered, and simmer for about 25 minutes, stirring occasionally.
The lentils should be tender
The carrots and cabbage will soften
The onions will become translucent
Turn off the heat. Using a garlic press, press the ginger directly into the mixture, allowing the juice to fall in. Discard the remaining ginger fibers.
Stir and serve warm.
Frequently Asked Questions (FAQs)
Why Add Ginger at the End?
Fresh ginger is pressed into the dish after cooking to preserve its bright, warming flavour. Adding ginger at the end prevents bitterness and avoids fibrous pieces while giving the lentils that signature cozy, gingery warmth that makes this bowl stand out.
What Goes Well With a Lentil Cabbage Bowl?
Best Serving Ideas
This gingery lentil cabbage bowl pairs beautifully with:
Rice for a classic, comforting bowl
Barley for a hearty, nutty texture
Sourdough bread to soak up the broth
Garlic naan bread for easy scooping
These options make it easy to adapt the meal based on what you already have at home.
How Long Does This Recipe Take?
From start to finish, this recipe takes about 30 minutes, making it ideal for busy winter evenings or simple meal prep.
Is This a Good Winter Meal?
Yes—this is an ideal winter lentil recipe. It’s warm, filling, and nourishing without being heavy. The combination of lentils, vegetables, and ginger makes it both comforting and energizing, perfect for cold-weather cooking.
Storage suggestions
Store leftovers in an airtight container in the refrigerator for up to 4 days
Reheat gently on the stove or in the microwave
Add a splash of broth or water if it thickens
Final Thoughts
This Gingery Lentil Cabbage Bowl is proof that simple ingredients can create deeply satisfying meals. It’s easy, affordable, and comforting—exactly what winter cooking should be. Whether you serve it over grains or with warm bread, it’s a recipe worth keeping in regular rotation.
Recipe card
Here’s the recipe!
Ingredients:
4 carrots, about 4 cups diced
½ small cabbage, about 4 cups, diced
½ medium onion, about ½ cup, diced
2 cloves of garlic, diced
1 cup of green lentils, dried
2 tsp thyme, dried
1 tsp kosher salt
1 L beef broth
1 tbsp fresh ginger, peeled and cut into 1 cm pieces
Instructions:
Chop carrots, cabbage, onion and garlic.
In a large skillet, combine all of the diced vegetables, lentils, garlic, thyme, salt, and broth. Cover and let the mixture cook over medium heat until the broth comes to a light boil.
Reduce heat to low and let the mixture simmer, stirring occasionally. Ensure that the mixture is covered, during this phase of the cooking. Cook until the lentils become tender, about 25 minutes. The carrots and cabbage will become tender while the onions will become transparent as the flavours mix.
Turn the heat off. Using a garlic press, press the ginger into the mixture, discarding the ginger afterwards. Here, the aim is to have the juices fall into the mixture. It will provide that that amazing gingery taste we’ve all come to love.
Stir and serve over rice, barley, a slice of sourdough bread or along side garlic naan bread.
Enjoy!
DID YOU MAKE THIS RECIPE? I WANT TO SEE IT!
Leave a picture and a ⭐ star rating and comment below to let us know how your muffins turned out. Did you make any substitutions or additions? Share your tips and photos with us!
Share this recipe: Help others discover this delicious recipe by sharing it on Pinterest, Facebook, or Instagram. Tag us @Sageandsimplicity so we can see your beautiful creations!
📌 Pin it for later: Save this recipe to your Pinterest boards for easy access.
You might also like these recipes:
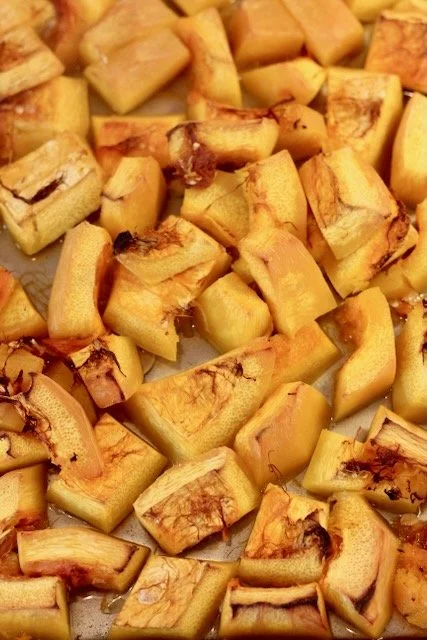
Butternut Squash Soup Recipe (Roasted, Creamy & Ready in 1.5 Hour)
📖 Jump to Recipe | 💬 Jump to FAQs | 🖨️ Print Recipe
Prep Time: 15 minutes | Cook Time: 65 minutes | Total Time: 1 hour 20 minutes | Yield: 6-8 servings | Difficulty: Easy
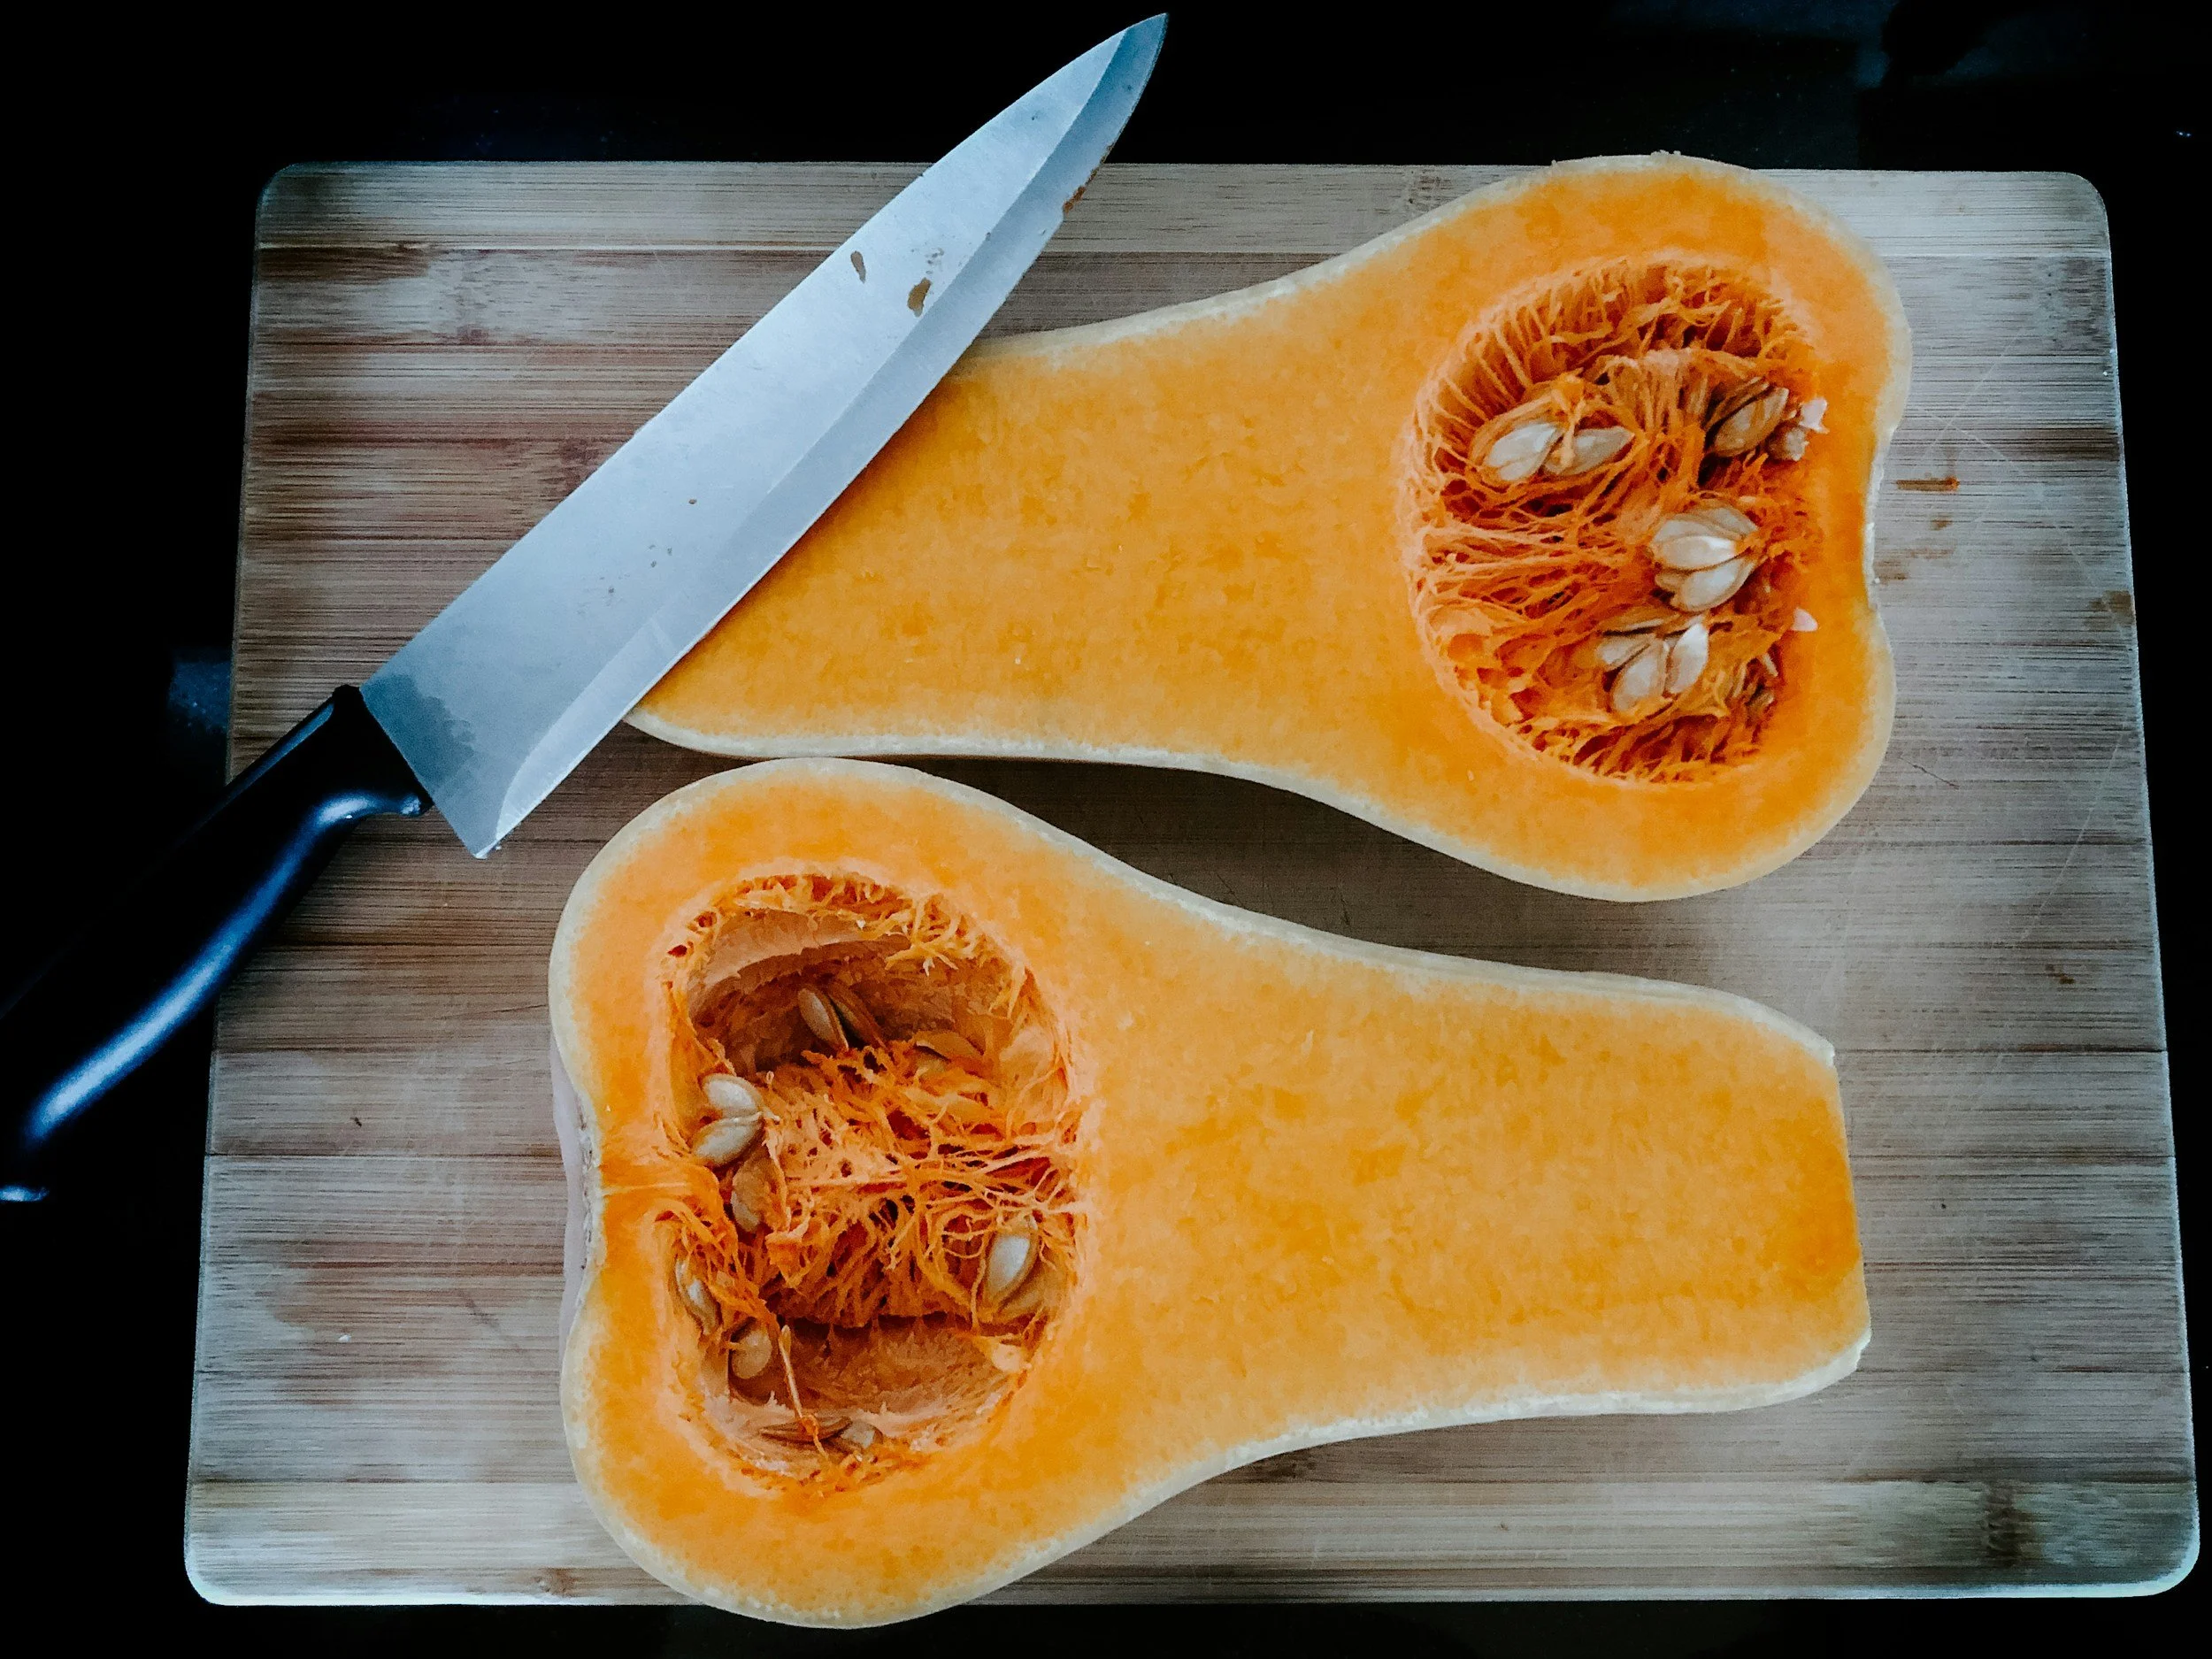
Published: January 30, 2026
Why This Butternut Squash Soup Recipe Works
This roasted butternut squash soup delivers restaurant-quality results with minimal effort. By roasting the vegetables first instead of just boiling them, you unlock deep caramelized flavours that transform a simple soup into something extraordinary. The golden edges bring natural sweetness, while the aromatic vegetables create a velvety, comforting bowl perfect for cold weather.
Whether you're meal prepping for the week or need an impressive dinner party starter, this healthy butternut squash soup comes together with just a handful of pantry ingredients.

Ingredients You'll Need:
Main Ingredients:
1 butternut squash, diced (3-4 pounds, about 6 cups diced)
1 medium onion, diced - yellow or white onion works best
1 carrot, large, diced
1 stalk of celery, diced
1 liter (about 4 cups) broth - chicken or vegetable broth
2 teaspoons kosher salt - divided
2 teaspoons garlic powder
2-3 tablespoons oil - olive oil, canola oil or vegetable oil for roasting
Optional: ½ teaspoon turmeric powder** - adds anti-inflammatory benefits and golden colour
Kitchen Equipment
Large baking sheet
Sharp knife and cutting board
Large stockpot (at least 2 quarts)
Immersion blender or regular blender
Peeler
Wooden spoon
Ladle
How to Make Butternut Squash Soup: Step-by-Step Instructions:
Step 1: Prepare Your Oven and Vegetables
Preheat your oven to 350°F (175-180°C). While the oven heats, peel the butternut squash using a sturdy vegetable peeler. Cut the squash, onion, carrot and celery into uniform 1-inch (2cm) pieces. Consistent sizing ensures even roasting.
Step 2: Season and Roast
Spread all the diced vegetables on a large baking sheet in a single layer. Drizzle with oil and toss to coat evenly. Sprinkle with 1 teaspoon of salt and the garlic powder. Roast for approximately 35 minutes, or until the edges turn golden brown and caramelized. This roasting step is key to developing rich, deep flavour.
Step 3: Simmer the Soup
Transfer all roasted vegetables to your large stockpot. Add the remaining 1 teaspoon of salt, turmeric powder (if using), and pour in the broth until vegetables are covered. Place the pot over medium heat and bring to a gentle simmer. Let the soup simmer for 30 minutes to allow the flavours to meld together.
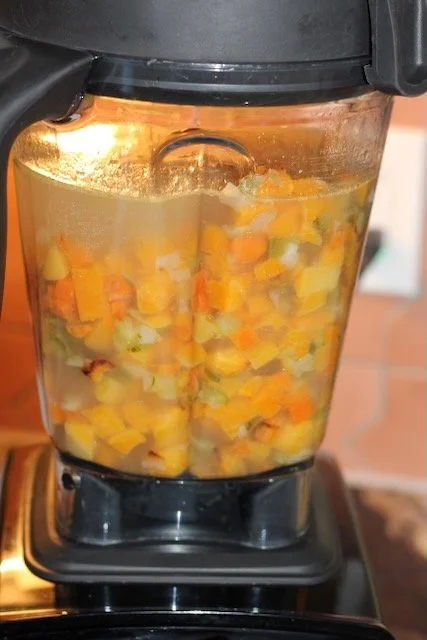
Step 4: Blend Until Smooth
Remove the pot from heat. Use an immersion blender directly in the pot to puree the soup until completely smooth and creamy. Alternatively, carefully transfer the soup in batches to a countertop blender, being cautious with the hot liquid. Blend until you achieve a silky, velvety texture.
Step 5: Serve and Enjoy
Ladle the hot soup into bowls. Optional garnishes include: a drizzle of cream, toasted pumpkin seeds, fresh herbs like cilantro, or a swirl of olive oil. Serve immediately with crusty bread.
Pro Tips for the Best Butternut Squash Soup
Choose the right squash: Look for butternut squash with a long neck and small bulb. The neck has more flesh and fewer seeds, giving you more usable squash.
Don't skip the roasting: This step makes all the difference. The caramelization adds natural sweetness and complexity you won't get from simply boiling.
Make it creamier: For an extra luxurious texture, add ½ cup of heavy cream, coconut milk, or cashew cream before serving.
Adjust consistency: If your soup is too thick, thin it with additional broth. If it's too thin, simmer uncovered for 10-15 minutes to reduce.
Season to taste: Always taste before serving and adjust salt, pepper, or add a squeeze of lemon juice to brighten the flavours.
Save Time: Frozen pre-cut squash and mirepoix (mix of pre-cut onions, celery and carrots) are often available in your grocery store freezer isle. Feel free to swap frozen pre-cut veggies, instead of fresh, saving time and sometimes money in the process.
Storage and Make-Ahead Instructions
Refrigerator: Store leftover butternut squash soup in an airtight container for up to 5 days. Reheat gently on the stovetop or in the microwave.
Freezer: This soup freezes beautifully for up to 3 months. Cool completely before freezing in portion-sized containers. Thaw overnight in the refrigerator and reheat on the stovetop or microwave oven.
Make-Ahead: You can roast the vegetables up to 2 days in advance. Store in the refrigerator and complete the remaining steps when ready to serve.
Variations and Substitutions
Instant Pot Method: Sauté diced vegetables in the Instant Pot using the sauté function, add broth, seal, and pressure cook on high for 10 minutes. Natural release for 10 minutes, then blend.
Slow Cooker: Place roasted vegetables and broth in slow cooker. Cook on low for 4-6 hours or high for 2-3 hours. Blend before serving.
Vegan Option: Use vegetable broth and coconut milk instead of cream. The soup is naturally vegan-friendly.
Spicy Version: Add ½ teaspoon cayenne pepper or red pepper flakes to the roasting vegetables, or garnish with hot sauce.
Thai-Inspired: Swap turmeric for curry powder and finish with coconut milk and fresh cilantro.
Apple Addition: Add one peeled, diced apple during roasting for extra sweetness.
Nutritional Benefits
Butternut squash is packed with vitamin A, vitamin C, potassium, and fiber. One serving provides over 100% of your daily vitamin A needs. The addition of turmeric adds anti-inflammatory properties, while keeping the recipe low in calories and naturally gluten-free.
What to Serve with Butternut Squash Soup
This creamy soup pairs beautifully with crusty bread, grilled cheese sandwiches, fresh salad, or roasted chicken. It also makes an elegant first course for holiday dinners like Thanksgiving or Christmas.
Frequently Asked Questions (FAQs)
Can I make butternut squash soup without roasting the vegetables?
Yes, you can skip the roasting step and simmer raw vegetables in broth for 30-40 minutes until tender, then blend. However, roasting develops deeper, caramelized flavours that give the soup a richer, more complex taste. The roasting step is highly recommended for the best results.
How do I easily peel and cut a butternut squash?
First, cut off both ends of the squash. Then, cut the squash right above the bulb. Stand each piece upright on the flat end and carefully slice down the sides with a sharp knife to remove the skin. Alternatively, poke holes in the squash, microwave for 2-3 minutes to soften the skin, which makes peeling much easier. Then cut in half lengthwise, scoop out seeds, and dice the flesh.
What type of broth works best for butternut squash soup?
Both chicken broth and vegetable broth work excellently. Chicken broth adds more depth and richness, while vegetable broth keeps the recipe vegetarian and vegan-friendly. You can also use bone broth for added nutrients or low-sodium broth if you want to control the salt content.
Can I freeze butternut squash soup?
Absolutely! Butternut squash soup freezes very well for up to 3 months. Let the soup cool completely, then transfer to freezer-safe containers leaving 1 inch (2cm) of space at the top for expansion. Thaw overnight in the refrigerator and reheat gently on the stovetop, adding a splash of broth if needed to adjust consistency.
How can I make this soup creamier?
To make the soup extra creamy, add ½ to 1 cup of heavy cream, half-and-half, coconut milk, or cashew cream just before serving. Alternatively, add a dollop of sour cream or Greek yogurt to each bowl. Blending the soup thoroughly until completely smooth also enhances the creamy texture.
Why is my butternut squash soup bitter?
Bitterness can come from overcooking the vegetables until they burn, using old or spoiled squash, or not adding enough salt to balance the flavours. Make sure to roast only until golden (not dark brown or black), use fresh squash, and season properly with salt. Adding a pinch of sugar can also balance the bitterness.
Can I add other vegetables to this recipe?
Yes! Carrots, sweet potatoes, parsnips, or regular potatoes work wonderfully in this soup. Keep the total vegetable quantity roughly the same to maintain the proper soup consistency.
How long does butternut squash soup last in the fridge?
Properly stored in an airtight container, butternut squash soup will last 4-5 days in the refrigerator. Reheat only the amount you plan to eat to maximize freshness.
What's the difference between butternut squash soup and pumpkin soup?
While both are winter squash soups, butternut squash has a sweeter, nuttier flavour and creamier texture compared to pumpkin. Butternut squash also has firmer flesh that's easier to peel and cut. The recipes are largely interchangeable, though cooking times may vary slightly.
Can I make this soup in an Instant Pot or slow cooker?
Yes! For Instant Pot: Sauté the vegetables (skip roasting), add broth, pressure cook on high for 10 minutes, natural release for 10 minutes, then blend. For slow cooker: Add all roasted vegetables and broth, cook on low for 4-6 hours, then blend. Both methods work well, though stovetop after roasting provides the deepest flavour.
Is butternut squash soup healthy?
Yes! Butternut squash soup is naturally low in calories, high in fiber, and packed with vitamins A and C, potassium, and antioxidants. It's naturally gluten-free and can easily be made vegan. One serving typically contains around 100-150 calories (without cream), making it an excellent choice for healthy eating.
What garnishes go well with butternut squash soup?
Popular garnishes include toasted pumpkin seeds (pepitas), a drizzle of cream or coconut milk, fresh herbs like cilantro, crispy bacon bits, croutons, a swirl of olive oil, roasted chickpeas, or a sprinkle of nutmeg or cinnamon. These add both visual appeal and complementary flavours.


Did you make this recipe? I want to see it!
Leave a picture and a ⭐ star rating and comment below to let us know how your muffins turned out. Did you make any substitutions or additions? Share your tips and photos with us!
Share this recipe: Help others discover this delicious recipe by sharing it on Pinterest, Facebook, or Instagram. Tag us @Sageandsimplicity so we can see your beautiful creations!
📌 Pin it for later: Save this recipe to your Pinterest boards for easy access.
you might also like:

Roasted Tomato & basil soup
tomato basil soup
📖 Jump to Recipe | 💬 Jump to FAQs | 🖨️ Print Recipe
Prep Time: 15 minutes | Cook Time: 65 minutes | Total Time: 1 hour 20 minutes | Yield: 6-8 servings | Difficulty: Easy

Homemade roasted tomato basil soup is one of the easiest and most comforting meals to make during the colder months. This is a family-favourite recipe in our home, loved for its rich flavour, simple ingredients, and cozy, homemade feel. It’s the kind of soup that warms you up while still being easy and budget friendly.
Roasting the tomatoes is what gives this soup its deep, slightly sweet flavour. The oven caramelizes the tomatoes while roasted garlic becomes soft and mellow, adding richness without overpowering the dish. This simple roasting step creates a depth of flavour that makes this soup taste slow-cooked, even though it’s surprisingly easy to make.
Fresh basil brings brightness and balance, creating that classic roasted tomato basil soup flavour everyone recognizes and loves. With the seasoning perfectly salted, this soup needs very little else. It’s smooth, savoury, and satisfying, whether served on its own or paired with grilled cheese, crusty sourdough bread, or a simple salad.
This easy roasted tomato basil soup is also a budget-friendly meal that works well for families. It’s made with affordable pantry and produce ingredients, stretches easily to feed a crowd, and reheats beautifully. That makes it ideal for leftovers, meal prep, and quick lunches during busy weeks.
This soup has become a cold-weather staple in our home because it’s simple, comforting, and consistently loved by everyone at the table. It proves that family-friendly comfort food doesn’t have to be complicated—and that homemade soup can be both economical and deeply satisfying.

table of content
What do I need to make this soup?
Ingredients:
10-12 Roma tomatoes, diced
5-6 garlic cloves
Extra virgin olive oil, 2 TBSP
1 tsp salt, I use kosher salt
Fresh basil
1 L chicken broth
Optional topping:
Sharp cheddar or fresh parmesan
salt and pepper, to taste
How do make this soup? A step-by-step guide
Preheat over to 350F. Put garlic cloves in ramekin and add the extra virgin olive oil to cover 3/4 coves.
Cut tomatoes into 8 pieces. Put on a baking sheet and coat with oil. Sprinkle salt. Put the garlic filled ramekin on a the baking sheet.
Roast tomatoes and garlic until edges become golden. Be sure to watch the garlic. It might need to be removed before the rest of the tomatoes.
Remove the veggies from the oven and let cool.
Add chicken broth, roasted veggies, garlic and oil, fresh basil in a blender. Blend until smooth.
Add cheese, pepper, fresh basil to taste. Serve. This pairs well with homemade sourdough bread, salads and sandwiches.
Enjoy!

other soup recipes:
Recipe Card
Ingredients:
10-12 Roma tomatoes, diced
5-6 garlic cloves
Extra virgin olive oil, 2 TBSP
1 tsp salt, I use kosher salt
Fresh basil
1 L chicken broth
Optional topping:
Sharp cheddar or fresh parmesan
salt and pepper, to taste
Instructions:
Preheat over to 350F. Put garlic cloves in ramekin and add the extra virgin olive oil to cover 3/4 coves.
Cut tomatoes into 8 pieces. Put on a baking sheet and coat with oil. Sprinkle salt. Put the garlic filled ramekin on a the baking sheet.
Roast tomatoes and garlic until edges become golden. Be sure to watch the garlic. It might need to be removed before the rest of the tomatoes.
Remove the veggies from the oven and let cool.
Add chicken broth, roasted veggies, garlic and oil, fresh basil in a blender. Blend until smooth.
Add cheese, pepper, fresh basil to taste. Serve. This pairs well with homemade sourdough bread, salads and sandwiches.
Enjoy!
did you make this recipe? I want to see it!
Leave a picture and a ⭐ star rating and comment below to let us know how your muffins turned out. Did you make any substitutions or additions? Share your tips and photos with us!
Share this recipe: Help others discover this delicious recipe by sharing it on Pinterest, Facebook, or Instagram. Tag us @Sageandsimplicity so we can see your beautiful creations!
📌 Pin it for later: Save this recipe to your Pinterest boards for easy access.
you might also like:

Roasted Tomato, Garlic & Thyme soup
thyme and roasted tomatoes soup
📖 Jump to Recipe | 💬 Jump to FAQs | 🖨️ Print Recipe
Prep Time: 15 minutes | Cook Time: 65 minutes | Total Time: 1 hour 20 minutes | Yield: 6-8 servings | Difficulty: Easy

Why I Love This Soup
Homemade roasted tomato, garlic and thyme soup is one of the easiest and most comforting meals to make during the colder months. This is a family-favourite recipe in our home, loved for its rich flavour, simple ingredients, and cozy, homemade feel. It’s the kind of soup that warms you up while still being easy and budget friendly.
Roasting the tomatoes is what gives this soup its deep, slightly sweet flavour. The oven caramelizes the tomatoes while roasted garlic becomes soft and mellow, adding richness without overpowering the dish. This simple roasting step creates a depth of flavour that makes this soup taste slow-cooked, even though it’s surprisingly easy to make.
The roasted garlic and thyme combination is a classic culinary combination that has an irresistible flavour profile. This satisfying soup can be served on its own or paired with grilled cheese, crusty sourdough bread, or a simple salad.
This easy, budget-friendly, roasted tomato basil soup that works well for families. It’s made with affordable pantry and produce ingredients, stretches easily to feed a crowd, freezes beautifully, which can be an easy hands-off meal. That makes it ideal for leftovers, meal prep, and quick lunches during busy weeks.
This soup has become a cold-weather staple in our home because it’s simple, comforting, and consistently loved by everyone at the table. It proves that family-friendly comfort food doesn’t have to be complicated—and that homemade soup can be both economical and deeply satisfying.
Bon appétit!

What do I need to make this soup
ingredients:
10-12 Roma tomatoes, diced
5-6 garlic cloves
Extra virgin olive oil, 2 TBSP
1 tsp salt, I use kosher salt
Fresh thyme
1 L chicken broth
Optional topping:
Sharp cheddar or fresh parmesan
salt and pepper, to taste
instructions:
Preheat over to 350F. Put garlic cloves in ramekin and add the extra virgin olive oil to cover 3/4 coves.
Cut tomatoes into 8 pieces. Put on a baking sheet and coat with extra virgin olive oil, and the springs of fresh thyme. Sprinkle salt. Put the garlic filled ramekin on a the baking sheet.
Roast tomatoes and garlic until edges become golden, about 25 minutes. Be sure to watch the garlic. It might need to be removed before the rest of the tomatoes.
Remove the veggies from the oven and let cool.
Add chicken broth, roasted veggies, garlic and oil mixture in a blender. Blend until smooth.
Add cheese, pepper, thyme to taste. Serve. This pairs well with homemade sourdough bread, salads and sandwiches.
Enjoy!

how to make Roasted Tomato, Garlic & Thyme Soup
a step-by-step guide
step 1: preheat your oven
Preheat over to 350F. Put garlic cloves in ramekin and add the extra virgin olive oil to cover 3/4 coves.
step 2: Wash, Cut and prep the vegetables for roasting
Cut tomatoes into 8 pieces. Put on a baking sheet and coat with extra virgin olive oil, and the springs of fresh thyme. Sprinkle salt. Put the garlic filled ramekin on a the baking sheet.
Step 3: roasting the vegetables
Roast tomatoes and garlic until edges become golden, about 25 minutes. Be sure to watch the garlic. It might need to be removed before the rest of the tomatoes.
Step 4: let the vegetables cool
Remove the veggies from the oven and let cool.
step 5: blend the ingredients
Add chicken broth, roasted veggies, garlic and oil mixture in a blender. Blend until smooth.
Step 6: add the toppings
Add cheese, pepper, thyme to taste. Serve. This pairs well with homemade sourdough bread, salads and sandwiches.
Enjoy!
Recipe Card
Ingredients:
10-12 Roma tomatoes, diced
5-6 garlic cloves
Extra virgin olive oil, 2 TBSP
1 tsp salt, I use kosher salt
Fresh thyme
1 L chicken broth
Optional topping:
Sharp cheddar or fresh parmesan
salt and pepper, to taste
Instructions:
Preheat over to 350F. Put garlic cloves in ramekin and add the extra virgin olive oil to cover 3/4 coves.
Cut tomatoes into 8 pieces. Put on a baking sheet and coat with extra virgin olive oil, and the springs of fresh thyme. Sprinkle salt. Put the garlic filled ramekin on a the baking sheet.
Roast tomatoes and garlic until edges become golden, about 25 minutes. Be sure to watch the garlic. It might need to be removed before the rest of the tomatoes.
Remove the veggies from the oven and let cool.
Add chicken broth, roasted veggies, garlic and oil mixture in a blender. Blend until smooth.
Add cheese, pepper, thyme to taste. Serve. This pairs well with homemade sourdough bread, salads and sandwiches.
Enjoy!
did you make this recipe? I want to see it!
Leave a picture and a ⭐ star rating and comment below to let us know how your muffins turned out. Did you make any substitutions or additions? Share your tips and photos with us!
Share this recipe: Help others discover this delicious recipe by sharing it on Pinterest, Facebook, or Instagram. Tag us @Sageandsimplicity so we can see your beautiful creations!
📌 Pin it for later: Save this recipe to your Pinterest boards for easy access.
You might also like:

Homemade pumpkin pie spice mixture
📖 Jump to Recipe | 💬 Jump to FAQs | 🖨️Print Recipe
Total Time: 5 minutes | Difficulty: Easy
Making your own pumpkin spice blend at home is surprisingly simple — and a lot more cost-effective — letting you skip the pricey pre-made packets and keep full control over freshness and flavour. Instead of paying extra for mixes that may expire before you have time to use it up, you can whip up a perfectly balanced blend using just four pantry staples: cinnamon, ginger, nutmeg, and cloves.
The process is simple, combine ground cinnamon, ground ginger, ground nutmeg, and ground cloves in a small bowl or jar. A classic ratio is four parts cinnamon, two parts ginger, one part nutmeg, and one part cloves — but feel free to adjust it to match your taste. Prefer a bold cinnamon-forward blend or something with more spice from the ginger or cloves? Go for it.
From a budget standpoint, buying the individual spices is far more economical than repeatedly grabbing pre-packaged pumpkin spice, which can sometimes be hard to find during the fall. Those blends often charge a premium for convenience and branding, while a few basic spices can yield multiple batches with far less waste.
Once mixed, store your blend in an airtight container away from heat and light, and it will stay fresh for months. Make a batch at the start of the season and enjoy it all autumn and winter — in everything from lattes, cookies, pies, oatmeal, even roasted veggies! And if you love experimenting, try adding allspice or cardamom to create your own signature spin. ;)
Creating your own pumpkin spice mix is an easy, flexible, and budget-friendly way to bring seasonal flavour to your kitchen. A handful of simple spices becomes a fresh, customizable blend that elevates your recipes without elevating your grocery bill.

other pumpkin recipes:


REcipe card
Ingredients
4 tablespoon Cinnamon, ground
2 tablespoons Ginger, ground
1 tablespoon Nutmeg, ground
1 tablespoon Cloves, ground
Optional: 1 tablespoon All Spice, ground
Optional: 1 tablespoon Cardamom, ground
instructions
Combine all listed spices in a large mixing bowl. Mix well. Poor into a spice jar. Use it in all recipes calling for Pumpkin Pie Spice mixture.
Did you make this? I want to see it!
Leave a picture and a ⭐ star rating and comment below to let us know how your muffins turned out. Did you make any substitutions or additions? Share your tips and photos with us!
Share this recipe: Help others discover this delicious recipe by sharing it on Pinterest, Facebook, or Instagram. Tag us @Sageandsimplicity so we can see your beautiful creations!
📌 Pin it for later: Save this recipe to your Pinterest boards for easy access.
You might also like these recipes:

Turkey & Wild Rice Soup
turkey wild rice soup
📖 Jump to Recipe | 💬 Jump to FAQs | 🖨️Print Recipe
Total Time: 55 minutes | Difficulty: Easy
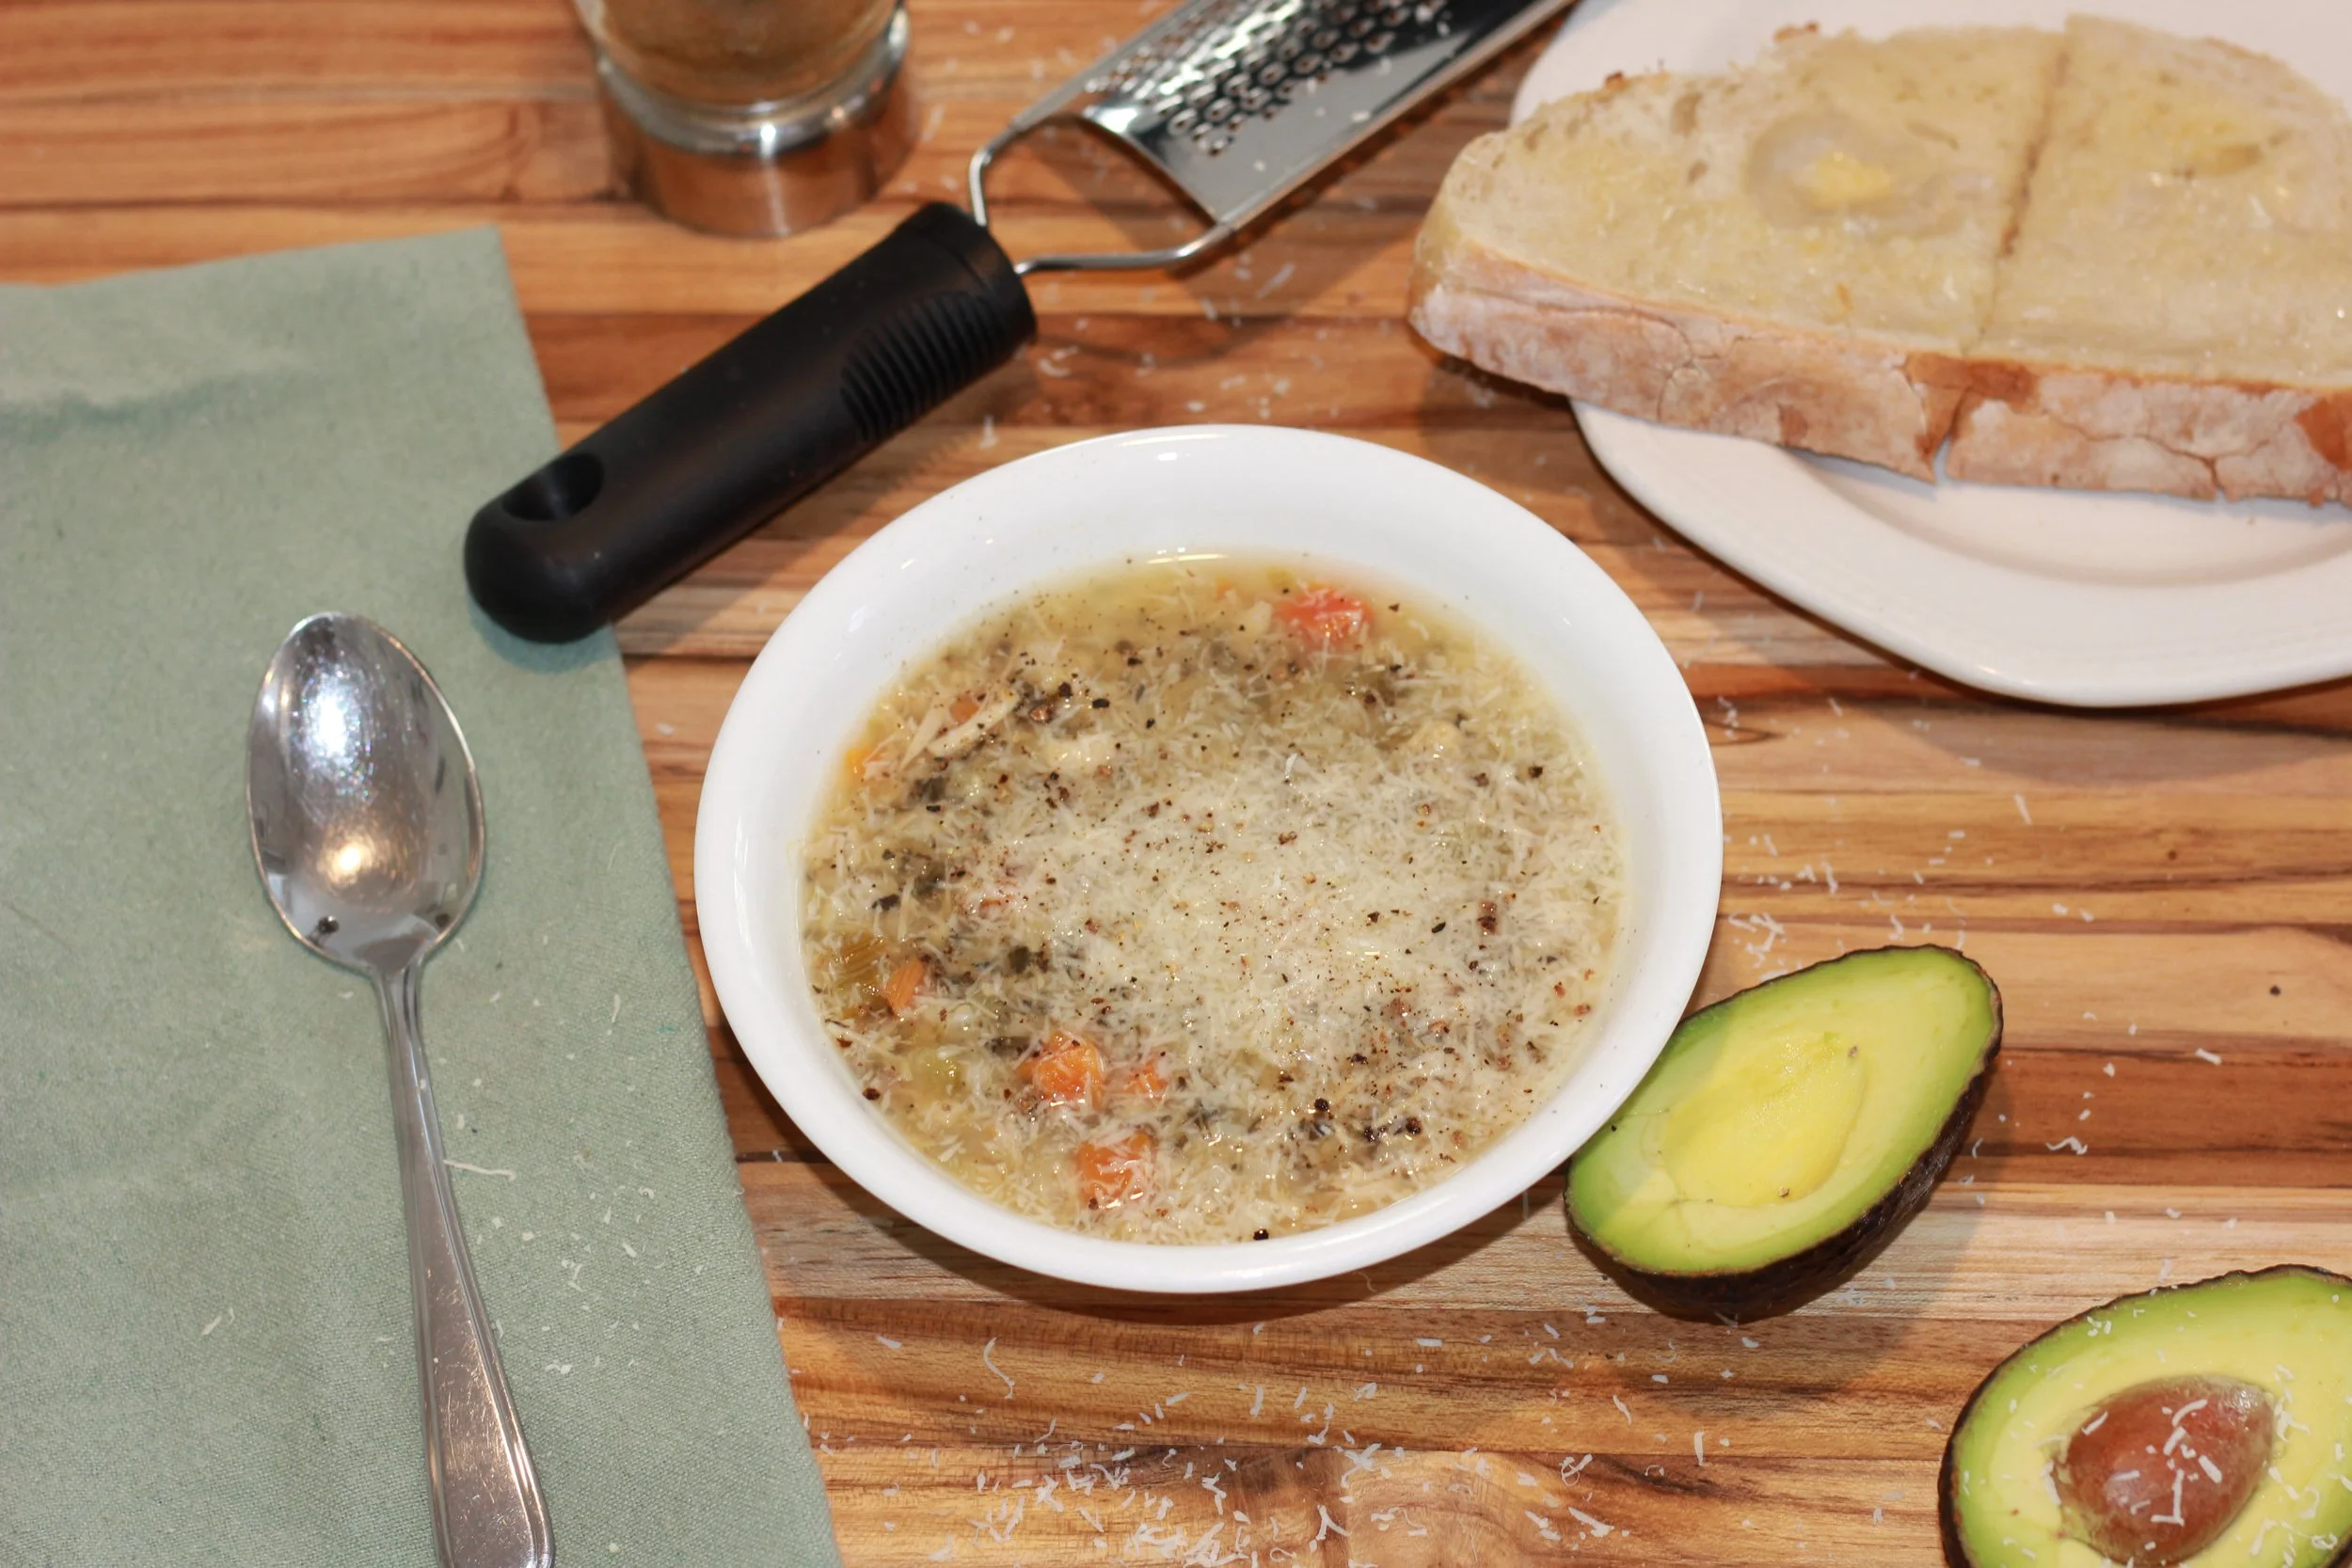
There’s nothing quite like a warm, comforting bowl of turkey wild rice soup to carry you through the coldest months of the year. This hearty, budget-friendly meal comes together with minimal effort and ingredients you likely already have on hand—making it a true winter staple. Whether you're looking to use up leftover holiday turkey or simply craving something cozy, this soup delivers all the savoury goodness you could want in a single pot.

One of the best time-saving and money saving tips for this recipe is using frozen mirepoix. With diced carrots, celery, and onions already prepped and ready to go, you shave tones of time off of cleaning and chopping vegetables, making this a perfect weeknight dinner solution. The mirepoix simmers gently with the rice to create a thick, hearty base that’s naturally creamy without needing much added richness.
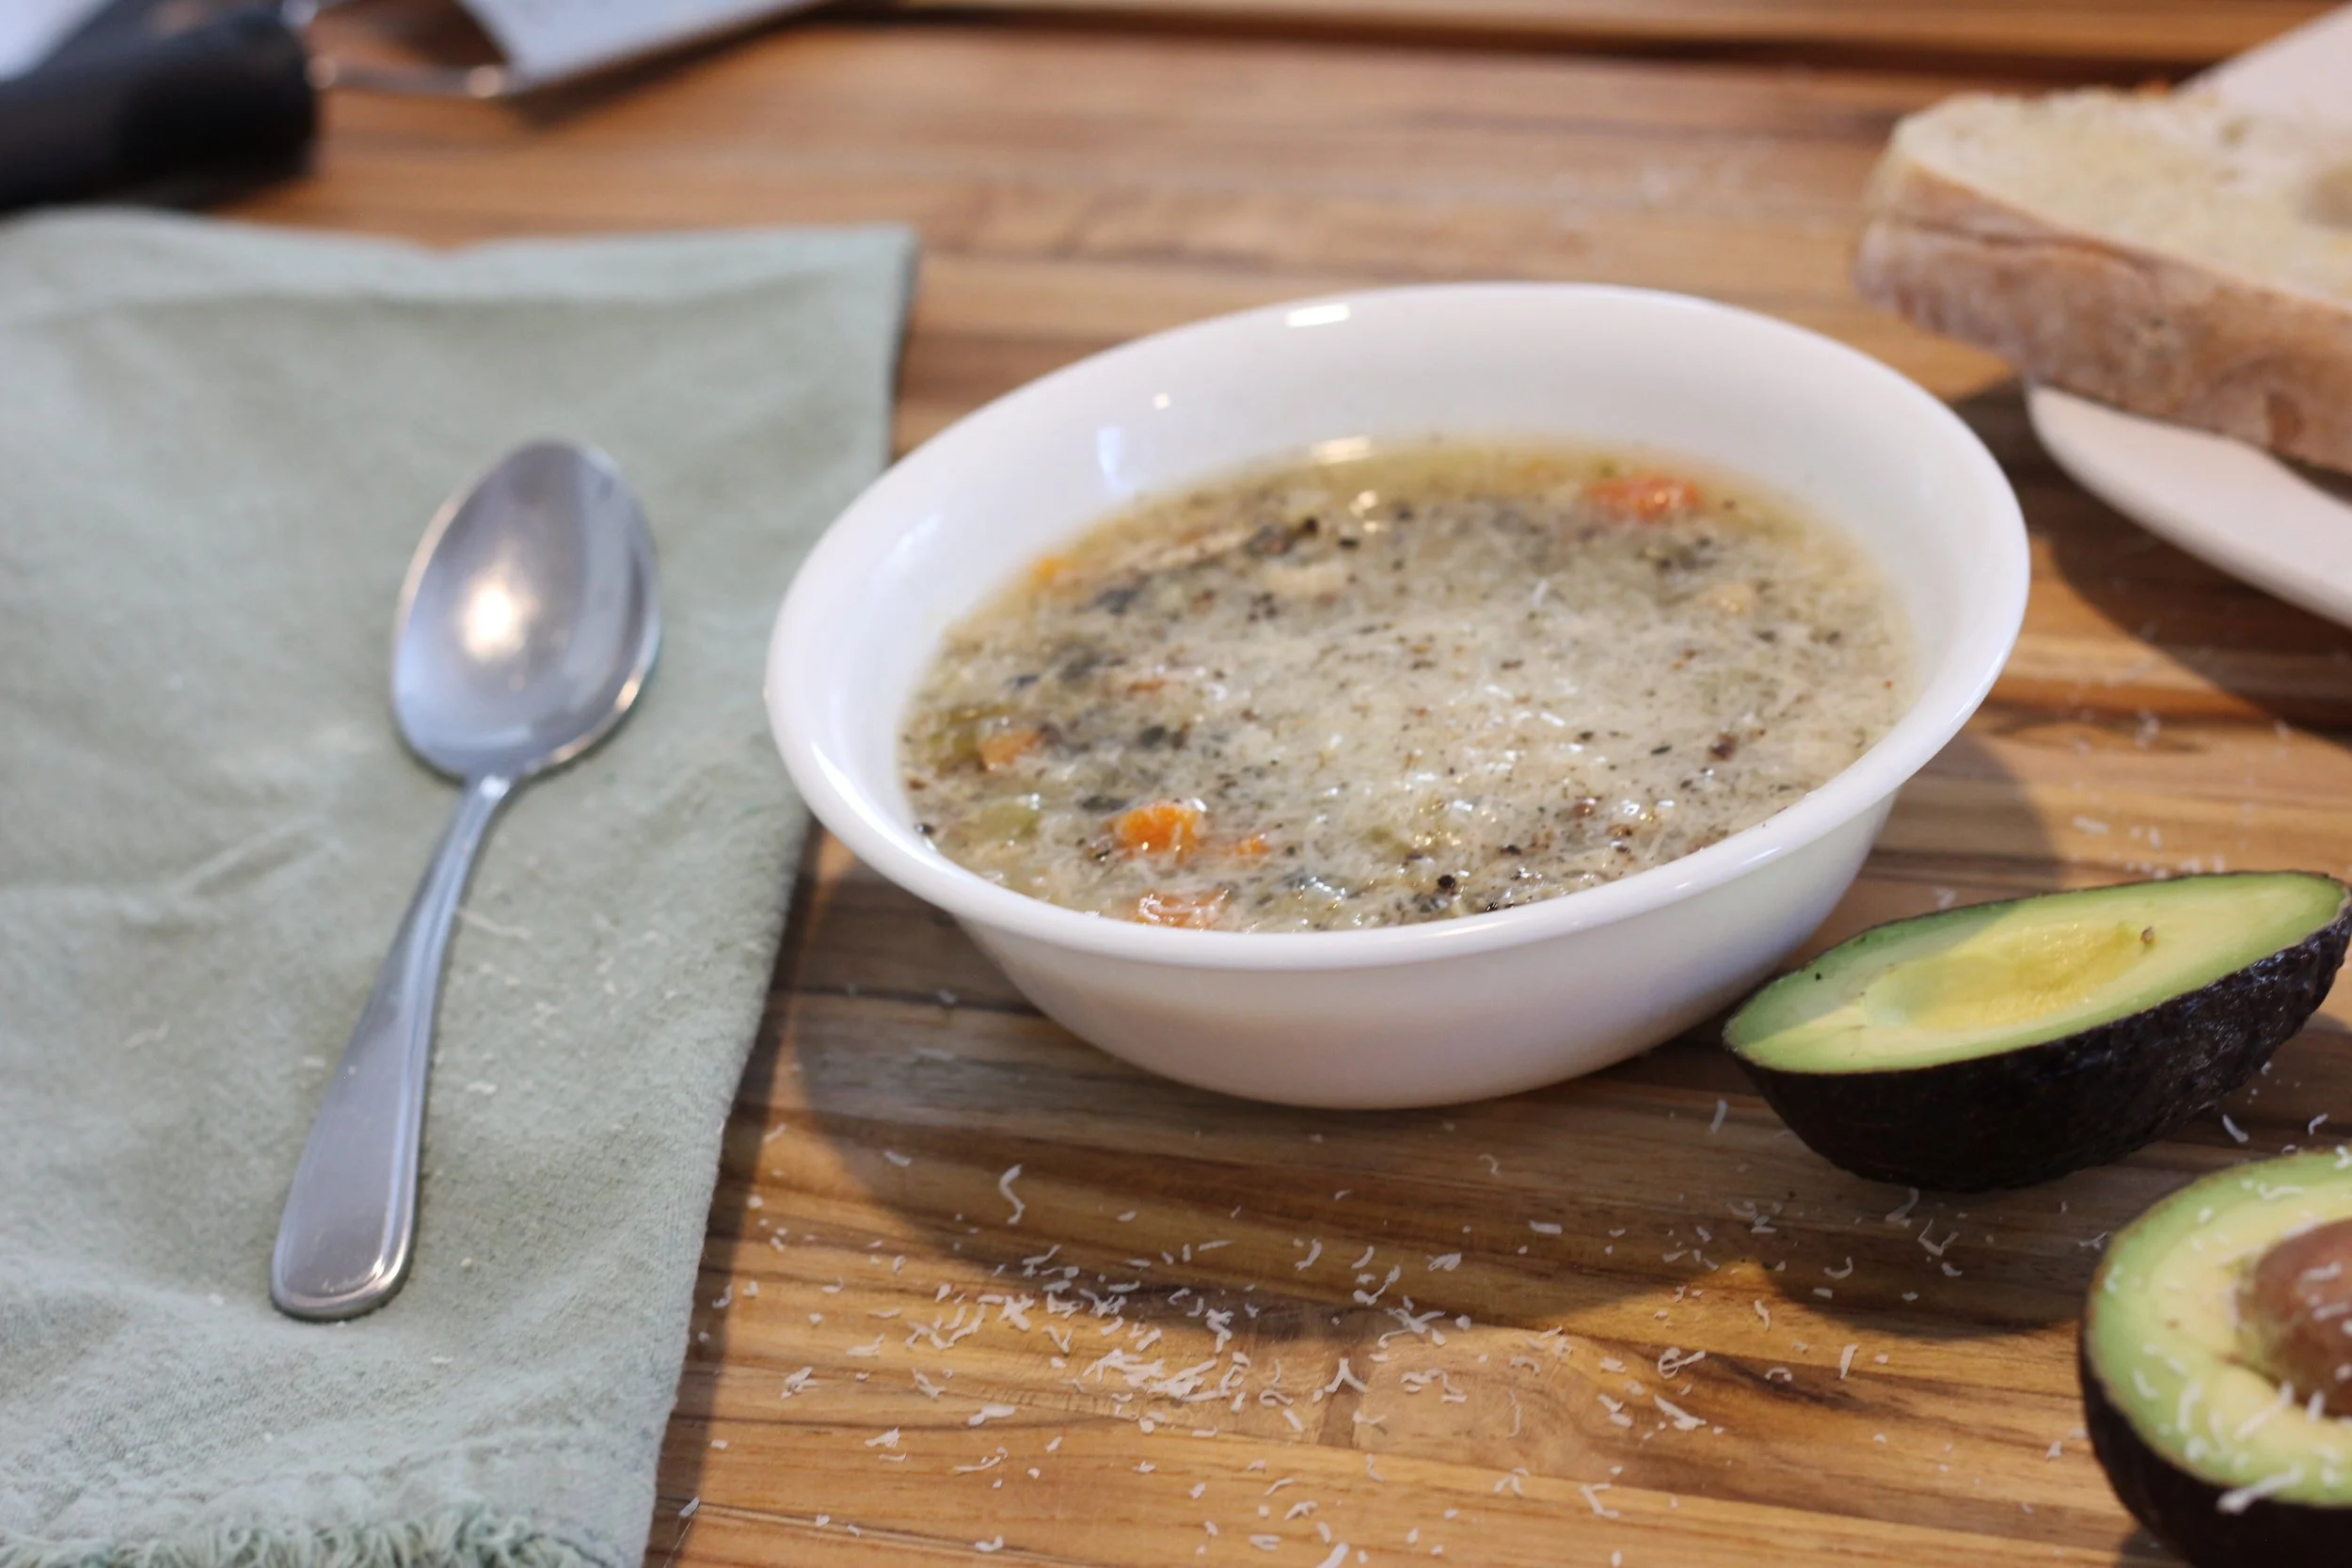
Leftover turkey finds new life here, turning into tender bites that pair perfectly with the earthy flavour of wild rice. A blend of basil, thyme, and garlic powder keeps the seasoning simple but deeply flavourful, allowing the natural savouriness of the turkey and vegetables to shine through. A little salt and pepper to taste brings everything together in a well-balanced, comforting bowl that feels both wholesome and satisfying.
What makes this recipe especially appealing is how inexpensive it is to prepare. With just a handful of pantry staples and freezer items, you can make a big batch that feeds the family—or future you. The mix of rice not only gives the soup wonderful texture but also stretches it farther, making it a great option for meal prepping on a budget.
And the best part? This soup freezes beautifully. Portion it into containers, pop them in the freezer, and you’ve got ready-to-reheat lunches and dinners for weeks to come. When the temperatures drop and you’re craving something warm, hearty, and homemade, this turkey wild rice soup will be waiting for you—simple, cozy, nourishing comfort in every spoonful.
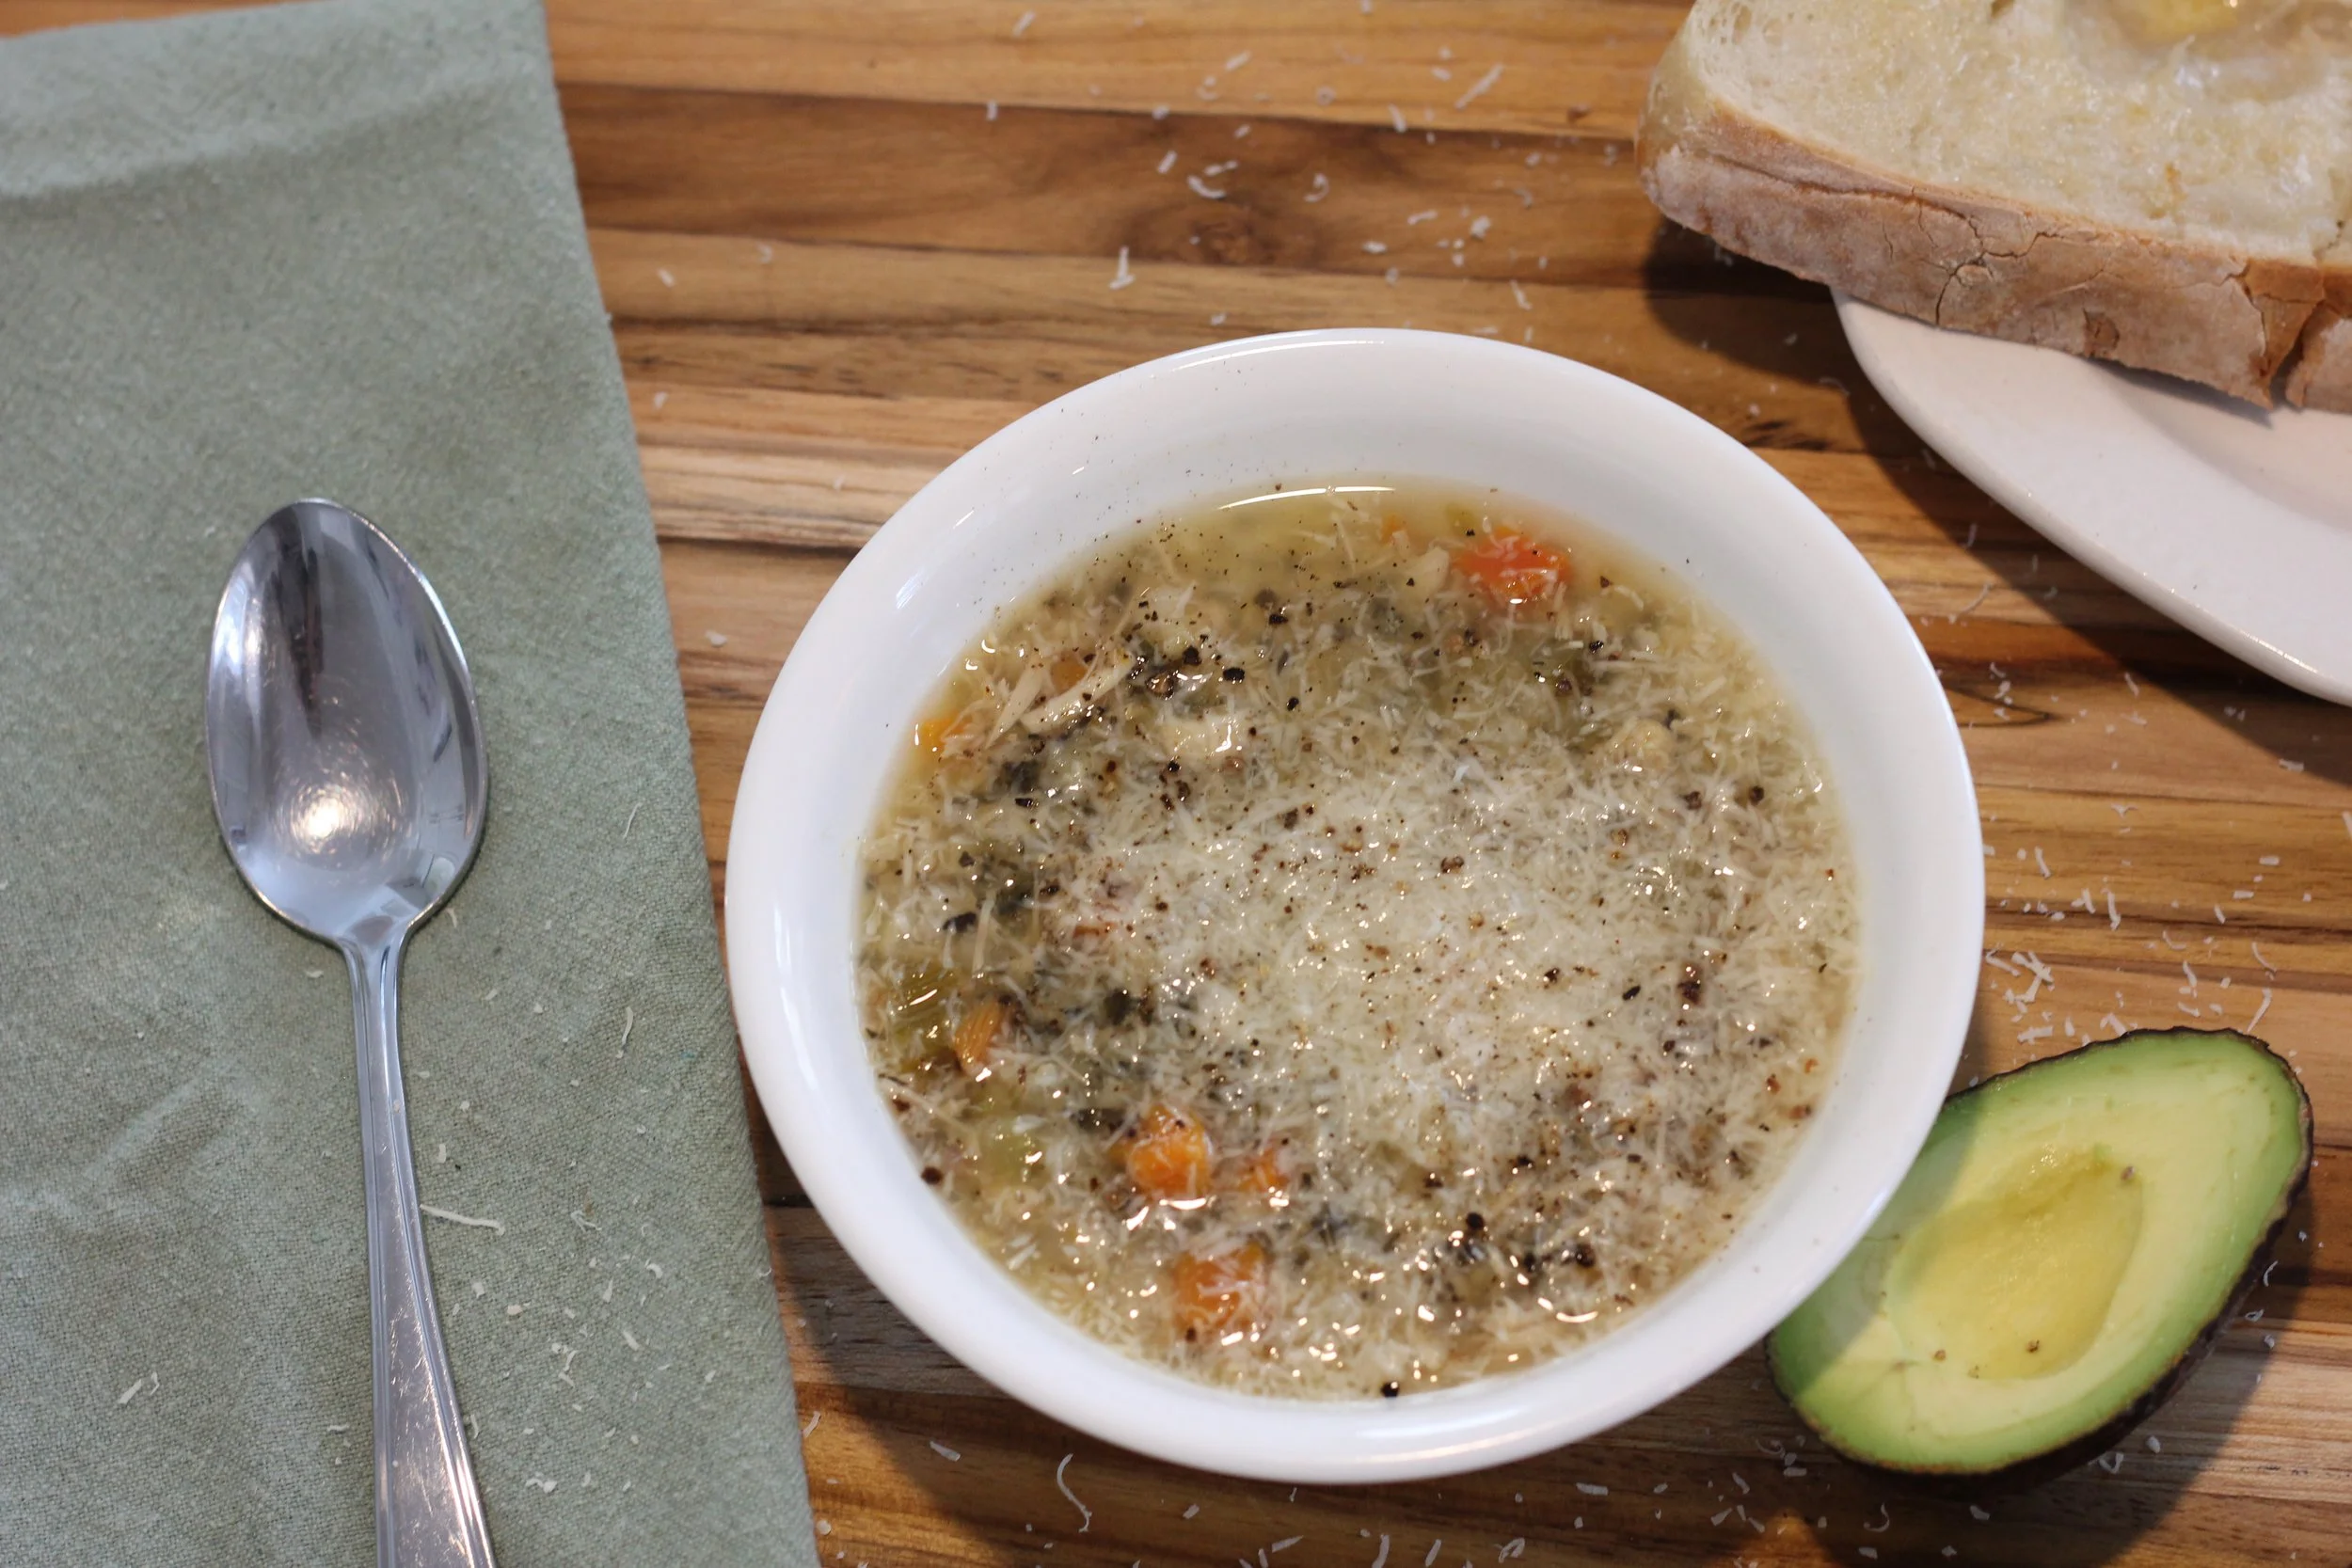
other turkey recipes:
Recipe Card
Here’s the recipe!
Ingredients:
1 bag frozen Mirepoix diced vegetables (there should only have carrots, celery, onions)
1 cup rice, I like using brown rice
1 dinner plate full of leftover turnkey meat, cut up into bite-sized pieces
4L of turkey broth
1/4 cup dried basil
3 tbsp dried thyme
2 tbsp garlic powder
2 tsp salt, I like using kosher salt
1/2 cup wild rice, added 20 minutes before serving
Optional: 1 cup pumpkin purée
Instructions:
In a large stockpot, add in all ingredients, minus the wild rice. Cook on stovetop over medium heat until all the ingredients are gently boiling. Reduce the heat and allow the soup to simmer for about 20-30 minutes.
Add wild rice 20 minutes before serving.
season to taste.
Pairs nicely with fresh sourdough bread, and topped with freshly grated parmesan, fresh ground pepper and avocado.
Enjoy!
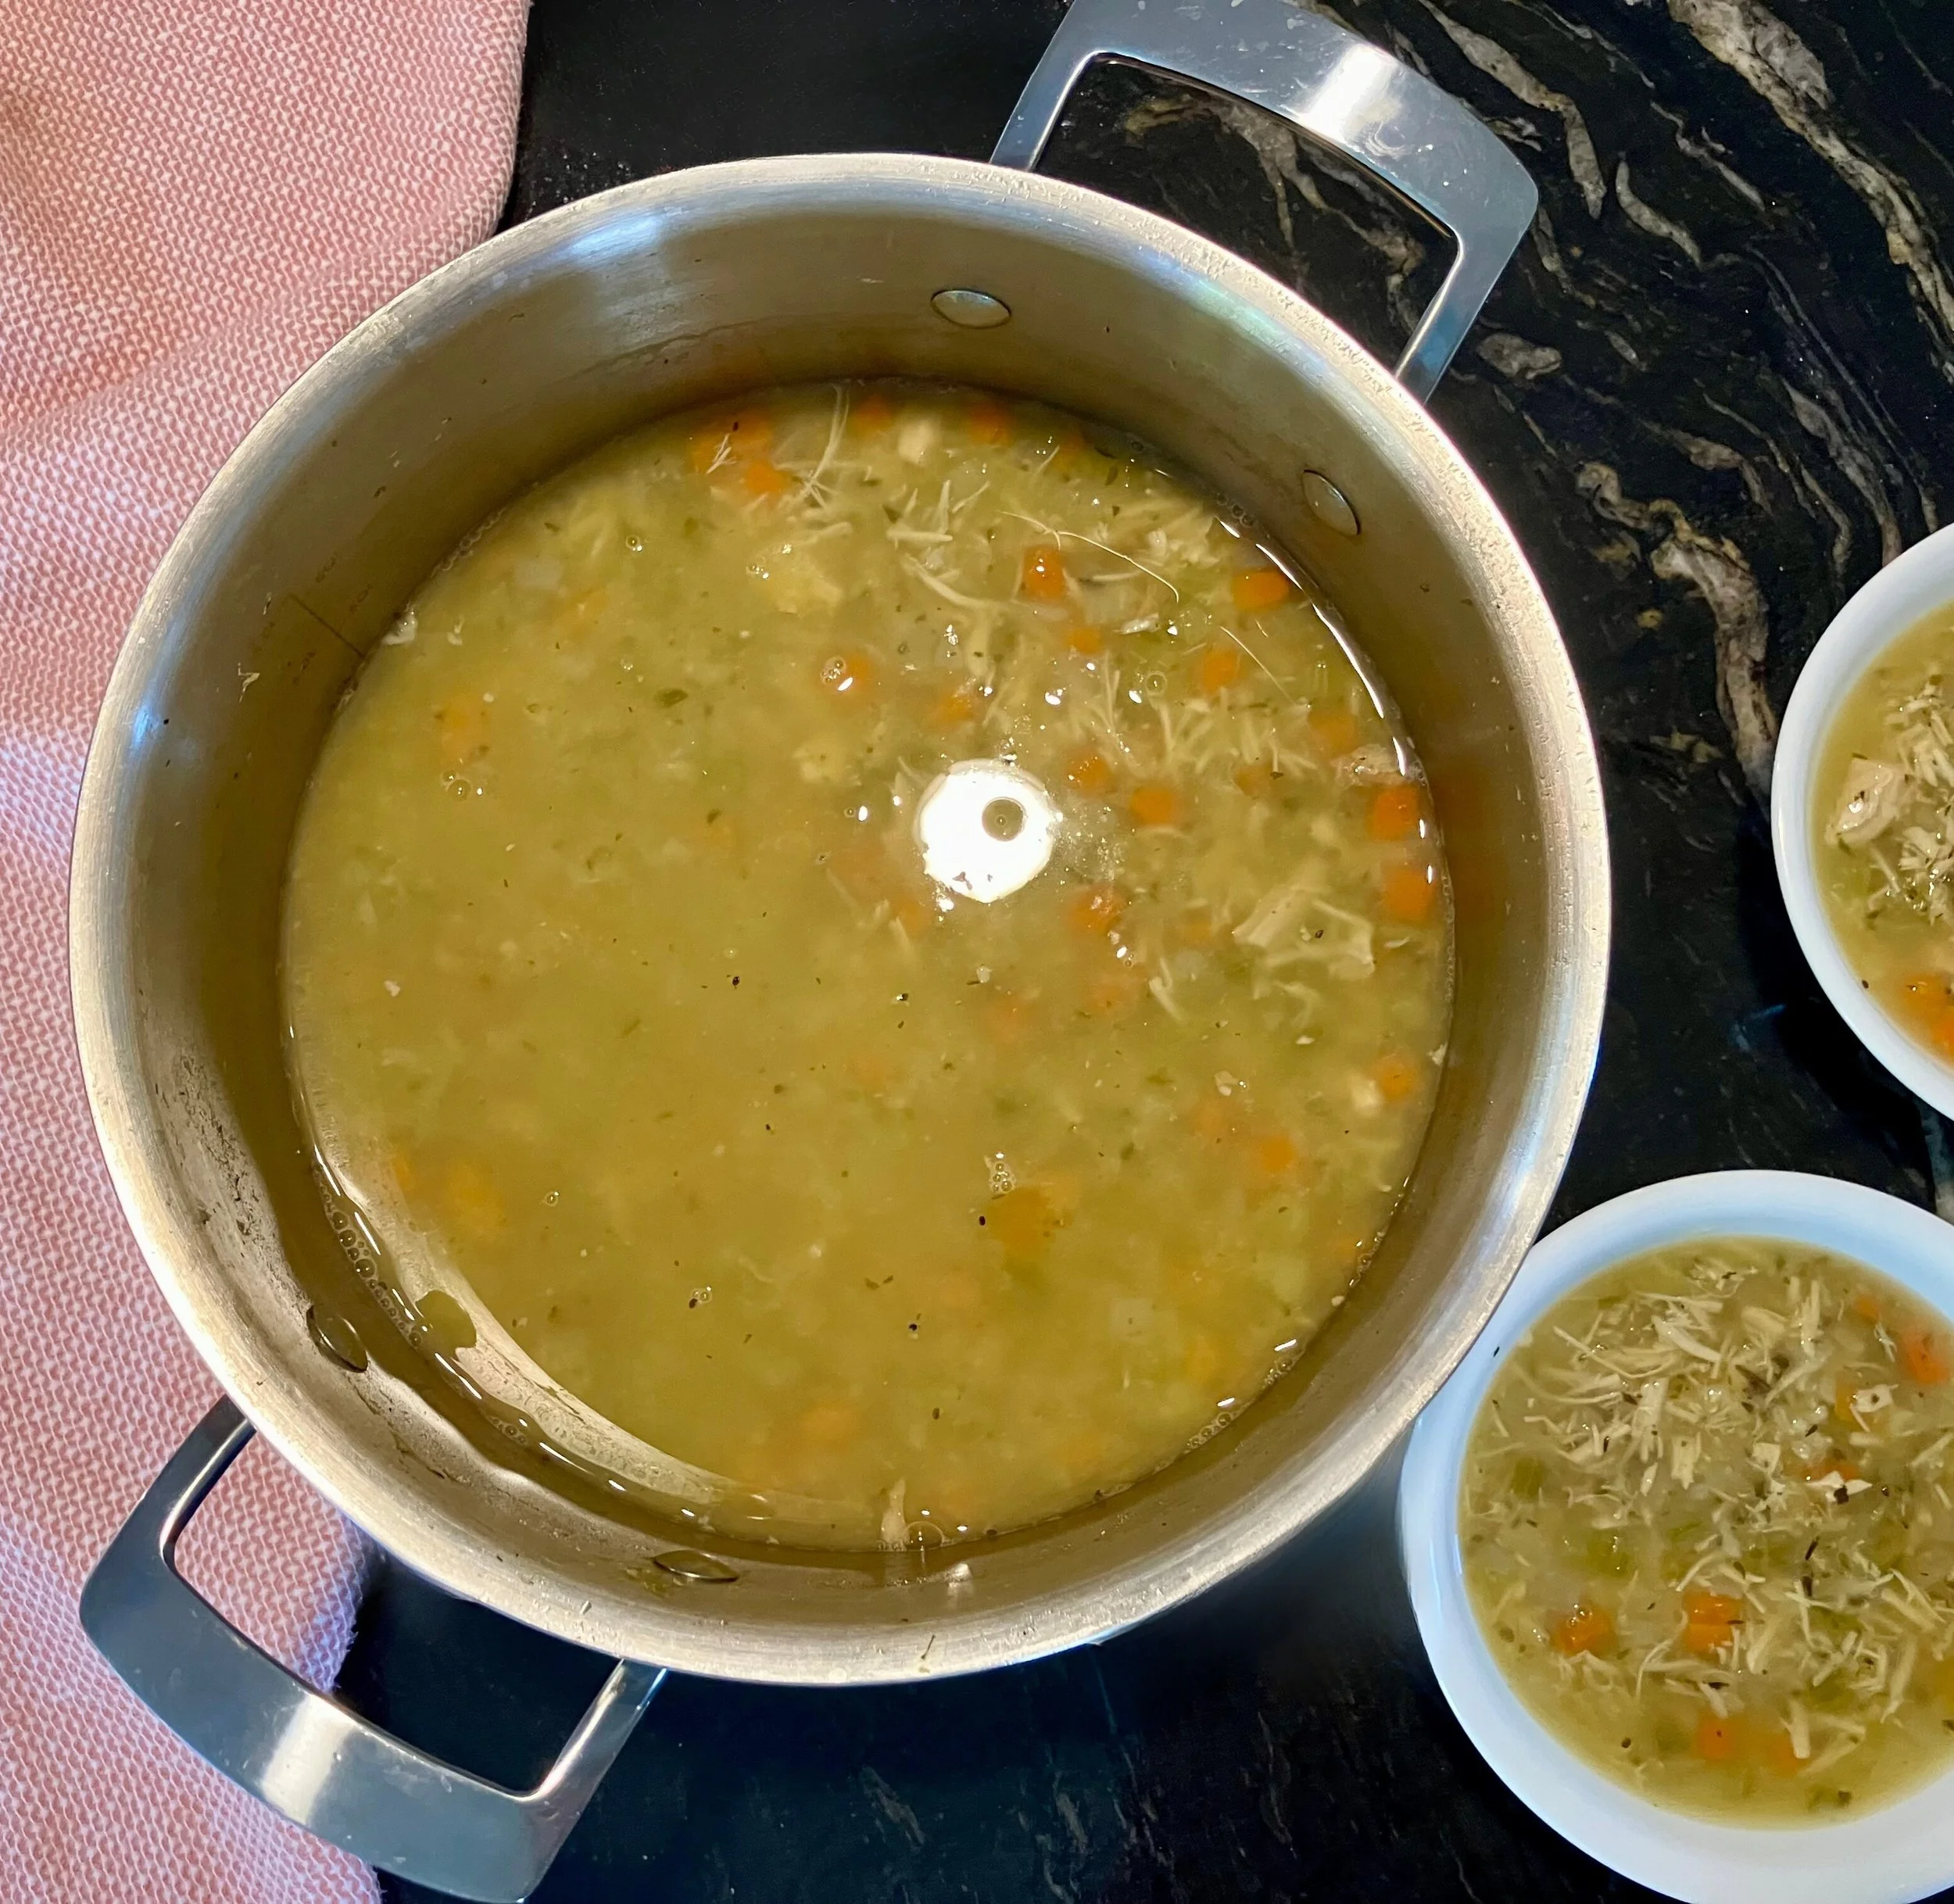
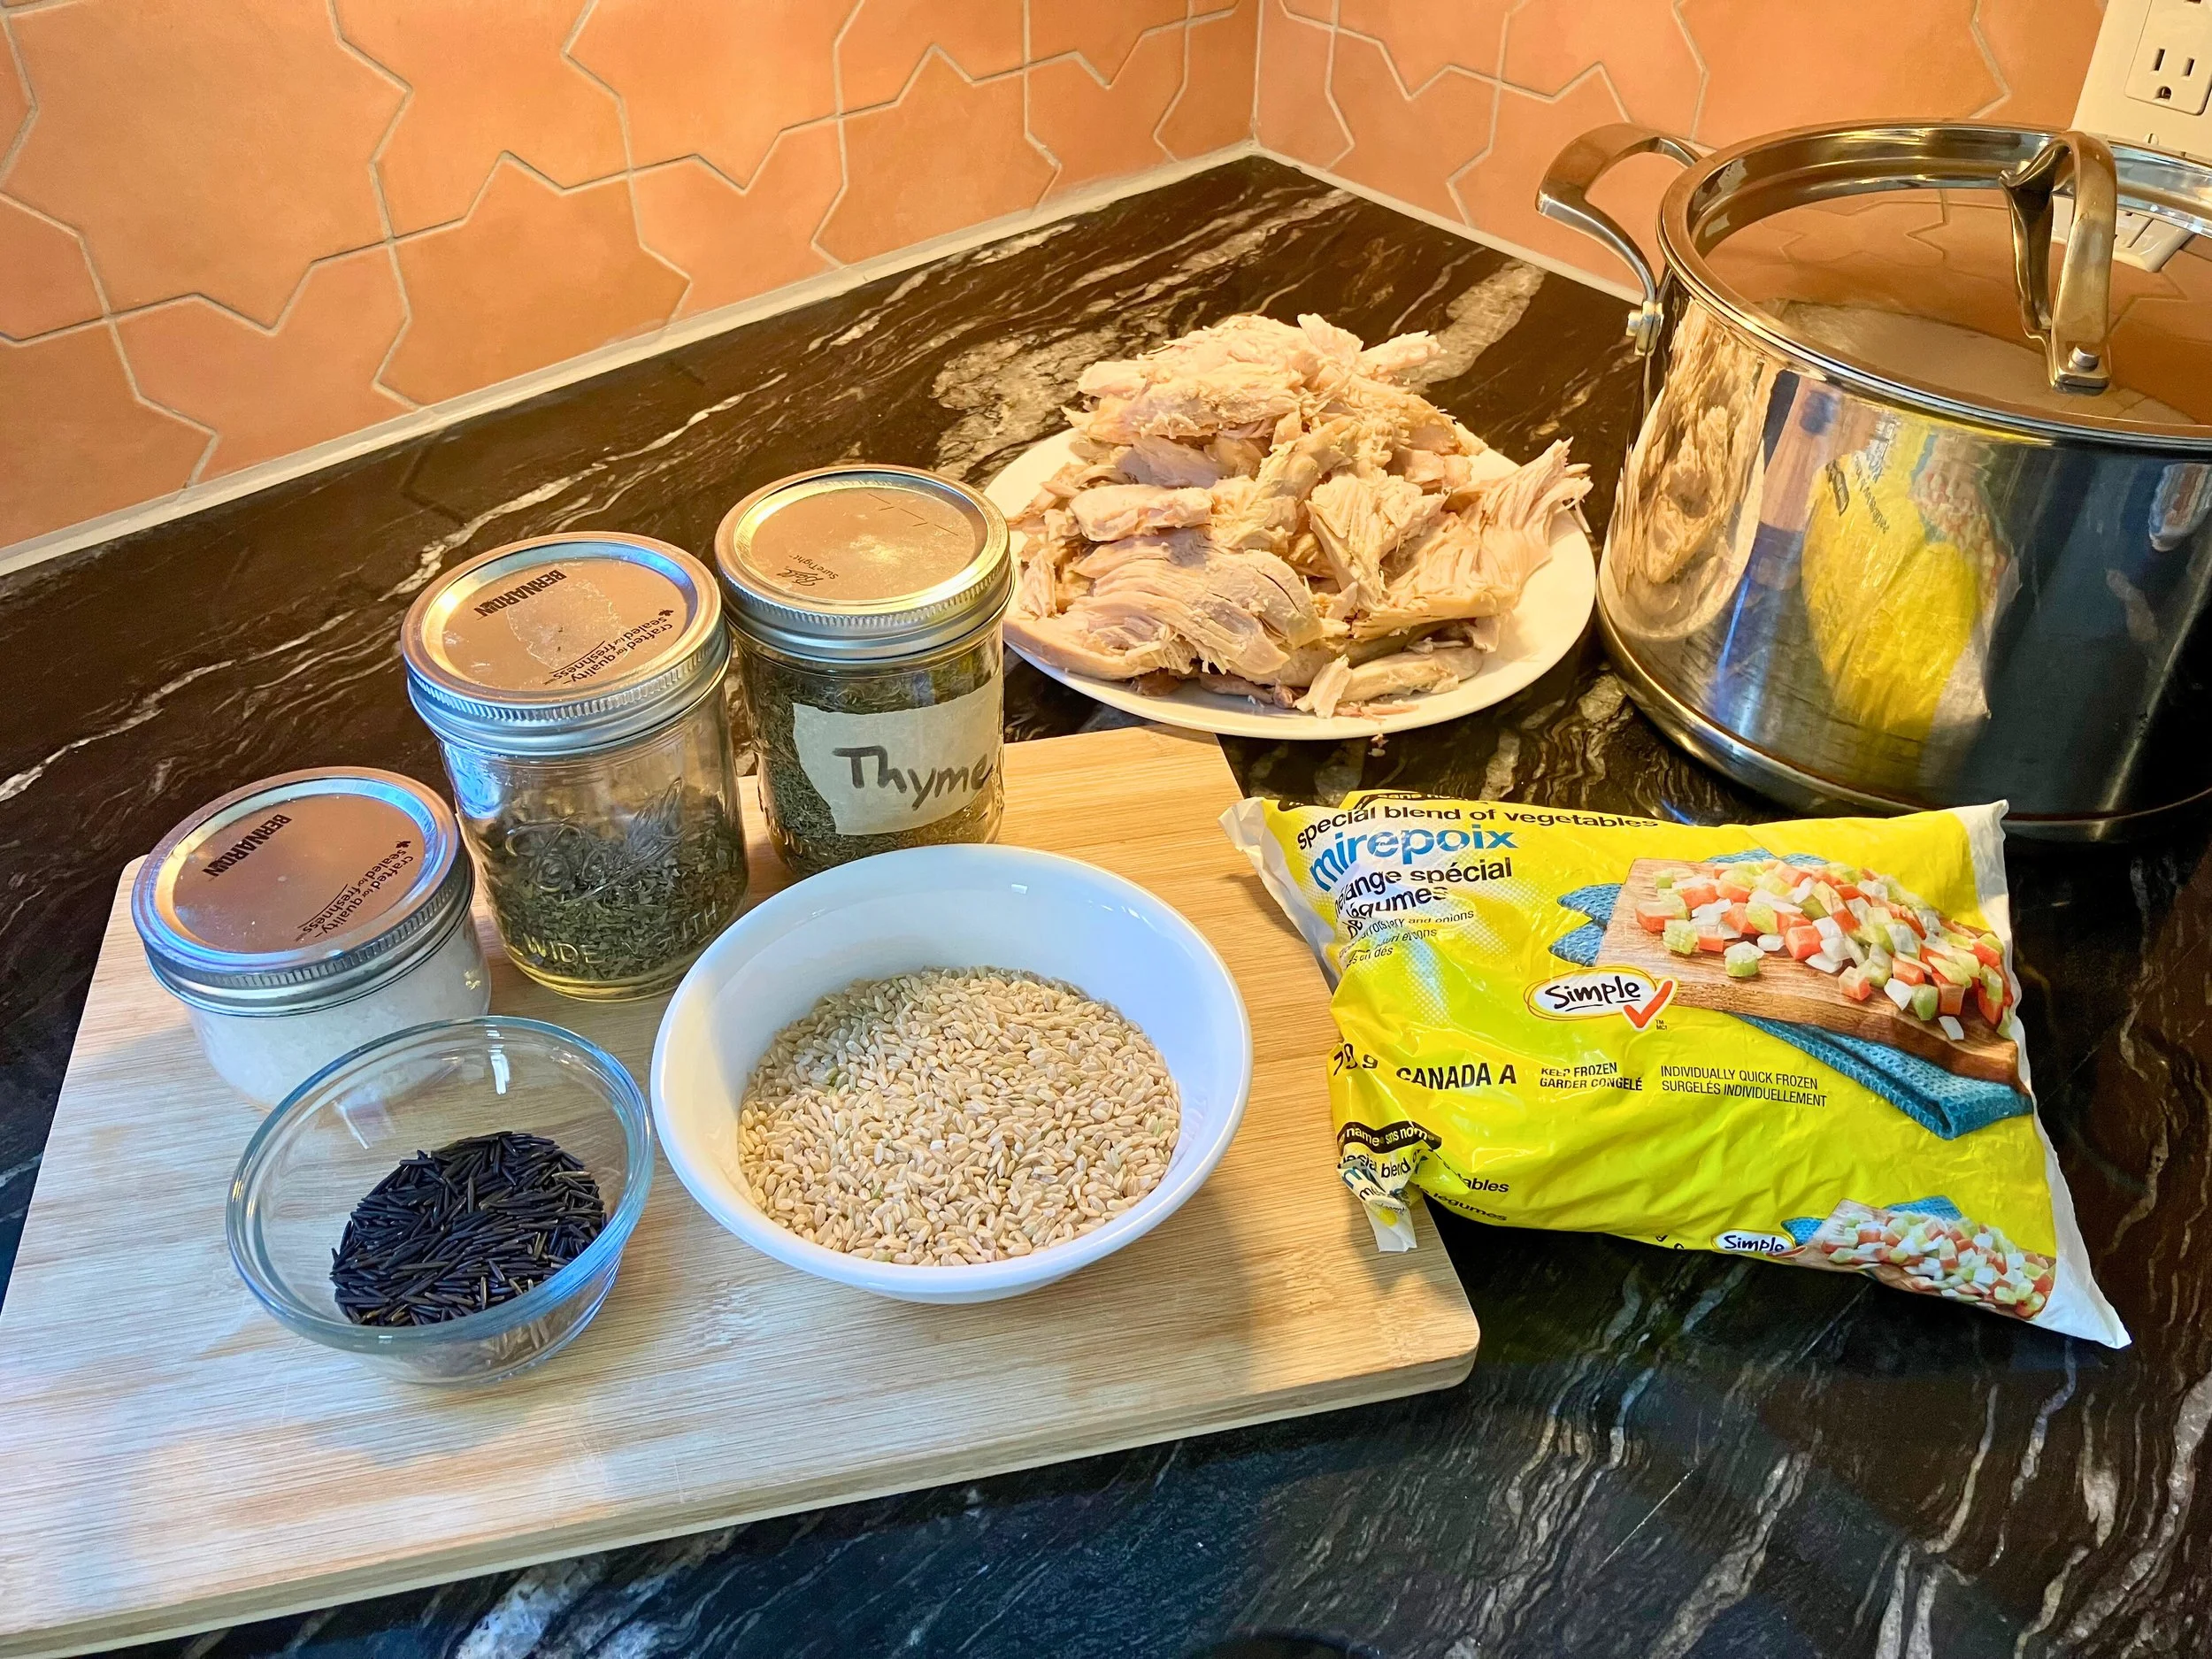
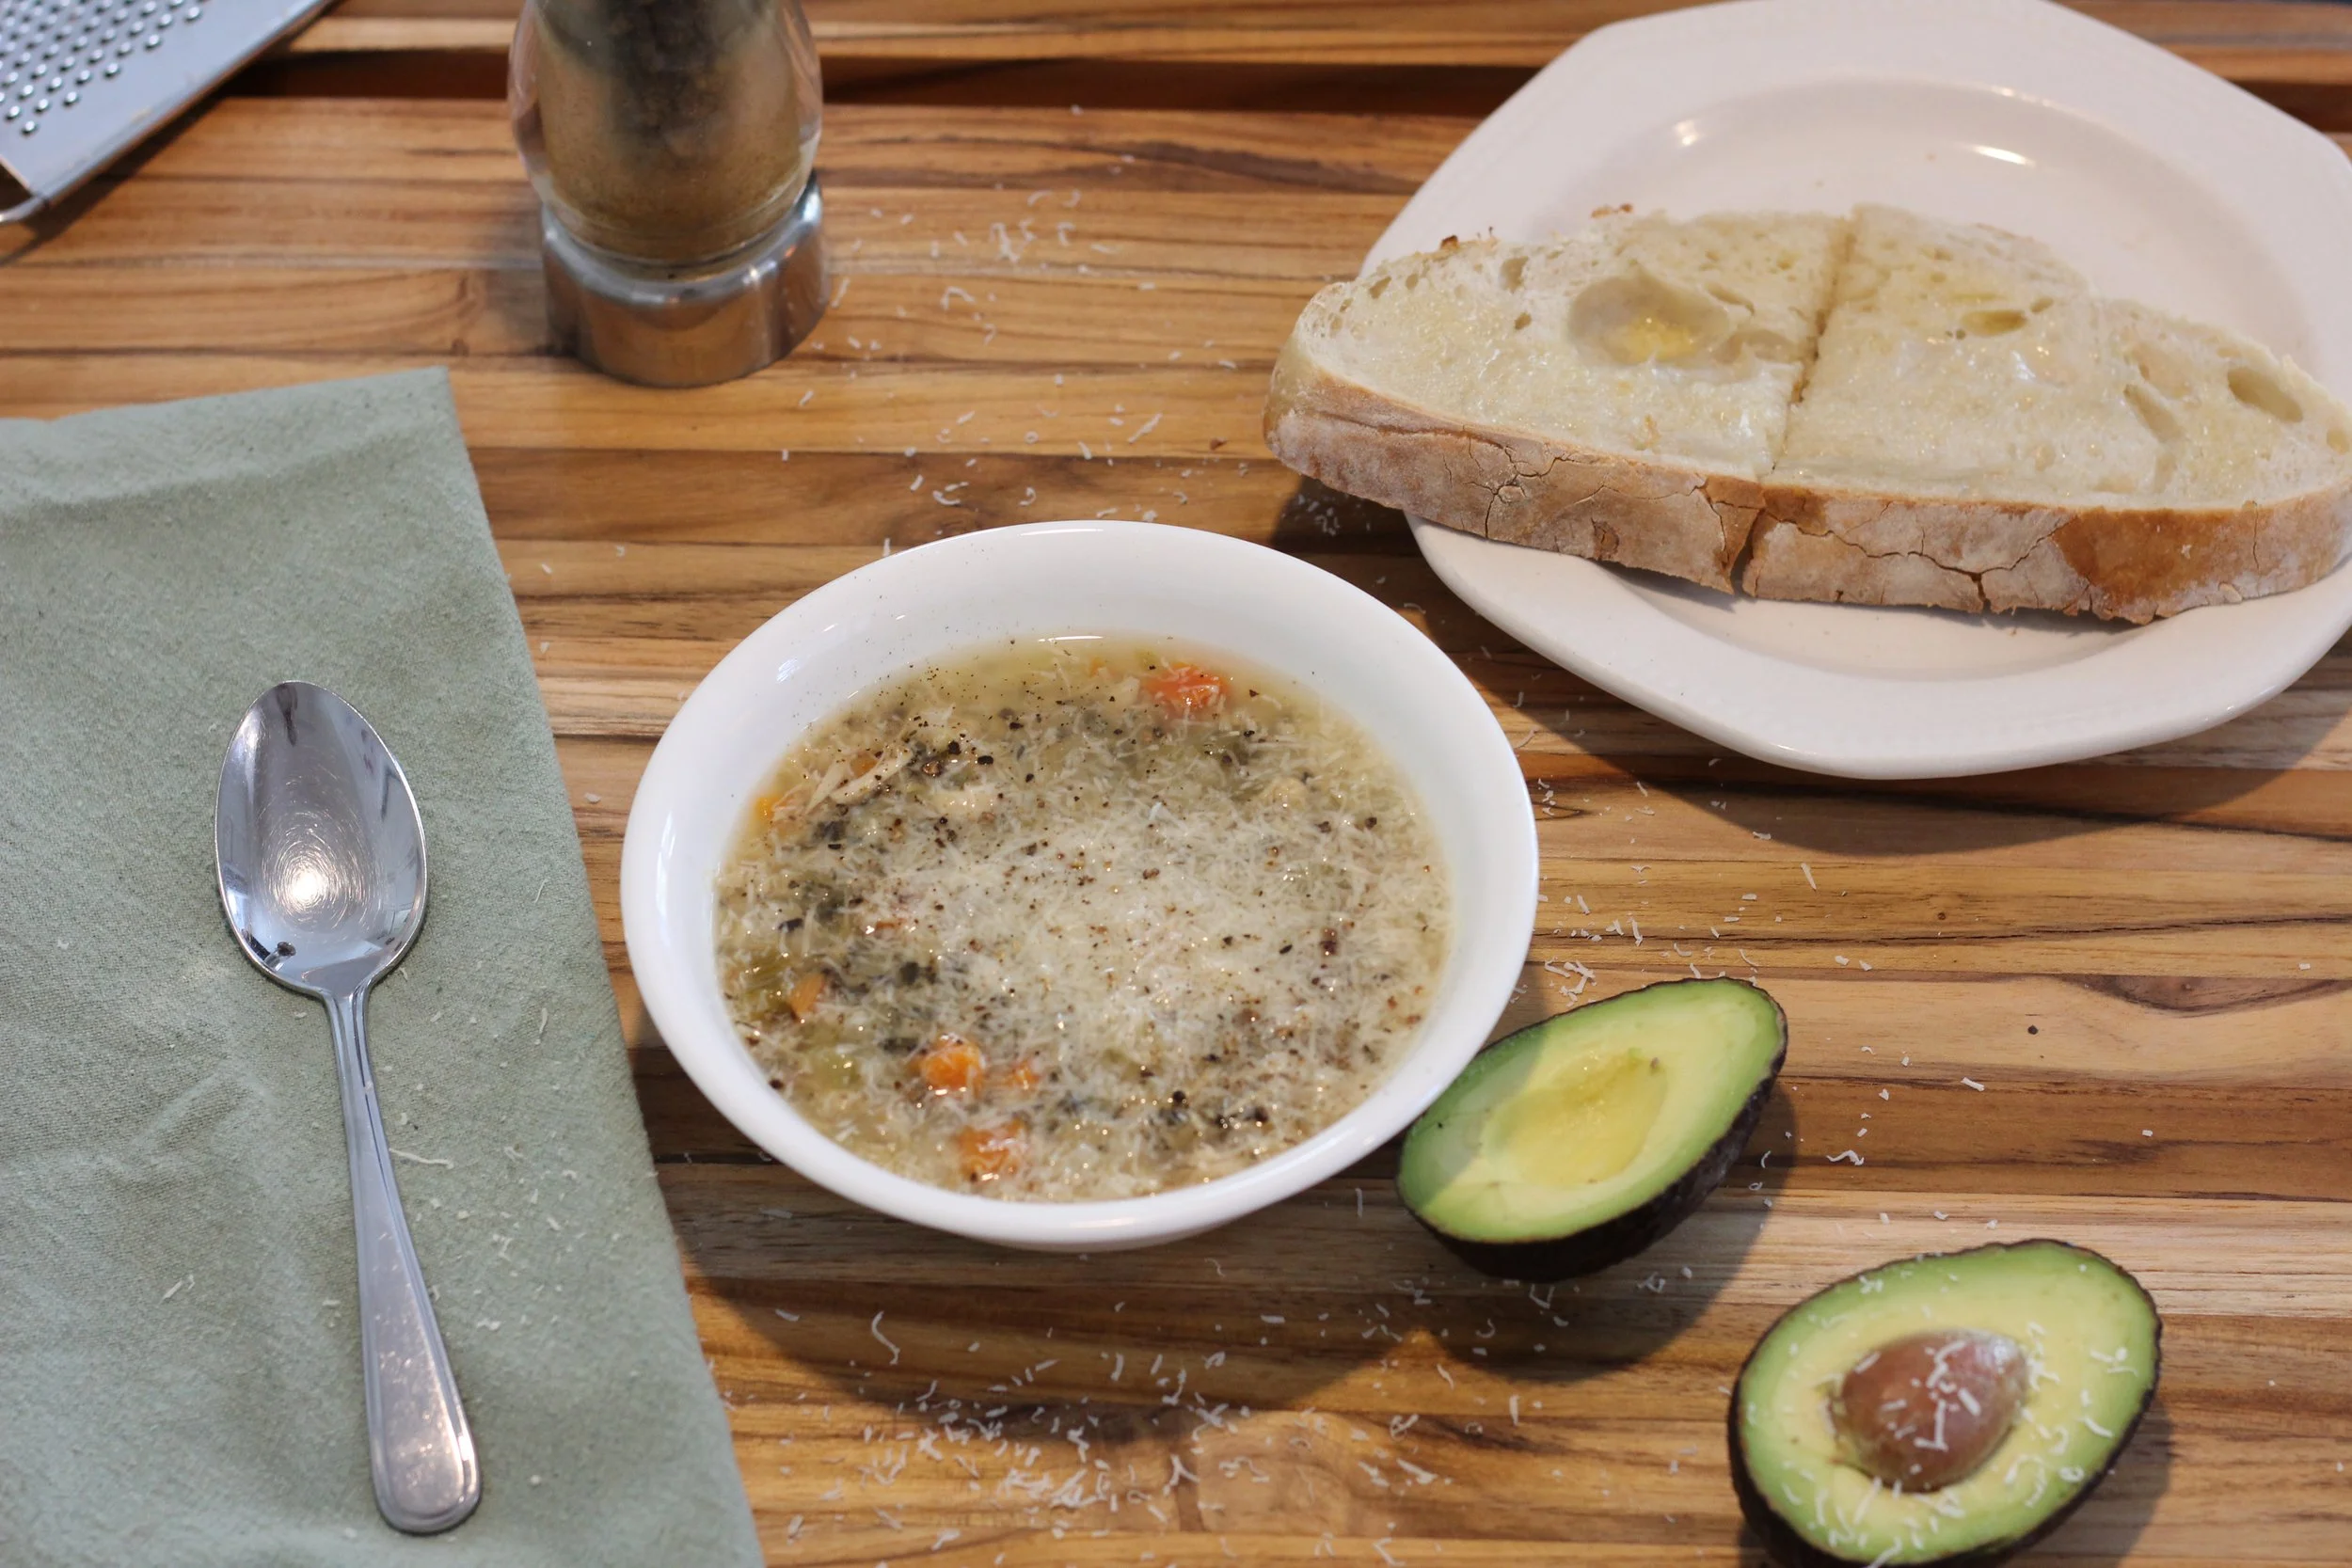
Did you make this recipe? I want to see it!
Leave a picture and a ⭐ star rating and comment below to let us know how your muffins turned out. Did you make any substitutions or additions? Share your tips and photos with us!
Share this recipe: Help others discover this delicious recipe by sharing it on Pinterest, Facebook, or Instagram. Tag us @Sageandsimplicity so we can see your beautiful creations!
📌 Pin it for later: Save this recipe to your Pinterest boards for easy access.
You might also like:
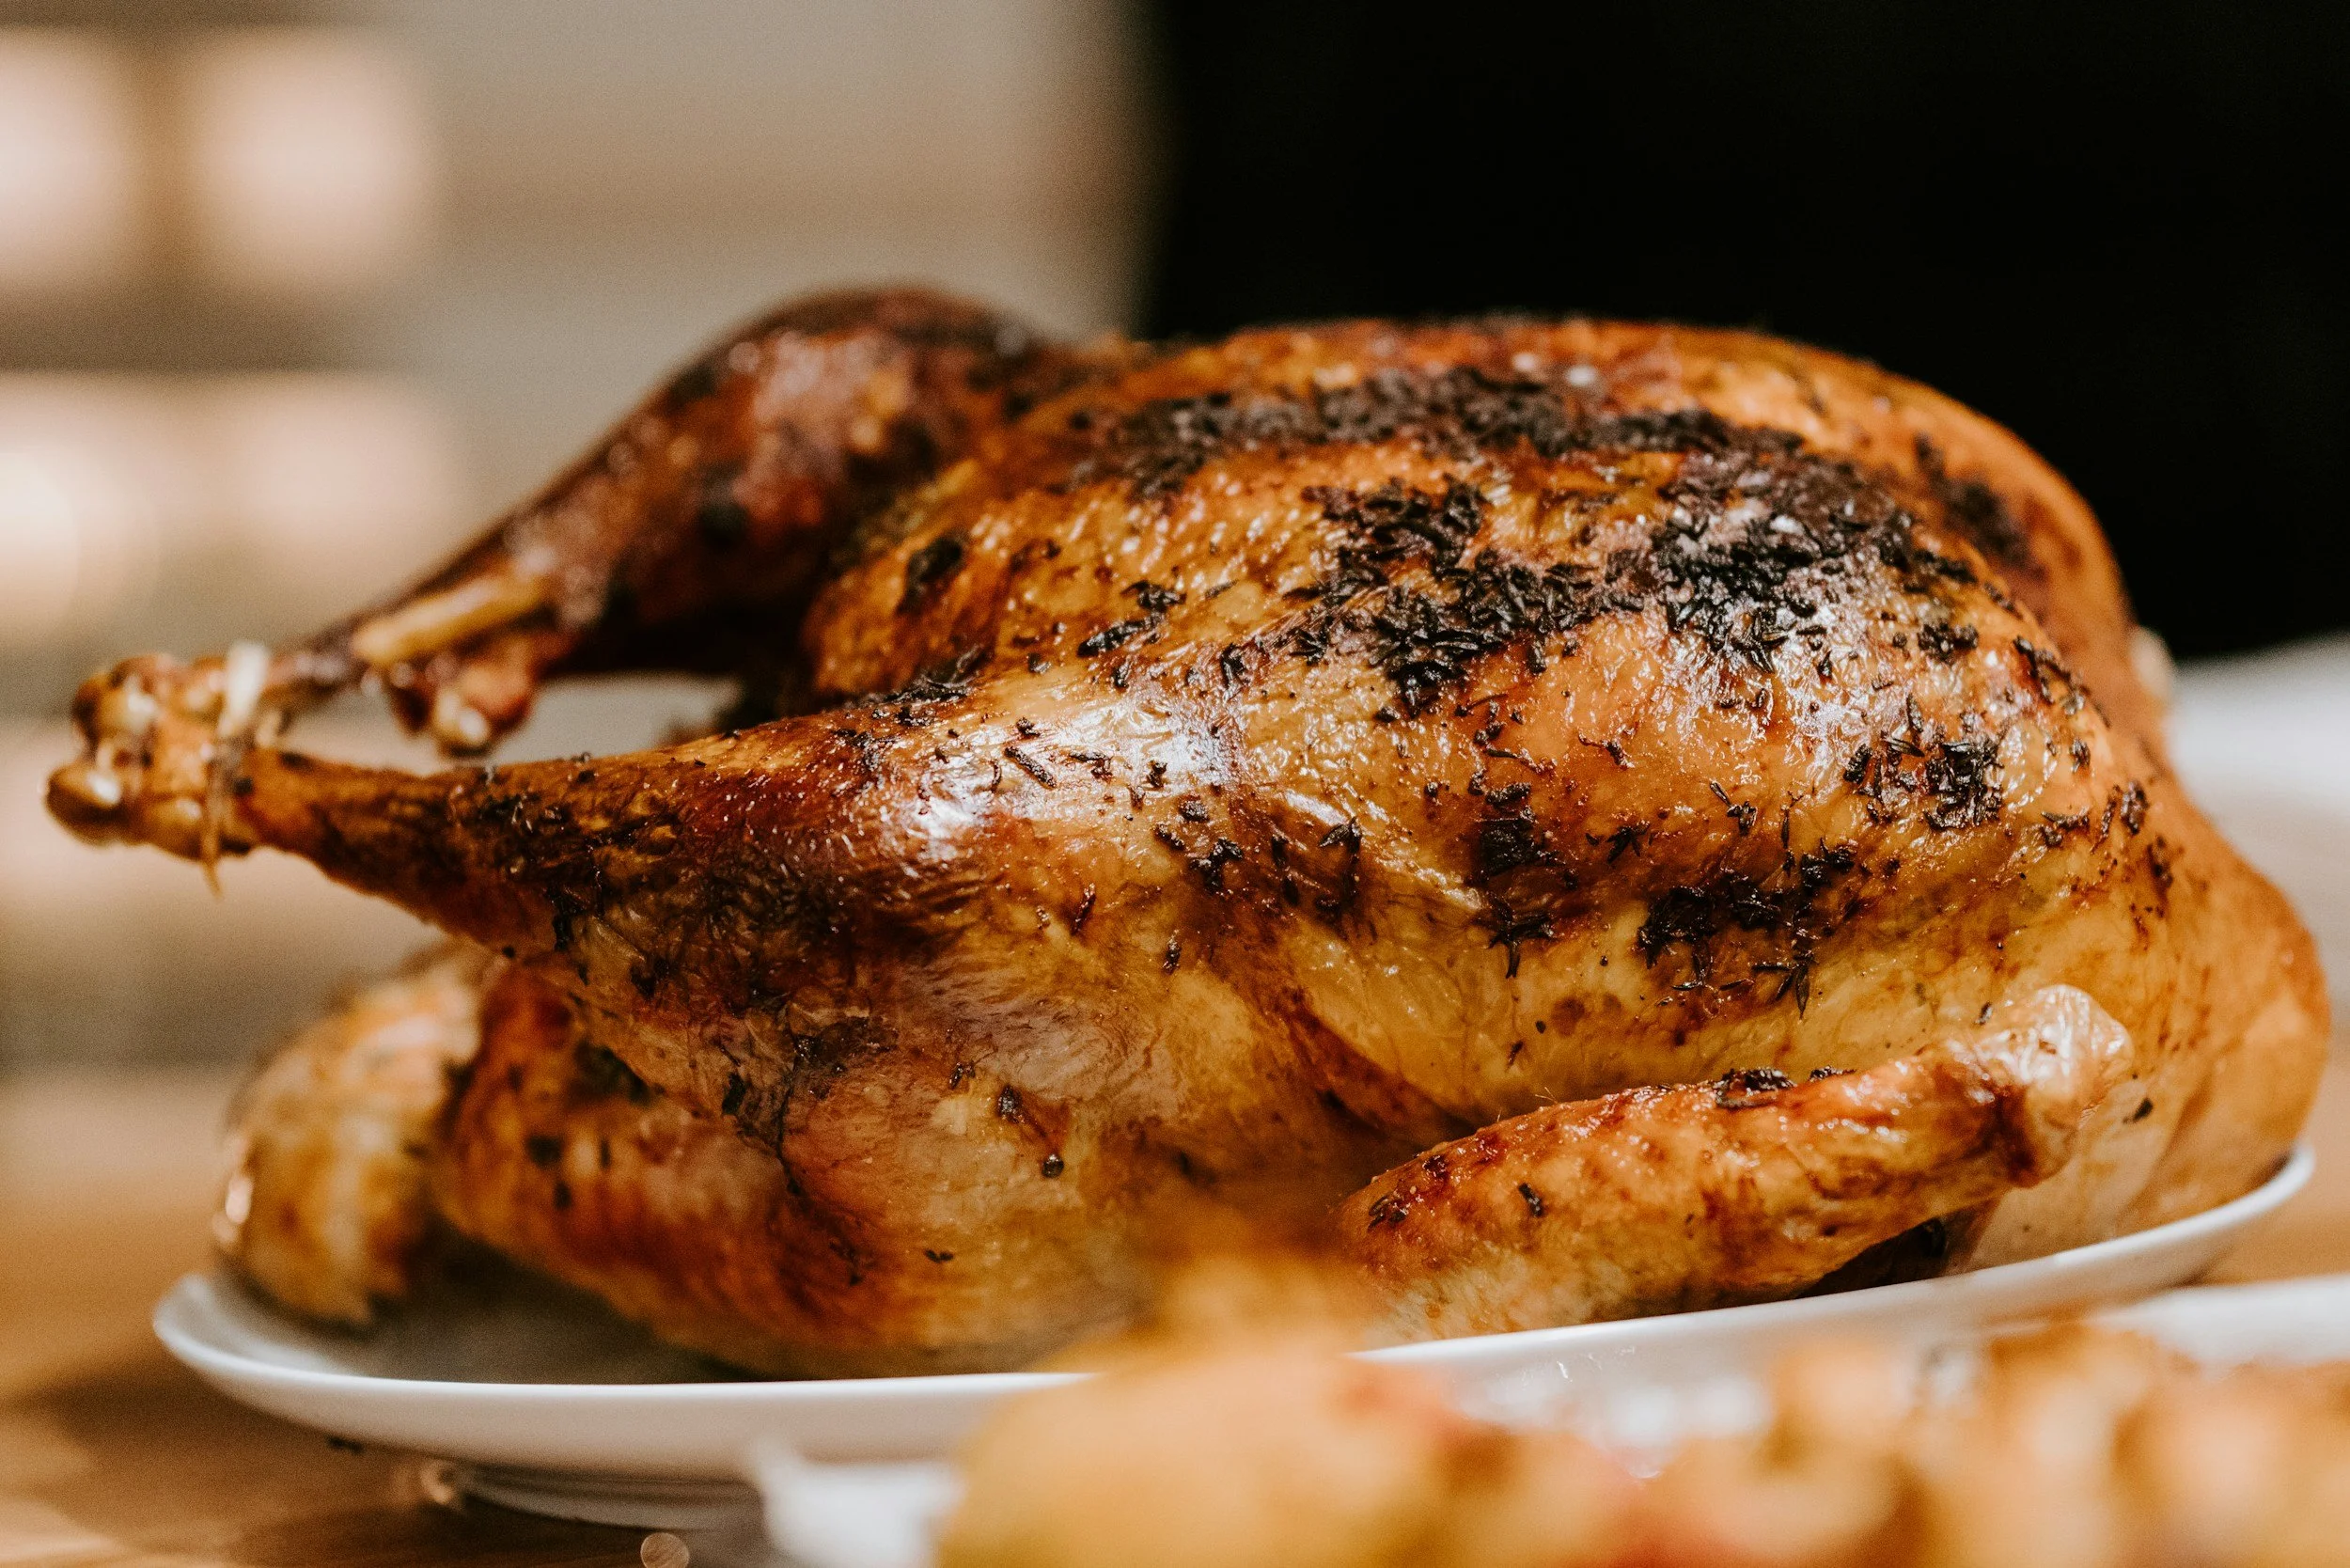
the no fuss way to bake a turkey!
Cooking a turkey doesn’t have to be complicated. Let me show you how!
As an Amazon Associate I earn from qualifying purchases.
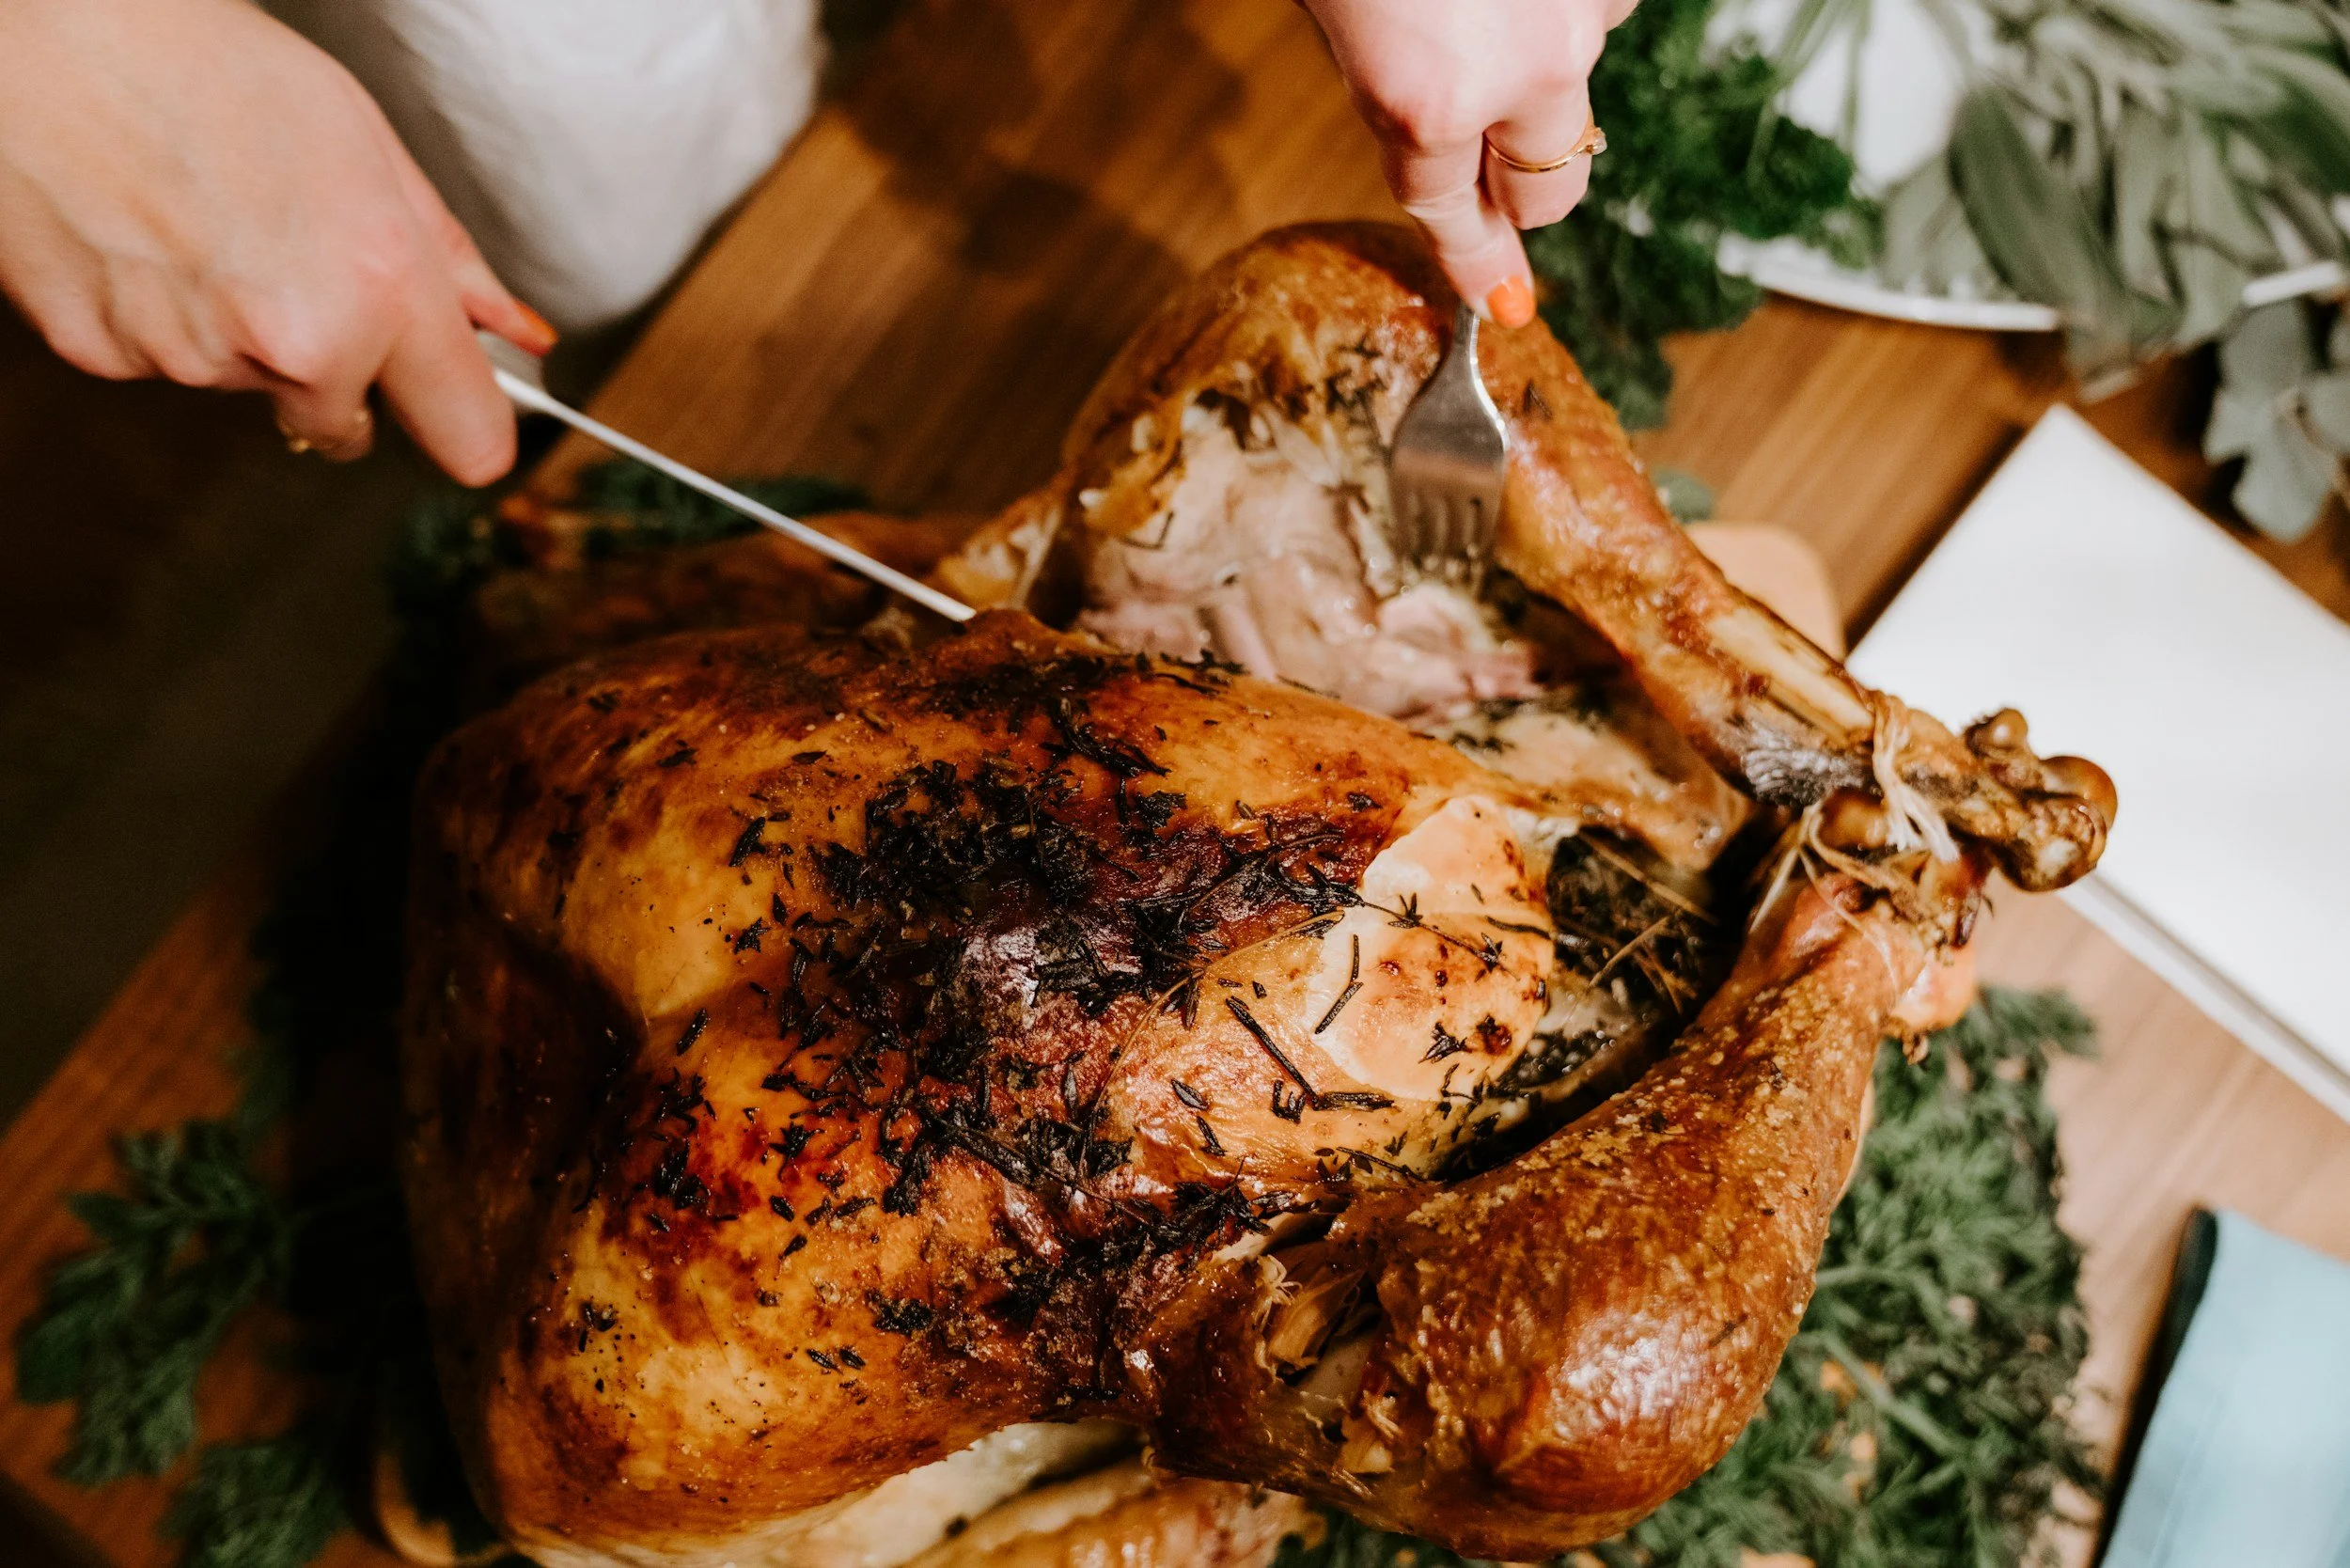
Cook your turkey the simple, easy way!
The Ultimate No-Fuss Way to Bake a Turkey (Just a few Ingredients that are probably always in your pantry!)
If the idea of cooking a turkey fills you with stress, long prep lists, and way too many opinions—you’re going to love this.
This is the no-fuss, no-frills, no-panic way to bake a turkey.
No brining.
No butter under the skin.
No chopping, stuffing, or basting every 20 minutes.
Just a few ingredients:
Salt
A turkey
A little bit of water
Rosemary
Dried Thyme
Dried Basil
Ground Pepper
Powdered Sage
Powdered Garlic
That’s it.
And the best part? The gravy that comes from this method is rich, deeply flavoured, and completely homemade—using the turkey juices and coming together in minutes.
This method saves TONES of time, stress, and mental energy, while still delivering a juicy turkey and incredible gravy.

Why This No-Fuss Turkey Method Works
Turkey already has everything it needs to taste good. When you cook it gently, simply, and without overhandling it, the flavour stays where it belongs—inside the bird and in the pan juices.
Instead of fussing with extras, this method focuses on:
Moist heat
Consistent roasting
Letting the turkey do the work
The result:
Juicy meat
A flavour-packed roasting pan
Gravy that tastes like you worked much harder than you did
Ingredients (Yes, Really)
You only need:
Salt
1 whole turkey (any size)
Water (about 2-4 cups, depending on your pan)
Rosemary, 1 tbsp
Dried Thyme, 1 tbsp
Dried Basil, 1 tbsp
Ground Pepper, 1 tbsp
Powdered Sage, 1 tbsp
Powdered Garlic, 1 tbsp
The flavour comes later—in the gravy.
Equipment
Roaster Pan with Lid
Ladle (affiliate link)
Knife
Large Cutting Board, perferably with juice grooves
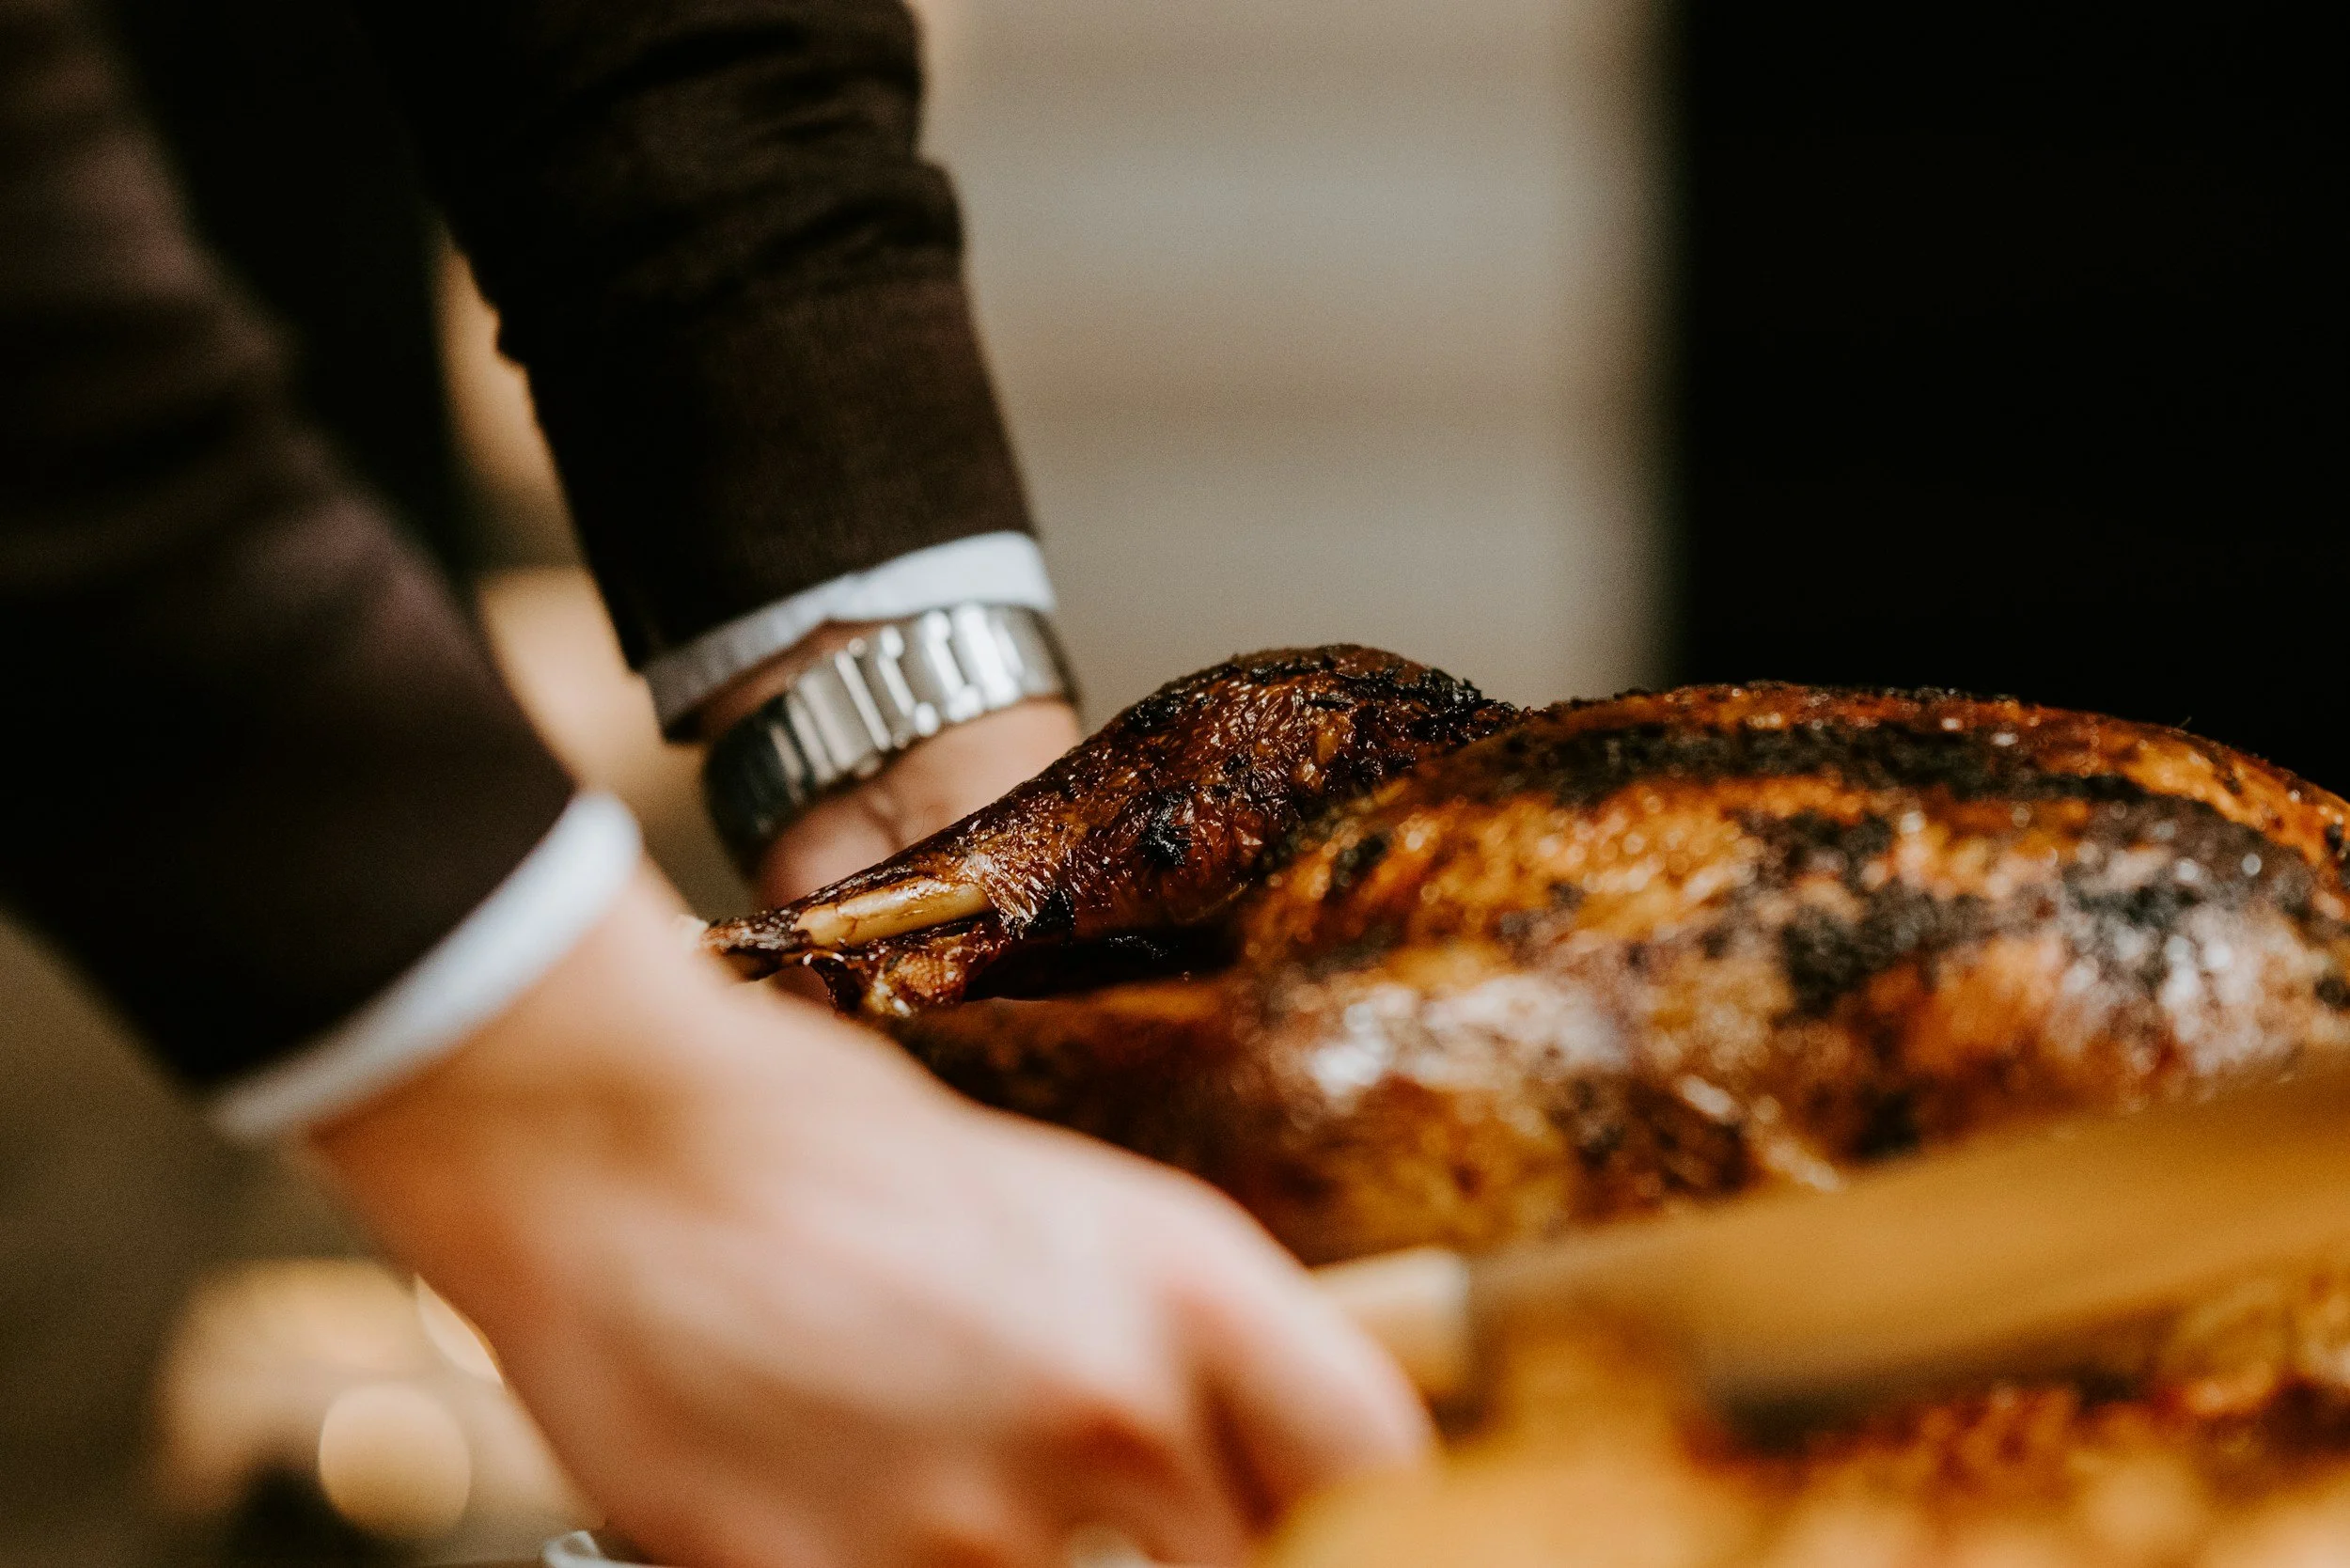
How to Bake a Turkey the No-Fuss Way
1. If the turkey is frozen, place it in a roasting pan in the fridge to thaw it out 3 days before you plan on cooking and serving. Keep the turkey in its original wrapping, but put it in a roasting pan to contain the juices as it thaws.
If your turkey is large, give yourself an extra day a to thaw it out.
2. The night before:
Take the turkey out of the wrapping and put it breast side up in the roaster. Rub the salt on the turkey breast and thighs, I like to use kosher salt. Cover and put in the fridge overnight.
2.The next day, preheat the oven
Preheat your oven to 350°F.
This lower, steady temperature helps the turkey cook evenly and stay moist.
3. Prepare the Pan
Pour 2-4 cups of water into the bottom of the pan. The water:
Prevents drippings from burning
Creates steam for moisture
Sets you up for incredible gravy later, if that’s a project you’d like to take on.
4. Prepare the herb and spice mixture and rub it on the turkey
Add the herbs and spice (rosemary, thyme, basil, sage garlic powder, pepper) in a bowl or ramekin, and give it a stir. Rub that beautiful herbs and spice mixture on the turkey.
That’s the prep, you’re done!
5. Roast (Without Fussing)
Roast the turkey covered until it reaches a safe internal temperature:
165°F (74°C) in the thickest part of the breast
175–180°F (79–82°C) in the thigh
Cooking time will depend on the size of your turkey, but a general guideline is about 13–15 minutes per pound.
No rotating.
No checking every 10 minutes. I do recommend taking a laddle (affiliate link) and basting it every 30-60 minutes.
Put it in the oven and let it cook.
4. Rest the Turkey
Once cooked, remove the turkey from the oven and transfer it to a cutting board.
Tent loosely with foil and let it rest for 15-20 minutes.
This is when the magic happens:
Juices redistribute into the meat
The pan juices concentrate
In the mean time, you take a few minutes to make the gravy.
The Best Part: No-Fuss, Flavour-Loaded Gravy
While the turkey is resting, take a few minutes to out the gravy together. Its comes together quickly with pantry staples. This gravy is where all the flavour lives—and like I said, the best part is it comes together in minutes.
Because the turkey roasted simply, the pan juices are:
Clean
Rich
Intensely turkey-flavoured
No burned bits. No competing flavours.
Why This Method Saves So Much Time and Stress
No prep work
No ingredient shopping
No complicated steps
No second-guessing yourself
You free up:
Counter space
Mental energy
Time to focus on sides, guests, or resting
This is especially perfect if:
You’re hosting and juggling a lot
You’re cooking turkey for the first time
You want great results without pressure

Final Thoughts: Simple Is Not the Same as Boring
This no-fuss turkey proves that less effort doesn’t mean less flavour.
By keeping the turkey simple and letting the gravy carry the seasoning, you get:
Juicy, reliable results
Incredible homemade gravy
A calmer, more enjoyable cooking experience
Sometimes the easiest way really is the best way.
Here’s the recipe!
Ingredients:
Whole Turkey
Water, 2-4 cups
Rosemary, 1 tbsp
Dried Thyme, 1 tbsp
Dried Basil, 1 tbsp
Ground Pepper, 1 tbsp
Powdered Sage, 1 tbsp
Powdered Garlic, 1 tbsp
Instructions:
If the turkey is frozen, place it in the fridge to thaw it out 3 days before you plan on cooking and serving. Keep the turkey in its original wrapping, but be sure to put it in a roasting pan to contain the juices as it thaws. If your turkey is large, give yourself an extra day to thaw it out. Pro tip: Put the frozen turkey in a roasting pan while in the fridge, to catch the turkey juice as it thaws out.
The night before: Remove the turkey from the wrapper. Remove the plastic hook that’s hooked on the inside of the turkey legs, the neck and bag that contains the heart and liver from the turkey cavity, and put it in the fridge of you plan on using it during cooking or if you plan on making turkey broth.
Cut the excess skin, and tissues that cover the cavity to make handling easier.
Rub the salt on the turkey skin. Put the roaster lid back on. Put the roaster in the fridge overnight.
The morning of: Preheat the oven to 350F.
Remove the roaster from the fridge.
Remove the turkey juices from the bottom of the pan and fill it with water up to the halfway point, roughly 2-4 cups.
Add the herbs and spice, rosemary, thyme, sage, garlic powder, pepper in a bowl or ramekin, and give it a stir so the mixture is mixed well. Rub the herbs and spice mix on the turkey skin.
Optional: add your favourite stuffing in the turkey cavity.
Optional: Take the turkey neck, heart and liver out of the bag, and add them to the bottom of the pan if you or your guests would like them, or keep them in the fridge and add them when making your broth at a later time.
Cook until the turkey reaches an internal temperature of 165F (74C), roughly 13-15 minutes per pound.
Let rest for 15-20 minutes before cutting it up.
Enjoy!
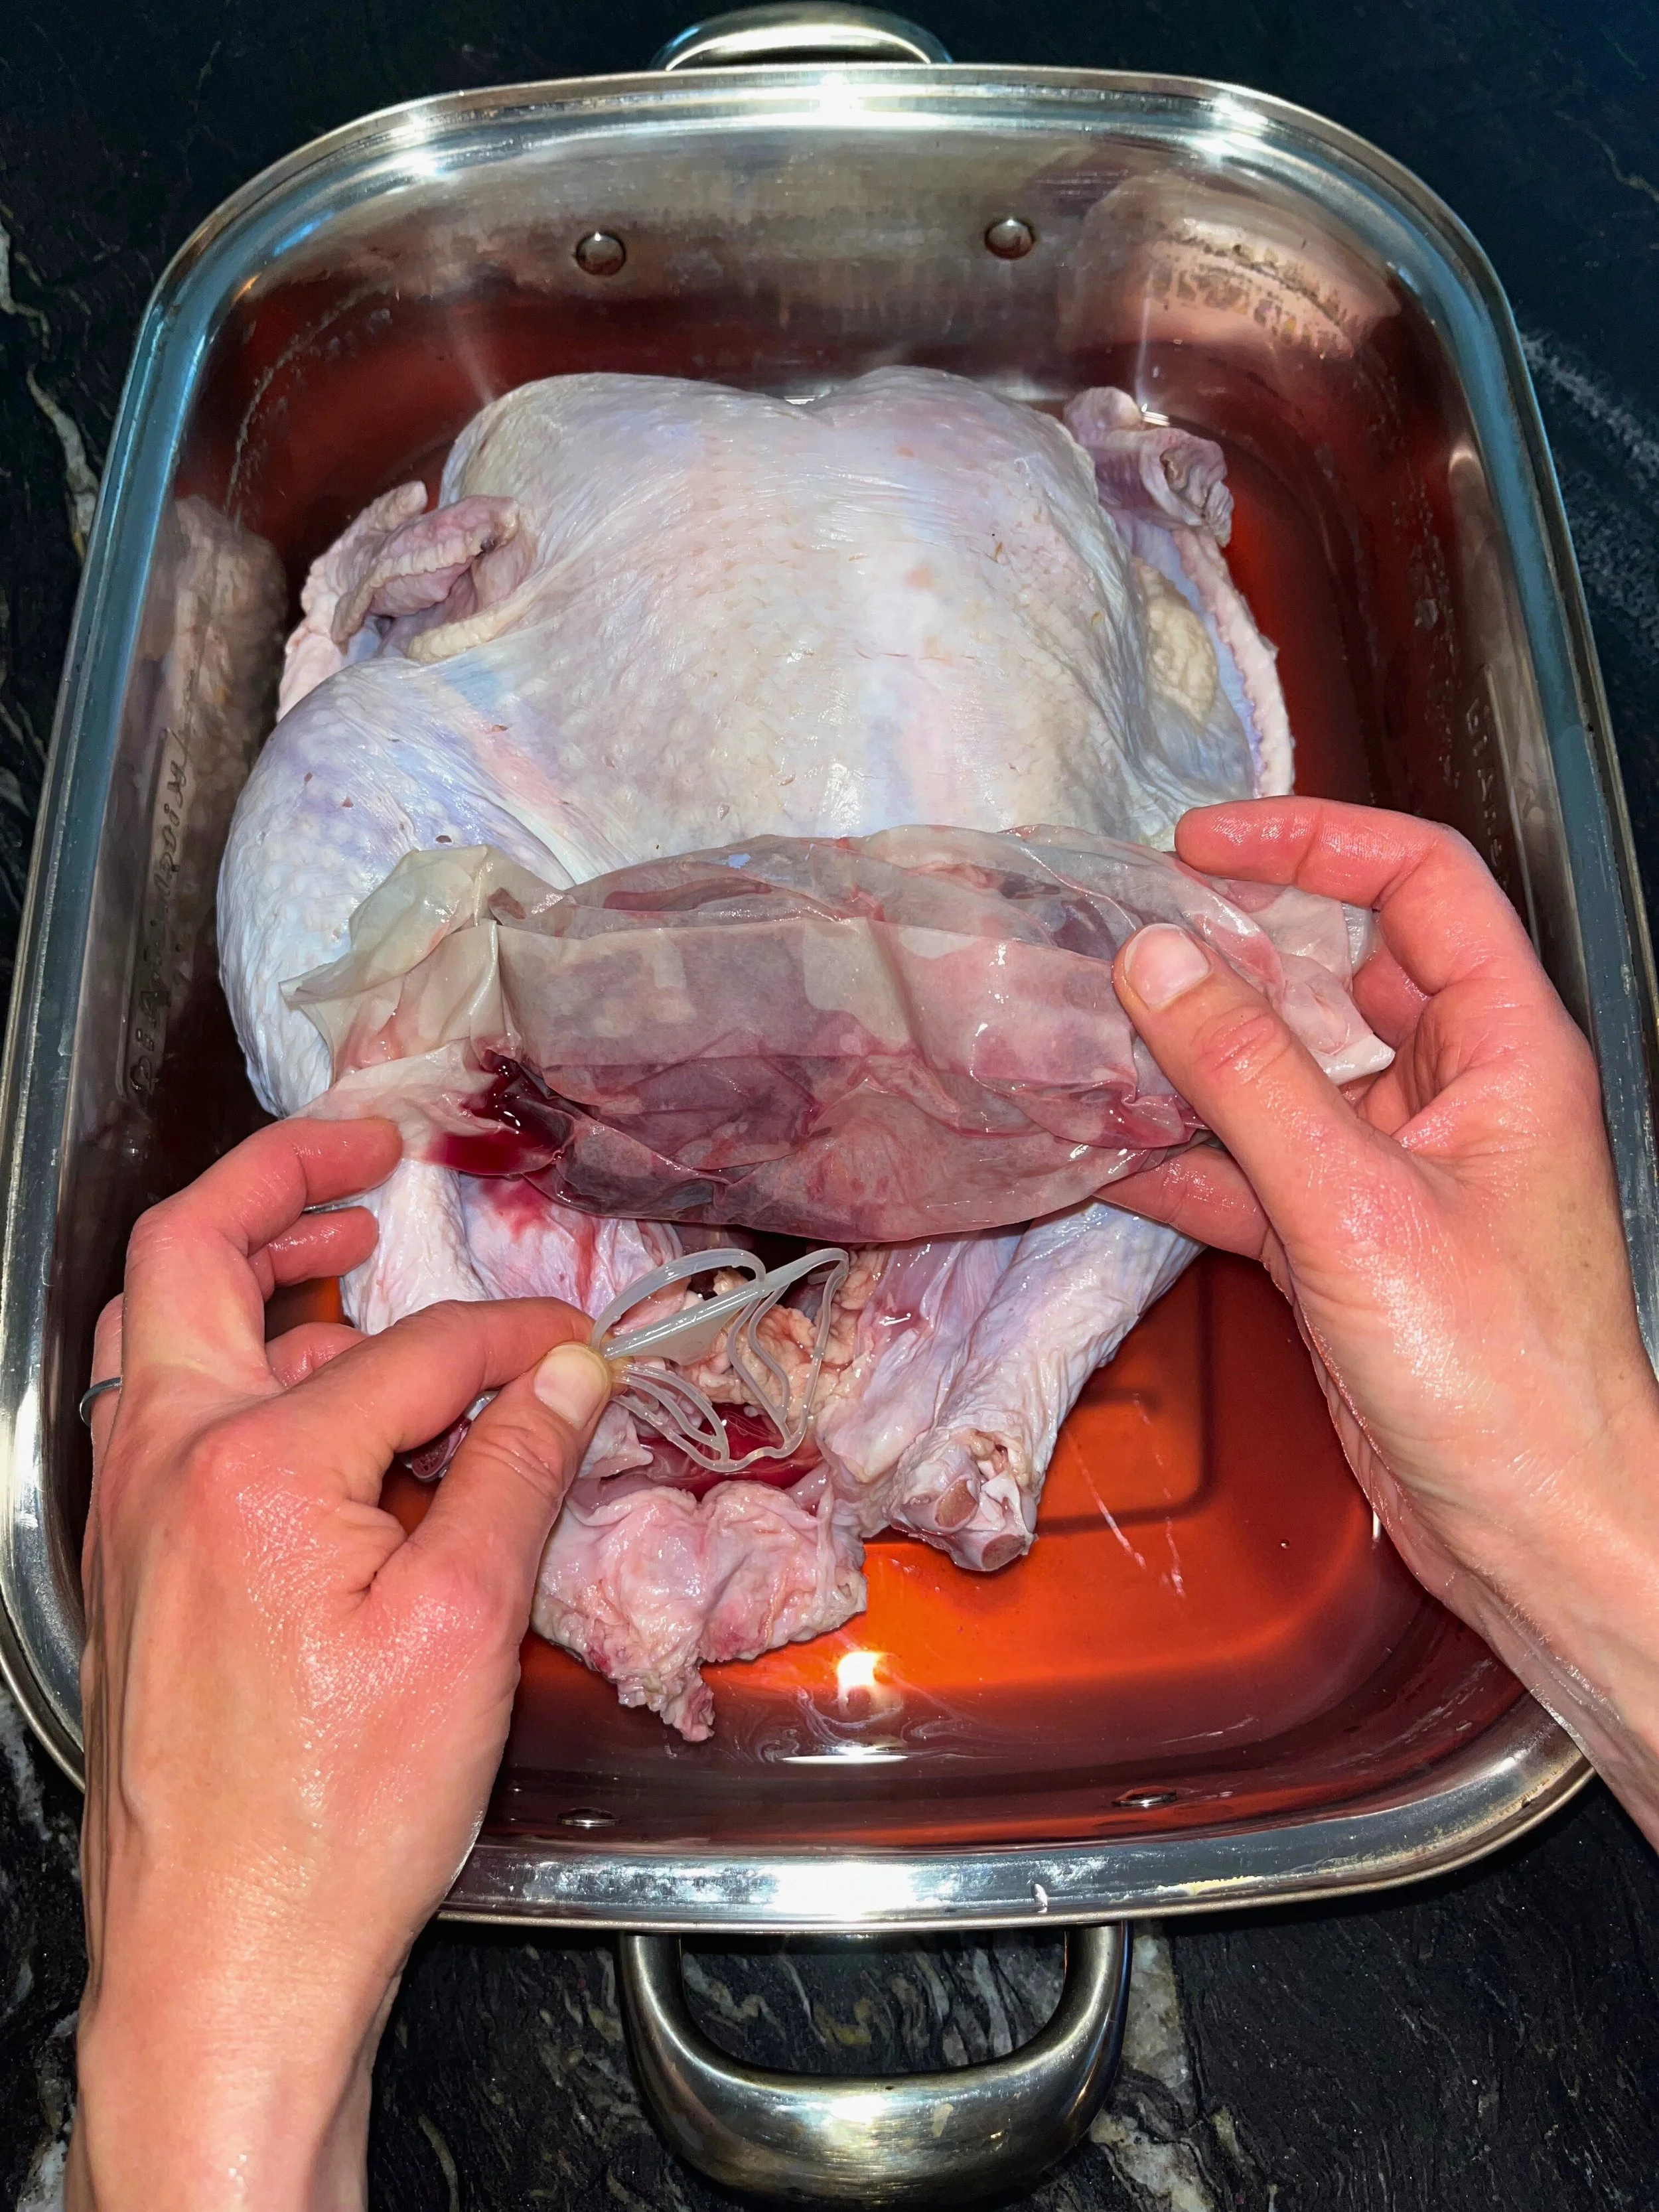

did you make this recipe? I want to see it!
Leave a picture and a ⭐ star rating and comment below to let us know how your muffins turned out. Did you make any substitutions or additions? Share your tips and photos with us!
Share this recipe: Help others discover this delicious recipe by sharing it on Pinterest, Facebook, or Instagram. Tag us @Sageandsimplicity so we can see your beautiful creations!
📌 Pin it for later: Save this recipe to your Pinterest boards for easy access.
you might also like these recipes:
a step-by-step guide to making Homemade Pumpkin Purée
Let me show you how to make pumpkin puree for pennies on the dollar! Click here to learn how.
As an Amazon Associate I earn from qualifying purchases.
📖 Jump to Recipe | 💬 Jump to FAQs | 🖨️Print Recipe
Total Time: 1 hour | Difficulty: Easy

Why I love pumpkin purée!
When fall rolls in and the pumpkin-spice cravings hit, there’s nothing more satisfying—or more budget-friendly—than making your own pumpkin purée at home. If you’ve only ever bought the canned version, you’re in for a delightful surprise! Homemade pumpkin purée is incredibly easy to prepare, tastes fresher than anything on the shelf, and costs just pennies on the dollar. Once you try it, you may never go back to store-bought again.
The beauty of this simple kitchen project is that it requires just one ingredient: pumpkin, and sometimes a little bit of water. That’s it! No additives, no preservatives, nothing extra. With a single sugar pumpkin (aka pie pumpkin)—and sometimes even a discounted clearance pumpkin after Halloween—you can batch-make enough purée to power countless fall recipes. Whether you’re baking a classic pumpkin pie, stirring up pumpkin pancakes, or whipping together a creamy autumn soup, fresh purée brings a richness and depth that are more affordable than the canned version.
Making your own pumpkin purée is surprisingly hands-off. Slice the pumpkin in half, scoop out the seeds (save them for roasting!), and let the oven do all the heavy lifting. As it bakes, your home fills with that cozy, earthy fall aroma that instantly puts you in the mood for soft sweaters and warm drinks. Once the pumpkin is fork-tender, you simply scoop out the flesh and blend until smooth. You’re left with a velvety purée that looks and tastes like pure autumn comfort.
One of the best perks? Homemade pumpkin purée freezes beautifully. Make a big batch now and portion it into bags or jars to freeze for the entire season. You’ll always have the star ingredient ready for whatever fall recipe inspiration strikes—pumpkin bread, lattes, muffins, overnight oats, you name it. With a freezer stash at the ready, you’re essentially giving your future self a cozy seasonal gift.
So this year, skip the canned aisle and go straight for the whole pumpkin. It’s easier than you think, far cheaper than buying ready-made, and the flavour payoff is absolutely worth it. Homemade pumpkin purée opens the door to all the pumpkin-spice magic fall has to offer—comforting, aromatic, and deliciously affordable.

What do I need to make Homemade Pumpkin Purée?
Ingredients:
Sugar Pumpkin
A little bit of water, roughly 1 cup
Equipment:
Baking sheet (affiliate link)
Spatula (affiliate link)
Blender (affiliate link) or Food Processor (affiliate link)
Cooling Rack (affiliate link)
a step-by-step guide to making pumpkin purée
step 1: prep the oven
Pre-heat the oven to 350F.
step 2: rinse the pumpkin
Rinse the pumpkin under cool water, rubbing off any dirt or mud that can be found on the skin. Pat dry. Cut the bottom of the pumpkin to make it stable.

step 3: cut the pumpkin in half, scoop out the seeds
Using a knife, cut the pumpkin in half. Using a soup spoon, scoop out the seeds. Set aside to make Roasted Pumpin Seeds, if desired.
step 4: peel the skin
Place the pumpkin flat side down. Using a knife ( I recommend a chefs knife), remove the skin on both halves of the pumpkin.
step 5: cut the pumpin into strips, then cubes
Cut the pumpkin into 2 inch (4.5 cm) strips, then cubes.
The ultimate budget friendly way to enjoy all of your favourite fall recipes!
step 6: add to a baking sheet with water
Add the raw pumpkin cubes to the baking sheet, and add 1 cup of water to the bottom of the pan. The water will steam the pumpkin cubes when baking in the oven.
step 7: bake
Place in the oven and bake for approx 30-45 minutes. Checking periodically to make sure that there still water at the bottom of the pan. Add a bit more, if it evaporates.

step 8: cool
The pumpkin cubes will be cooked when the pumpkin becomes a deep orange colour and edges become golden. To test, you should be to put a fork through them. Remove from the oven and let cool on a cooling rack (affiliate link) for at least 20 minutes.
step 9: blend
Once the pumpkin has cooled, add the cooked pumpkin to a blender or food processor and blend until smooth.

It’s so easy!
Storage
fridge:
keep this pumpkin puree in the fridge for up to 4 days.
Freezer:
Freeze in a freezer-safe bag or container for up to 3 months. I highly recommend pre-portion in 1 cup portions before freezing.
Frequently Asked Questions
can I use a carving pumpkin instead of a sugar pumpkin?
Yes! I’ve used this same technique for carving pumpkins as sugar pumpkins and got a similar result. The carving pumpkin is much larger than a sugar pumpkin so it will produce more puree. you might need to add a bit more water to the bottom of the pan when baking.
Pro Tip: Be sure to check you have enough baking sheets, storage bags or containers and storage room if using a carving pumpkin.
how much time does it take to make pumpkin purée?
Start to finish, the process takes 1-2 hours. I usually chose to make mine during a rainy, grey fall afternoon, when I know we will be home, and take advantage of that time to prepare a few fall snacks and meals at the time.
Can I freeze homemade pumpkin purée?
Yes! Pumpkin puree freezes really well, and can be frozen for up to 3 months. I usually pre-portion my pumpkin purée in 1 cup portions in freezer safe bags so I can easily pull out and thaw based on the amount I need for my recipes.
How do I thaw out pumpkin purée?
I recommend to pull it out of the freezer and put it in the fridge the night before you need it. If it’s still frozen the next day, submerge the bag in cold water, and use once thawed.
How long does homemade pumpkin purée last in the fridge?
Store it in the fridge for up to 4 days. This pumpkin puree doesn’t contain preservatives, so I recommend you use them sooner than later.
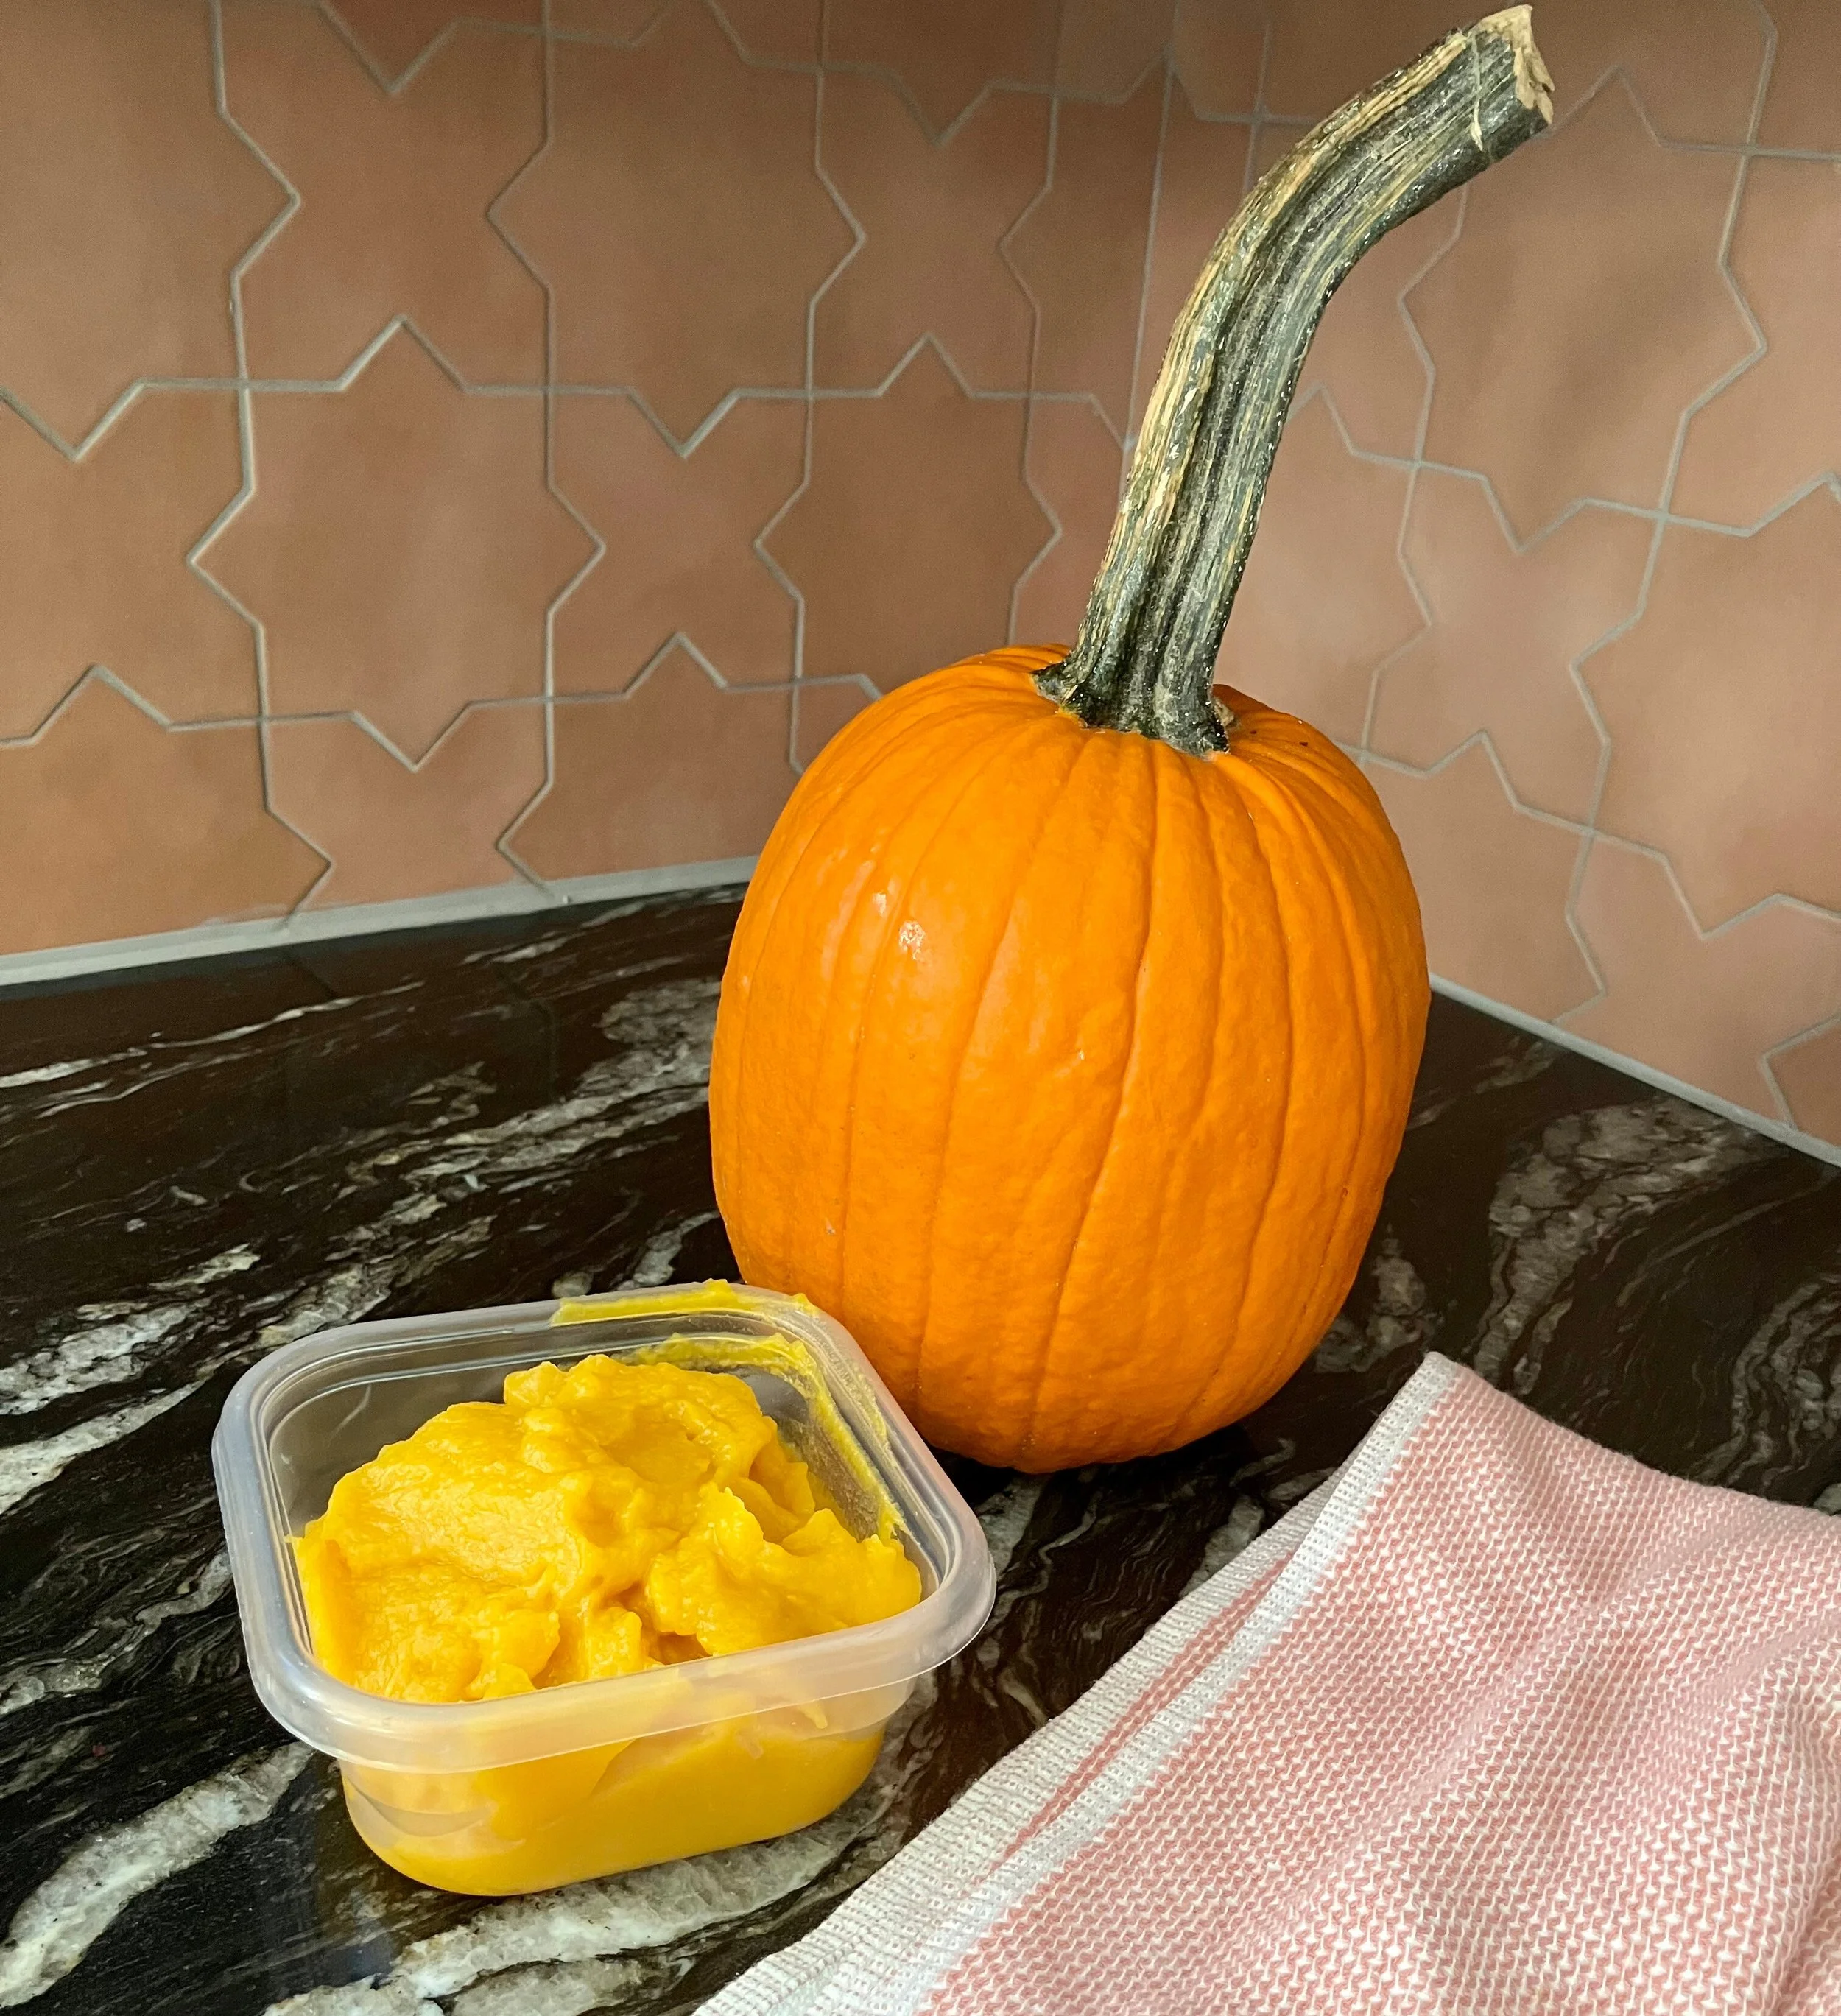
Pumpkin puree, perfect for all your pumpkin recipes!
other pumpkin recipes:
Recipe Card
Ingredients:
1 pumpkin, I like using a sugar pumpkin
A little bit of water at the bottom of the pan
Instructions:
Pre-heat the oven to 350F.
Cut the pumpkin, and remove the skin.
Put the raw pumpkin on a baking sheet. Add water to the bottom of the pan so the entire bottom of the pan is filled with water.
Put it in the oven for 30-45 minutes until golden brown
Let cool and blend until puree.
Enjoy!
Did you make this recipe? I want to see it!
Leave a picture and a ⭐ star rating and comment below to let us know how your muffins turned out. Did you make any substitutions or additions? Share your tips and photos with us!
Share this recipe: Help others discover this delicious recipe by sharing it on Pinterest, Facebook, or Instagram. Tag us @Sageandsimplicity so we can see your beautiful creations!
📌 Pin it for later: Save this recipe to your Pinterest boards for easy access.
you might also like:

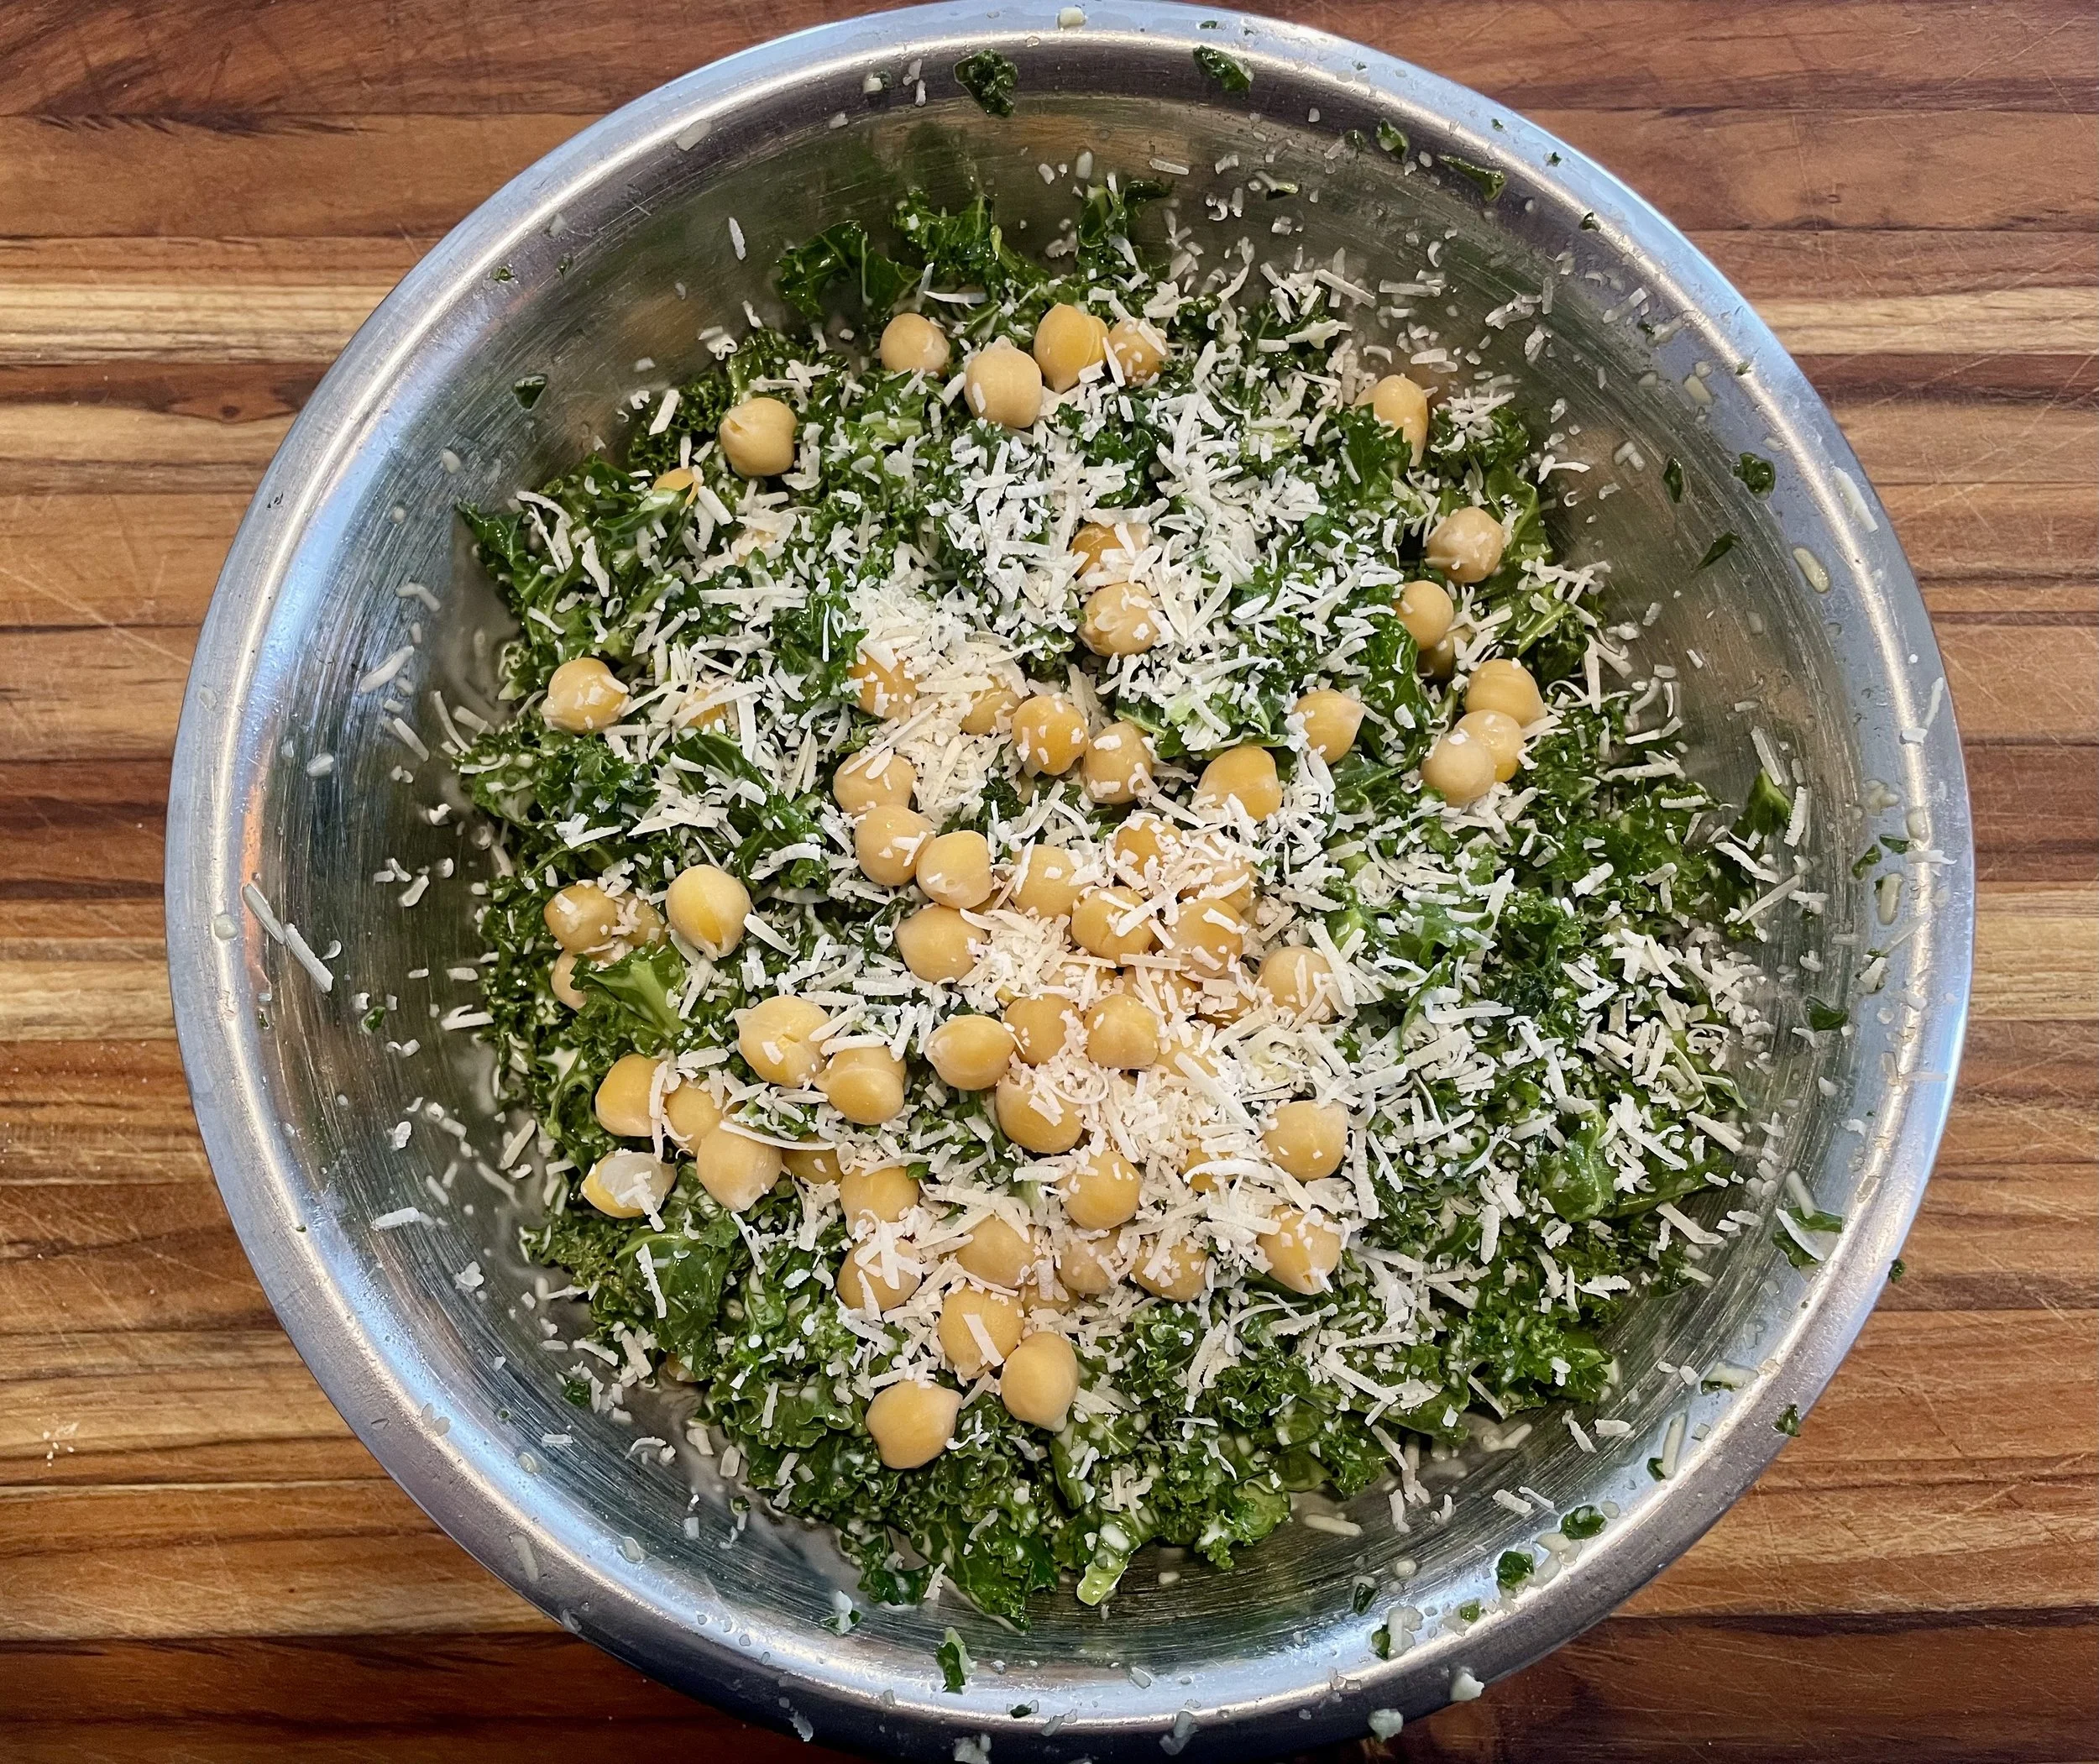
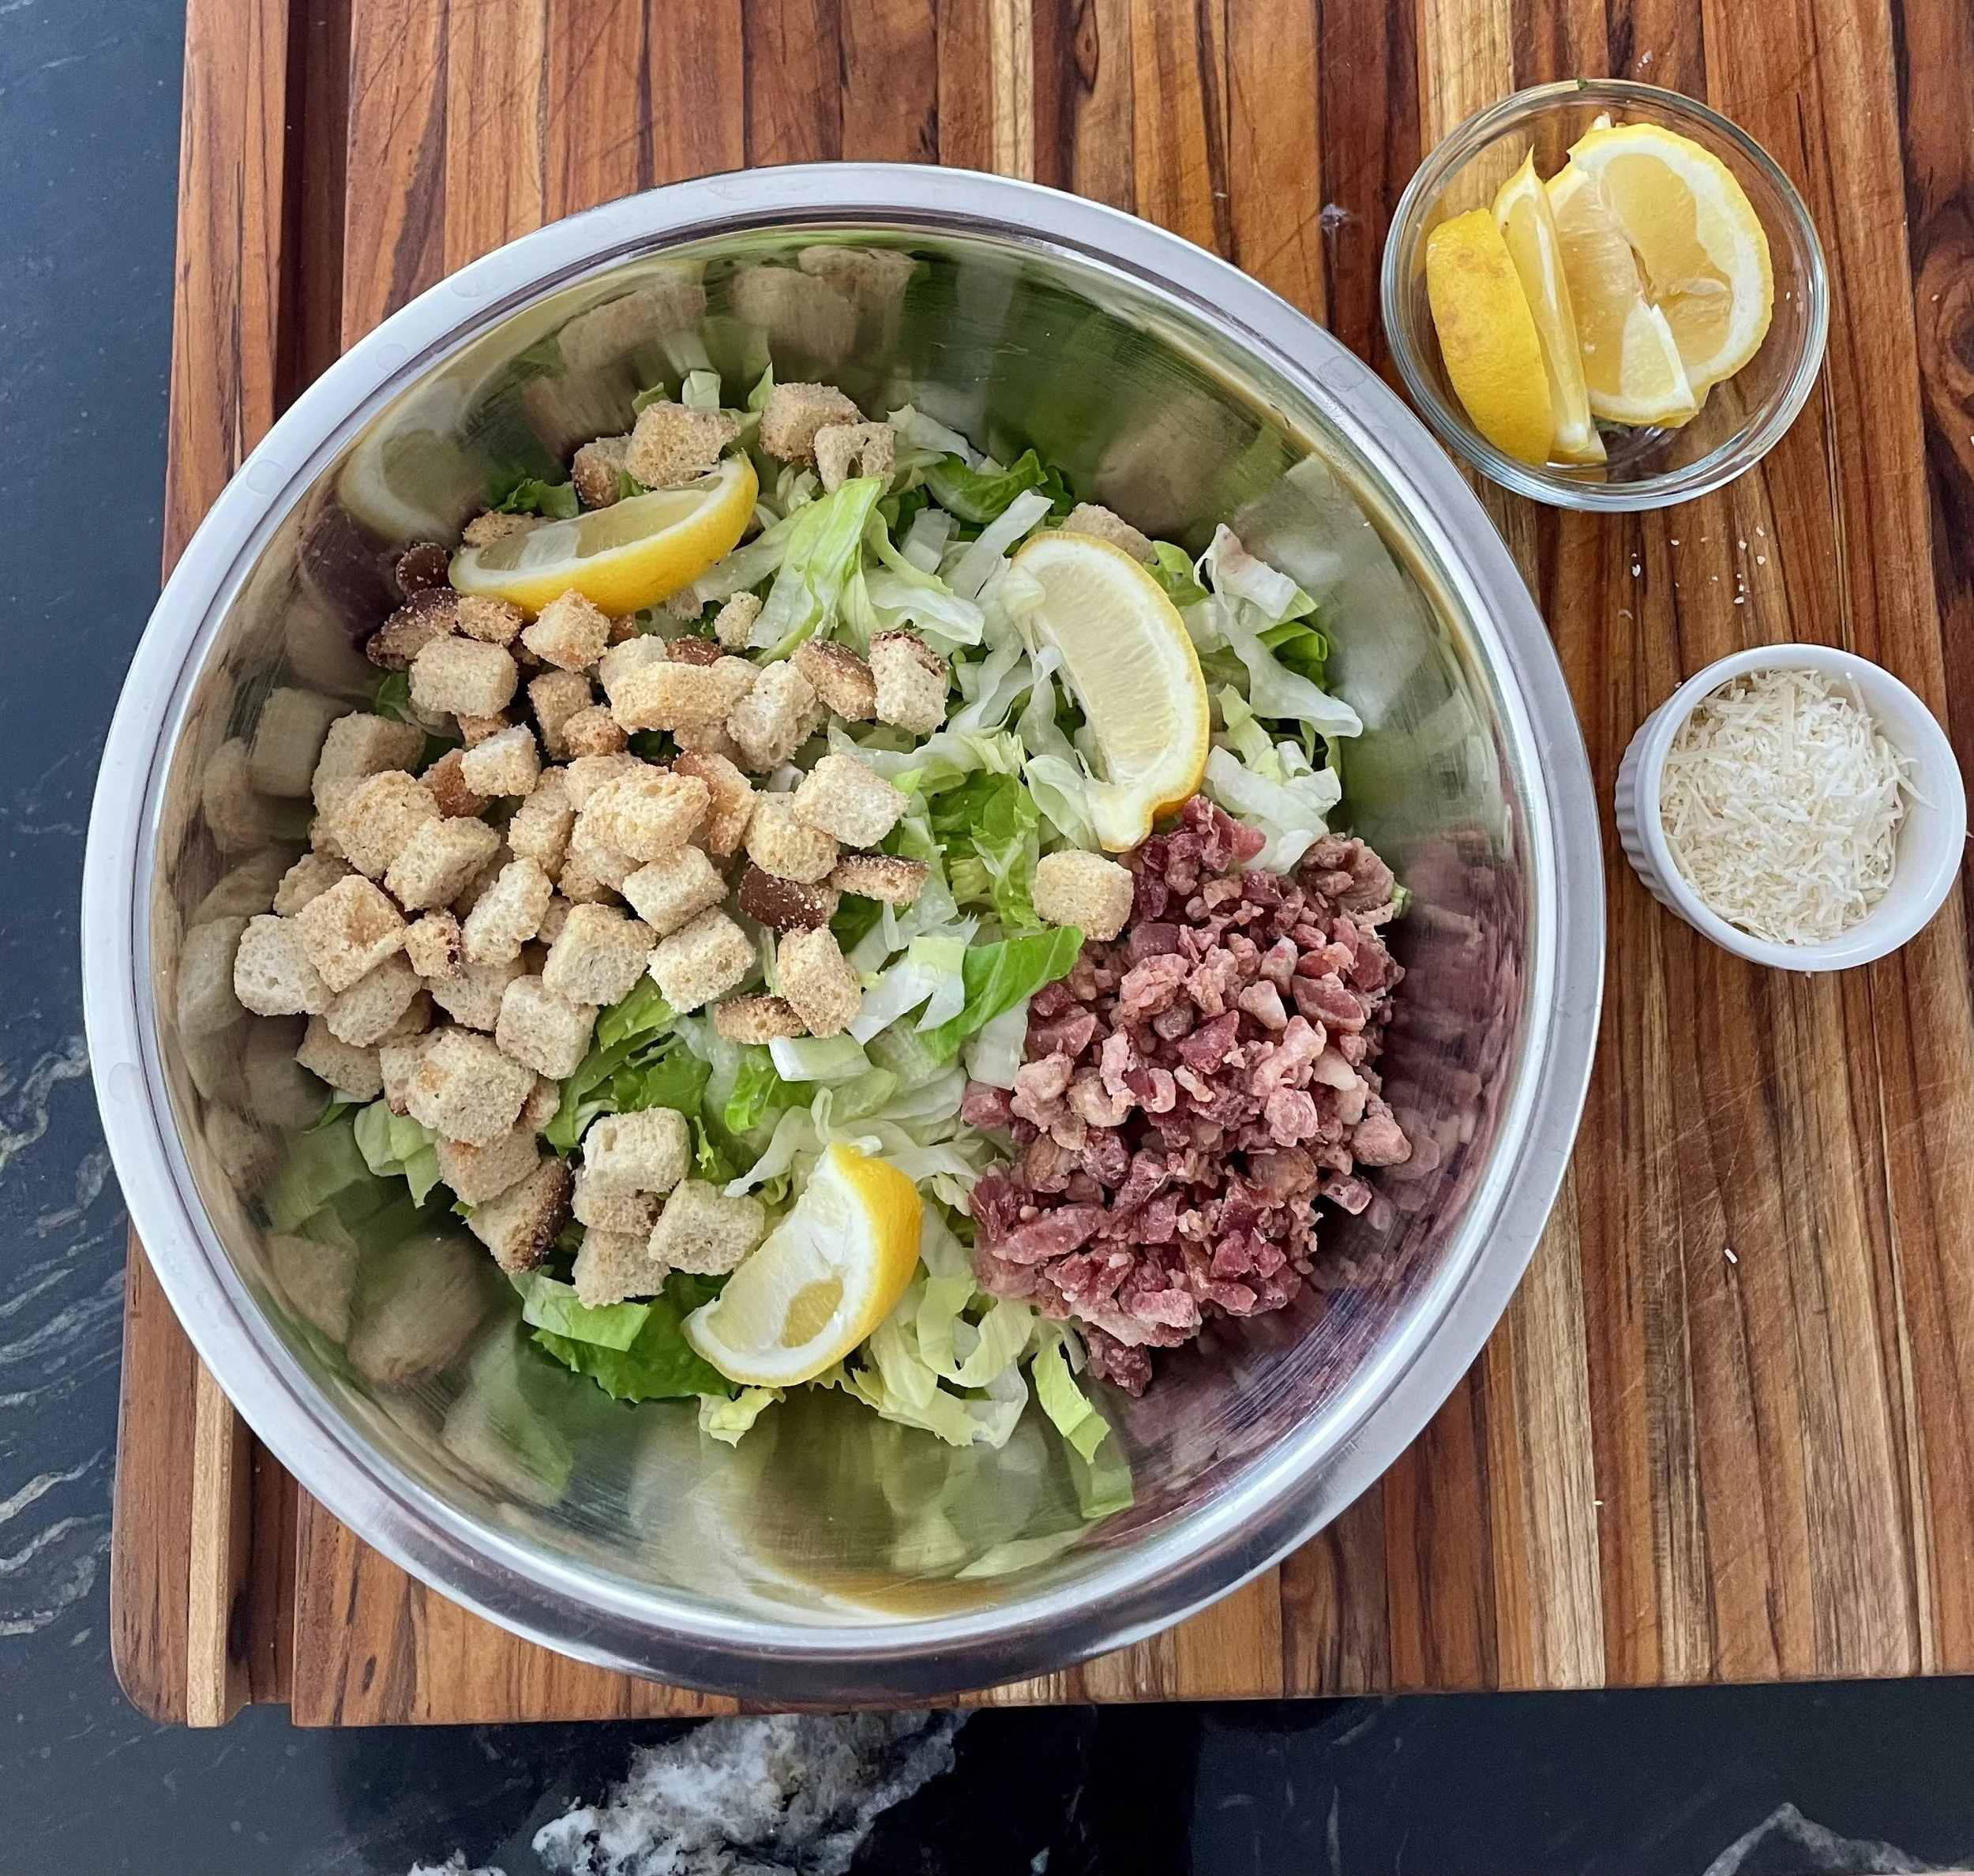

Black Bean Patties
Black bean burgers

These simple patties take no time to put together, are budget friendly and freeze beautifully. Win-win-win!
If you’ve been searching for a delicious, nourishing meal that’s as easy on your wallet as it is on your schedule, these Black Bean Patties are about to become your new weeknight hero. Packed with simple, recognizable ingredients, they’re proof that real food doesn’t have to be complicated to taste incredible. Whether you’re feeding a crowd or just looking for something quick and satisfying, these patties deliver hearty flavour in every bite.
One of the best things about these black bean patties is how wholesome they truly are. Made with black beans, flour, herbs, and eggs, they rely entirely on whole-food ingredients you already know and trust. No fillers, no mystery components—just real, nourishing foods that leave you feeling good long after the meal is over. It’s comfort food with a clean, feel-good twist.
And let’s talk budget friendliness. Beans are one of the most affordable protein sources out there, which makes these patties a smart choice for families looking to stretch their grocery dollars without sacrificing flavour or nutrition. A single batch can feed several people, and the ingredients are pantry staples you can keep on hand at all times. A delicious dinner or lunch that’s also kind to your budget? Yes, please.
Another major bonus: these patties freeze beautifully. Make a double—or even triple—batch on the weekend, and stash them away for busy days. Making them the ultimate grab-and-go meal for school lunches, workdays, or those evenings when cooking feels like a big ask. Freezer meals have never tasted this fresh.
Best of all, kids absolutely love them. Their mild, savoury flavour pairs well with everything from melted cheese, and the soft interior is perfect for little eaters. Serve them on hamburger buns, cut-up over rice, or tucked into a wrap, and watch how quickly they disappear. When a recipe is wholesome, affordable, freezer-friendly, and kid-approved, you know you’ve found a winner—and these black bean patties check every box.
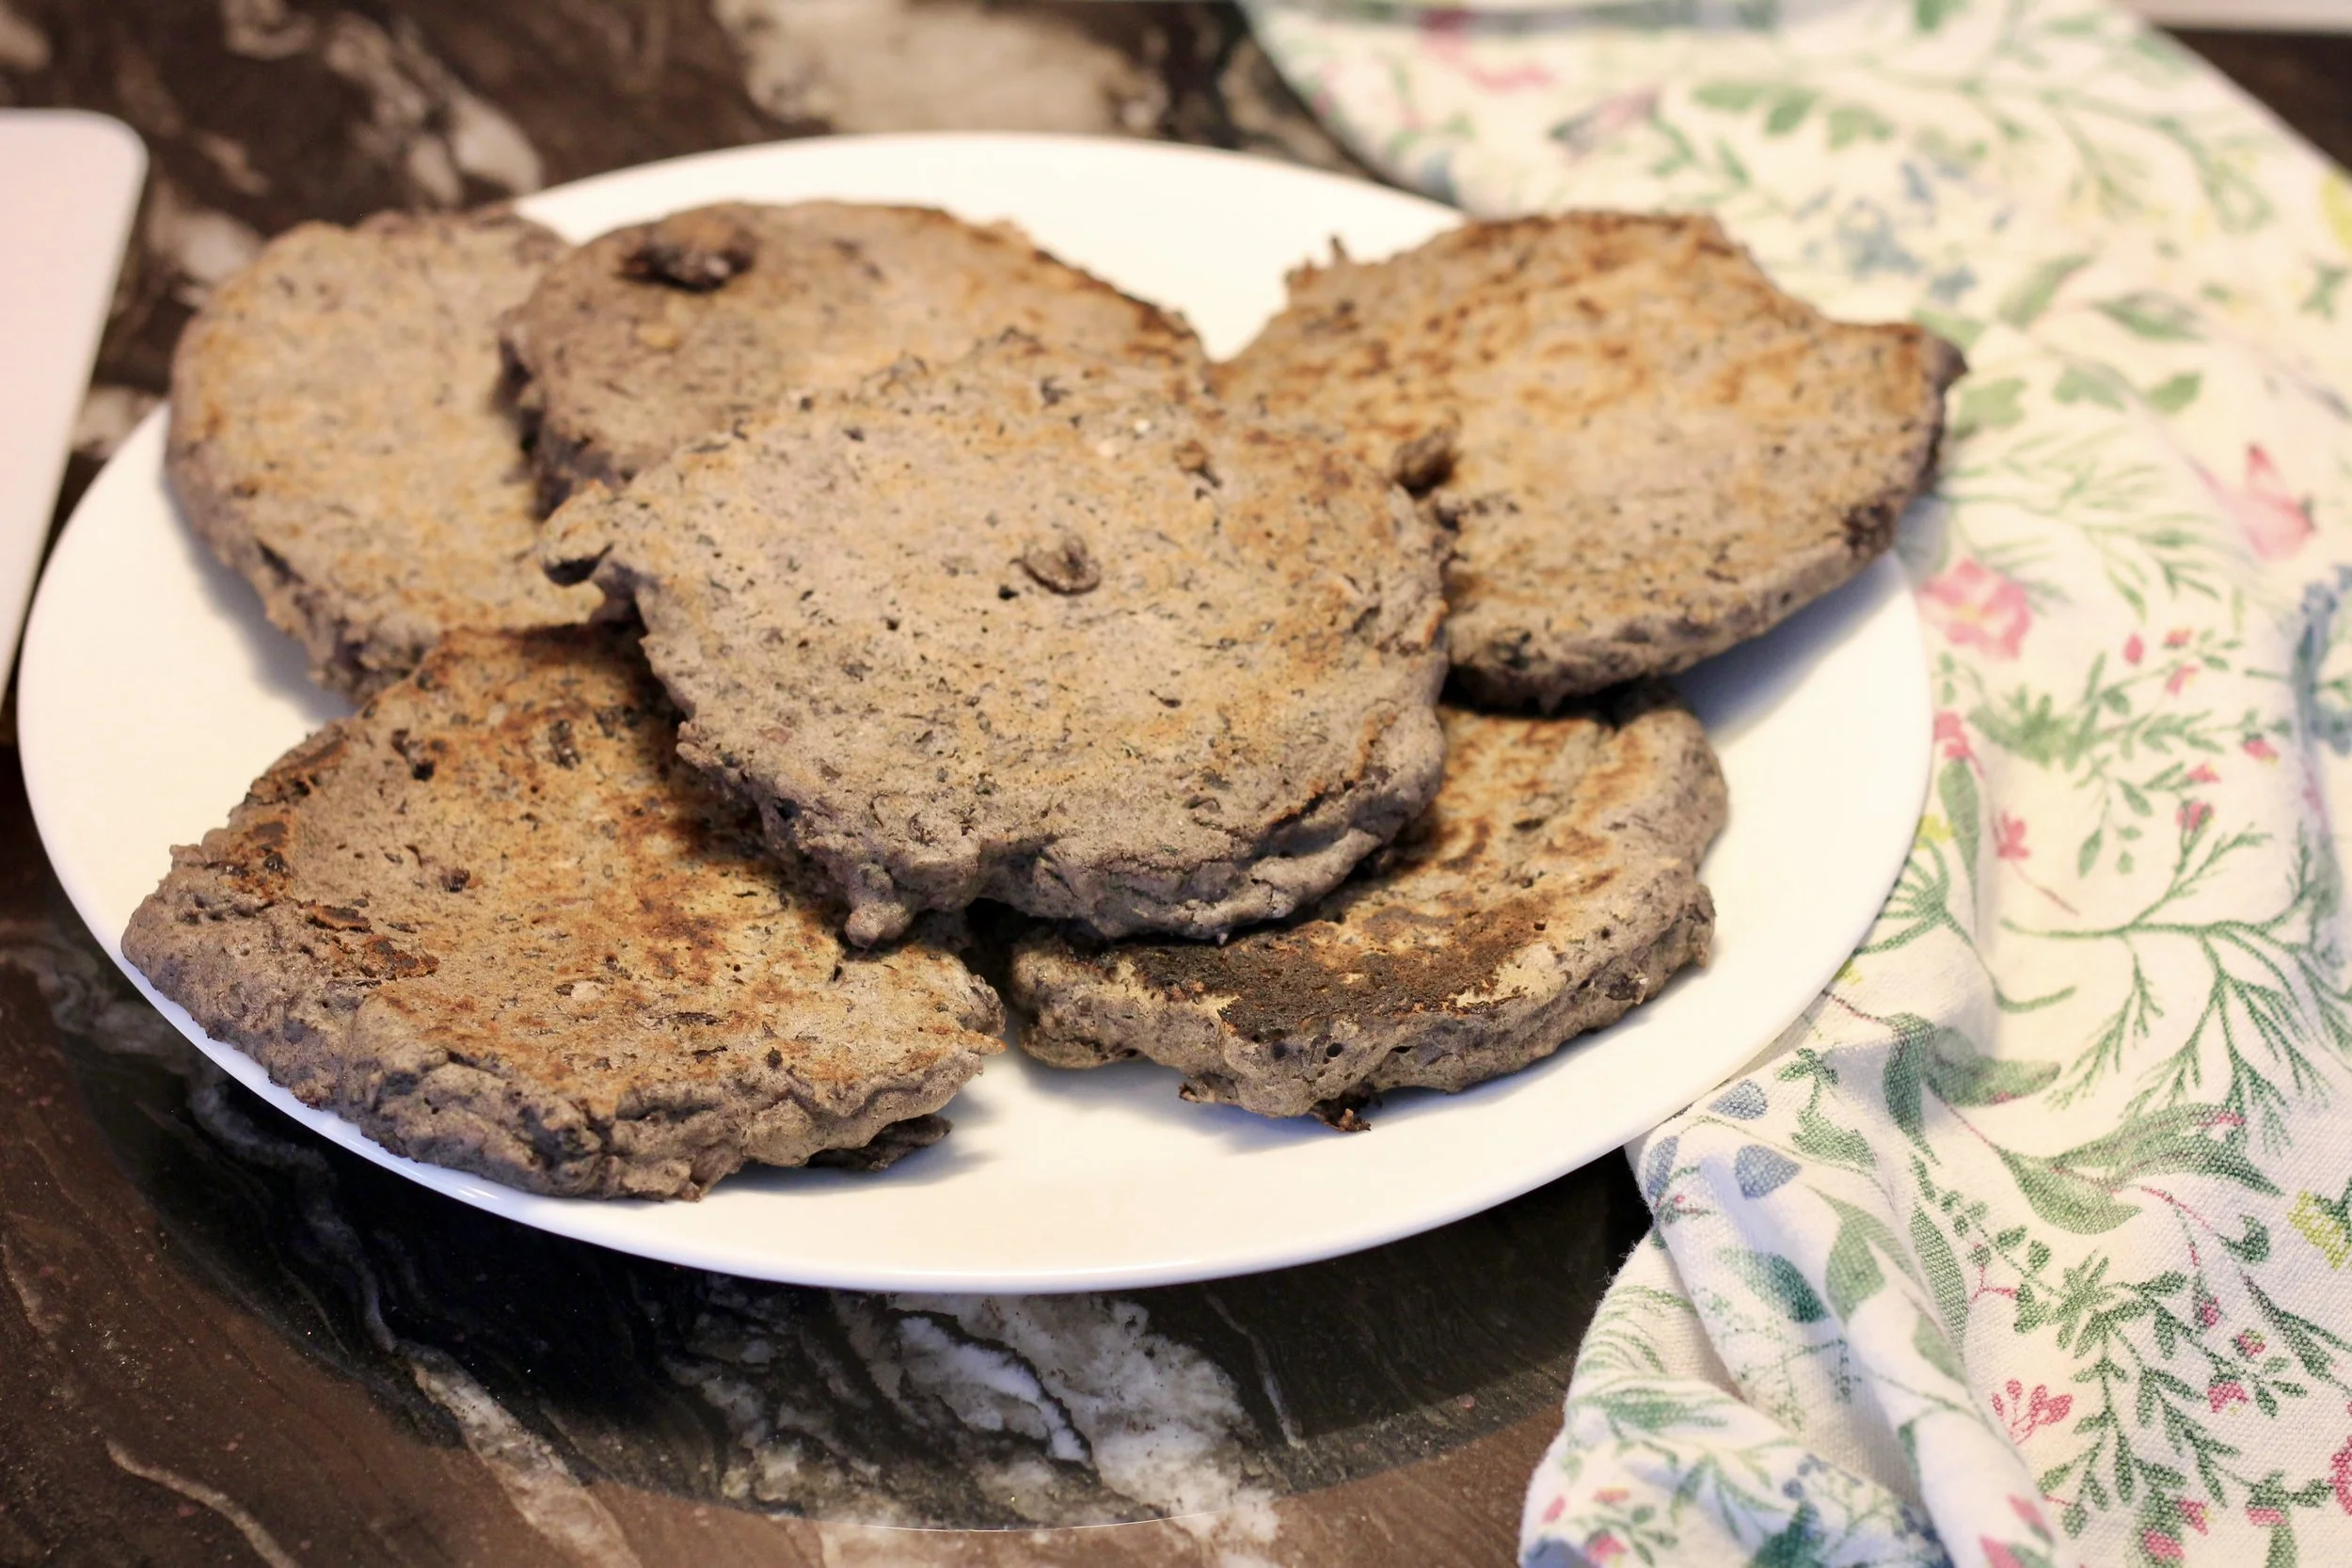
other vegetarian recipes:
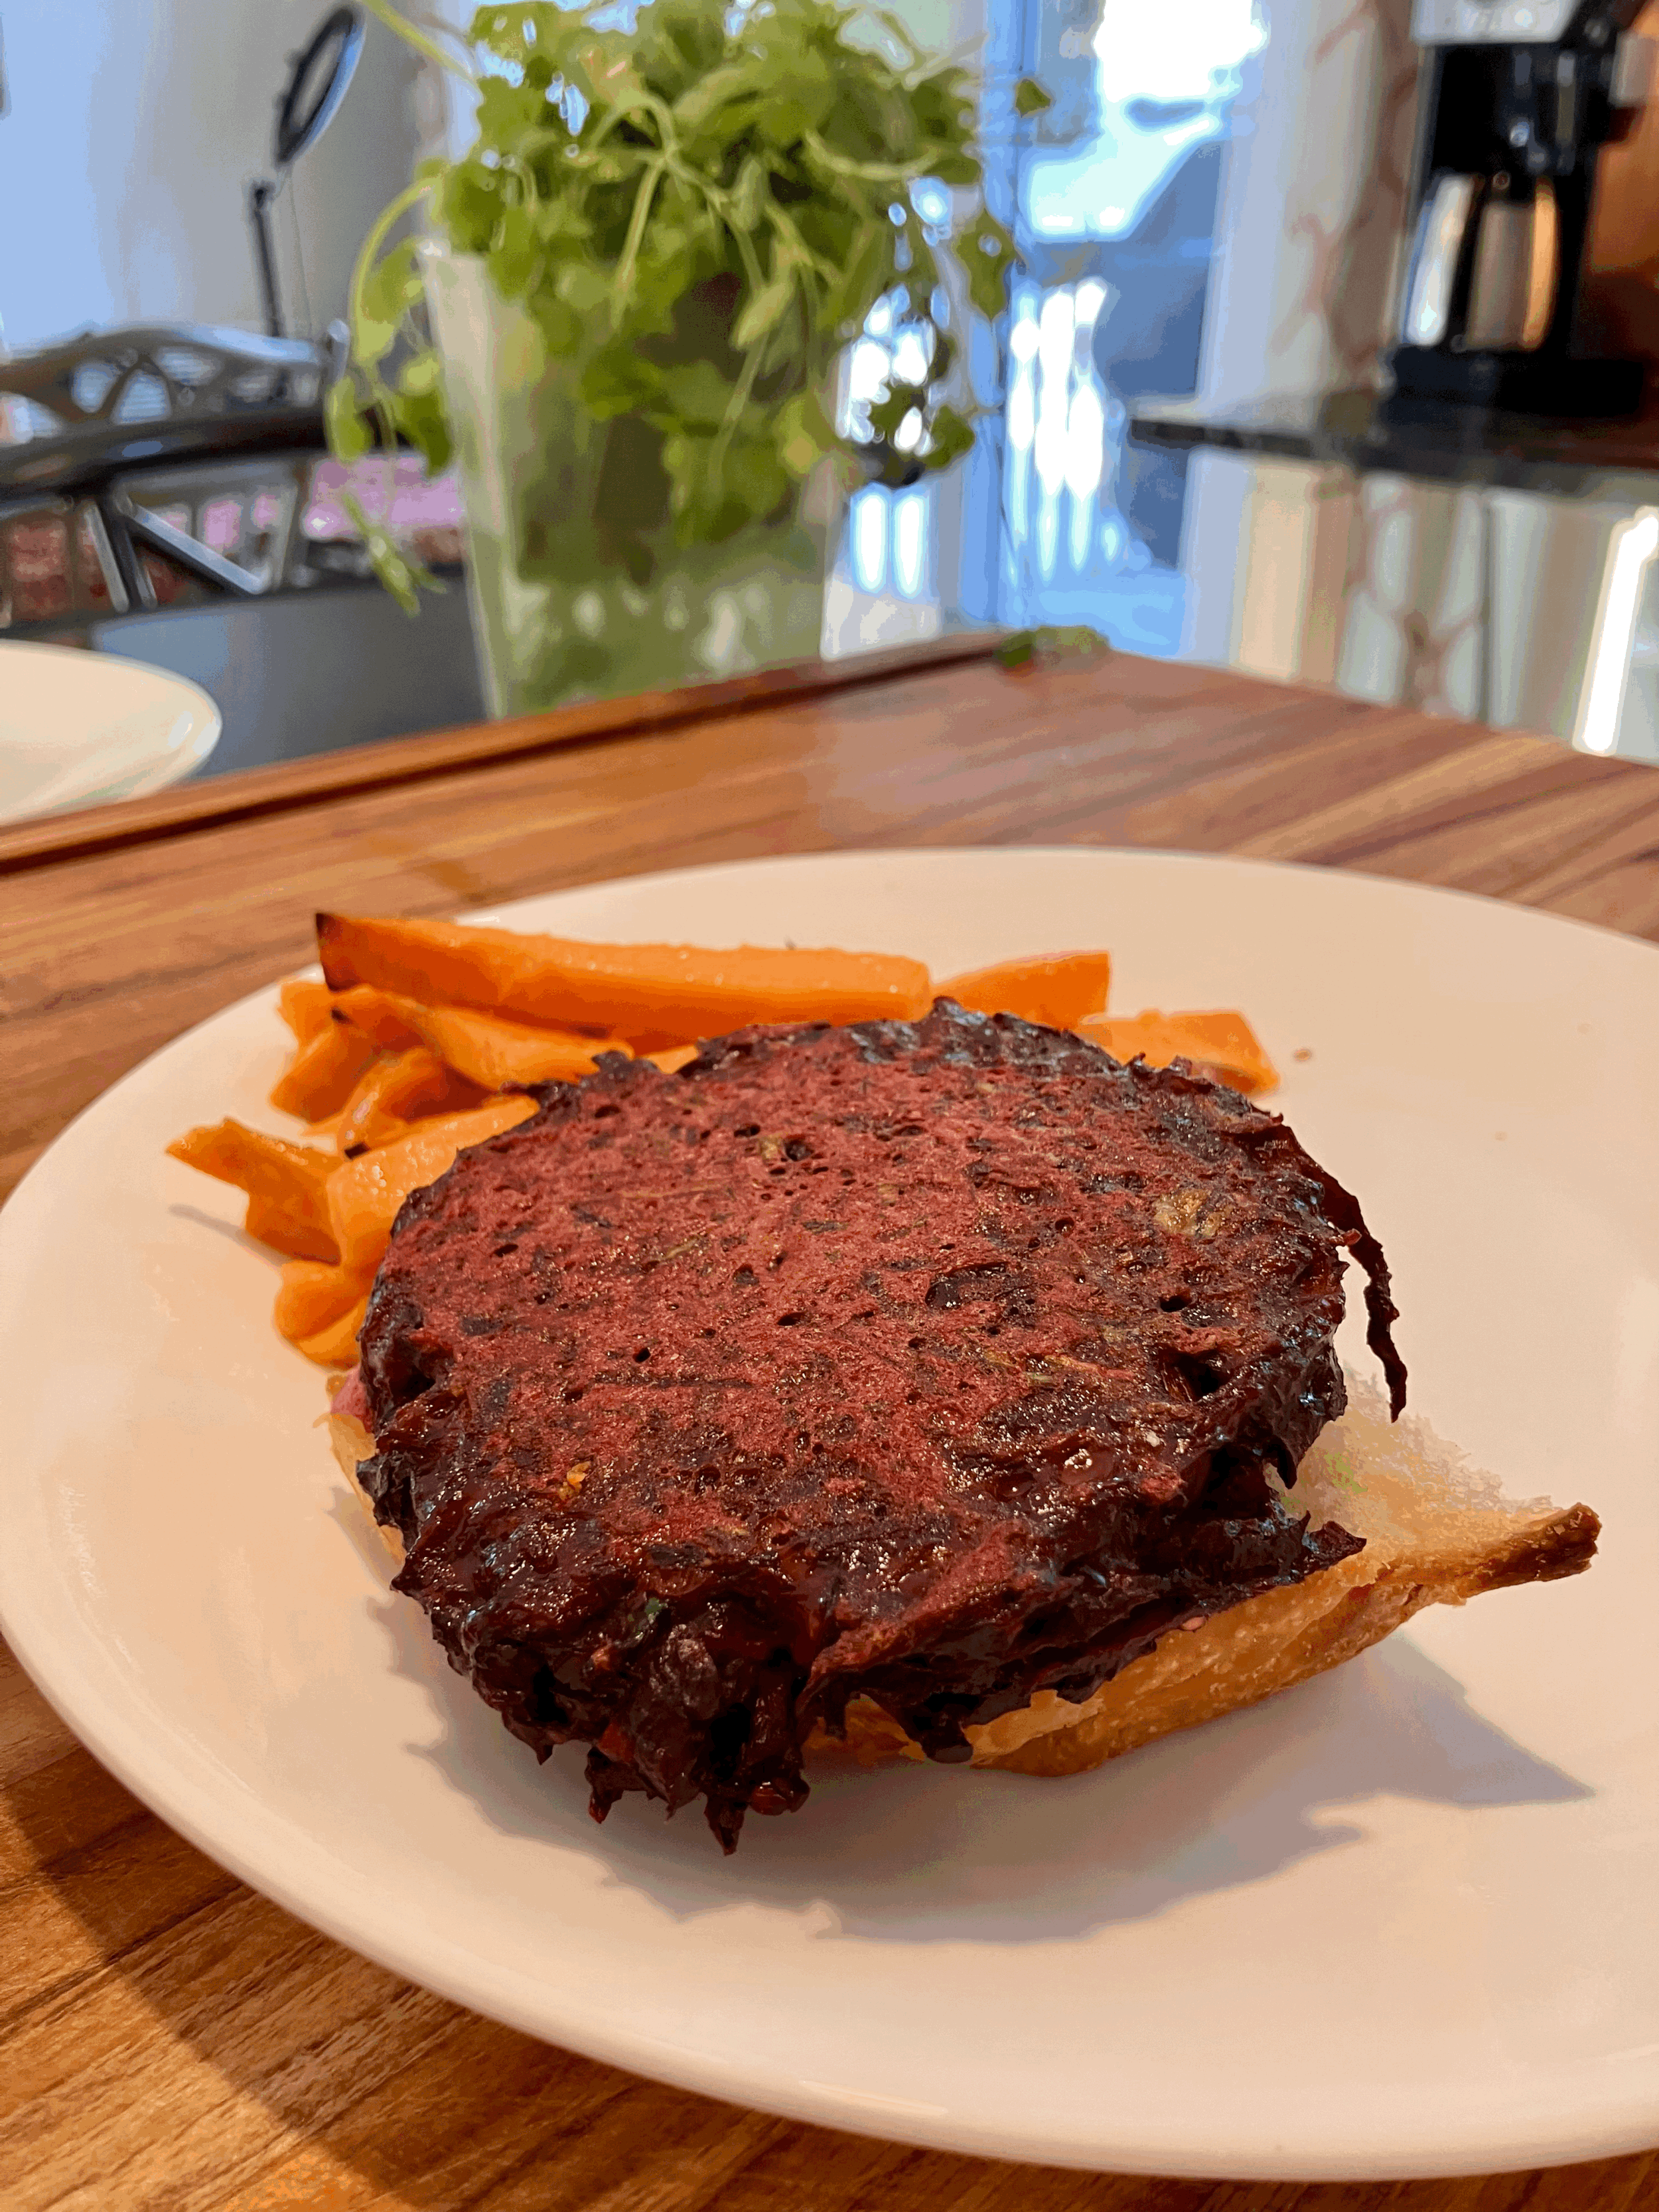
Here’s the recipe!
Ingredients:
2 eggs, (flax-egg work too, if you’d like take make these vegan.)
1 cup of black beans
1/2 cup all purpose flour
2 tsp dill, fresh or dried
1 tsp salt, I like using kosher salt
1 tsp garlic powder
Optional: 1 tbsp balsamic vinegar
Instructions:
In a food processor, add all ingredients in the listed order, Mix well.
Put mixture in the fridge and let it rest a minimum of 30 minutes.
Cook in a lightly oiled frying pan on the stovetop over medium heat. using a soup spoon, scoop one spoonful of the mixture. Flip the patty when the bottom side is cooked. flatten the burger, and cook the opposite side. flip once more top make sure the burger is fully cooked throughout.
Serve on a burger bun with toppings you like, or with barley or rice.
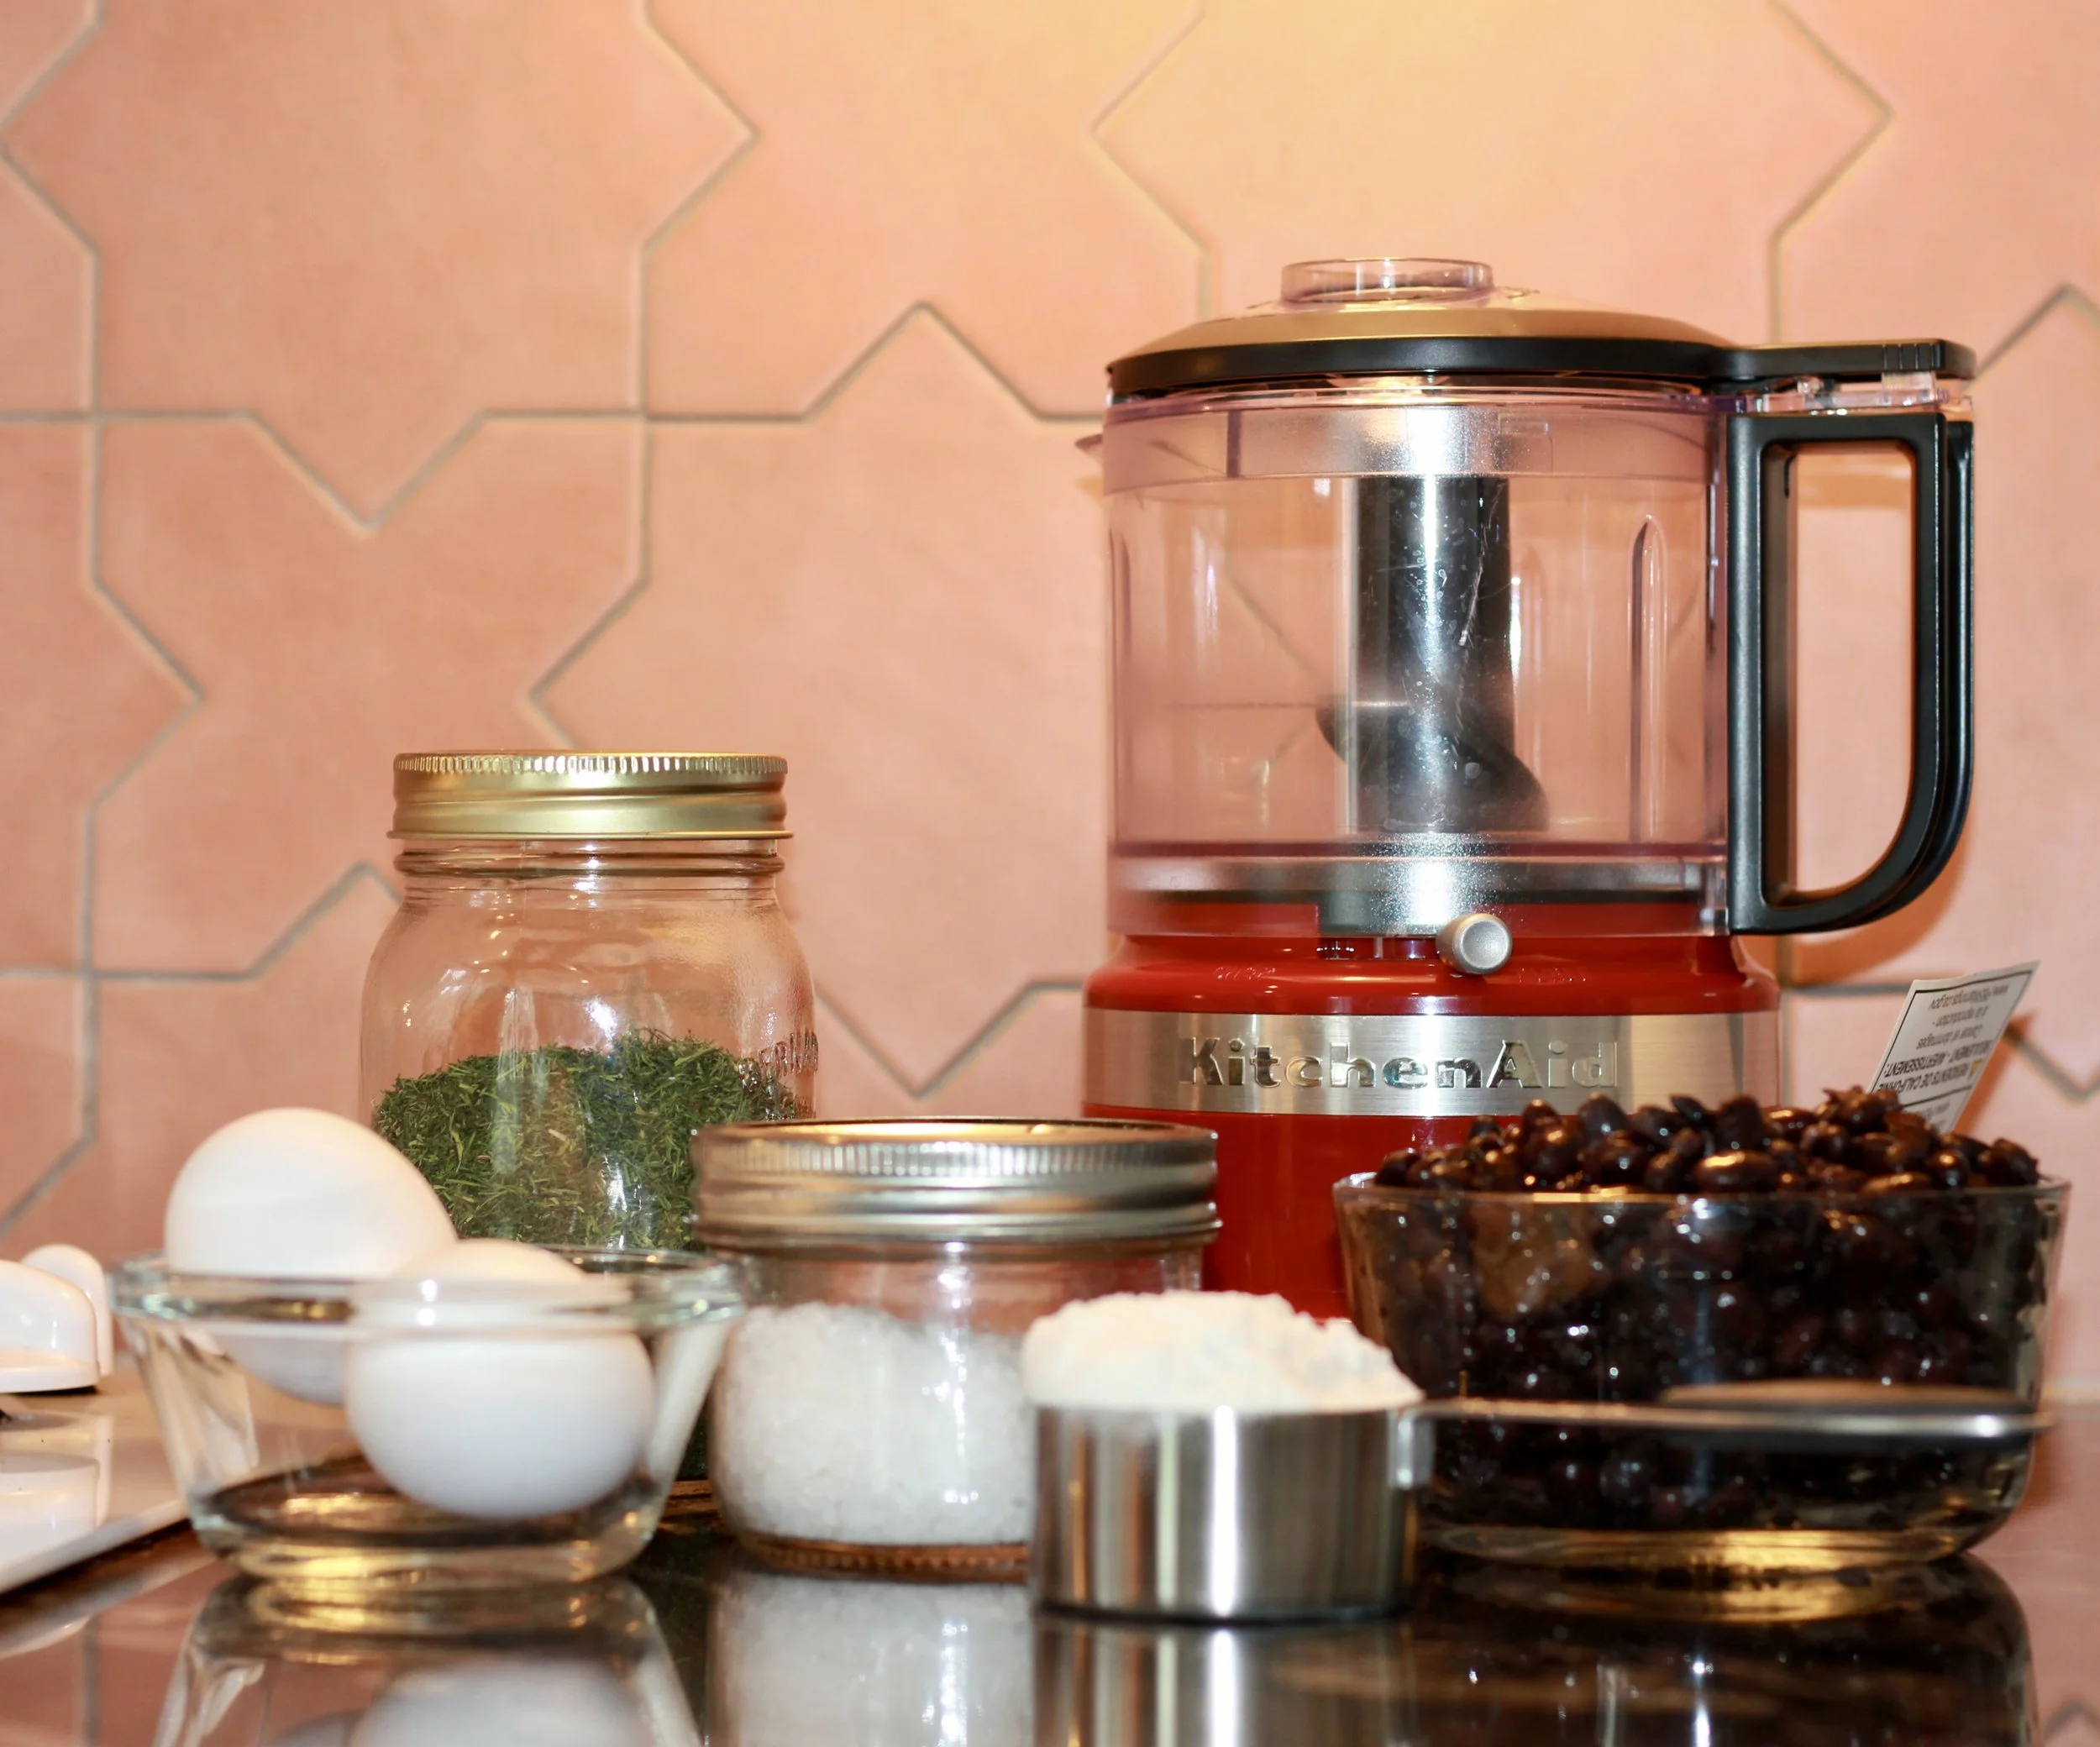
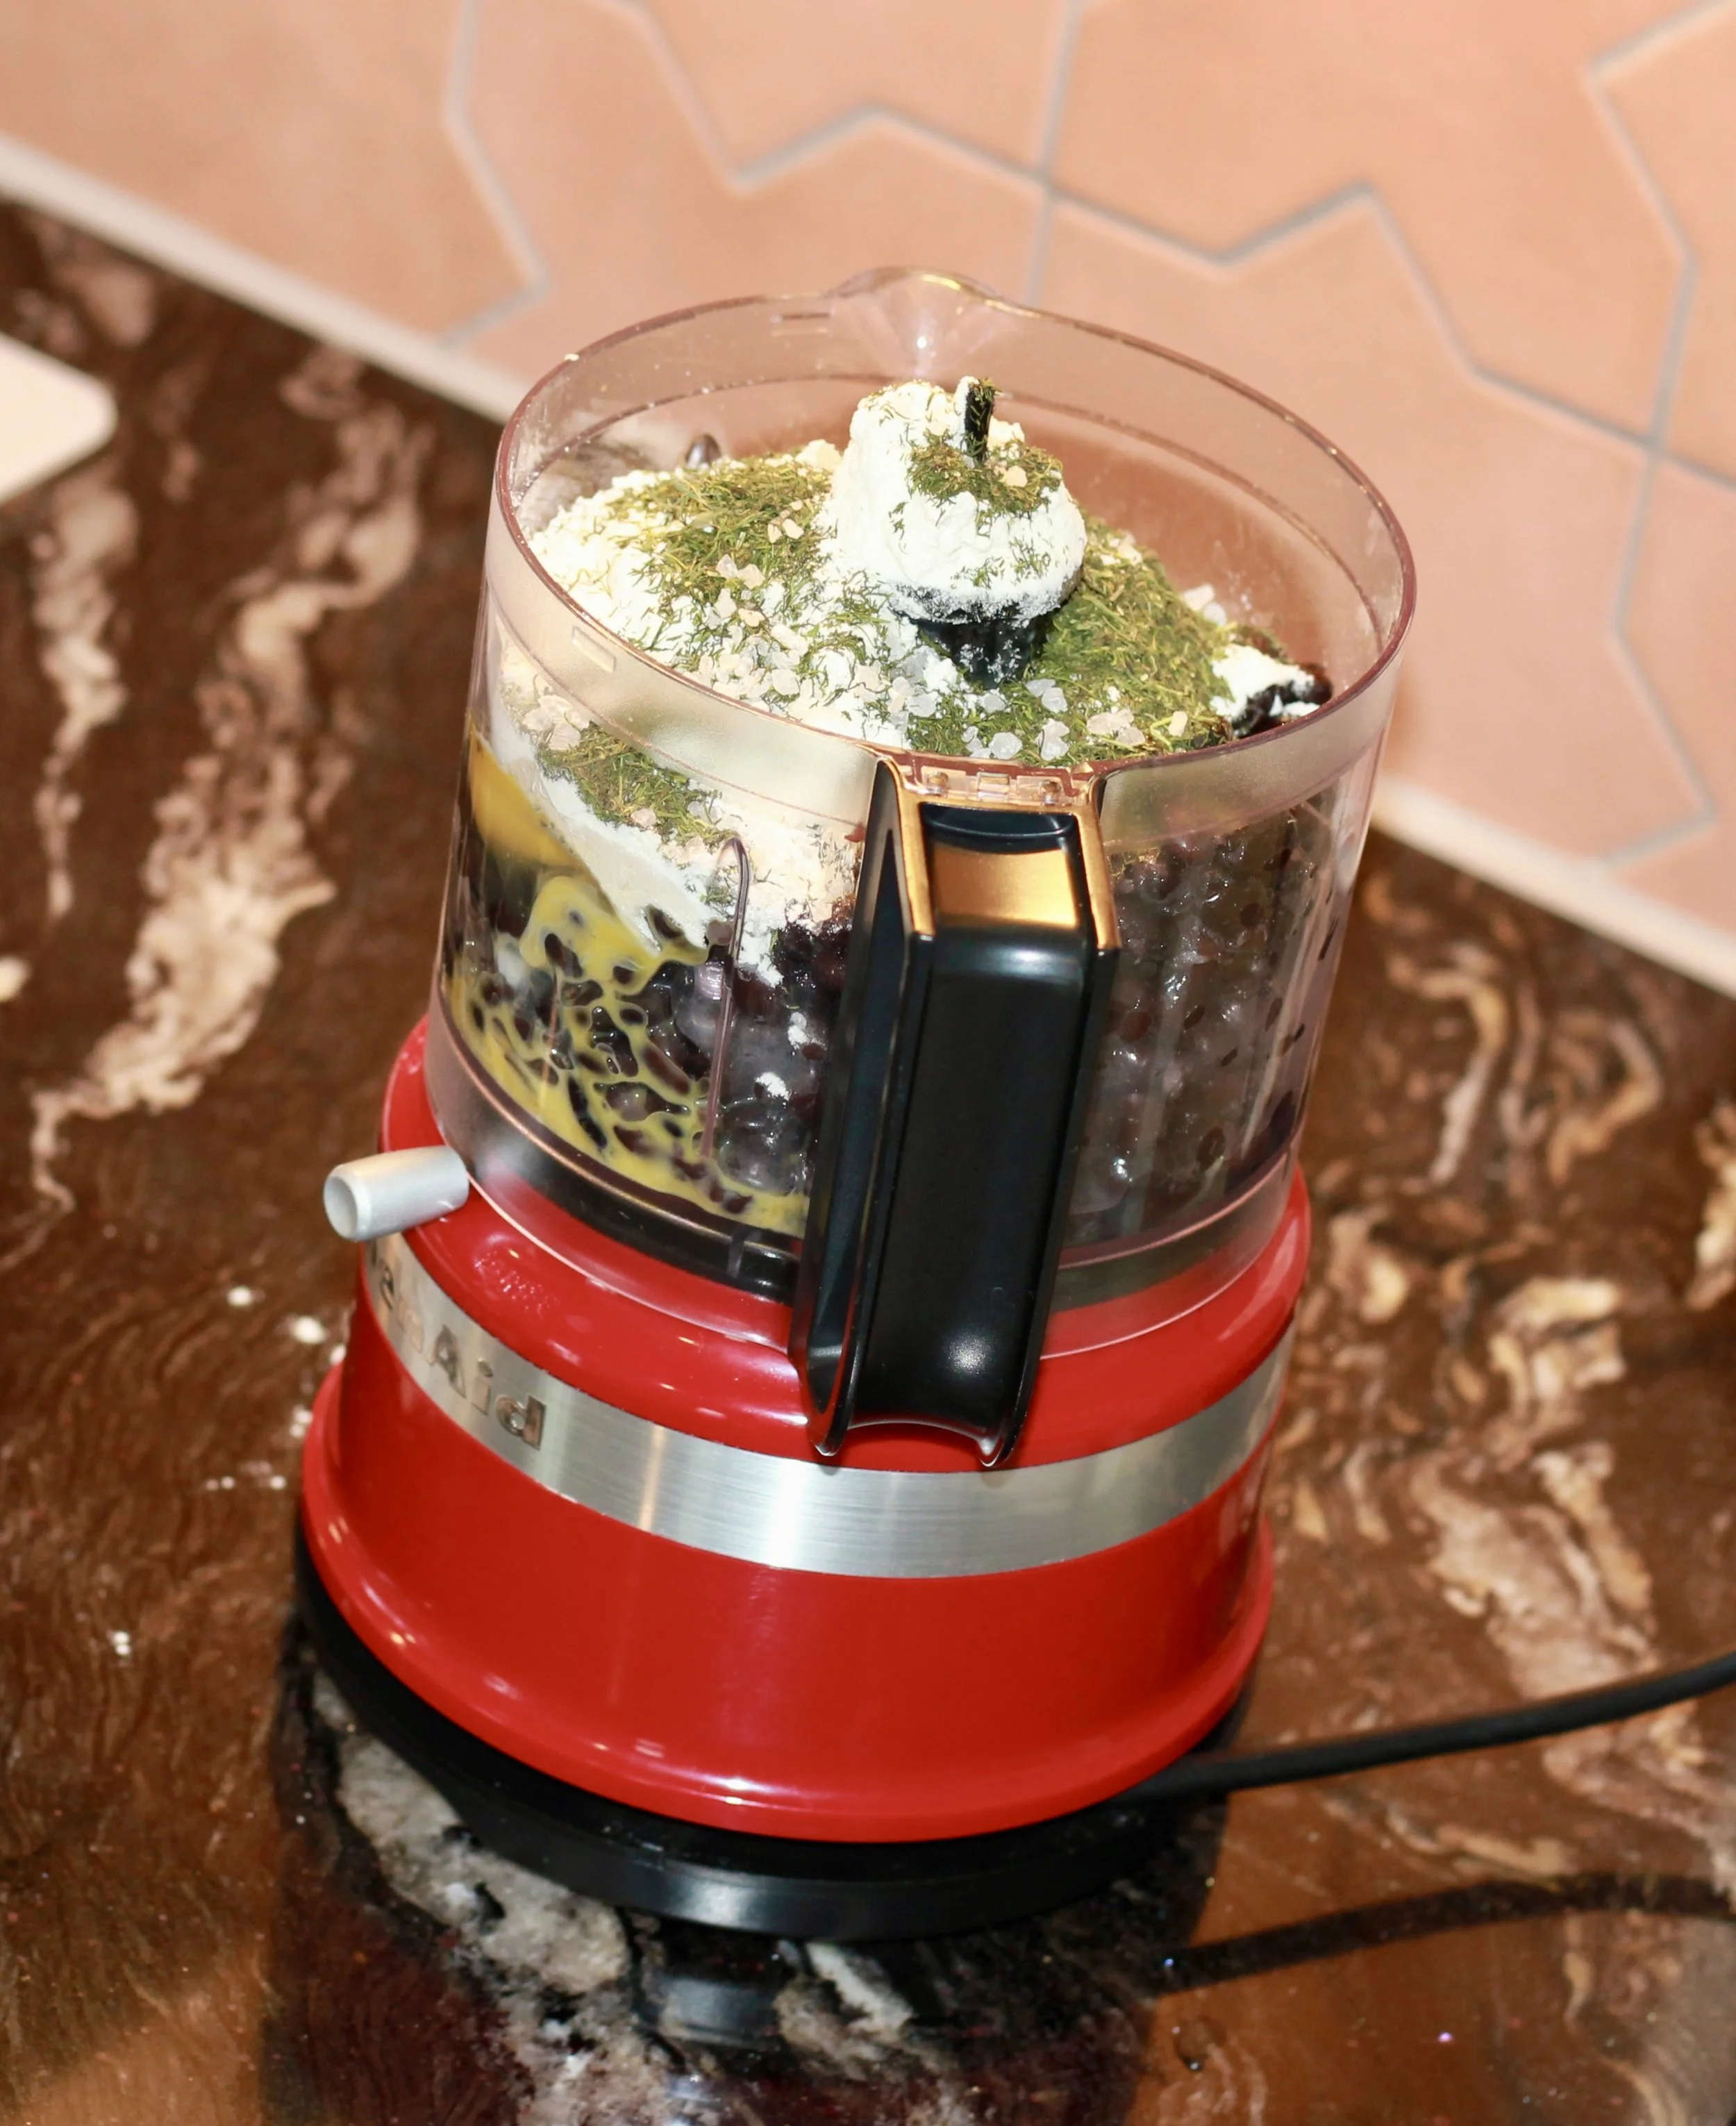
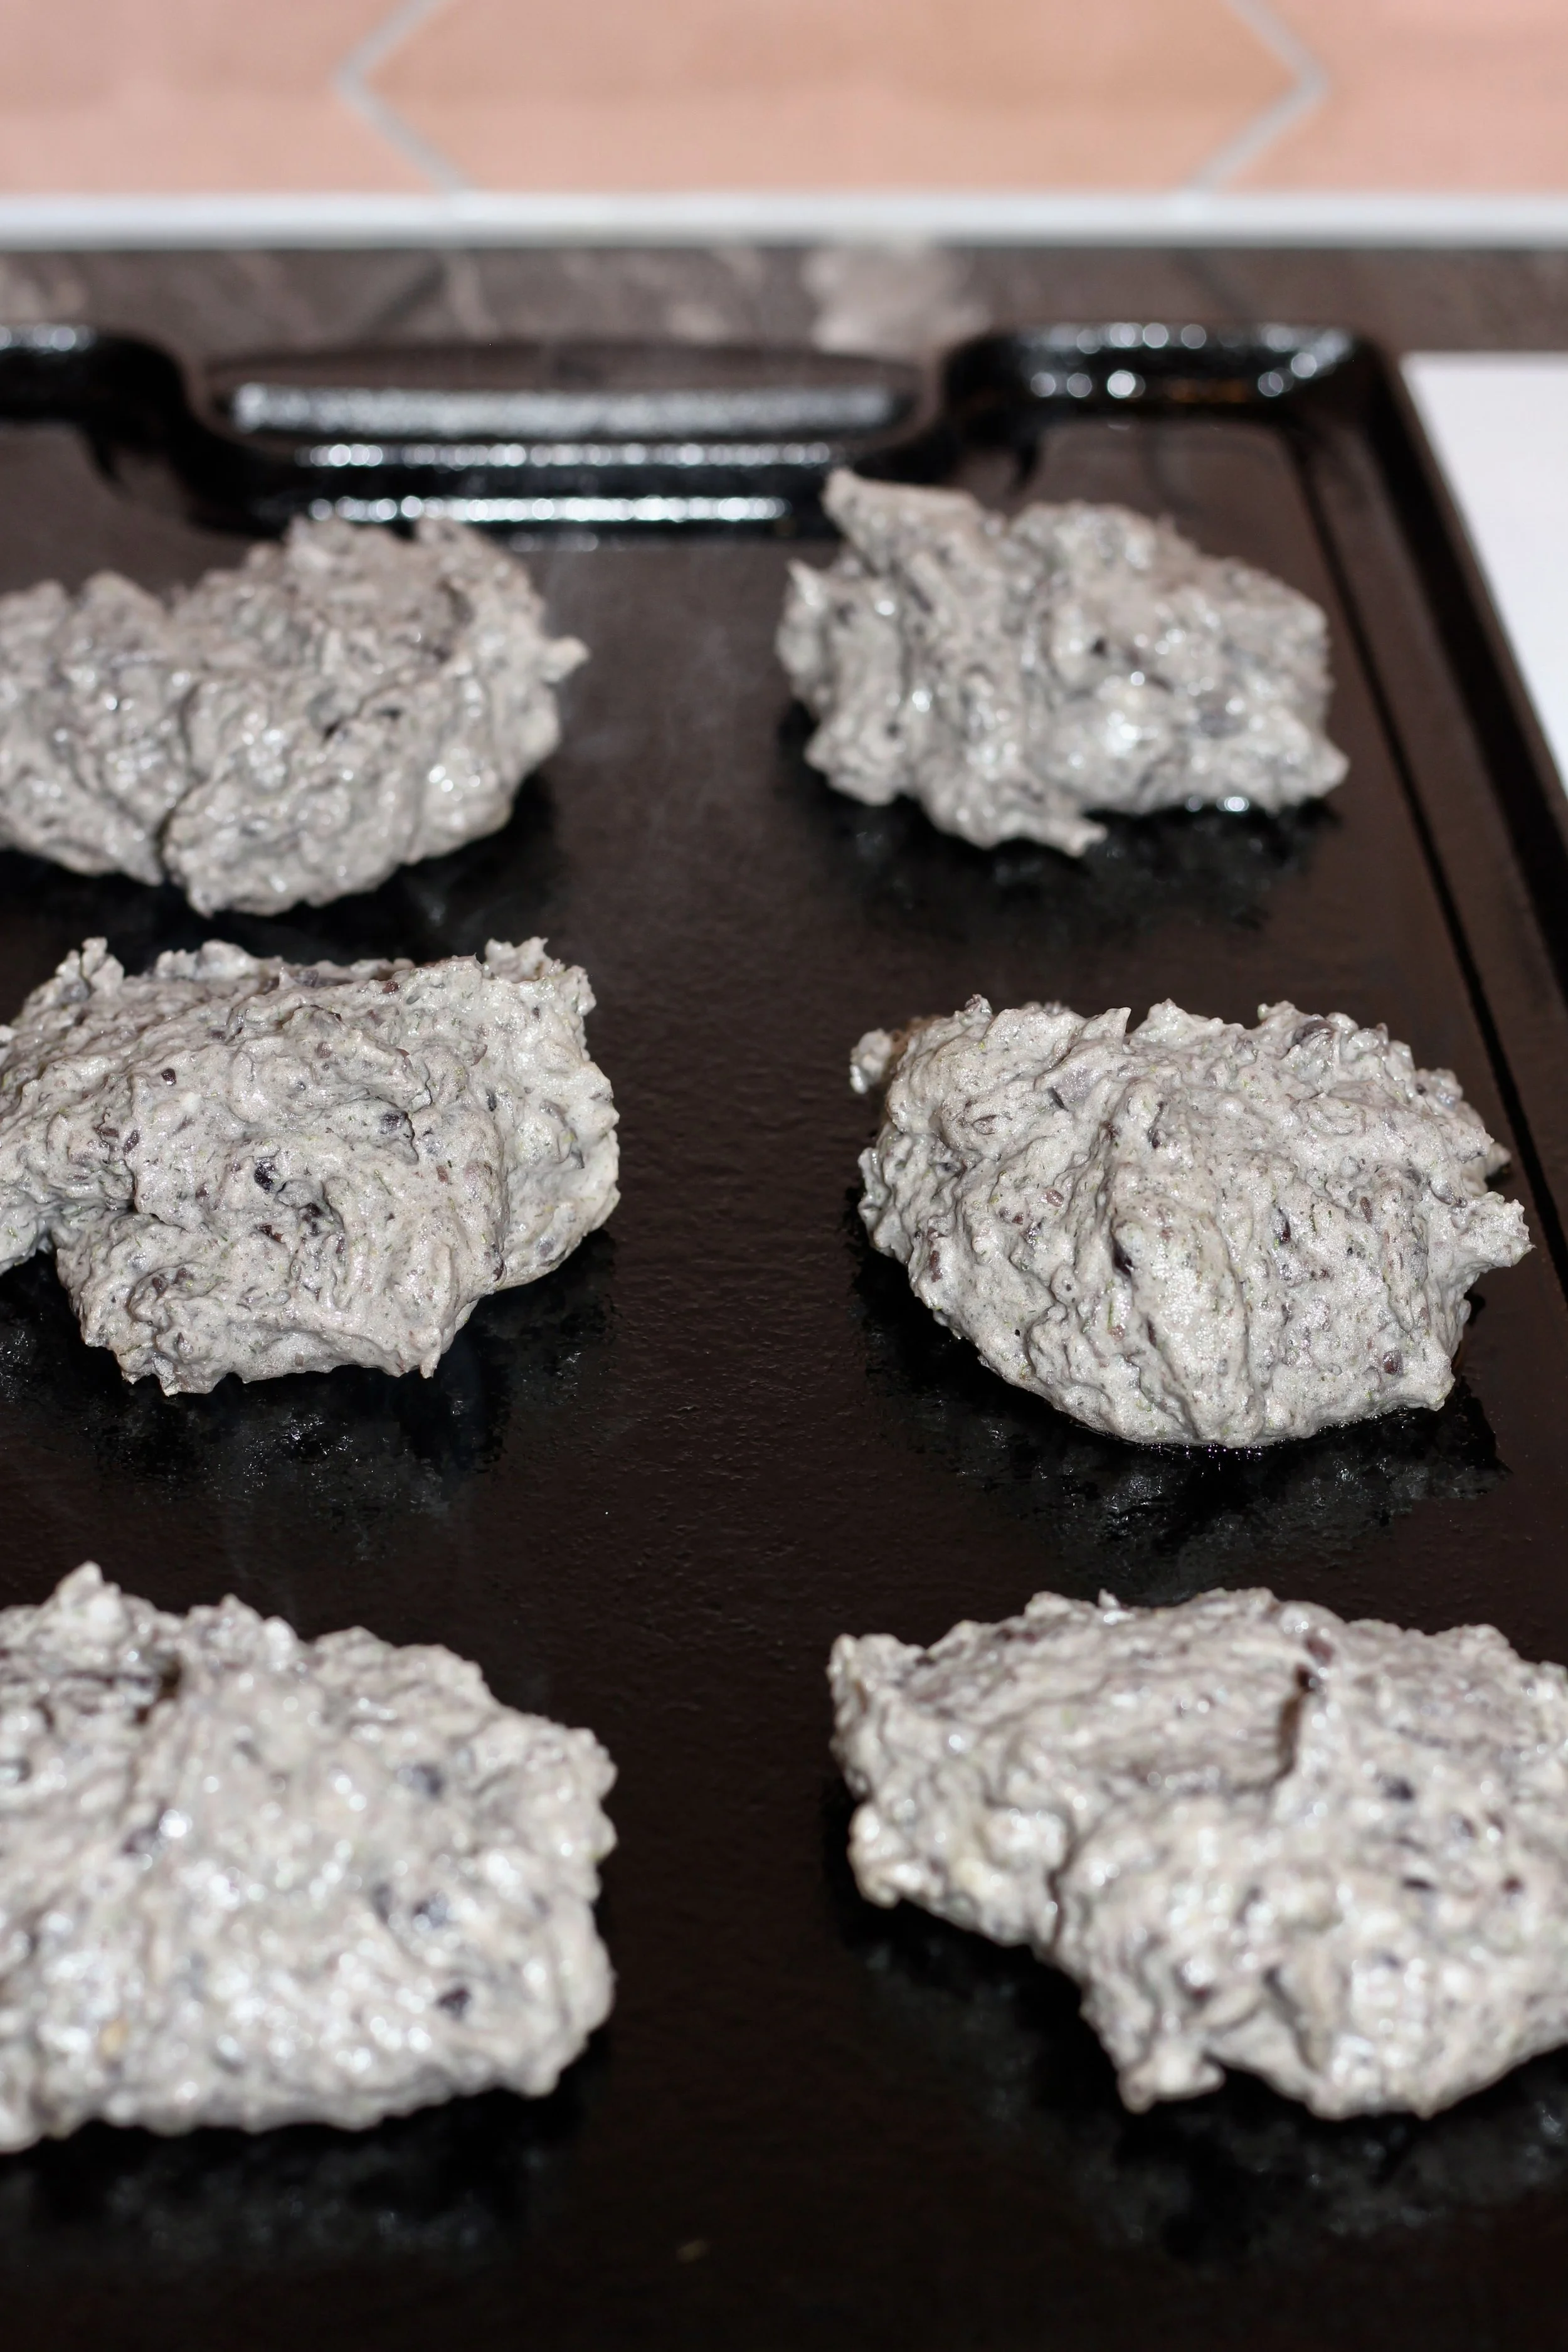


did you make this recipe? I want to see it!
Leave a picture and a ⭐ star rating and comment below to let us know how your muffins turned out. Did you make any substitutions or additions? Share your tips and photos with us!
Share this recipe: Help others discover this delicious recipe by sharing it on Pinterest, Facebook, or Instagram. Tag us @Sageandsimplicity so we can see your beautiful creations!
📌 Pin it for later: Save this recipe to your Pinterest boards for easy access.