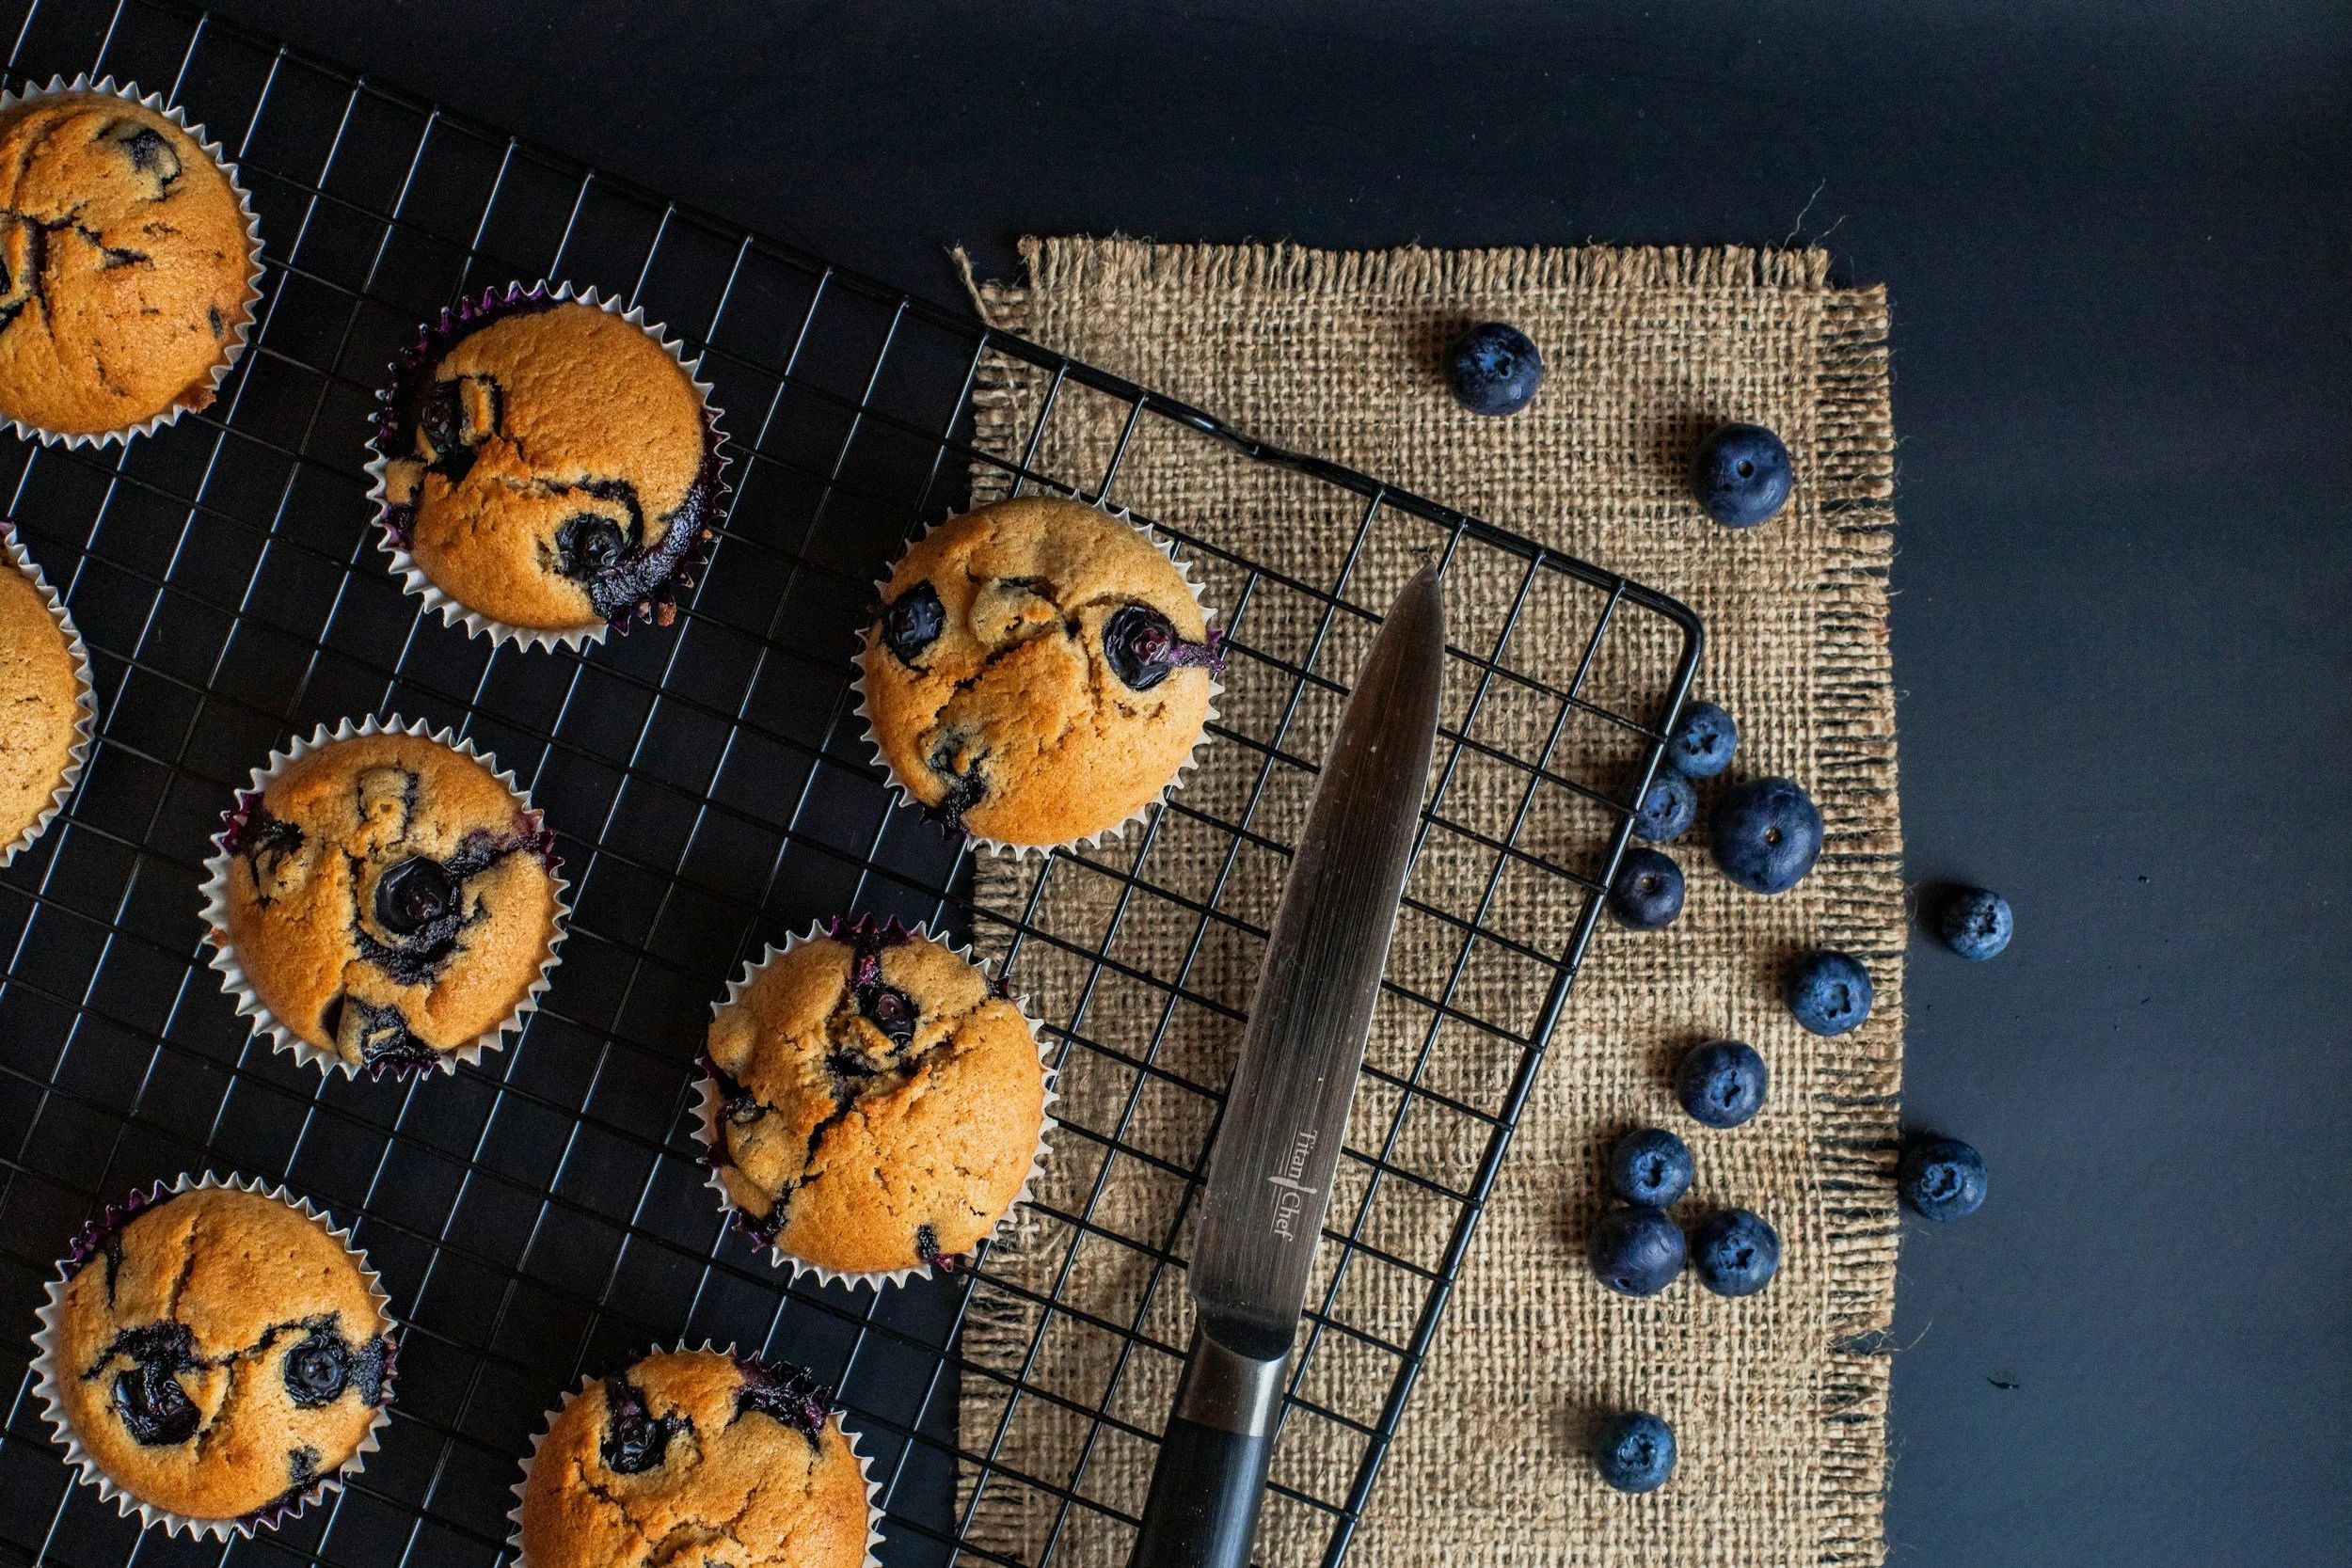
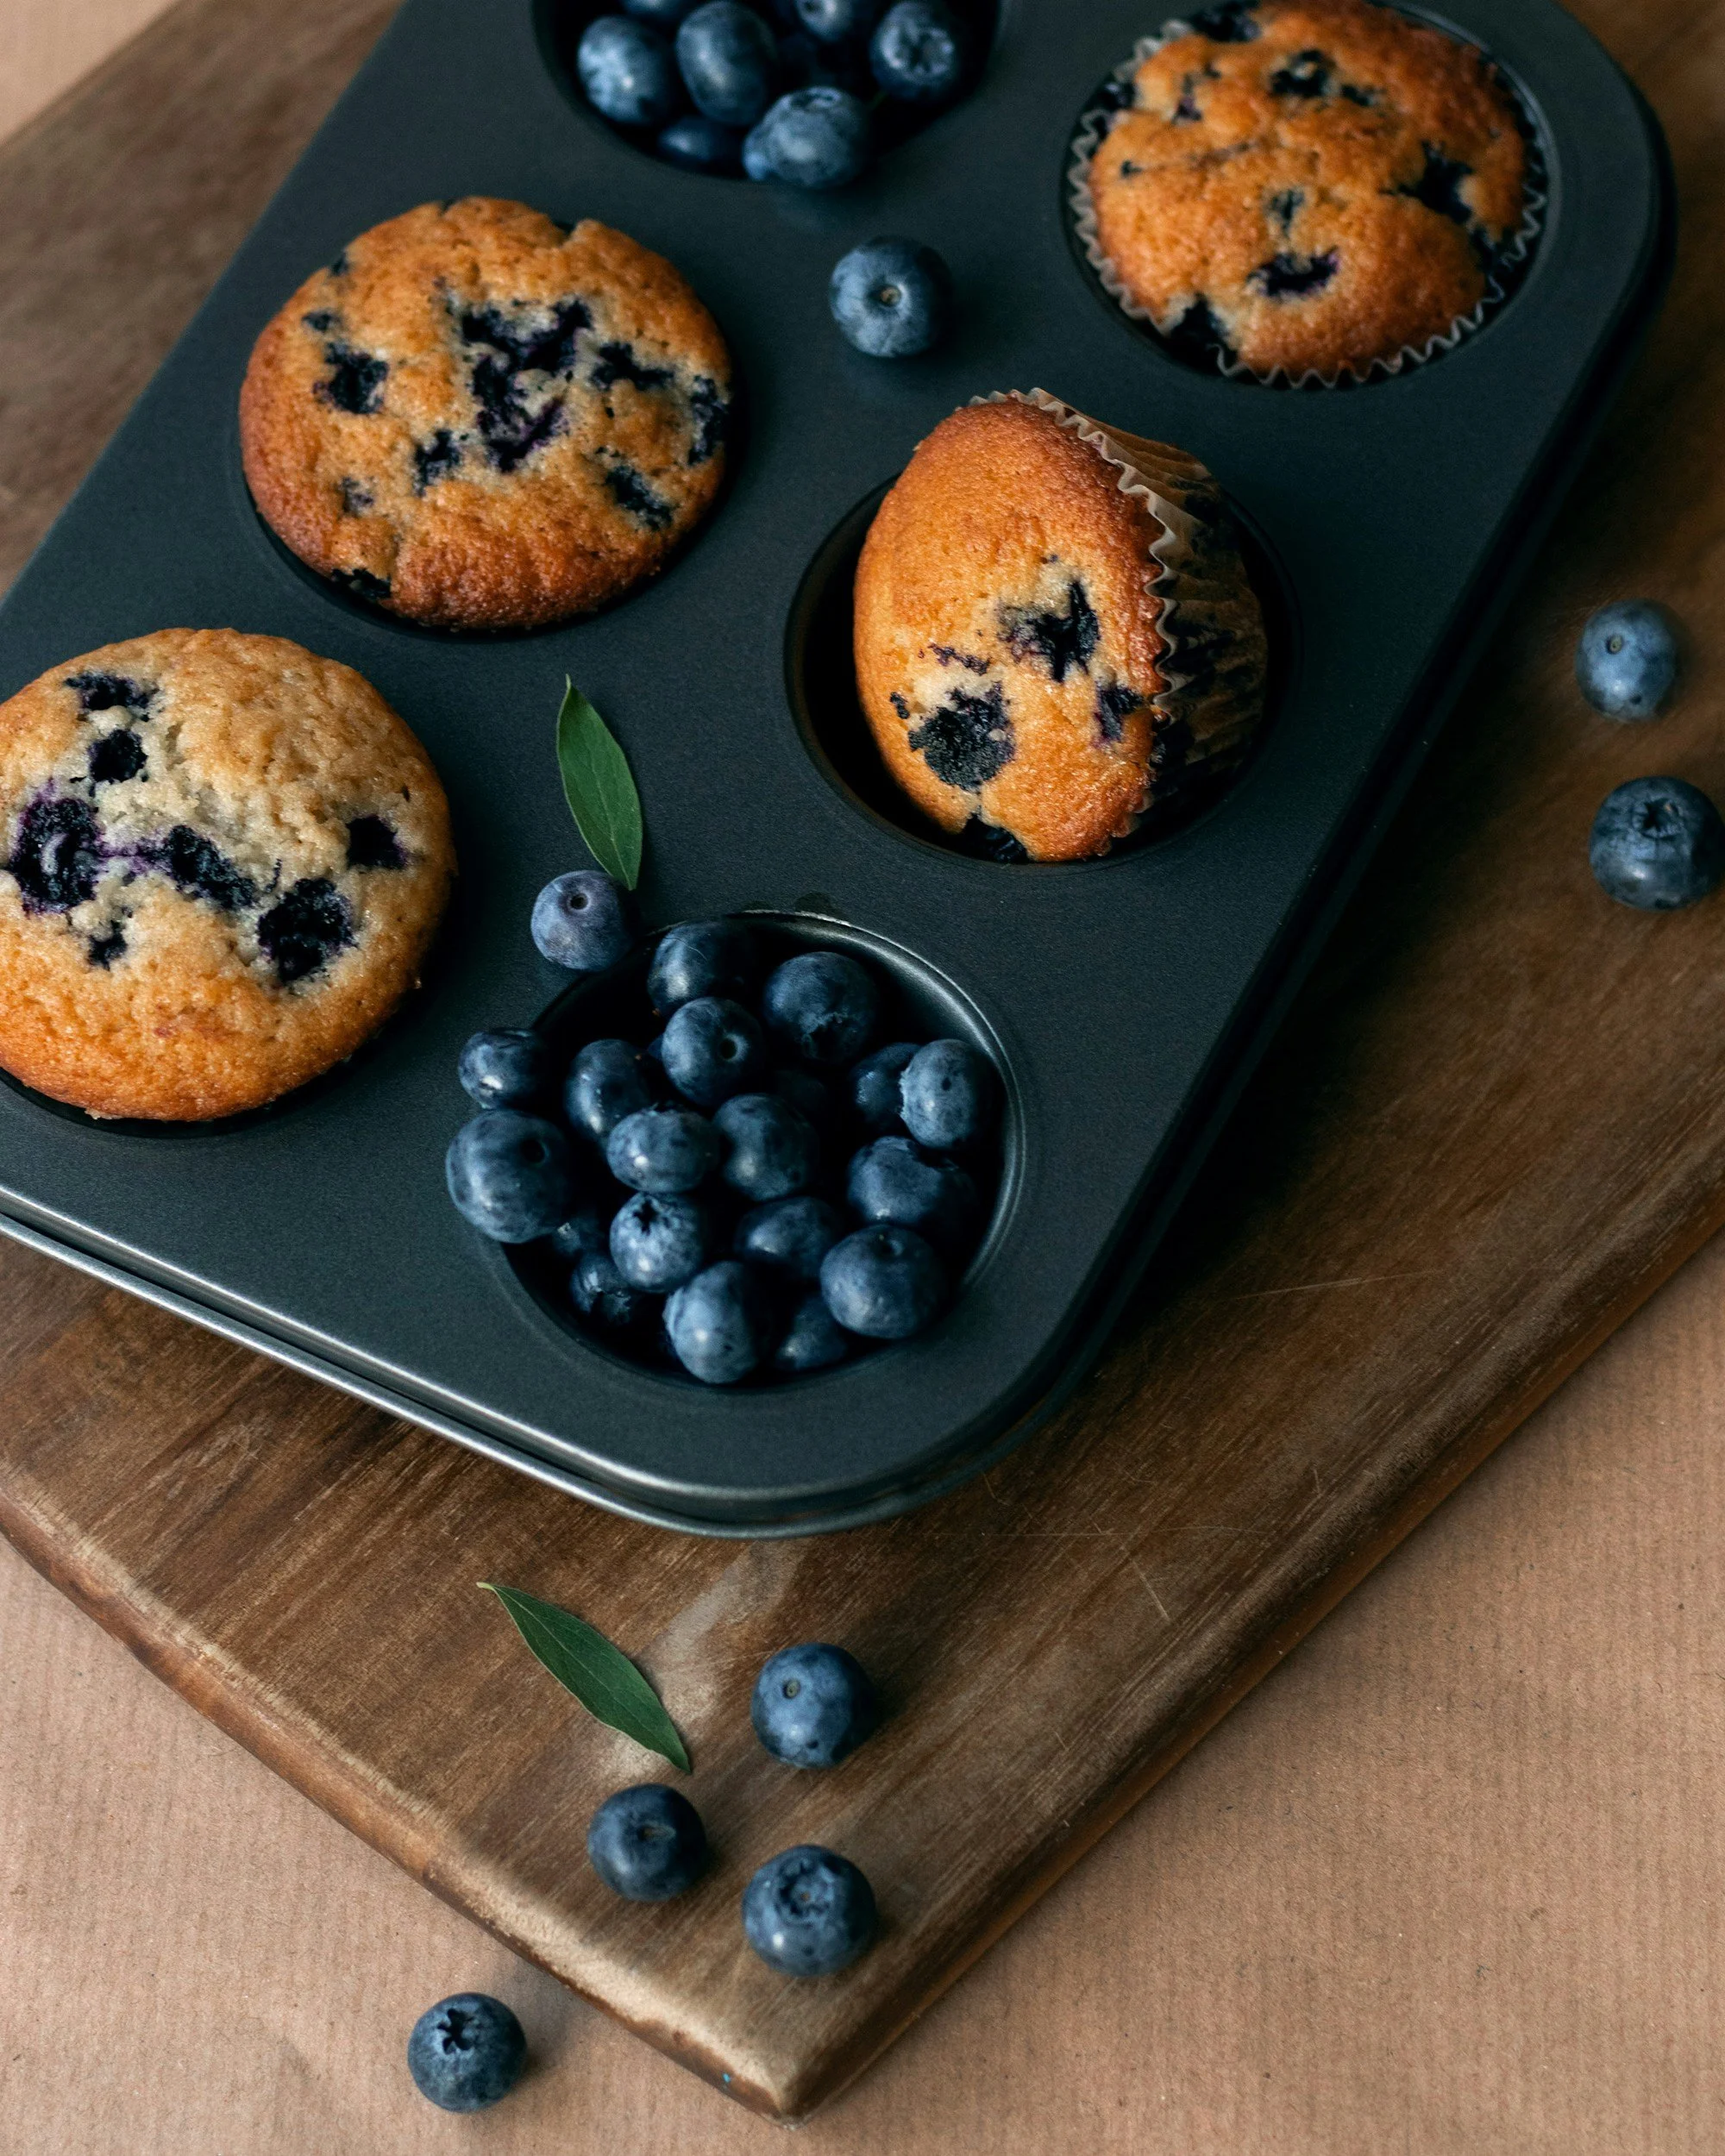
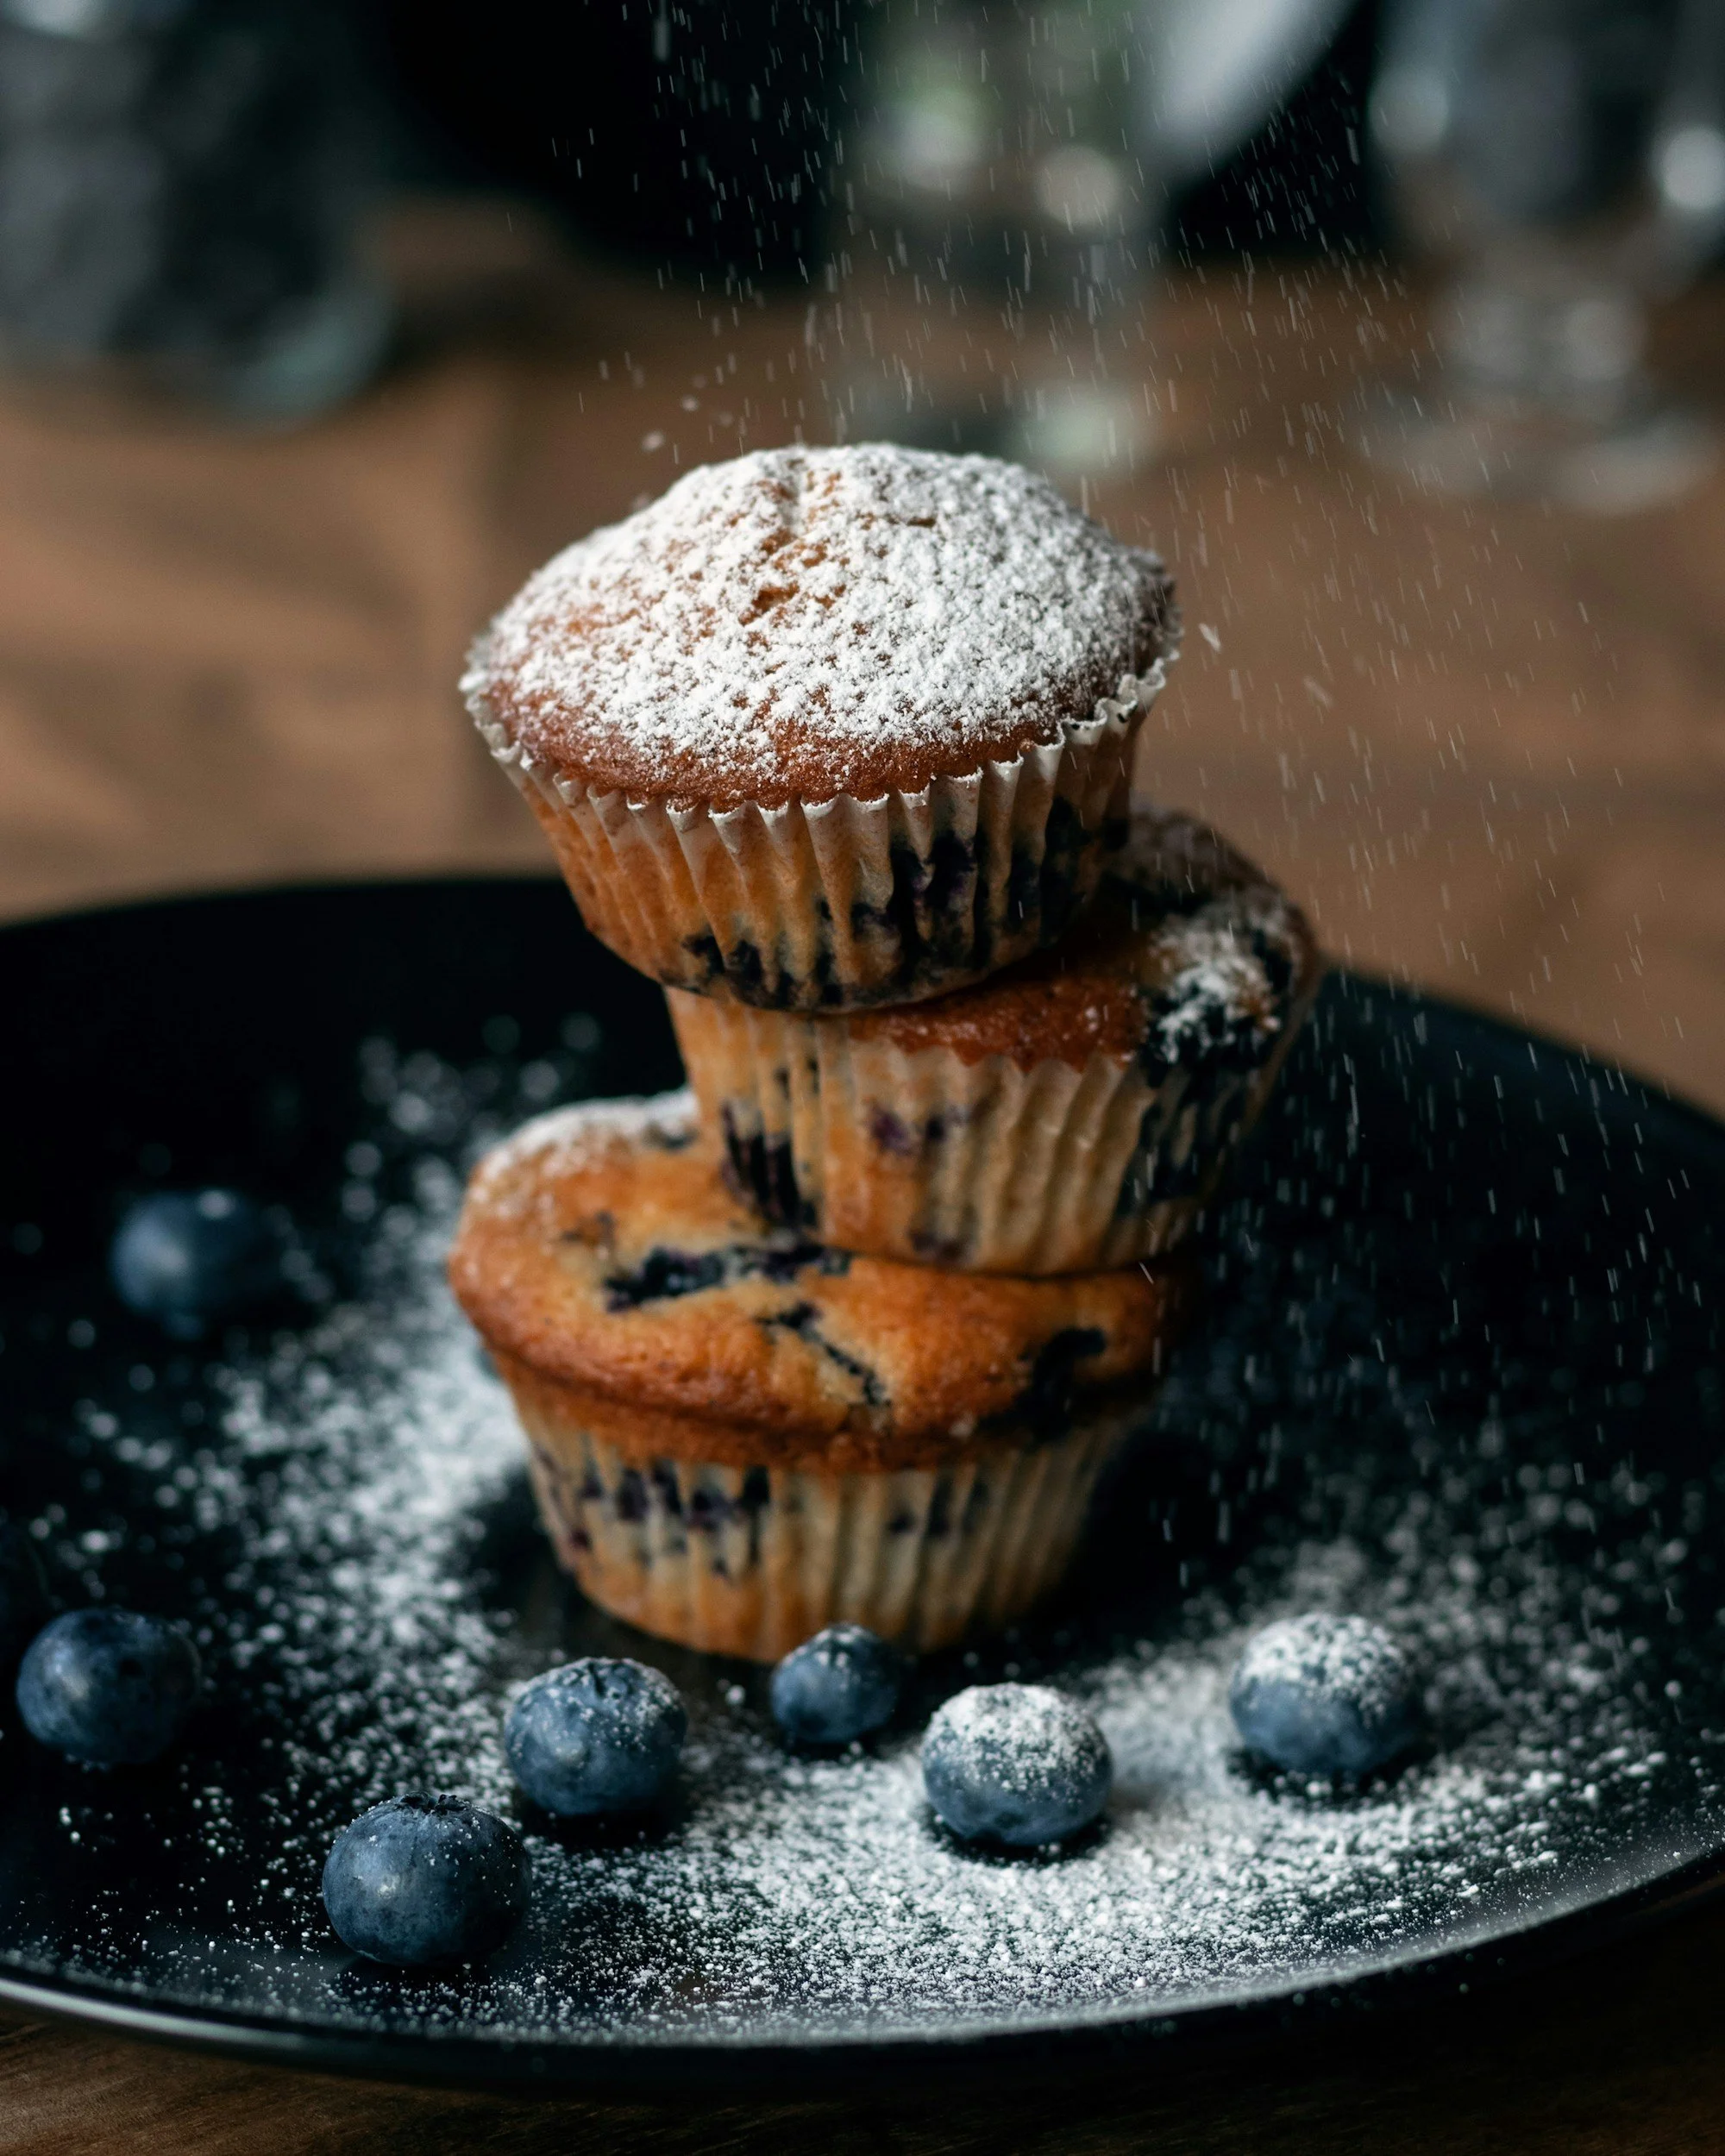
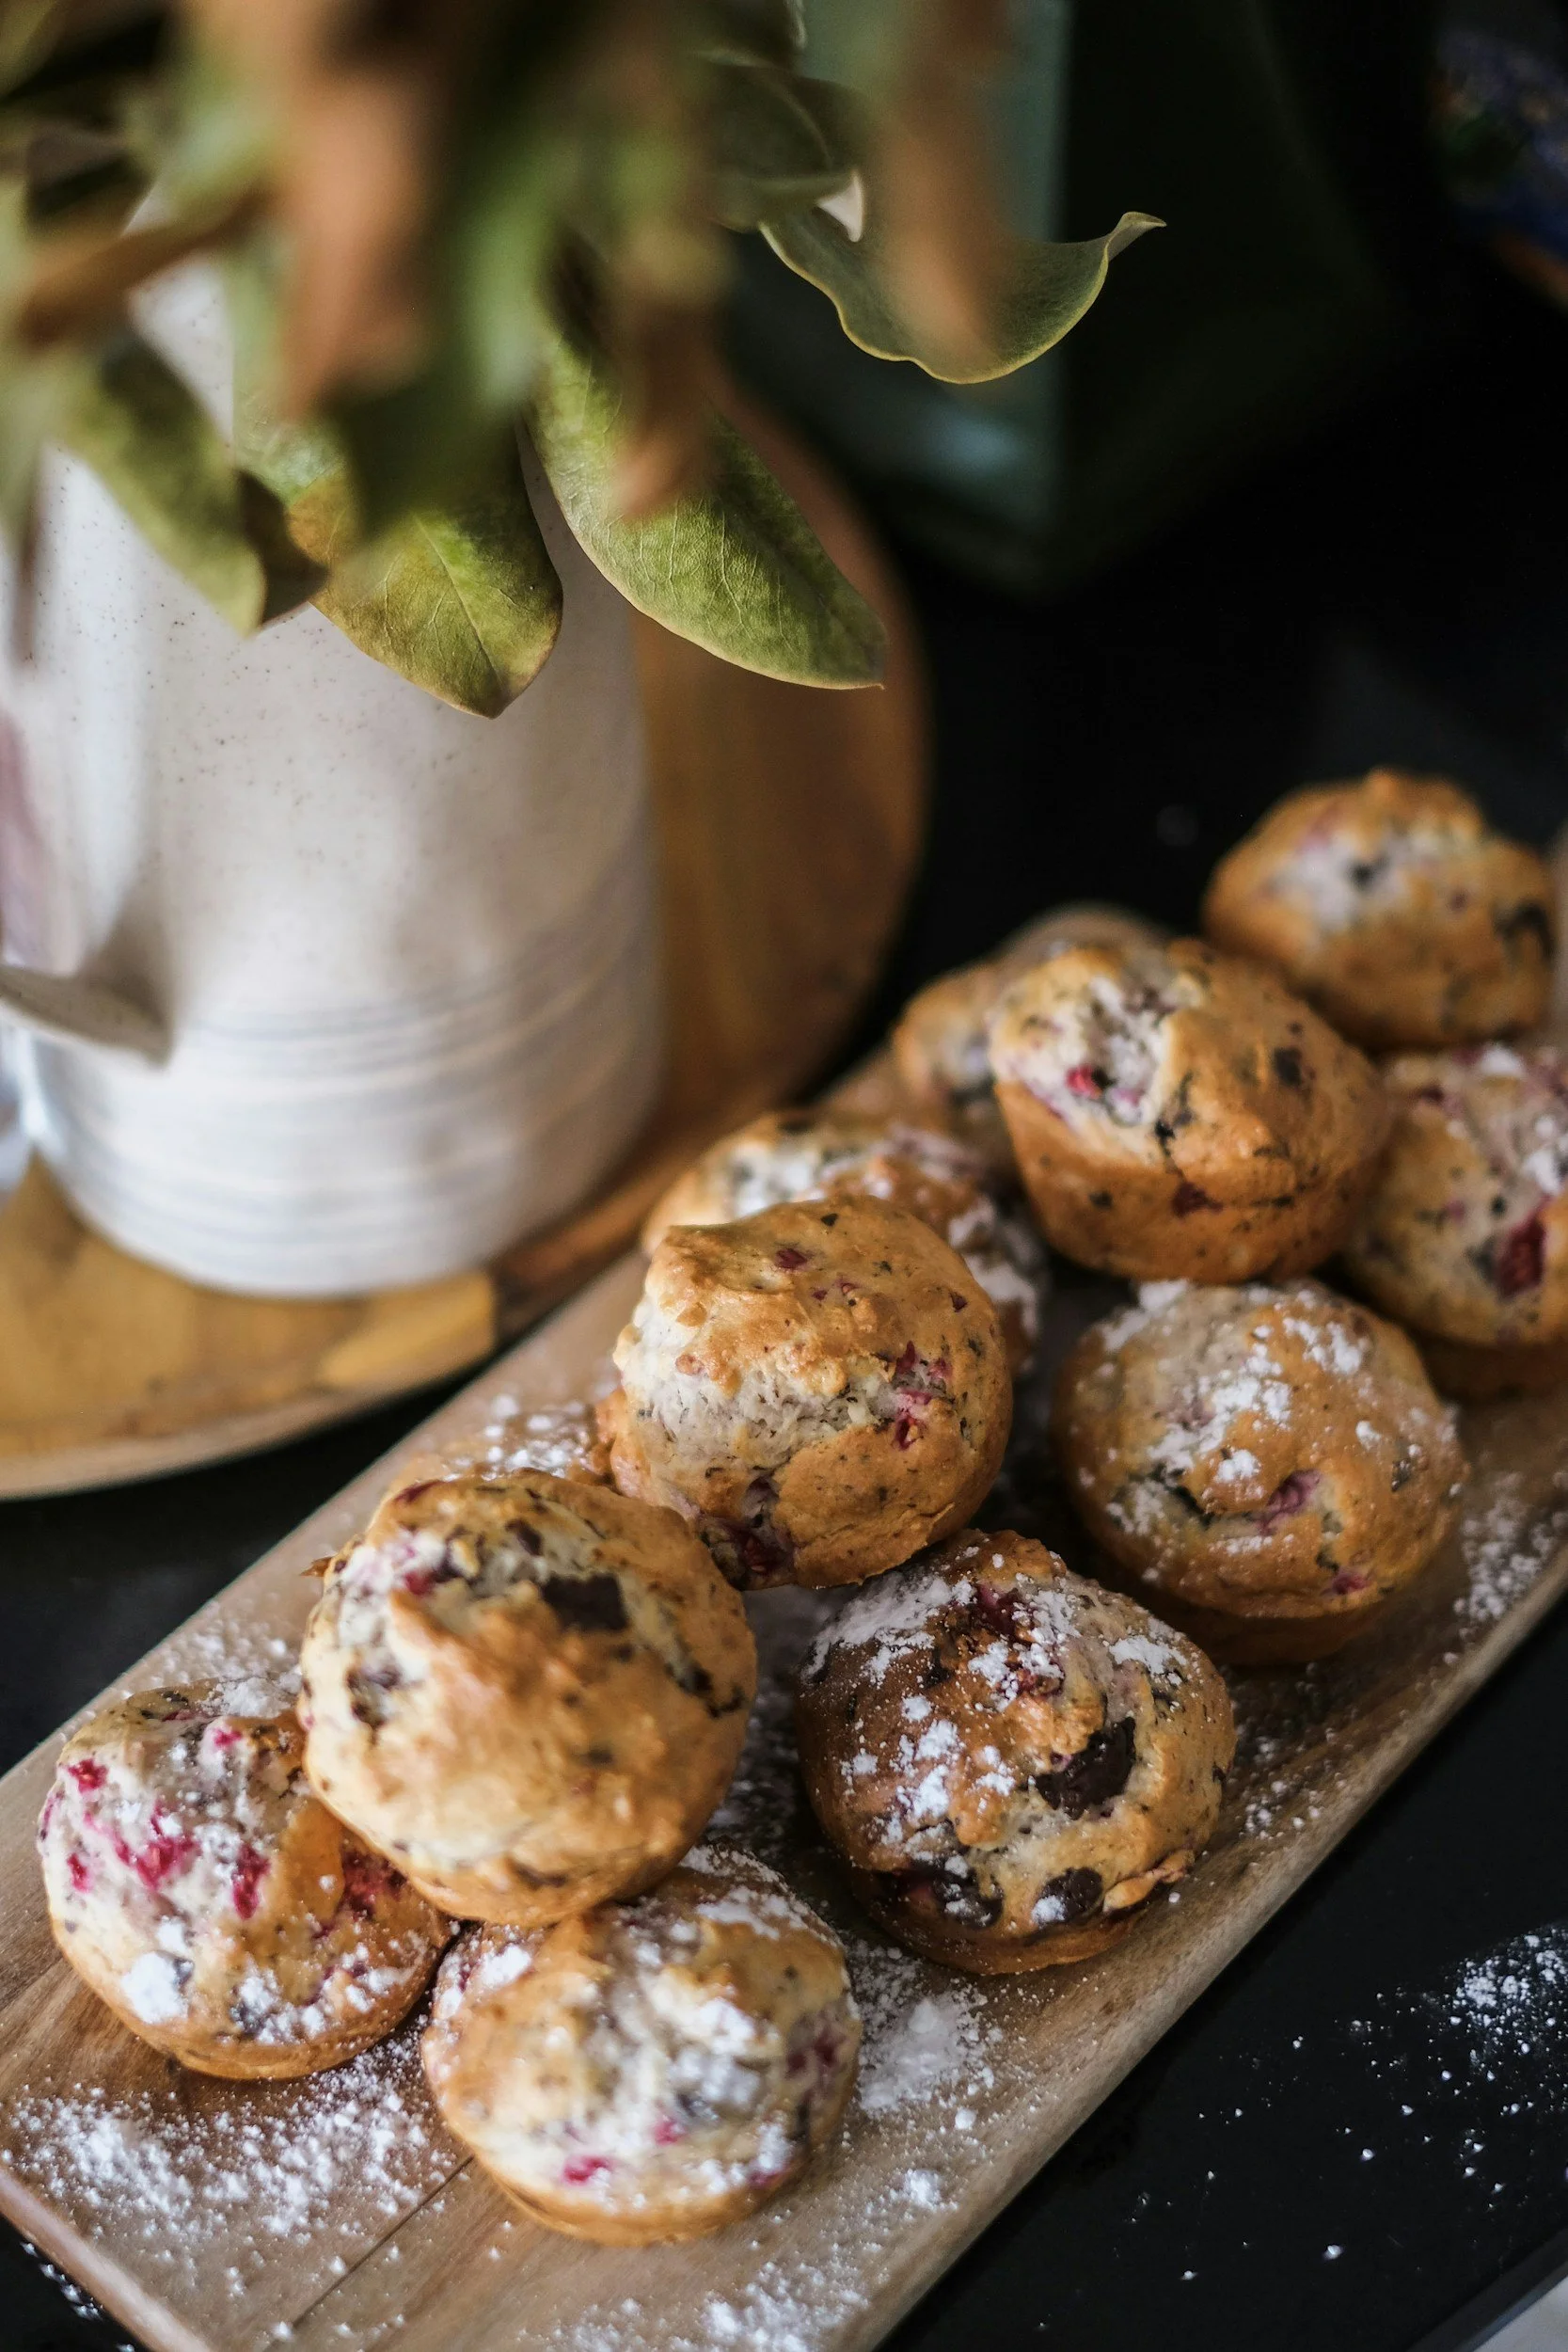
The secret ingredient: EAsy & delicious Wild Blueberry Muffins
These quick and wholesome wild Blueberry Muffins are the perfect kid-approved snack or light breakfast, ready in just 30 minutes. Made with simple, feel-good ingredients, they're the kind of recipe you'll find yourself coming back to again and again. The best part? You can use frozen blueberries instead of fresh — just as delicious and so much easier on the grocery bill. Whether you're prepping for a busy week ahead or just need something homemade on the table fast, these muffins deliver every single time.
As an Amazon Associate I earn from qualifying purchases.
By Danielle | Prep: 10 min | Cook: 22 min | Total Time: 32 minutes | Makes: 12 muffins
📖 Jump to Recipe | 💬 Jump to FAQs
Magical moments!
There's something about late August that feels like pure magic in our house. I’m incredibly fortunate to live in an area that wild blueberry patches are bountiful. The sun is warm, and somehow, every year, we make it a whole family affair — buckets in hand, kids in tow, and the best of intentions to come home with enough berries to last us a while. Spoiler alert! We never quite make it… Between the giggling and the sneaking, the kids manage to eat just as many berries as we pick. And honestly? I wouldn't have it any other way.
On the days we do make it home with a good haul, these Wild Blueberry Muffins are the first thing I make! They've become one of those recipes that my kids ask for by name — a little sweet, a little bright from the lemon, and packed with those gorgeous wild blueberries we worked so hard to bring home. They make the perfect after-pick snack, a light breakfast the next morning, or honestly, a little treat any time of day.
I started with my go-to base muffin batter, but after a batch or two, I noticed they were drying out faster than I'd like. Adding applesauce was a total game changer. It keeps them wonderfully moist, well past day one, and as a bonus, it adds a little extra fibre, which I love when I'm feeding my family. As a parent, there's so much peace of mind that comes from knowing exactly what's going into their bodies — and these muffins are something I genuinely feel good about.
Oh, and did I mention they only use one bowl? Because they do. You're welcome! 😄
Danielle's Easy blueberry Muffins Recipe
Equipment
Large mixing bowl (affiliate link), or standmixer with paddle attachment
spatula (affiliate link)
muffin tin (affiliate link)
muffin liners
Base Ingredients
2 eggs
1 cup milk
½ cup oil (canola or vegetable oil work great)
½ cup unsweetened apple sauce
½ cup brown sugar
½ tsp iodized salt
1 tsp baking soda
2 cups all-purpose flour
1 cup wild blueberries, fresh or frozen
pinch of granular sugar to sprinkle on top of the batter
Step-by-Step Instructions
Step 1: Prep oven
Preheat your oven to 35o°F (175°C).
Step 2: Make your batter
In a large bowl, whisk together the wet ingredients in the listed order: whisk the eggs, milk, oil and apple sauce. Followed by the dry ingredients in the listed order: brown sugar, salt, baking soda, fold in the blueberries. Mix well. Finally, add the flour, being careful not to over mix.
Step 3 – Bake the muffins
Line a muffin tin with paper liners or grease well. Scoop batter into the cups, filling each about ¾ full. Bake until toothpick comes out clean, roughly 20–25 minutes. Let cool for 15 minutes before moving to a cooling rack.
Tips for the Best blueberry & lemon Muffins Every Time
Don't overmix. Stir until just combined — lumps in the batter are your friend. Overmixing develops gluten and leads to tough, flat results.
The mix-ins make it versatile. Each variation gives the batter a completely different personality. The pecan- orange combo is bright and fresh.
Make a double batch and freeze. Muffins freeze beautifully for up to 3 months. Thaw in the fridge before using. Future-you will be very grateful.
Use room temperature eggs and milk. This helps the batter come together more evenly and gives you a better rise.
Canola or vegetable oil keeps the batter light and neutral, letting your mix-in flavours really shine through.
Frequently Asked Questions
can I use frozen blueberry instead of fresh blueberries?
Yes! use frozen or fresh blueberries interchangeably.
can I use farmed berries instead of wild blueberries?
Yes. Use farmed or wild blueberries interchangeably.
Can you use this batter to make pancakes?
Yes! That's exactly what this recipe is designed for. The same batter works beautifully for both pancakes on the stovetop and muffins in the oven. Just pour onto a griddle for pancakes, or scoop into a muffin tin and bake at 35o°F for roughly 22 minutes.
Can I make the batter ahead of time?
Yes, you can make this batter up to 24 hours in advance. Store it covered in the refrigerator and give it a gentle stir before using. Avoid overmixing when you stir it again.
Can I freeze pancakes and muffins made from this batter?
Absolutely. Both pancakes and muffins freeze well for up to 3 months. Store in an airtight bag or container. Thaw in the fridge or microwave pancakes for 10-15 seconds.
What makes this a kid-friendly recipe?
It uses simple pantry staples, comes together in one bowl, and the mix-in options let kids pick their favourite flavour. This muffin recipe is especially popular with little ones.
How do I know when muffins are done baking?
Insert a toothpick into the centre of a muffin — if it comes out clean or with just a few dry crumbs, they're done. If batter sticks to the toothpick, bake for another 2–3 minutes and check again.
Recipe variations
Add Raspberries: Add ½ cup of raspberries, fresh or frozen to the batter at the same time as adding the bluberries.
Orange Bliss: Add in 1 tsp of orange zest, roughly the rind of 1 navel orange instead of lemon zest.
Dark Chocolate: Add 1/3 cup of dark chocolate chips to the batter at the same time as adding the blueberries.
Recipe Card
Ingredients:
2 eggs
1 cup milk
½ cup oil (canola or vegetable oil work great)
1 tsp lemon zest
½ cup unsweetened apple sauce
½ cup brown sugar
½ tsp iodized salt
1 tsp baking soda
2 cups all-purpose flour
Instructions:
Preheat your oven to 35o°F (175°C).
In a large mixing bowl, whisk together the wet ingredients in the listed order: whisk the eggs, milk, oil, lemon zest and apple sauce. Mix well.
Add the dry ingredients in the listed order: brown sugar, salt, baking soda, fold in the blueberries. Mix well. Finally, flour, being careful not to over mix.
Line a muffin tin with paper liners or grease well. Scoop batter into the cups using a 1/4 cup measuring spoon, filling each about ¾ full.
Bake until toothpick comes out clean, roughly 20–25 minutes. Let cool for 5 minutes before removing.
DID YOU MAKE THIS RECIPE? I want to see it!
Leave a ⭐ star rating and comment below to let us know how your muffins turned out. Did you make any substitutions or additions? Share your tips and photos with us!
Share this recipe: Help others discover this delicious recipe by sharing it on Pinterest, Facebook, or Instagram. Tag us @Sageandsimplicity so we can see your beautiful creations!
📌 Pin it for later: Save this recipe to your Pinterest boards for easy access.
You might also like these recipes:


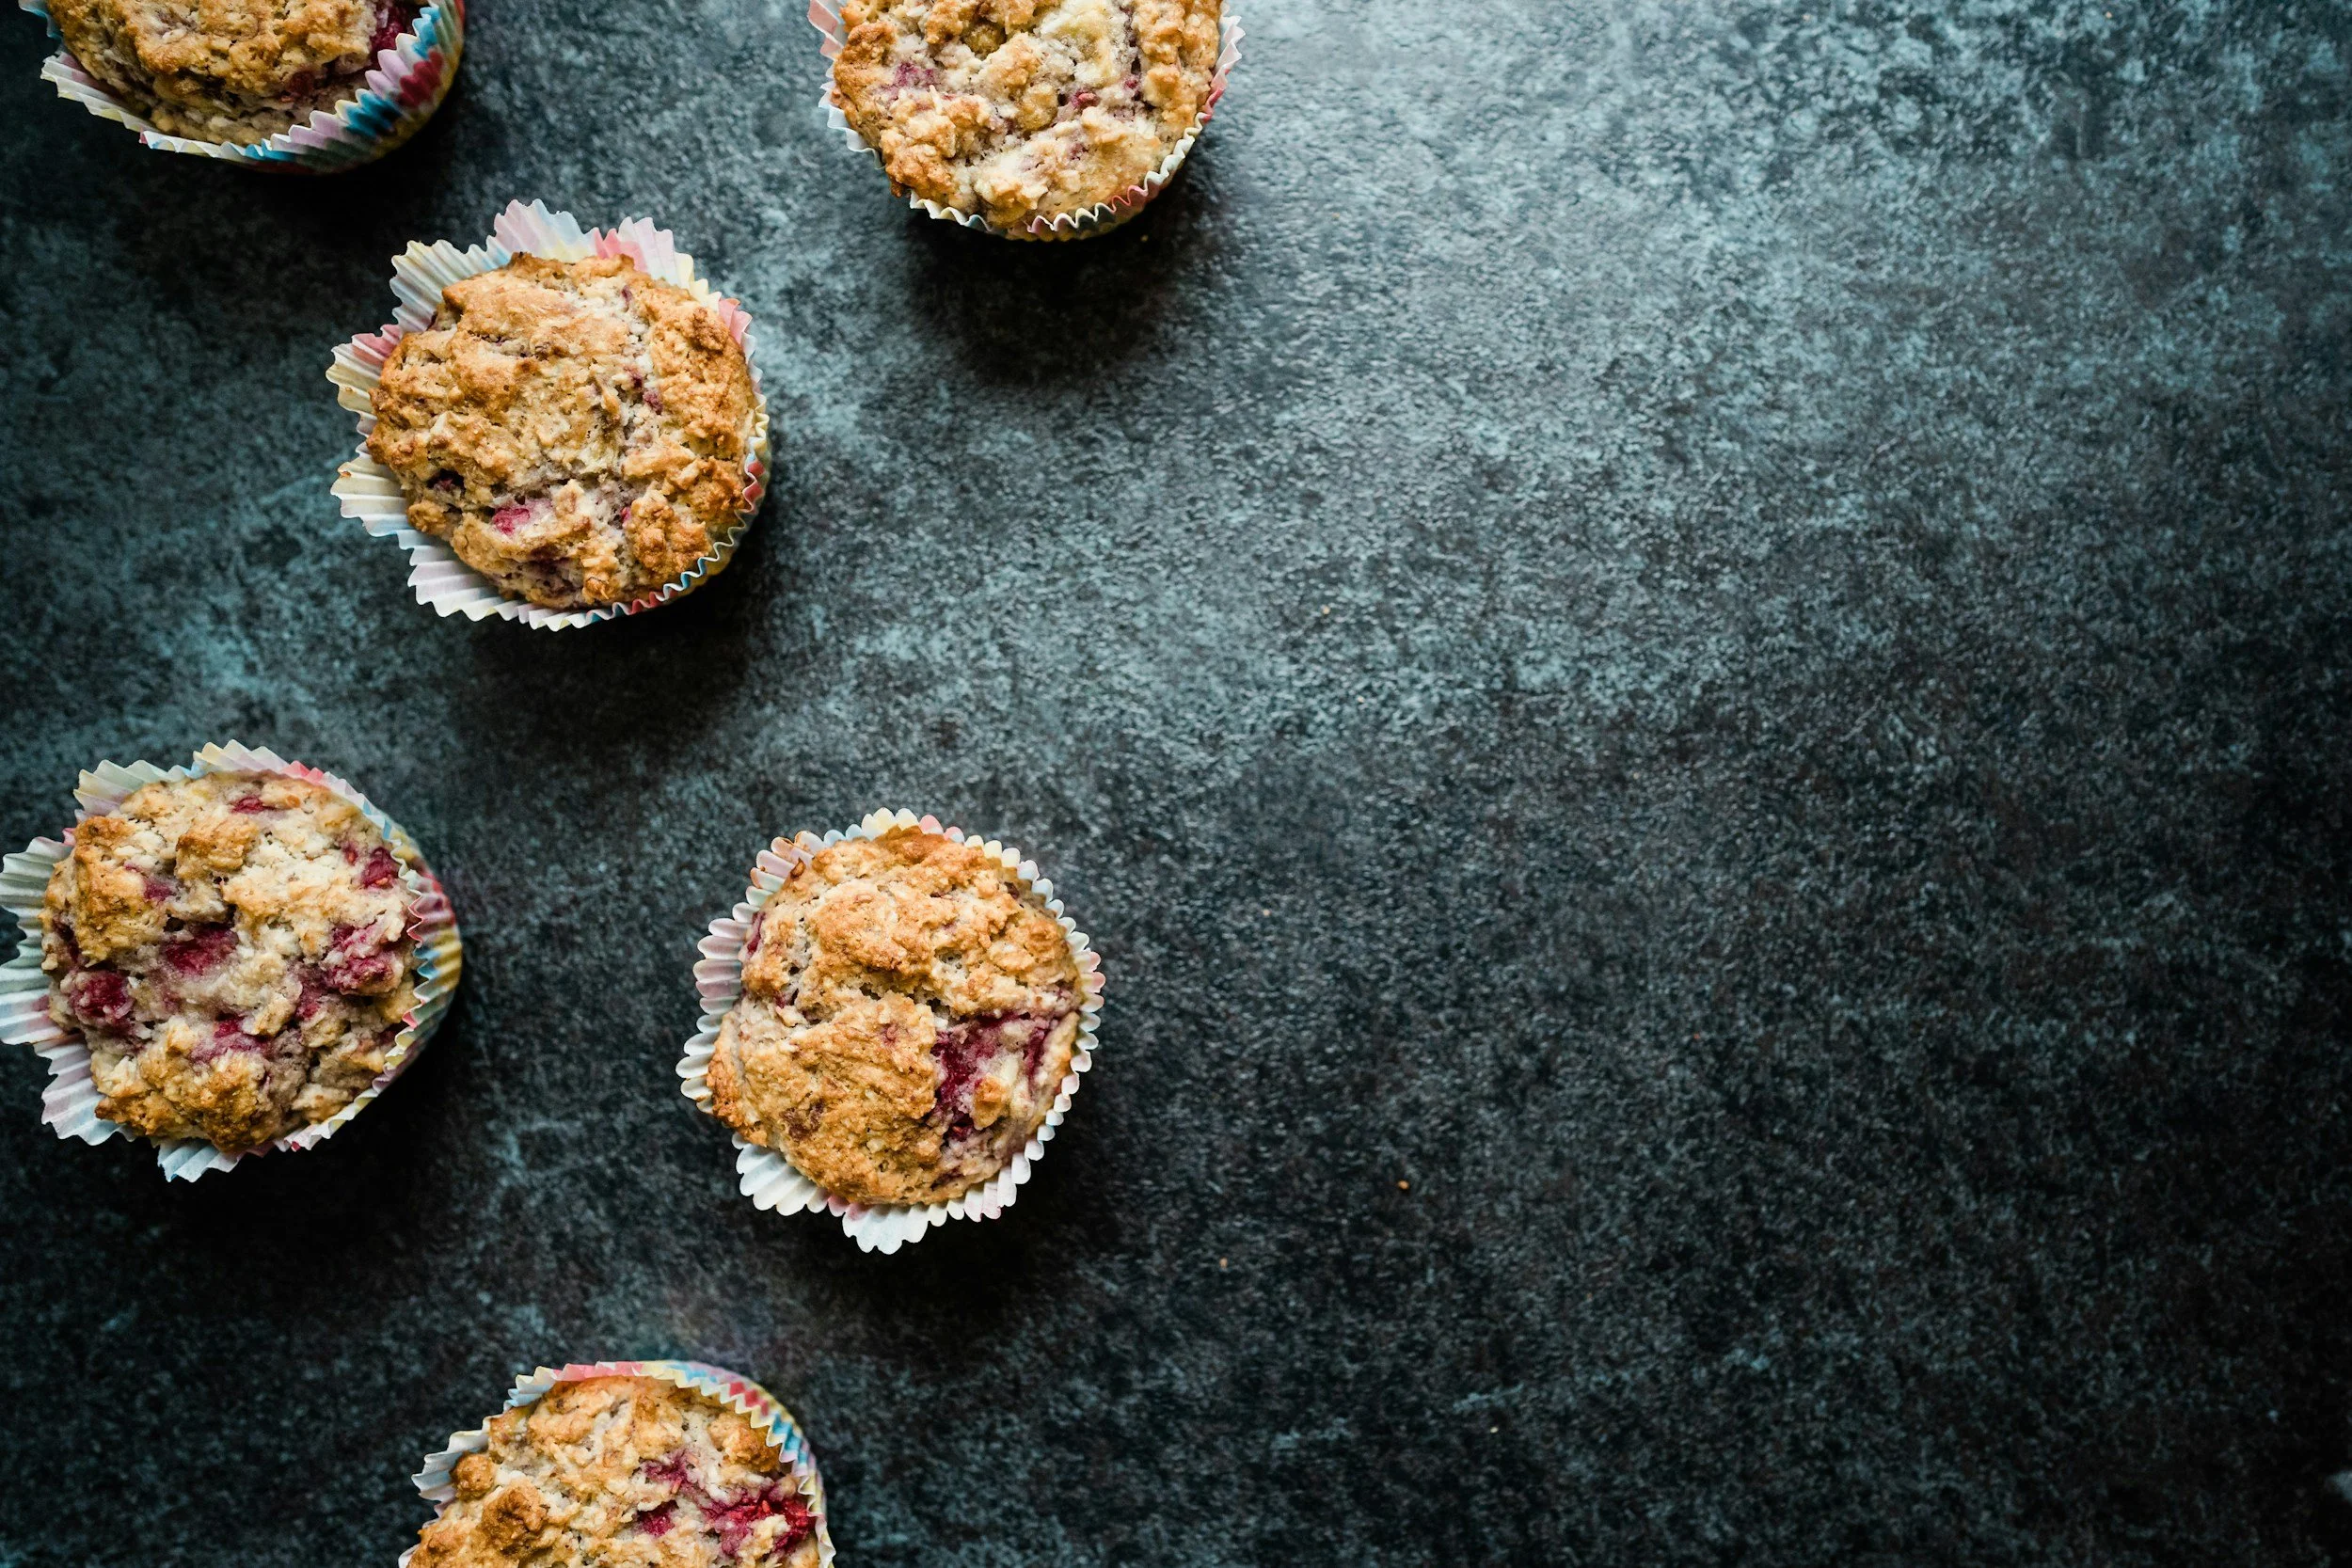
Raspberry Muffins
As an Amazon Associate I earn from qualifying purchases.
By Danielle | Prep: 10 min | Cook: 22 min | Total Time: 32 minutes | Makes: 12 muffins
📖 Jump to Recipe | 💬 Jump to FAQs | 🖨️ Print Recipe
Why I love this REcipe
If there's one thing I've learned as a parent, it's that having a quick, wholesome snack ready to go can make all the difference on a busy day. These Raspberry Muffins have become a staple in our house for exactly that reason — they come together in just 30 minutes, can make them using one bowl (fewer dishes), the kids absolutely love them, and I feel genuinely good about every ingredient going into them.
What I especially love about this recipe is that you don't need fresh raspberries to make them shine. Frozen raspberries work beautifully here — and honestly, they're what I reach for most often. They're available year-round, significantly more affordable than fresh, and they bake up just as delicious. It's one of those little swaps that makes a recipe feel truly doable any time of year, not just when berries are in season.
Whether you're packing these into a lunchbox, setting them out for an after-school snack, or grabbing one alongside your morning coffee, these muffins are the kind of thing the whole family can get behind. Simple ingredients, minimal fuss, and that cozy homemade feeling — that's what this recipe is all about. And as a parent, knowing exactly what's in your kids' food? That never gets old.
Danielle's Easy raspberry Muffins Recipe
Equipment
Large mixing bowl (affiliate link), or standmixer with paddle attachment
spatula (affiliate link)
muffin tin (affiliate link)
muffin liners
Base Ingredients
2 eggs
1 cup milk
½ cup oil (canola or vegetable oil work great)
1 tbsp vanilla extract
½ cup unsweetened apple sauce
½ cup brown sugar
½ tsp iodized salt
1 tsp baking soda
1 cup raspberries, frozen or fresh, you chose!
2 cups all-purpose flour
Step-by-Step Instructions
Step 1: Prep oven:
Preheat your oven to 35o°F (175°C).
Step 2: Make your batter:
In a large bowl, whisk together the wet ingredients in the listed order: whisk the eggs, milk, oil, and vanilla. Followed by the dry ingredients in the listed order: brown sugar, salt, baking soda, fold in the raspberries. Mix well. Finally, flour, being careful not to over mix.
Step 3 – Bake the muffins
Line a muffin tin with paper liners or grease well. Using ¼ cup measuring spoon, scoop batter into the cups, filling each about ¾ full. Bake until toothpick comes out clean, roughly 20–25 minutes. Let cool for 5 minutes before removing.
Tips for the Best raspberry Muffins Every Time
Don't overmix. Stir until just combined — lumps in the batter are your friend. Overmixing develops gluten and leads to tough, flat results.
The mix-ins make it versatile. Each variation gives the batter a completely different personality. The pecan- orange combo is bright and fresh.
Don’t skip the applesauce. This is the secret ingredient that keeps the muffins moist.
Make a double batch and freeze. Muffins freeze beautifully for up to 3 months. Thaw in the fridge before using. Future-you will be very grateful.
Use room temperature eggs and milk. This helps the batter come together more evenly and gives you a better rise.
Canola or vegetable oil keeps the batter light and neutral, letting your mix-in flavours really shine through.
Frequently Asked Questions
Can you use this batter to make pancakes?
Yes! That's exactly what this recipe is designed for. The same batter works beautifully for both pancakes on the stovetop and muffins in the oven. Just pour onto a griddle for pancakes, or scoop into a muffin tin and bake at 35o°F for roughly 22 minutes.
Can I make the batter ahead of time?
Yes, you can make this batter up to 24 hours in advance. Store it covered in the refrigerator and give it a gentle stir before using. Avoid overmixing when you stir it again.
Can I freeze pancakes and muffins made from this batter?
Absolutely. Both pancakes and muffins freeze well for up to 3 months. Store in an airtight bag or container. Thaw in the fridge or microwave pancakes for 30–60 seconds.
What makes this a kid-friendly recipe?
It uses simple pantry staples, comes together in one bowl, and the mix-in options let kids pick their favourite flavour. These chocolate chip muffin recipe is especially popular with little ones.
How do I know when muffins are done baking?
Insert a toothpick into the centre of a muffin — if it comes out clean or with just a few dry crumbs, they're done. If batter sticks to the toothpick, bake for another 2–3 minutes and check again.
Sign up fOR our EMAIL Newsletter!
Recipe variations
Raspberry & Almond: substitute 1 tsp pure Almond extract to the batter, instead of vanilla extract.
Macadamia Nut & White Chocolate: Add ¼ cup macadamia and ¼ cup of white chocolate chips.
Orange Bliss: Add in 1 tsp of orange zest, roughly the rind of 1 navel orange.
Dark Chocolate: Use dark chocolate chips.
Recipe Card
Ingredients:
2 eggs
1 cup milk
½ cup oil (canola or vegetable oil work great)
1 tbsp vanilla extract
½ cup unsweetened apple sauce
½ cup brown sugar
½ tsp iodized salt
1 tsp baking soda
1 cup raspberries, fresh or frozen, your choice!
2 cups all-purpose flour
Instructions:
Preheat your oven to 35o°F (175°C).
In a large mixing bowl, whisk together the wet ingredients in the listed order: whisk the eggs, milk, oil, and vanilla and mix well.
Add the dry ingredients in the listed order: brown sugar, salt, baking soda, fold in the raspberries. Mix well. Finally, add the flour, being careful not to over mix.
Line a muffin tin with paper liners or grease well. Scoop batter into the cups using a ¼ cup measuring spoon, filling each about ¾ full.
Bake until toothpick comes out clean, roughly 20–25 minutes. Let cool for 5 minutes before removing.
DID YOU MAKE THIS RECIPE?
We'd love to hear from you! Please leave a ⭐ star rating and comment below to let us know how your muffins turned out. Did you make any substitutions or additions? Share your tips and photos with us!
Share this recipe: Help others discover this delicious recipe by sharing it on Pinterest, Facebook, or Instagram. Tag us @Sageandsimplicity so we can see your beautiful creations!
📌 Pin it for later: Save this recipe to your Pinterest boards for easy access.
You might also like these recipes:
Wild Blueberry & lemon Muffins
These quick and wholesome Blueberry & Lemon Muffins are the perfect kid-approved snack or light breakfast, ready in just 30 minutes. Made with simple, feel-good ingredients, they're the kind of recipe you'll find yourself coming back to again and again. The best part? You can use frozen blueberries instead of fresh — just as delicious and so much easier on the grocery bill. Whether you're prepping for a busy week ahead or just need something homemade on the table fast, these muffins deliver every single time.
As an Amazon Associate I earn from qualifying purchases.
By Danielle | Prep: 10 min | Cook: 22 min | Total Time: 32 minutes | Makes: 12 muffins
📖 Jump to Recipe | 💬 Jump to FAQs | 🖨️ Print Recipe
Magical moments!
There's something about late August that feels like pure magic in our house. The wild blueberry patches are full, the sun is warm, and somehow, every year, we make it a whole family affair — buckets in hand, kids in tow, and the best of intentions to come home with enough berries to last us a while. Spoiler alert! We never quite make it… Between the giggling and the sneaking, the kids manage to eat just as many berries as we pick. And honestly? I wouldn't have it any other way.
On the days we do make it home with a good haul, these Wild Blueberry & Lemon Muffins are the first thing I make! They've become one of those recipes that my kids ask for by name — a little sweet, a little bright from the lemon, and packed with those gorgeous wild blueberries we worked so hard to bring home. They make the perfect after-pick snack, a light breakfast the next morning, or honestly, a little treat any time of day.
I started with my go-to base muffin batter, but after a batch or two, I noticed they were drying out faster than I'd like. Adding applesauce was a total game changer. It keeps them wonderfully moist, well past day one, and as a bonus, it adds a little extra fibre, which I love when I'm feeding my family. As a parent, there's so much peace of mind that comes from knowing exactly what's going into their bodies — and these muffins are something I genuinely feel good about.
Oh, and did I mention they only use one bowl? Because they do. You're welcome! 😄
Danielle's Easy blueberry & Lemon Muffins Recipe
Equipment
Large mixing bowl (affiliate link), or standmixer with paddle attachment
spatula (affiliate link)
muffin tin (affiliate link)
muffin liners
Base Ingredients
2 eggs
1 cup milk
½ cup oil (canola or vegetable oil work great)
1 tsp lemon zest, roughly one lemon
½ cup unsweetened apple sauce
½ cup brown sugar
½ tsp iodized salt
1 tsp baking soda
2 cups all-purpose flour
1 cup blueberries, fresh or frozen,
pinch of granular sugar to sprinkle on top of the batter
Step-by-Step Instructions
Step 1: Prep oven
Preheat your oven to 35o°F (175°C).
Step 2: Make your batter
In a large bowl, whisk together the wet ingredients in the listed order: whisk the eggs, milk, oil, lemon zest and apple sauce. Followed by the dry ingredients in the listed order: brown sugar, salt, baking soda, fold in the blueberries. Mix well. Finally, add the flour, being careful not to over mix.
Step 3 – Bake the muffins
Line a muffin tin with paper liners or grease well. Scoop batter into the cups, filling each about ¾ full. Bake until toothpick comes out clean, roughly 20–25 minutes. Let cool for 15 minutes before moving to a cooling rack.
Tips for the Best blueberry & lemon Muffins Every Time
Don't overmix. Stir until just combined — lumps in the batter are your friend. Overmixing develops gluten and leads to tough, flat results.
The mix-ins make it versatile. Each variation gives the batter a completely different personality. The pecan- orange combo is bright and fresh.
Make a double batch and freeze. Muffins freeze beautifully for up to 3 months. Thaw in the fridge before using. Future-you will be very grateful.
Use room temperature eggs and milk. This helps the batter come together more evenly and gives you a better rise.
Canola or vegetable oil keeps the batter light and neutral, letting your mix-in flavours really shine through.
Frequently Asked Questions
can I use frozen blueberry instead of fresh blueberries?
Yes! use frozen or fresh blueberries interchangeably.
can I use farmed berries instead of wild blueberries?
Yes. Use farmed or wild blueberries interchangeably.
Can you use this batter to make pancakes?
Yes! That's exactly what this recipe is designed for. The same batter works beautifully for both pancakes on the stovetop and muffins in the oven. Just pour onto a griddle for pancakes, or scoop into a muffin tin and bake at 35o°F for roughly 22 minutes.
Can I make the batter ahead of time?
Yes, you can make this batter up to 24 hours in advance. Store it covered in the refrigerator and give it a gentle stir before using. Avoid overmixing when you stir it again.
Can I freeze pancakes and muffins made from this batter?
Absolutely. Both pancakes and muffins freeze well for up to 3 months. Store in an airtight bag or container. Thaw in the fridge or microwave pancakes for 10-15 seconds.
What makes this a kid-friendly recipe?
It uses simple pantry staples, comes together in one bowl, and the mix-in options let kids pick their favourite flavour. This muffin recipe is especially popular with little ones.
How do I know when muffins are done baking?
Insert a toothpick into the centre of a muffin — if it comes out clean or with just a few dry crumbs, they're done. If batter sticks to the toothpick, bake for another 2–3 minutes and check again.
Recipe variations
Add Raspberries: Add ½ cup of raspberries, fresh or frozen to the batter at the same time as adding the bluberries.
Orange Bliss: Add in 1 tsp of orange zest, roughly the rind of 1 navel orange instead of lemon zest.
Dark Chocolate: Add 1/3 cup of dark chocolate chips to the batter at the same time as adding the blueberries.
Recipe Card
Ingredients:
2 eggs
1 cup milk
½ cup oil (canola or vegetable oil work great)
1 tsp lemon zest
½ cup unsweetened apple sauce
½ cup brown sugar
½ tsp iodized salt
1 tsp baking soda
2 cups all-purpose flour
Instructions:
Preheat your oven to 35o°F (175°C).
In a large mixing bowl, whisk together the wet ingredients in the listed order: whisk the eggs, milk, oil, lemon zest and apple sauce. Mix well.
Add the dry ingredients in the listed order: brown sugar, salt, baking soda, fold in the blueberries. Mix well. Finally, flour, being careful not to over mix.
Line a muffin tin with paper liners or grease well. Scoop batter into the cups using a 1/4 cup measuring spoon, filling each about ¾ full.
Bake until toothpick comes out clean, roughly 20–25 minutes. Let cool for 5 minutes before removing.
DID YOU MAKE THIS RECIPE? I want to see it!
Leave a ⭐ star rating and comment below to let us know how your muffins turned out. Did you make any substitutions or additions? Share your tips and photos with us!
Share this recipe: Help others discover this delicious recipe by sharing it on Pinterest, Facebook, or Instagram. Tag us @Sageandsimplicity so we can see your beautiful creations!
📌 Pin it for later: Save this recipe to your Pinterest boards for easy access.
You might also like these recipes:

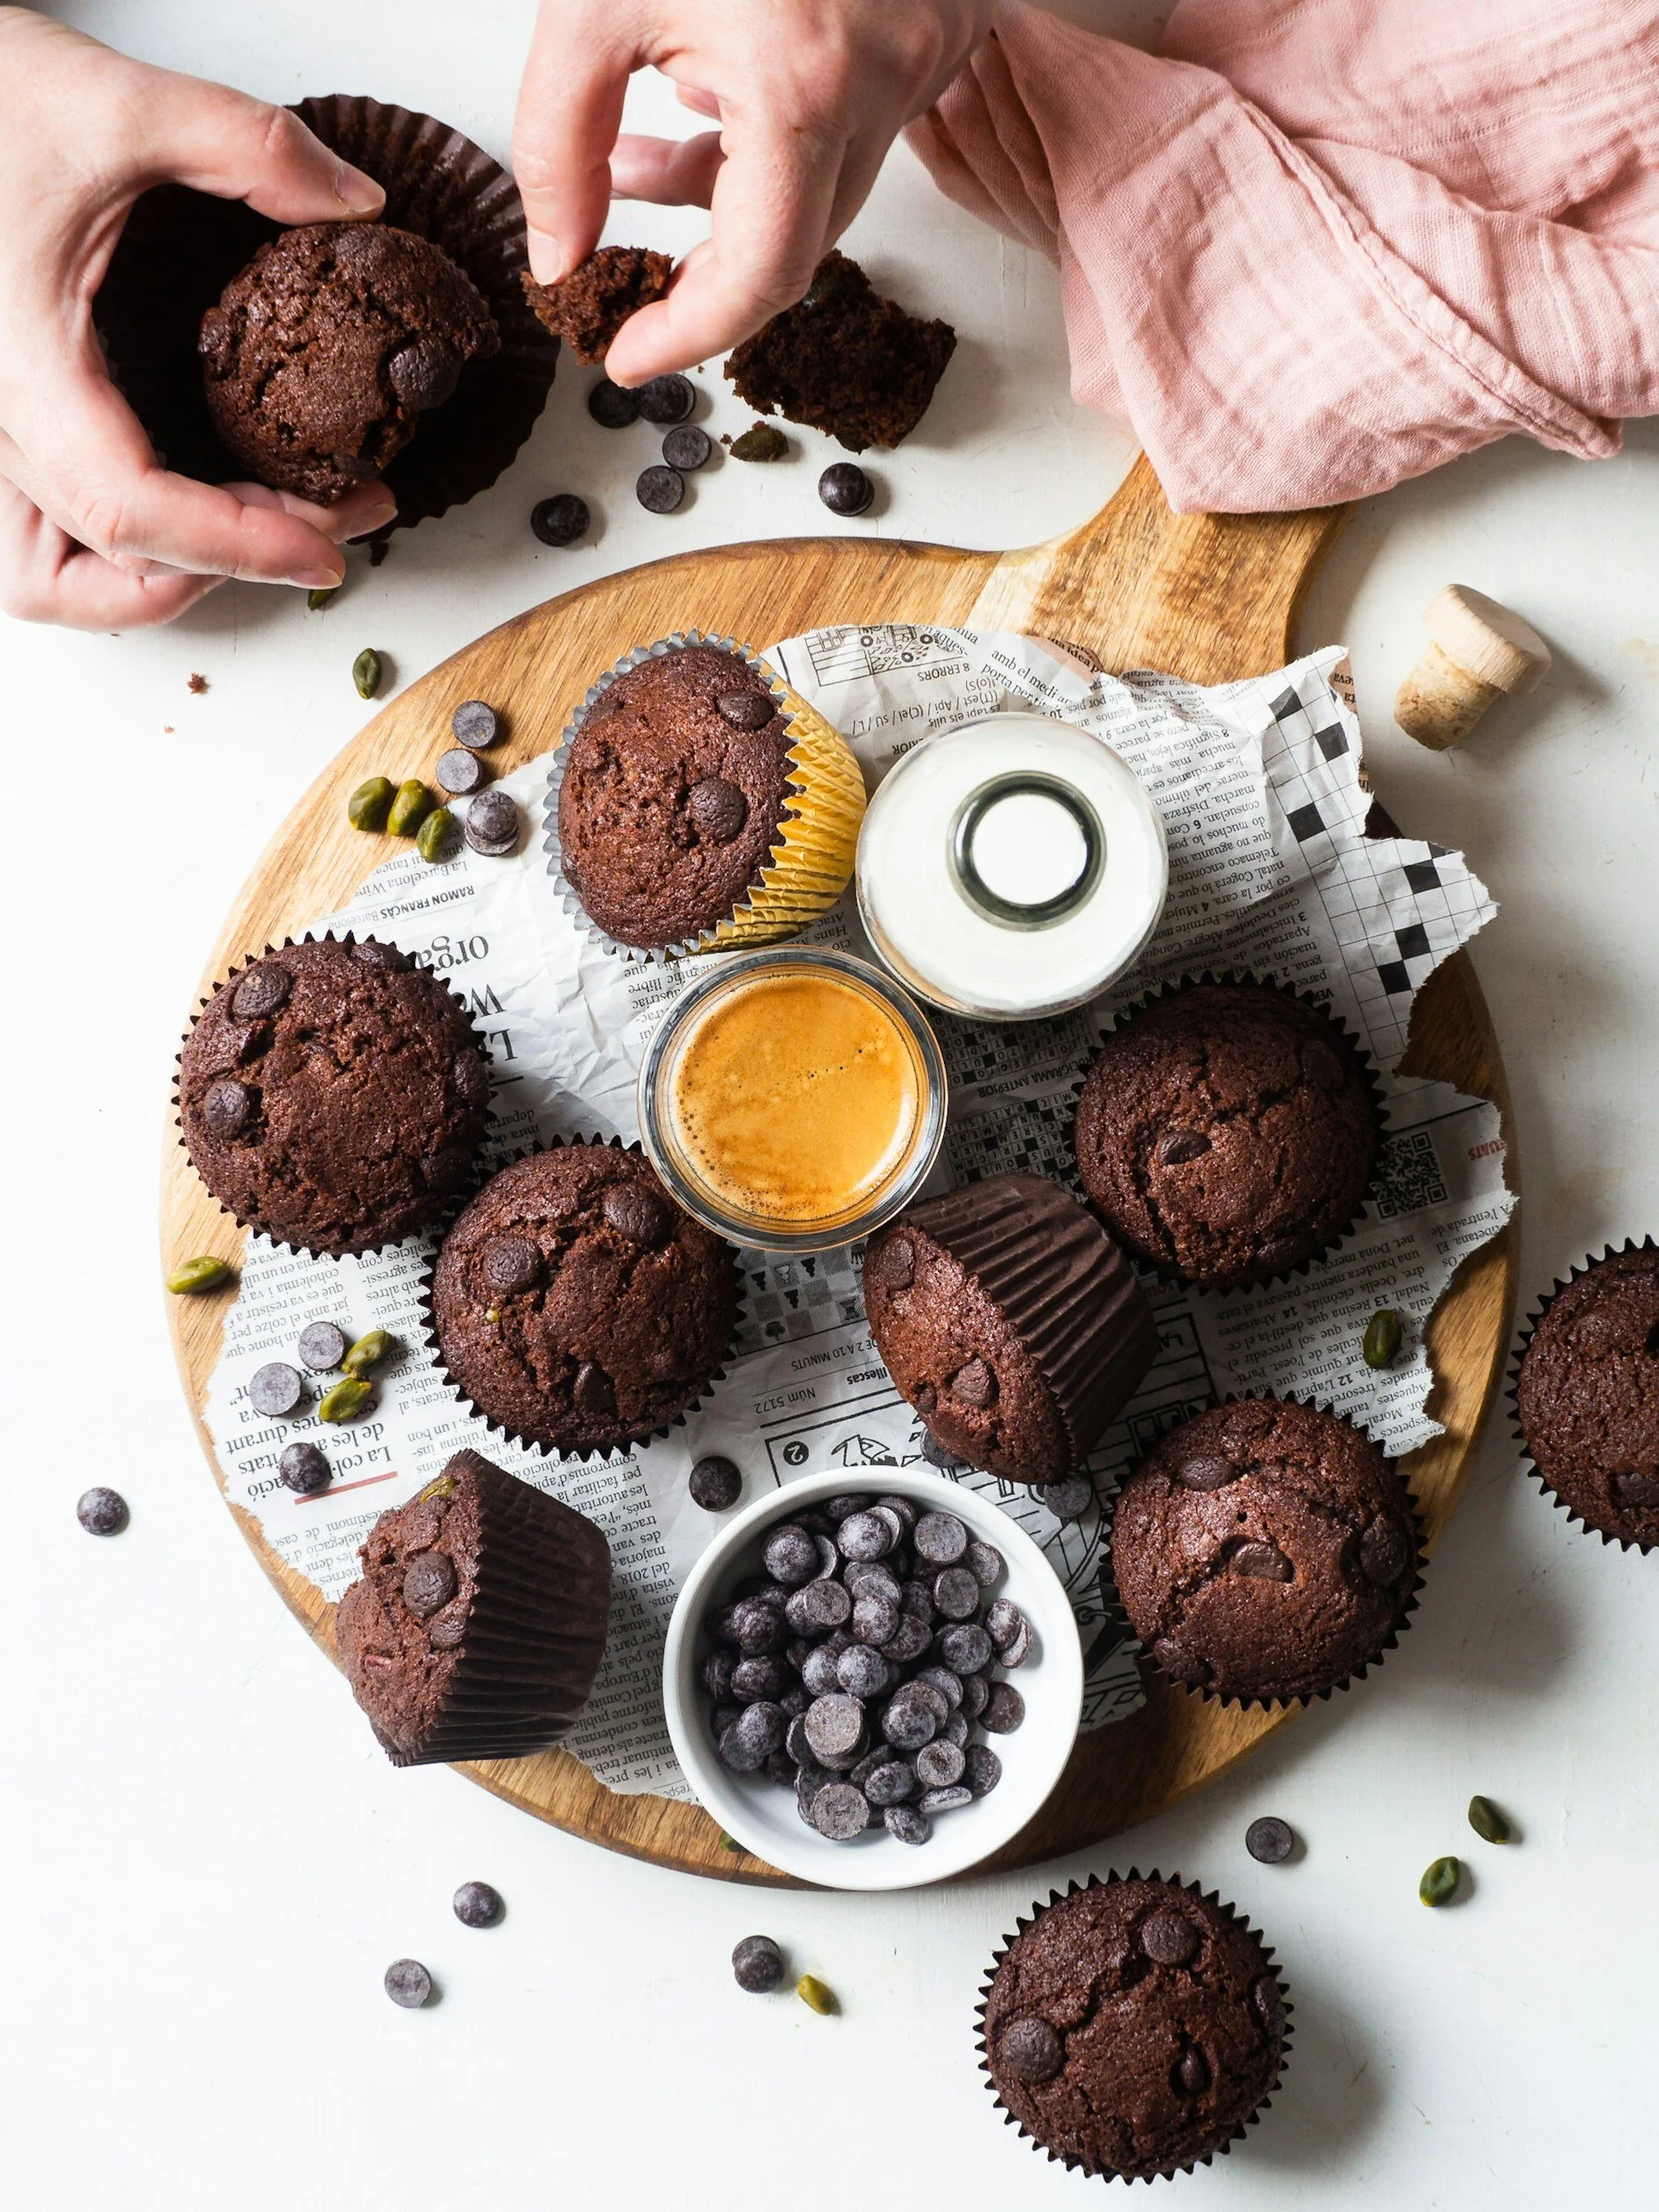
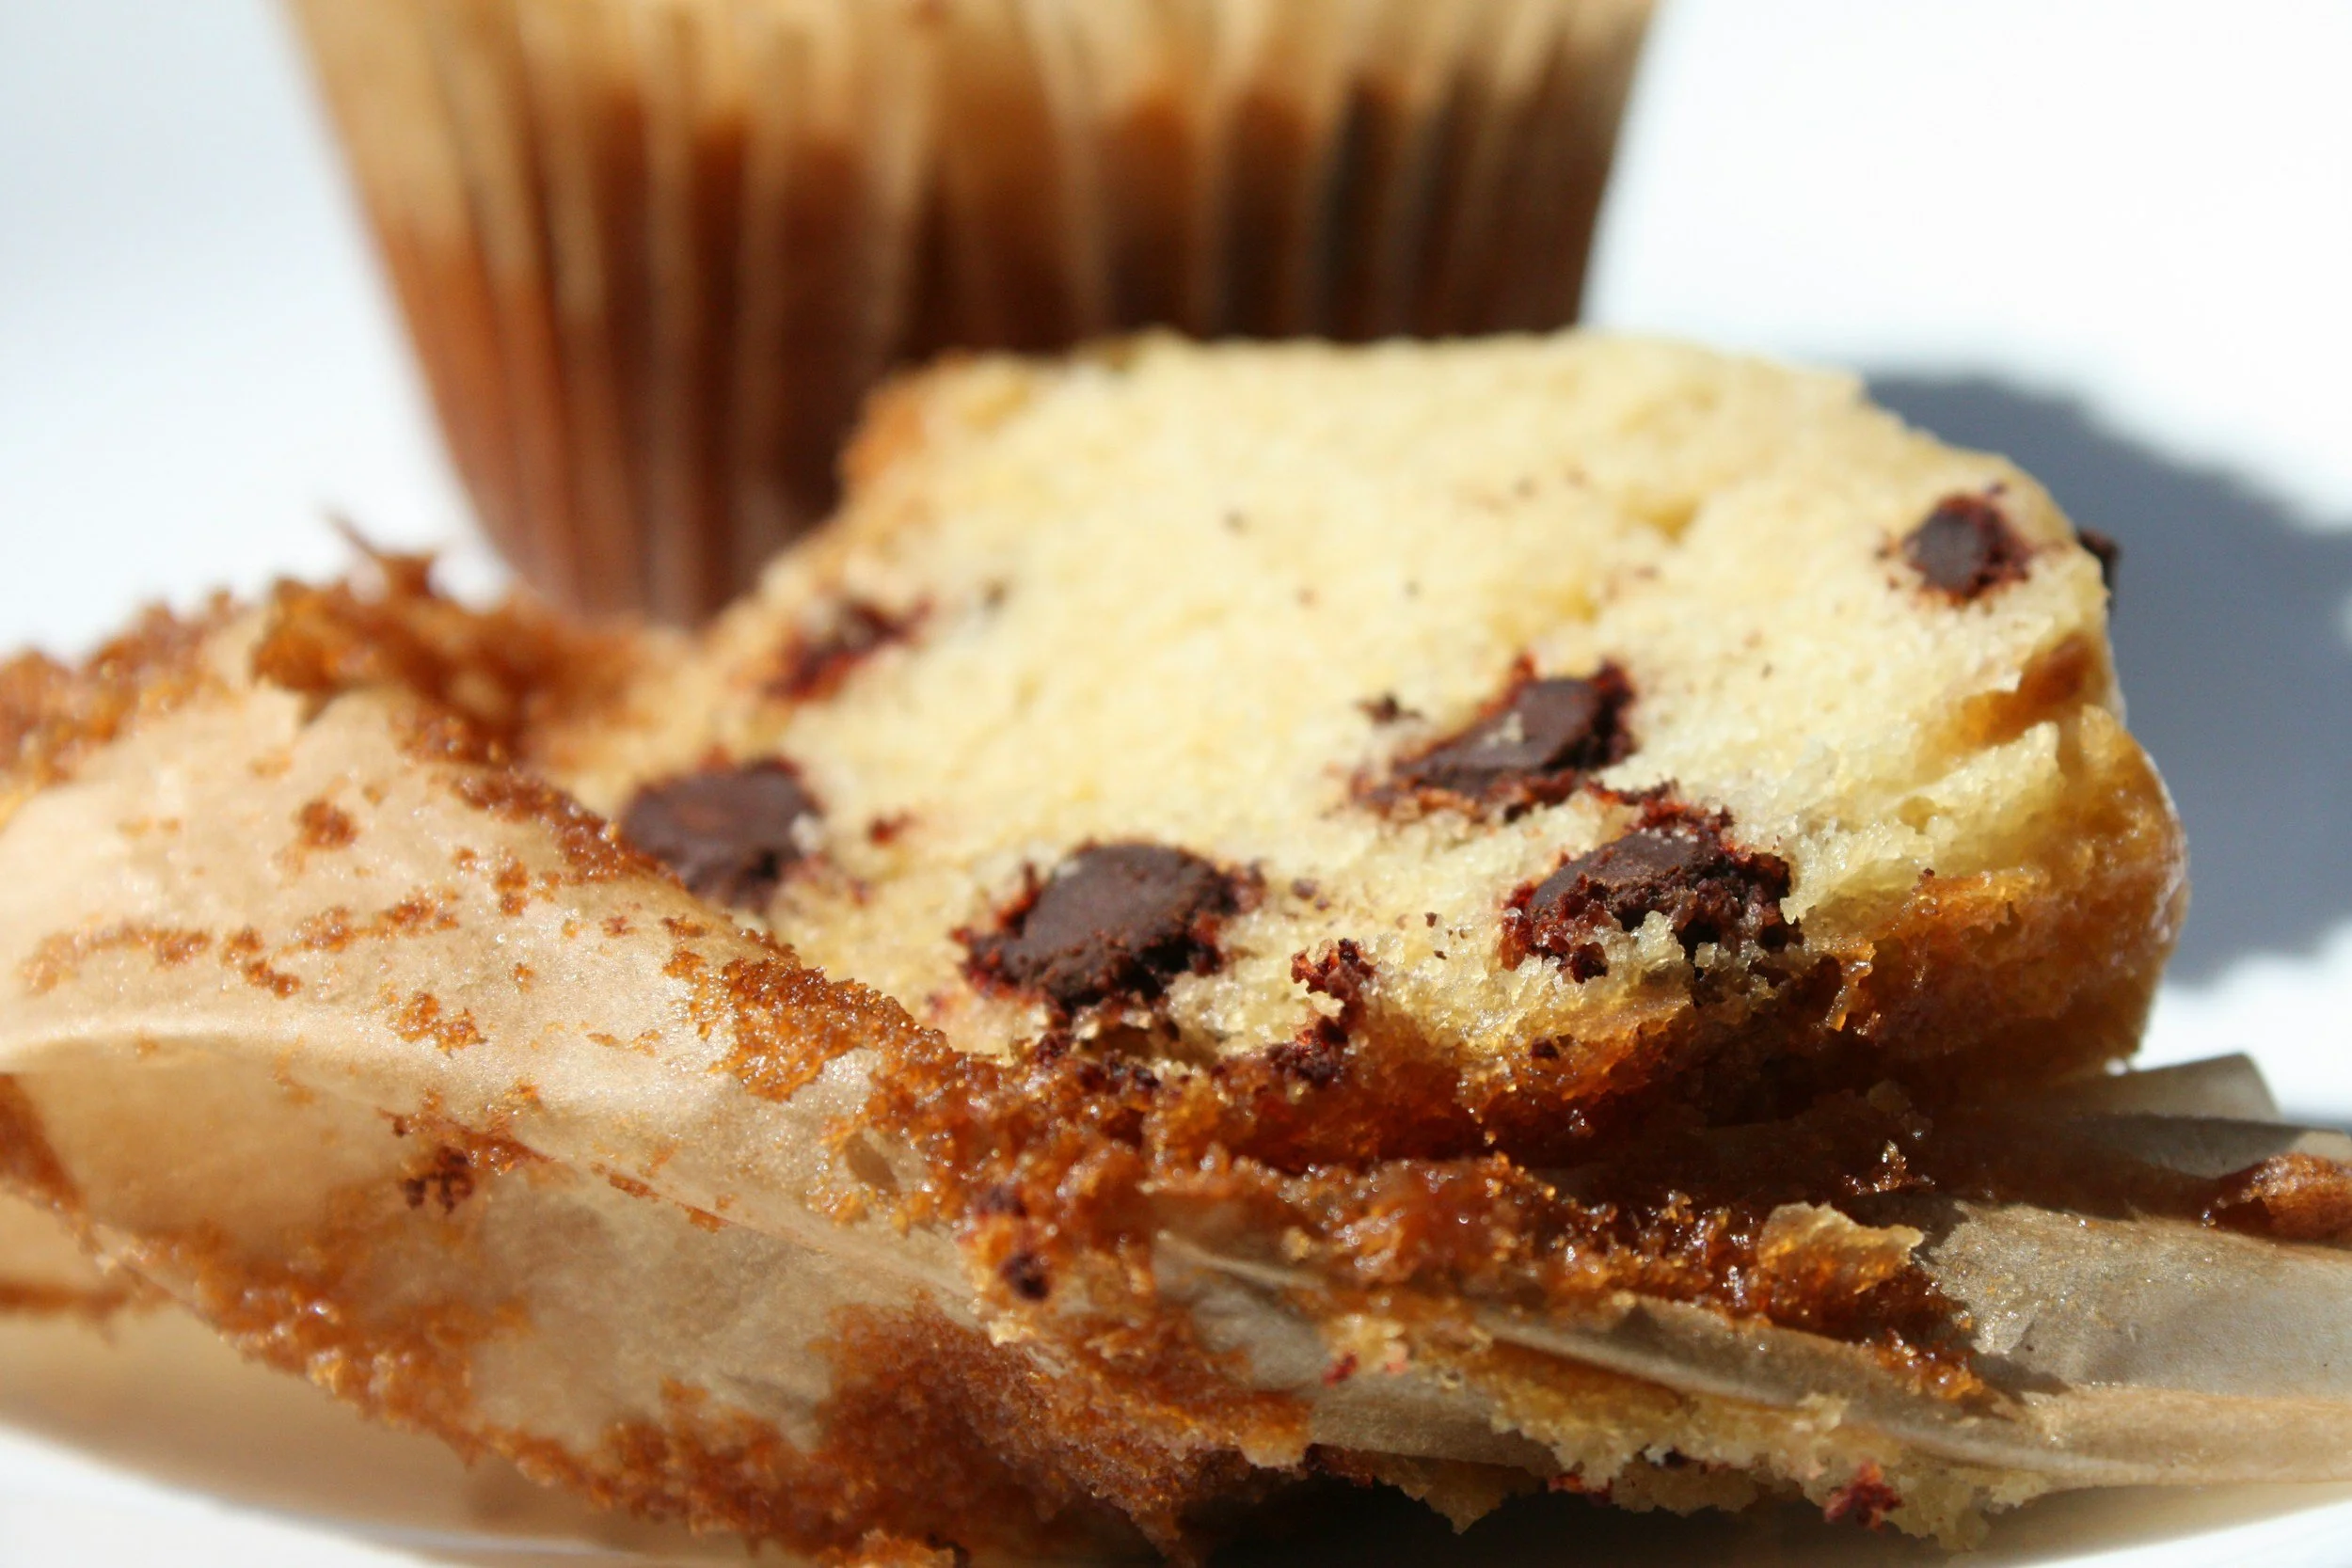
One Bowl Chocolate Chip Muffins (Easy, Fluffy & Kid-Approved)
These One Bowl Chocolate Chip Muffins are the ultimate easy bake for busy parents — fluffy, delicious, and made with simple, wholesome ingredients your whole family will love. With applesauce mixed right into the batter, they stay moist and tender for days, making them just as perfect for tomorrow's lunchbox as they are fresh out of the oven. One bowl means minimal cleanup, and one bite means everyone will be asking for more.
As an Amazon Associate I earn from qualifying purchases.
By Danielle | Prep: 10 min | Cook: 22 min | Total Time: 32 minutes | Makes: 12 muffins
📖 Jump to Recipe | 💬 Jump to FAQs | 🖨️ Print Recipe
why i love these muffins
Is there anything more universally loved than a chocolate chip muffin? In our house, the answer is a firm no. These are the kind of muffins that disappear from the counter faster than I can set them out — and honestly, I can't blame anyone. They're fluffy, packed with chocolate chips in every bite, and made entirely in one bowl, which means less mess and more time doing the things that actually matter.
One of my favourite things about this recipe is the addition of applesauce. It might sound like an unexpected ingredient, but it's a total game changer — it keeps these muffins wonderfully moist well past day one, which is saying something in a house full of kids. It also adds a little extra fibre, which I always love when I'm baking for my family. A simple swap that makes a big difference.
Whether you're baking these for an after-school snack, tucking them into lunchboxes, or just want something homemade on the table without a lot of fuss, this recipe has you covered. One bowl, simple ingredients, and that feel-good knowing exactly what your kids are eating. It really doesn't get much better than that.
Danielle's Easy chocolate chip Muffin Recipe
Equipment
Large mixing bowl (affiliate link), or standmixer with paddle attachment
spatula (affiliate link)
muffin tin (affiliate link)
muffin liners
Base Ingredients
2 eggs
1 cup milk
½ cup oil (canola or vegetable oil work great)
1 tbsp vanilla extract
½ cup brown sugar
½ tsp iodized salt
1 tsp baking soda
½ cup unsweetened apple sauce
½ cup chocolate chips, semi-sweet
2 cups all-purpose flour
Optional add-ins:
¼ cup of chopped pecans
orange zest, of 1 navel orange
Step-by-Step Instructions
Step 1 – Prep your oven
Preheat your oven to 35o°F (175°C).
Step 2 - Make your batter:
In a large bowl, whisk together the wet ingredients in the listed order: whisk the eggs, milk, oil, vanilla and apple sauce. Mix well. Add in the dry ingredients in the listed order: brown sugar, salt, baking soda, fold in the chocolate chips. Mix well. Finally, add in the flour.
Step 3 – Prep oven, and bake the muffins
Line a muffin tin with paper liners or grease well. Using a ¼ cup measuring spoon, scoop batter into the cups, filling each about ¾ full. Bake for 18–20 minutes, or until a toothpick inserted in the centre comes out clean. Let cool for 5 minutes before removing.
Tips for the Best chocolate chip Muffins Every Time
- Don't overmix. Stir until just combined — lumps in the batter are your friend. Overmixing develops gluten and leads to tough, flat results.
- The mix-ins make it versatile. Each variation gives the batter a completely different personality. The pecan- orange combo is bright and fresh.
- Make a double batch and freeze. Muffins freeze beautifully for up to 3 months. Thaw in the fridge before using. Future-you will be very grateful.
- Use room temperature eggs and milk. This helps the batter come together more evenly and gives you a better rise.
- Canola or vegetable oil keeps the batter light and neutral, letting your mix-in flavours really shine through.

Variations
Berry Chocolate Chip Muffins: Fold in ¾ cup of your favourite berries (blueberries, raspberries, sliced strawberries) to this muffin mix at the same time as adding the chocolate chips.
Chocolate-Chip & Pecan Muffins: Fold in 1/2 cup of chopped pecans to this muffin mix at the same time as adding the chocolate chips.
Orange Chocolate-Chip Muffins: Don’t add vanilla. Add the zest of 1 navel orange at the same time as the applesauce, and mix well. Continue the recipe as instructed.
Frequently Asked Questions
Can you use this batter to make pancakes?
Yes! That's exactly what this recipe is designed for. The same batter works beautifully for both pancakes on the stovetop and muffins in the oven. Just pour onto a griddle for pancakes, or scoop into a muffin tin and bake at 35o°F for roughly 22 minutes.
Can I make the batter ahead of time?
Yes, you can make this batter up to 24 hours in advance. Store it covered in the refrigerator and give it a gentle stir before using. Avoid overmixing when you stir it again.
Can I freeze pancakes and muffins made from this batter?
Absolutely. Both pancakes and muffins freeze well for up to 3 months. Store in an airtight bag or container. Thaw in the fridge or microwave pancakes for 30–60 seconds.
What makes this a kid-friendly recipe?
It uses simple pantry staples, comes together in one bowl, and the mix-in options let kids pick their favourite flavour. These chocolate chip muffin recipe is especially popular with little ones.
How do I know when muffins are done baking?
Insert a toothpick into the centre of a muffin — if it comes out clean or with just a few dry crumbs, they're done. If batter sticks to the toothpick, bake for another 2–3 minutes and check again.
REcipe card
Ingredients:
2 eggs
1 cup milk
½ cup oil (canola or vegetable oil work great)
1 tbsp vanilla extract
½ cup brown sugar
½ tsp iodized salt
1 tsp baking soda
½ cup unsweetened apple sauce
½ cup chocolate chips, semi-sweet
2 cups all-purpose flour
Instructions:
Preheat your oven to 35o°F (175°C).
In a large bowl, whisk together the wet ingredients in the listed order: whisk the eggs, milk, oil, vanilla and apple sauce. Mix well.
Add in the dry ingredients in the listed order: brown sugar, salt, baking soda. Mix well.
Fold in the chocolate chips.
Finally, add in the flour, being careful not to over mix.
Line a muffin tin with paper liners or grease well.
Using a ¼ cup measuring spoon, scoop batter into the cups, filling each about ¾ full.
Bake for 18–20 minutes, or until a toothpick inserted in the centre comes out clean.
Let cool for 15 minutes before removing to the cooling rack.
DID YOU MAKE THIS RECIPE? I want to see it!
Leave a photo and a ⭐ star rating and comment below to let us know how your muffins turned out. Did you make any substitutions or additions? Share your tips and photos with us!
Share this recipe: Help others discover this delicious recipe by sharing it on Pinterest, Facebook, or Instagram. Tag us @Sageandsimplicity so we can see your beautiful creations!
📌 Pin it for later: Save this recipe to your Pinterest boards for easy access.
You might also like:

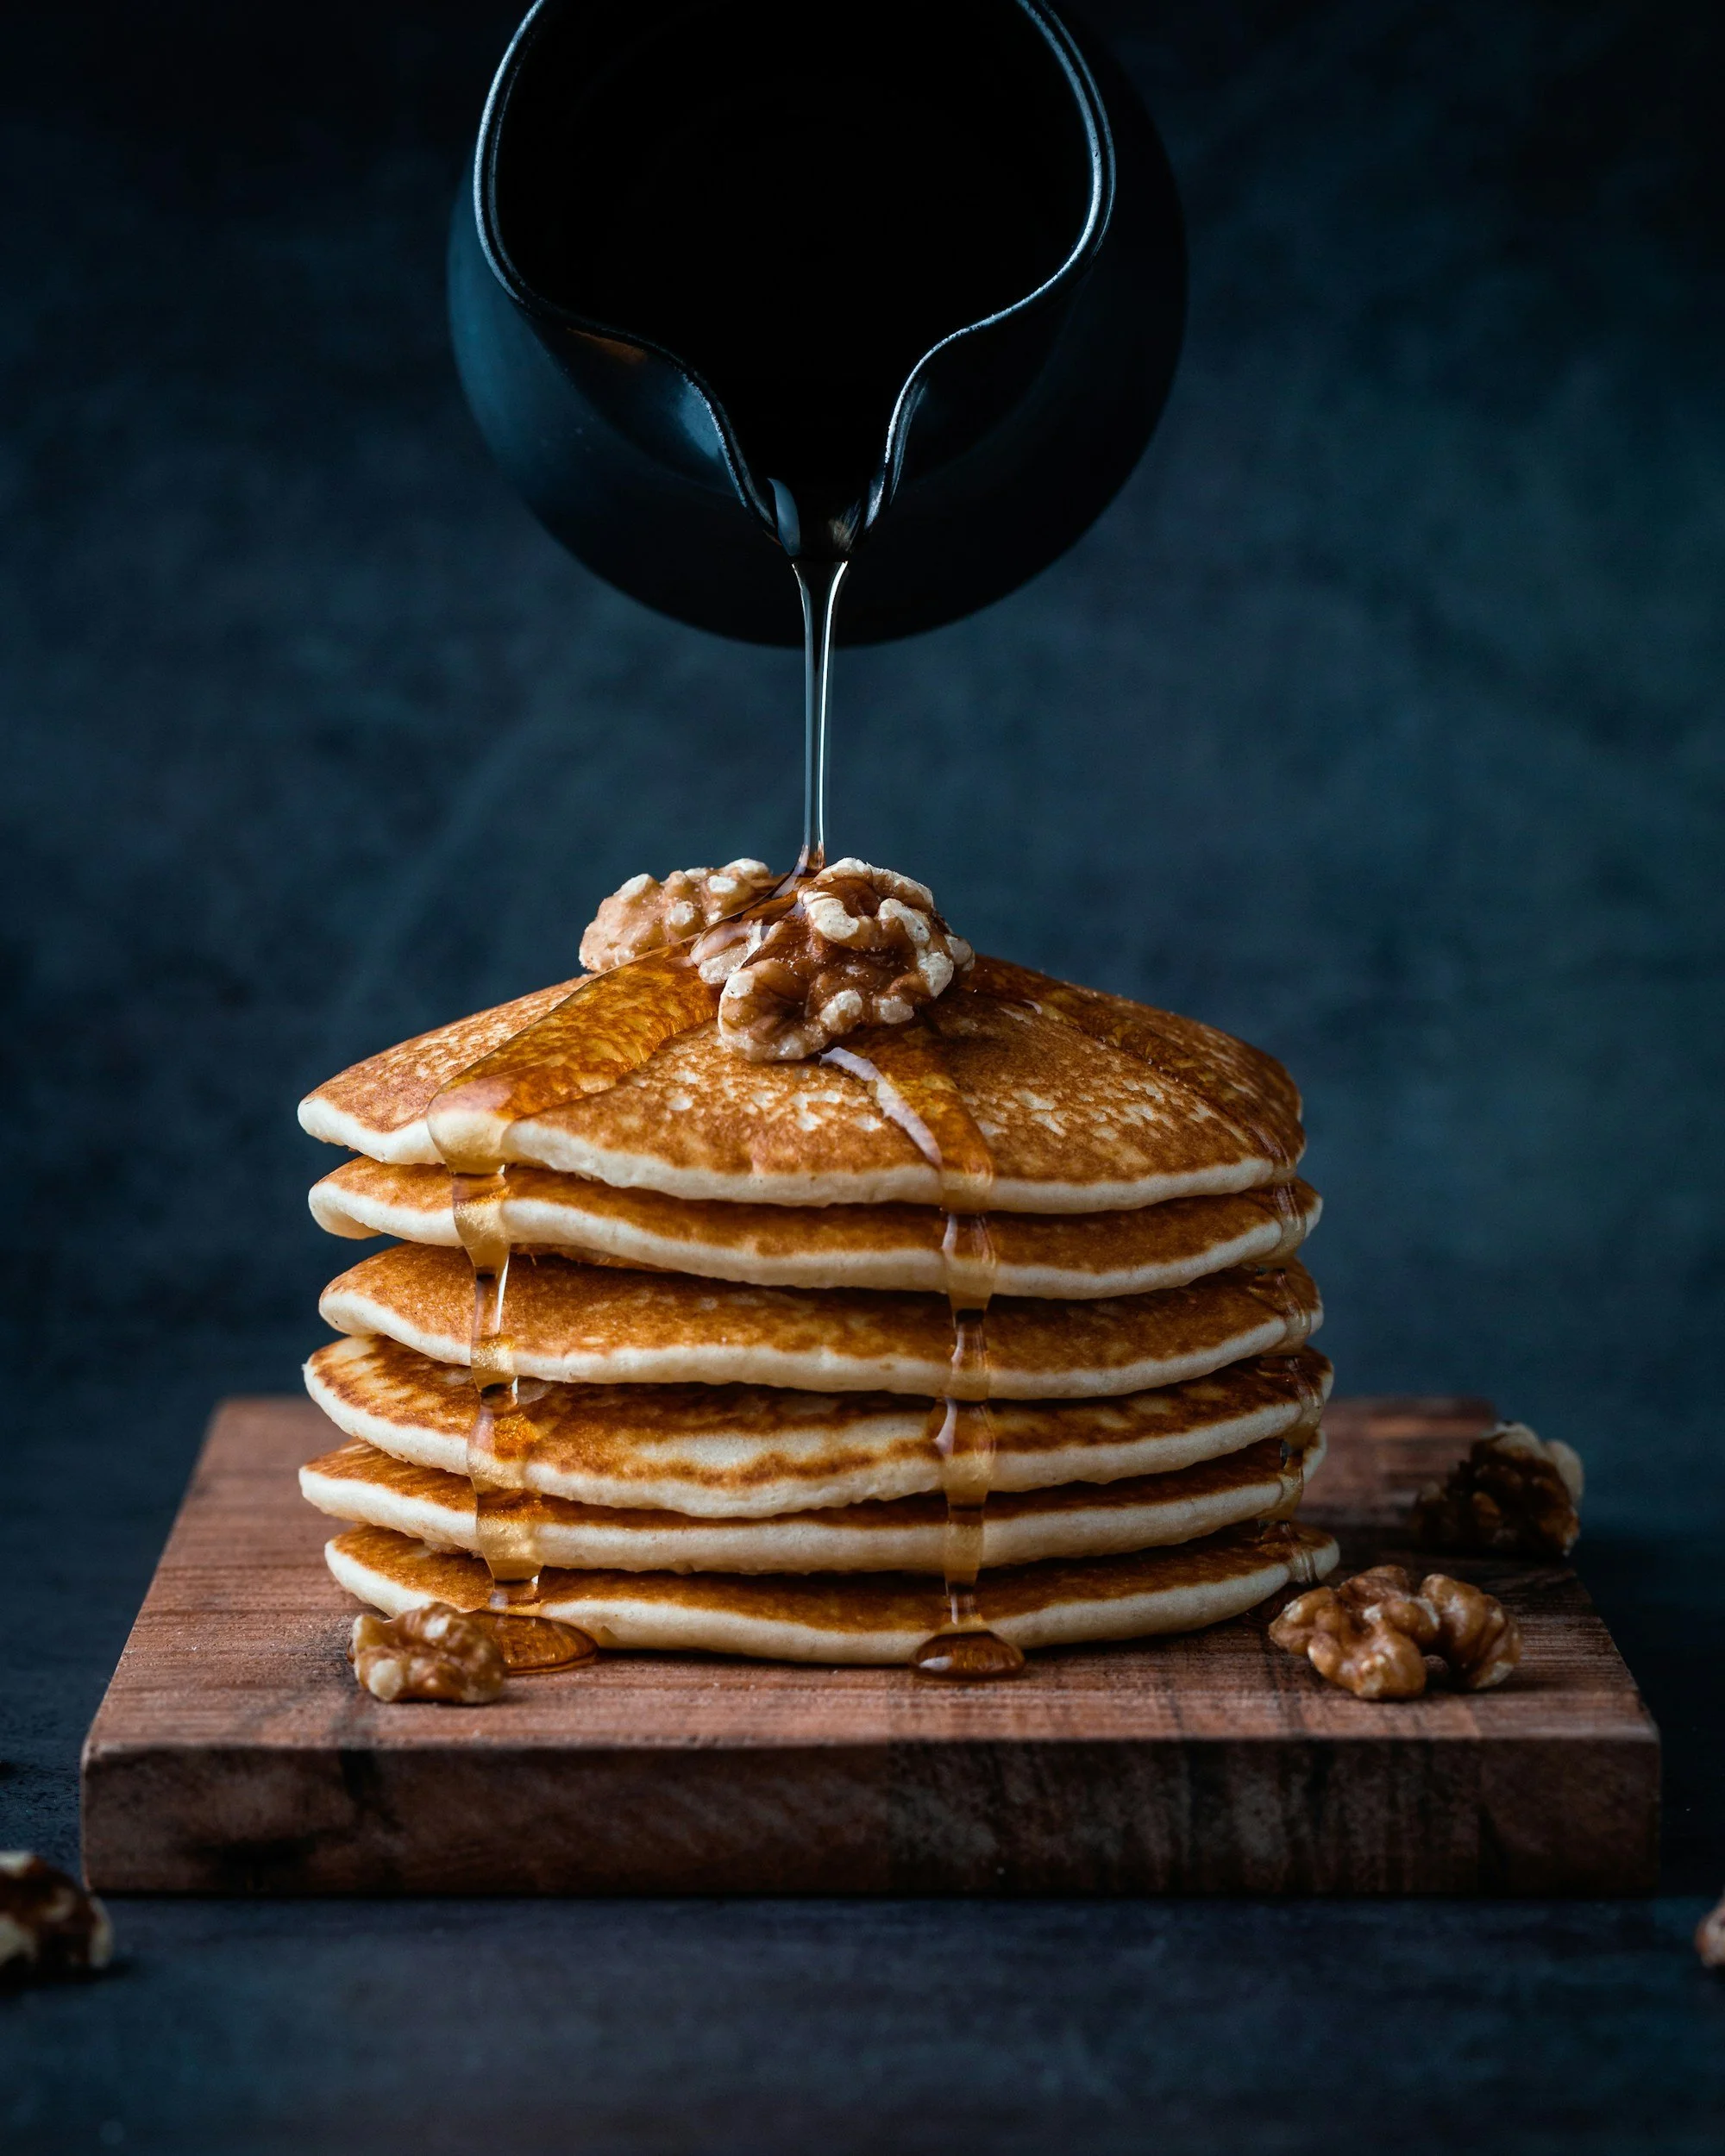
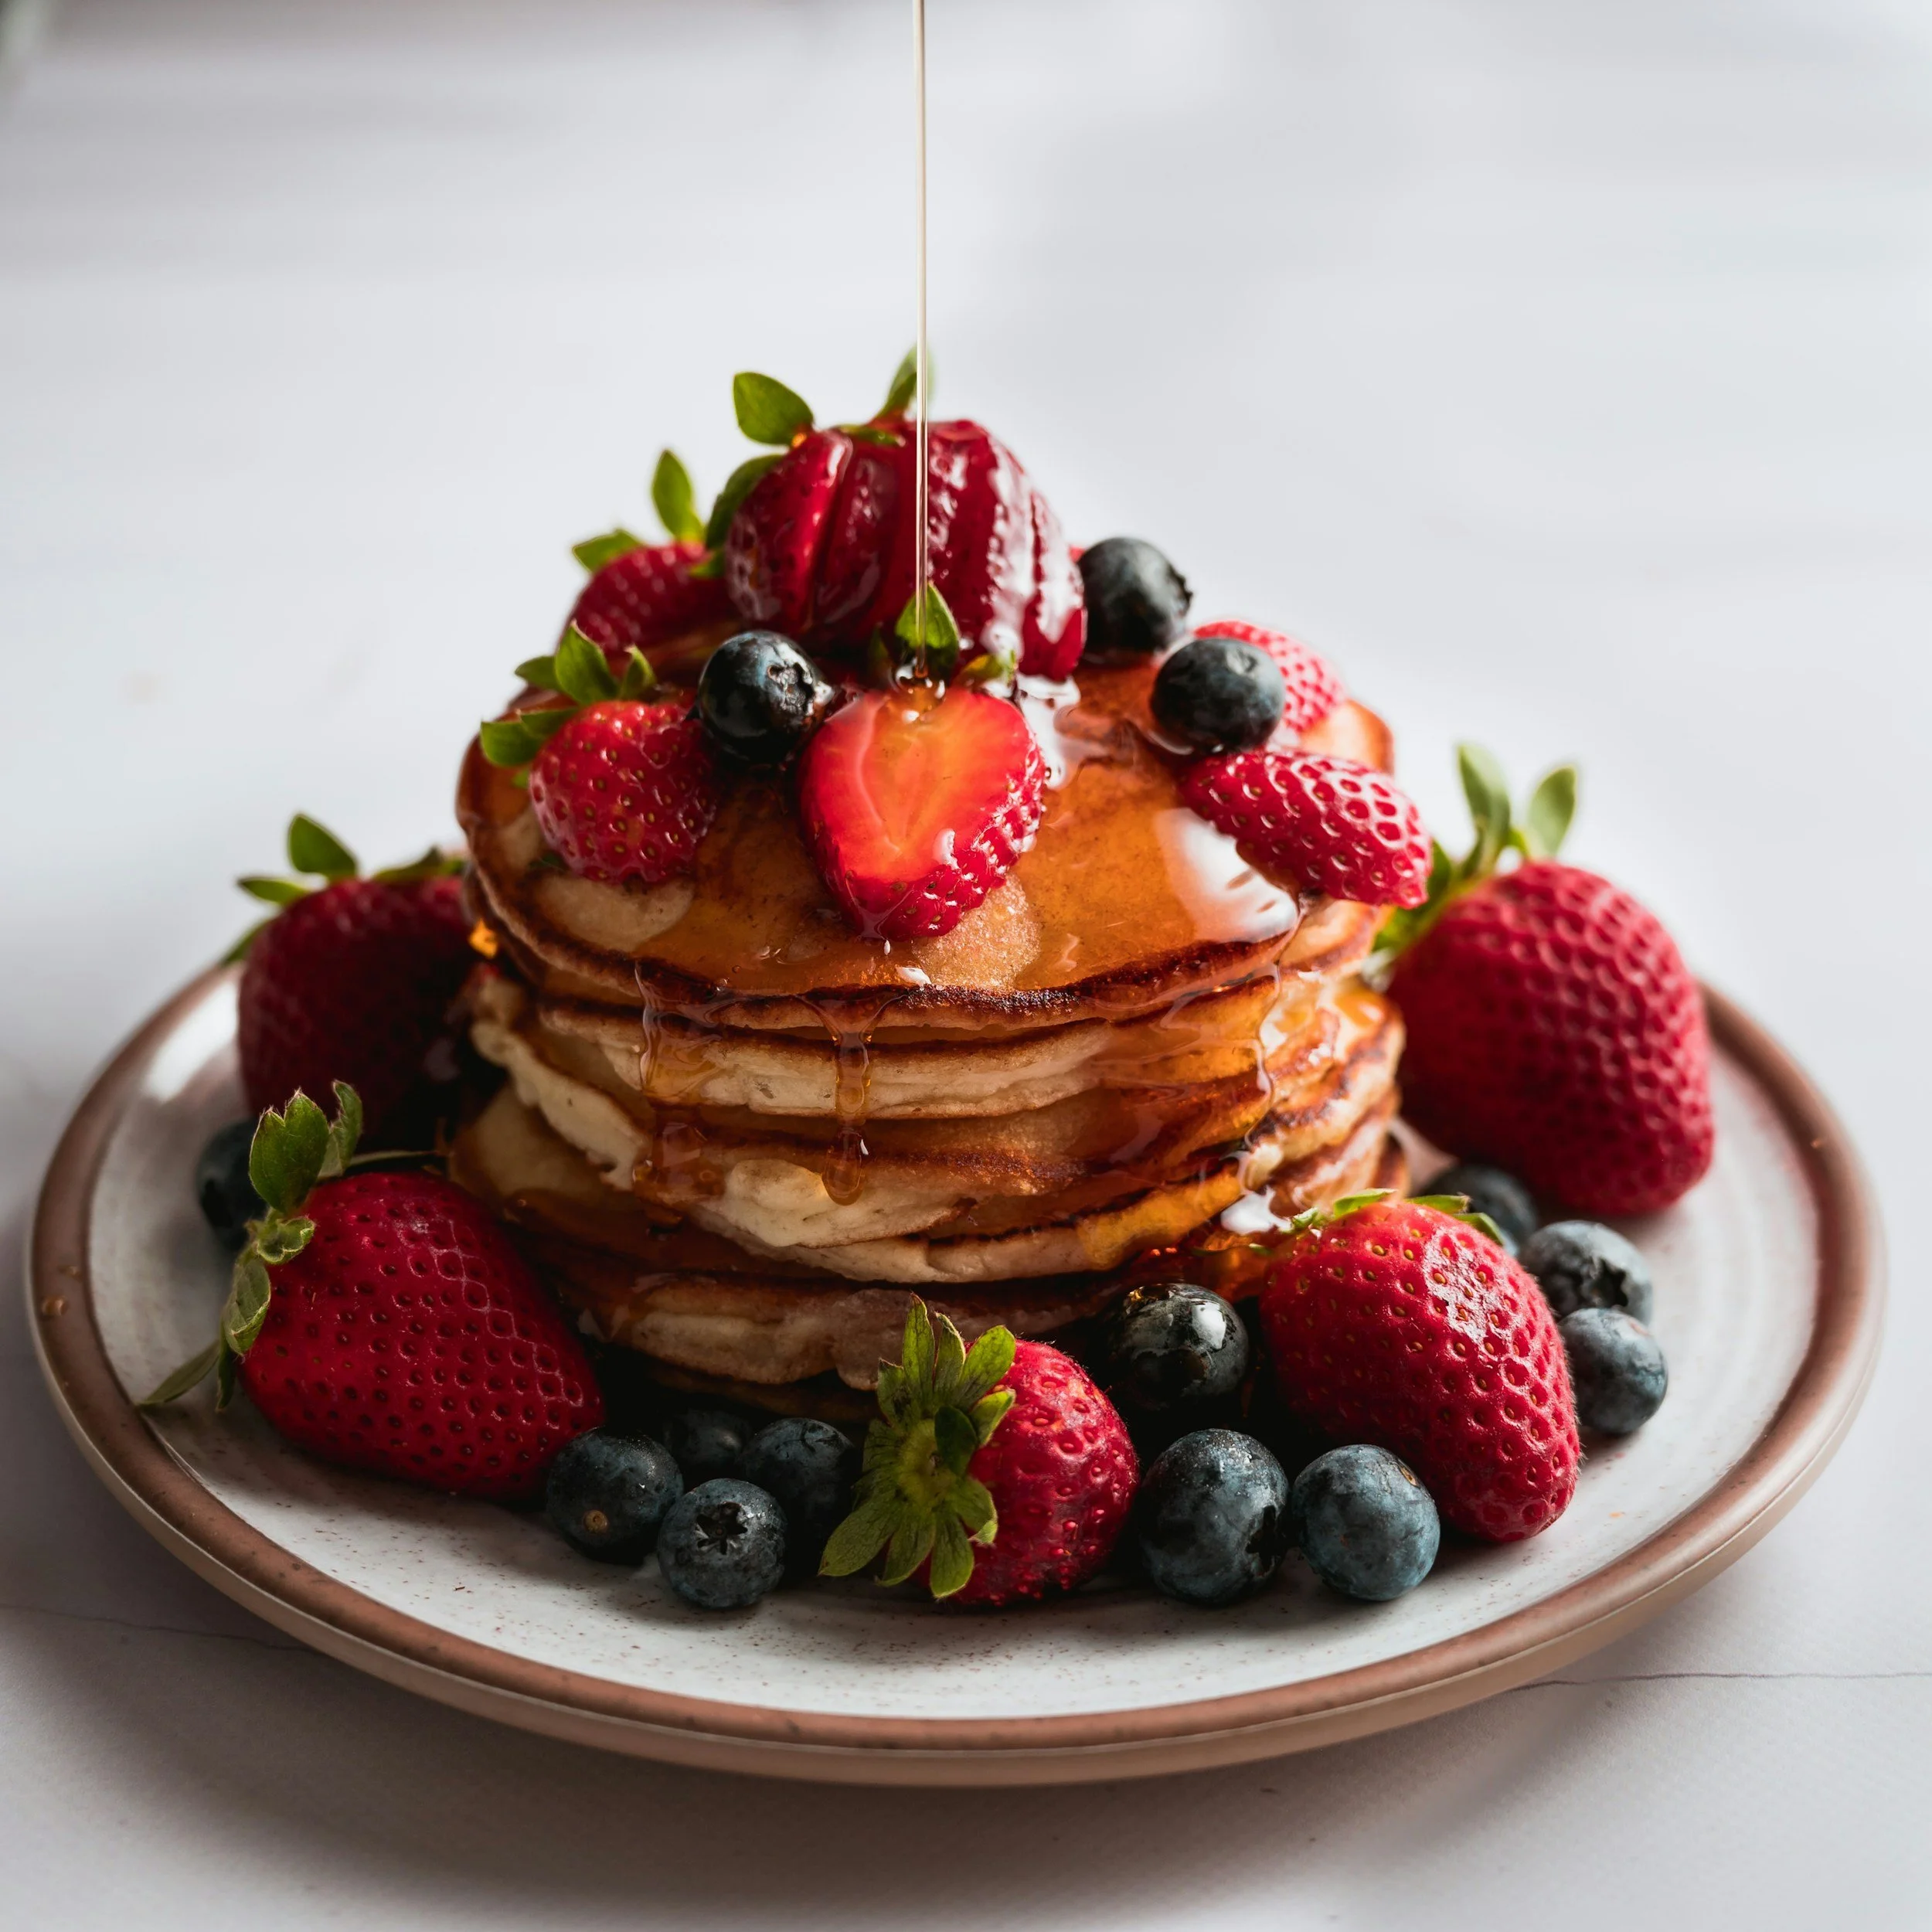
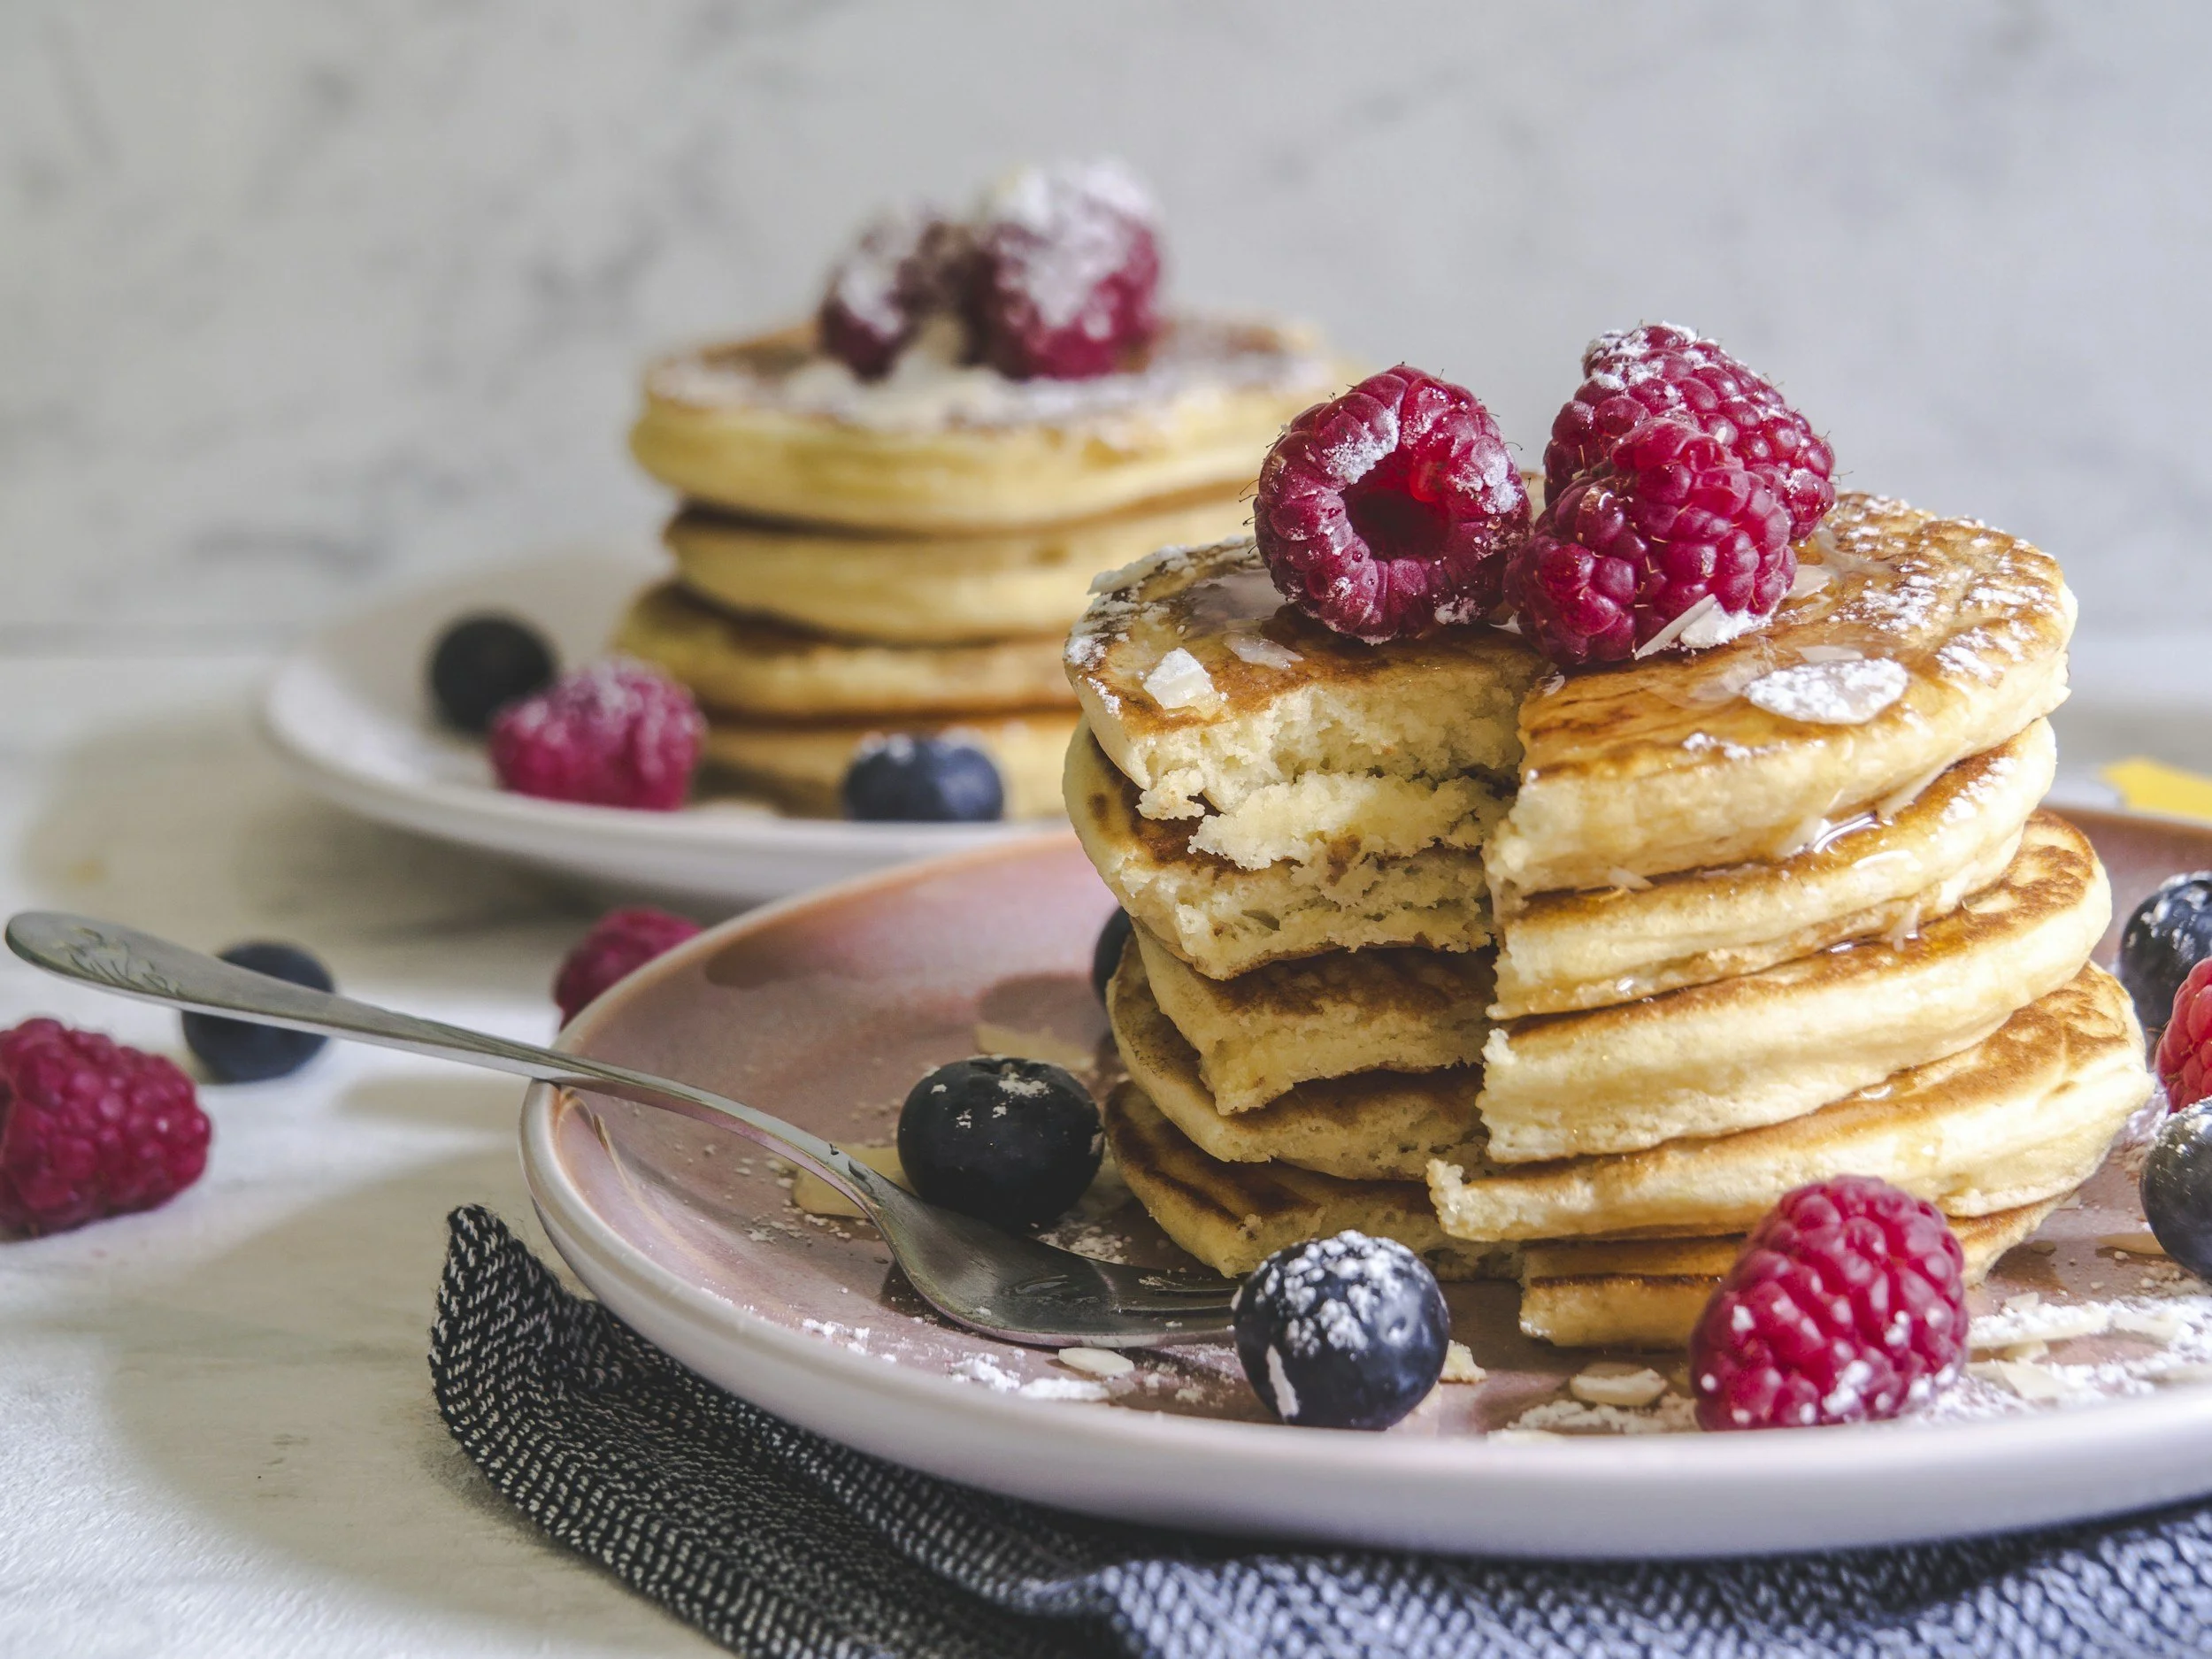
Easy Pancake and Muffin Recipe – One Batter, Two Ways
As an Amazon Associate I earn from qualifying purchases.
By Danielle | Prep: 10 min | Cook: 20 min | Makes: ~10 pancakes or 12 muffins
📖 Jump to Recipe | 💬 Jump to FAQs | 🖨️ Print Recipe
There's a kind of magic that happens in a kitchen when things are simple.
I used to think that feeding my family well meant juggling a dozen different recipes, keeping track of a dozen different ingredient lists, and spending my Sunday mornings elbow-deep in flour trying to remember which recipe was which. It was exhausting. And honestly? The kids didn't care. They just wanted something warm, something good, and they wanted it now.
So I did what any tired but determined parent does: I simplified!
I started experimenting until I landed on one batter — just one — that I could pour onto a griddle for fluffy, golden pancakes on a slow Sunday morning, or scoop into a muffin tin and pop in the oven for grab-and-go breakfasts during the week. Same bowl. Same ingredients. Four different flavour variations. Different mornings.
My kids love it. My mornings are calmer. And I love knowing exactly what's going into their little bodies, sometime that I feel good about.
Why This One-Batter Pancake and Muffin Recipe Works
The beauty of this easy pancake and muffin recipe isn't just convenience — though yes, that matters a lot. It's that by keeping things simple, you actually make a homemade breakfast more often. When there's less to remember, there's less reason to skip it.
One bowl. One batter. And with four mix-in options, it never gets boring.
Whether you're asking "how do I make homemade muffins from scratch?" or "can you use pancake batter to make muffins?" — the answer is right here, and it's easier than you think.
Danielle's Easy Pancake and Muffin Recipe
Equipment
Large mixing bowl (affiliate link), or standmixer with paddle attachment
spatula (affiliate link)
pan (affiliate link), if making pancakes
muffin tin (affiliate link), if making muffins
Base Ingredients
2 eggs
1 cup milk
½ cup oil (canola or vegetable oil work great)
1 tbsp vanilla extract
½ cup brown sugar
½ tsp iodized salt
1 tsp baking soda
2 cups all-purpose flour
Mix-In Options (pick your favourite!)
Blueberry Orange: ½ cup blueberries + zest of ½ navel orange
Raspberry: 1 cup raspberries, fresh or frozen
Chocolate Chip: ½ cup chocolate chips
Pumpkin Spice: ½ cup pumpkin puree + 1 tsp cinnamon + 1 tsp pumpkin spice + ¼ cup chocolate chips
Step-by-Step Instructions
Step 1 – Make your batter:
In a large bowl, whisk together the wet ingredients in the listed order: whisk the eggs, milk, oil, and vanilla. Followed by the dry ingredients in the listed order: brown sugar, salt, baking soda, and finally, flour.
Step 2a – For pancakes:
Heat a non-stick pan or griddle over medium heat and grease lightly. Pour ¼ cup of batter per pancake. Cook until bubbles form on the surface and the edges look set, about 2–3 minutes. Flip and cook another 1–2 minutes. Serve warm.
Step 2b – For muffins:
Preheat your oven to 35o°F (175°C). Line a muffin tin with paper liners or grease well. Scoop batter into the cups, filling each about ¾ full. Bake for 18–20 minutes, or until a toothpick inserted in the centre comes out clean. Let cool for 5 minutes before removing.
Tips for the Best Pancakes and Muffins Every Time
- Don't overmix. Stir until just combined — lumps in the batter are your friend. Overmixing develops gluten and leads to tough, flat results.
- The mix-ins make it versatile. Each variation gives the batter a completely different personality. The blueberry orange combo is bright and fresh; the pumpkin spice version is pure cozy-season magic.
- Make a double batch and freeze. Muffins freeze beautifully for up to 3 months. Thaw in teh fridge before using. Future-you will be very grateful.
- Use room temperature eggs and milk. This helps the batter come together more evenly and gives you a better rise, especially in muffins.
- Canola or vegetable oil keeps the batter light and neutral, letting your mix-in flavours really shine through.
The Part That Matters Most
The whole idea behind this easy pancake and muffin recipe is that it's a workhorse for mornings or snacks. This recipe has found a permanent home in my kitchen and I hope it can find one in yours too!
Happy cooking. 🥞
Frequently Asked Questions
Can you use this pancake batter to make muffins?
Yes! That's exactly what this recipe is designed for. The same batter works beautifully for both pancakes on the stovetop and muffins in the oven. Just pour onto a griddle for pancakes, or scoop into a muffin tin and bake at 35o°F for roughly 20 minutes.
Can I make the batter ahead of time?
Yes, you can make this batter up to 24 hours in advance. Store it covered in the refrigerator and give it a gentle stir before using. Avoid overmixing when you stir it again.
Can I freeze pancakes and muffins made from this batter?
Absolutely. Both pancakes and muffins freeze well for up to 3 months. Store in an airtight bag or container. Thaw in the fridge or microwave pancakes for 30–60 seconds.
What makes this a kid-friendly pancake recipe?
It uses simple pantry staples, comes together in one bowl, and the mix-in options let kids pick their favourite flavour. The pumpkin spice and chocolate chip version is especially popular with little ones.
What's the difference between pancake batter and muffin batter?
Traditional pancake batter and muffin batter have slightly different ratios of fat and leavening. This recipe is specifically balanced to work for both, giving you fluffy pancakes and moist, well-risen muffins from the exact same mix.
How do I know when muffins are done baking?
Insert a toothpick into the centre of a muffin — if it comes out clean or with just a few dry crumbs, they're done. If batter sticks to the toothpick, bake for another 2–3 minutes and check again.
Danielle is a home cook and mom who believes the best family recipes are the ones you can actually remember. She developed this one-batter pancake and muffin recipe out of a need for fewer ingredients, less cleanup, and more time at the breakfast table with her kids. It's been a staple in her kitchen ever since.
DID YOU MAKE THIS RECIPE? I want to see it!
Leave a photo and a ⭐ star rating and comment below to let us know how your muffins turned out. Did you make any substitutions or additions? Share your tips and photos with us!
Share this recipe: Help others discover this delicious recipe by sharing it on Pinterest, Facebook, or Instagram. Tag us @Sageandsimplicity so we can see your beautiful creations!
📌 Pin it for later: Save this recipe to your Pinterest boards for easy access.
You might also like:

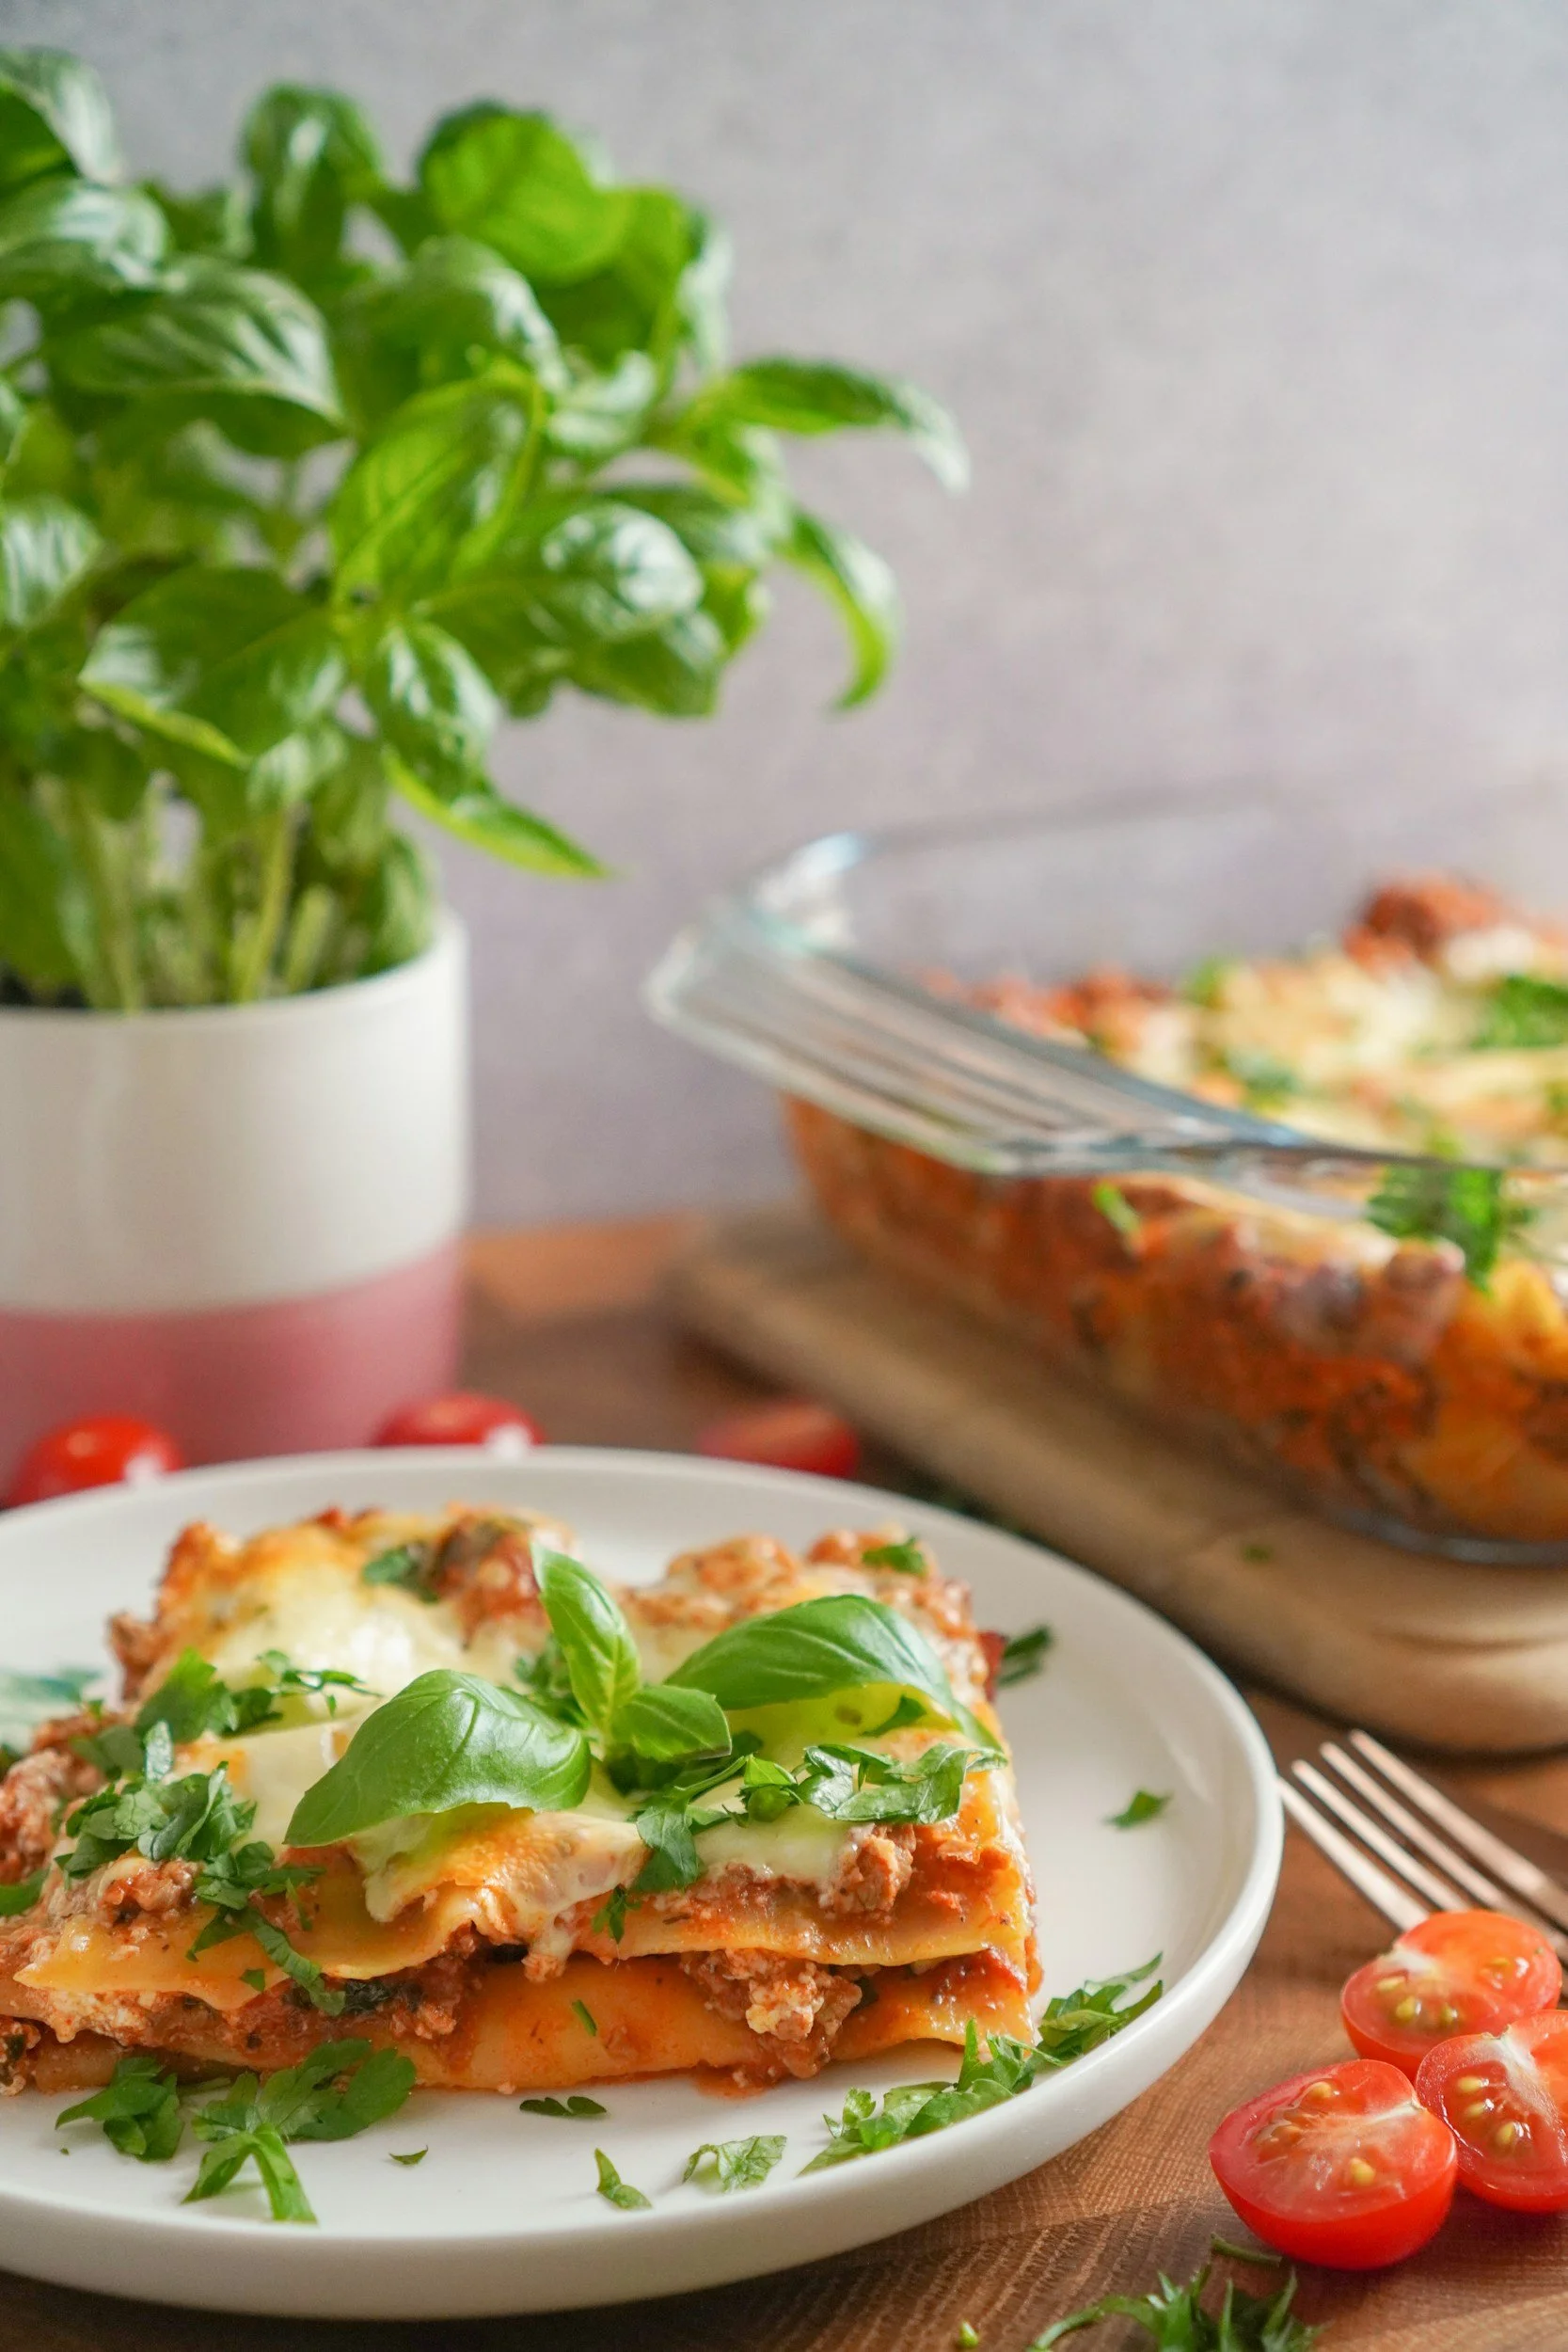
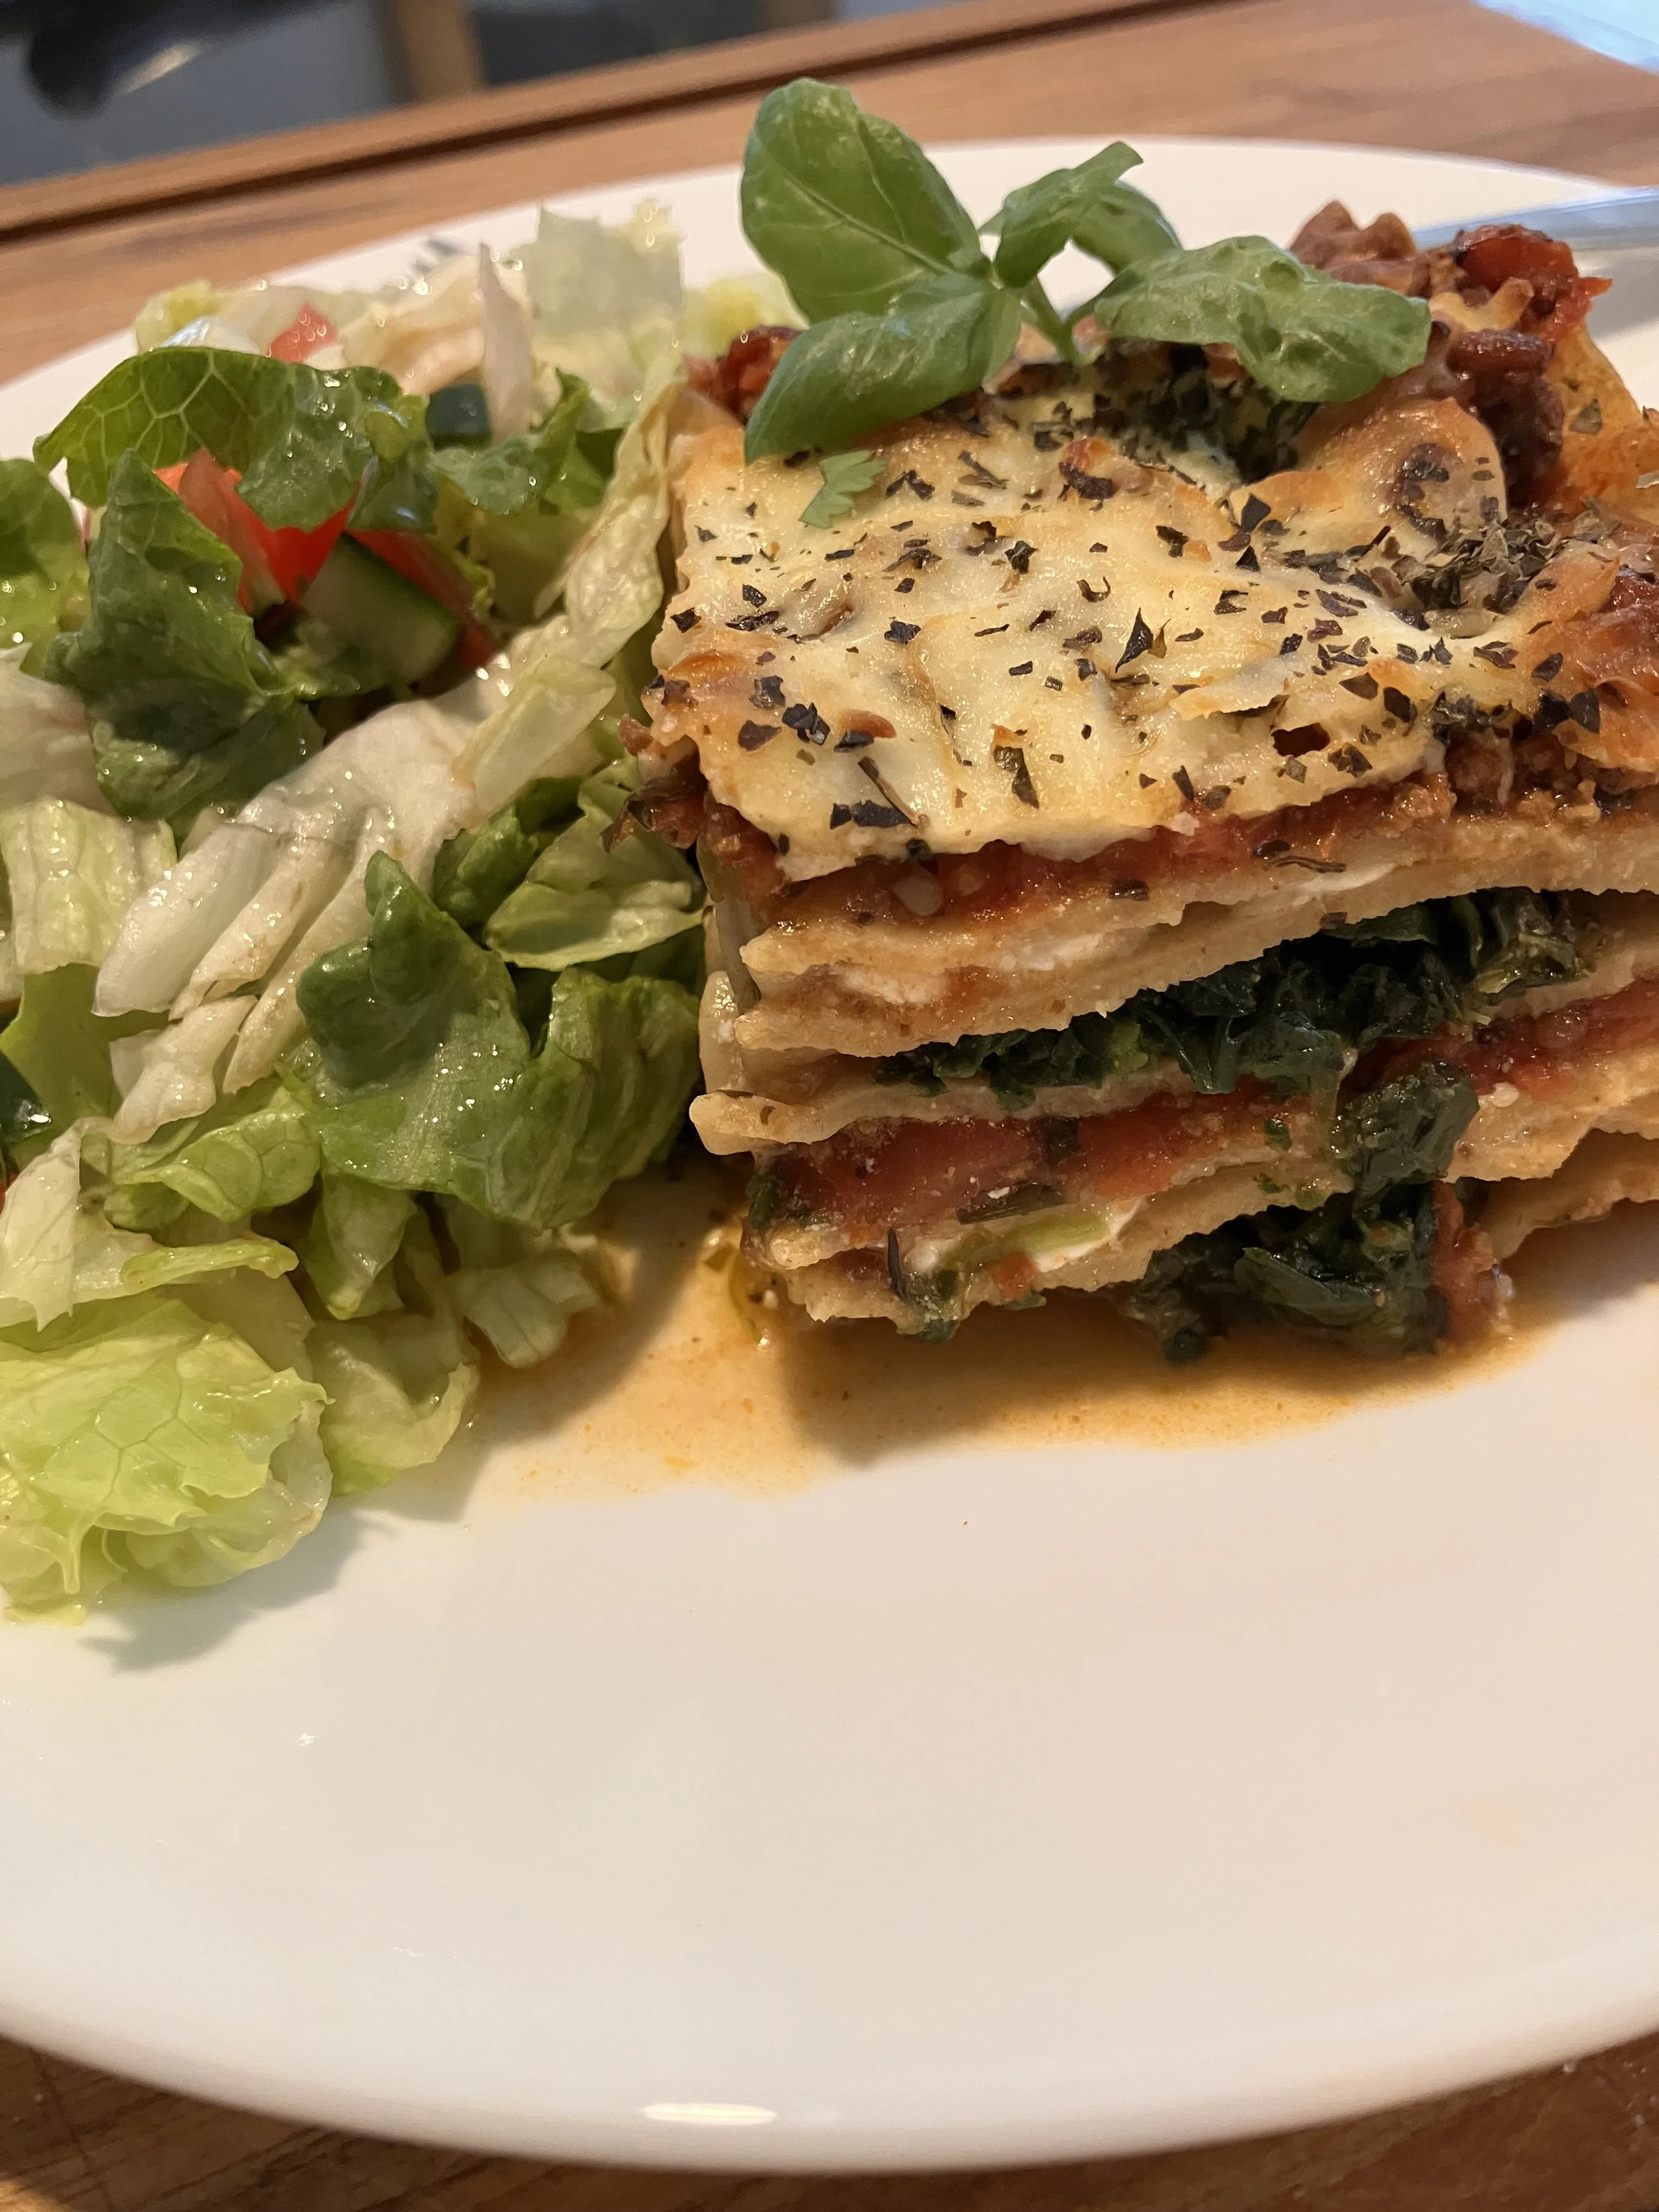
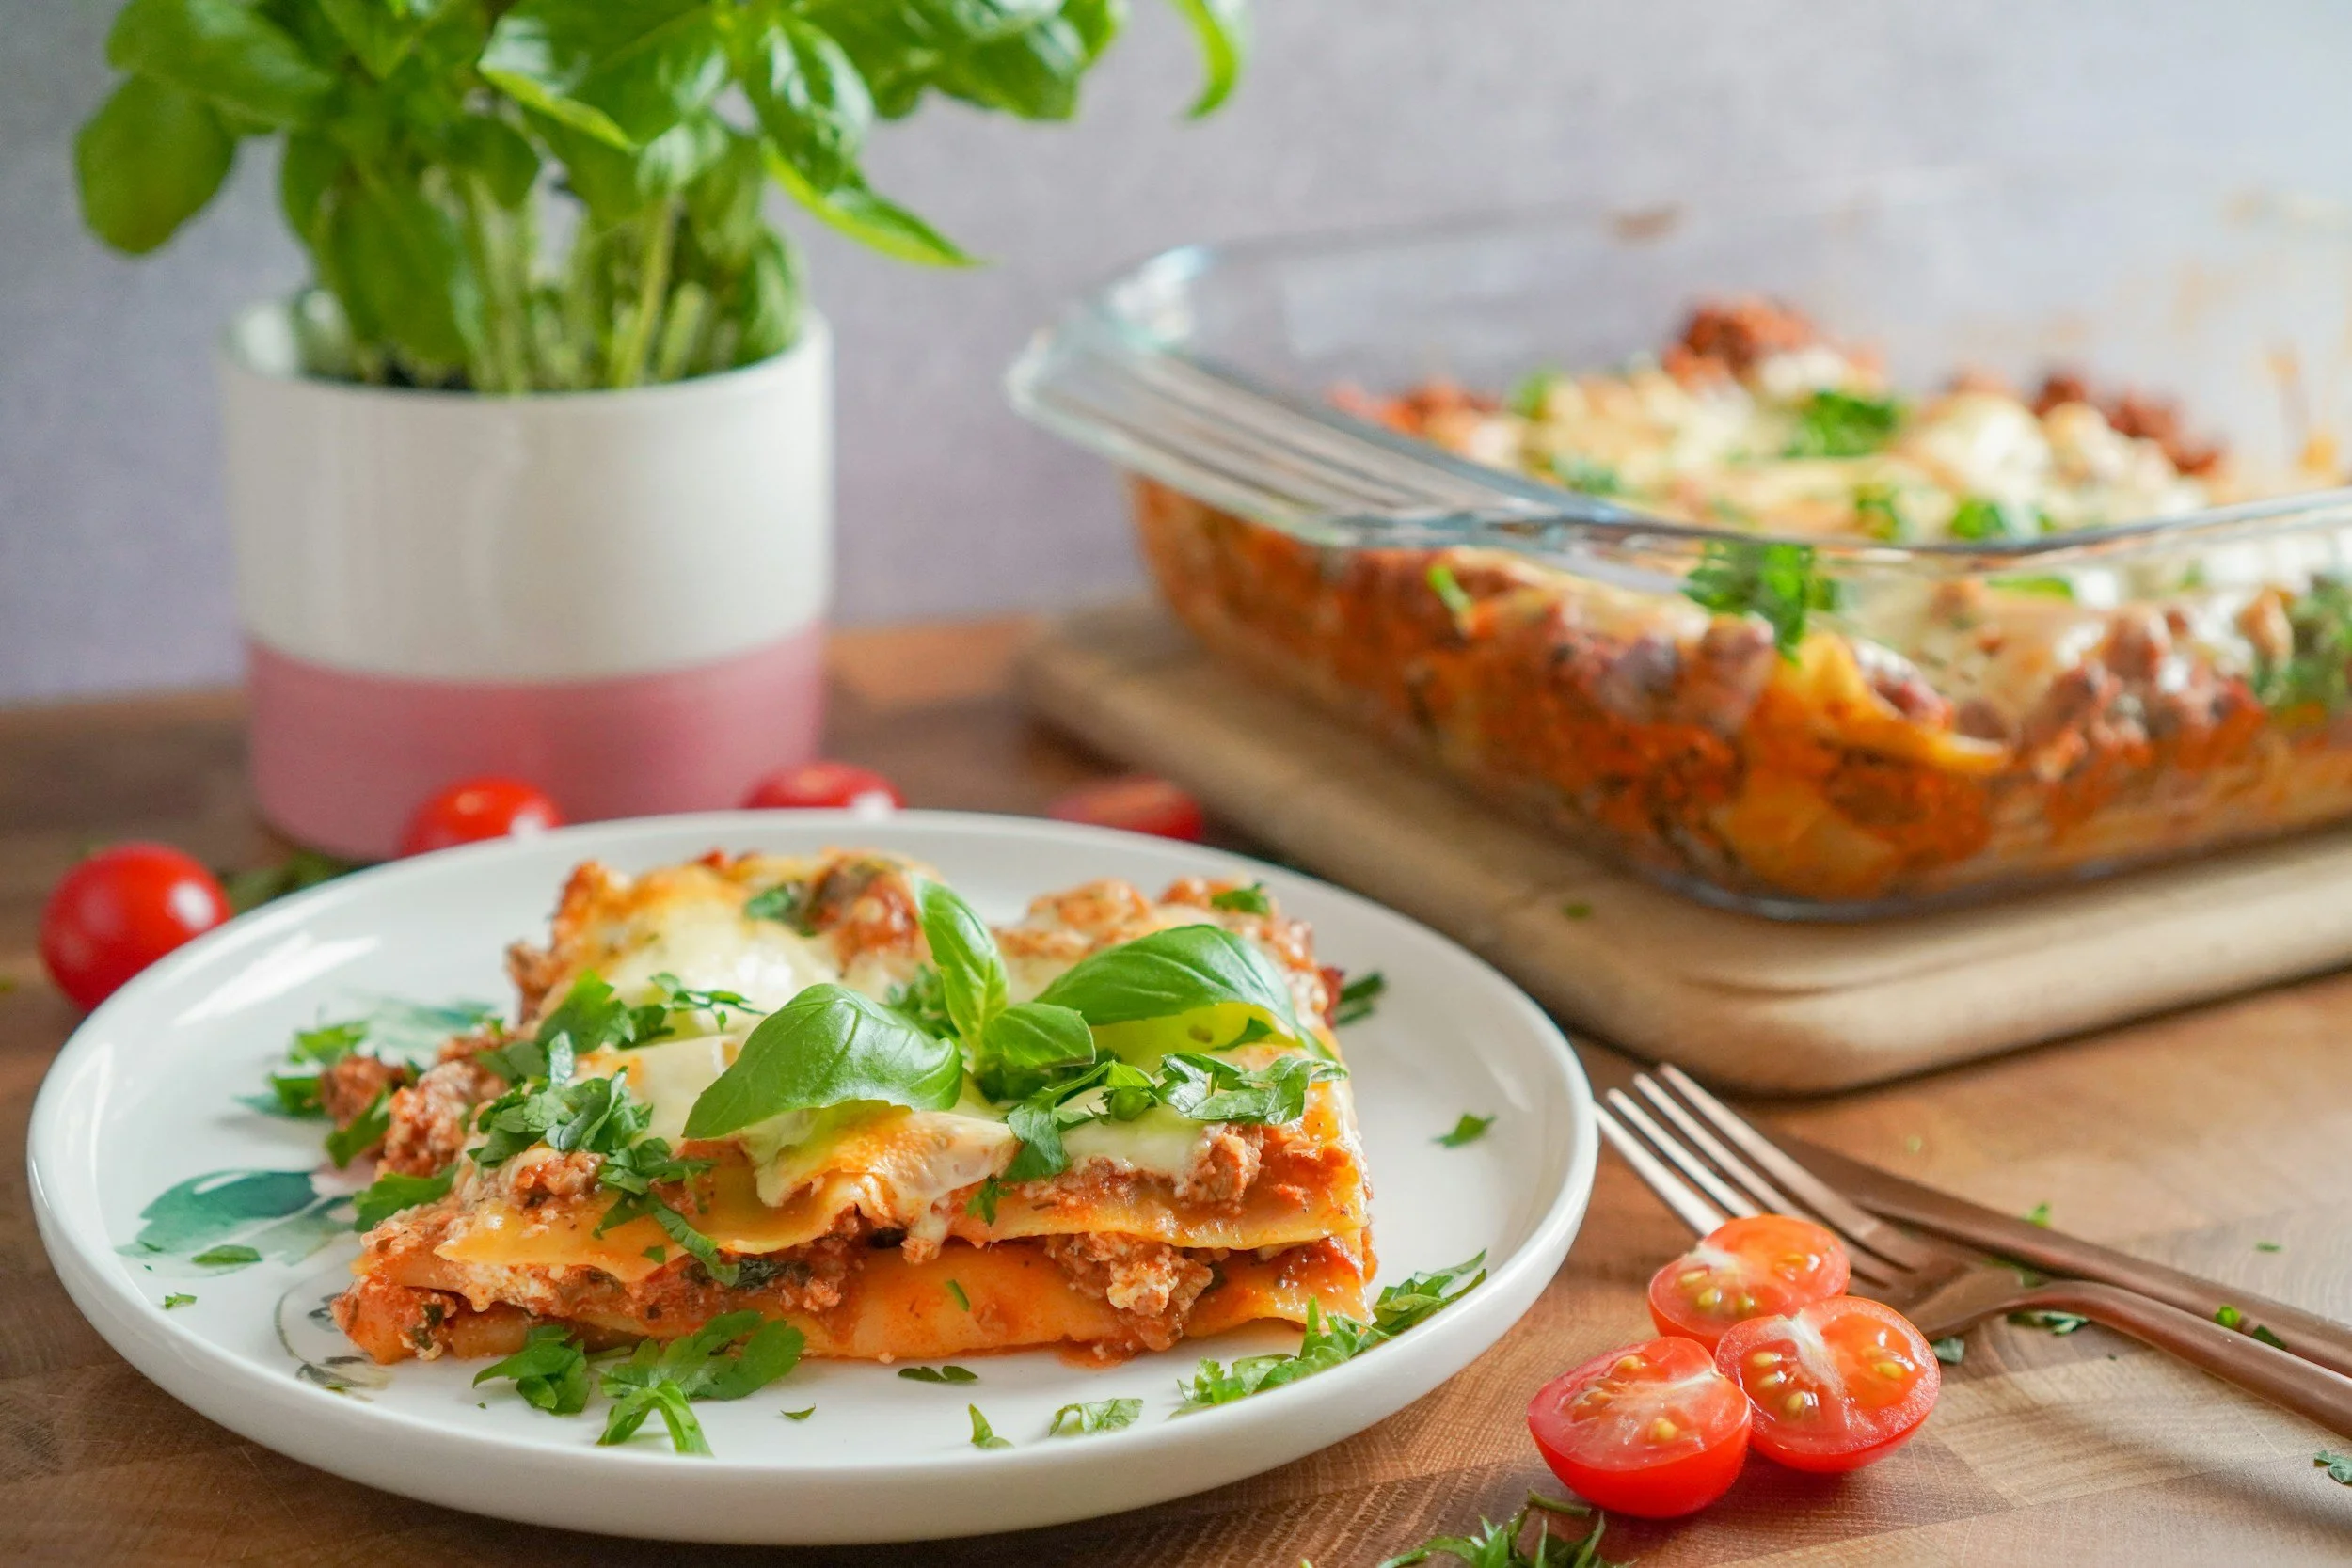
The Best Spinach and Cottage Cheese Lasagna Recipe (Lasagne à Danielle)
This spinach and cottage cheese lasagna is the one your family will ask for by name. In our house, my daughter requests it every month and it's the first thing my husband asks for after a work trip. Hearty layers, simple ingredients, and a golden cheesy top — this is what home tastes like."
Prep Time: 30 minutes | Cook Time: 45 minutes | Total Time: 1 hour 15 minutes | Serves: 8–10
📖 Jump to Recipe | 💬 Jump to FAQs | 🖨️ Print Recipe

Some recipes are just recipes. And then there are the ones that become yours — the ones your family calls by name, the ones that mark a homecoming, the ones that mean something. Lasagne à Danielle (French for “Danielles’ lasagna recipe”) is that recipe in our house. My daughter asks for it every single month, without fail, even in the hot summer months (!). As for my husband, the moment he walks through the door after a work trip, will ask: "Is there any chance you made your lasagna recipe?” There usually is.
This is the dish that lives at the centre of our table — a hearty, layered spinach and cottage cheese lasagna that has earned its place not just in our recipe rotation, but in our family's story. In my home, it's the taste of home. I hope it becomes that for yours too.
Whether you're feeding a crowd, prepping a weeknight dinner, or looking for the perfect dish to bring to a potluck, this recipe delivers every single time. It's comforting, it's satisfying, and it's far simpler to pull together than it looks. ;)
What Makes This Lasagna Special?

What sets Lasagne à Danielle apart is its beautiful simplicity. Instead of a heavy meat filling, this recipe leans into spinach and cottage cheese — a classic pairing that keeps things lighter without skimping on flavour or comfort. The cottage cheese melts into creamy, pillowy layers, the spinach adds colour and nutrition, and the golden mozzarella on top? Absolutely irresistible.
It's also wonderfully flexible: use homemade lasagna sauce if you have it, or reach for your favourite jar from the store. No judgment here — we're all about making great food work for your real life.
Frequently Asked Questions
Can I use ricotta instead of cottage cheese in lasagna?
Absolutely! Ricotta is a popular substitute, but cottage cheese creates a slightly lighter, creamier texture. Both work beautifully in this recipe.
Can I make lasagna ahead of time?
Yes! You can assemble this lasagna the night before, cover it, and refrigerate until you're ready to bake. Add 5-10 extra minutes to the cook time if baking from cold.
How do I prevent lasagna from being watery?
Make sure to strain your cooked spinach well before assembling. Squeezing out excess moisture is the key to a lasagna that holds its layers perfectly.
I’ve also had success either putting uncooked lasagna noodles with my homemade sauce. The noodles cooked in the sauce. The lasagna was a little bit more pasty, but still delicious. I would not try this ion you’re using pasta sauce bought at the store.
Can I freeze this lasagna?
Yes! This lasagna freezes wonderfully. Let it cool completely, cut into portions, wrap tightly, and freeze for up to 3 months.
What temperature should I bake lasagna at?
Bake this lasagna uncovered at 350°F (175°C) for about 45 minutes, until the cheese is golden and bubbly.
Ingredients
Makes one 9×13 pan — approximately 8–10 servings
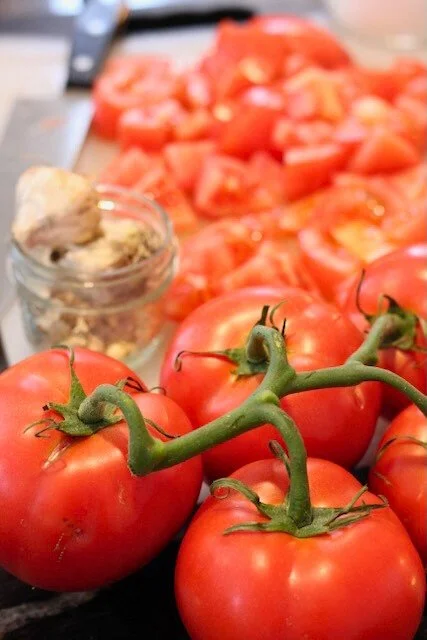
1/2 batch of homemade Danielle lasagna sauce, or 1 jar of your favourite store-bought pasta sauce
750g (about 1.5 containers) cottage cheese
2 × 300g packs of chopped frozen spinach
18 lasagna noodles
1 tbsp kosher salt
250g shredded mozzarella cheese
2 tsp dried basil
2 tsp granulated garlic, dried
Step-by-Step Instructions
The Night Before
Thaw your frozen lasagna sauce in the fridge overnight so it's ready to go. This small bit of planning makes assembly day so much smoother!
When You're Ready to Cook
Step 1: Preheat and prep.
Preheat your oven to 350°F (175°C). Fill a large stockpot with water and bring it to a boil over high heat.
Step 2: Cook the noodles.
Once the water is boiling, add all 18 lasagna noodles and a pinch of salt (I like kosher salt) and reduce to a soft boil. Cook until fully tender, then drain, cover with a bit of olive oil. This will prevent the cooked noodles from sticking to each other as they cool, and while you prep the rest of the ingredients. Set aside.
Step 3: Cook the spinach.
While the noodles cook, plate your frozen spinach and microwave according to the package directions. Give it a good squeeze or strain to remove excess water — this step really matters for the texture of your final lasagna!
Step 4: Prep the cottage cheese.
Open your cottage cheese. You'll typically use about one and a half 500g containers, leaving roughly half a container left over.
Step 5: Assemble the lasagna.
This is where the magic happens! Using a 9×13 lasagna pan, build your layers in the following order:
Sauce layer — Ladle two scoops of sauce onto the bottom of the pan and spread it evenly.
Noodles — Lay 3 noodles side by side, lengthwise.
Spinach layer — Place 9 spoonfuls of spinach over the noodles (3 per noodle, spread from top, middle, and bottom), then smooth it out evenly.
Noodles — Lay 3 noodles side by side, lengthwise.
Cottage cheese layer — Spoon cottage cheese generously over each noodle, one spoonful at a time, covering all 3 noodles evenly.
Noodles — Lay 3 noodles side by side, lengthwise.
Sauce layer — Ladle sauce over the noodles and spread evenly.
Noodles — Lay 3 noodles side by side, lengthwise.
Spinach layer — Repeat: 9 spoonfuls of spinach (3 per noodle), spread evenly.
Noodles — Lay 3 noodles side by side, lengthwise.
Cottage cheese layer — Cover the noodles with cottage cheese, one spoonful at a time.
Noodles — Lay 3 noodles side by side, lengthwise.
Sauce layer — Ladle sauce over the top noodle layer.
Mozzarella — Cover generously with shredded mozzarella.
Season — Sprinkle the dried basil and granulated garlic over the cheese.
Step 6: Bake.
Place the pan in the oven, uncovered, and bake for approximately 45 minutes — until the cheese is a gorgeous golden colour and the edges are bubbling.
Step 7: Rest and serve.
This part requires patience, but it's worth it! Let the lasagna cool for at least 15 minutes before cutting. This helps the layers set so you get those beautiful, clean slices.
Serving Suggestions
Lasagne à Danielle is a complete meal on its own, but it shines alongside a simple garden salad or a classic Caesar salad. A warm piece of crusty garlic bread on the side? Now that's a dinner worth sitting down for.
Tips for Lasagna Success
Don't skip the rest time. We know it's tempting, but letting your lasagna sit for 15 minutes makes a real difference in how cleanly it slices and how the flavours come together.
Homemade sauce makes it special. If you have the time, a homemade marinara or meat sauce takes this dish to another level. But a good quality jar sauce works perfectly on a busy weeknight — and there's zero shame in that.
Make it your own. This recipe is wonderfully forgiving. Add a layer of sautéed mushrooms, add eggplant, swap in ricotta for the cottage cheese, or sprinkle in some red pepper flakes if you like a little heat.
Nutritional Overview (Approximate per serving)
This spinach and cottage cheese lasagna is a great source of protein (from cottage cheese and mozzarella), calcium, and iron (thanks to the spinach). It's a balanced, filling meal the whole family will love.
Why You'll Make This Again and Again
Lasagne à Danielle is the kind of recipe that becomes a family tradition. It's the dish people ask you to bring to every gathering. It's the thing you make when someone needs a meal delivered to their door. It's comfort food done right — made with love, and tasting every bit like it.
So go ahead, preheat that oven. You've got this. 💛
related recipes:
Recipe card
Makes one 9×13 pan — approximately 8–10 servings
Ingredients:
1/2 batch of homemade Danielle lasagna sauce, or 1 jar of your favourite store-bought pasta sauce
750 g (about 1.5 containers) cottage cheese
2 × 300g packs of chopped frozen spinach
18 lasagna noodles
1 tbsp kosher salt
300g shredded mozzarella cheese
2 tsp dried basil
2 tsp granulated garlic, dried
Instructions:
THE NIGHT BEFORE Thaw lasagna sauce in the fridge overnight.
STEPS
Preheat oven to 350°F. Bring a large pot of water to a boil.
Cook 18 lasagna noodles until tender. Drain, toss with a little olive oil, and set aside.
Microwave frozen spinach per package directions. Strain well to remove excess water.
Open cottage cheese (you'll use about 1½ containers).
Assemble in a 9×13 pan, layering in this order:
2 ladles of sauce
3 noodles
Spinach (9 spoonfuls, 3 per noodle)
3 noodles
Cottage cheese (cover noodles evenly)
3 noodles
Sauce
3 noodles
Spinach (9 spoonfuls, 3 per noodle)
3 noodles
Cottage cheese (cover noodles evenly)
3 noodles
Sauce
Mozzarella
Sprinkle dried basil & garlic powder
Bake uncovered for 45 minutes, until cheese is golden and bubbling.
Rest 15 minutes before cutting.
Bon appétit!
*Did you try this recipe? We'd love to hear how it turned out! Share your photos and leave a comment below.*
DID YOU MAKE THIS RECIPE? I WANT TO SEE IT!
Leave a photo and a ⭐ star rating and comment below to let us know how your muffins turned out. Did you make any substitutions or additions? Share your tips and photos with us!
Share this recipe: Help others discover this delicious recipe by sharing it on Pinterest, Facebook, or Instagram. Tag us @Sageandsimplicity so we can see your beautiful creations!
📌 Pin it for later: Save this recipe to your Pinterest boards for easy access.