Roasted Tomato, Garlic & Thyme soup
thyme and roasted tomatoes soup
📖 Jump to Recipe | 💬 Jump to FAQs | 🖨️ Print Recipe
Prep Time: 15 minutes | Cook Time: 65 minutes | Total Time: 1 hour 20 minutes | Yield: 6-8 servings | Difficulty: Easy

Why I Love This Soup
Homemade roasted tomato, garlic and thyme soup is one of the easiest and most comforting meals to make during the colder months. This is a family-favourite recipe in our home, loved for its rich flavour, simple ingredients, and cozy, homemade feel. It’s the kind of soup that warms you up while still being easy and budget friendly.
Roasting the tomatoes is what gives this soup its deep, slightly sweet flavour. The oven caramelizes the tomatoes while roasted garlic becomes soft and mellow, adding richness without overpowering the dish. This simple roasting step creates a depth of flavour that makes this soup taste slow-cooked, even though it’s surprisingly easy to make.
The roasted garlic and thyme combination is a classic culinary combination that has an irresistible flavour profile. This satisfying soup can be served on its own or paired with grilled cheese, crusty sourdough bread, or a simple salad.
This easy, budget-friendly, roasted tomato basil soup that works well for families. It’s made with affordable pantry and produce ingredients, stretches easily to feed a crowd, freezes beautifully, which can be an easy hands-off meal. That makes it ideal for leftovers, meal prep, and quick lunches during busy weeks.
This soup has become a cold-weather staple in our home because it’s simple, comforting, and consistently loved by everyone at the table. It proves that family-friendly comfort food doesn’t have to be complicated—and that homemade soup can be both economical and deeply satisfying.
Bon appétit!

What do I need to make this soup
ingredients:
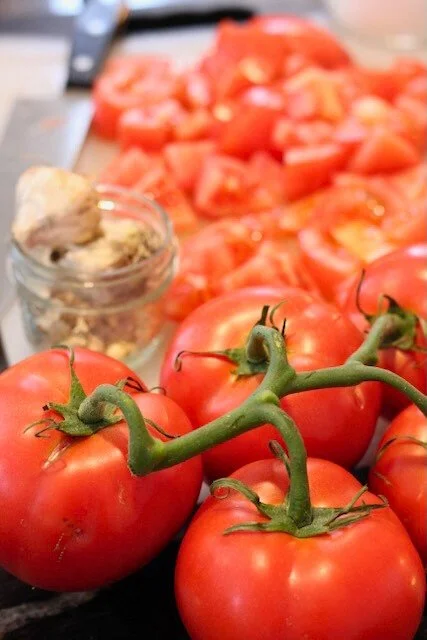
10-12 Roma tomatoes, diced
5-6 garlic cloves
Extra virgin olive oil, 2 TBSP
1 tsp salt, I use kosher salt
Fresh thyme
1 L chicken broth
Optional topping:
Sharp cheddar or fresh parmesan
salt and pepper, to taste
instructions:
Preheat over to 350F. Put garlic cloves in ramekin and add the extra virgin olive oil to cover 3/4 coves.
Cut tomatoes into 8 pieces. Put on a baking sheet and coat with extra virgin olive oil, and the springs of fresh thyme. Sprinkle salt. Put the garlic filled ramekin on a the baking sheet.
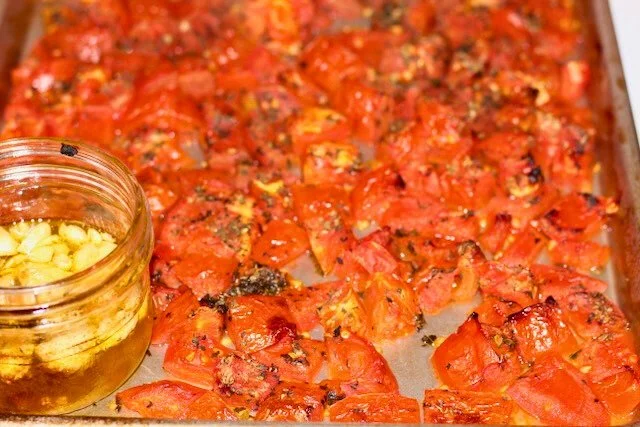
Roast tomatoes and garlic until edges become golden, about 25 minutes. Be sure to watch the garlic. It might need to be removed before the rest of the tomatoes.
Remove the veggies from the oven and let cool.
Add chicken broth, roasted veggies, garlic and oil mixture in a blender. Blend until smooth.
Add cheese, pepper, thyme to taste. Serve. This pairs well with homemade sourdough bread, salads and sandwiches.
Enjoy!

how to make Roasted Tomato, Garlic & Thyme Soup
a step-by-step guide
step 1: preheat your oven
Preheat over to 350F. Put garlic cloves in ramekin and add the extra virgin olive oil to cover 3/4 coves.
step 2: Wash, Cut and prep the vegetables for roasting
Cut tomatoes into 8 pieces. Put on a baking sheet and coat with extra virgin olive oil, and the springs of fresh thyme. Sprinkle salt. Put the garlic filled ramekin on a the baking sheet.
Step 3: roasting the vegetables
Roast tomatoes and garlic until edges become golden, about 25 minutes. Be sure to watch the garlic. It might need to be removed before the rest of the tomatoes.
Step 4: let the vegetables cool
Remove the veggies from the oven and let cool.
step 5: blend the ingredients
Add chicken broth, roasted veggies, garlic and oil mixture in a blender. Blend until smooth.
Step 6: add the toppings
Add cheese, pepper, thyme to taste. Serve. This pairs well with homemade sourdough bread, salads and sandwiches.
Enjoy!
Recipe Card
Ingredients:
10-12 Roma tomatoes, diced
5-6 garlic cloves
Extra virgin olive oil, 2 TBSP
1 tsp salt, I use kosher salt
Fresh thyme
1 L chicken broth
Optional topping:
Sharp cheddar or fresh parmesan
salt and pepper, to taste
Instructions:
Preheat over to 350F. Put garlic cloves in ramekin and add the extra virgin olive oil to cover 3/4 coves.
Cut tomatoes into 8 pieces. Put on a baking sheet and coat with extra virgin olive oil, and the springs of fresh thyme. Sprinkle salt. Put the garlic filled ramekin on a the baking sheet.
Roast tomatoes and garlic until edges become golden, about 25 minutes. Be sure to watch the garlic. It might need to be removed before the rest of the tomatoes.
Remove the veggies from the oven and let cool.
Add chicken broth, roasted veggies, garlic and oil mixture in a blender. Blend until smooth.
Add cheese, pepper, thyme to taste. Serve. This pairs well with homemade sourdough bread, salads and sandwiches.
Enjoy!
did you make this recipe? I want to see it!
Leave a picture and a ⭐ star rating and comment below to let us know how your muffins turned out. Did you make any substitutions or additions? Share your tips and photos with us!
Share this recipe: Help others discover this delicious recipe by sharing it on Pinterest, Facebook, or Instagram. Tag us @Sageandsimplicity so we can see your beautiful creations!
📌 Pin it for later: Save this recipe to your Pinterest boards for easy access.
You might also like:


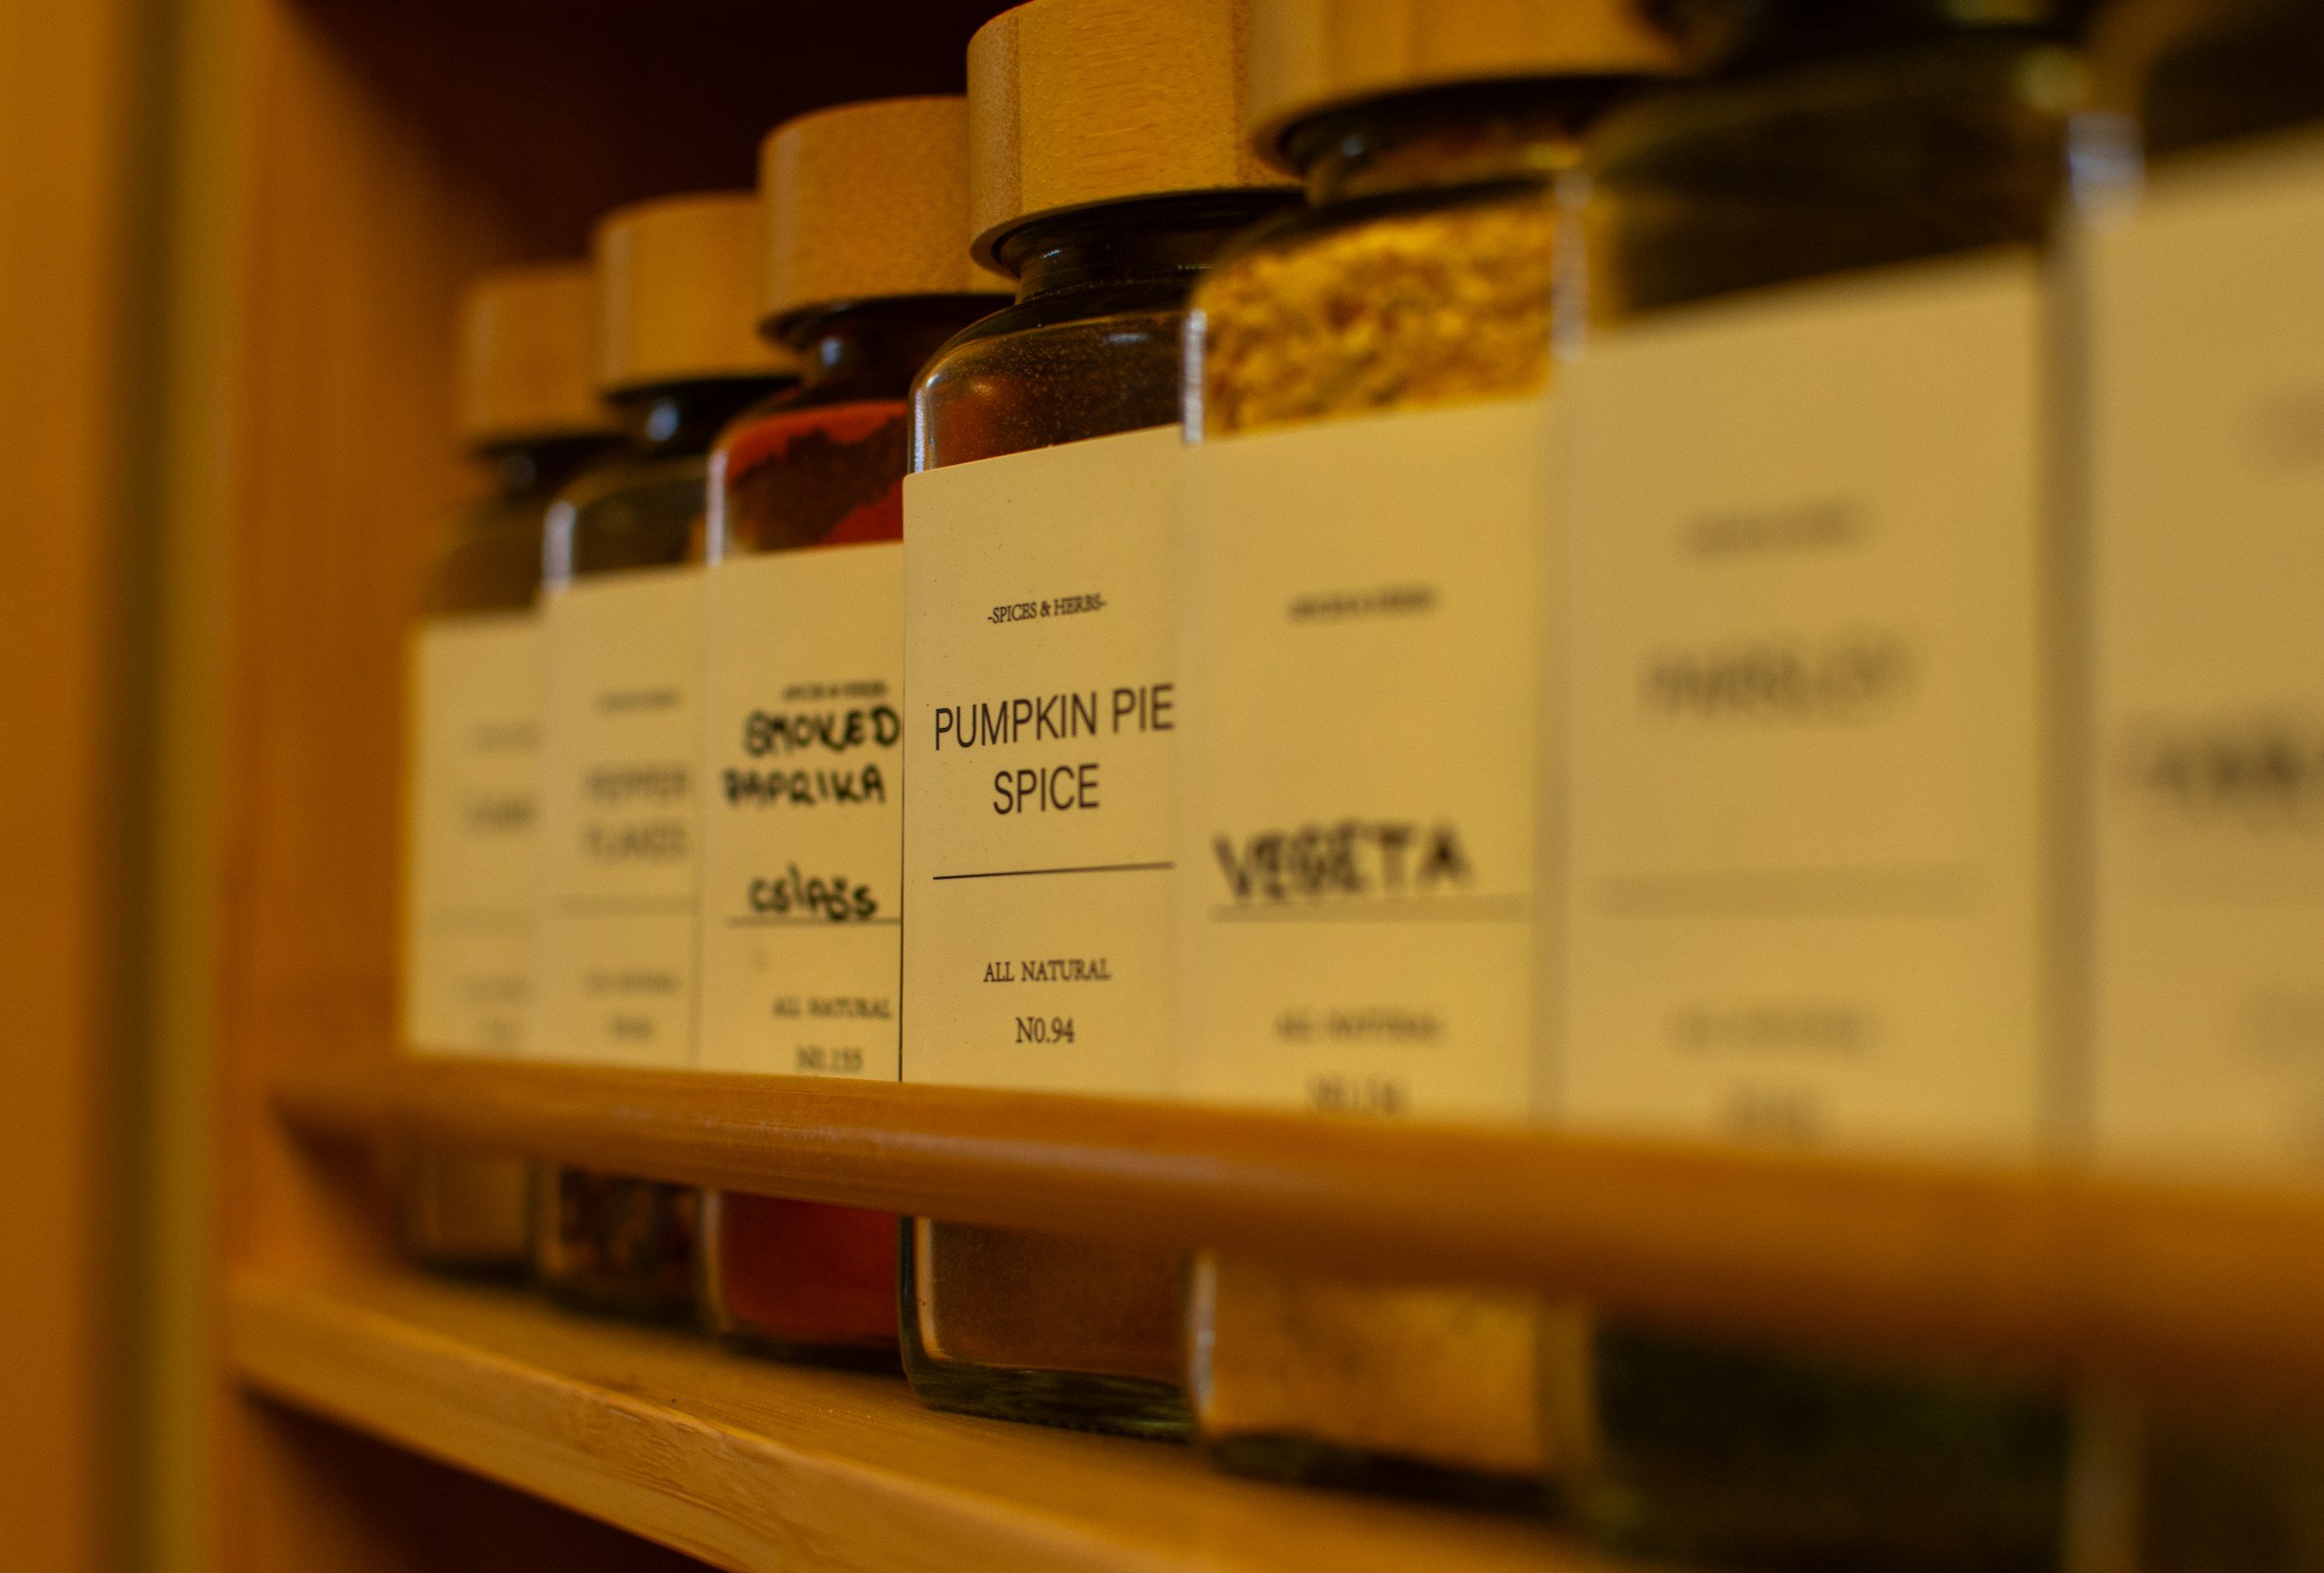
Homemade pumpkin pie spice mixture
📖 Jump to Recipe | 💬 Jump to FAQs | 🖨️Print Recipe
Total Time: 5 minutes | Difficulty: Easy
Making your own pumpkin spice blend at home is surprisingly simple — and a lot more cost-effective — letting you skip the pricey pre-made packets and keep full control over freshness and flavour. Instead of paying extra for mixes that may expire before you have time to use it up, you can whip up a perfectly balanced blend using just four pantry staples: cinnamon, ginger, nutmeg, and cloves.

The process is simple, combine ground cinnamon, ground ginger, ground nutmeg, and ground cloves in a small bowl or jar. A classic ratio is four parts cinnamon, two parts ginger, one part nutmeg, and one part cloves — but feel free to adjust it to match your taste. Prefer a bold cinnamon-forward blend or something with more spice from the ginger or cloves? Go for it.
From a budget standpoint, buying the individual spices is far more economical than repeatedly grabbing pre-packaged pumpkin spice, which can sometimes be hard to find during the fall. Those blends often charge a premium for convenience and branding, while a few basic spices can yield multiple batches with far less waste.
Once mixed, store your blend in an airtight container away from heat and light, and it will stay fresh for months. Make a batch at the start of the season and enjoy it all autumn and winter — in everything from lattes, cookies, pies, oatmeal, even roasted veggies! And if you love experimenting, try adding allspice or cardamom to create your own signature spin. ;)
Creating your own pumpkin spice mix is an easy, flexible, and budget-friendly way to bring seasonal flavour to your kitchen. A handful of simple spices becomes a fresh, customizable blend that elevates your recipes without elevating your grocery bill.

other pumpkin recipes:


REcipe card
Ingredients
4 tablespoon Cinnamon, ground
2 tablespoons Ginger, ground
1 tablespoon Nutmeg, ground
1 tablespoon Cloves, ground
Optional: 1 tablespoon All Spice, ground
Optional: 1 tablespoon Cardamom, ground
instructions
Combine all listed spices in a large mixing bowl. Mix well. Poor into a spice jar. Use it in all recipes calling for Pumpkin Pie Spice mixture.
Did you make this? I want to see it!
Leave a picture and a ⭐ star rating and comment below to let us know how your muffins turned out. Did you make any substitutions or additions? Share your tips and photos with us!
Share this recipe: Help others discover this delicious recipe by sharing it on Pinterest, Facebook, or Instagram. Tag us @Sageandsimplicity so we can see your beautiful creations!
📌 Pin it for later: Save this recipe to your Pinterest boards for easy access.
You might also like these recipes:

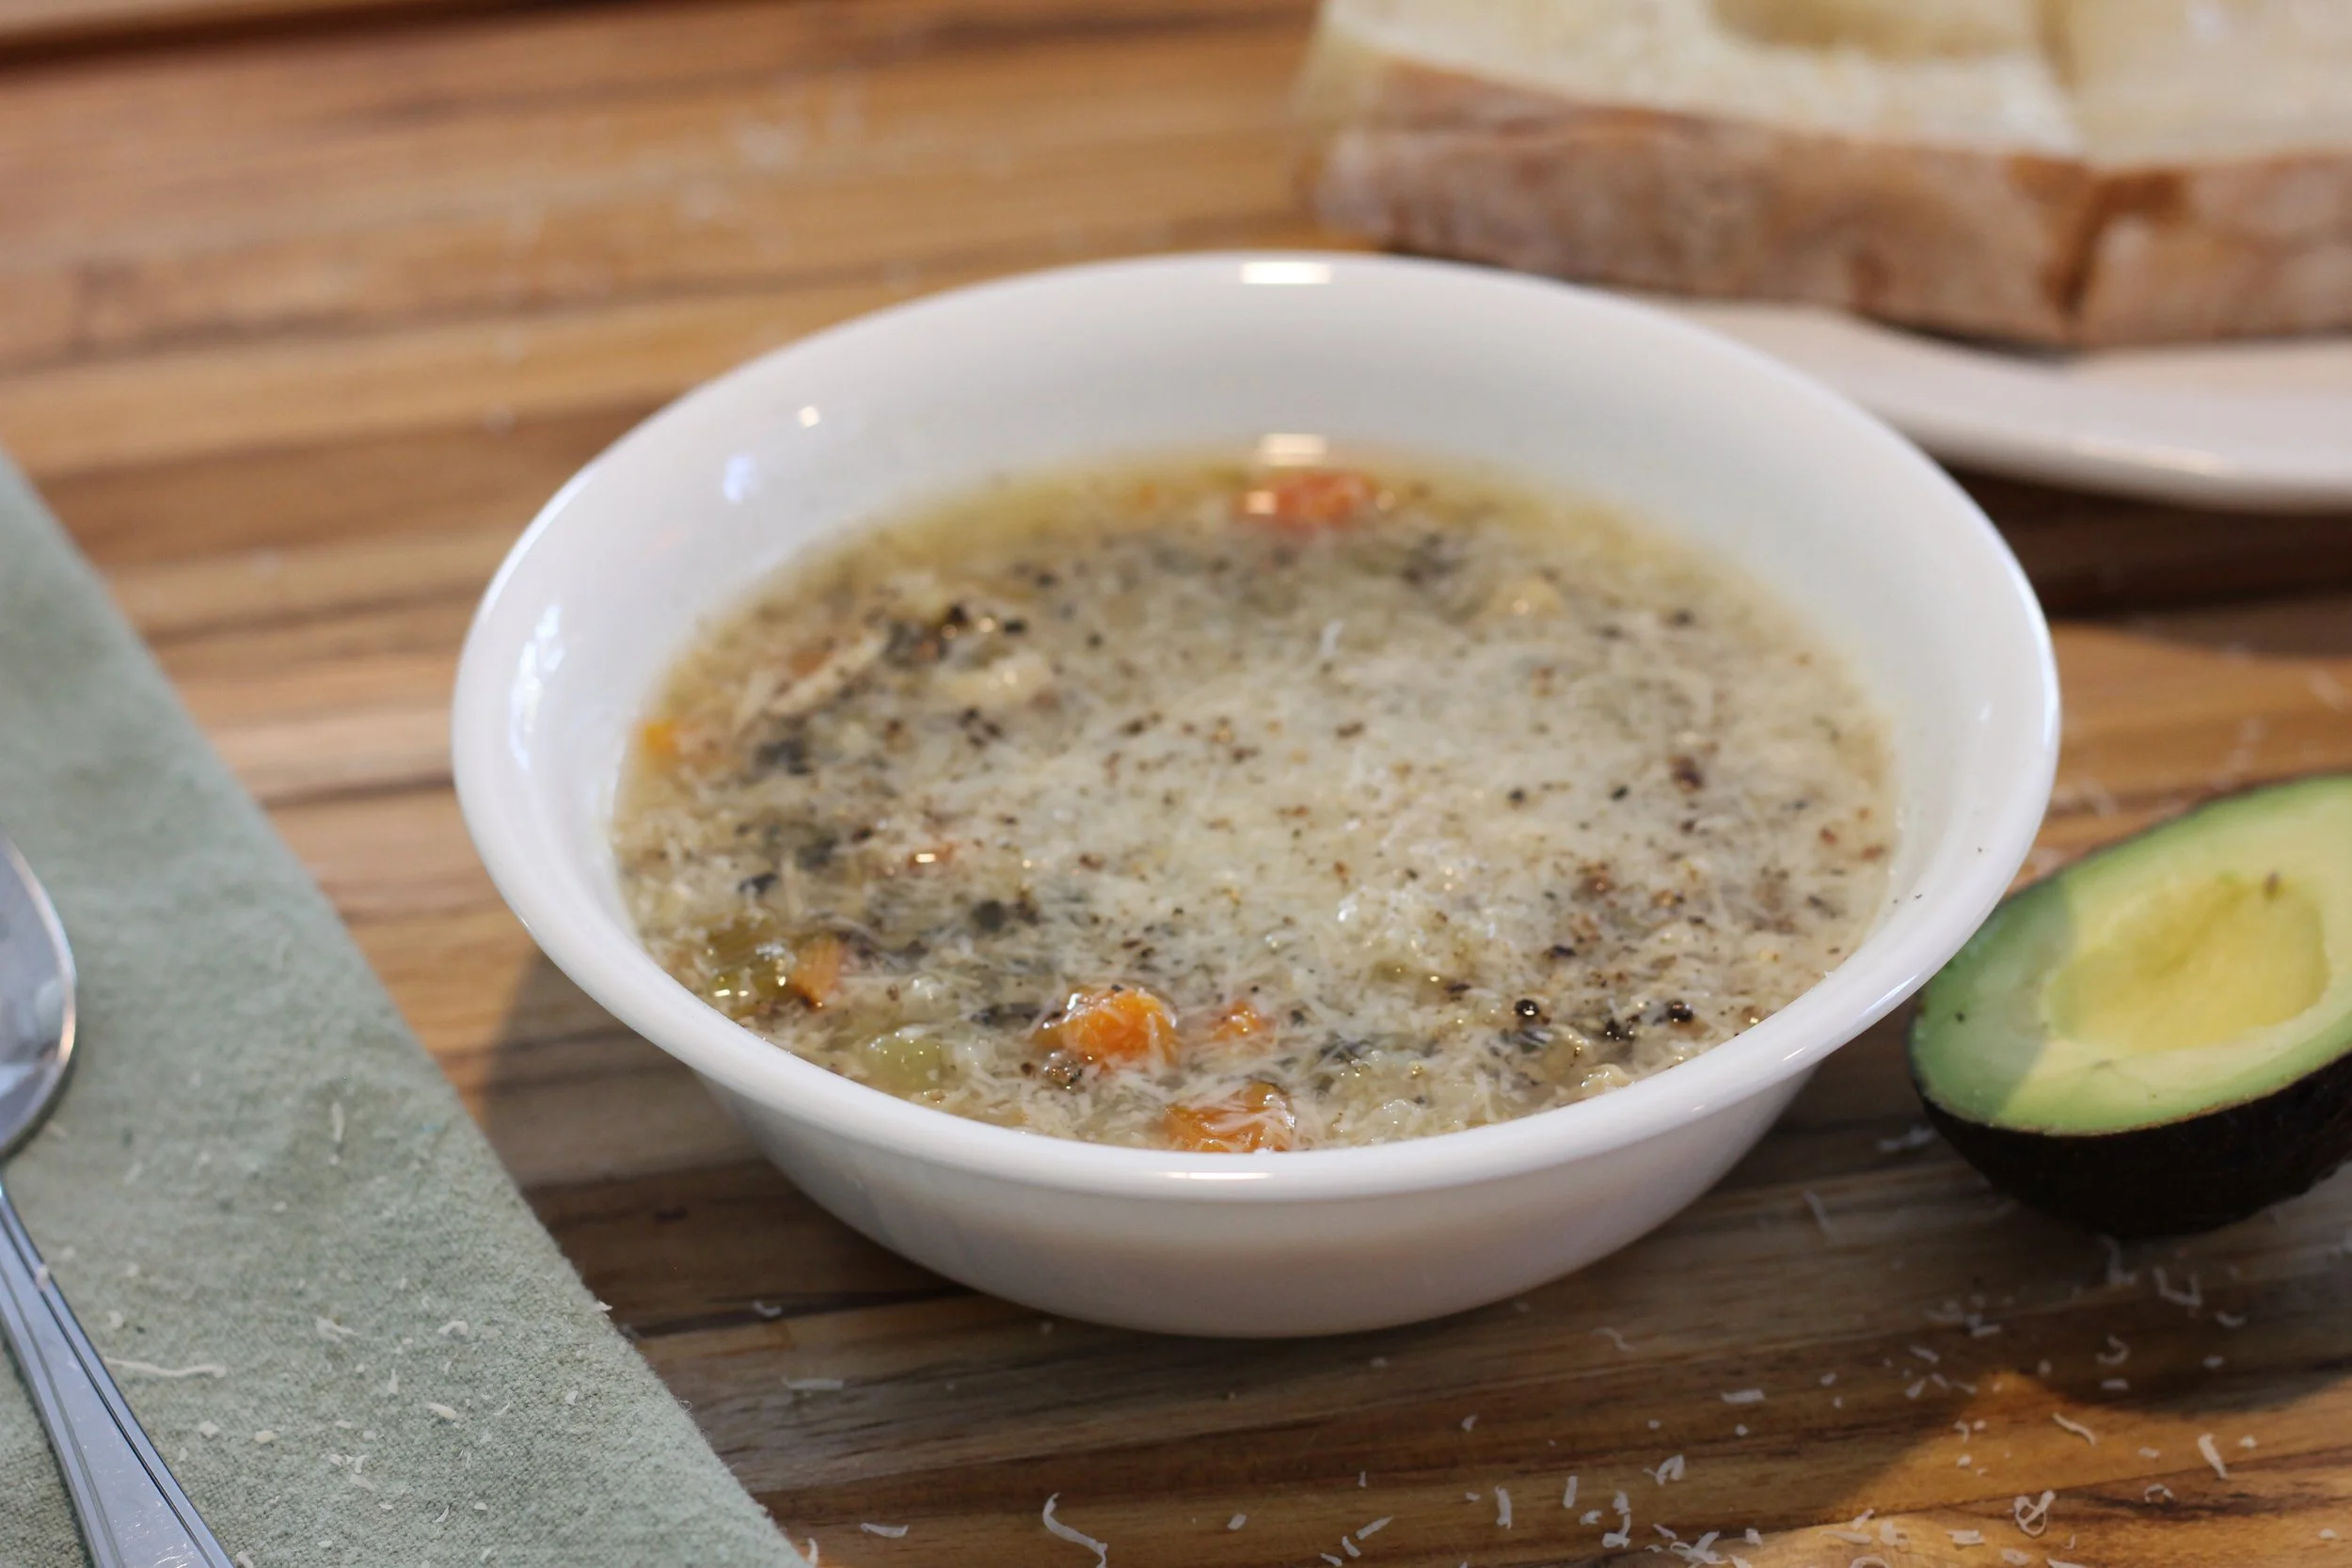
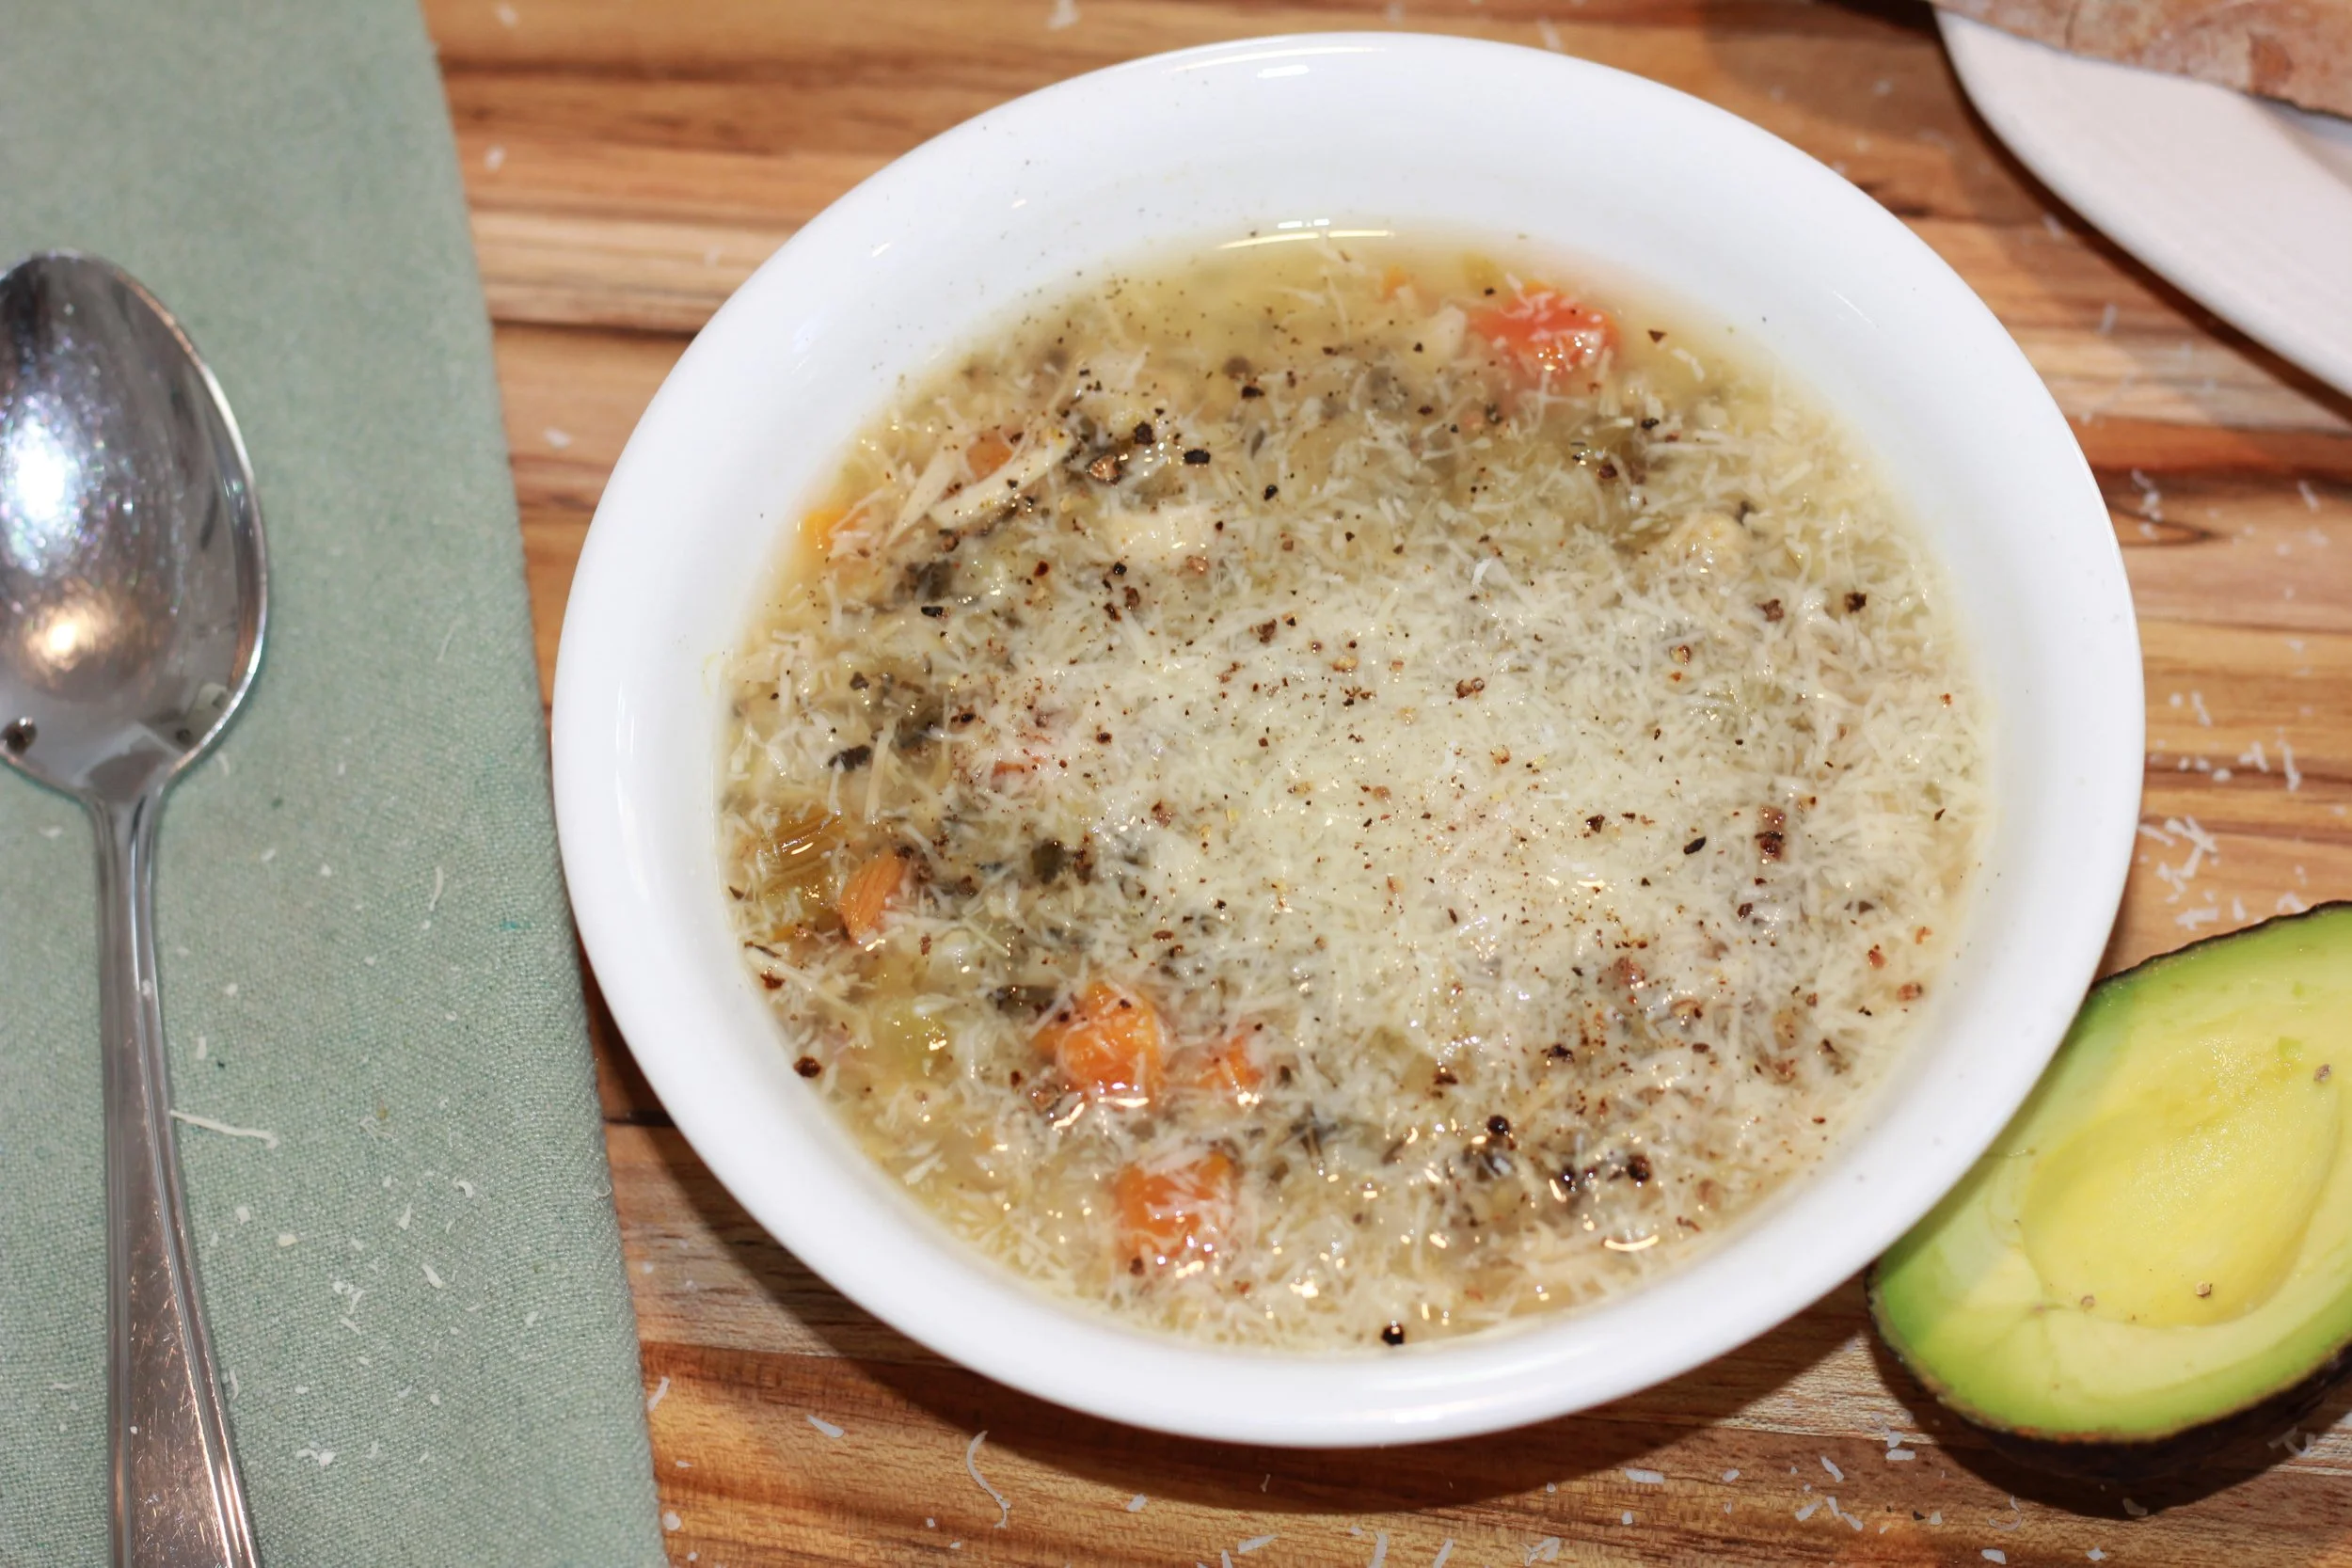
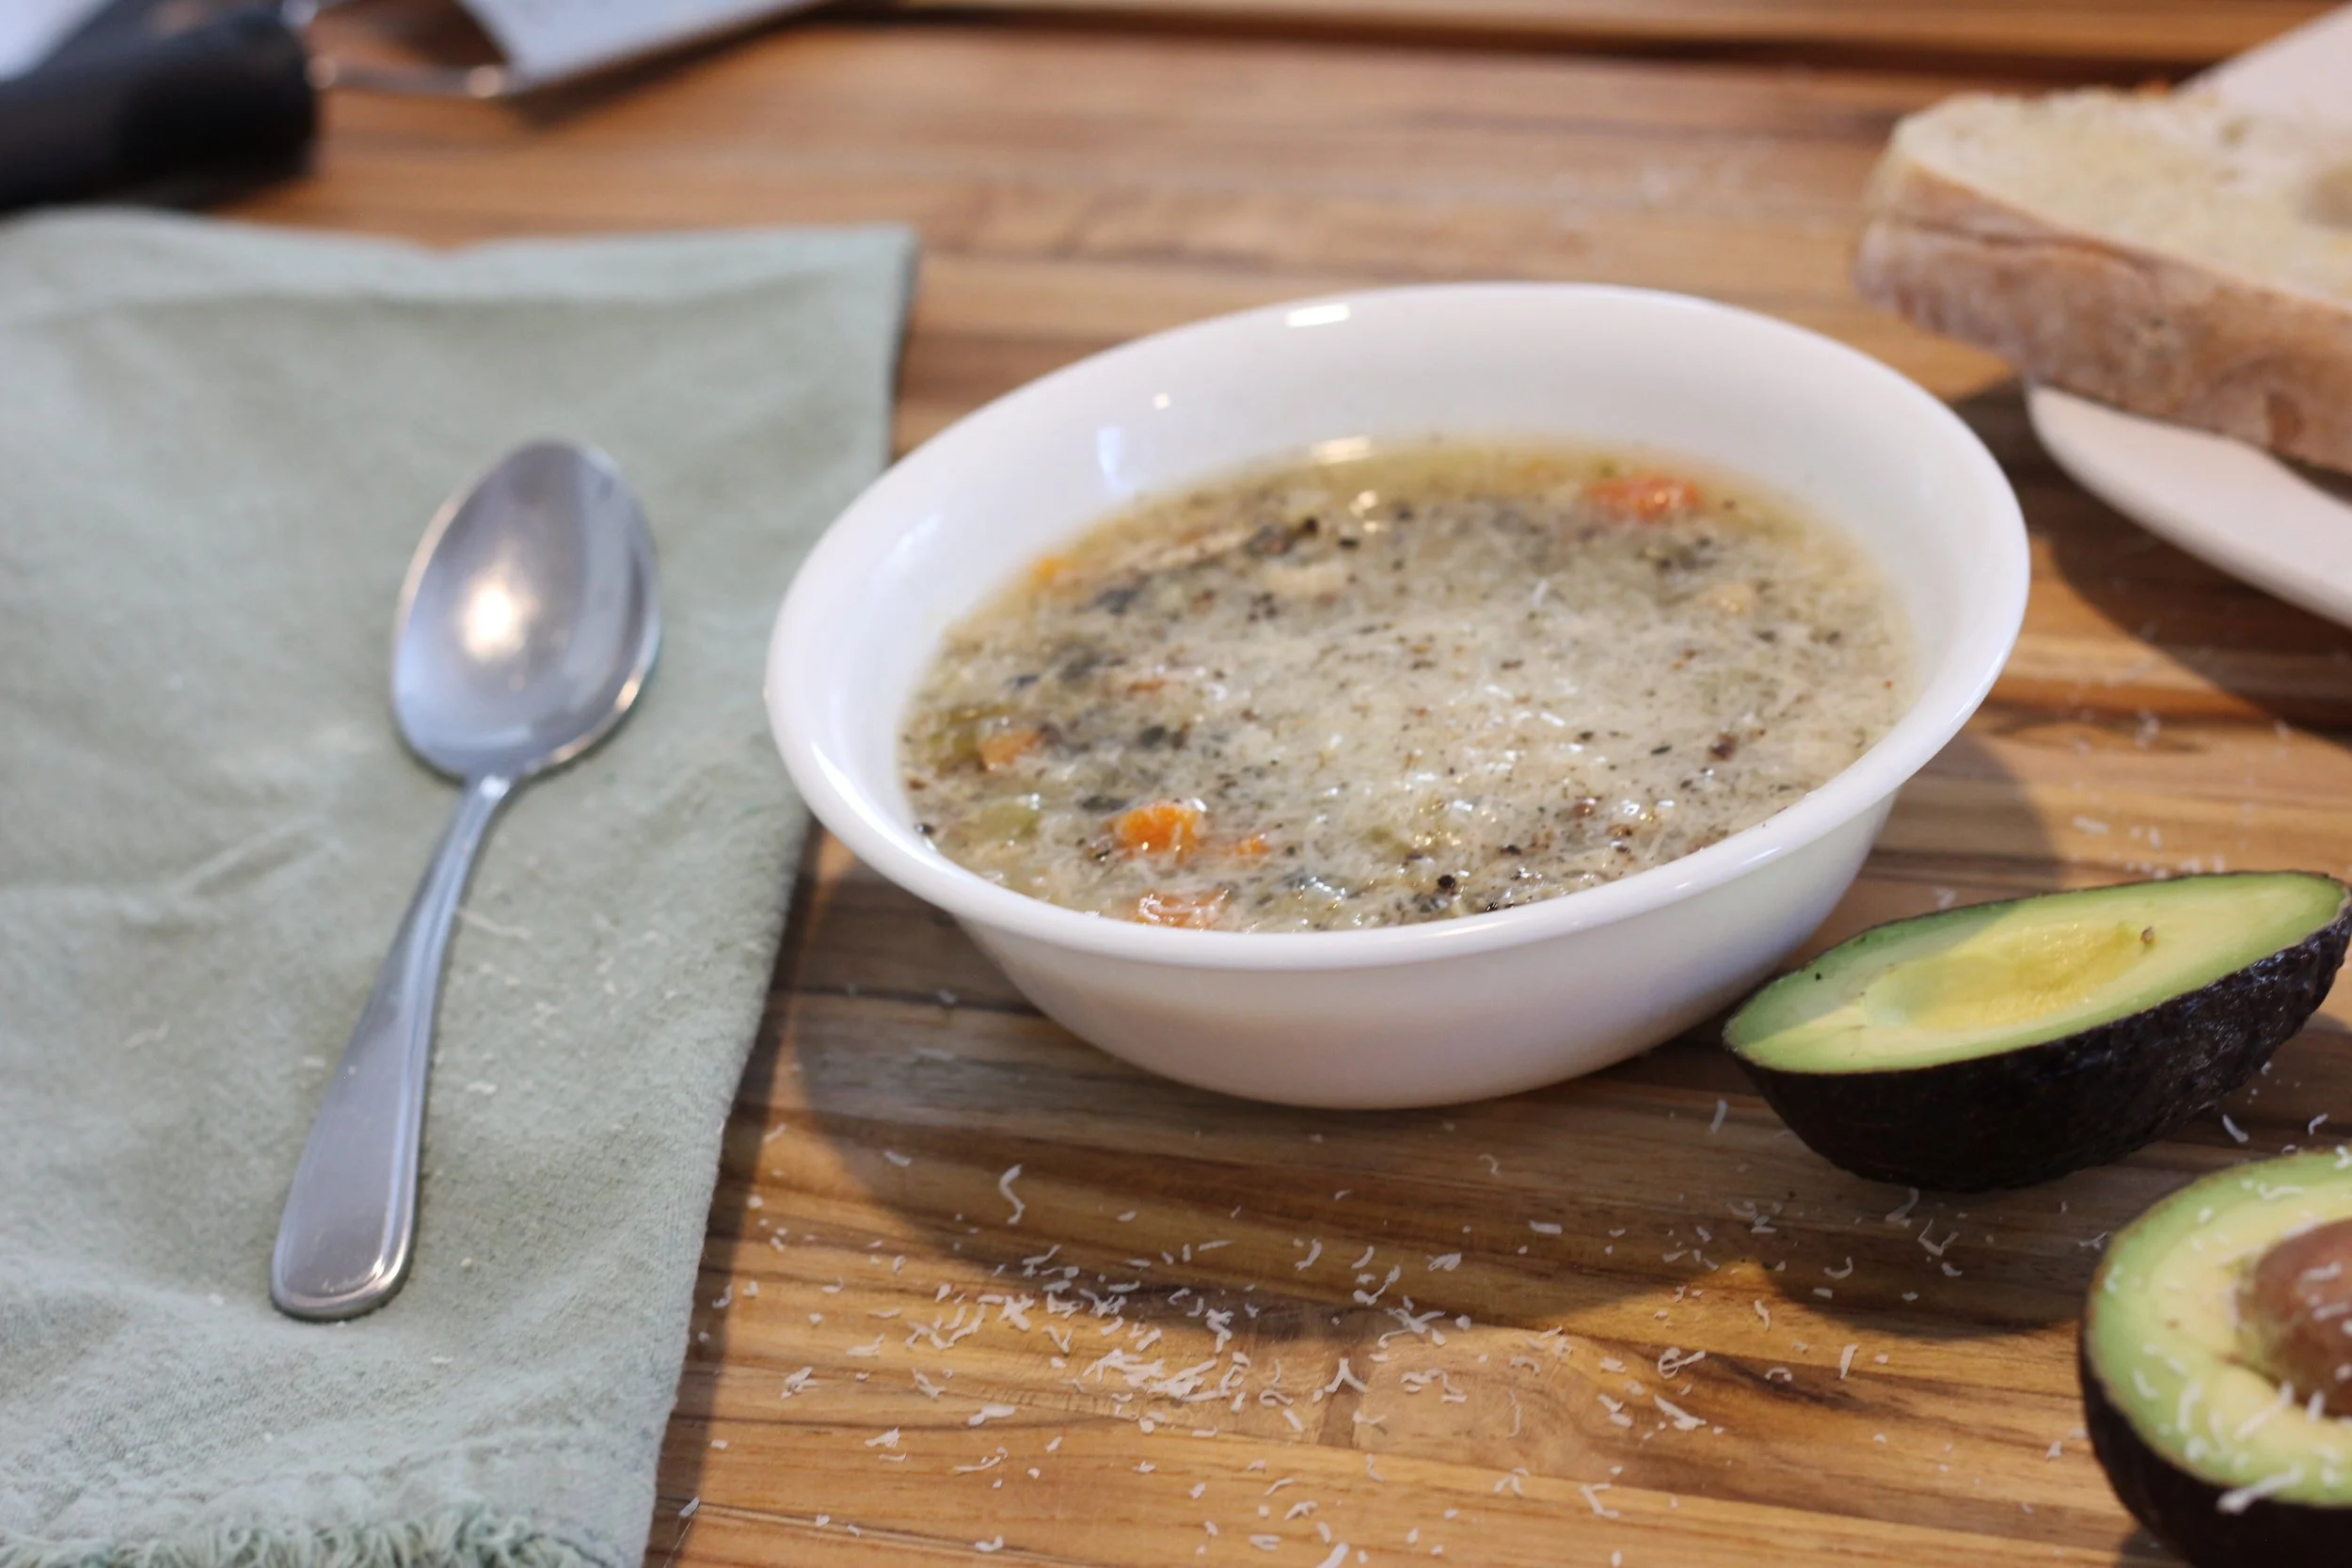
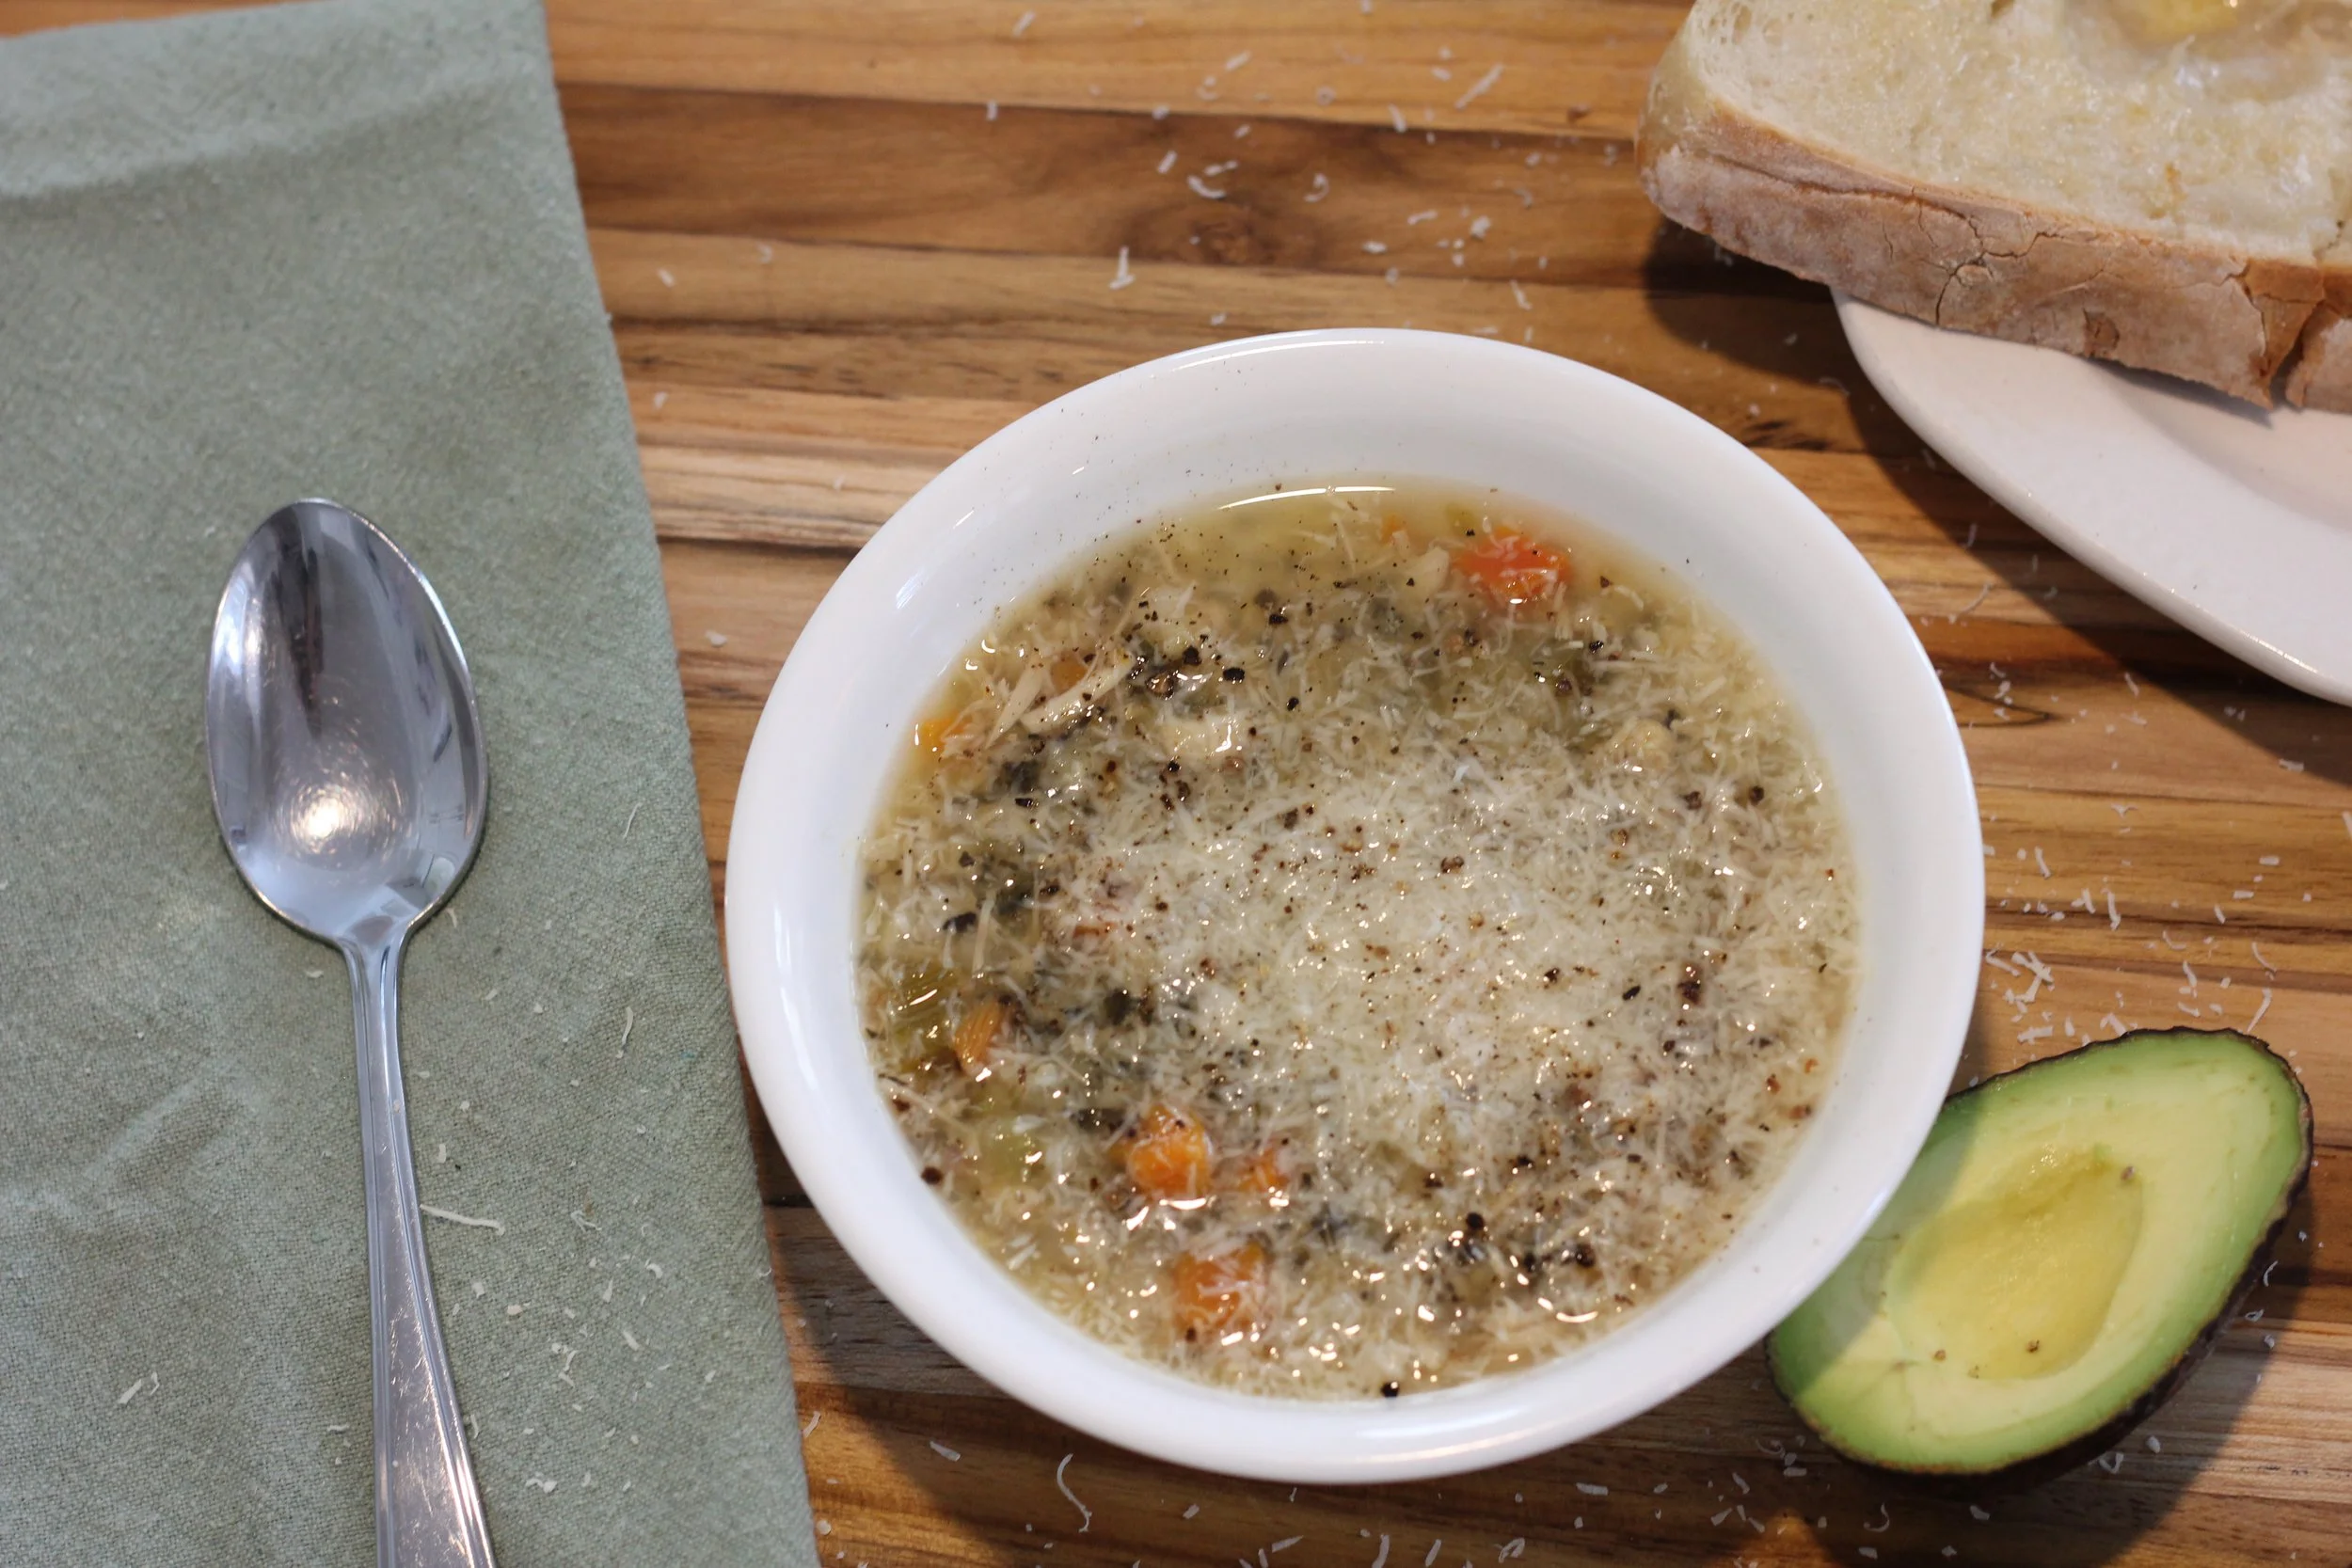
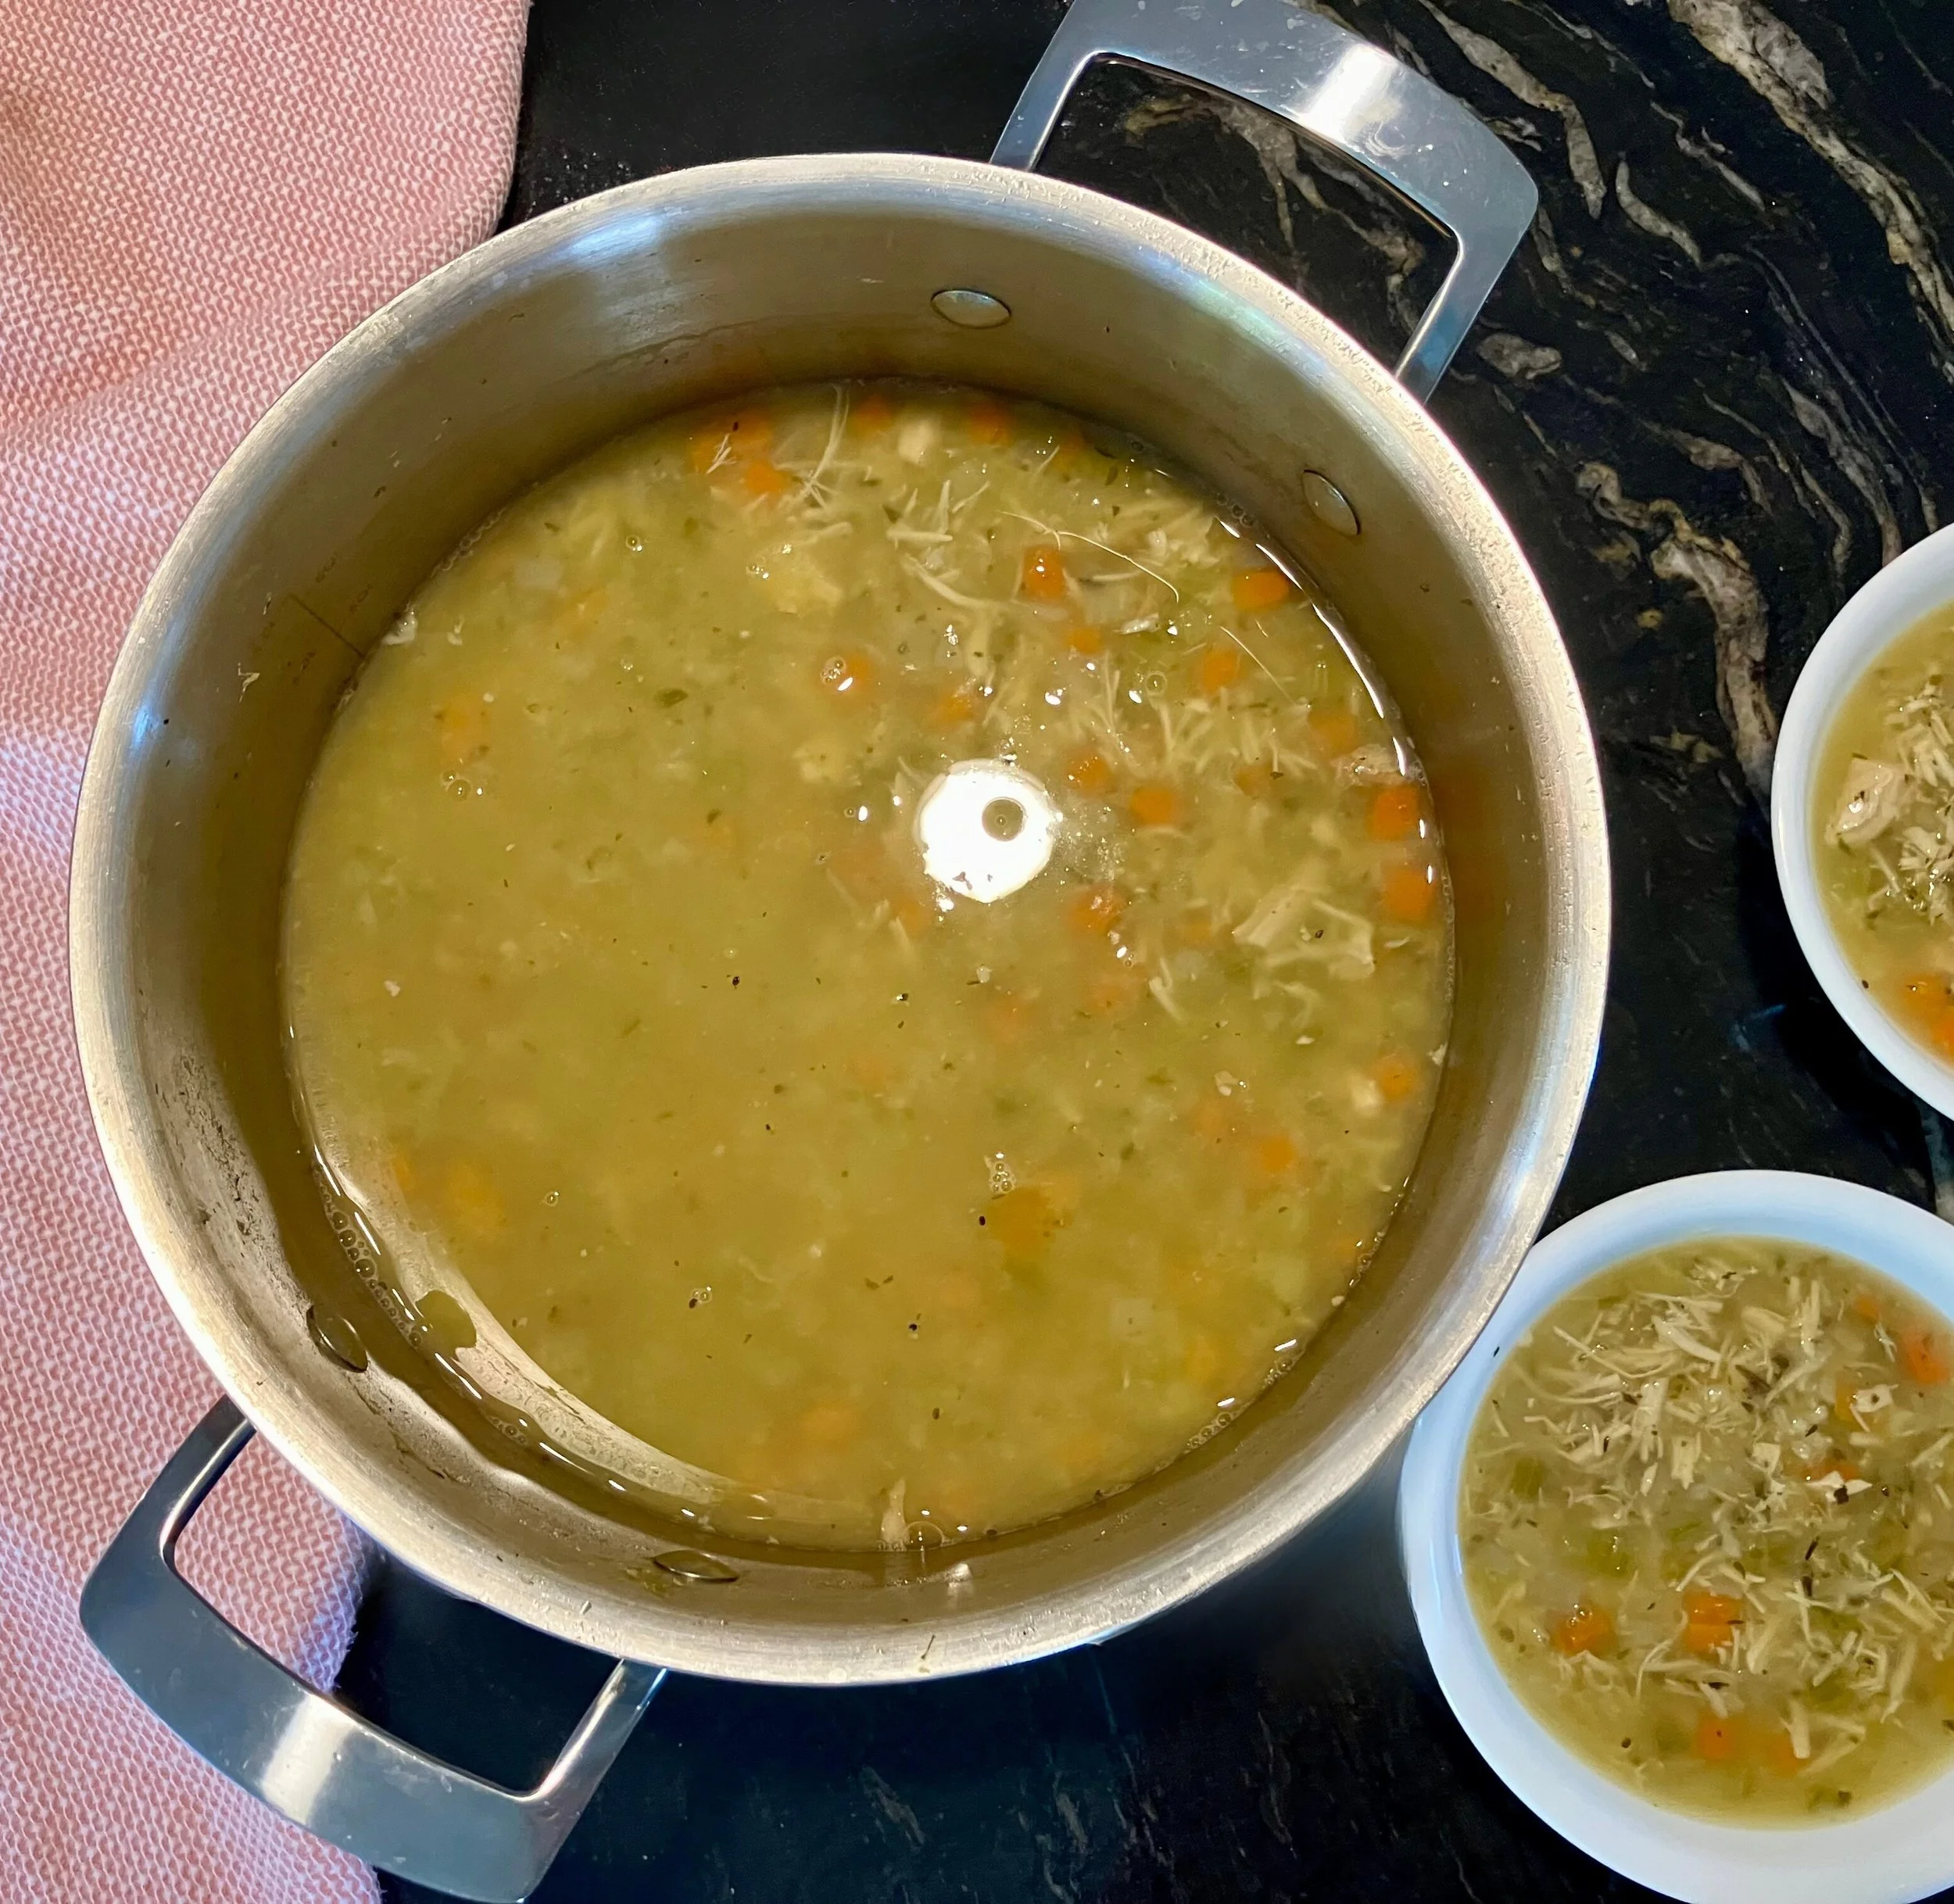
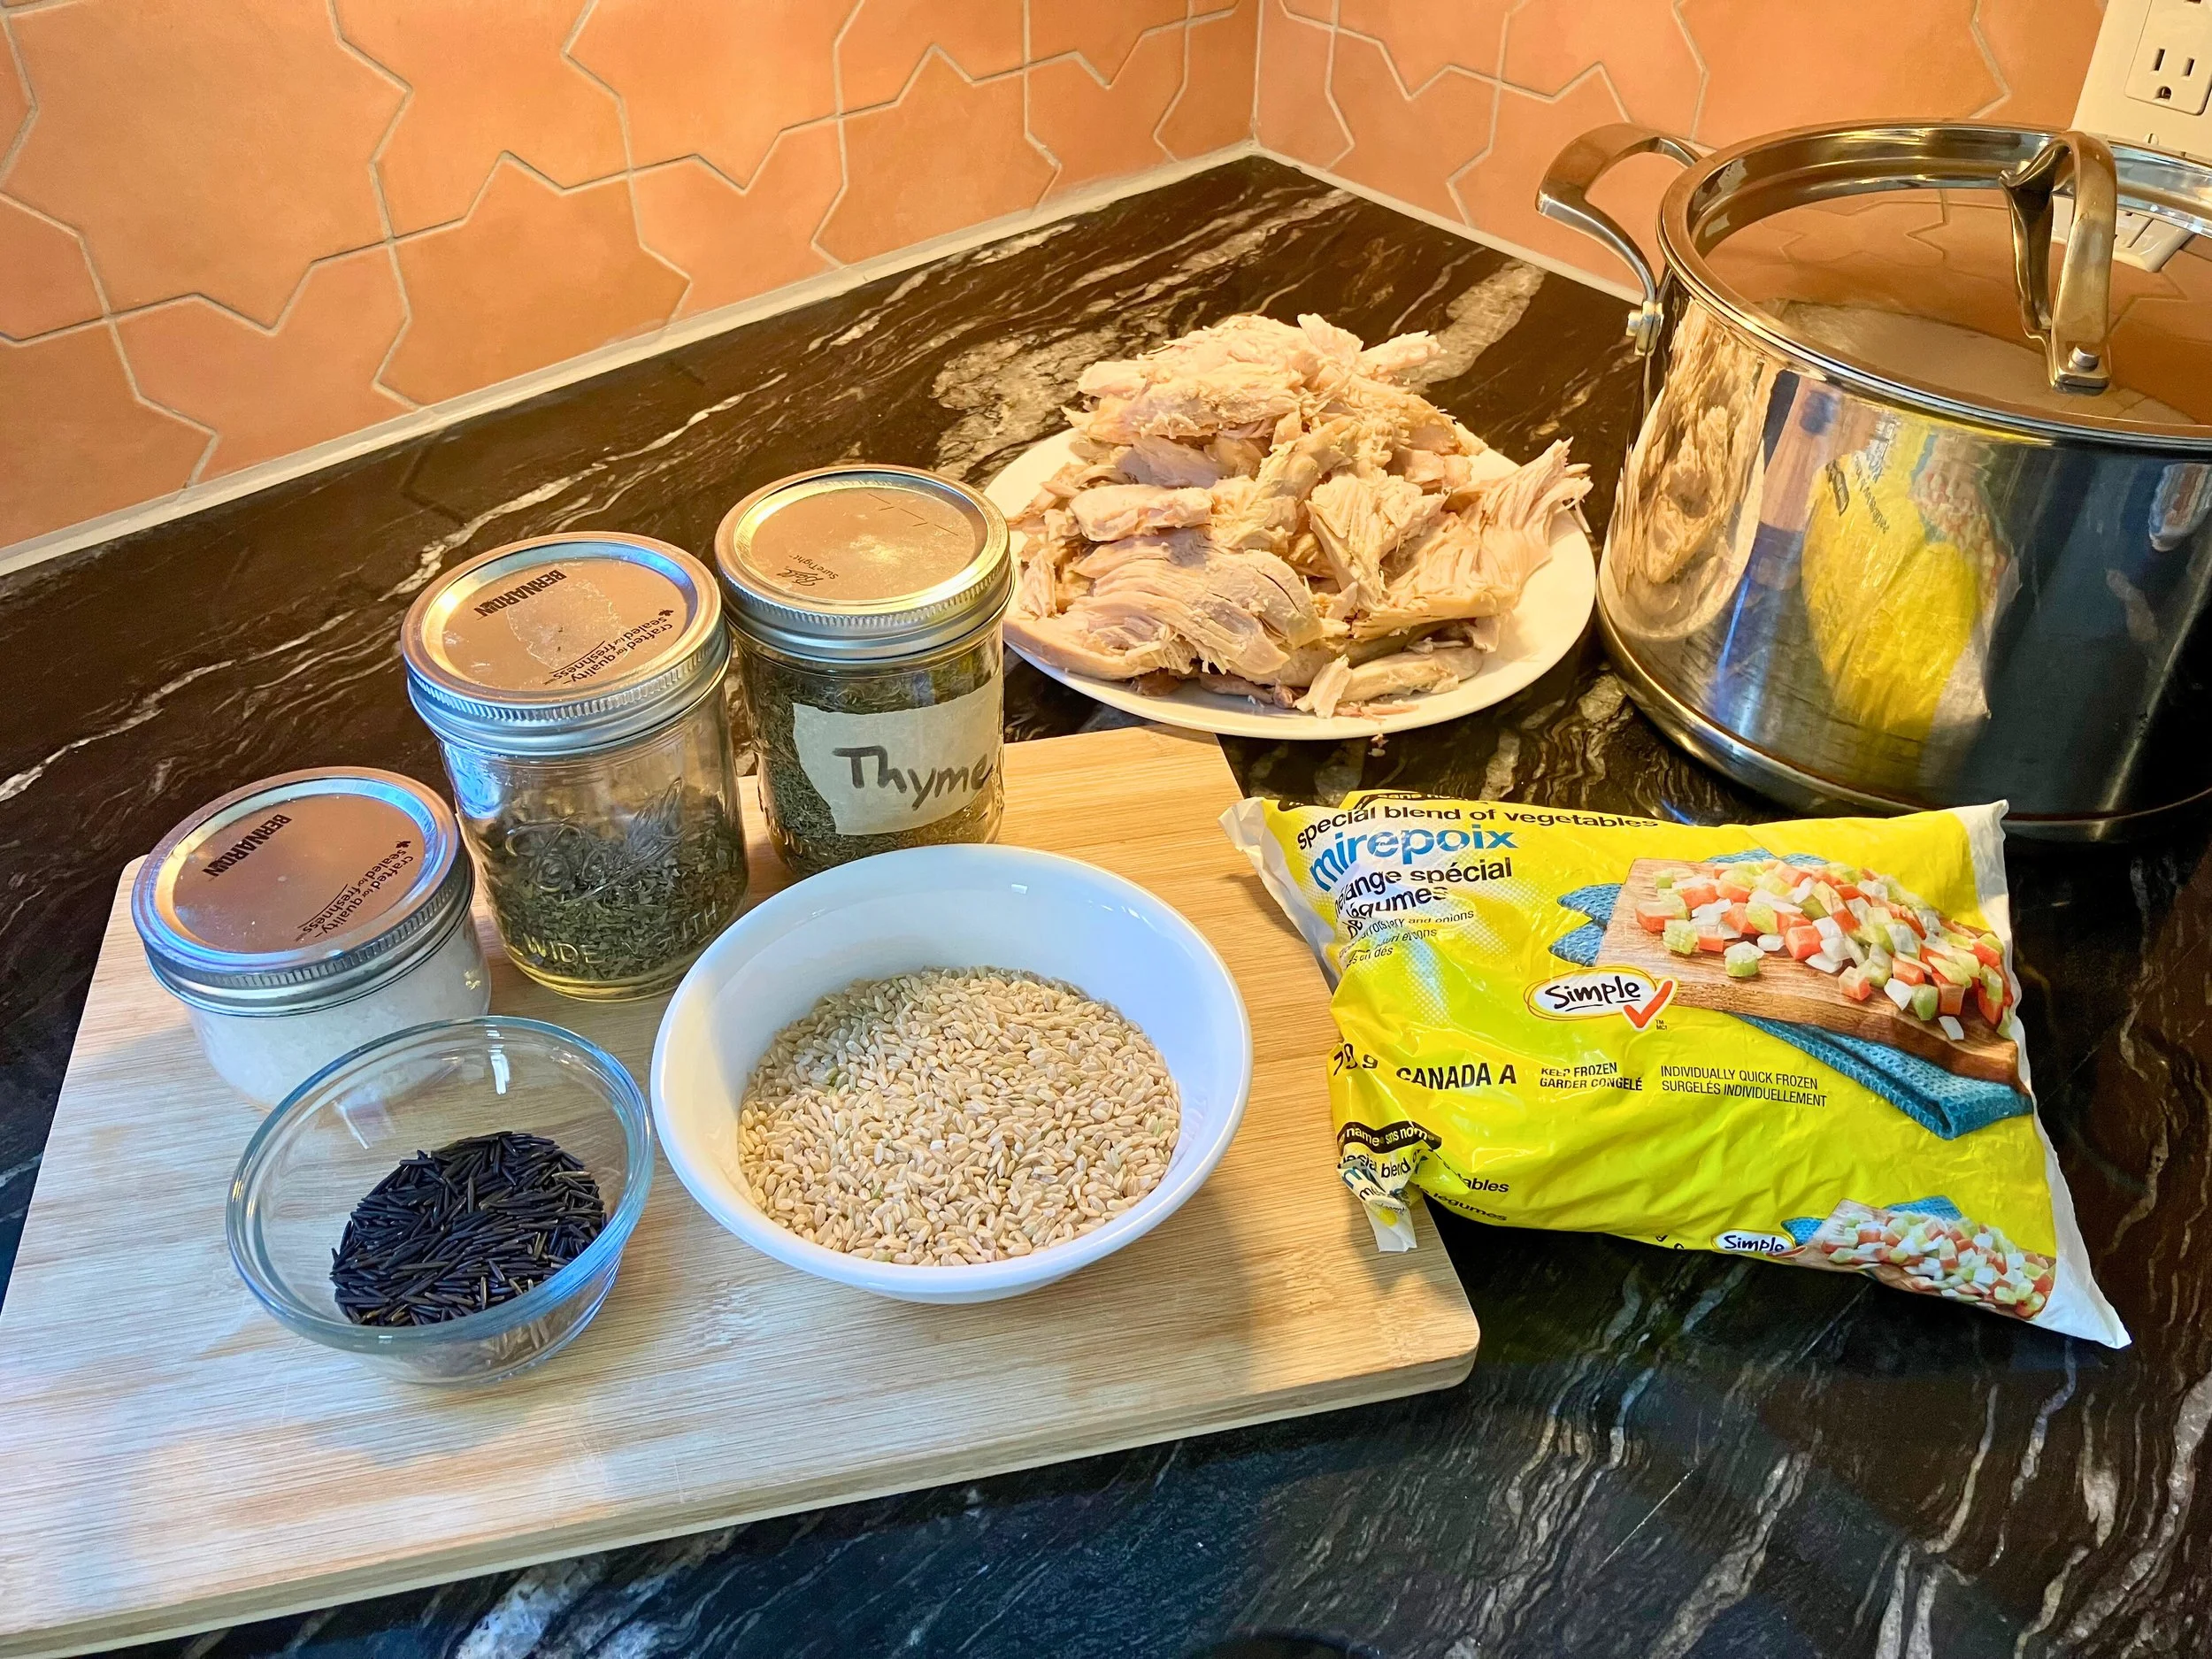
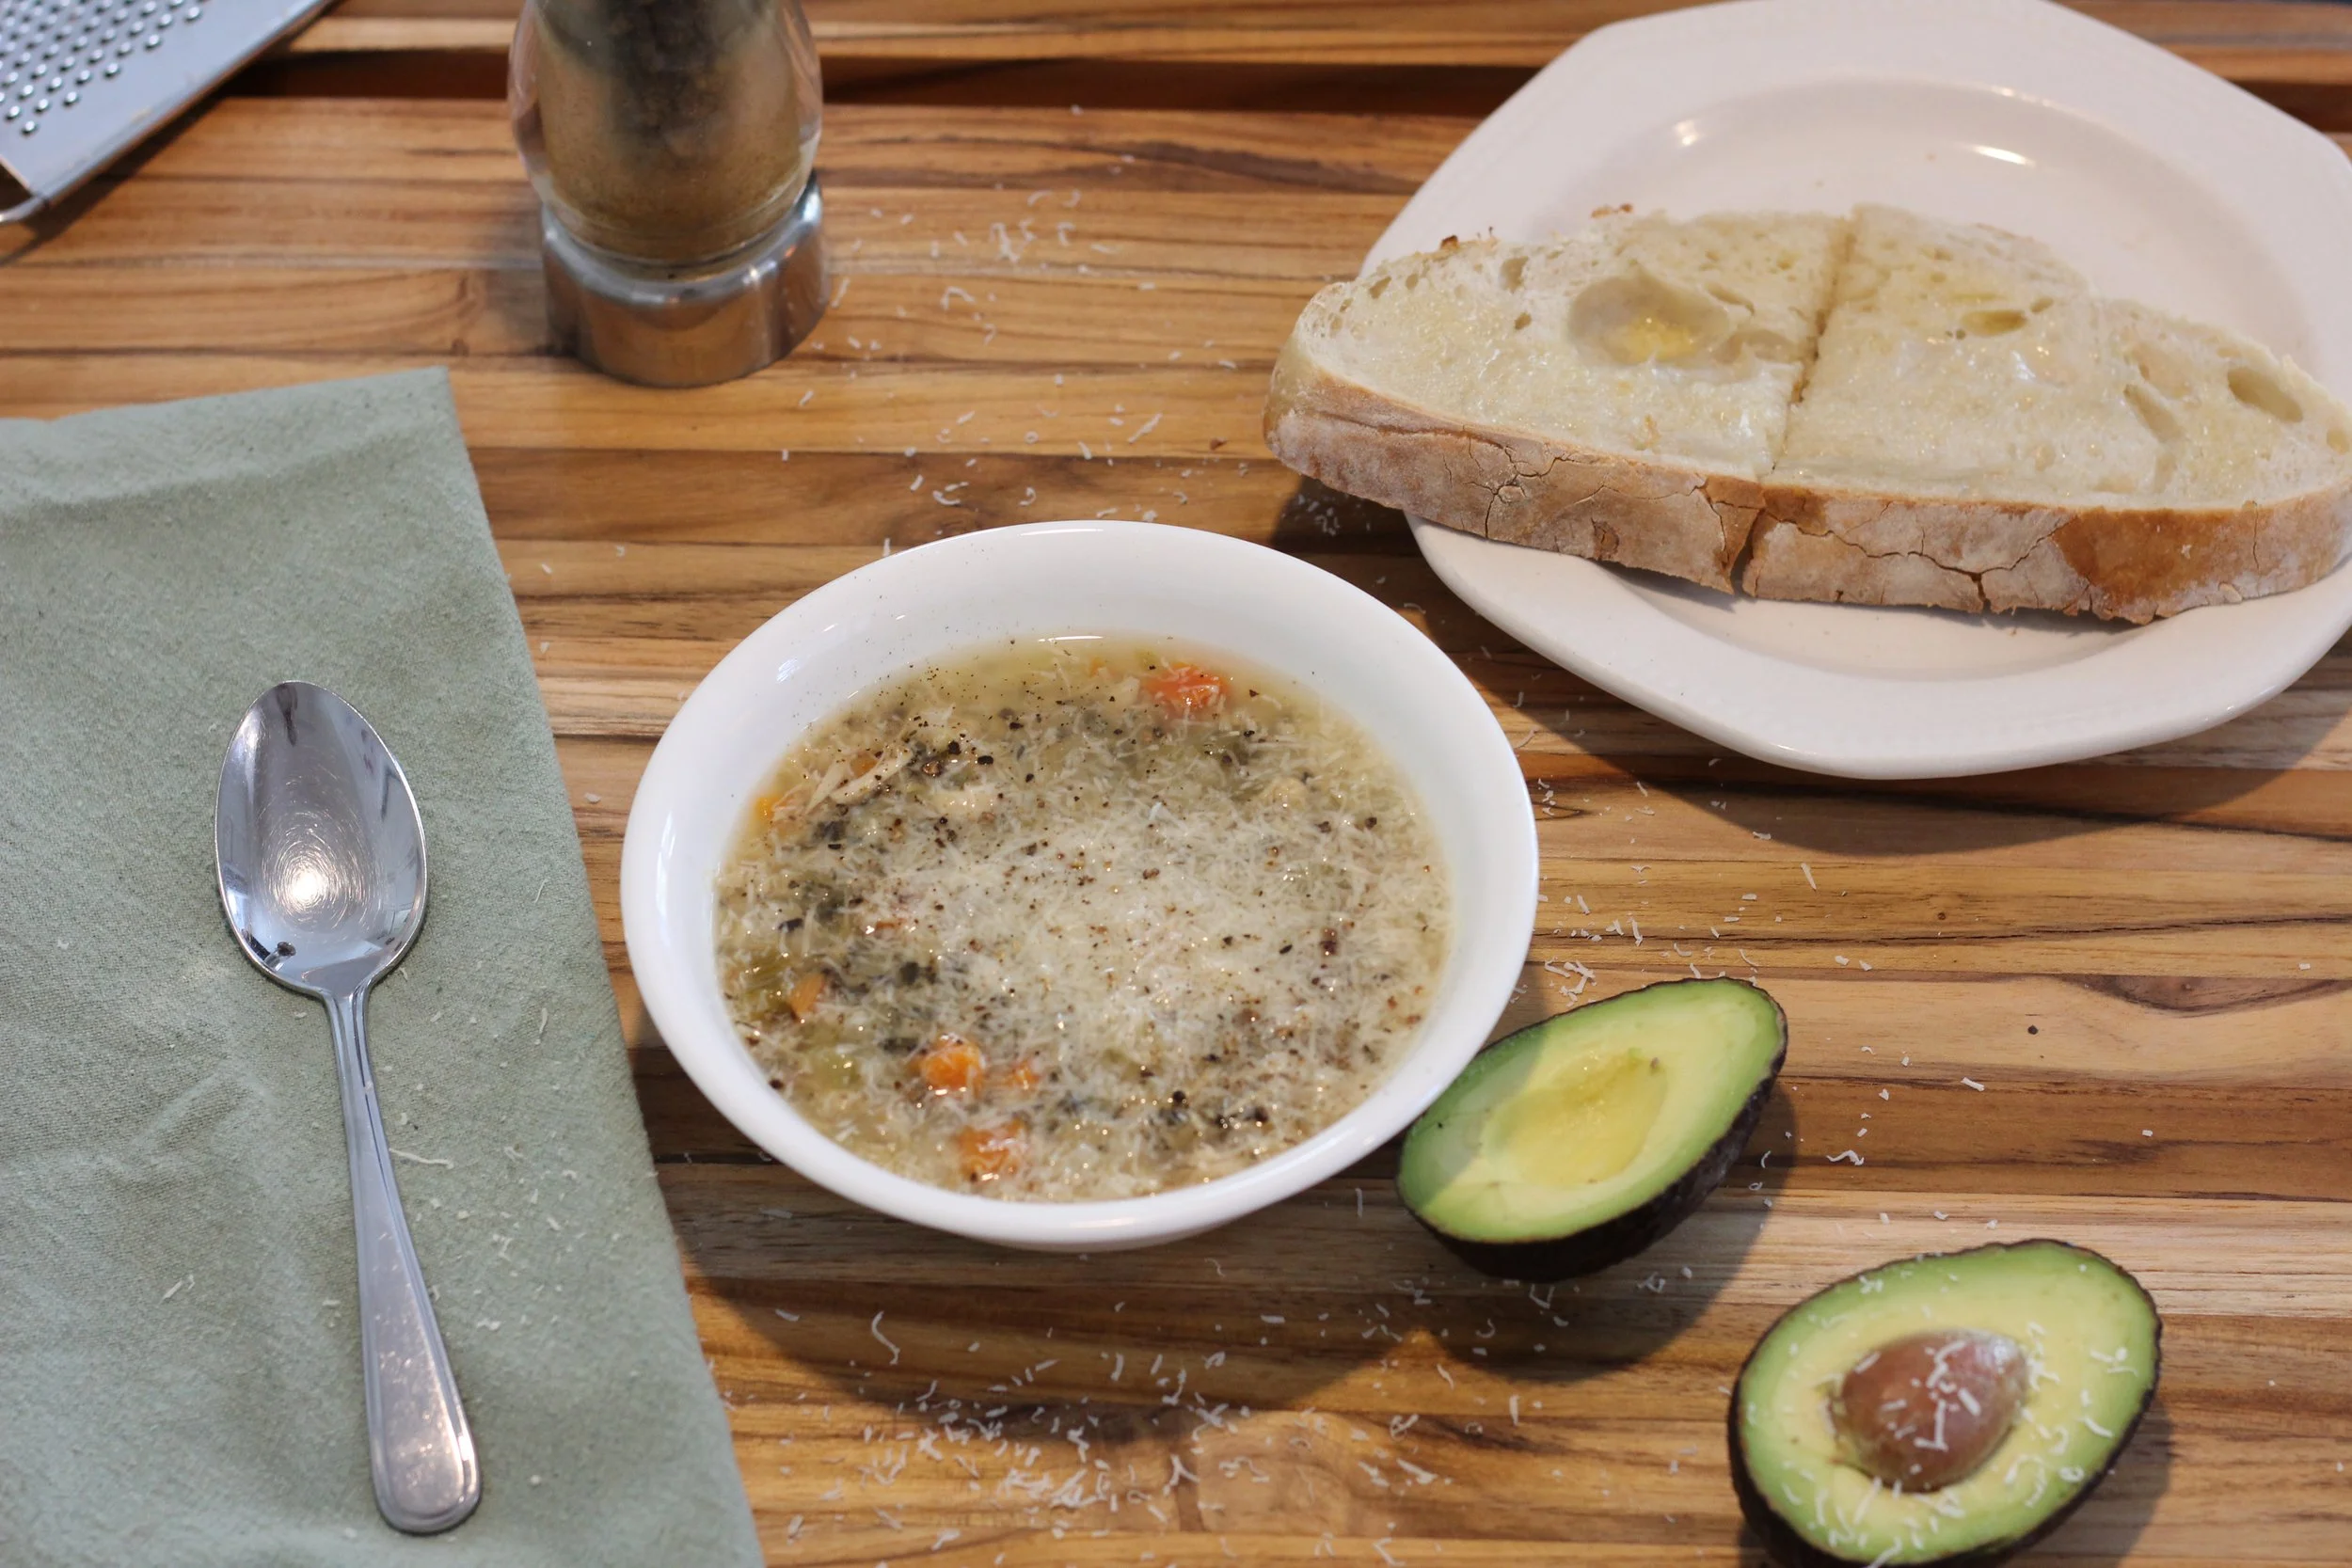
Turkey & Wild Rice Soup
turkey wild rice soup
📖 Jump to Recipe | 💬 Jump to FAQs | 🖨️Print Recipe
Total Time: 55 minutes | Difficulty: Easy
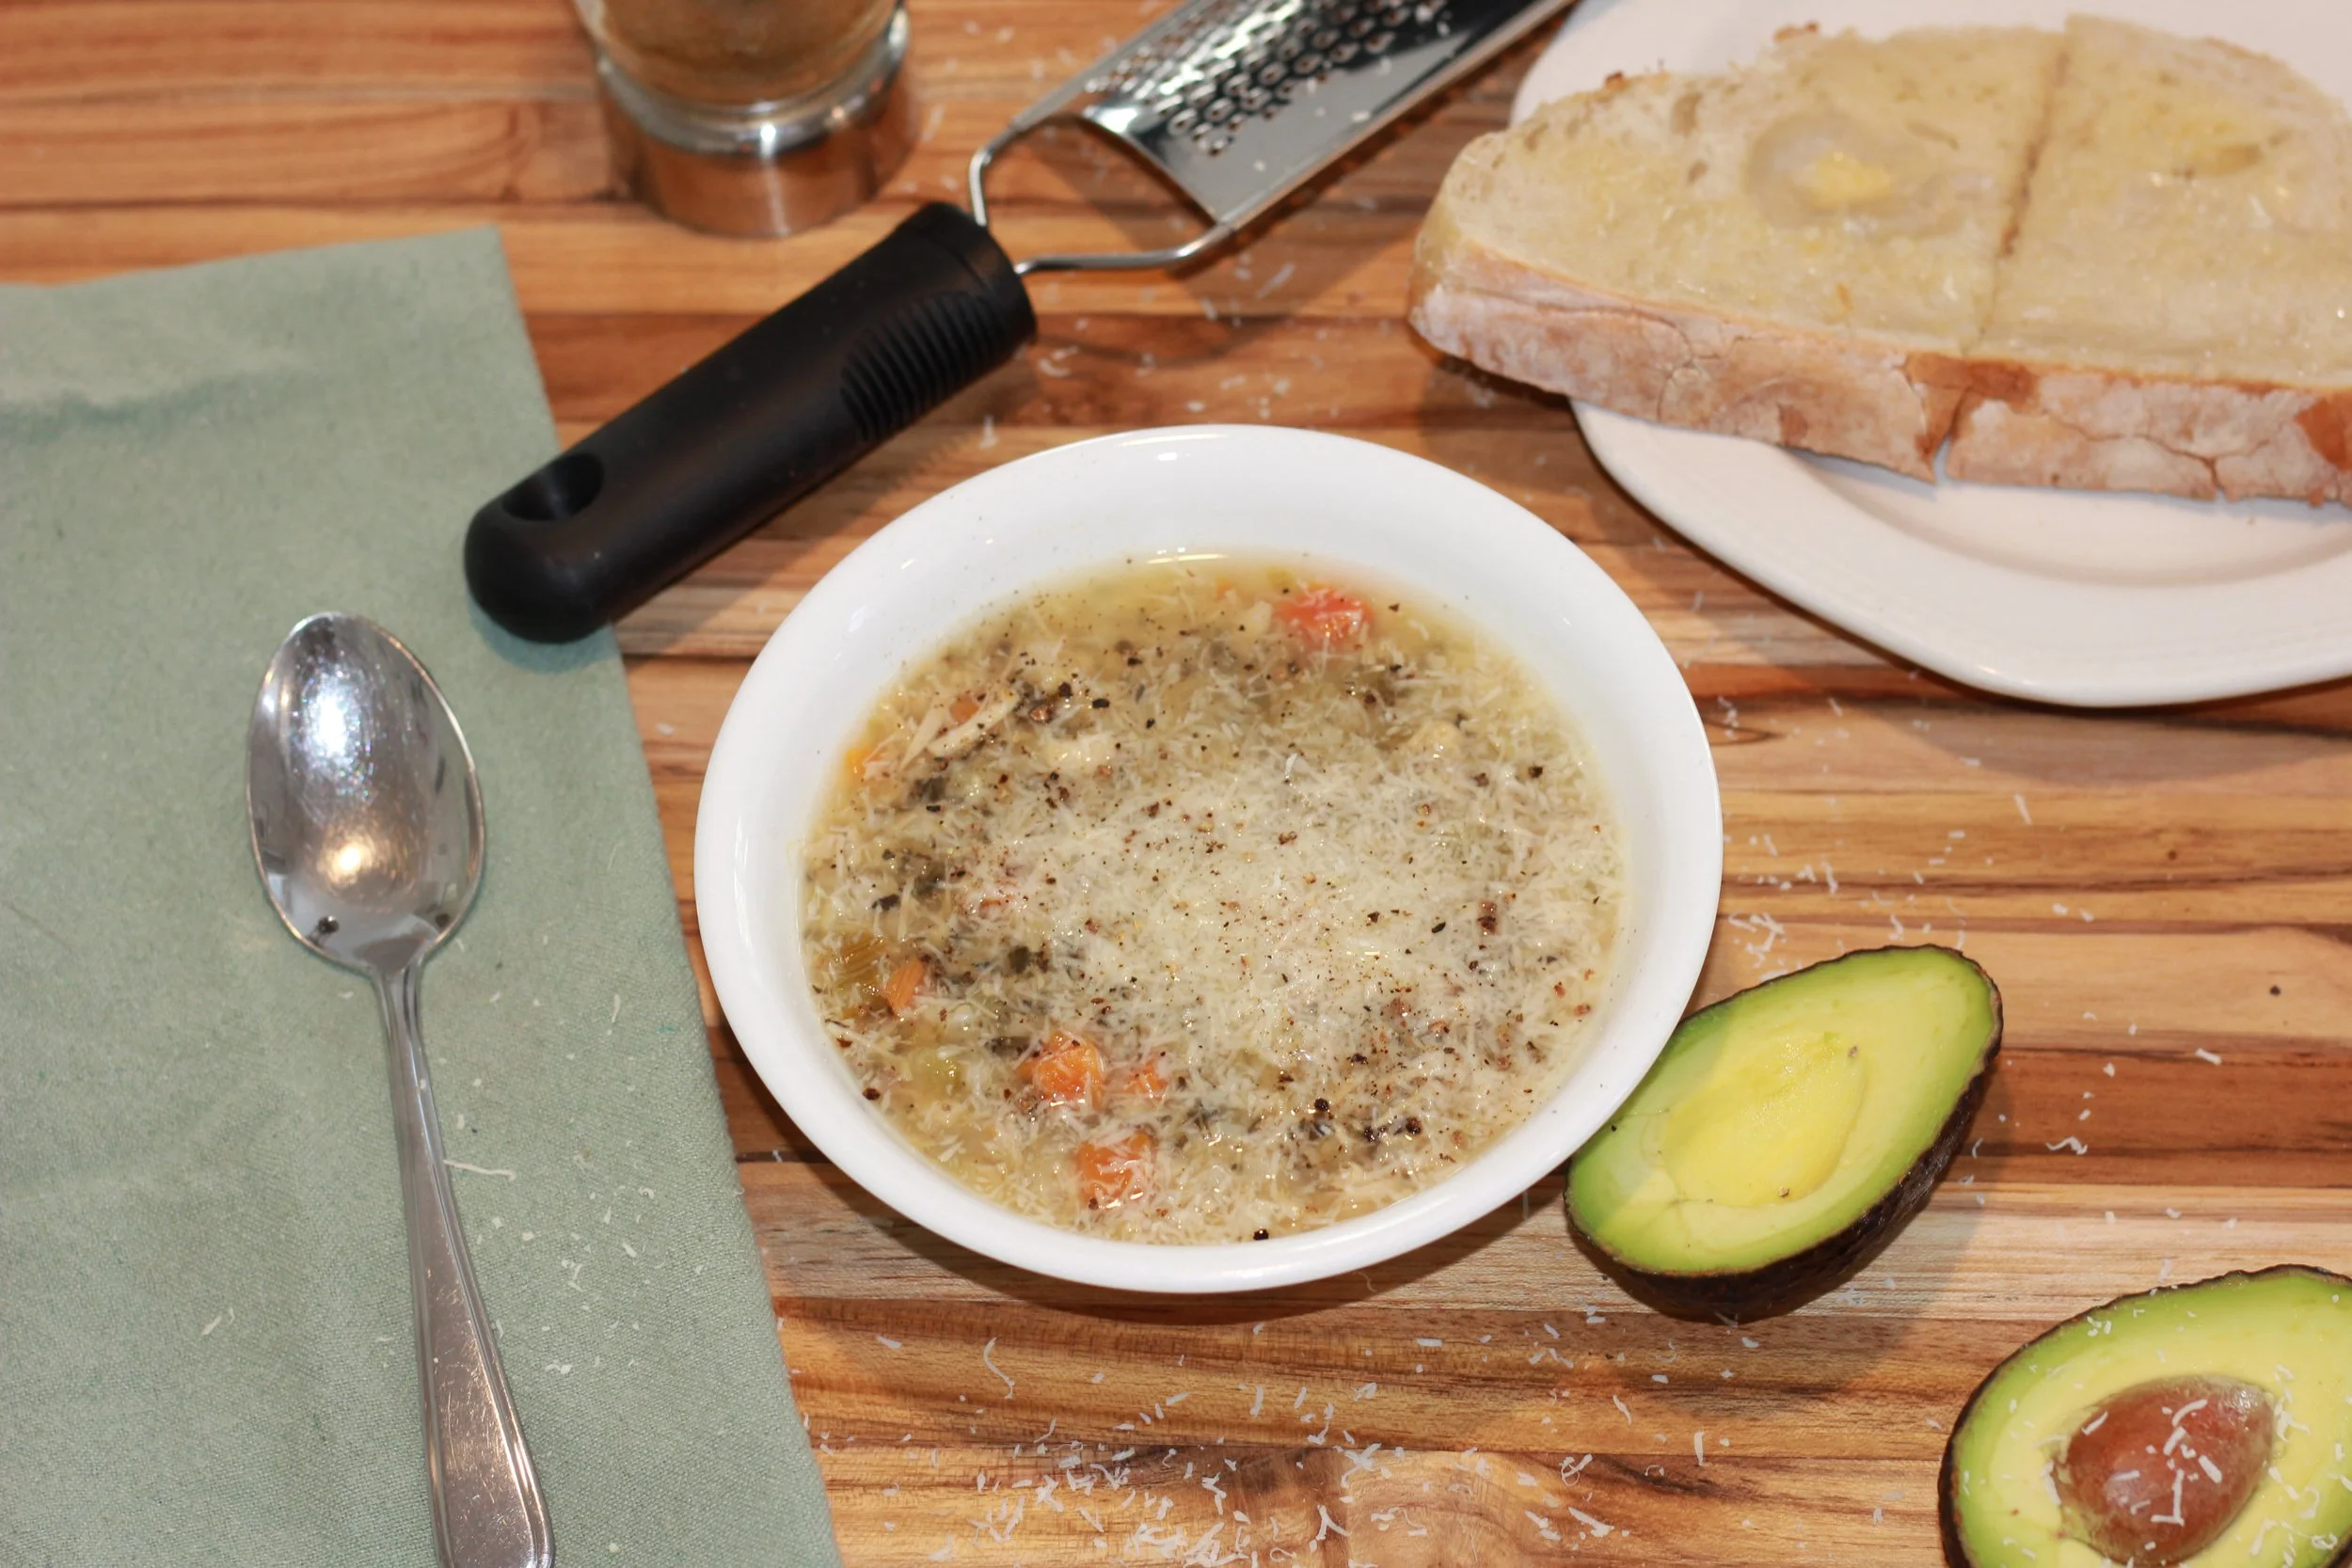
There’s nothing quite like a warm, comforting bowl of turkey wild rice soup to carry you through the coldest months of the year. This hearty, budget-friendly meal comes together with minimal effort and ingredients you likely already have on hand—making it a true winter staple. Whether you're looking to use up leftover holiday turkey or simply craving something cozy, this soup delivers all the savoury goodness you could want in a single pot.
One of the best time-saving and money saving tips for this recipe is using frozen mirepoix. With diced carrots, celery, and onions already prepped and ready to go, you shave tones of time off of cleaning and chopping vegetables, making this a perfect weeknight dinner solution. The mirepoix simmers gently with the rice to create a thick, hearty base that’s naturally creamy without needing much added richness.
Leftover turkey finds new life here, turning into tender bites that pair perfectly with the earthy flavour of wild rice. A blend of basil, thyme, and garlic powder keeps the seasoning simple but deeply flavourful, allowing the natural savouriness of the turkey and vegetables to shine through. A little salt and pepper to taste brings everything together in a well-balanced, comforting bowl that feels both wholesome and satisfying.
What makes this recipe especially appealing is how inexpensive it is to prepare. With just a handful of pantry staples and freezer items, you can make a big batch that feeds the family—or future you. The mix of rice not only gives the soup wonderful texture but also stretches it farther, making it a great option for meal prepping on a budget.
And the best part? This soup freezes beautifully. Portion it into containers, pop them in the freezer, and you’ve got ready-to-reheat lunches and dinners for weeks to come. When the temperatures drop and you’re craving something warm, hearty, and homemade, this turkey wild rice soup will be waiting for you—simple, cozy, nourishing comfort in every spoonful.
other turkey recipes:
Recipe Card
Here’s the recipe!
Ingredients:
1 bag frozen Mirepoix diced vegetables (there should only have carrots, celery, onions)
1 cup rice, I like using brown rice
1 dinner plate full of leftover turnkey meat, cut up into bite-sized pieces
4L of turkey broth
1/4 cup dried basil
3 tbsp dried thyme
2 tbsp garlic powder
2 tsp salt, I like using kosher salt
1/2 cup wild rice, added 20 minutes before serving
Optional: 1 cup pumpkin purée
Instructions:
In a large stockpot, add in all ingredients, minus the wild rice. Cook on stovetop over medium heat until all the ingredients are gently boiling. Reduce the heat and allow the soup to simmer for about 20-30 minutes.
Add wild rice 20 minutes before serving.
season to taste.
Pairs nicely with fresh sourdough bread, and topped with freshly grated parmesan, fresh ground pepper and avocado.
Enjoy!
Did you make this recipe? I want to see it!
Leave a picture and a ⭐ star rating and comment below to let us know how your muffins turned out. Did you make any substitutions or additions? Share your tips and photos with us!
Share this recipe: Help others discover this delicious recipe by sharing it on Pinterest, Facebook, or Instagram. Tag us @Sageandsimplicity so we can see your beautiful creations!
📌 Pin it for later: Save this recipe to your Pinterest boards for easy access.
You might also like:


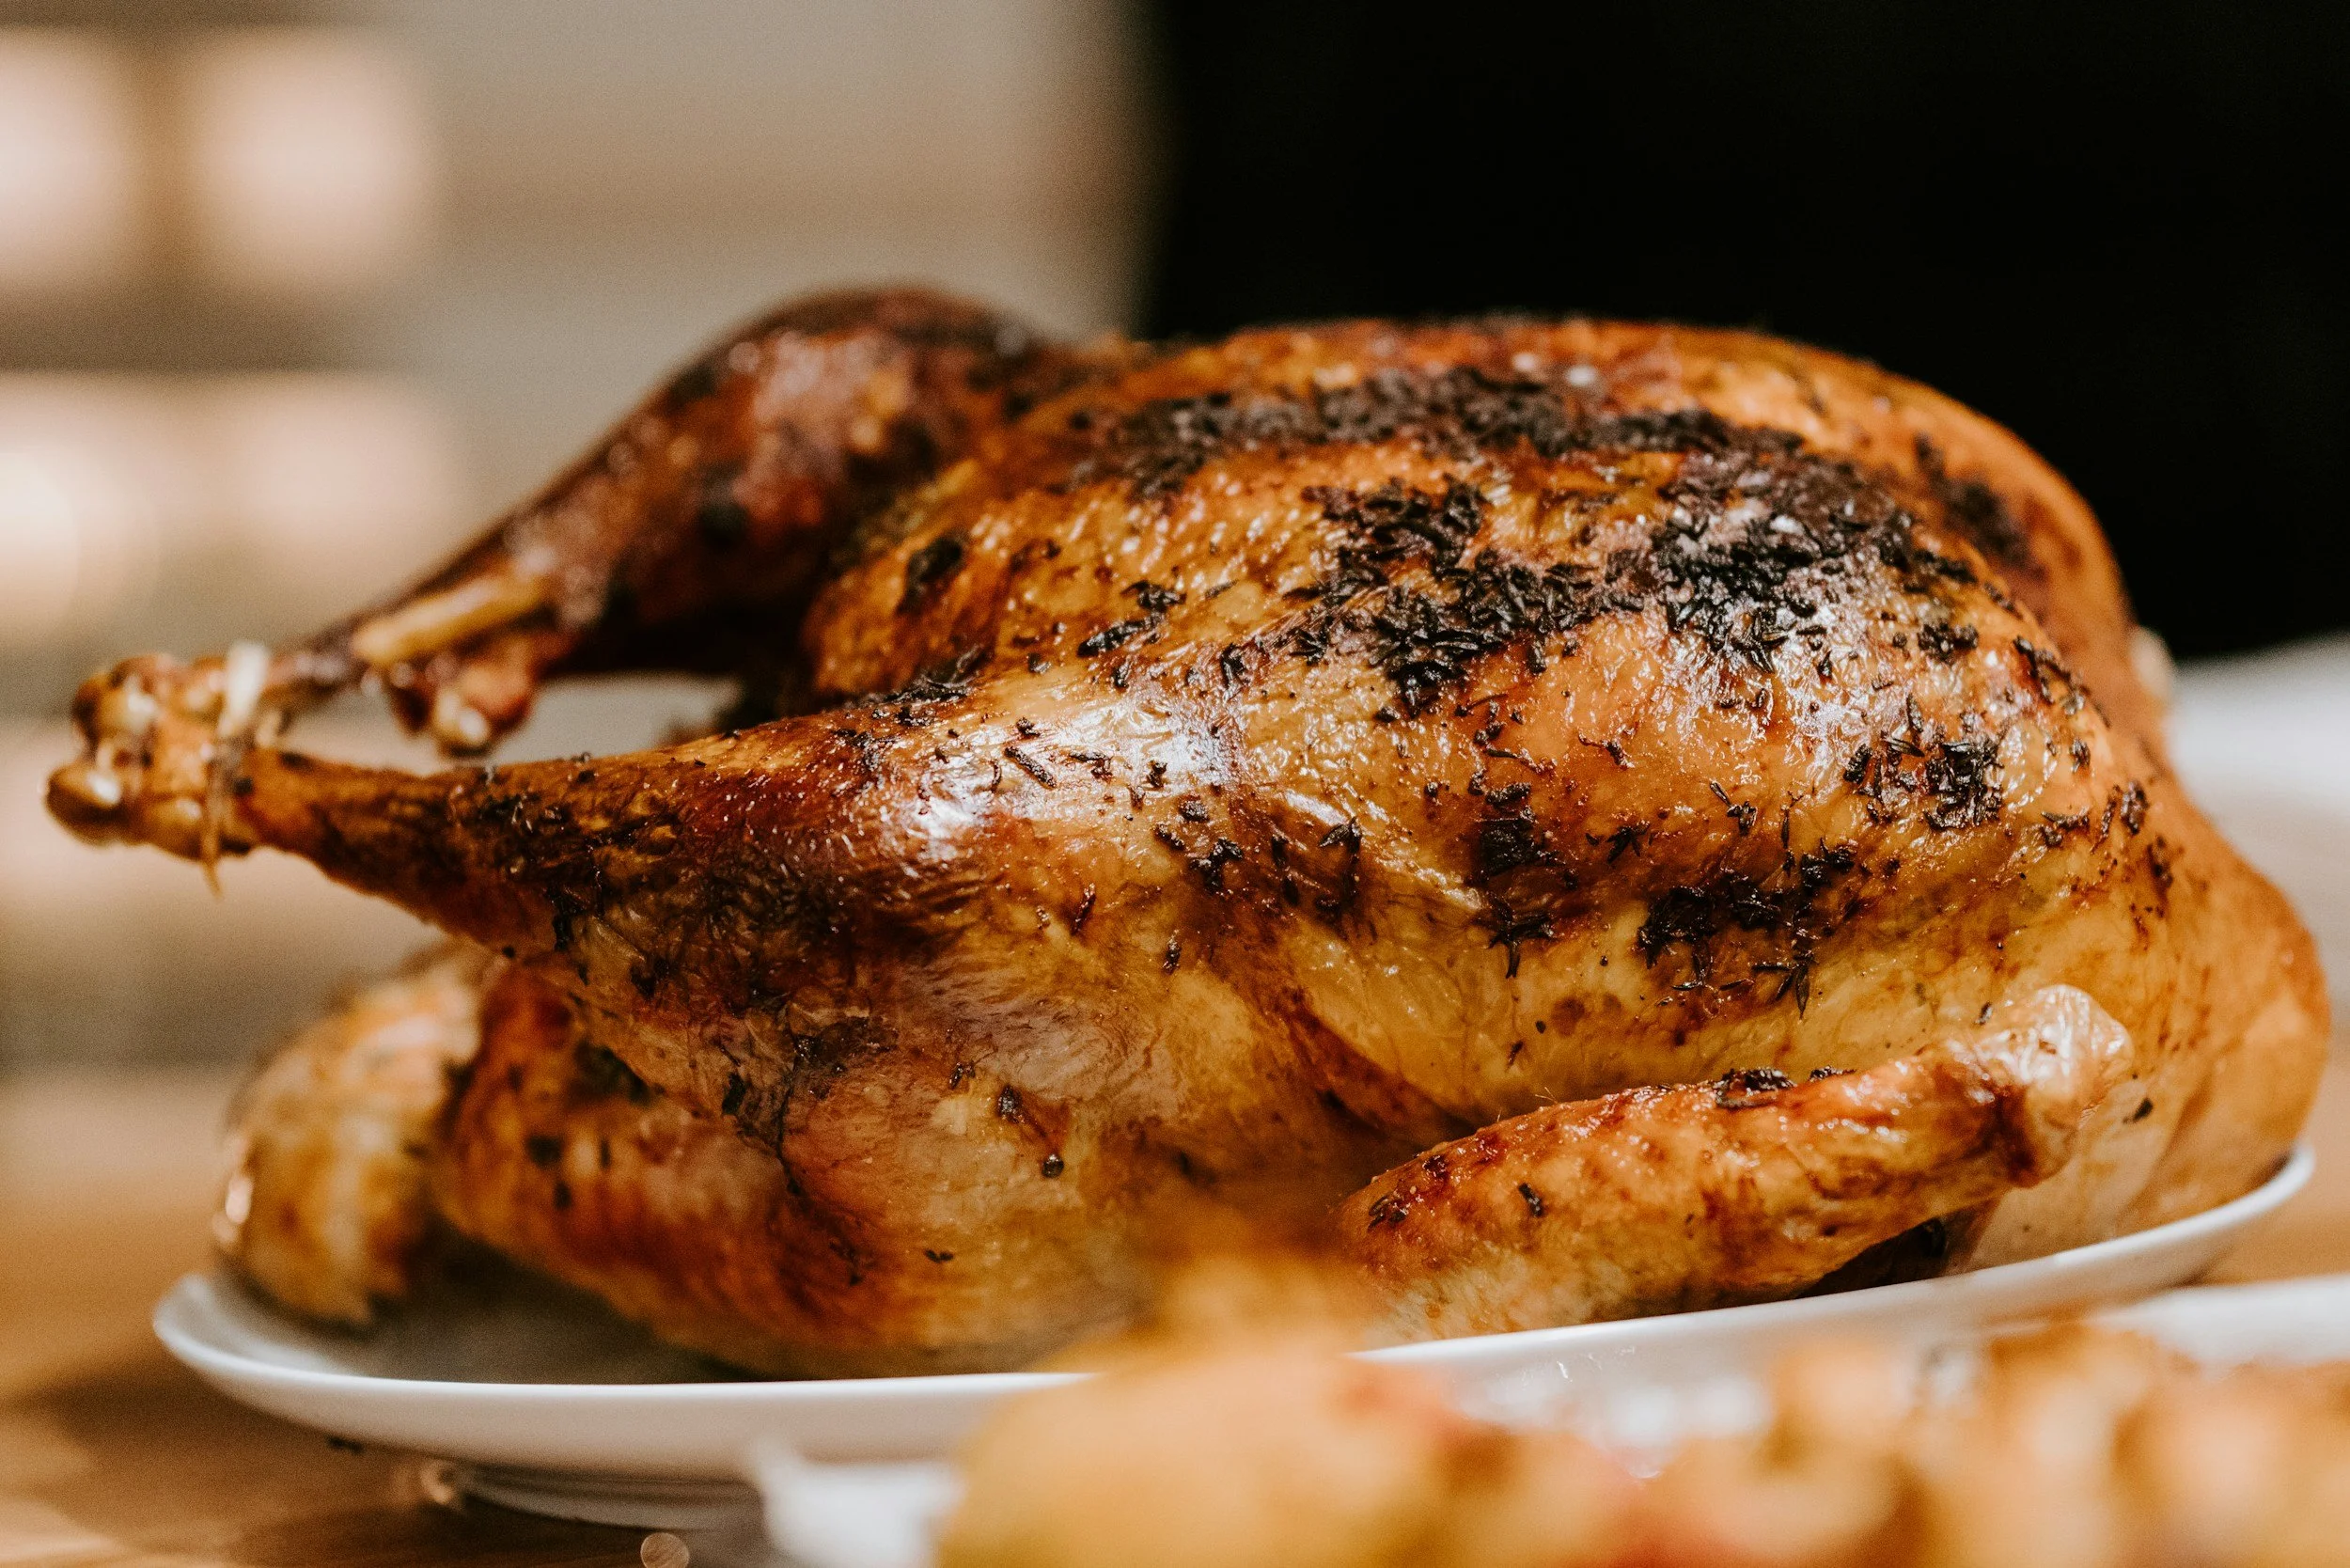
the no fuss way to bake a turkey!
Cooking a turkey doesn’t have to be complicated. Let me show you how!
As an Amazon Associate I earn from qualifying purchases.
Cook your turkey the simple, easy way!
The Ultimate No-Fuss Way to Bake a Turkey (Just a few Ingredients that are probably always in your pantry!)
If the idea of cooking a turkey fills you with stress, long prep lists, and way too many opinions—you’re going to love this.
This is the no-fuss, no-frills, no-panic way to bake a turkey.
No brining.
No butter under the skin.
No chopping, stuffing, or basting every 20 minutes.
Just a few ingredients:
Salt
A turkey
A little bit of water
Rosemary
Dried Thyme
Dried Basil
Ground Pepper
Powdered Sage
Powdered Garlic
That’s it.
And the best part? The gravy that comes from this method is rich, deeply flavoured, and completely homemade—using the turkey juices and coming together in minutes.
This method saves TONES of time, stress, and mental energy, while still delivering a juicy turkey and incredible gravy.

Why This No-Fuss Turkey Method Works
Turkey already has everything it needs to taste good. When you cook it gently, simply, and without overhandling it, the flavour stays where it belongs—inside the bird and in the pan juices.
Instead of fussing with extras, this method focuses on:
Moist heat
Consistent roasting
Letting the turkey do the work
The result:
Juicy meat
A flavour-packed roasting pan
Gravy that tastes like you worked much harder than you did
Ingredients (Yes, Really)
You only need:
Salt
1 whole turkey (any size)
Water (about 2-4 cups, depending on your pan)
Rosemary, 1 tbsp
Dried Thyme, 1 tbsp
Dried Basil, 1 tbsp
Ground Pepper, 1 tbsp
Powdered Sage, 1 tbsp
Powdered Garlic, 1 tbsp
The flavour comes later—in the gravy.
Equipment
Roaster Pan with Lid
Ladle (affiliate link)
Knife
Large Cutting Board, perferably with juice grooves
How to Bake a Turkey the No-Fuss Way
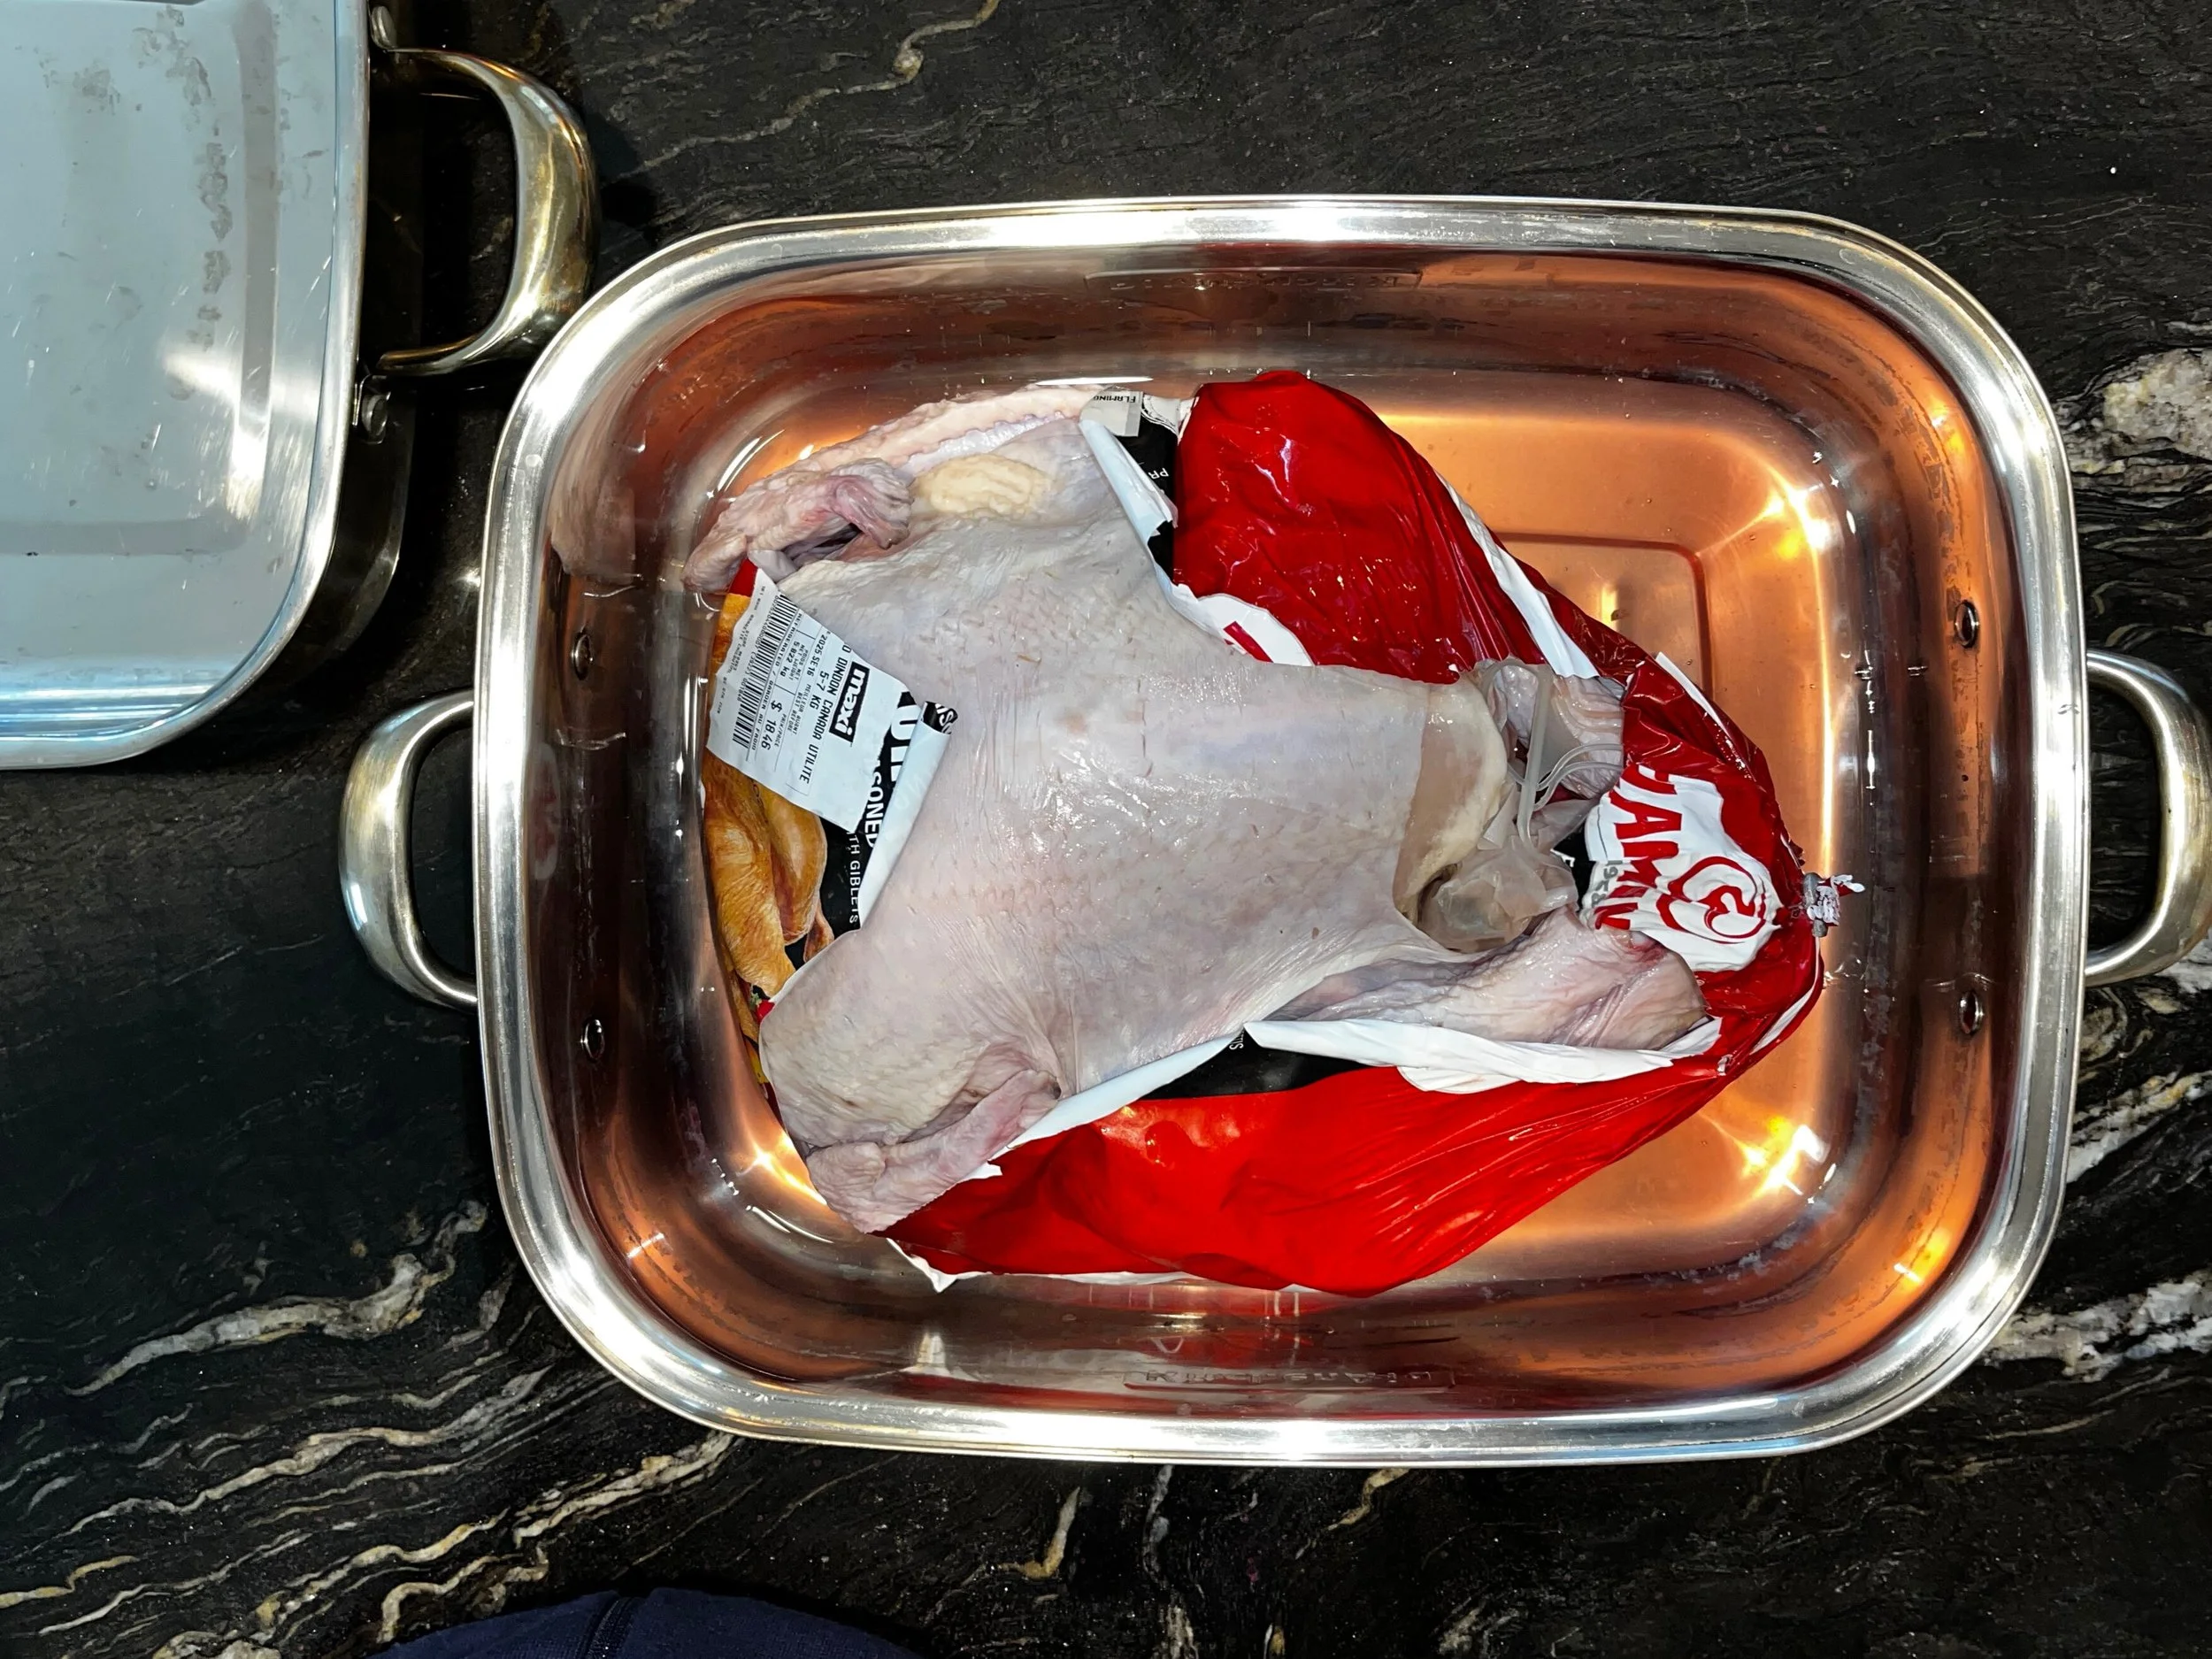
1. If the turkey is frozen, place it in a roasting pan in the fridge to thaw it out 3 days before you plan on cooking and serving. Keep the turkey in its original wrapping, but put it in a roasting pan to contain the juices as it thaws.
If your turkey is large, give yourself an extra day a to thaw it out.
2. The night before:
Take the turkey out of the wrapping and put it breast side up in the roaster. Rub the salt on the turkey breast and thighs, I like to use kosher salt. Cover and put in the fridge overnight.
2.The next day, preheat the oven
Preheat your oven to 350°F.
This lower, steady temperature helps the turkey cook evenly and stay moist.
3. Prepare the Pan
Pour 2-4 cups of water into the bottom of the pan. The water:
Prevents drippings from burning
Creates steam for moisture
Sets you up for incredible gravy later, if that’s a project you’d like to take on.
4. Prepare the herb and spice mixture and rub it on the turkey
Add the herbs and spice (rosemary, thyme, basil, sage garlic powder, pepper) in a bowl or ramekin, and give it a stir. Rub that beautiful herbs and spice mixture on the turkey.
That’s the prep, you’re done!
5. Roast (Without Fussing)
Roast the turkey covered until it reaches a safe internal temperature:
165°F (74°C) in the thickest part of the breast
175–180°F (79–82°C) in the thigh
Cooking time will depend on the size of your turkey, but a general guideline is about 13–15 minutes per pound.
No rotating.
No checking every 10 minutes. I do recommend taking a laddle (affiliate link) and basting it every 30-60 minutes.
Put it in the oven and let it cook.
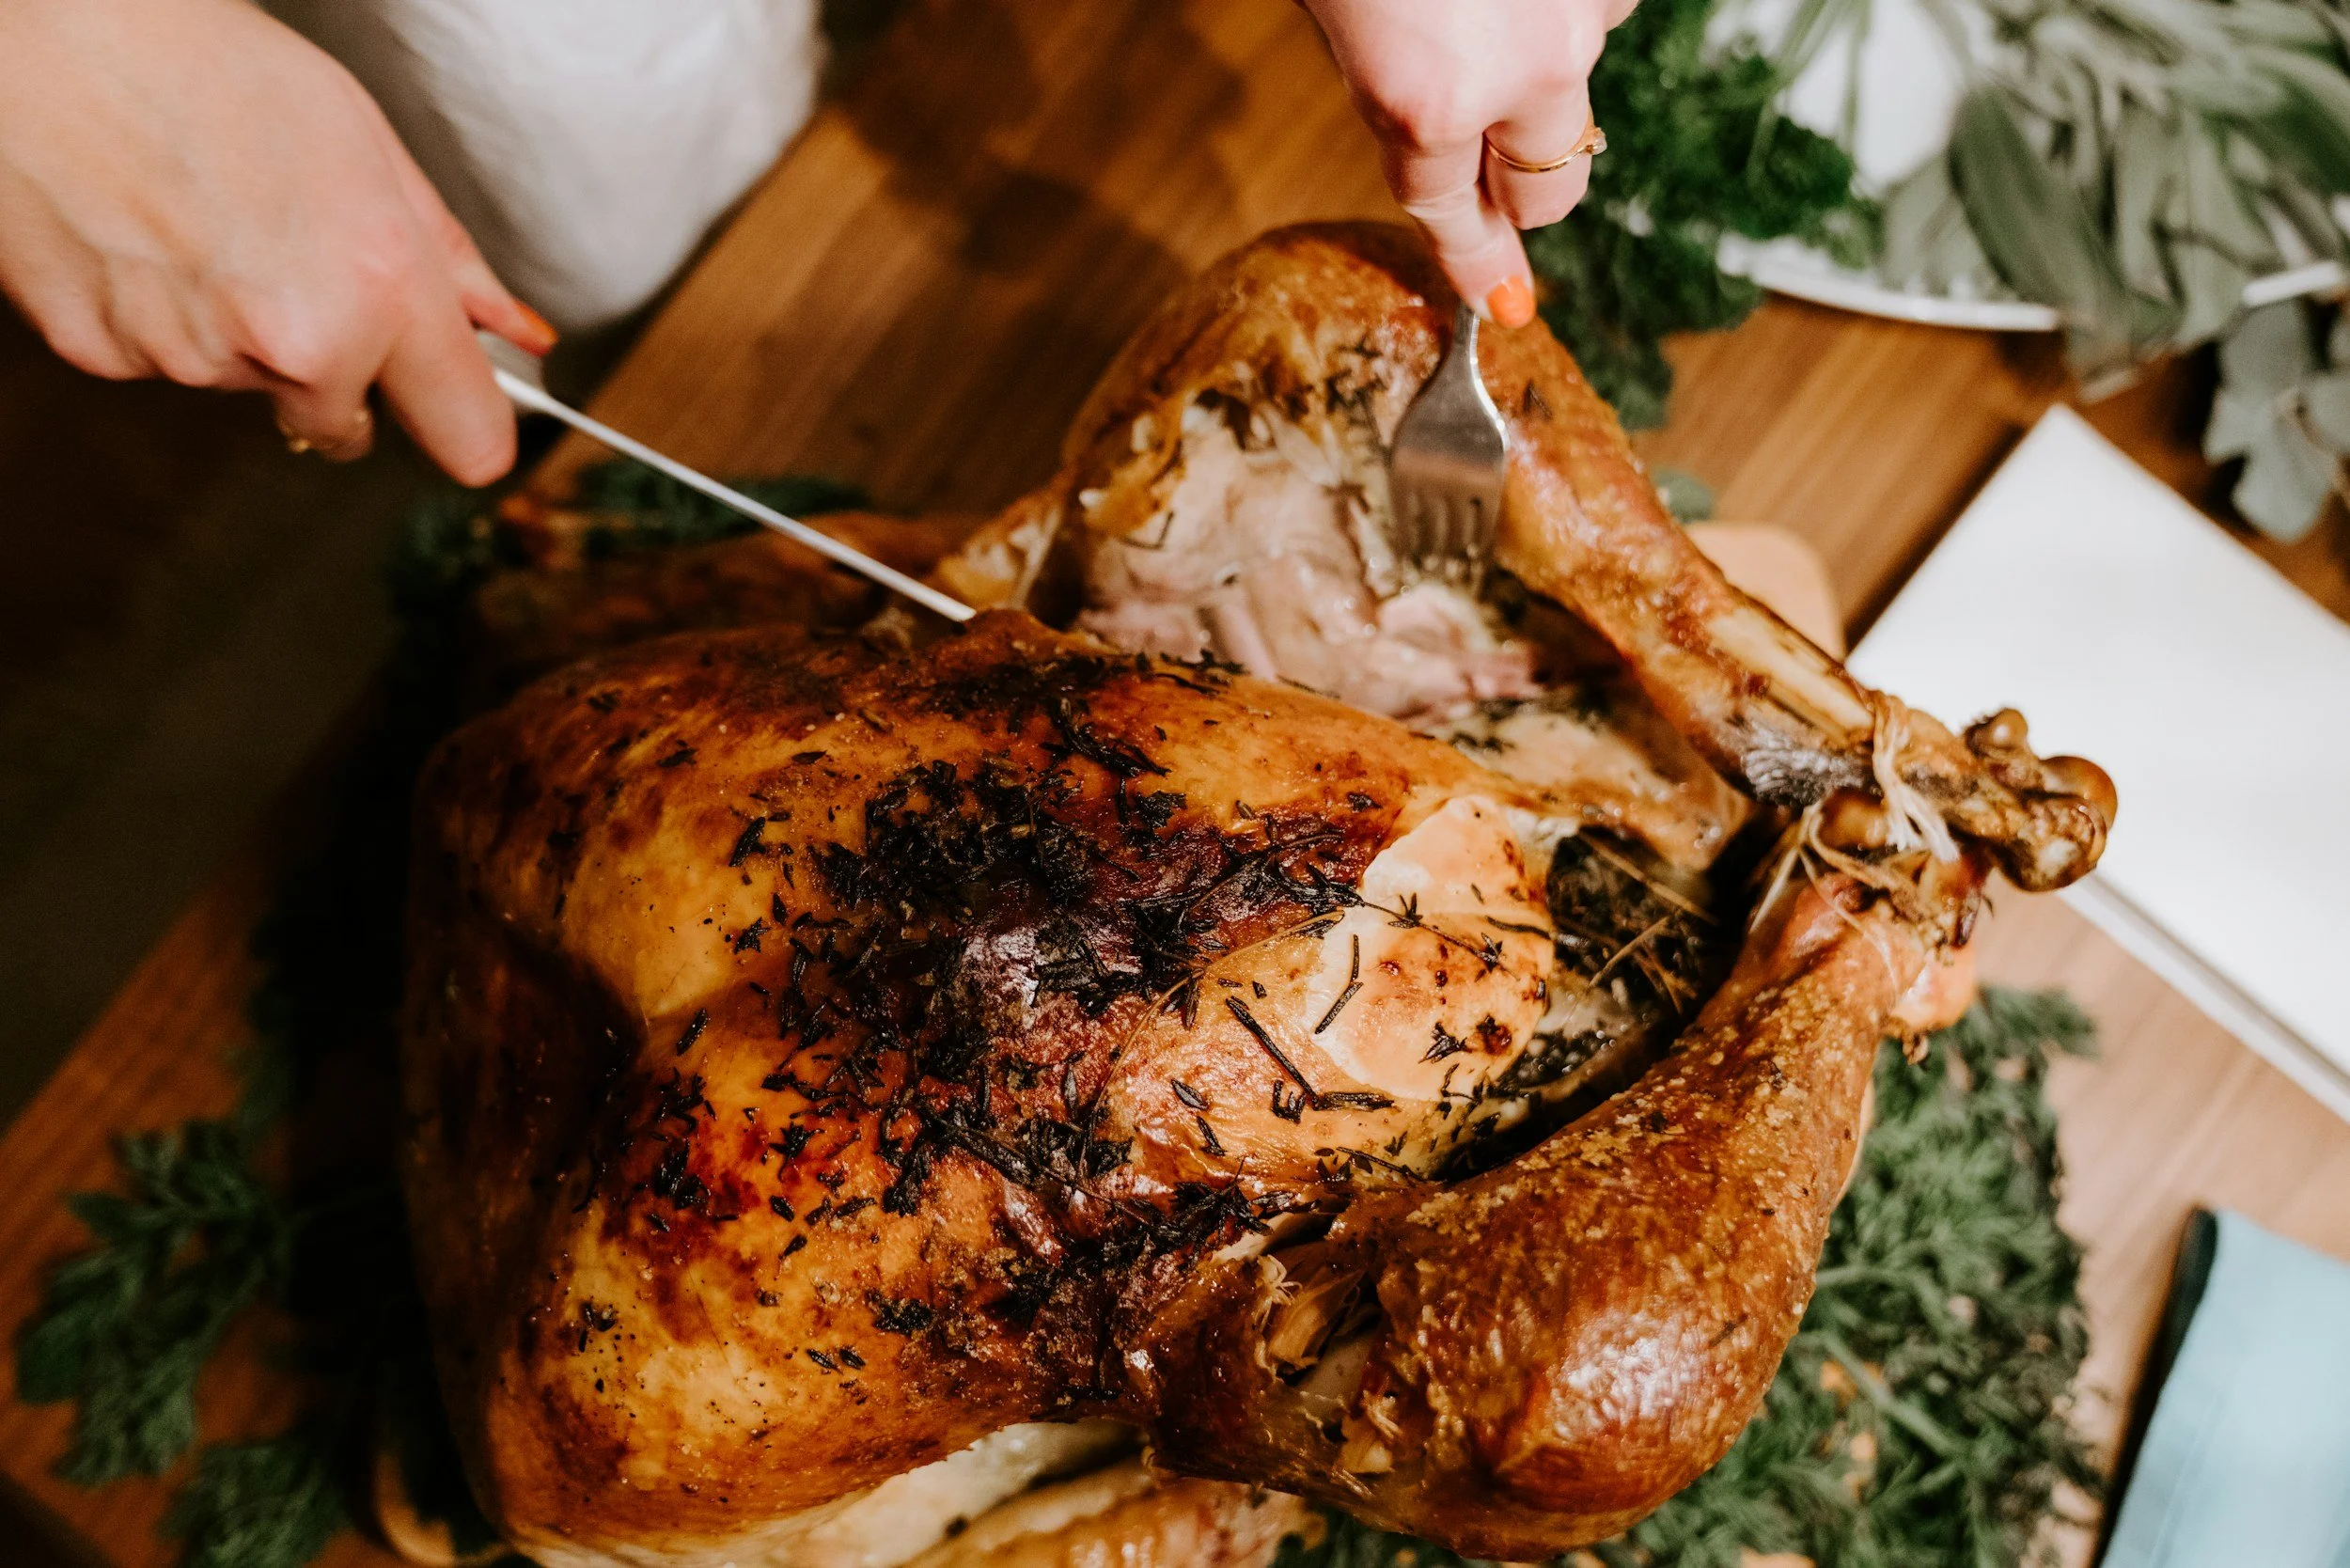
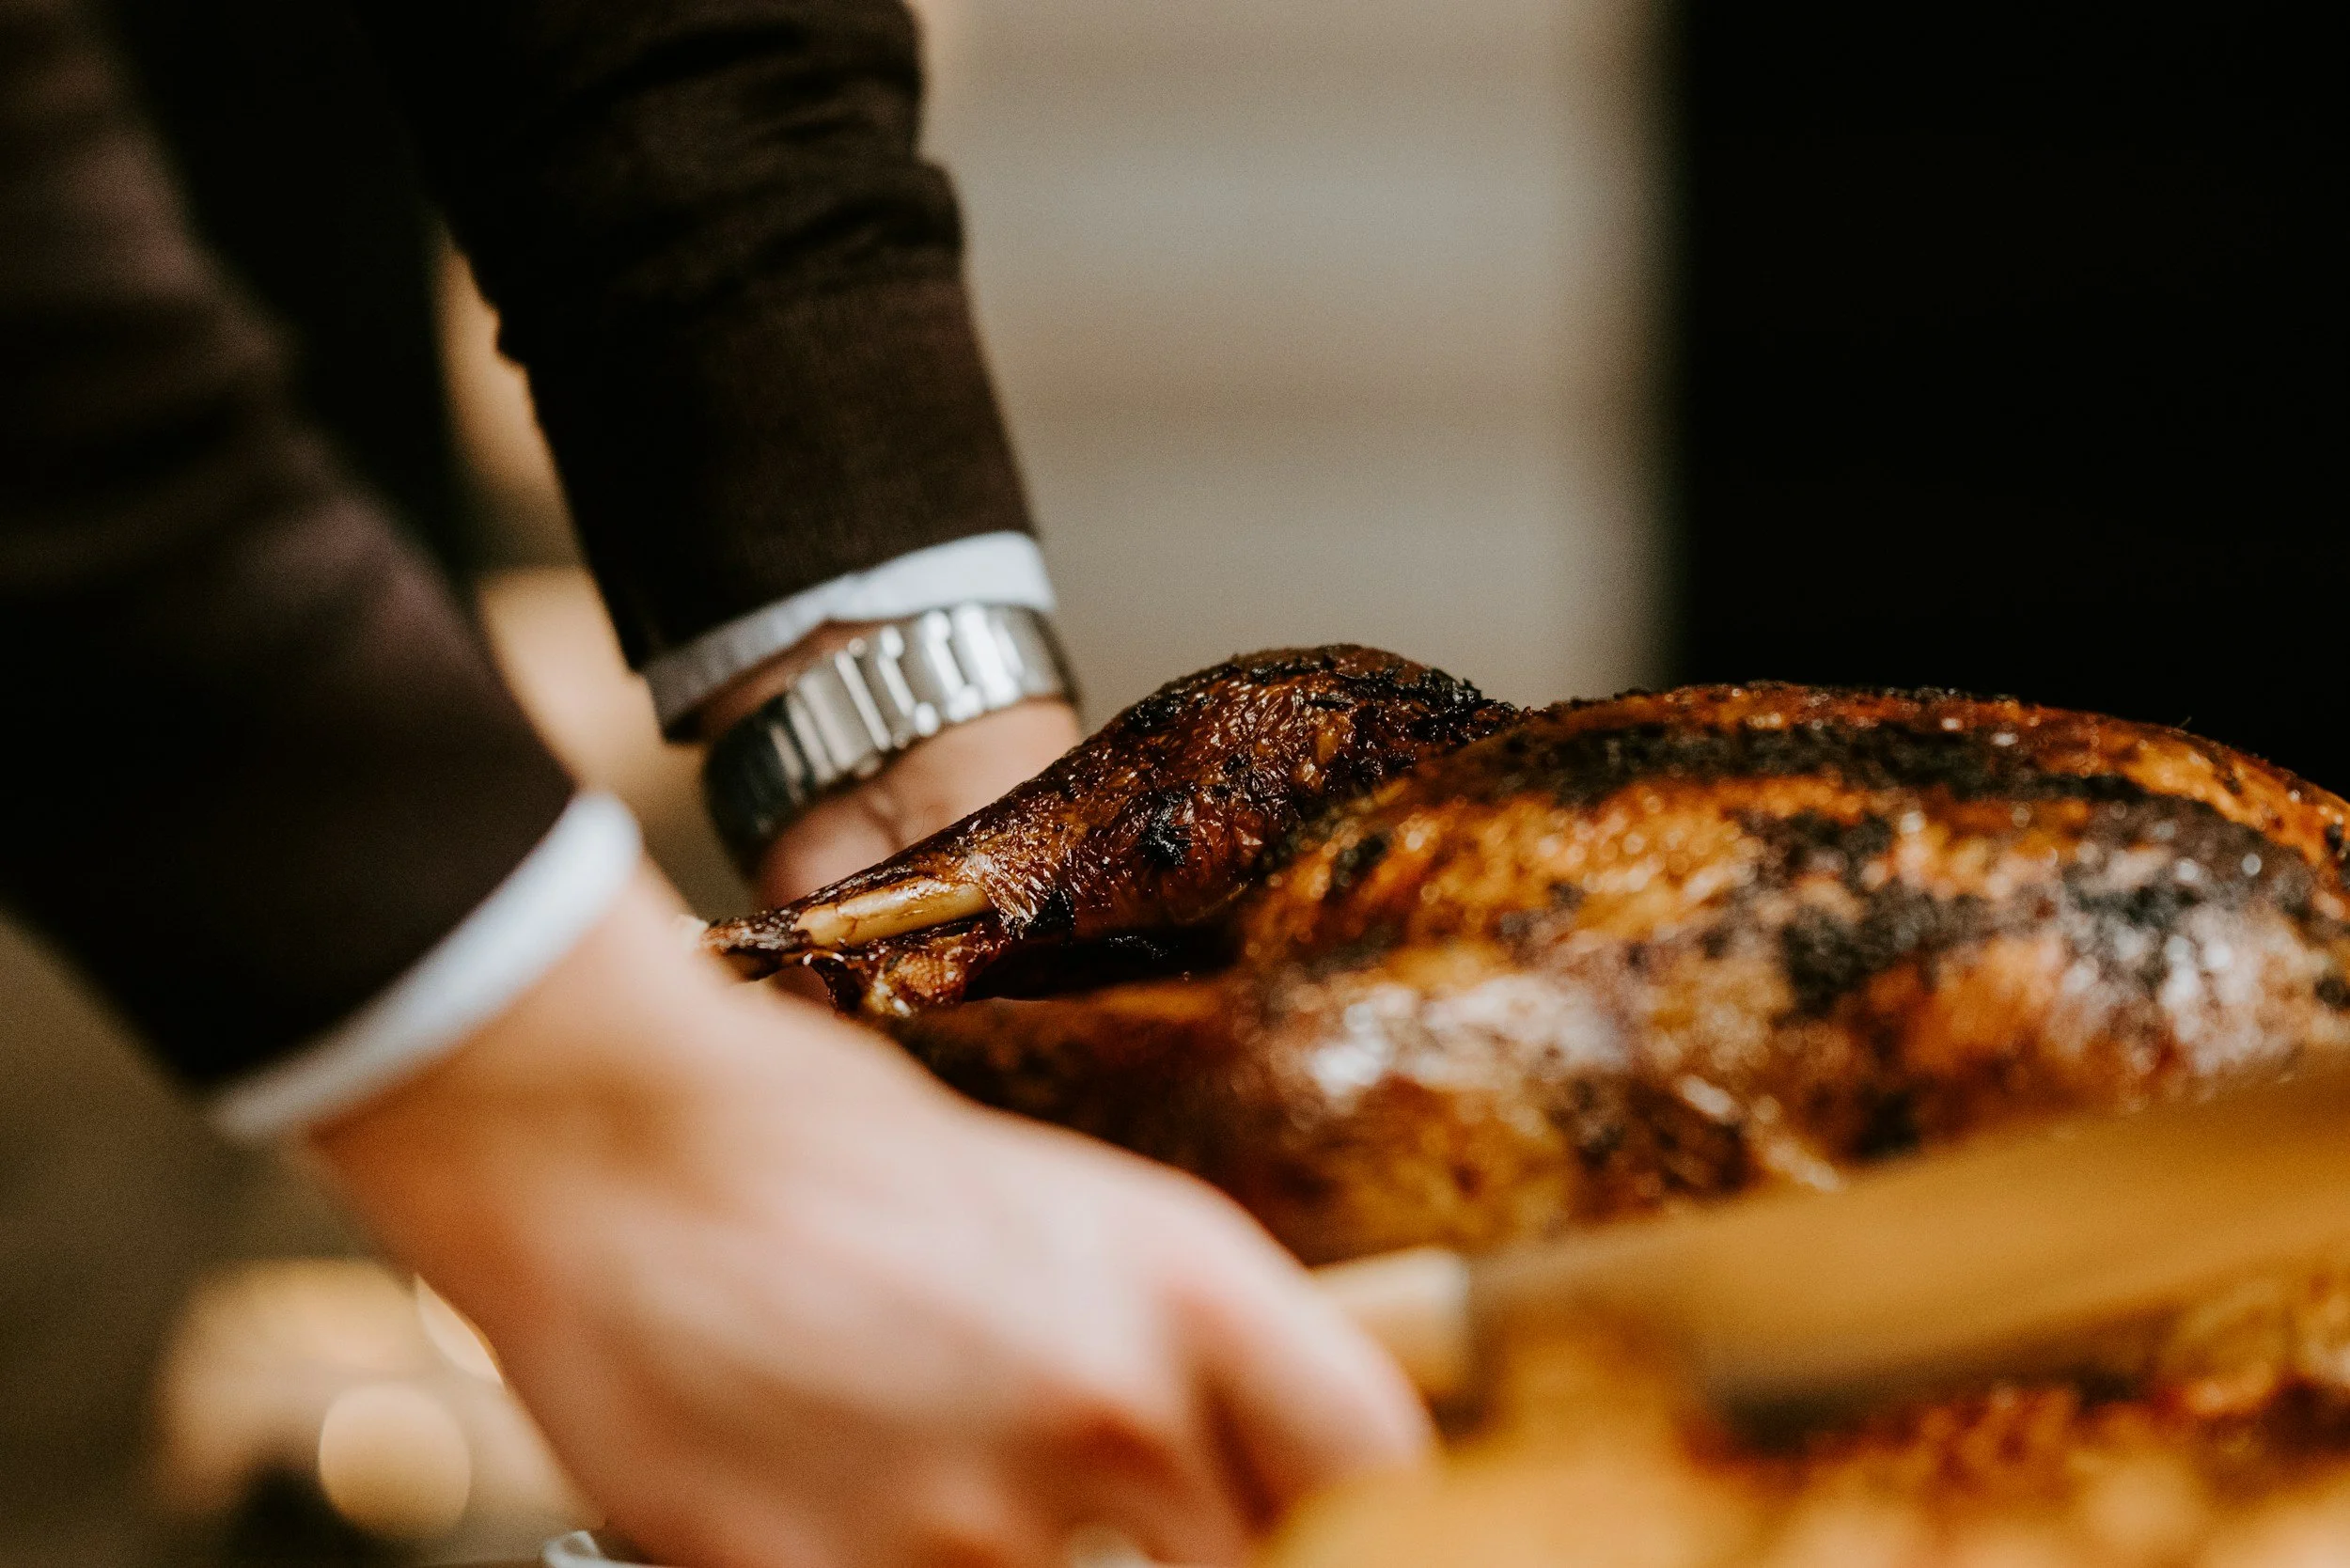
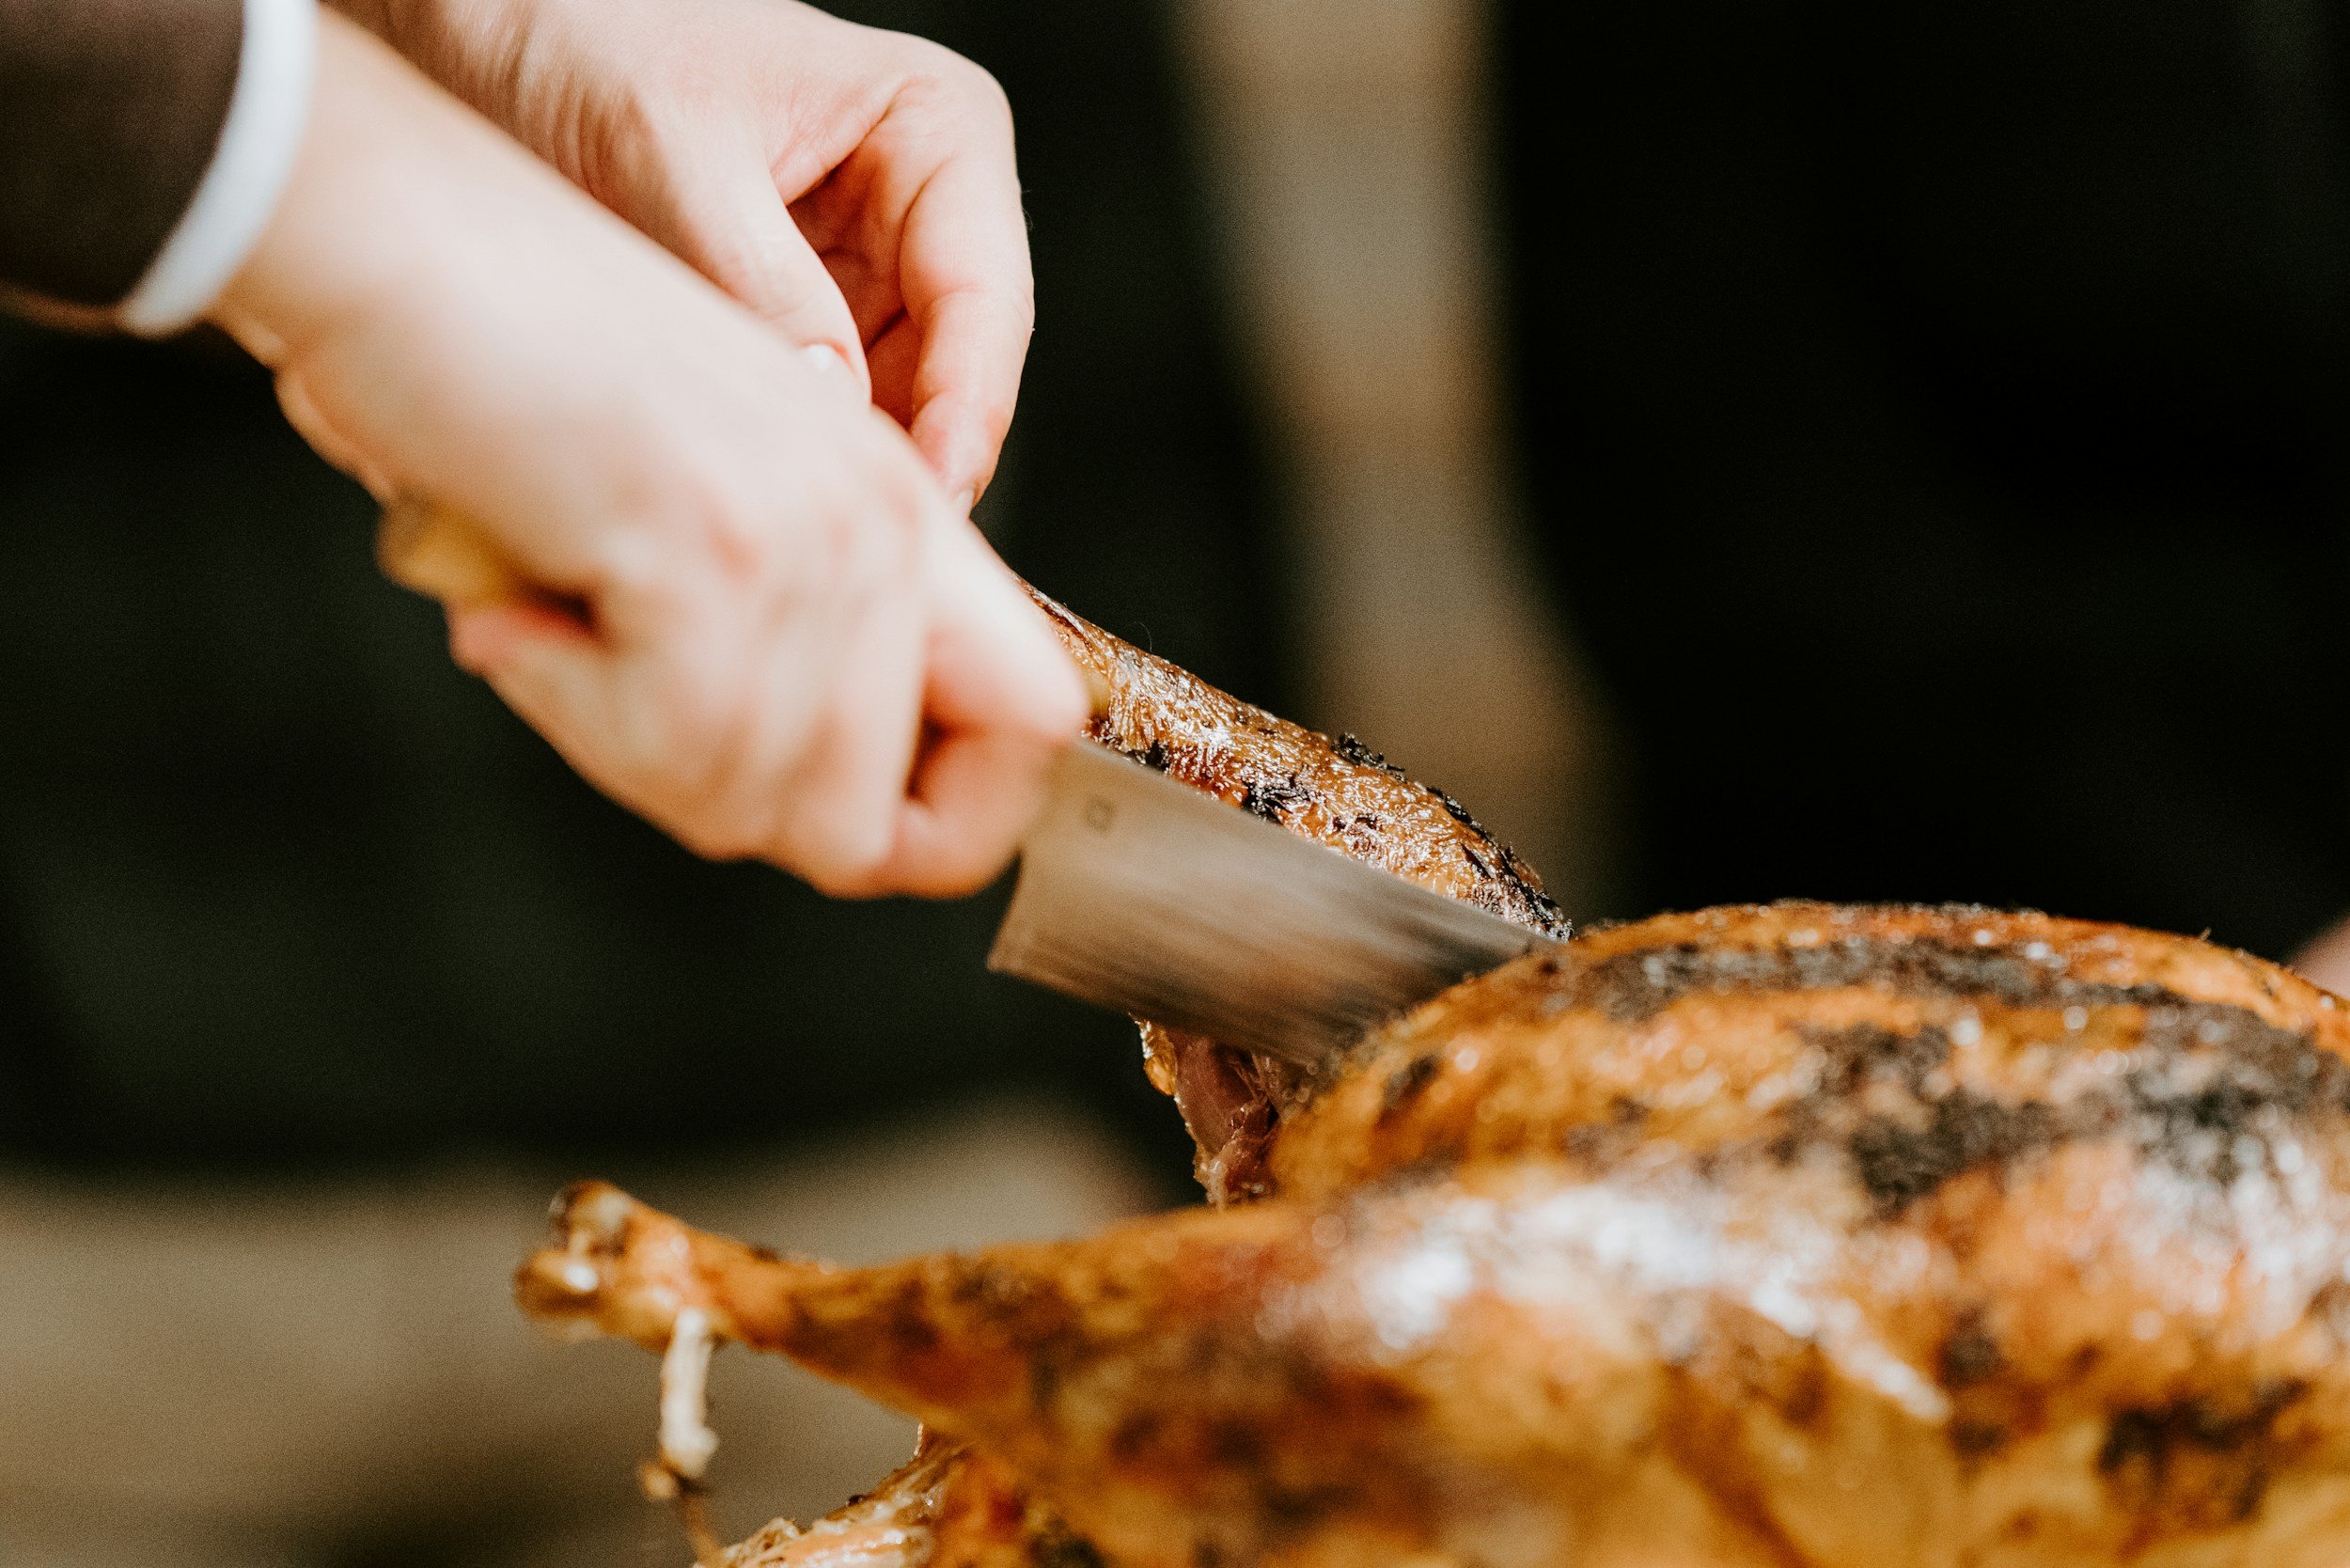
4. Rest the Turkey
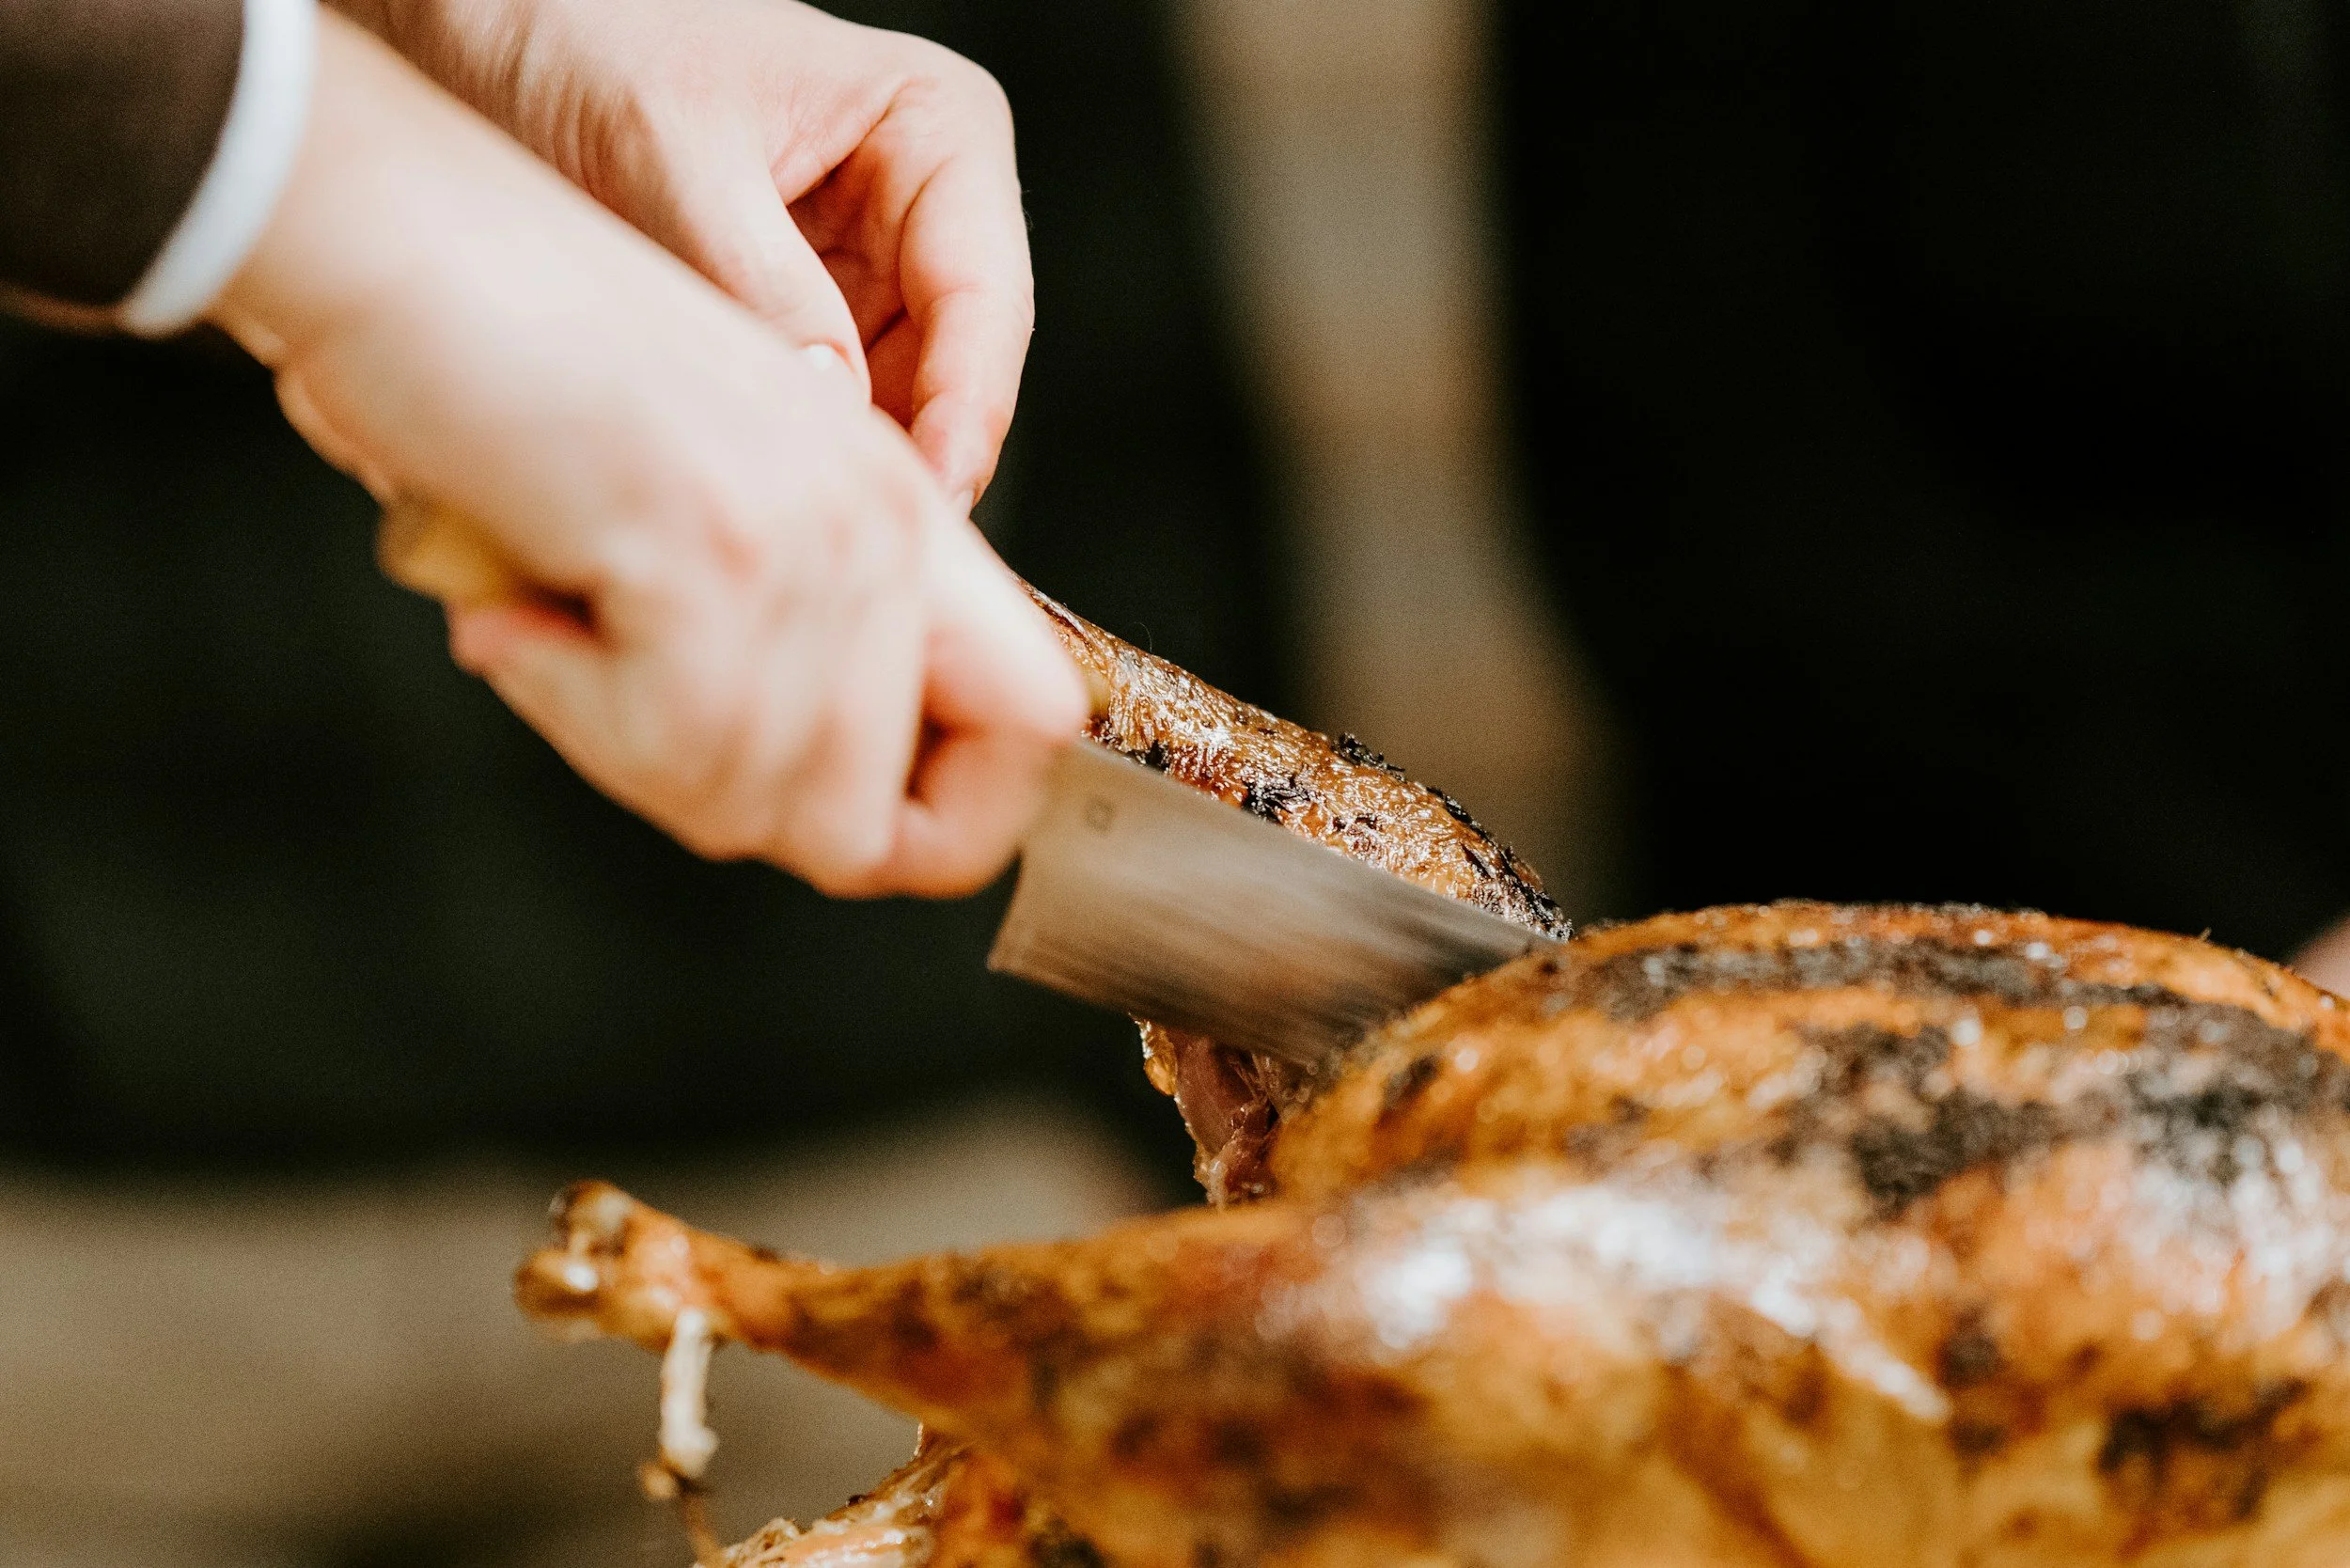
Once cooked, remove the turkey from the oven and transfer it to a cutting board.
Tent loosely with foil and let it rest for 15-20 minutes.
This is when the magic happens:
Juices redistribute into the meat
The pan juices concentrate
In the mean time, you take a few minutes to make the gravy.
The Best Part: No-Fuss, Flavour-Loaded Gravy
While the turkey is resting, take a few minutes to out the gravy together. Its comes together quickly with pantry staples. This gravy is where all the flavour lives—and like I said, the best part is it comes together in minutes.
Because the turkey roasted simply, the pan juices are:
Clean
Rich
Intensely turkey-flavoured
No burned bits. No competing flavours.
Why This Method Saves So Much Time and Stress
No prep work
No ingredient shopping
No complicated steps
No second-guessing yourself
You free up:
Counter space
Mental energy
Time to focus on sides, guests, or resting
This is especially perfect if:
You’re hosting and juggling a lot
You’re cooking turkey for the first time
You want great results without pressure

Final Thoughts: Simple Is Not the Same as Boring
This no-fuss turkey proves that less effort doesn’t mean less flavour.
By keeping the turkey simple and letting the gravy carry the seasoning, you get:
Juicy, reliable results
Incredible homemade gravy
A calmer, more enjoyable cooking experience
Sometimes the easiest way really is the best way.
Here’s the recipe!
Ingredients:
Whole Turkey
Water, 2-4 cups
Rosemary, 1 tbsp
Dried Thyme, 1 tbsp
Dried Basil, 1 tbsp
Ground Pepper, 1 tbsp
Powdered Sage, 1 tbsp
Powdered Garlic, 1 tbsp
Instructions:
If the turkey is frozen, place it in the fridge to thaw it out 3 days before you plan on cooking and serving. Keep the turkey in its original wrapping, but be sure to put it in a roasting pan to contain the juices as it thaws. If your turkey is large, give yourself an extra day to thaw it out. Pro tip: Put the frozen turkey in a roasting pan while in the fridge, to catch the turkey juice as it thaws out.
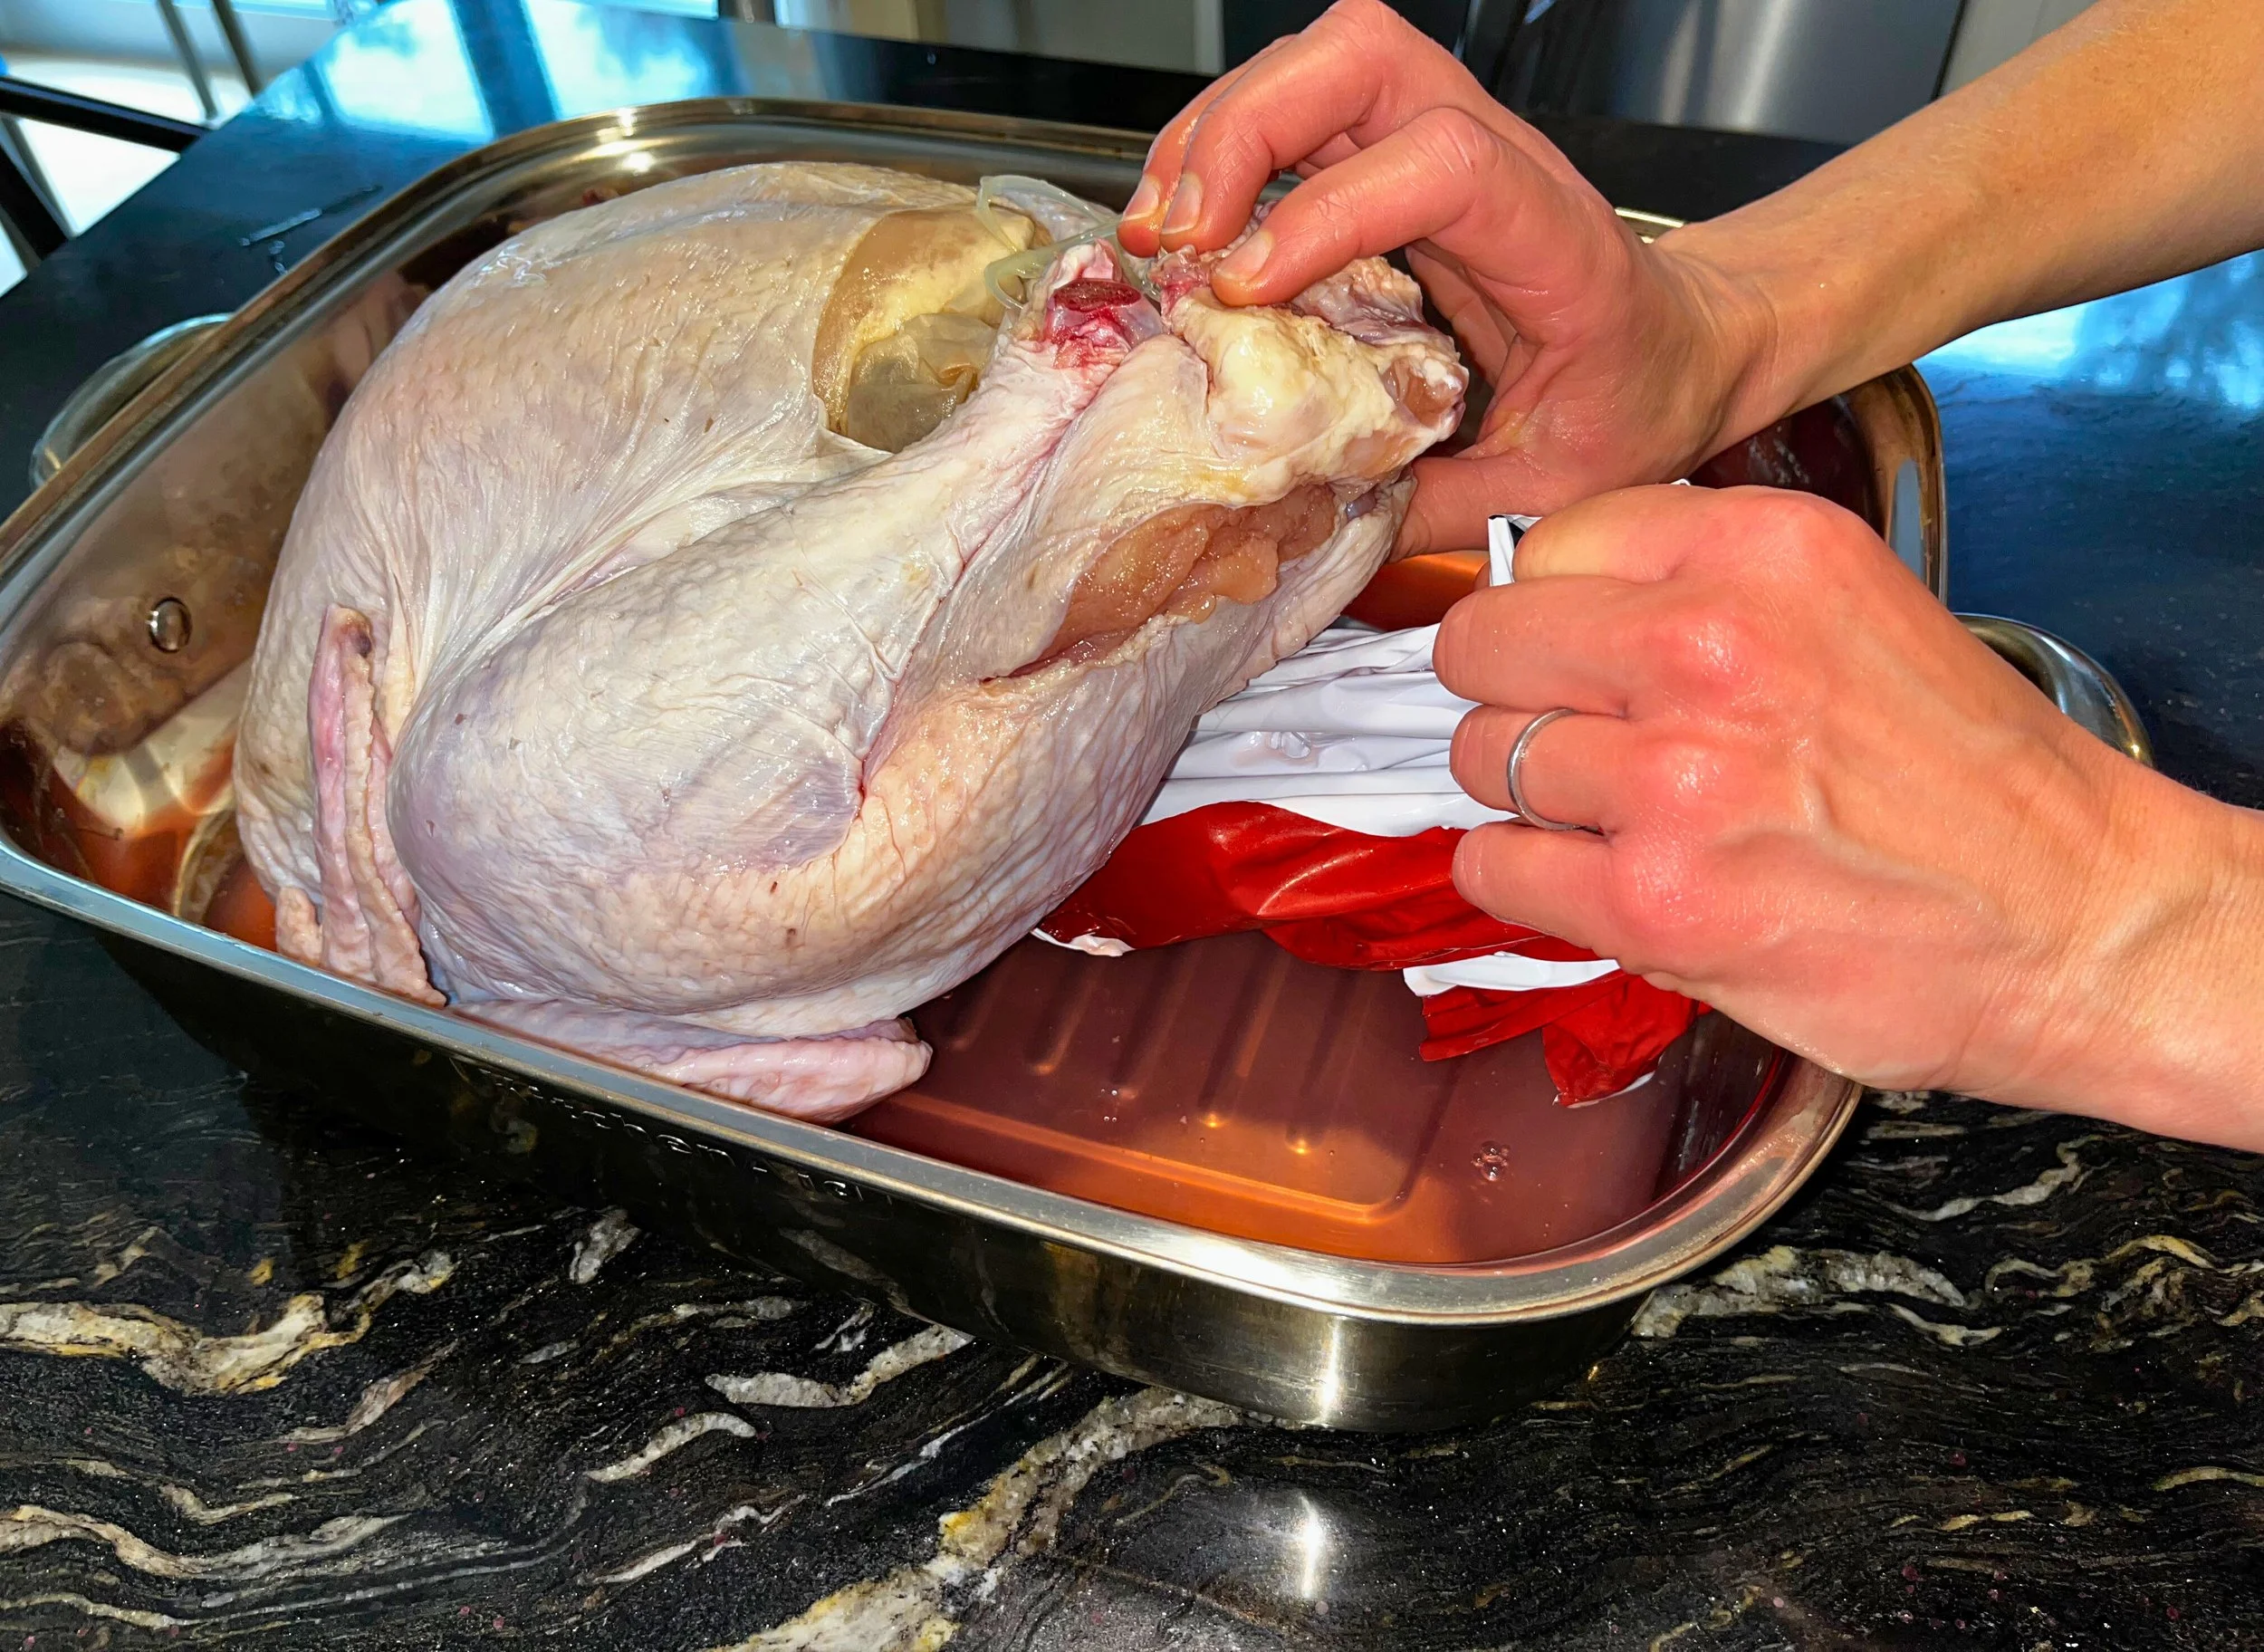
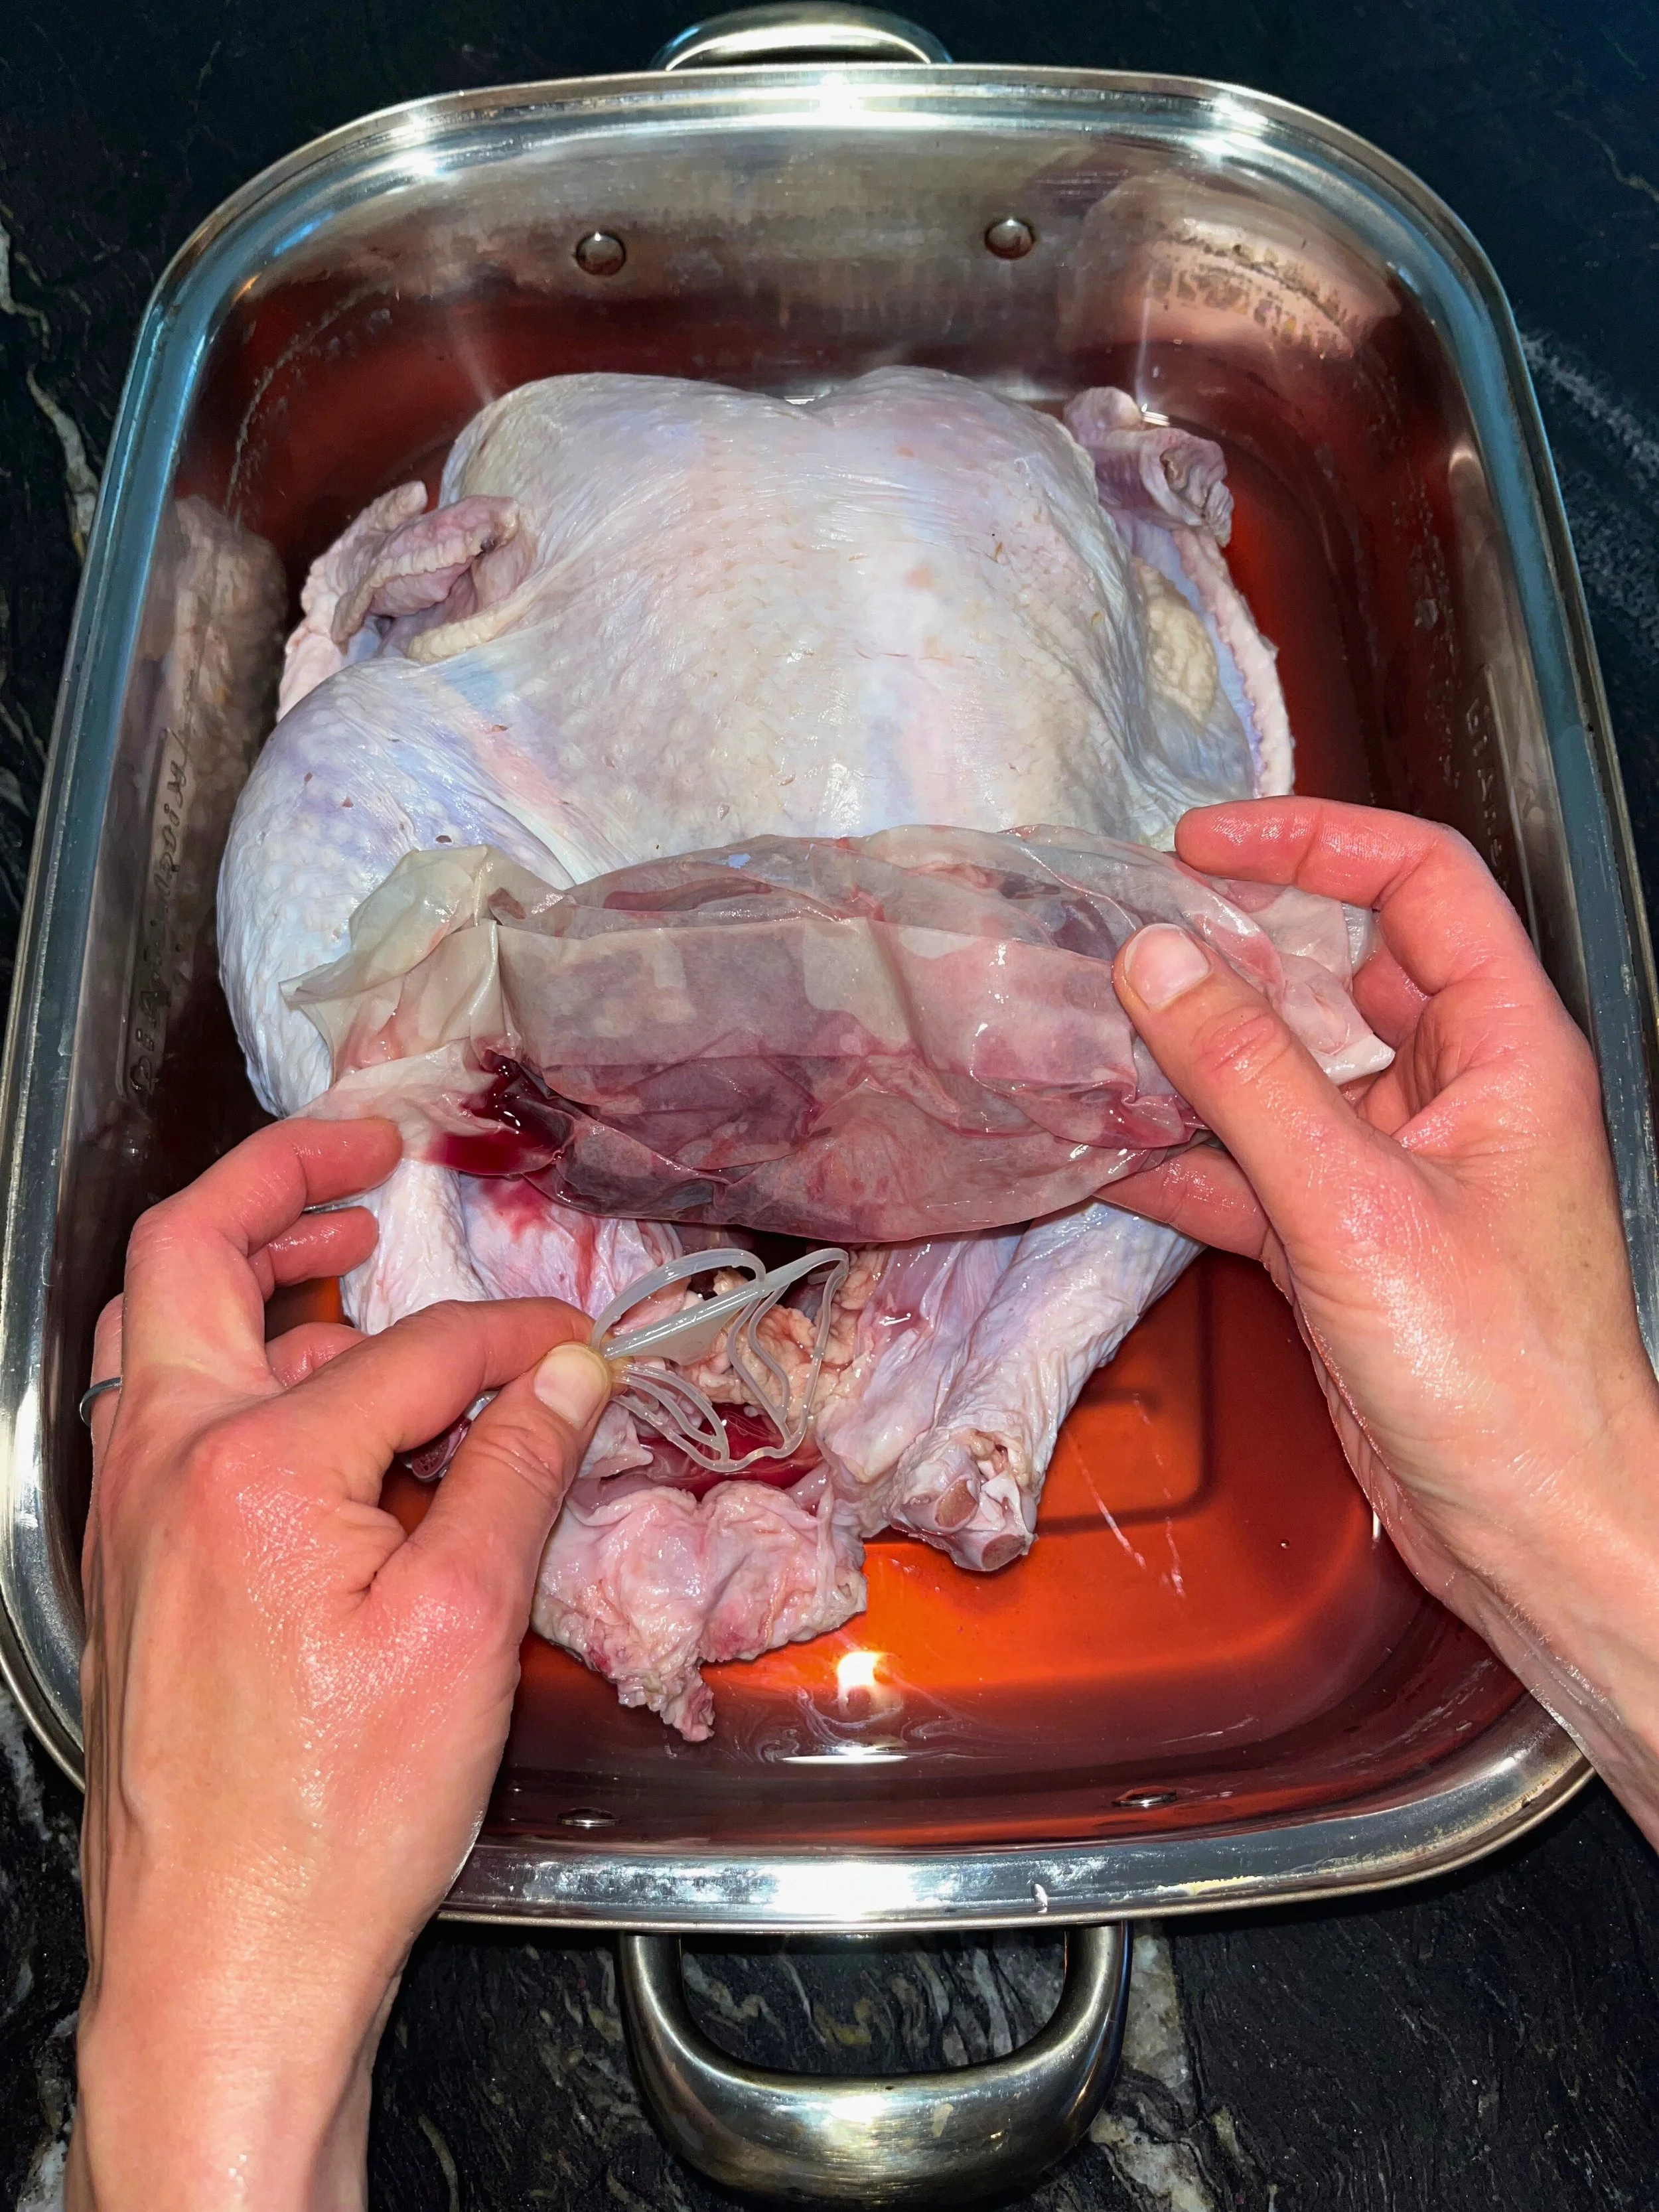
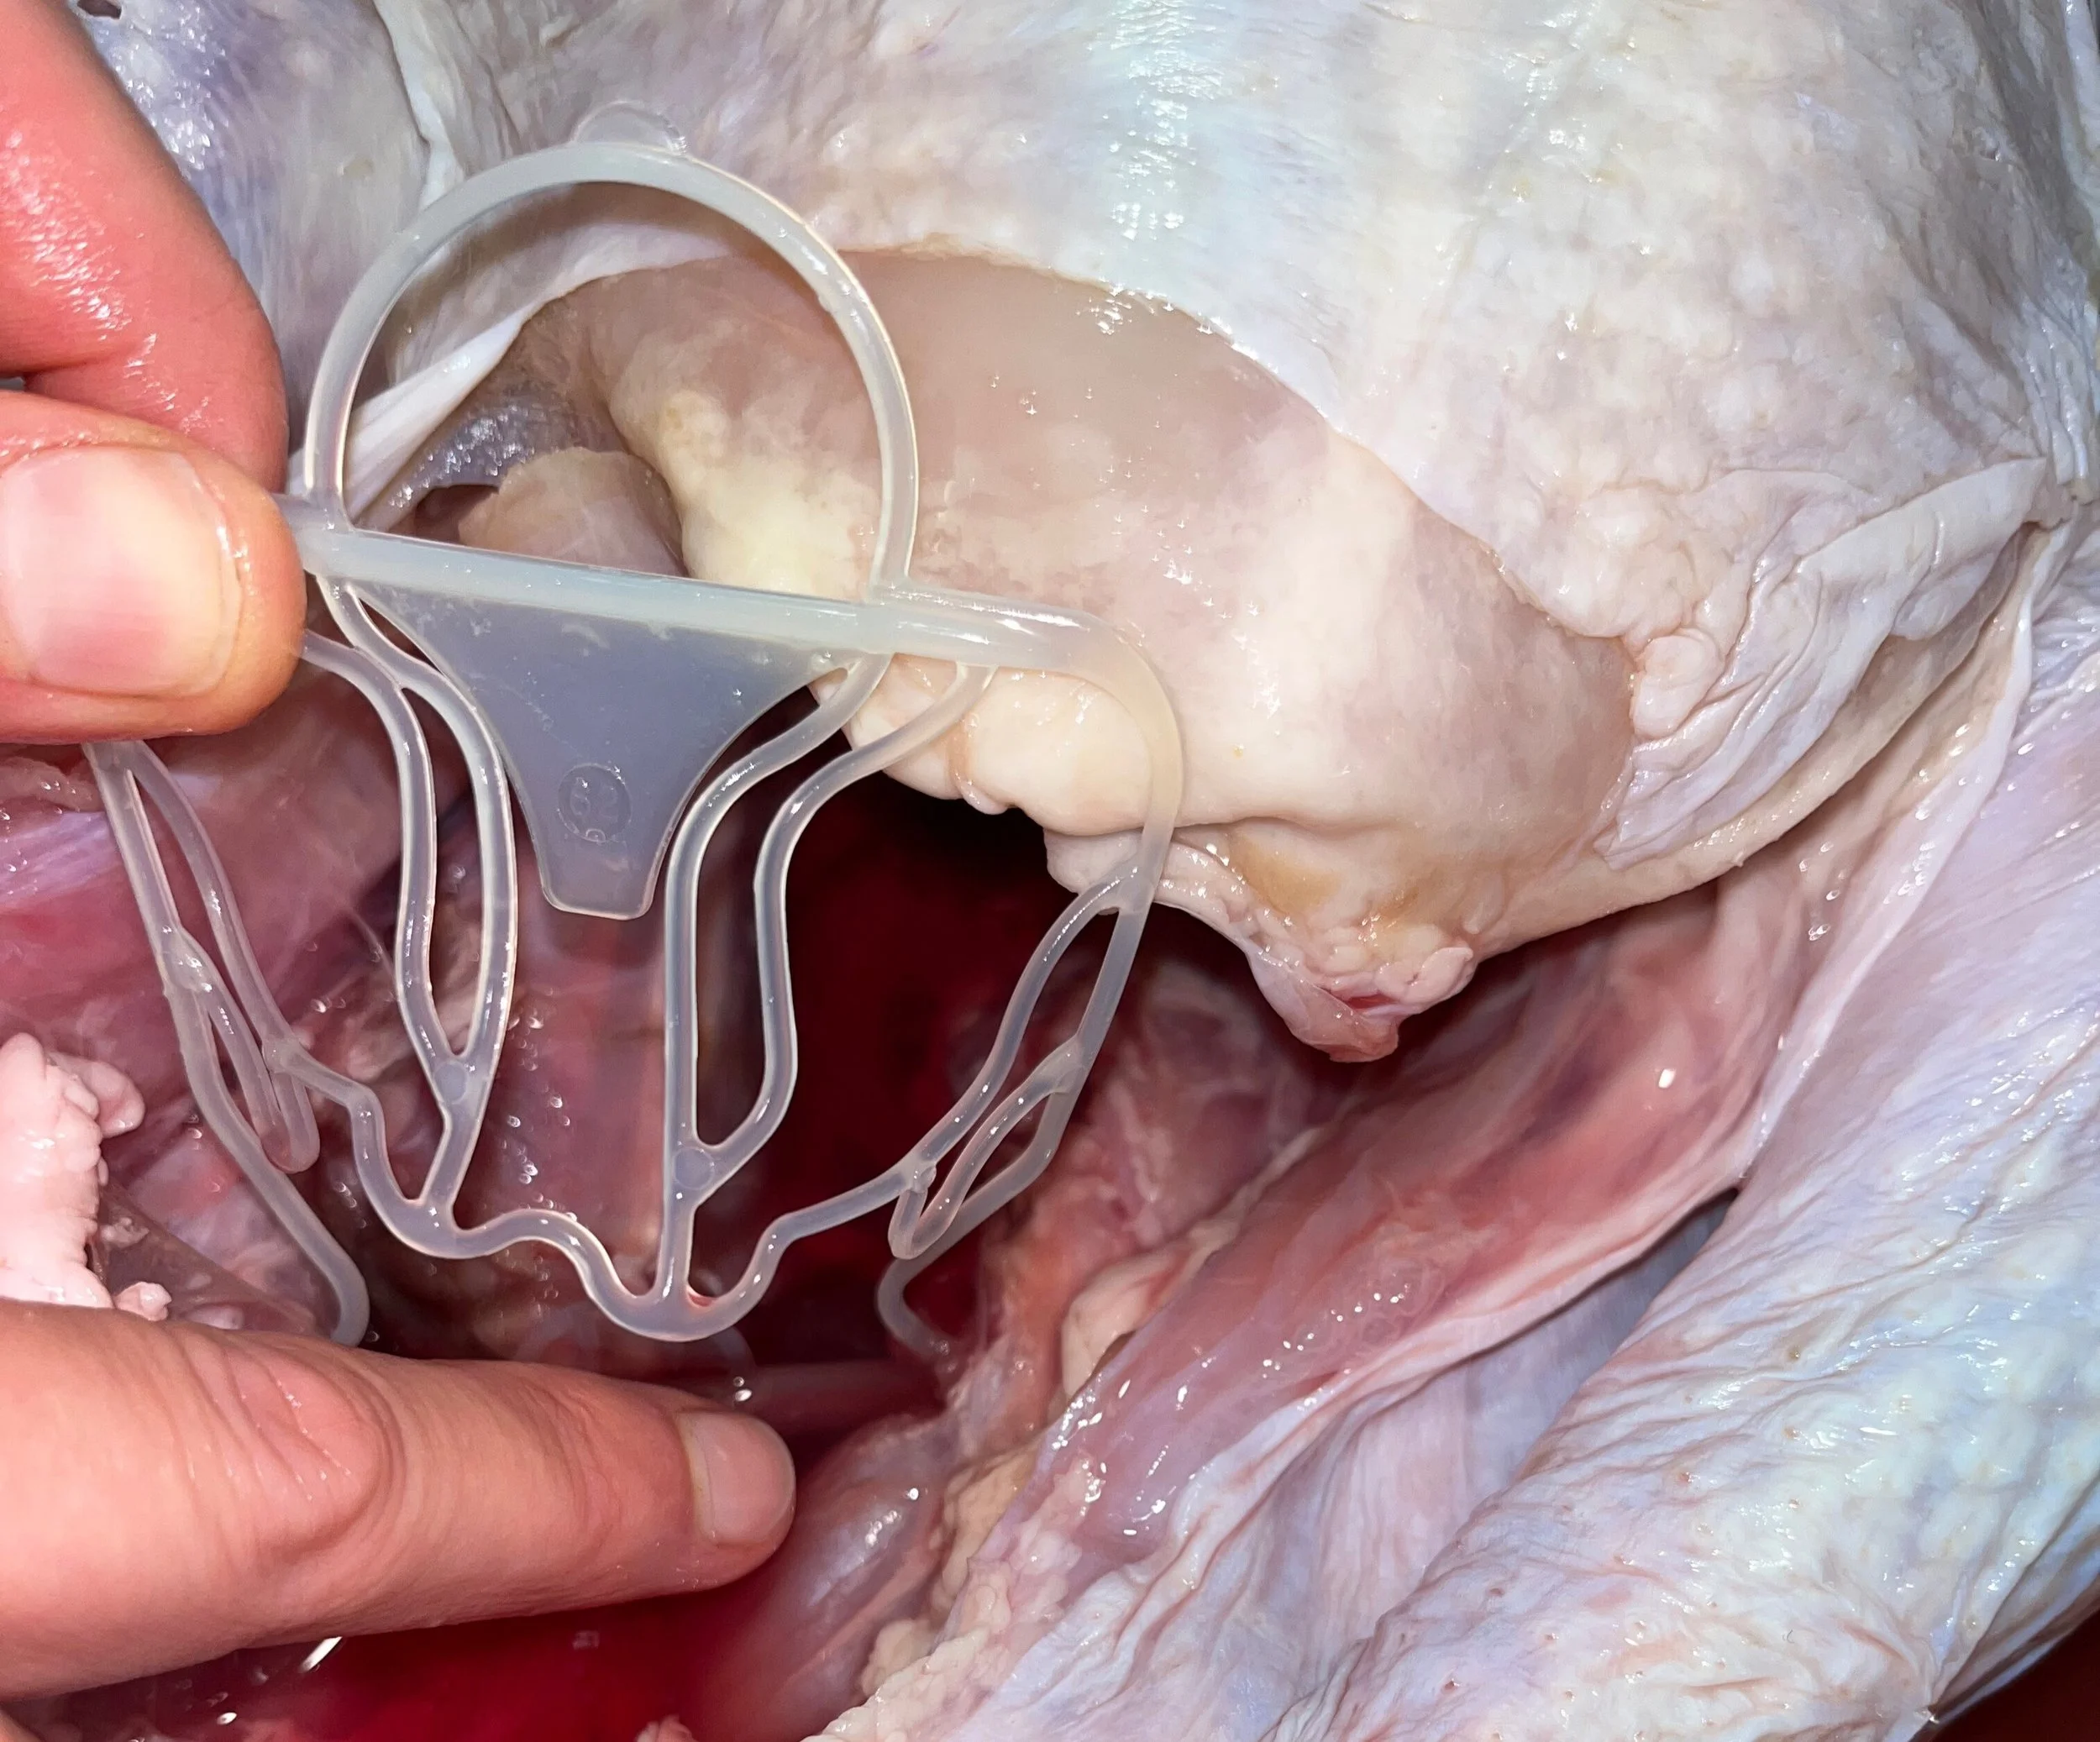
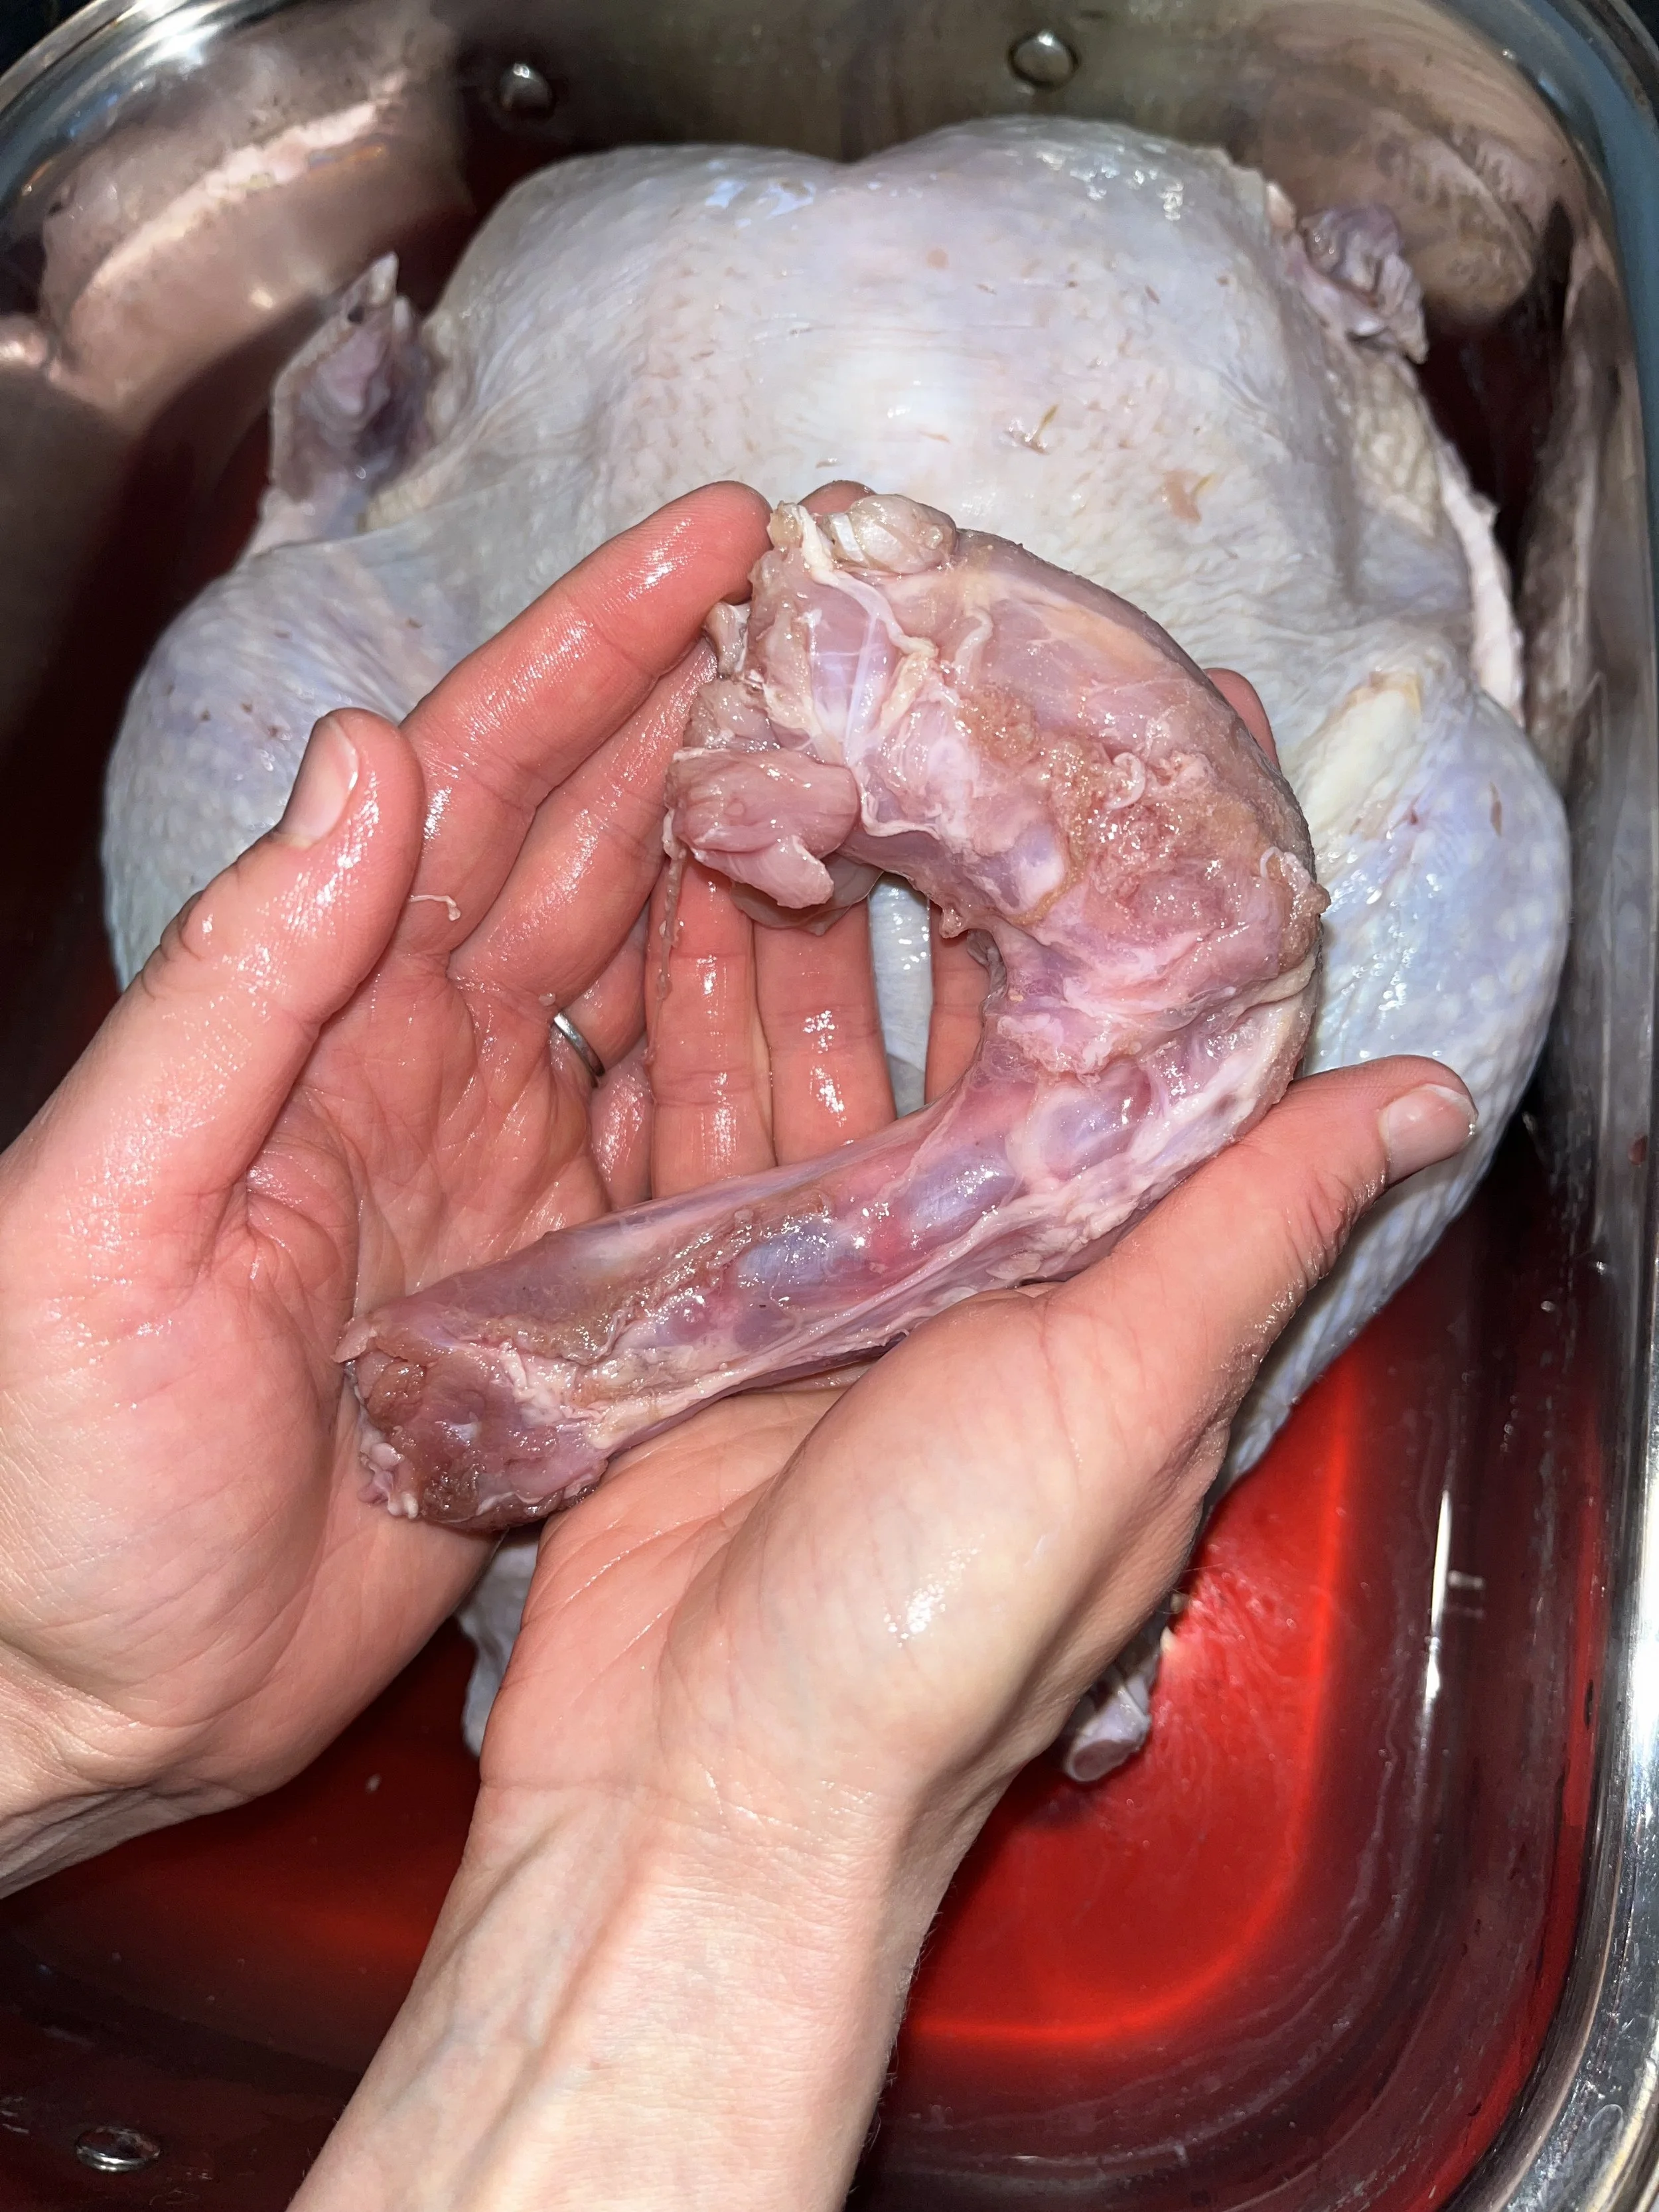
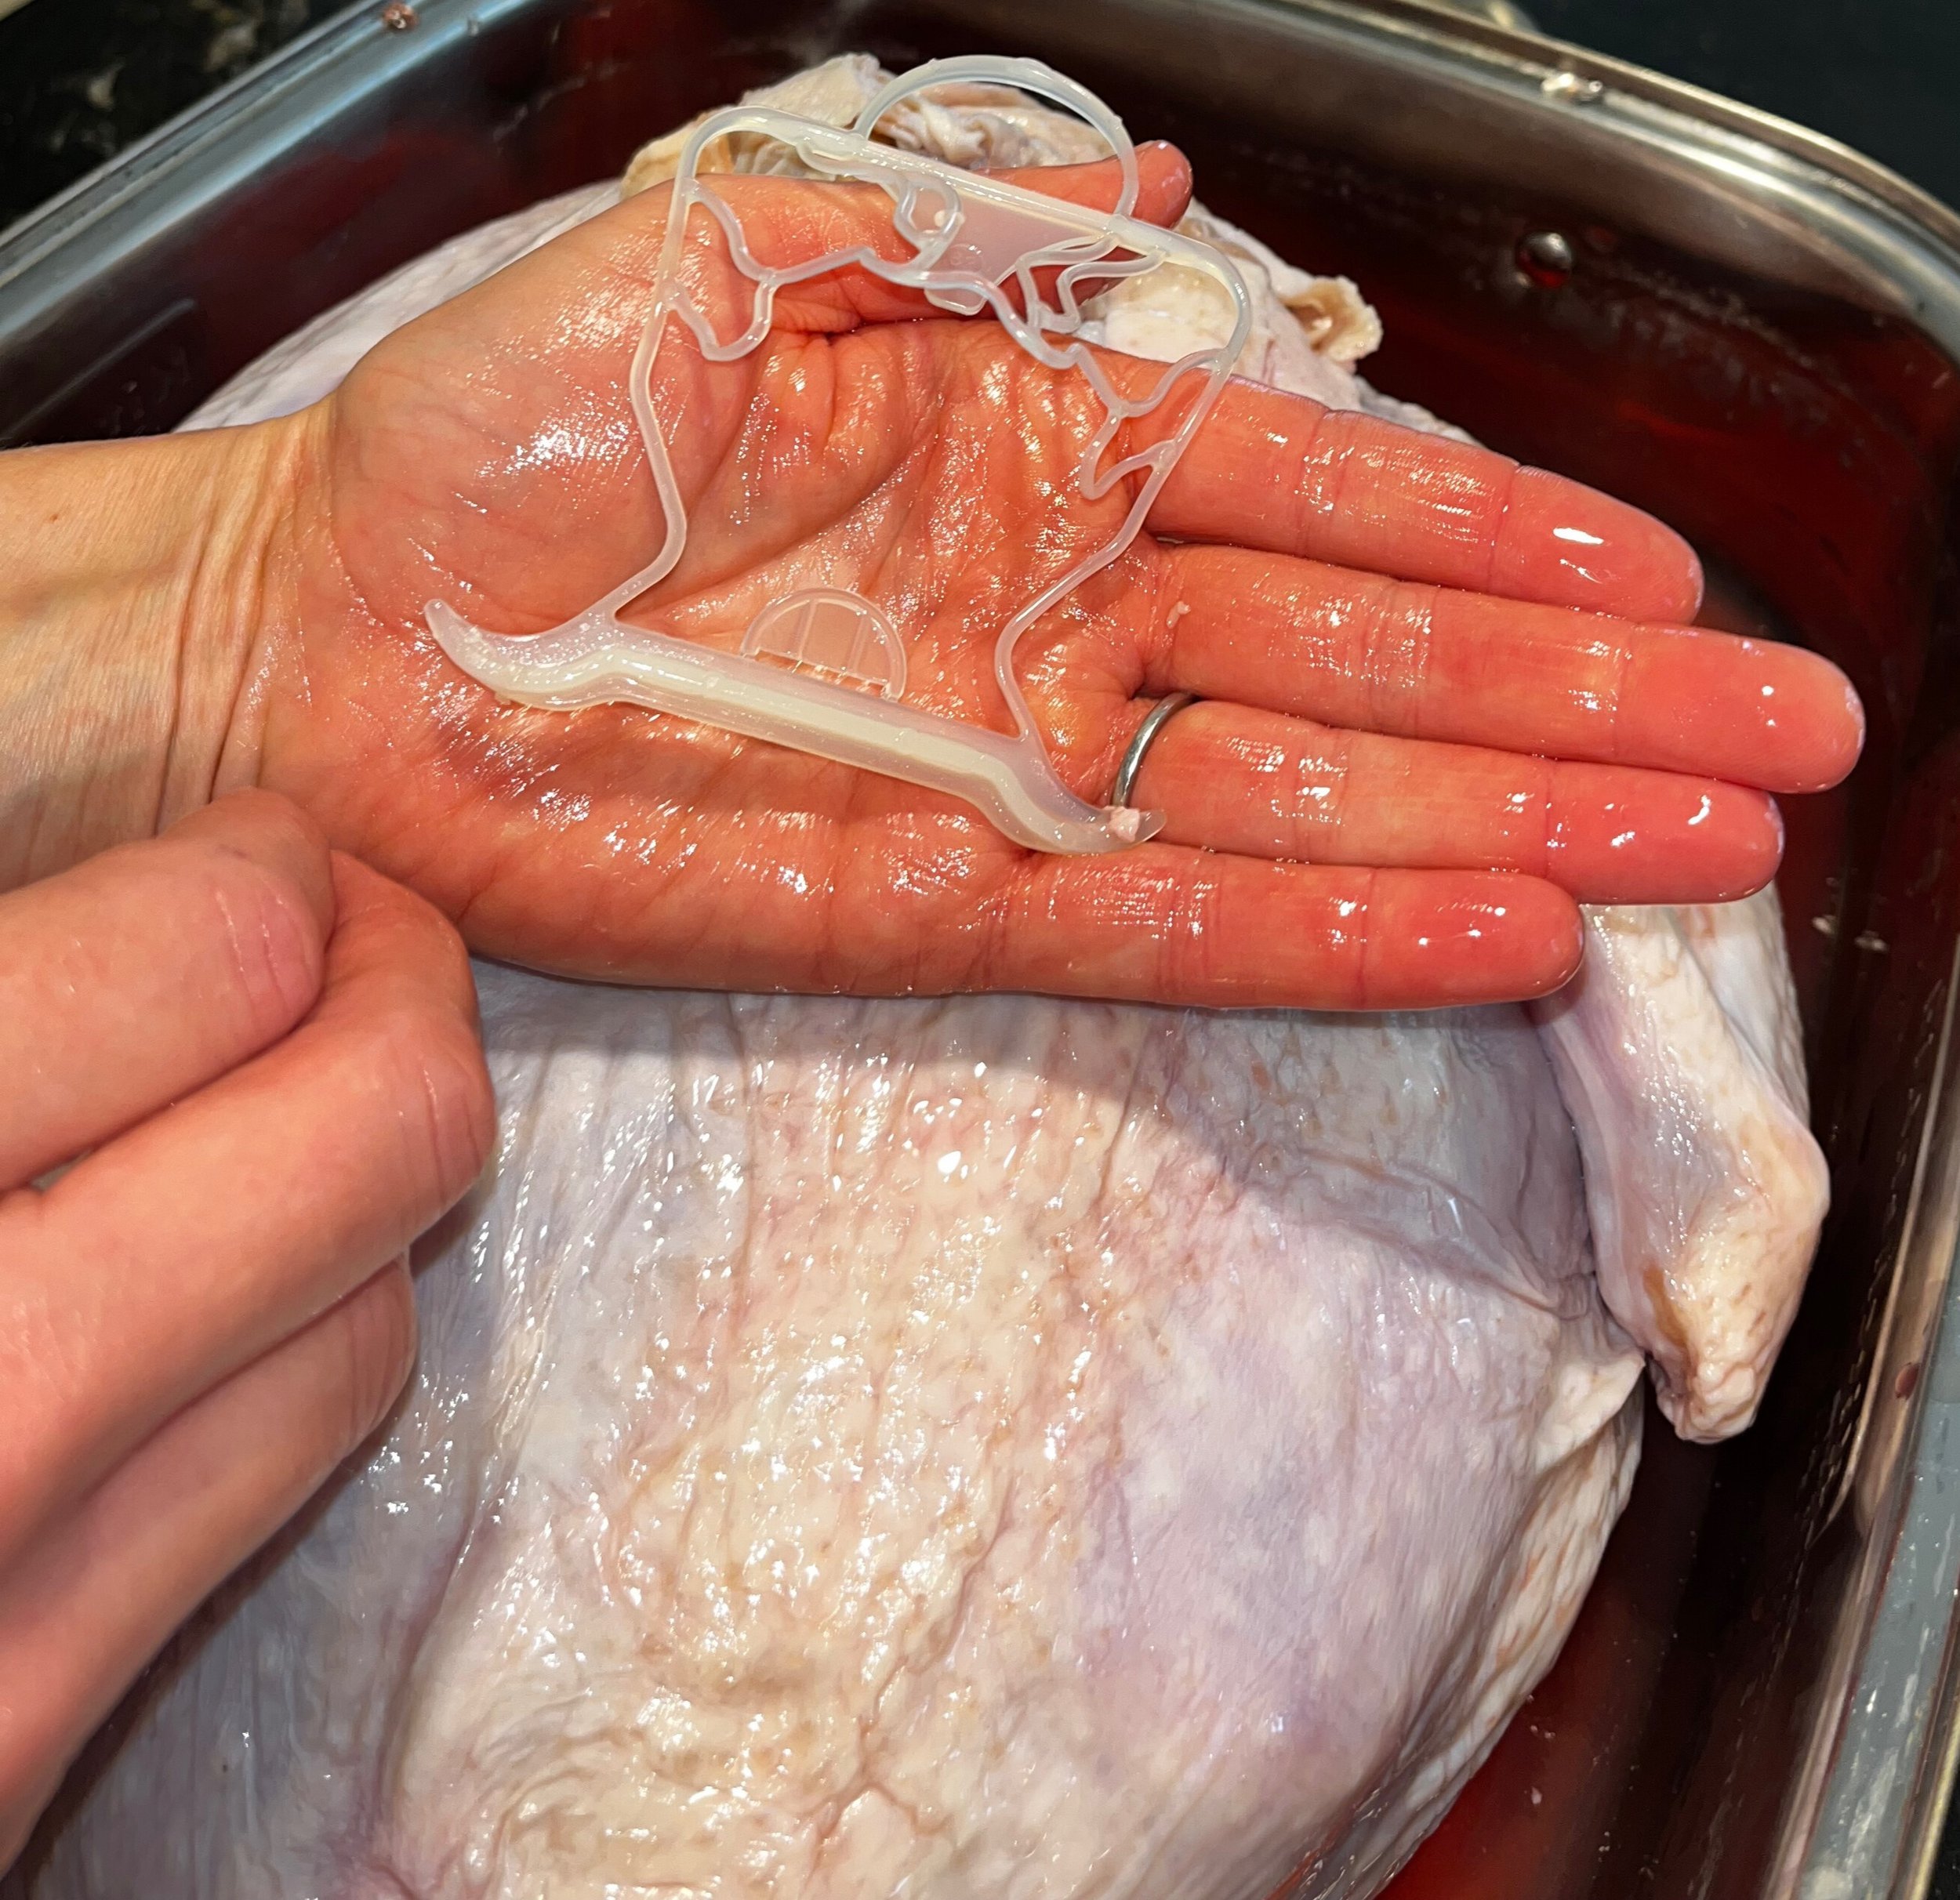
The night before: Remove the turkey from the wrapper. Remove the plastic hook that’s hooked on the inside of the turkey legs, the neck and bag that contains the heart and liver from the turkey cavity, and put it in the fridge of you plan on using it during cooking or if you plan on making turkey broth.
Cut the excess skin, and tissues that cover the cavity to make handling easier.
Rub the salt on the turkey skin. Put the roaster lid back on. Put the roaster in the fridge overnight.
The morning of: Preheat the oven to 350F.
Remove the roaster from the fridge.
Remove the turkey juices from the bottom of the pan and fill it with water up to the halfway point, roughly 2-4 cups.
Add the herbs and spice, rosemary, thyme, sage, garlic powder, pepper in a bowl or ramekin, and give it a stir so the mixture is mixed well. Rub the herbs and spice mix on the turkey skin.
Optional: add your favourite stuffing in the turkey cavity.
Optional: Take the turkey neck, heart and liver out of the bag, and add them to the bottom of the pan if you or your guests would like them, or keep them in the fridge and add them when making your broth at a later time.
Cook until the turkey reaches an internal temperature of 165F (74C), roughly 13-15 minutes per pound.
Let rest for 15-20 minutes before cutting it up.
Enjoy!

did you make this recipe? I want to see it!
Leave a picture and a ⭐ star rating and comment below to let us know how your muffins turned out. Did you make any substitutions or additions? Share your tips and photos with us!
Share this recipe: Help others discover this delicious recipe by sharing it on Pinterest, Facebook, or Instagram. Tag us @Sageandsimplicity so we can see your beautiful creations!
📌 Pin it for later: Save this recipe to your Pinterest boards for easy access.
you might also like these recipes:


a step-by-step guide to making Homemade Pumpkin Purée
Let me show you how to make pumpkin puree for pennies on the dollar! Click here to learn how.
As an Amazon Associate I earn from qualifying purchases.
📖 Jump to Recipe | 💬 Jump to FAQs | 🖨️Print Recipe
Total Time: 1 hour | Difficulty: Easy

Why I love pumpkin purée!
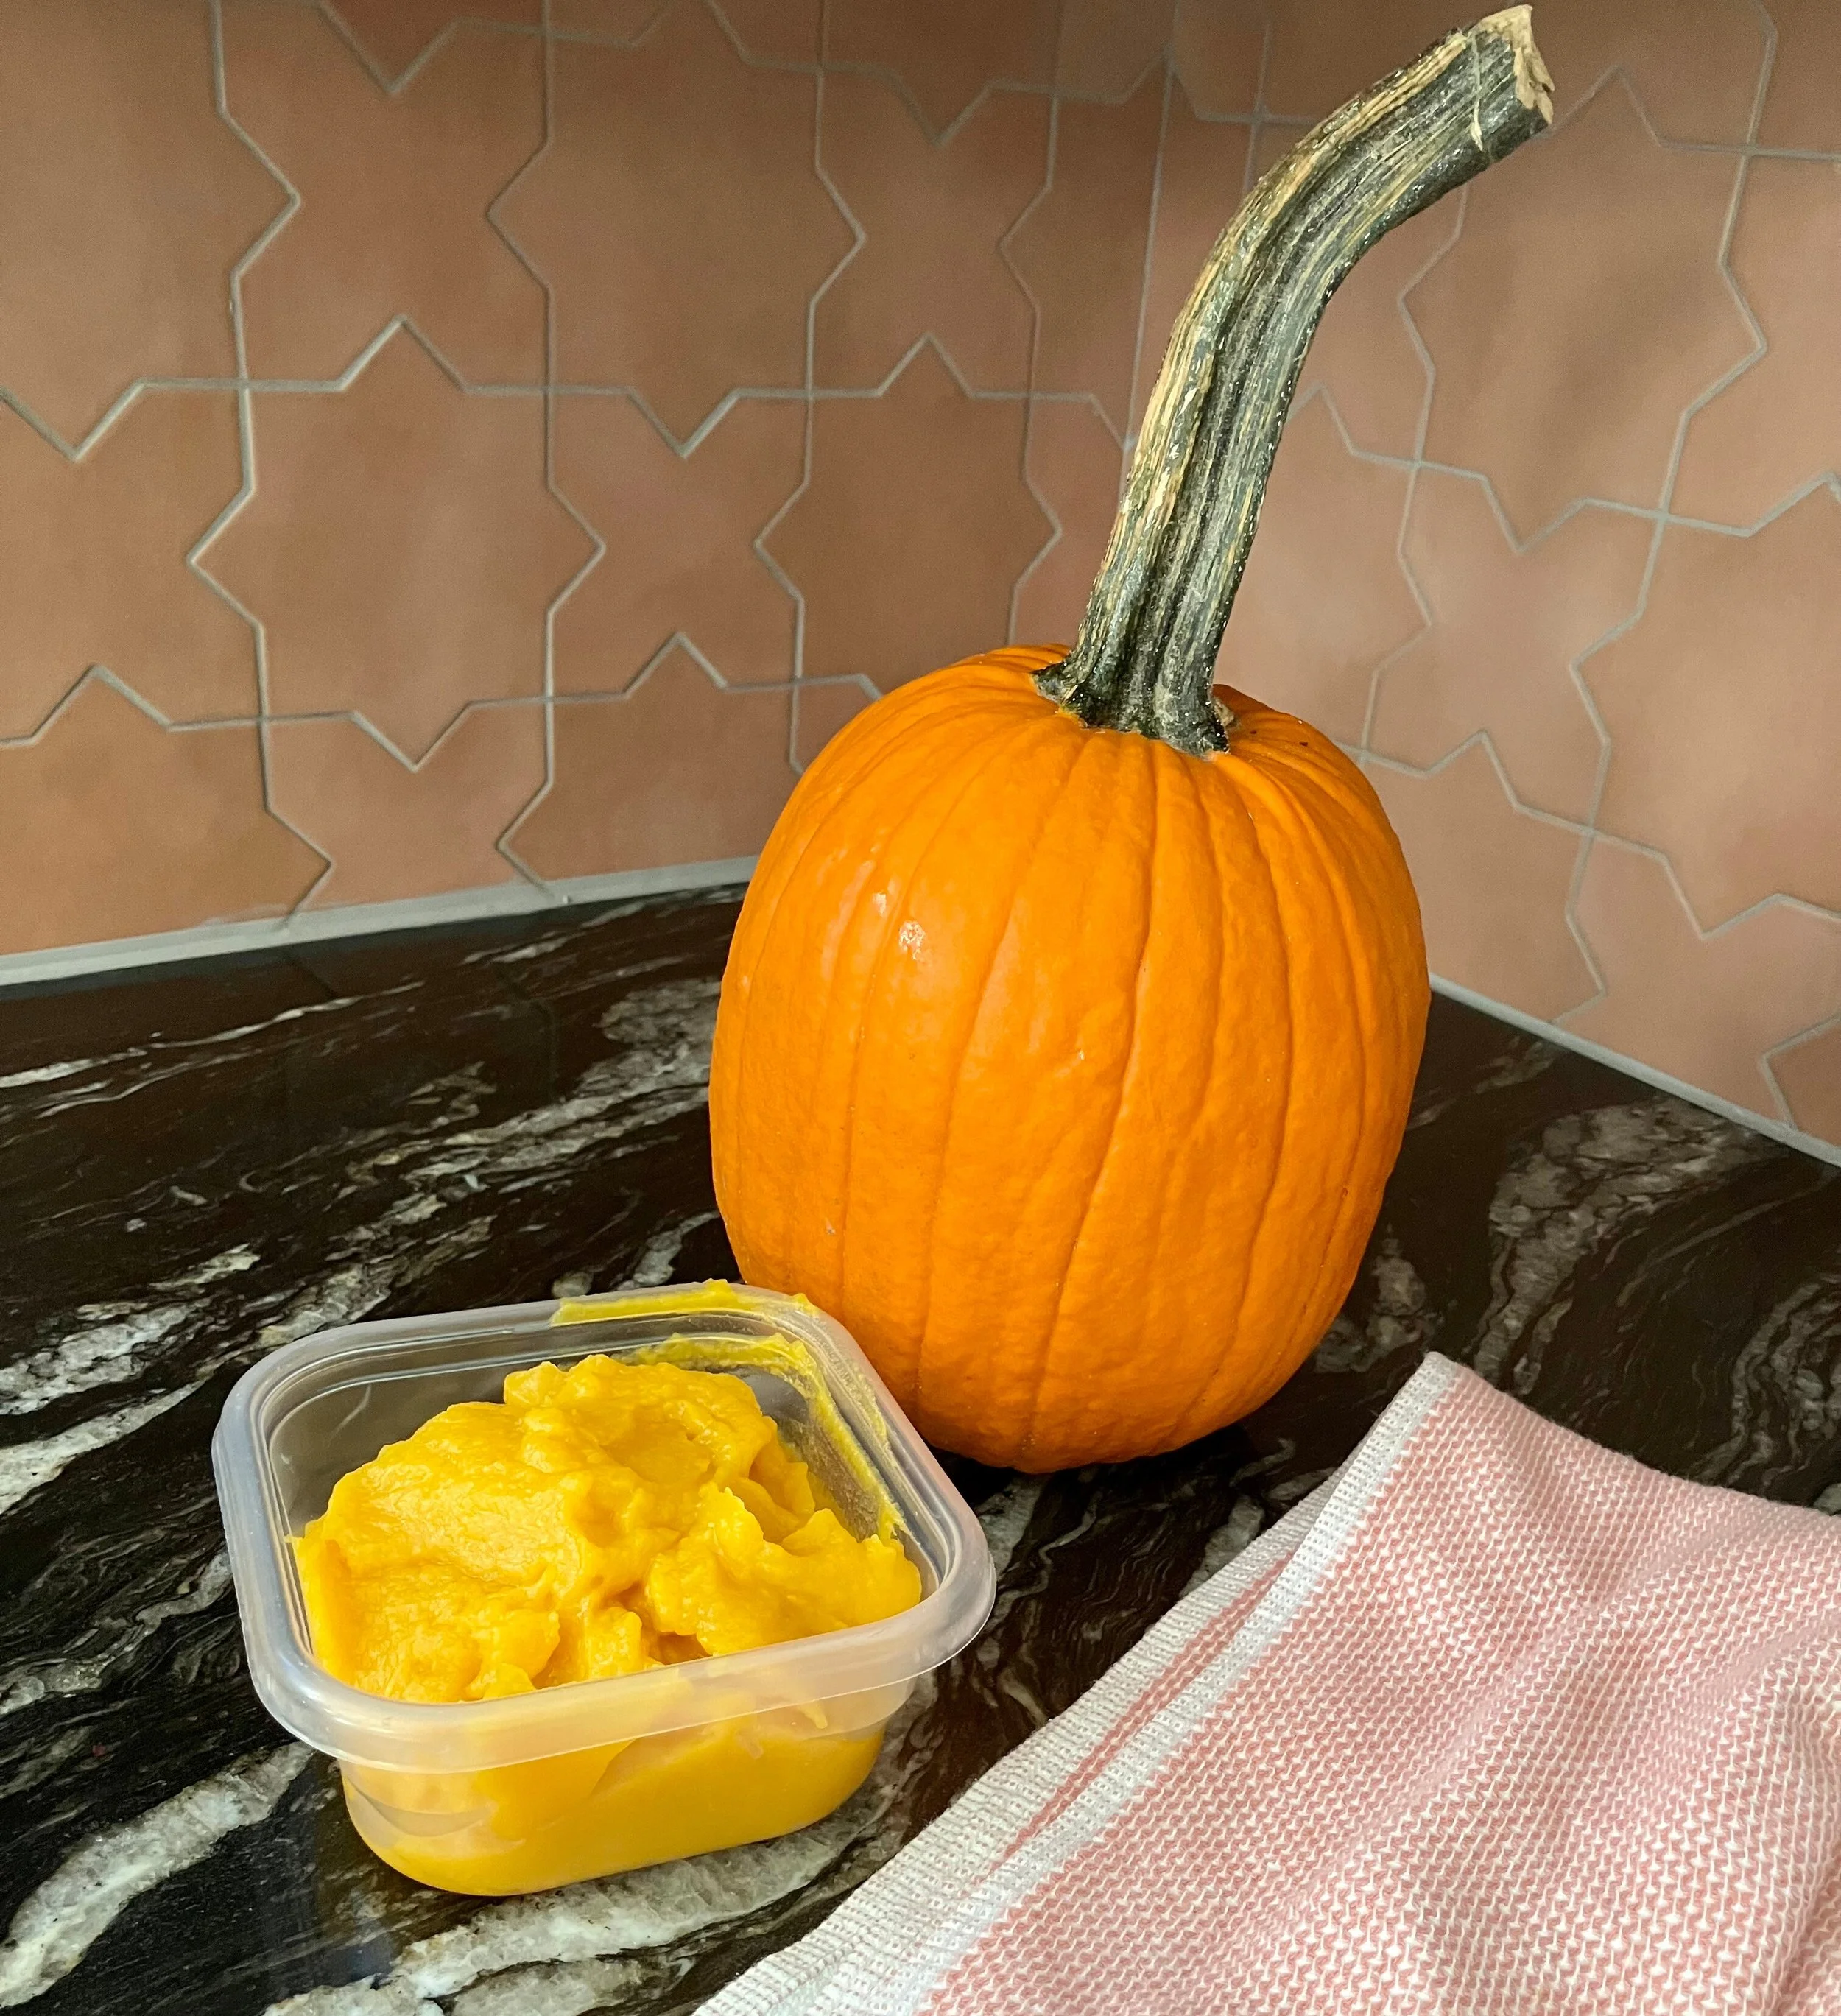
When fall rolls in and the pumpkin-spice cravings hit, there’s nothing more satisfying—or more budget-friendly—than making your own pumpkin purée at home. If you’ve only ever bought the canned version, you’re in for a delightful surprise! Homemade pumpkin purée is incredibly easy to prepare, tastes fresher than anything on the shelf, and costs just pennies on the dollar. Once you try it, you may never go back to store-bought again.
The beauty of this simple kitchen project is that it requires just one ingredient: pumpkin, and sometimes a little bit of water. That’s it! No additives, no preservatives, nothing extra. With a single sugar pumpkin (aka pie pumpkin)—and sometimes even a discounted clearance pumpkin after Halloween—you can batch-make enough purée to power countless fall recipes. Whether you’re baking a classic pumpkin pie, stirring up pumpkin pancakes, or whipping together a creamy autumn soup, fresh purée brings a richness and depth that are more affordable than the canned version.
Making your own pumpkin purée is surprisingly hands-off. Slice the pumpkin in half, scoop out the seeds (save them for roasting!), and let the oven do all the heavy lifting. As it bakes, your home fills with that cozy, earthy fall aroma that instantly puts you in the mood for soft sweaters and warm drinks. Once the pumpkin is fork-tender, you simply scoop out the flesh and blend until smooth. You’re left with a velvety purée that looks and tastes like pure autumn comfort.
One of the best perks? Homemade pumpkin purée freezes beautifully. Make a big batch now and portion it into bags or jars to freeze for the entire season. You’ll always have the star ingredient ready for whatever fall recipe inspiration strikes—pumpkin bread, lattes, muffins, overnight oats, you name it. With a freezer stash at the ready, you’re essentially giving your future self a cozy seasonal gift.
So this year, skip the canned aisle and go straight for the whole pumpkin. It’s easier than you think, far cheaper than buying ready-made, and the flavour payoff is absolutely worth it. Homemade pumpkin purée opens the door to all the pumpkin-spice magic fall has to offer—comforting, aromatic, and deliciously affordable.

What do I need to make Homemade Pumpkin Purée?
Ingredients:
Sugar Pumpkin
A little bit of water, roughly 1 cup
Equipment:
Baking sheet (affiliate link)
Spatula (affiliate link)
Blender (affiliate link) or Food Processor (affiliate link)
Cooling Rack (affiliate link)
a step-by-step guide to making pumpkin purée
step 1: prep the oven
Pre-heat the oven to 350F.
step 2: rinse the pumpkin
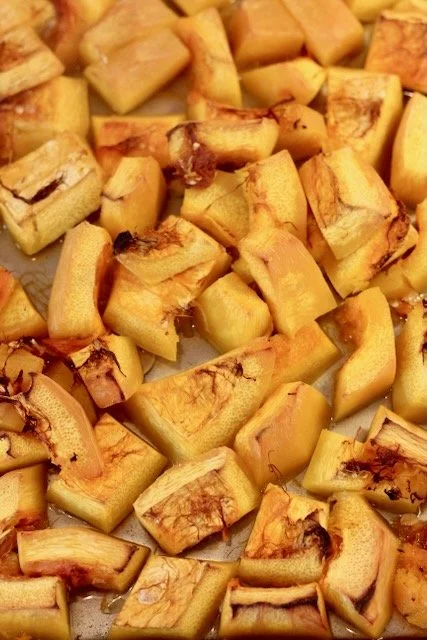
Rinse the pumpkin under cool water, rubbing off any dirt or mud that can be found on the skin. Pat dry. Cut the bottom of the pumpkin to make it stable.
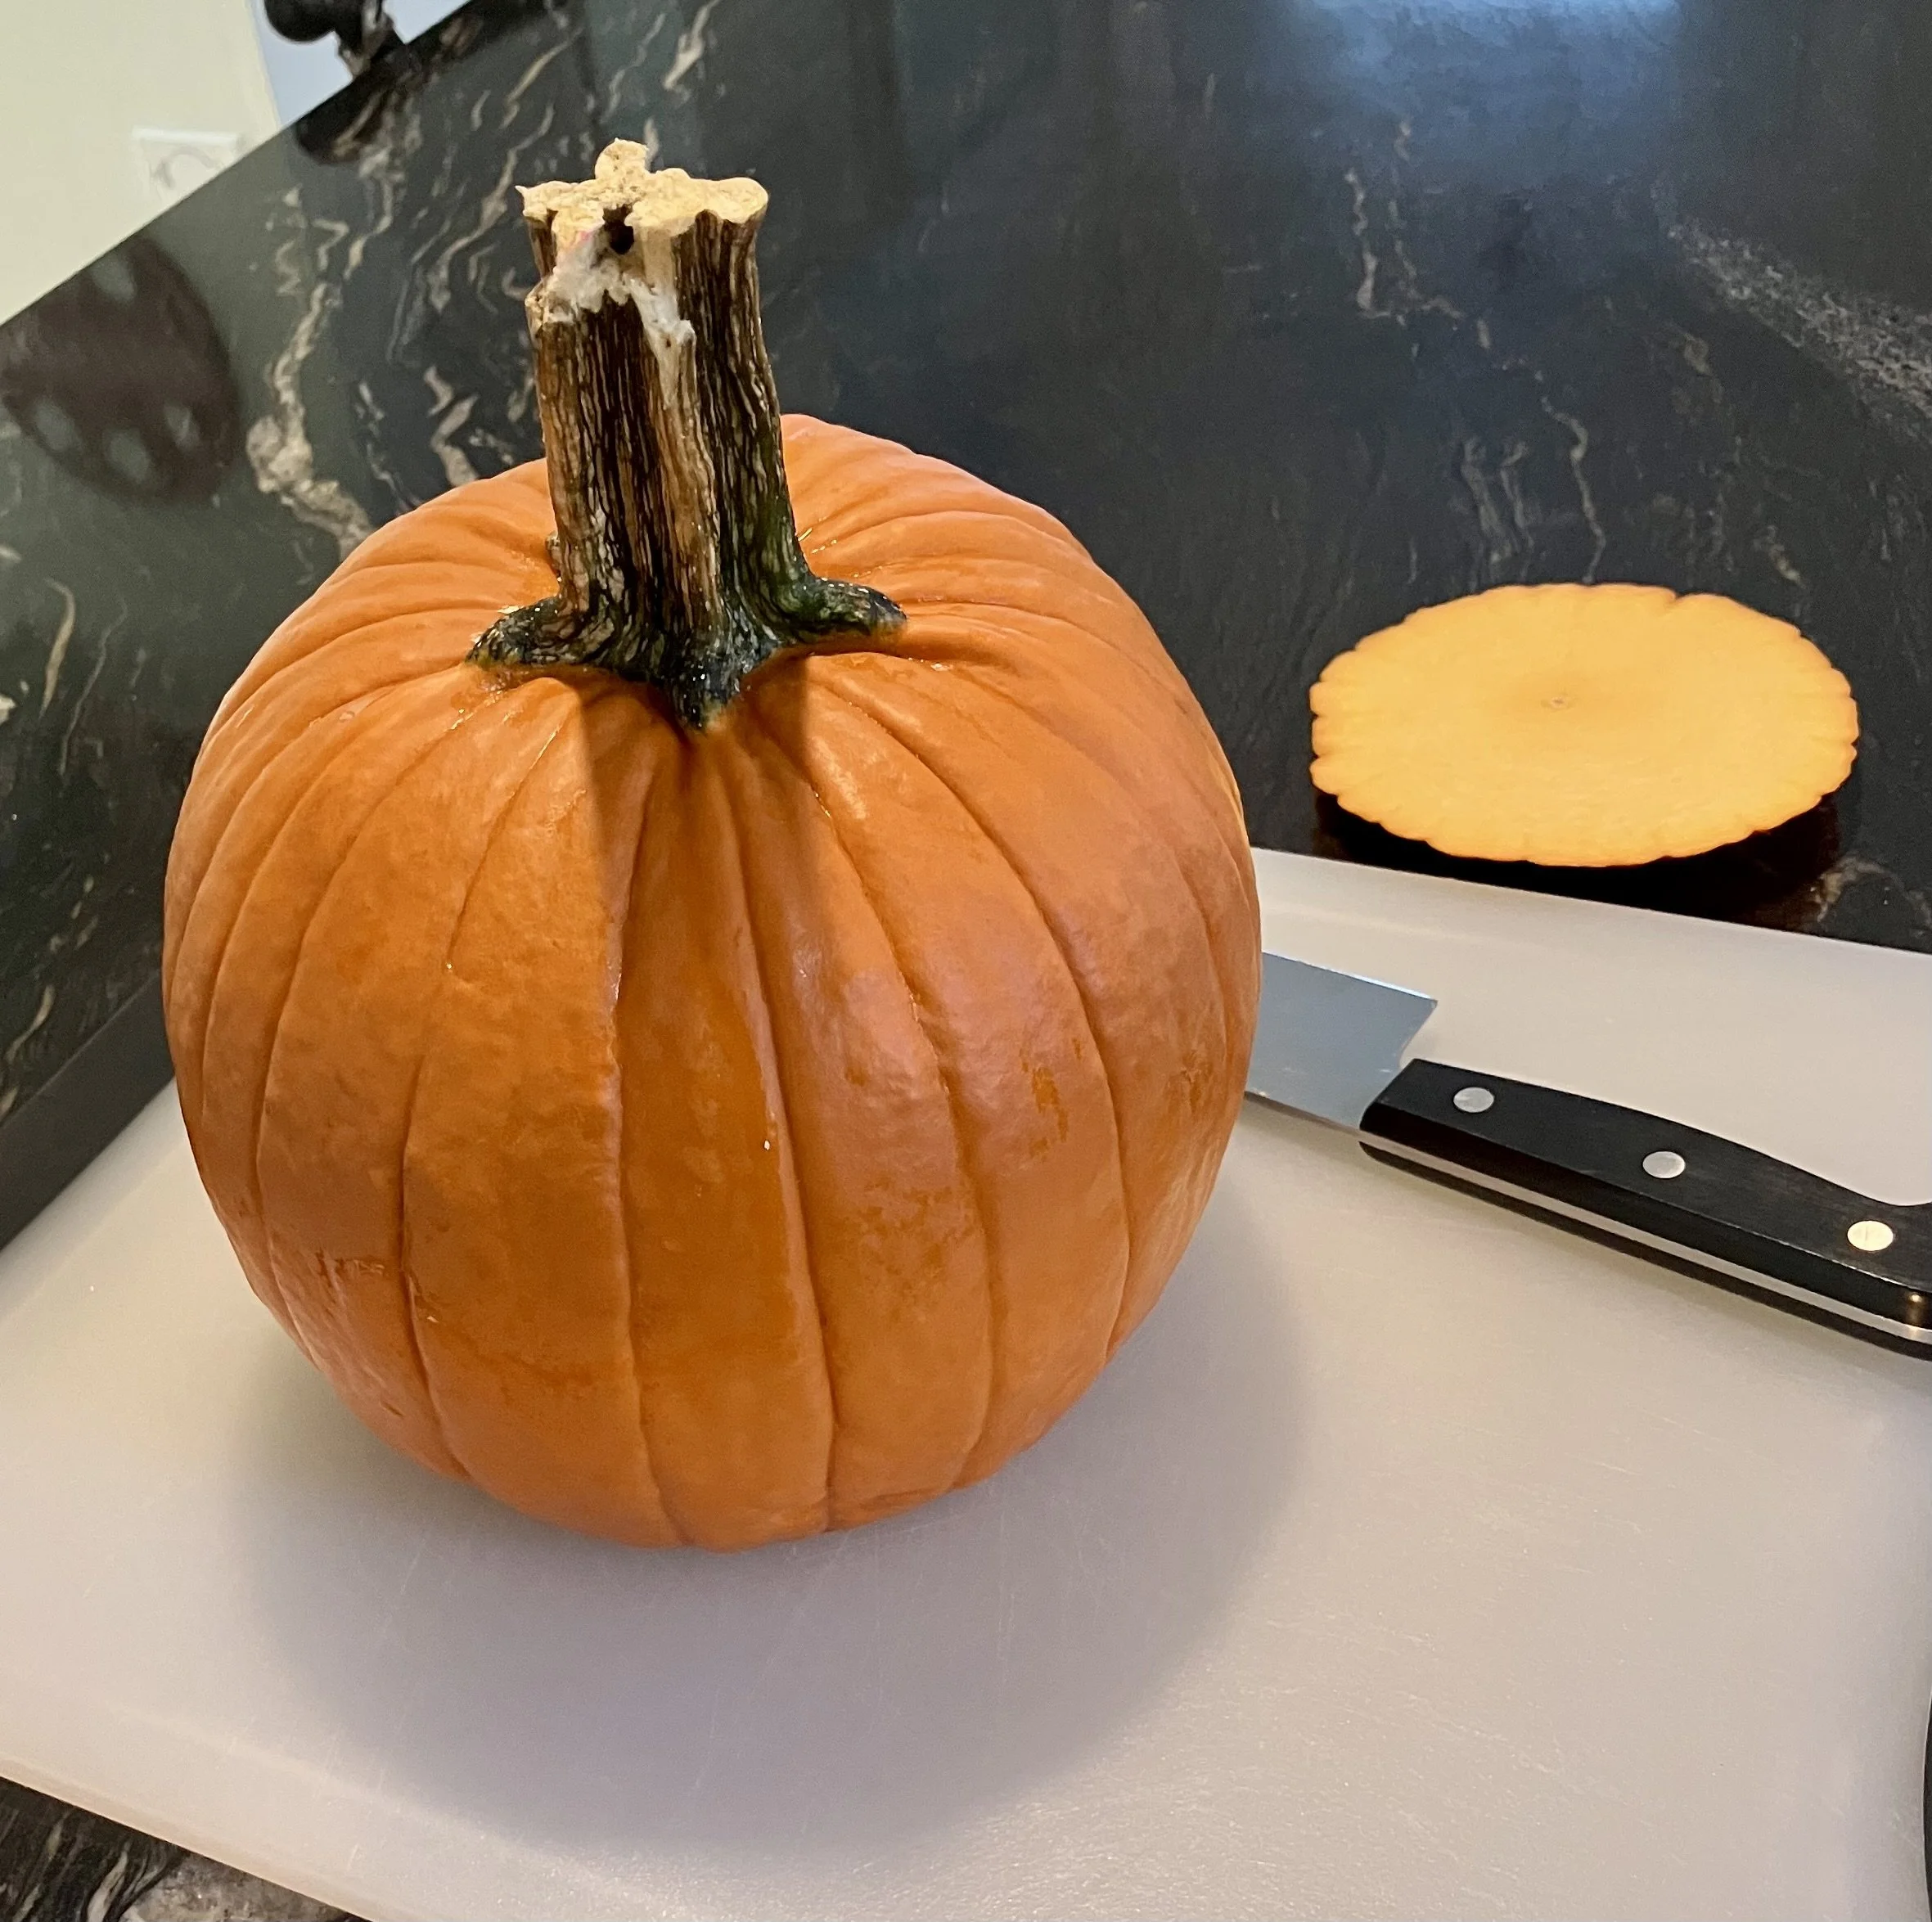
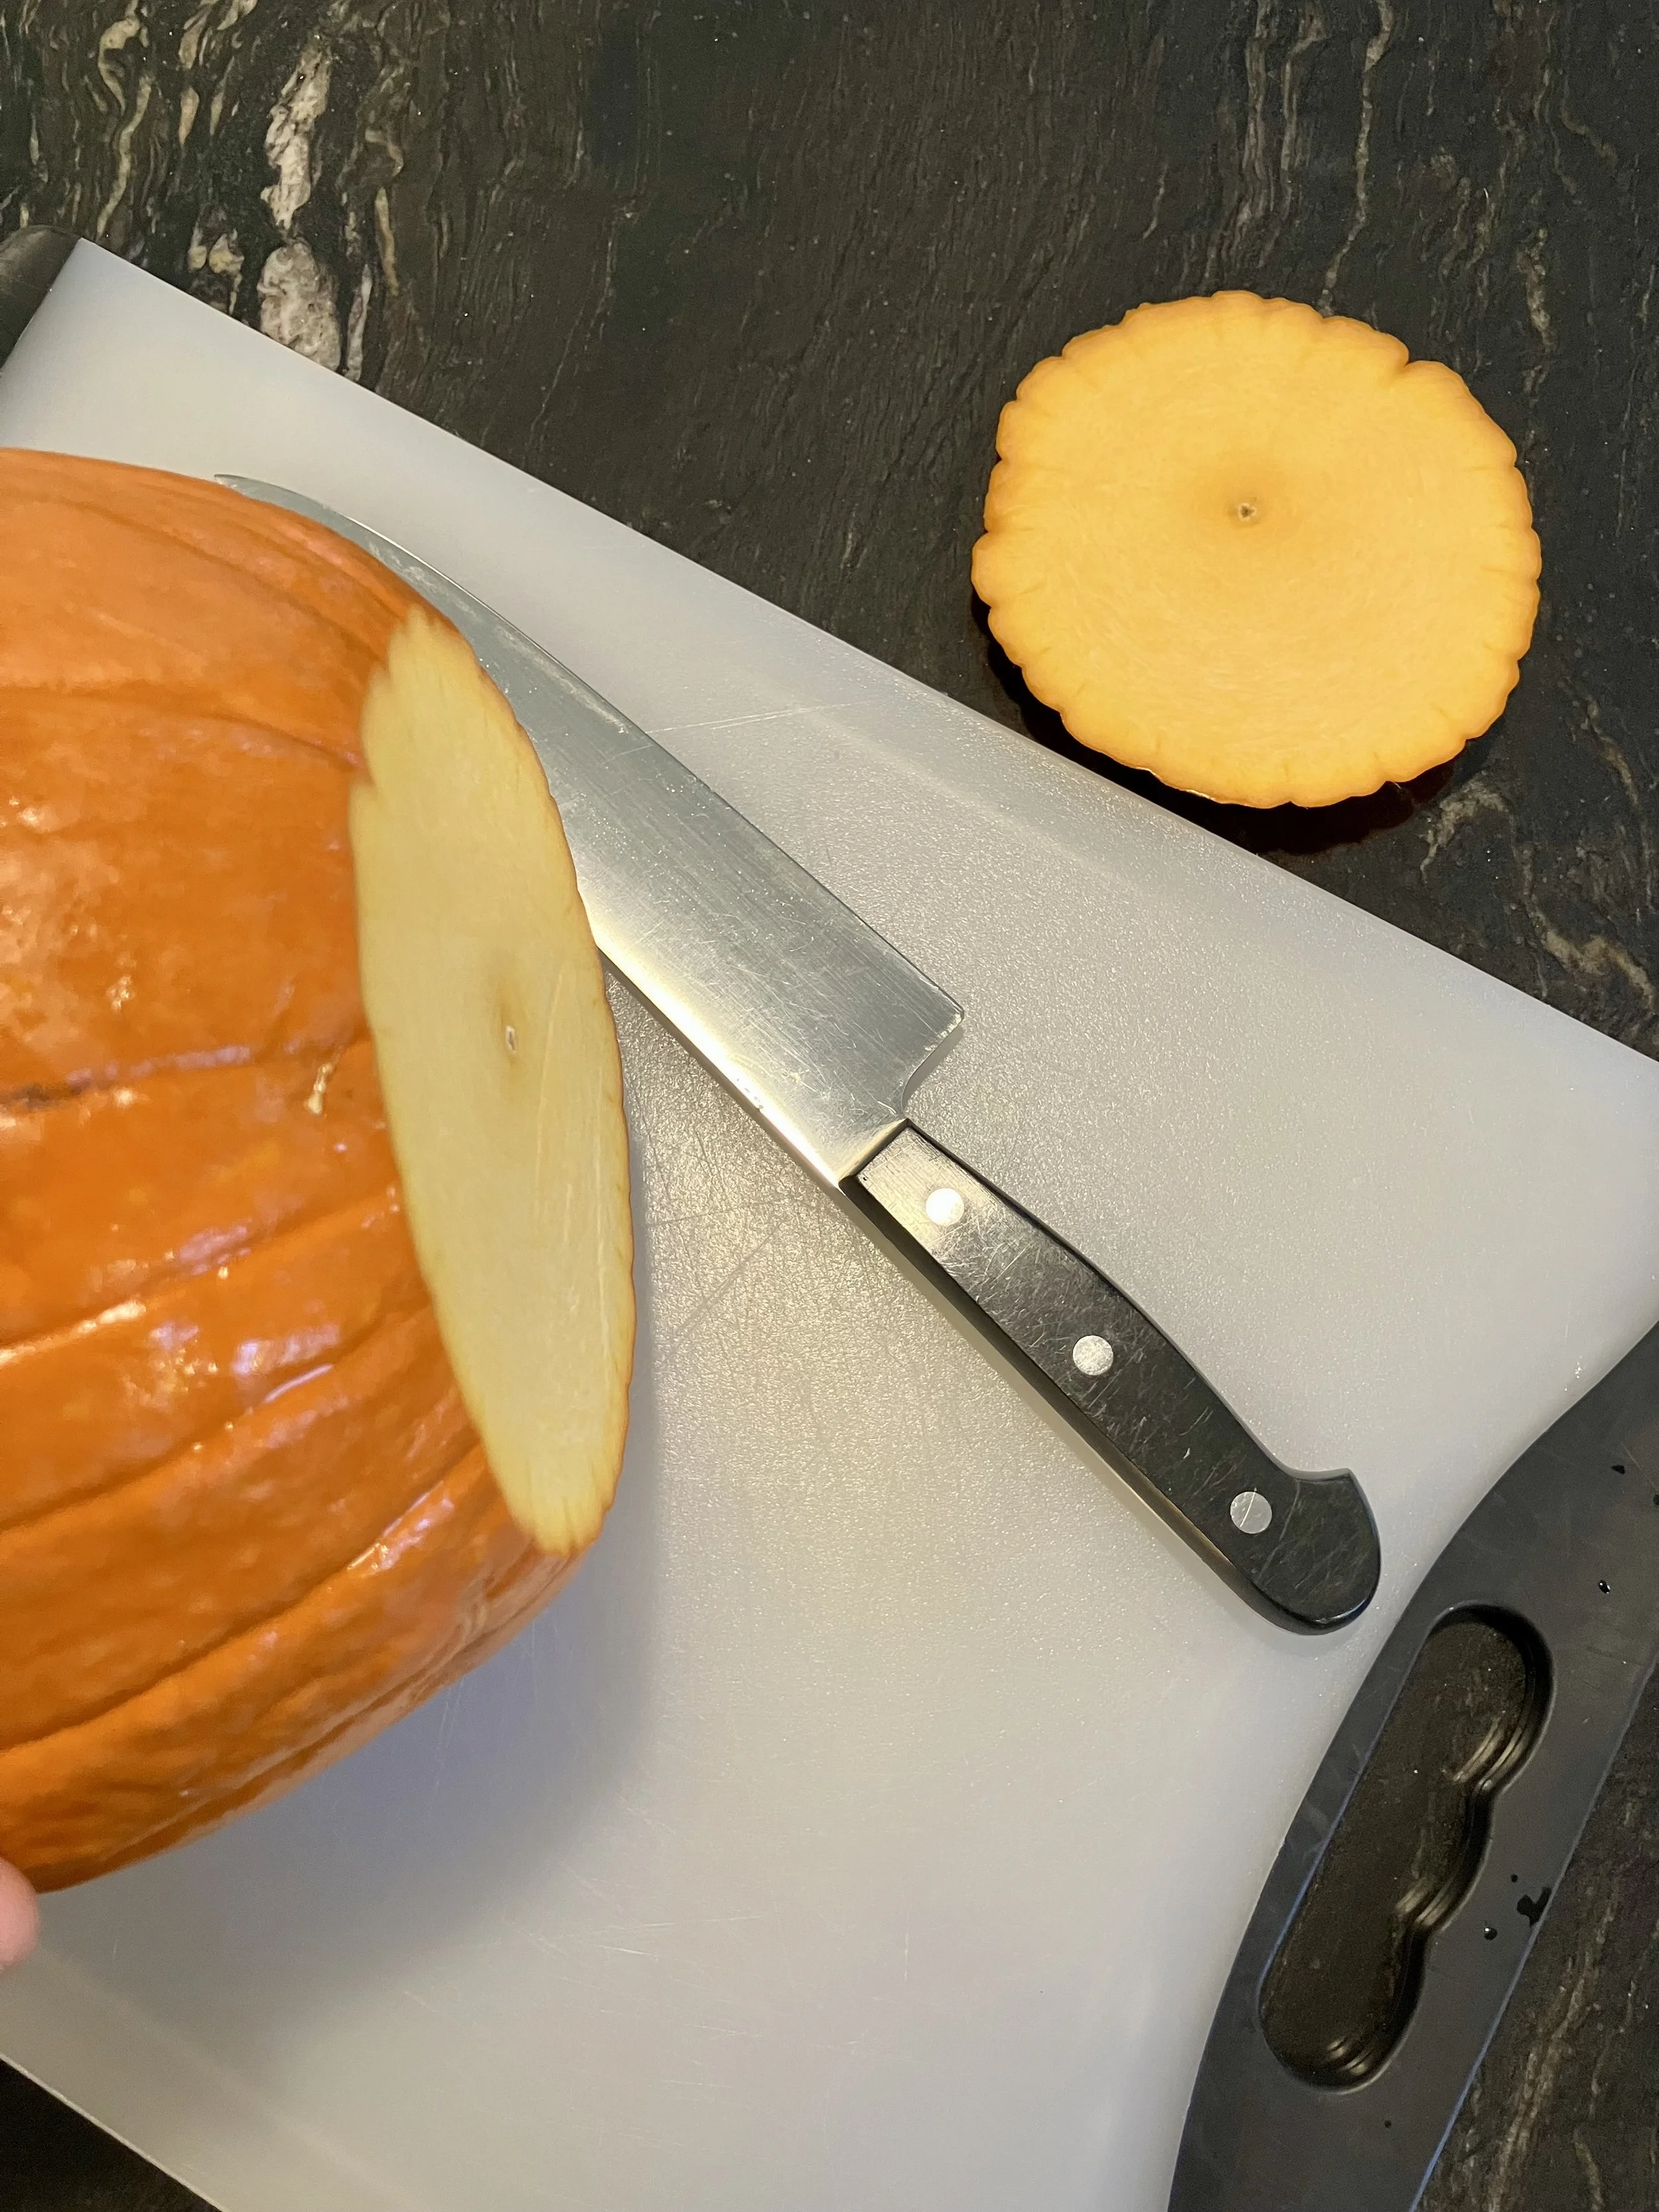
step 3: cut the pumpkin in half, scoop out the seeds
Using a knife, cut the pumpkin in half. Using a soup spoon, scoop out the seeds. Set aside to make Roasted Pumpin Seeds, if desired.
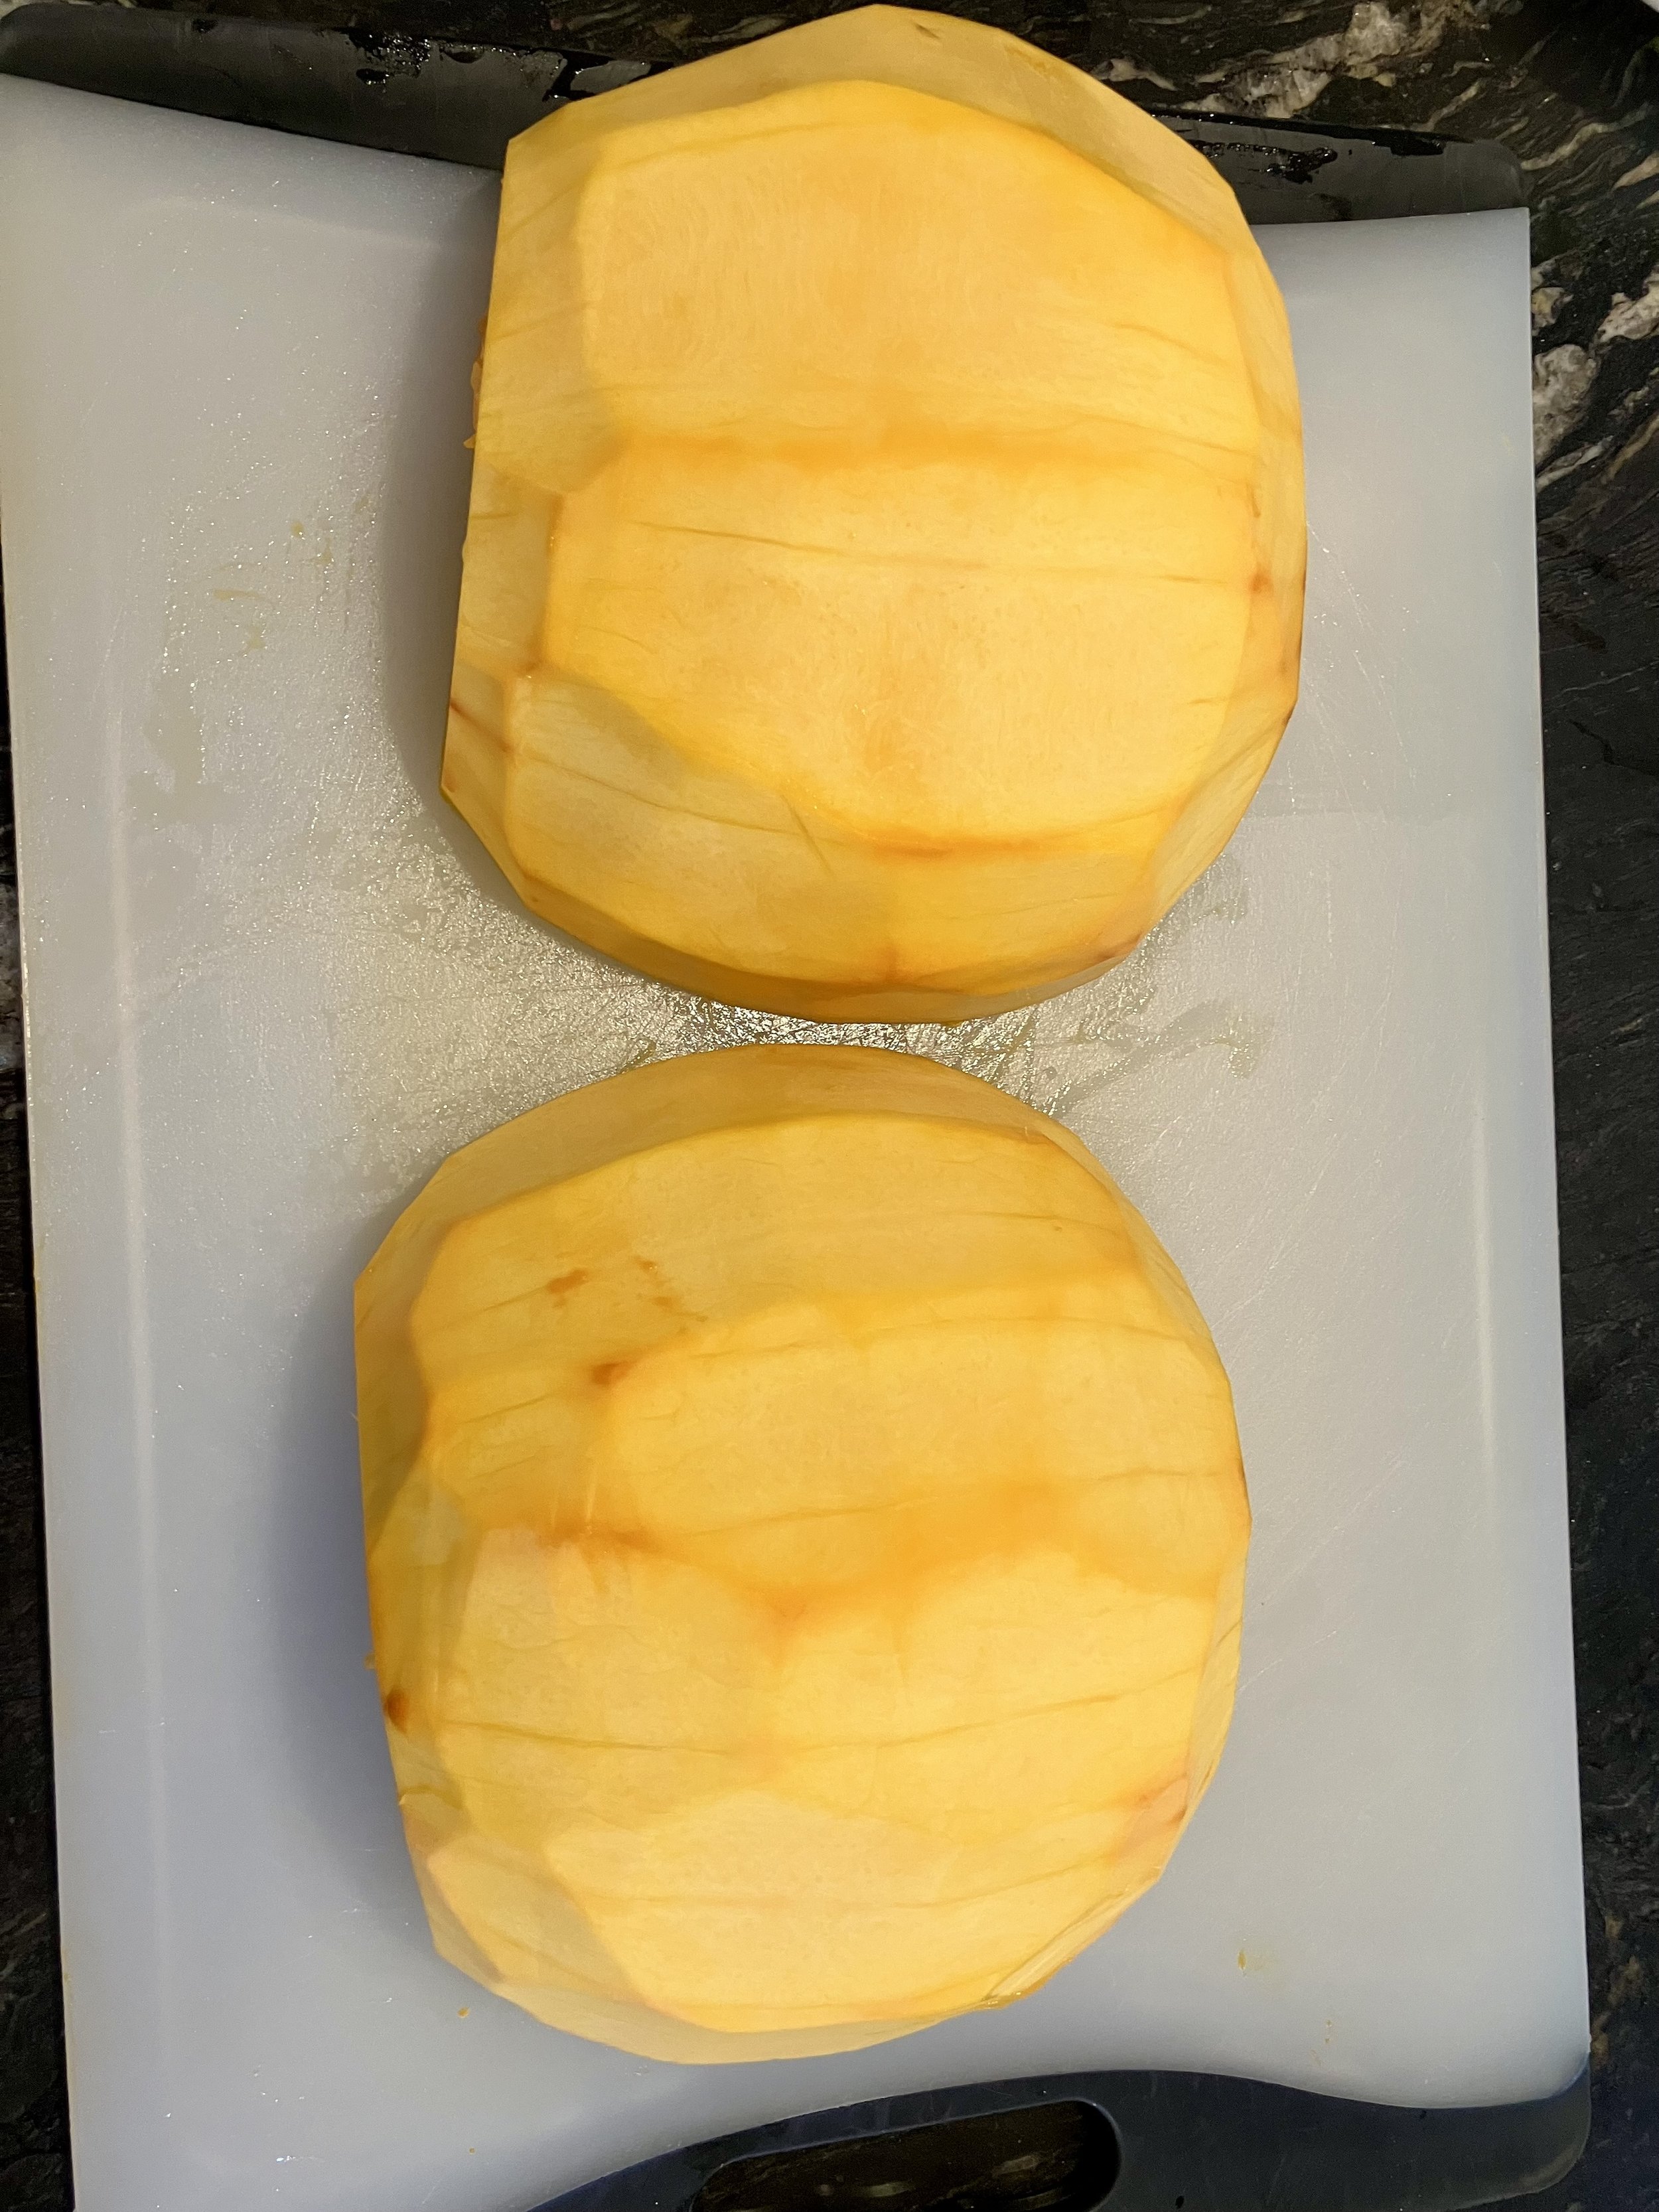
step 4: peel the skin
Place the pumpkin flat side down. Using a knife ( I recommend a chefs knife), remove the skin on both halves of the pumpkin.
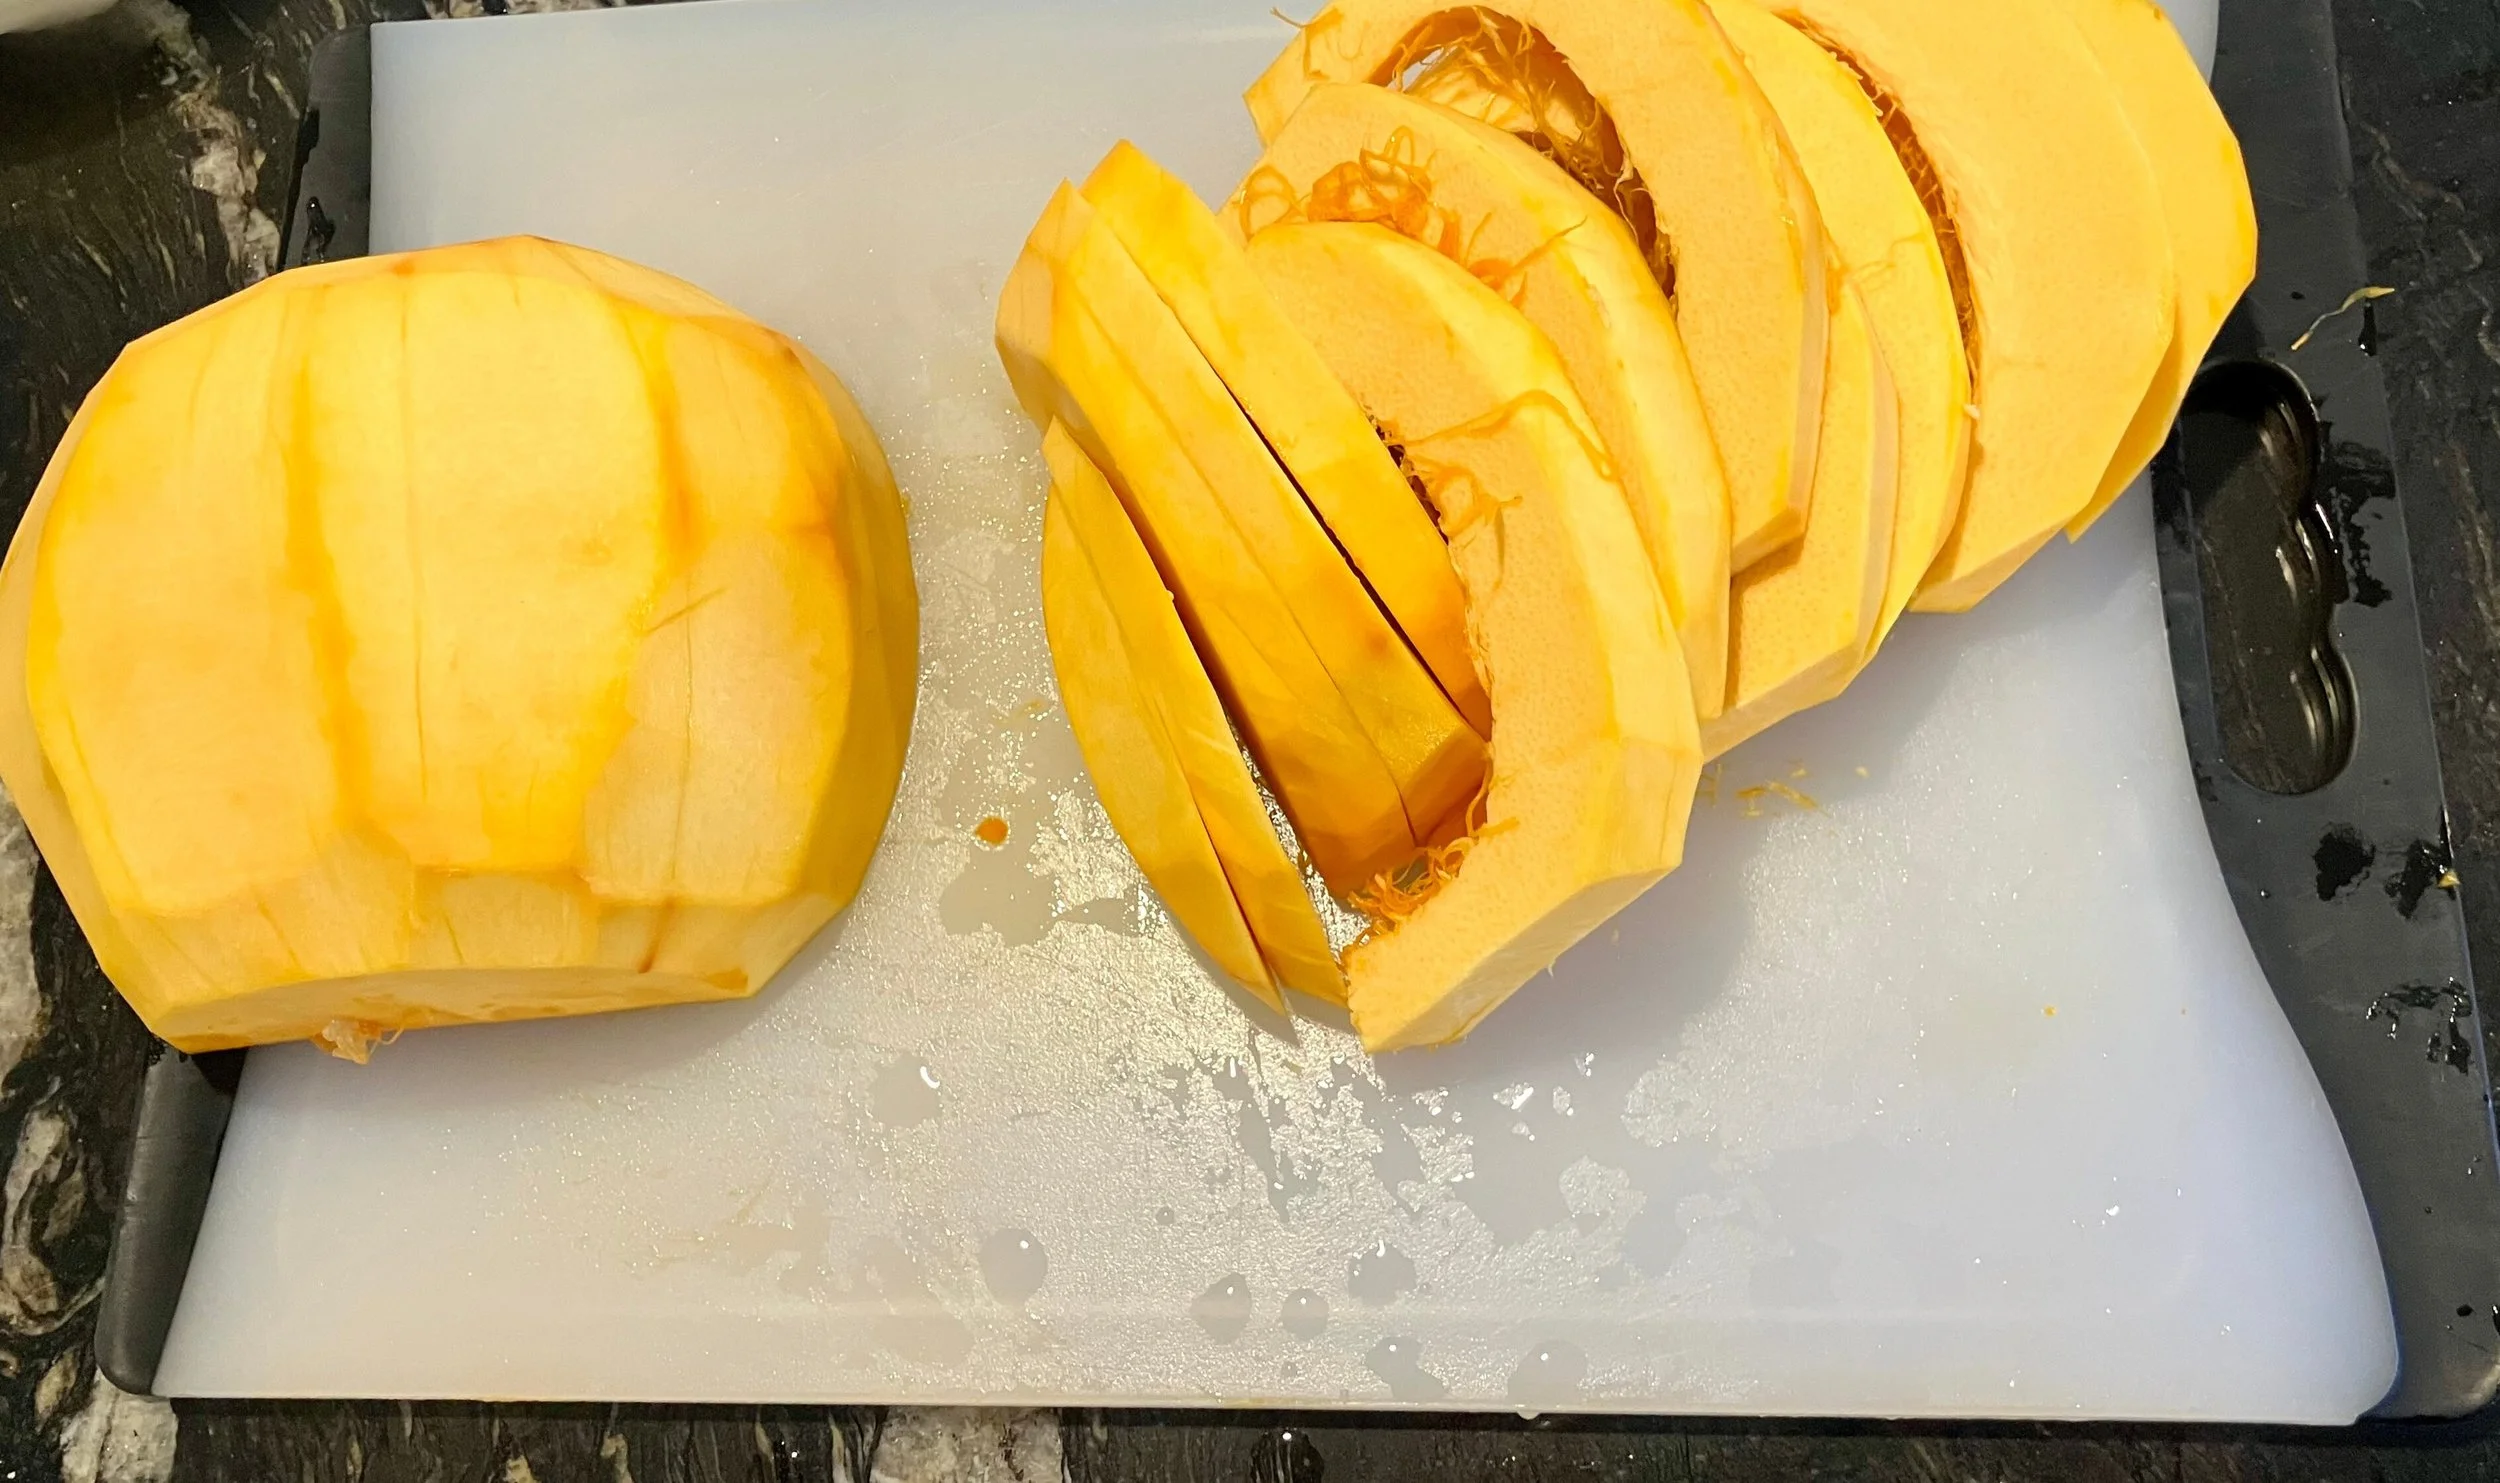
step 5: cut the pumpin into strips, then cubes
Cut the pumpkin into 2 inch (4.5 cm) strips, then cubes.
The ultimate budget friendly way to enjoy all of your favourite fall recipes!
step 6: add to a baking sheet with water
Add the raw pumpkin cubes to the baking sheet, and add 1 cup of water to the bottom of the pan. The water will steam the pumpkin cubes when baking in the oven.
step 7: bake
Place in the oven and bake for approx 30-45 minutes. Checking periodically to make sure that there still water at the bottom of the pan. Add a bit more, if it evaporates.

step 8: cool
The pumpkin cubes will be cooked when the pumpkin becomes a deep orange colour and edges become golden. To test, you should be to put a fork through them. Remove from the oven and let cool on a cooling rack (affiliate link) for at least 20 minutes.
step 9: blend
Once the pumpkin has cooled, add the cooked pumpkin to a blender or food processor and blend until smooth.

It’s so easy!
Storage
fridge:
keep this pumpkin puree in the fridge for up to 4 days.
Freezer:
Freeze in a freezer-safe bag or container for up to 3 months. I highly recommend pre-portion in 1 cup portions before freezing.
Frequently Asked Questions
can I use a carving pumpkin instead of a sugar pumpkin?
Yes! I’ve used this same technique for carving pumpkins as sugar pumpkins and got a similar result. The carving pumpkin is much larger than a sugar pumpkin so it will produce more puree. you might need to add a bit more water to the bottom of the pan when baking.
Pro Tip: Be sure to check you have enough baking sheets, storage bags or containers and storage room if using a carving pumpkin.
how much time does it take to make pumpkin purée?
Start to finish, the process takes 1-2 hours. I usually chose to make mine during a rainy, grey fall afternoon, when I know we will be home, and take advantage of that time to prepare a few fall snacks and meals at the time.
Can I freeze homemade pumpkin purée?
Yes! Pumpkin puree freezes really well, and can be frozen for up to 3 months. I usually pre-portion my pumpkin purée in 1 cup portions in freezer safe bags so I can easily pull out and thaw based on the amount I need for my recipes.
How do I thaw out pumpkin purée?
I recommend to pull it out of the freezer and put it in the fridge the night before you need it. If it’s still frozen the next day, submerge the bag in cold water, and use once thawed.
How long does homemade pumpkin purée last in the fridge?
Store it in the fridge for up to 4 days. This pumpkin puree doesn’t contain preservatives, so I recommend you use them sooner than later.
Pumpkin puree, perfect for all your pumpkin recipes!
other pumpkin recipes:
Recipe Card
Ingredients:
1 pumpkin, I like using a sugar pumpkin
A little bit of water at the bottom of the pan
Instructions:
Pre-heat the oven to 350F.
Cut the pumpkin, and remove the skin.
Put the raw pumpkin on a baking sheet. Add water to the bottom of the pan so the entire bottom of the pan is filled with water.
Put it in the oven for 30-45 minutes until golden brown
Let cool and blend until puree.
Enjoy!
Did you make this recipe? I want to see it!
Leave a picture and a ⭐ star rating and comment below to let us know how your muffins turned out. Did you make any substitutions or additions? Share your tips and photos with us!
Share this recipe: Help others discover this delicious recipe by sharing it on Pinterest, Facebook, or Instagram. Tag us @Sageandsimplicity so we can see your beautiful creations!
📌 Pin it for later: Save this recipe to your Pinterest boards for easy access.
you might also like:
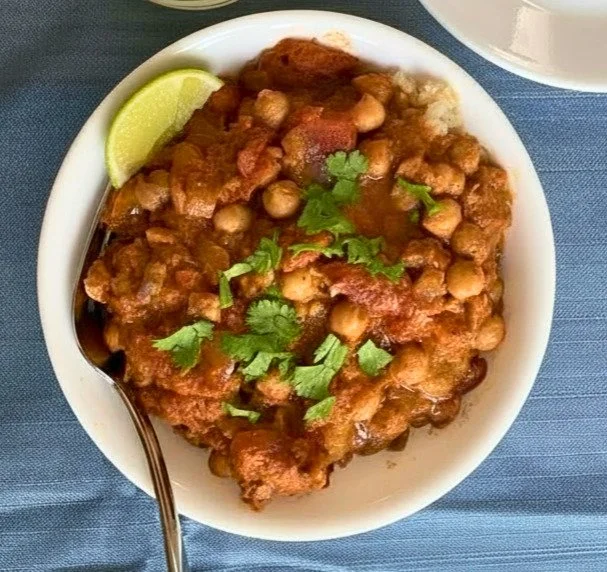


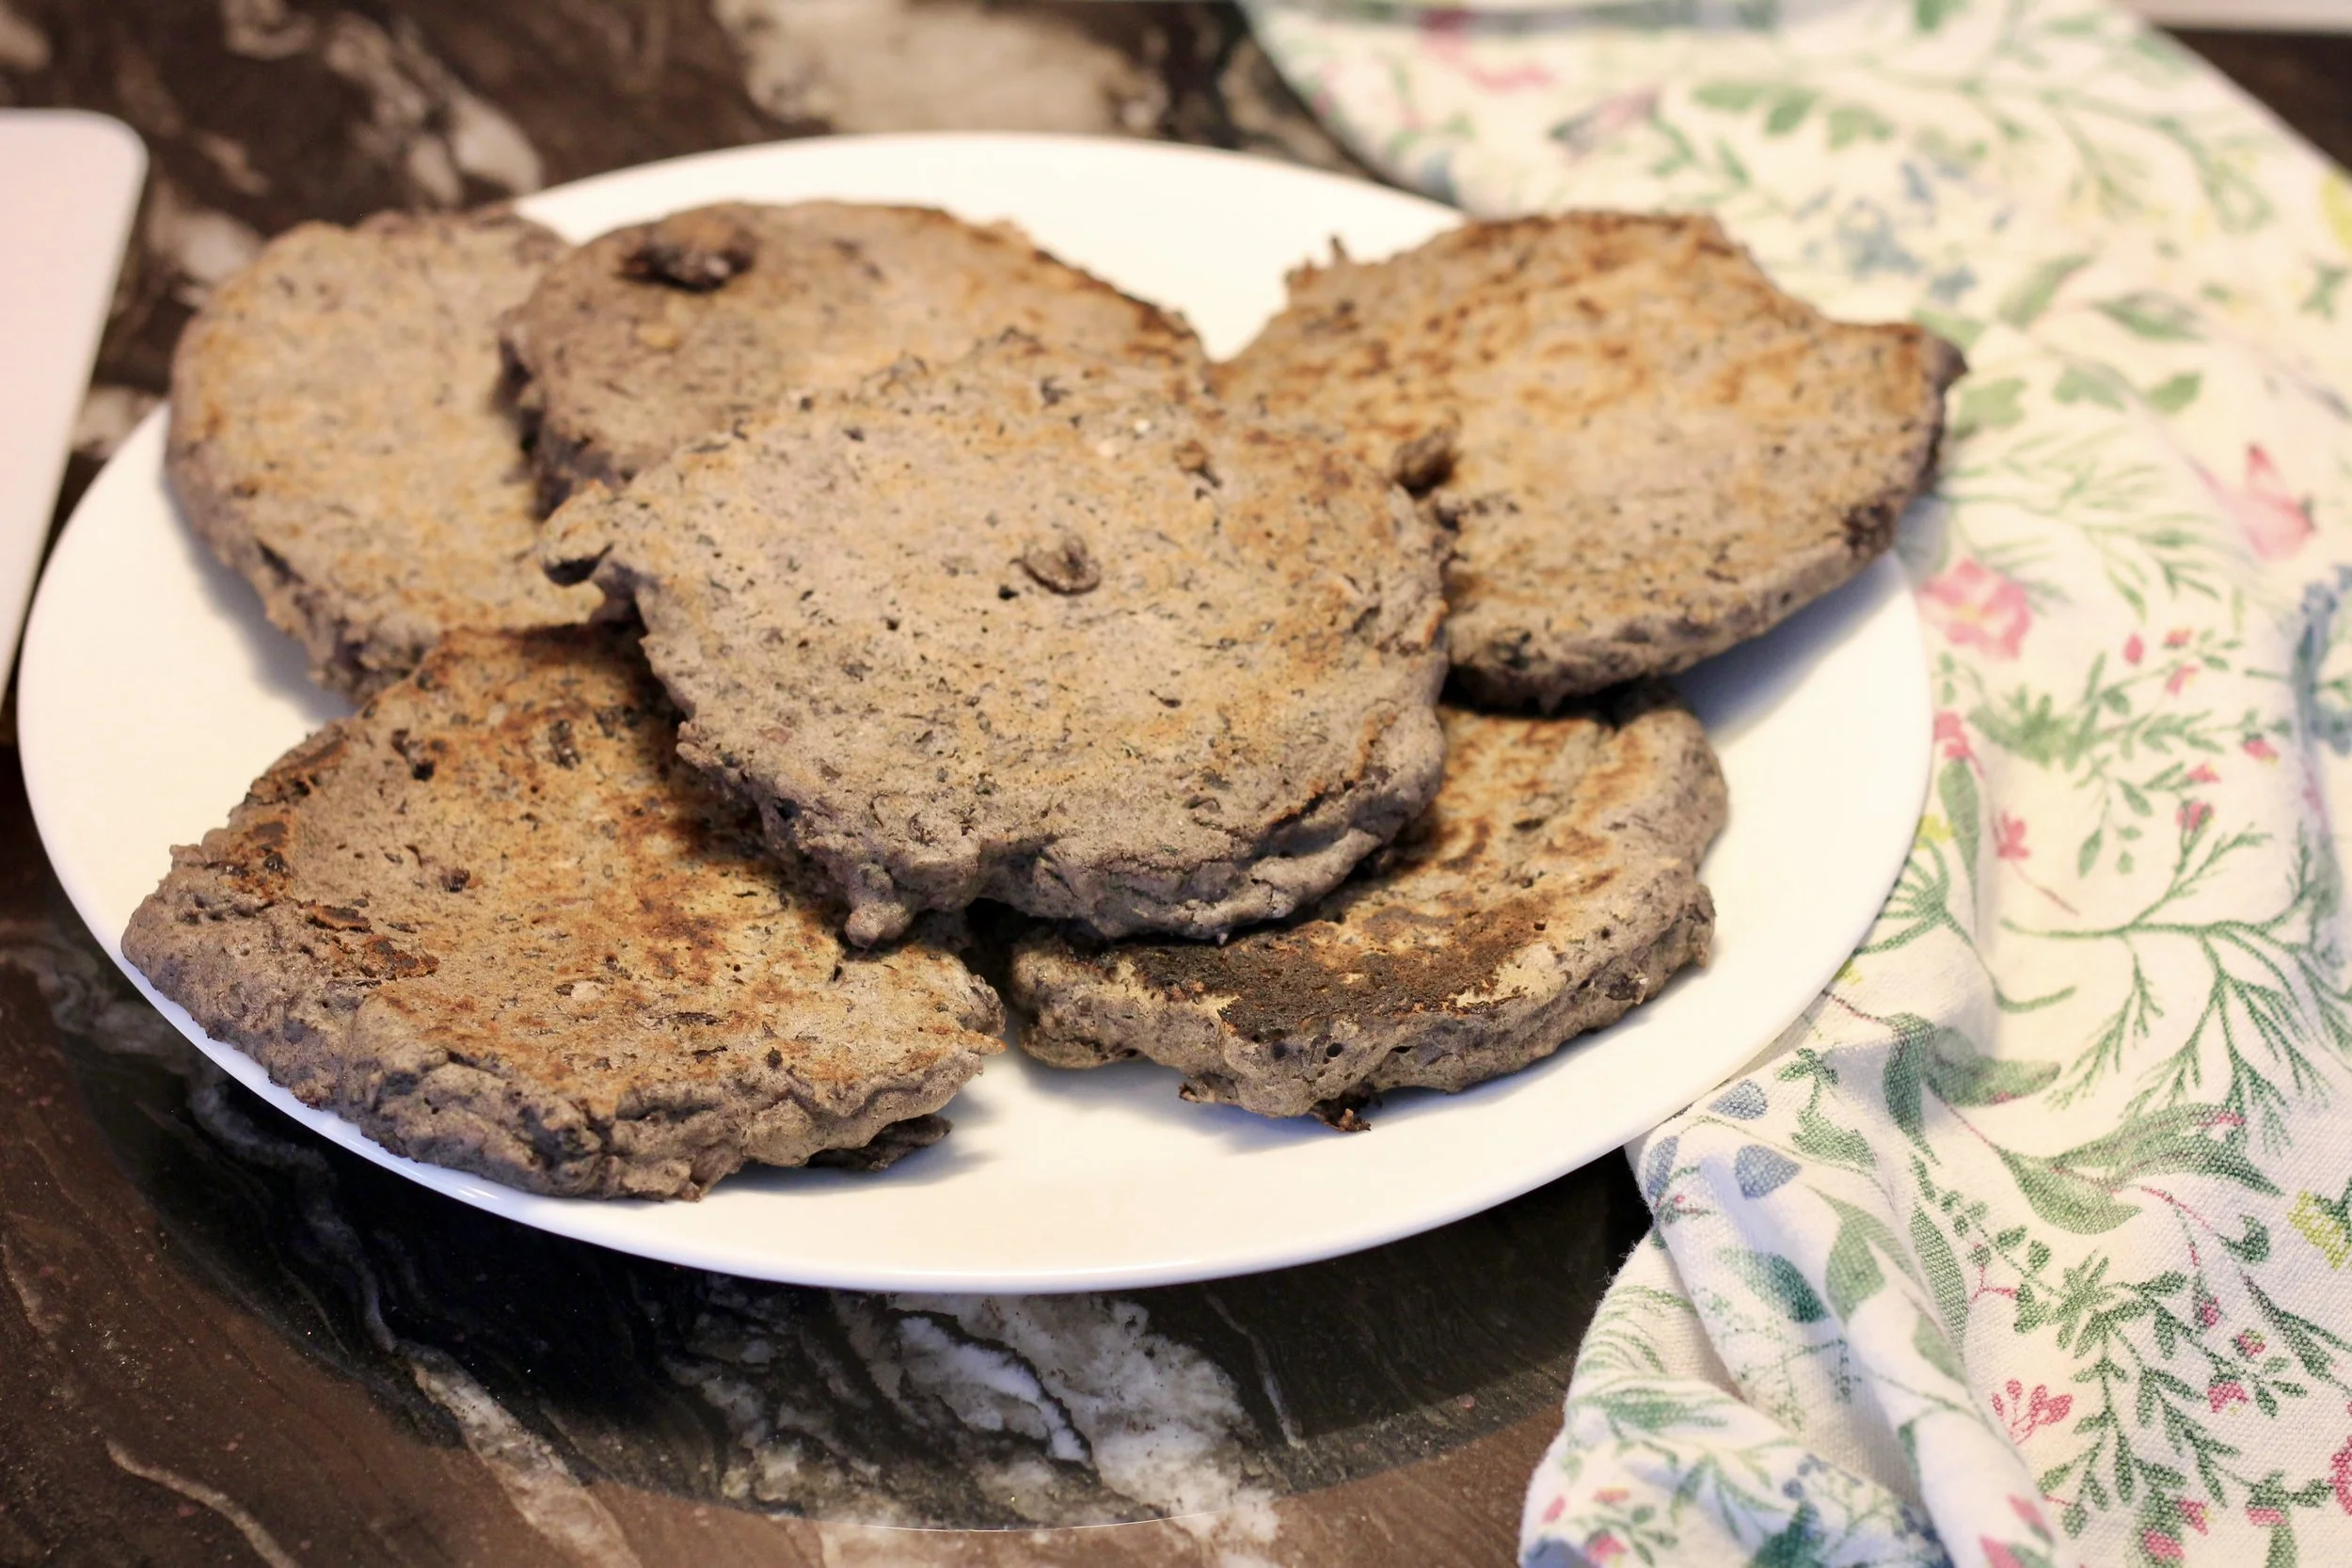
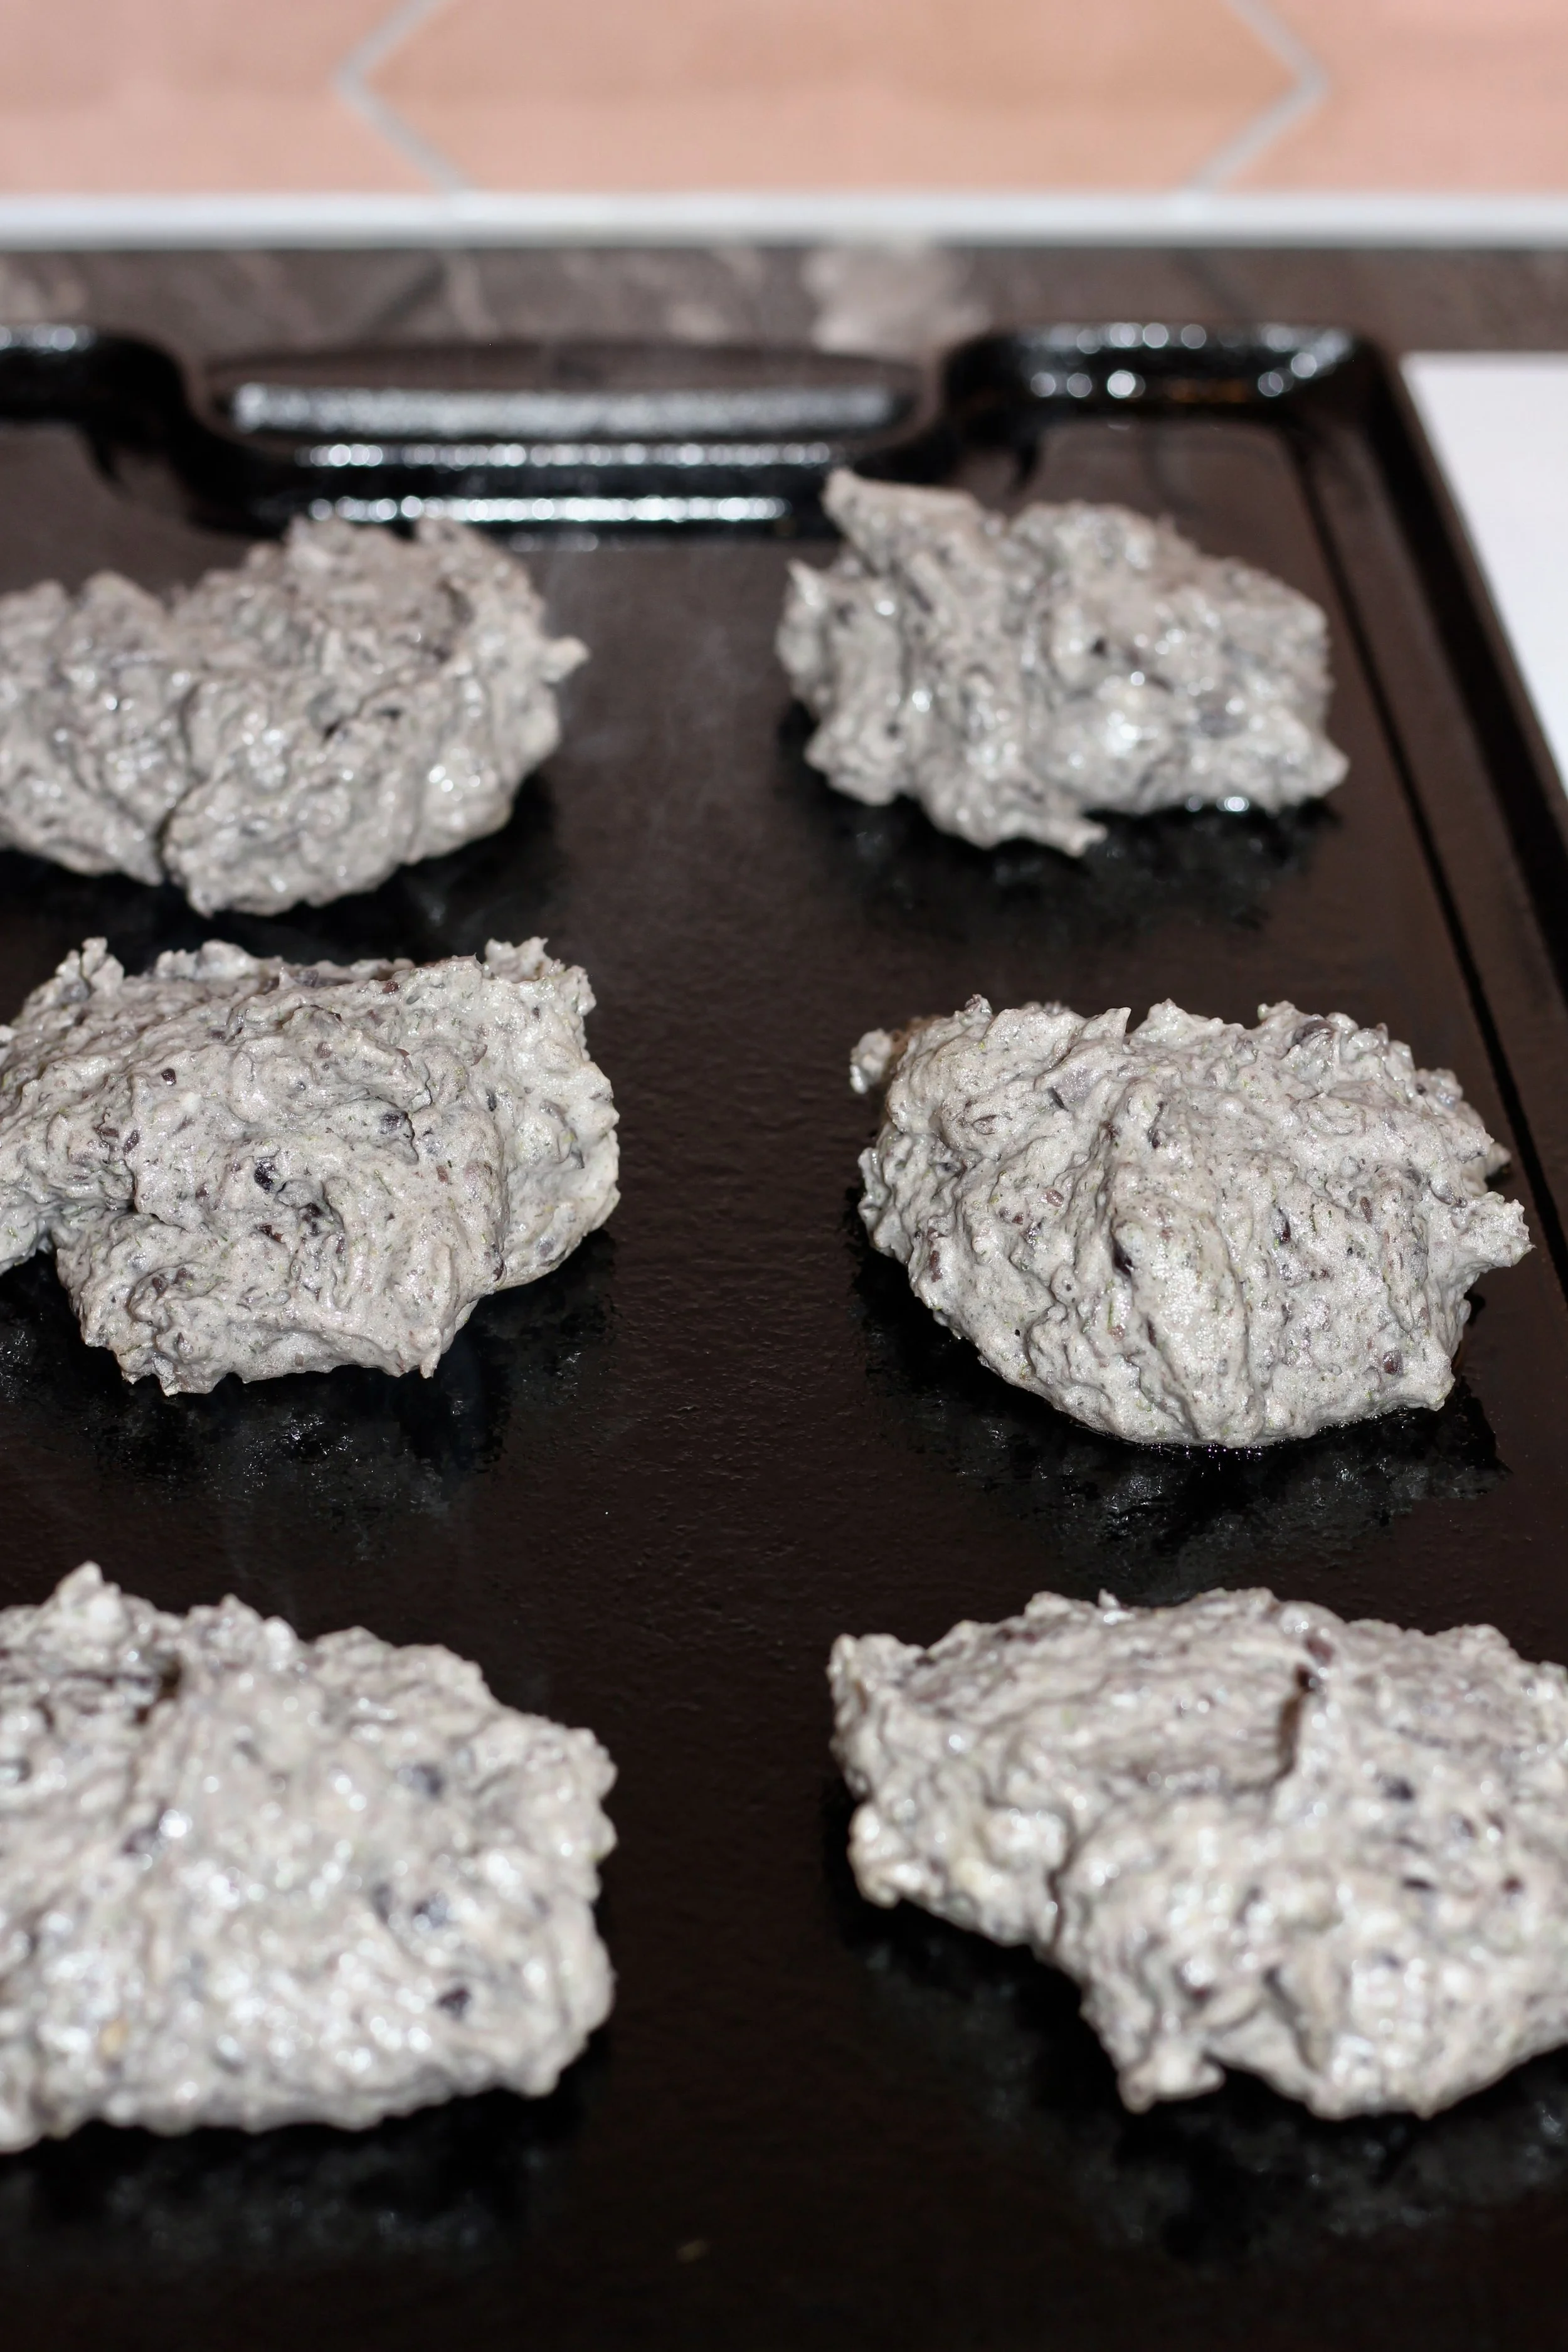
Black Bean Patties
Black bean burgers

These simple patties take no time to put together, are budget friendly and freeze beautifully. Win-win-win!
If you’ve been searching for a delicious, nourishing meal that’s as easy on your wallet as it is on your schedule, these Black Bean Patties are about to become your new weeknight hero. Packed with simple, recognizable ingredients, they’re proof that real food doesn’t have to be complicated to taste incredible. Whether you’re feeding a crowd or just looking for something quick and satisfying, these patties deliver hearty flavour in every bite.
One of the best things about these black bean patties is how wholesome they truly are. Made with black beans, flour, herbs, and eggs, they rely entirely on whole-food ingredients you already know and trust. No fillers, no mystery components—just real, nourishing foods that leave you feeling good long after the meal is over. It’s comfort food with a clean, feel-good twist.
And let’s talk budget friendliness. Beans are one of the most affordable protein sources out there, which makes these patties a smart choice for families looking to stretch their grocery dollars without sacrificing flavour or nutrition. A single batch can feed several people, and the ingredients are pantry staples you can keep on hand at all times. A delicious dinner or lunch that’s also kind to your budget? Yes, please.
Another major bonus: these patties freeze beautifully. Make a double—or even triple—batch on the weekend, and stash them away for busy days. Making them the ultimate grab-and-go meal for school lunches, workdays, or those evenings when cooking feels like a big ask. Freezer meals have never tasted this fresh.
Best of all, kids absolutely love them. Their mild, savoury flavour pairs well with everything from melted cheese, and the soft interior is perfect for little eaters. Serve them on hamburger buns, cut-up over rice, or tucked into a wrap, and watch how quickly they disappear. When a recipe is wholesome, affordable, freezer-friendly, and kid-approved, you know you’ve found a winner—and these black bean patties check every box.
other vegetarian recipes:

Here’s the recipe!
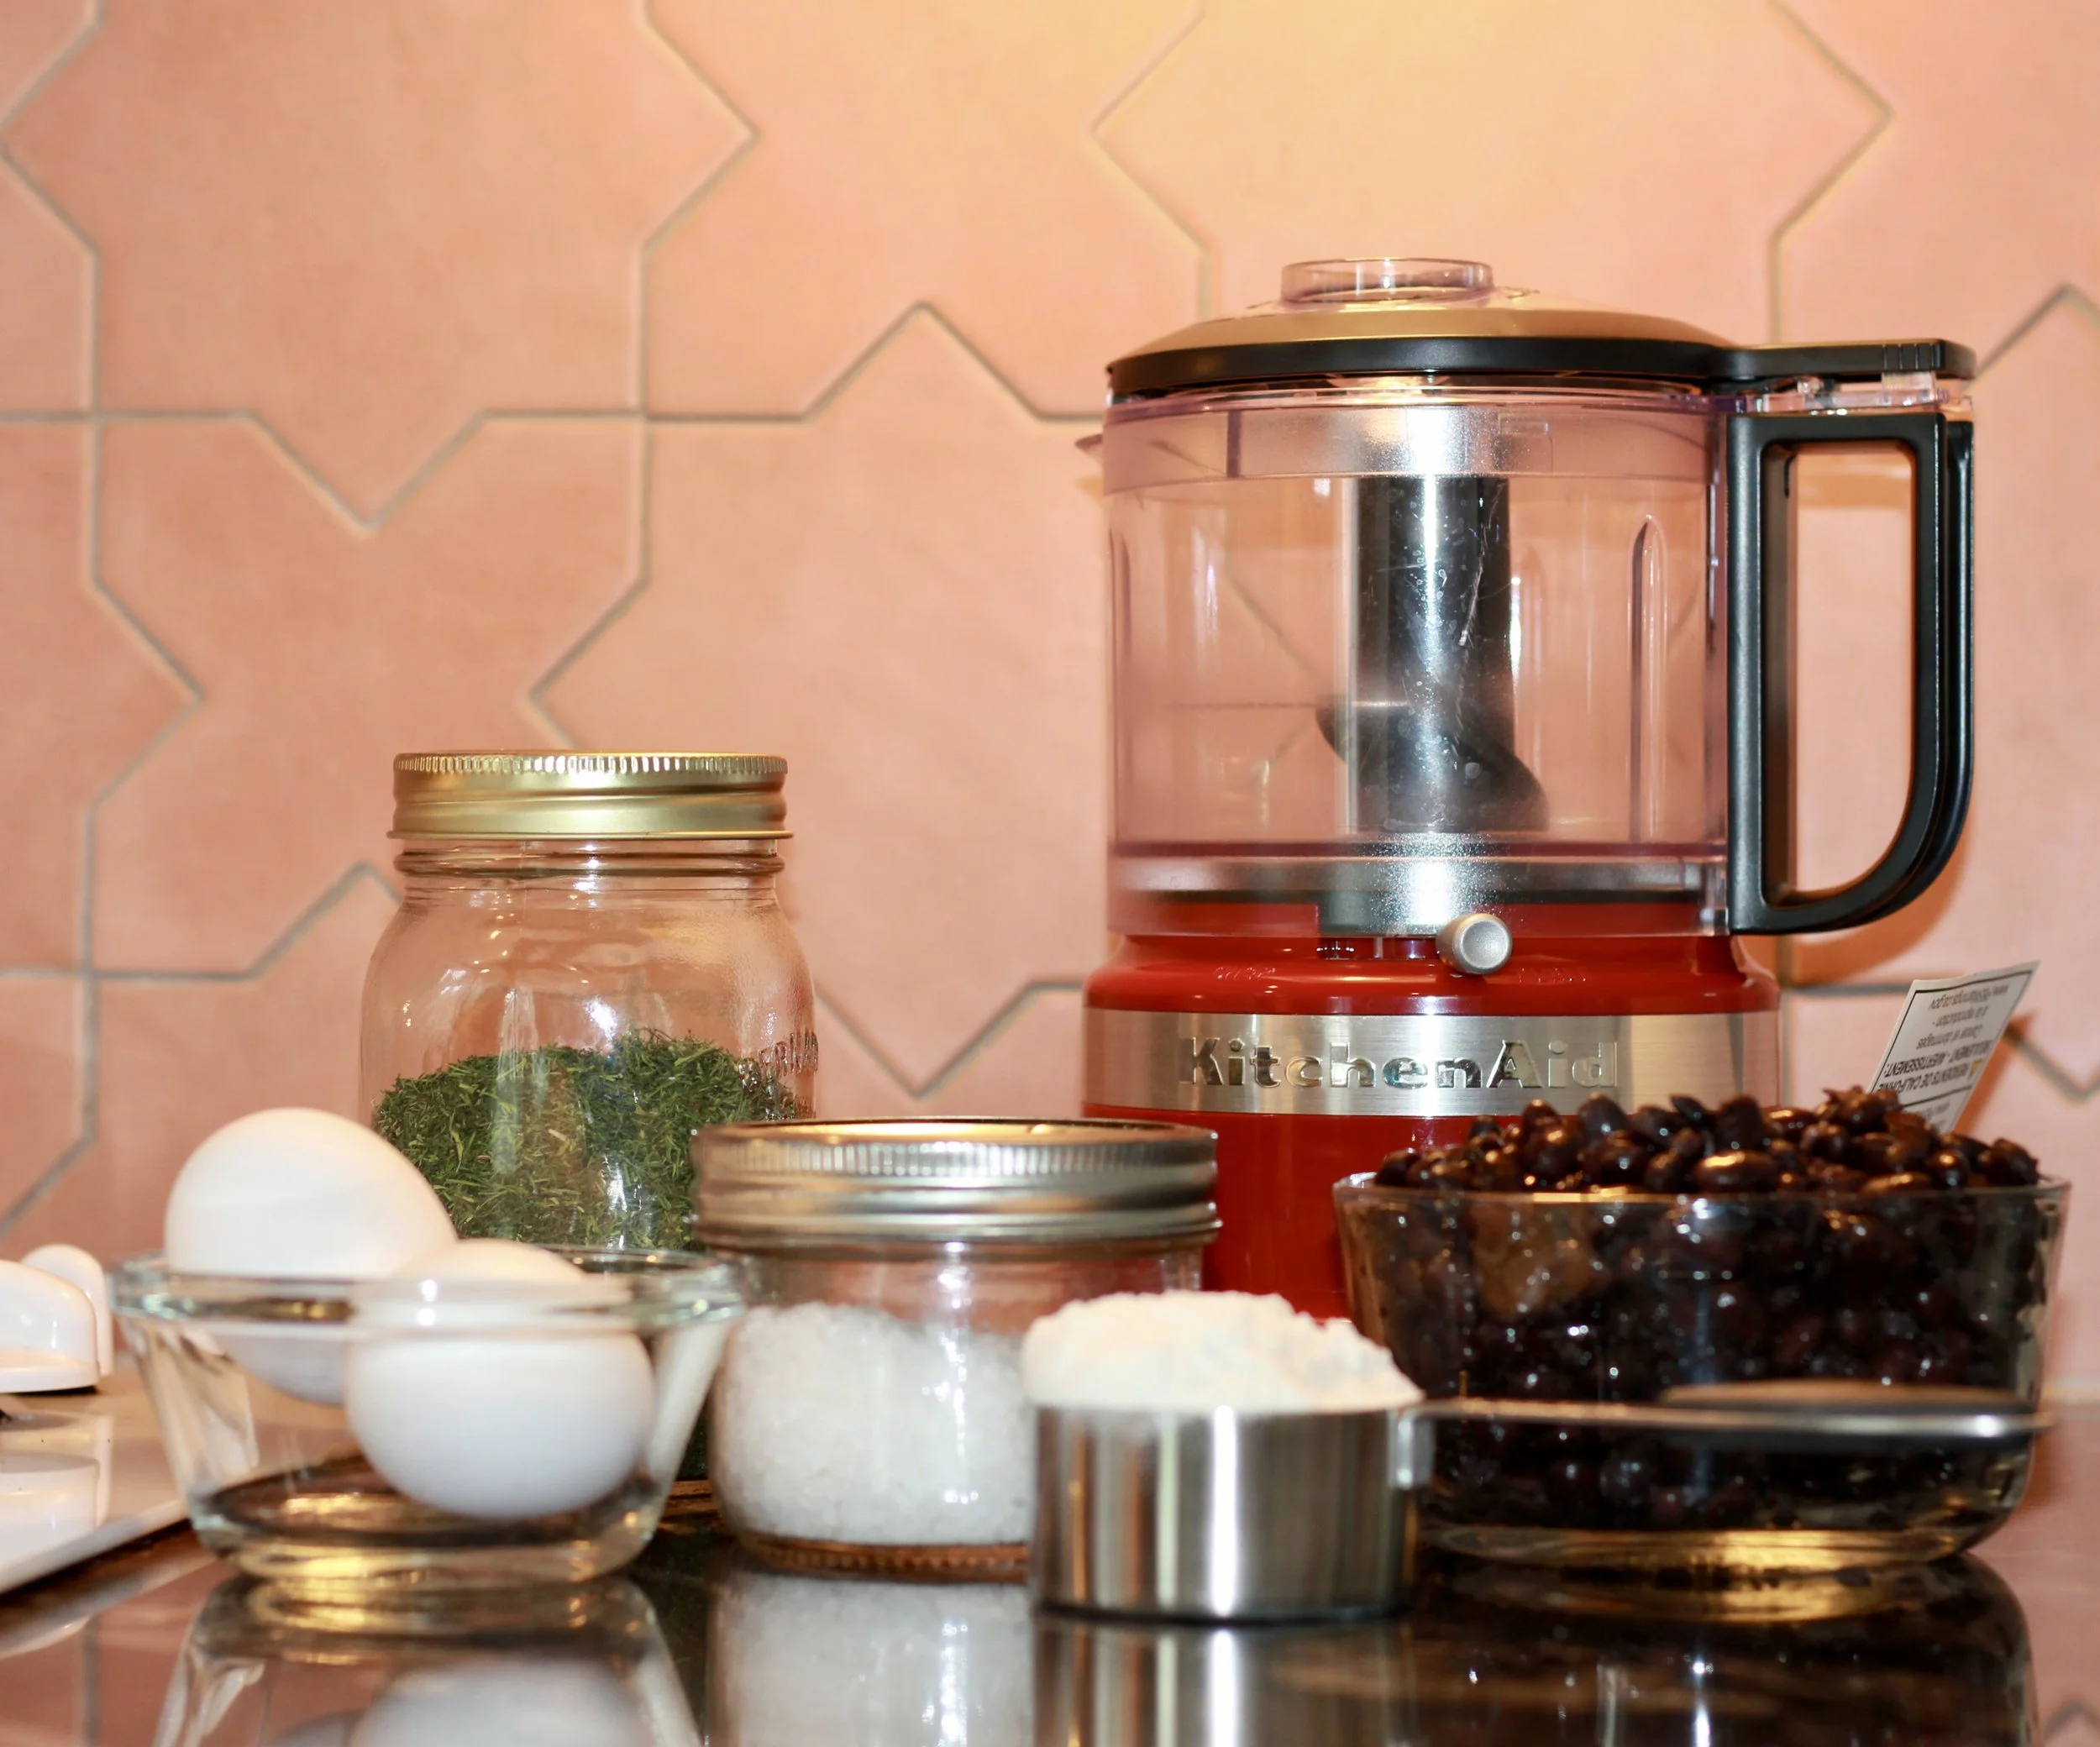
Ingredients:
2 eggs, (flax-egg work too, if you’d like take make these vegan.)
1 cup of black beans
1/2 cup all purpose flour
2 tsp dill, fresh or dried
1 tsp salt, I like using kosher salt
1 tsp garlic powder
Optional: 1 tbsp balsamic vinegar
Instructions:
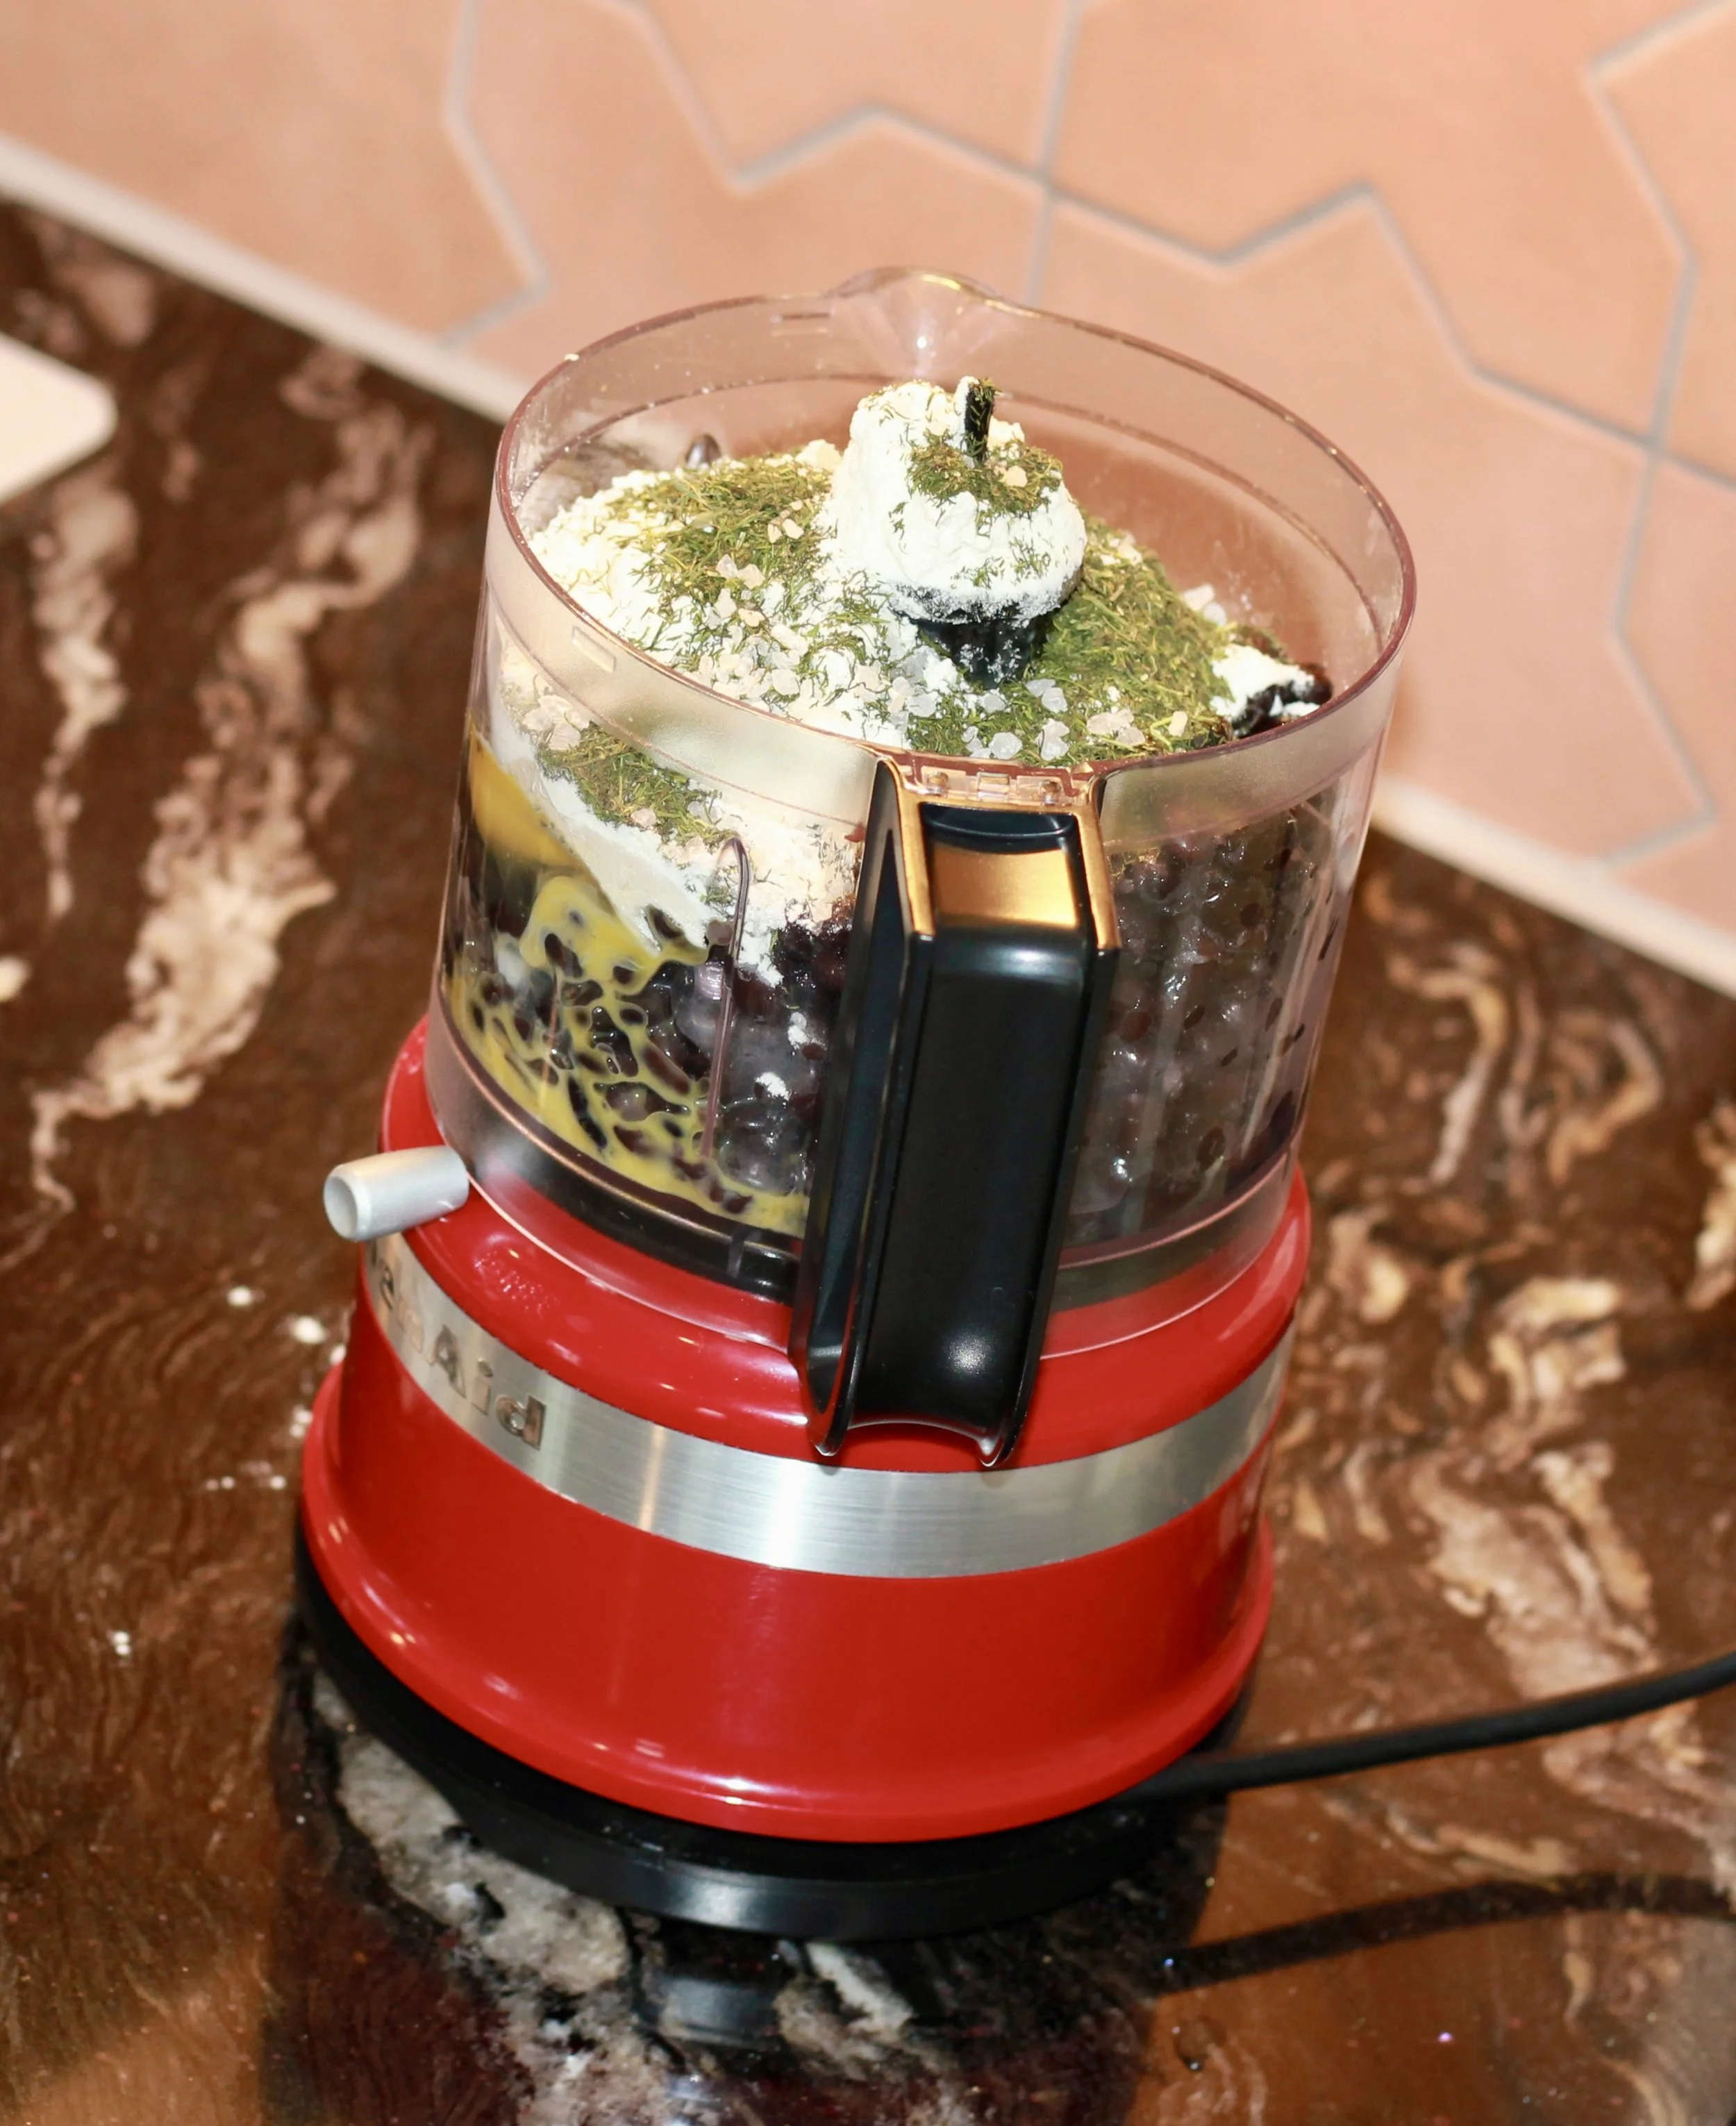
In a food processor, add all ingredients in the listed order, Mix well.
Put mixture in the fridge and let it rest a minimum of 30 minutes.
Cook in a lightly oiled frying pan on the stovetop over medium heat. using a soup spoon, scoop one spoonful of the mixture. Flip the patty when the bottom side is cooked. flatten the burger, and cook the opposite side. flip once more top make sure the burger is fully cooked throughout.
Serve on a burger bun with toppings you like, or with barley or rice.


did you make this recipe? I want to see it!
Leave a picture and a ⭐ star rating and comment below to let us know how your muffins turned out. Did you make any substitutions or additions? Share your tips and photos with us!
Share this recipe: Help others discover this delicious recipe by sharing it on Pinterest, Facebook, or Instagram. Tag us @Sageandsimplicity so we can see your beautiful creations!
📌 Pin it for later: Save this recipe to your Pinterest boards for easy access.