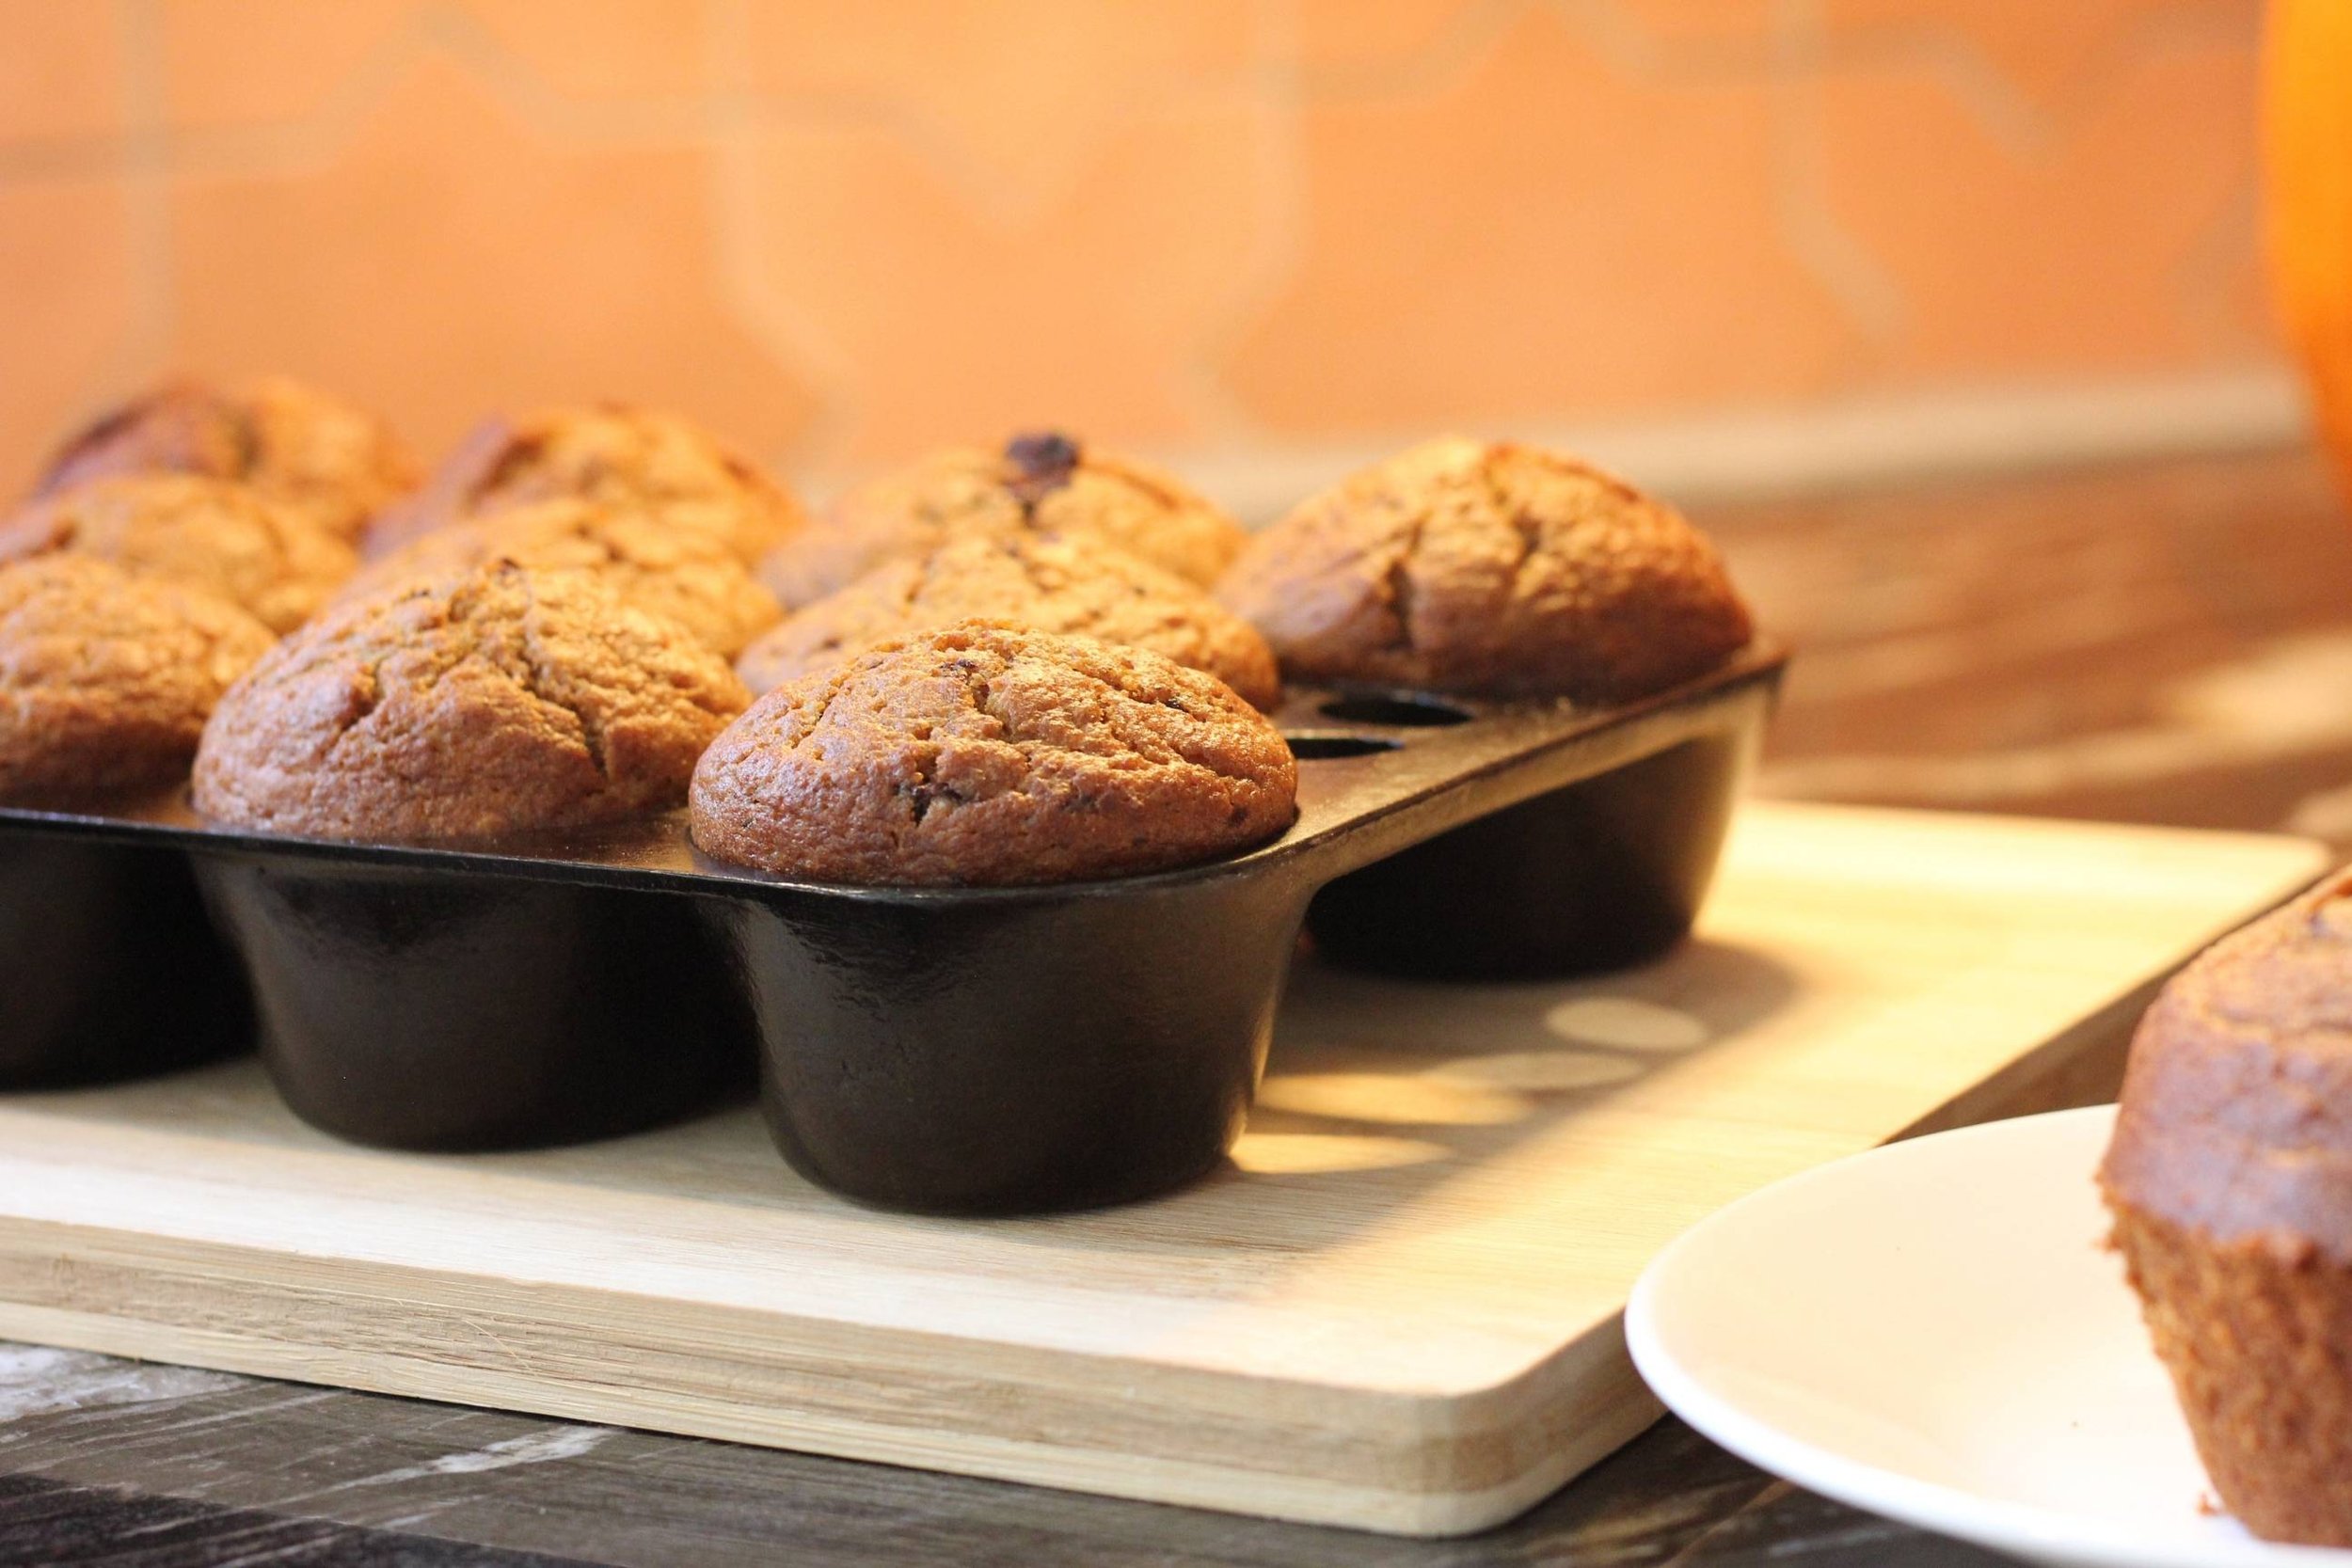
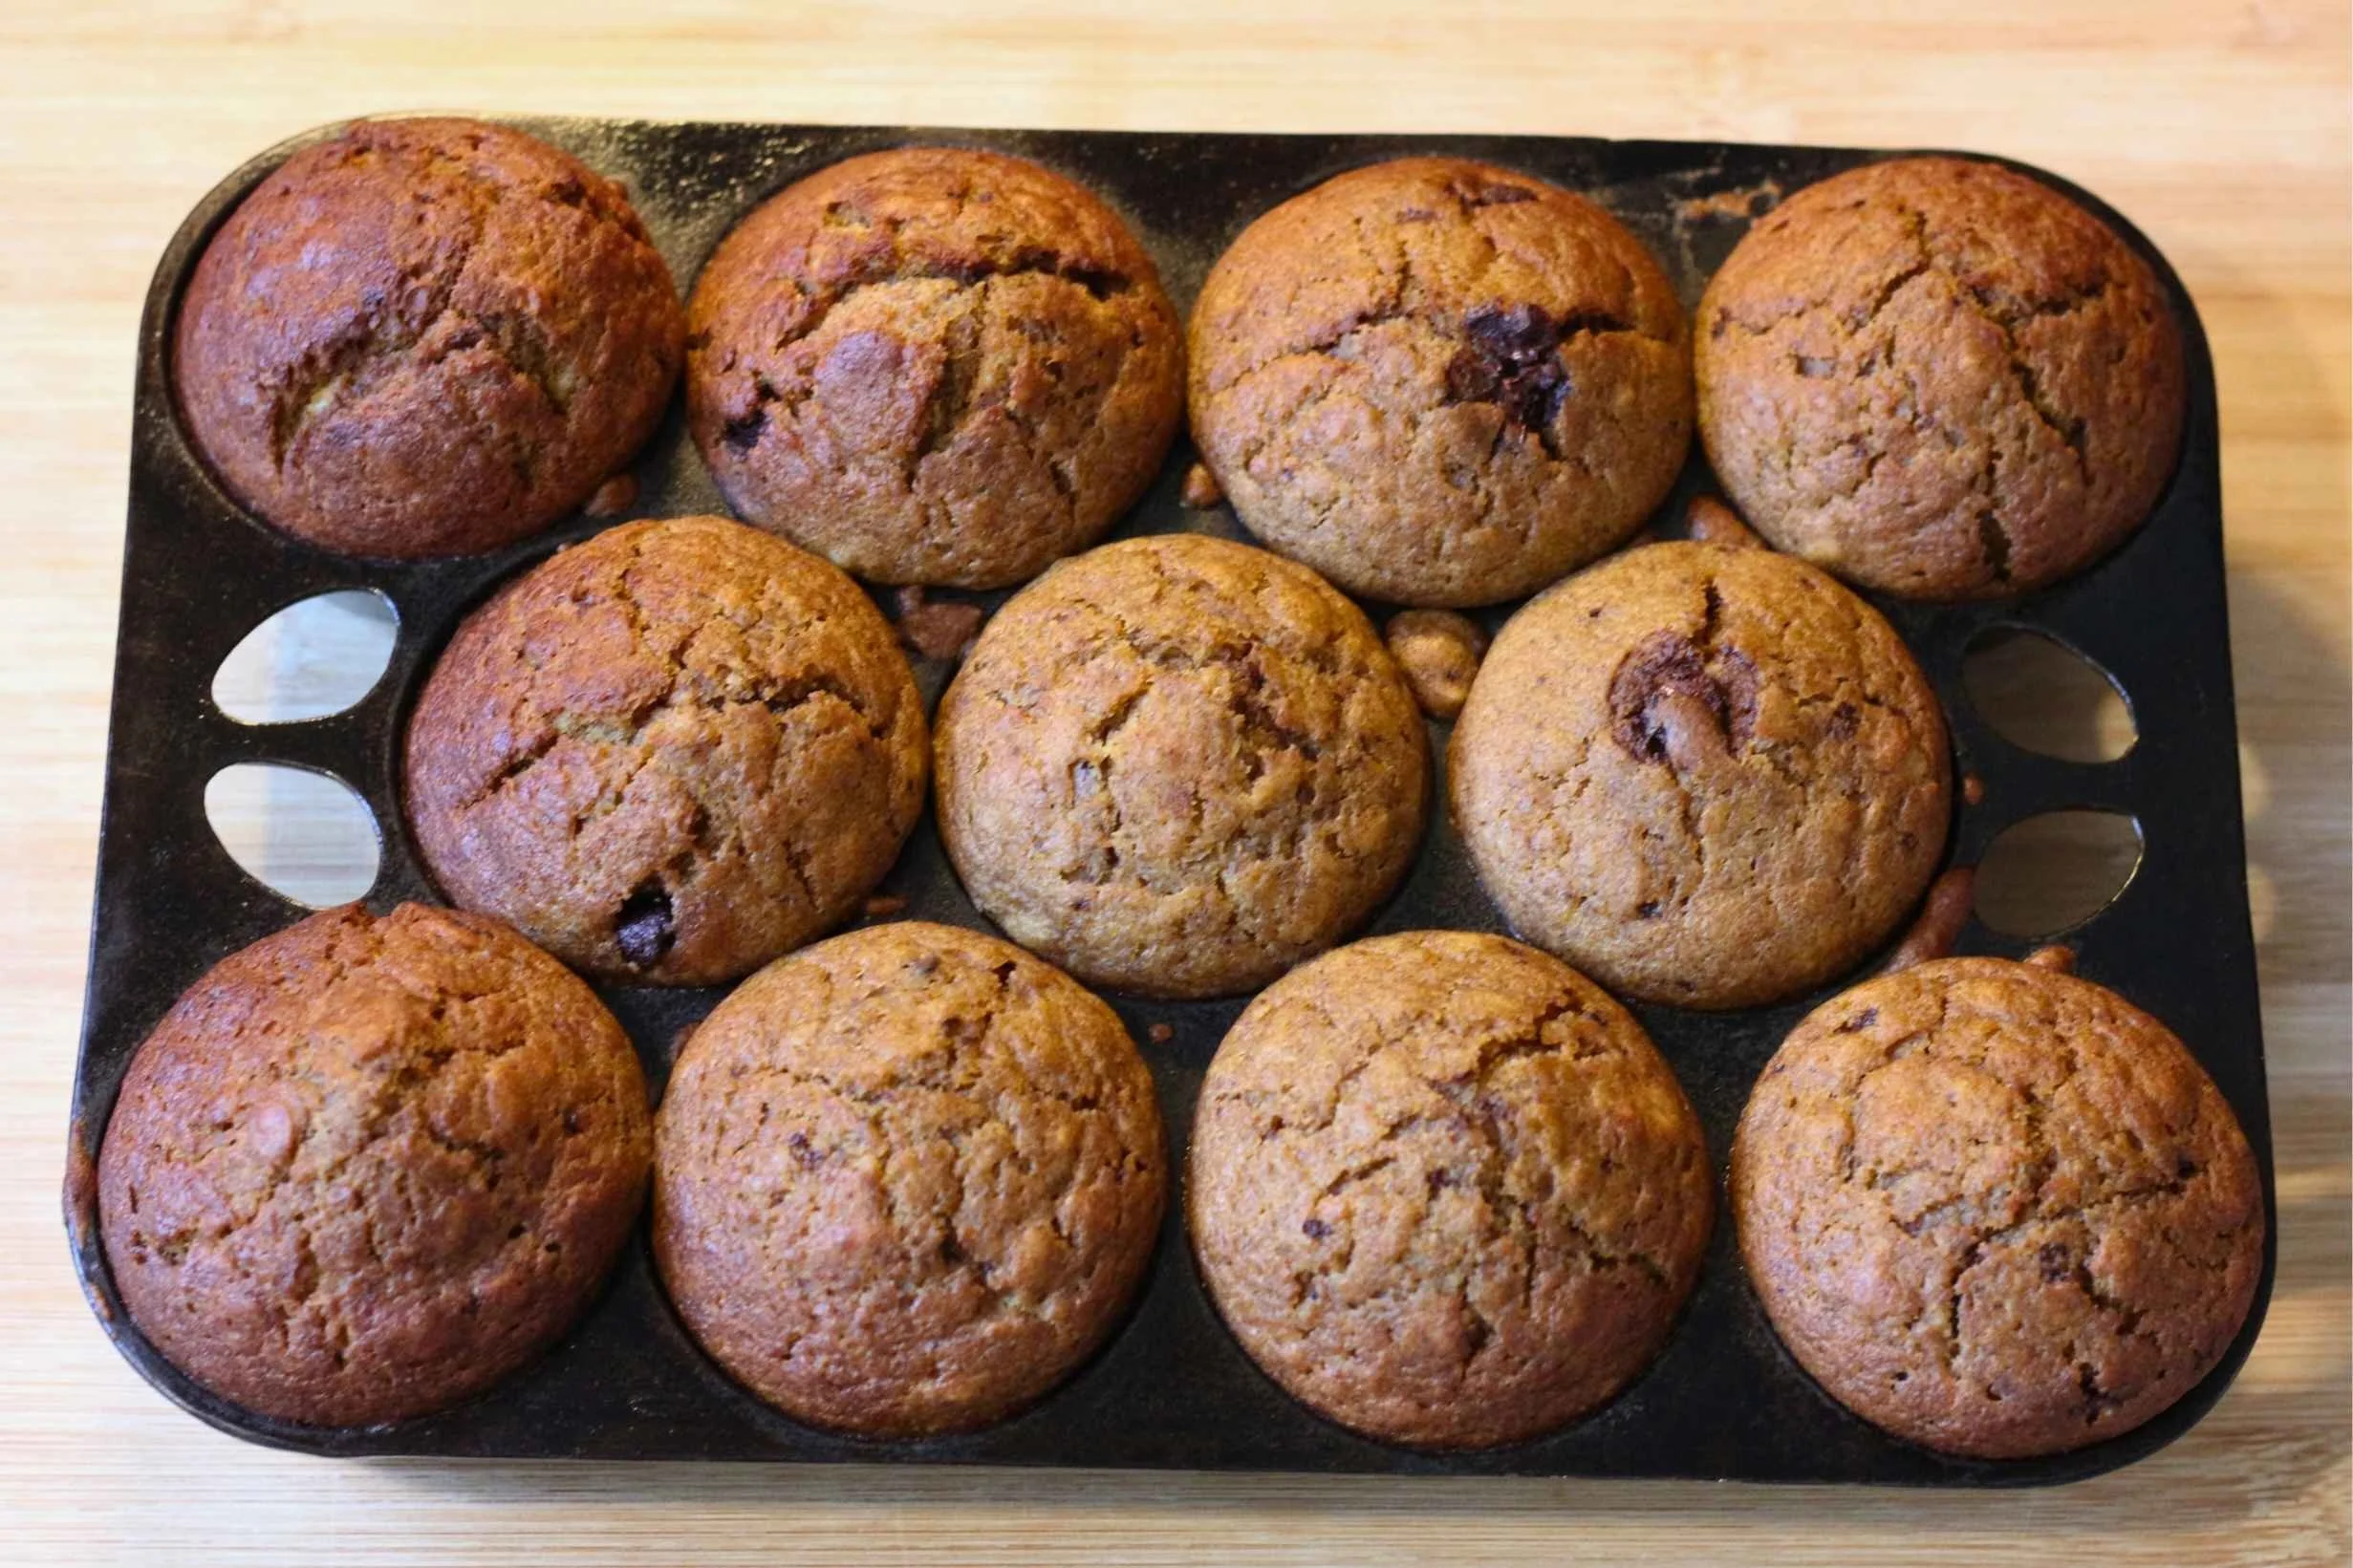
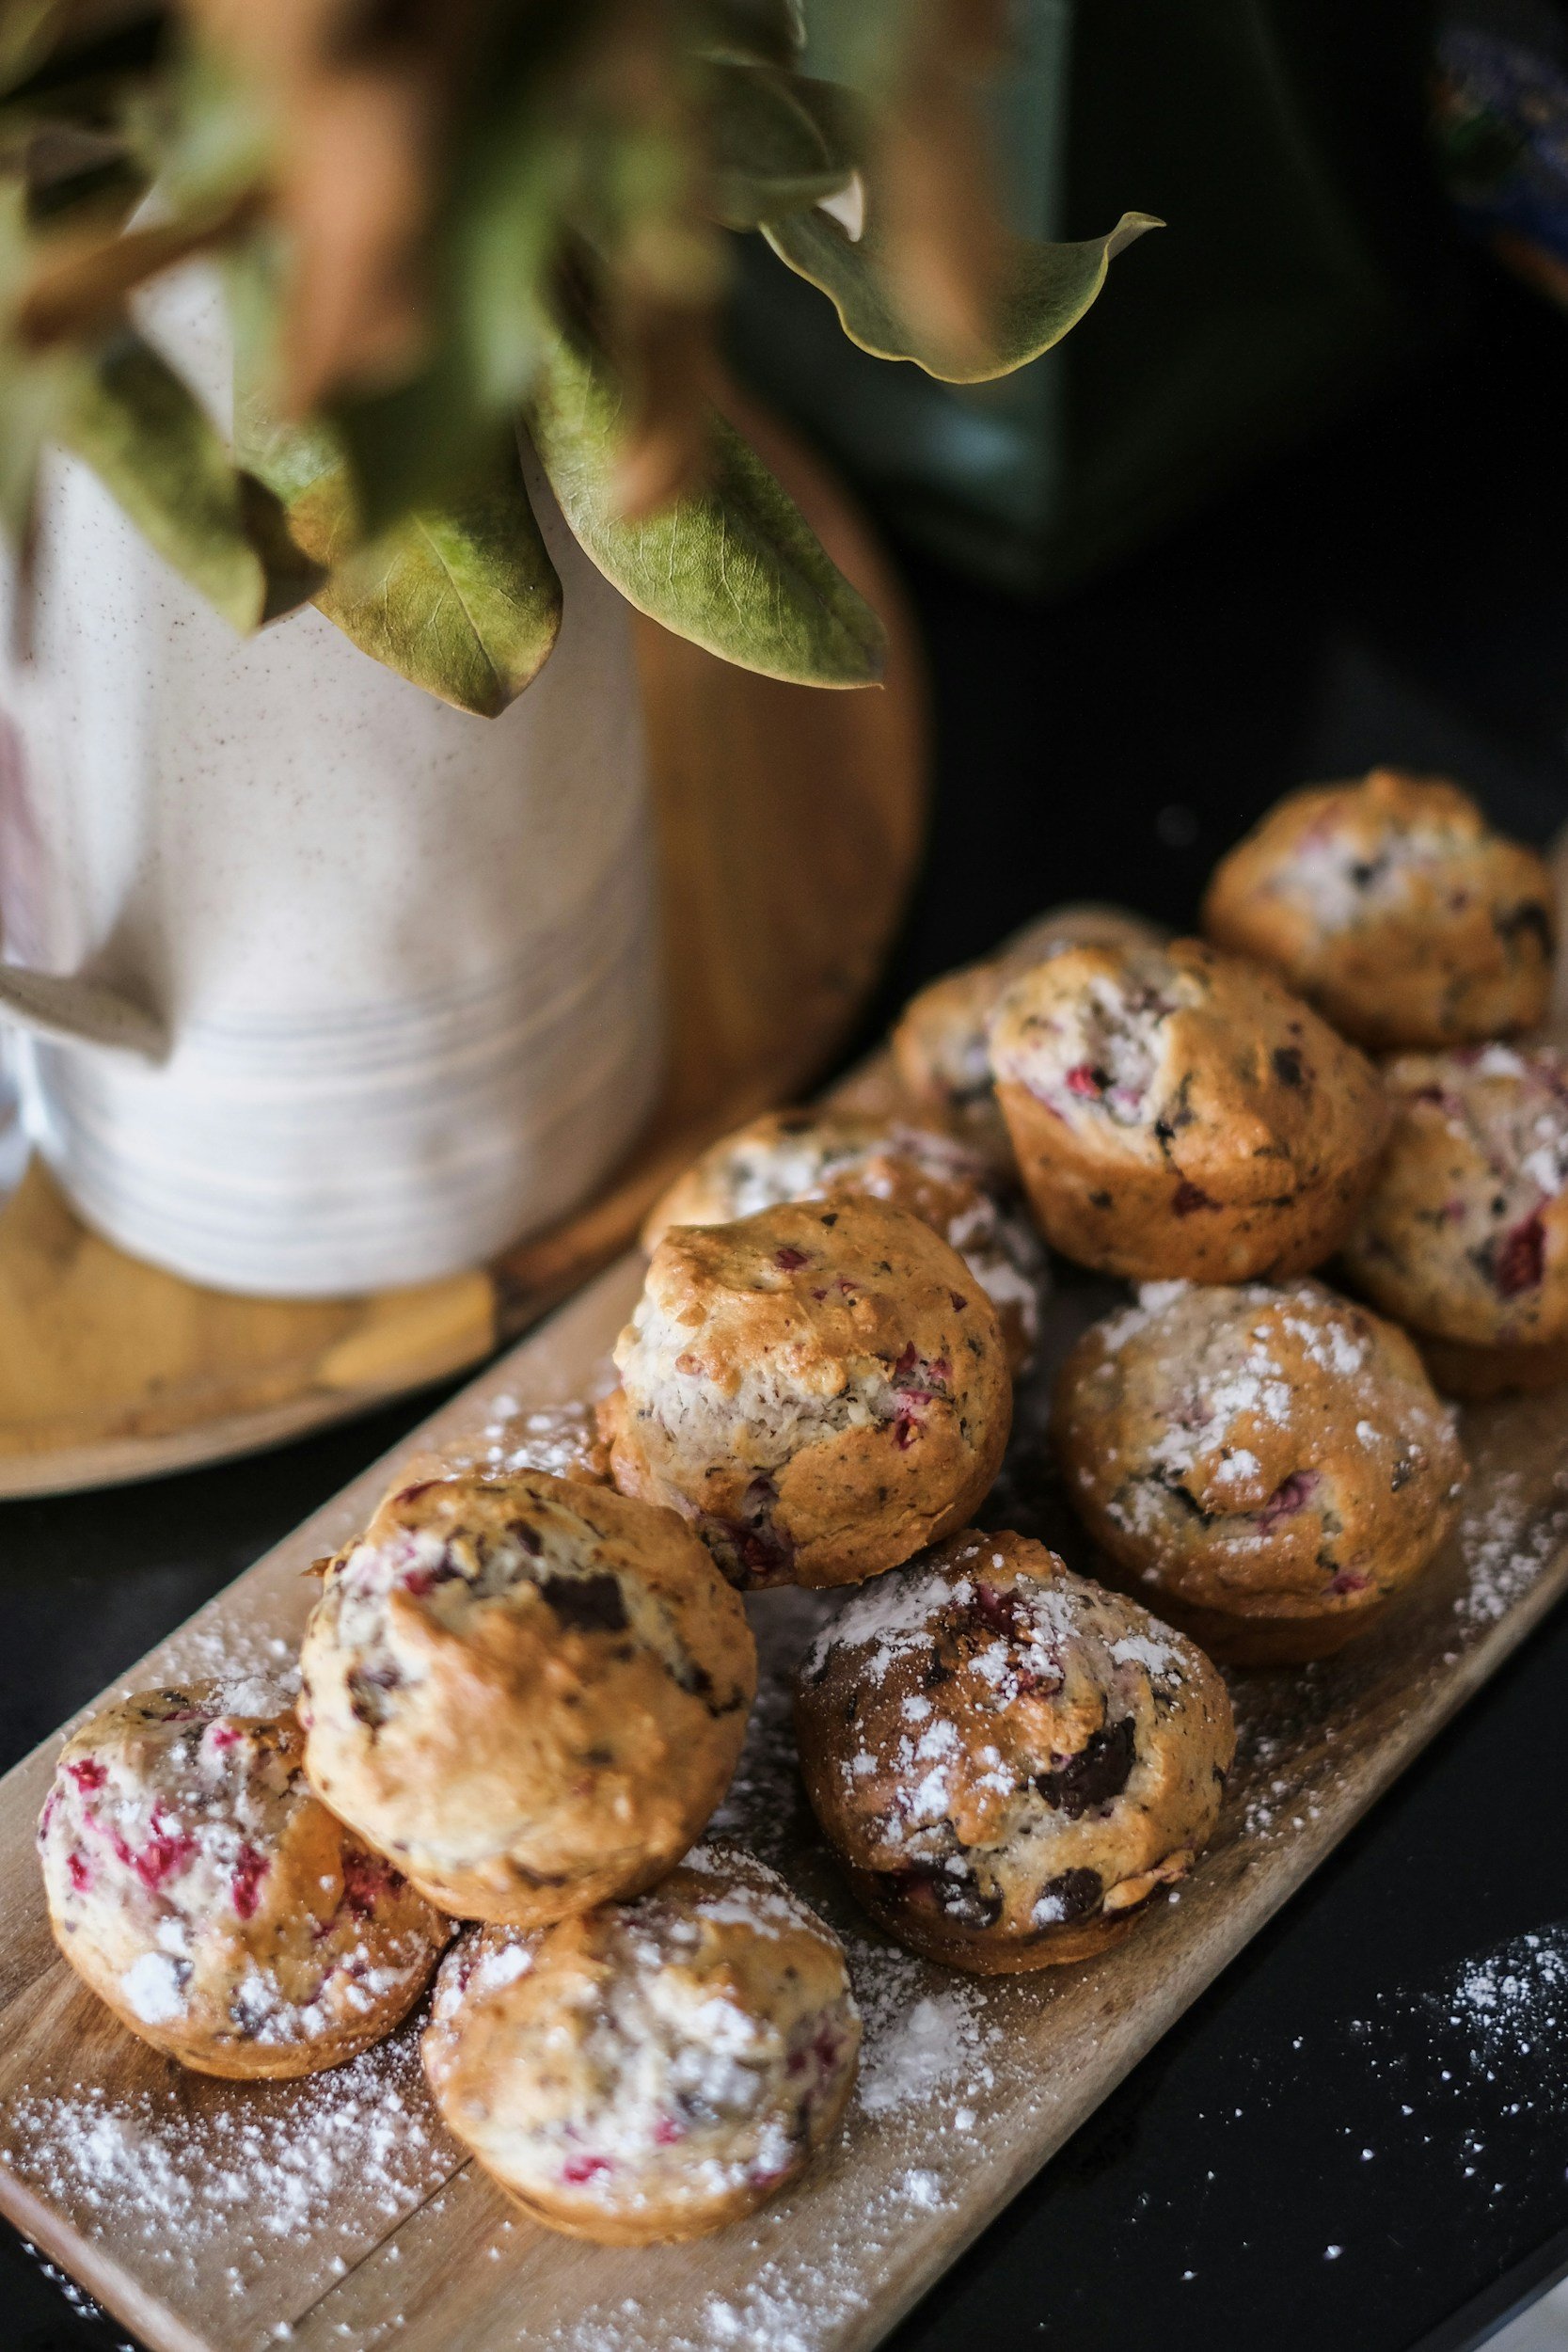
Easy Pumpkin Chocolate Chip Muffins (Moist & Perfect!)
This fresh pumpkin chocolate chip muffin recipe combines the rich, moist texture of pumpkin with the sweet bursts of chocolate chips, perfect for a cozy snack or breakfast.
These muffins offer a tender crumb with a warm, spicy flavour balanced by pockets of melted chocolate. Serve fresh or store an airtight container in the fridge for up to 3-4 days.
As an Amazon Associate I earn from qualifying purchases.
*Last Updated: February 24,2026
Prep: 10 min | Bake: 20 min | Total: 30 min | Yield: 12 muffins
📖 Jump to Recipe | 💬 Jump to FAQs | 🖨️ Print Recipe
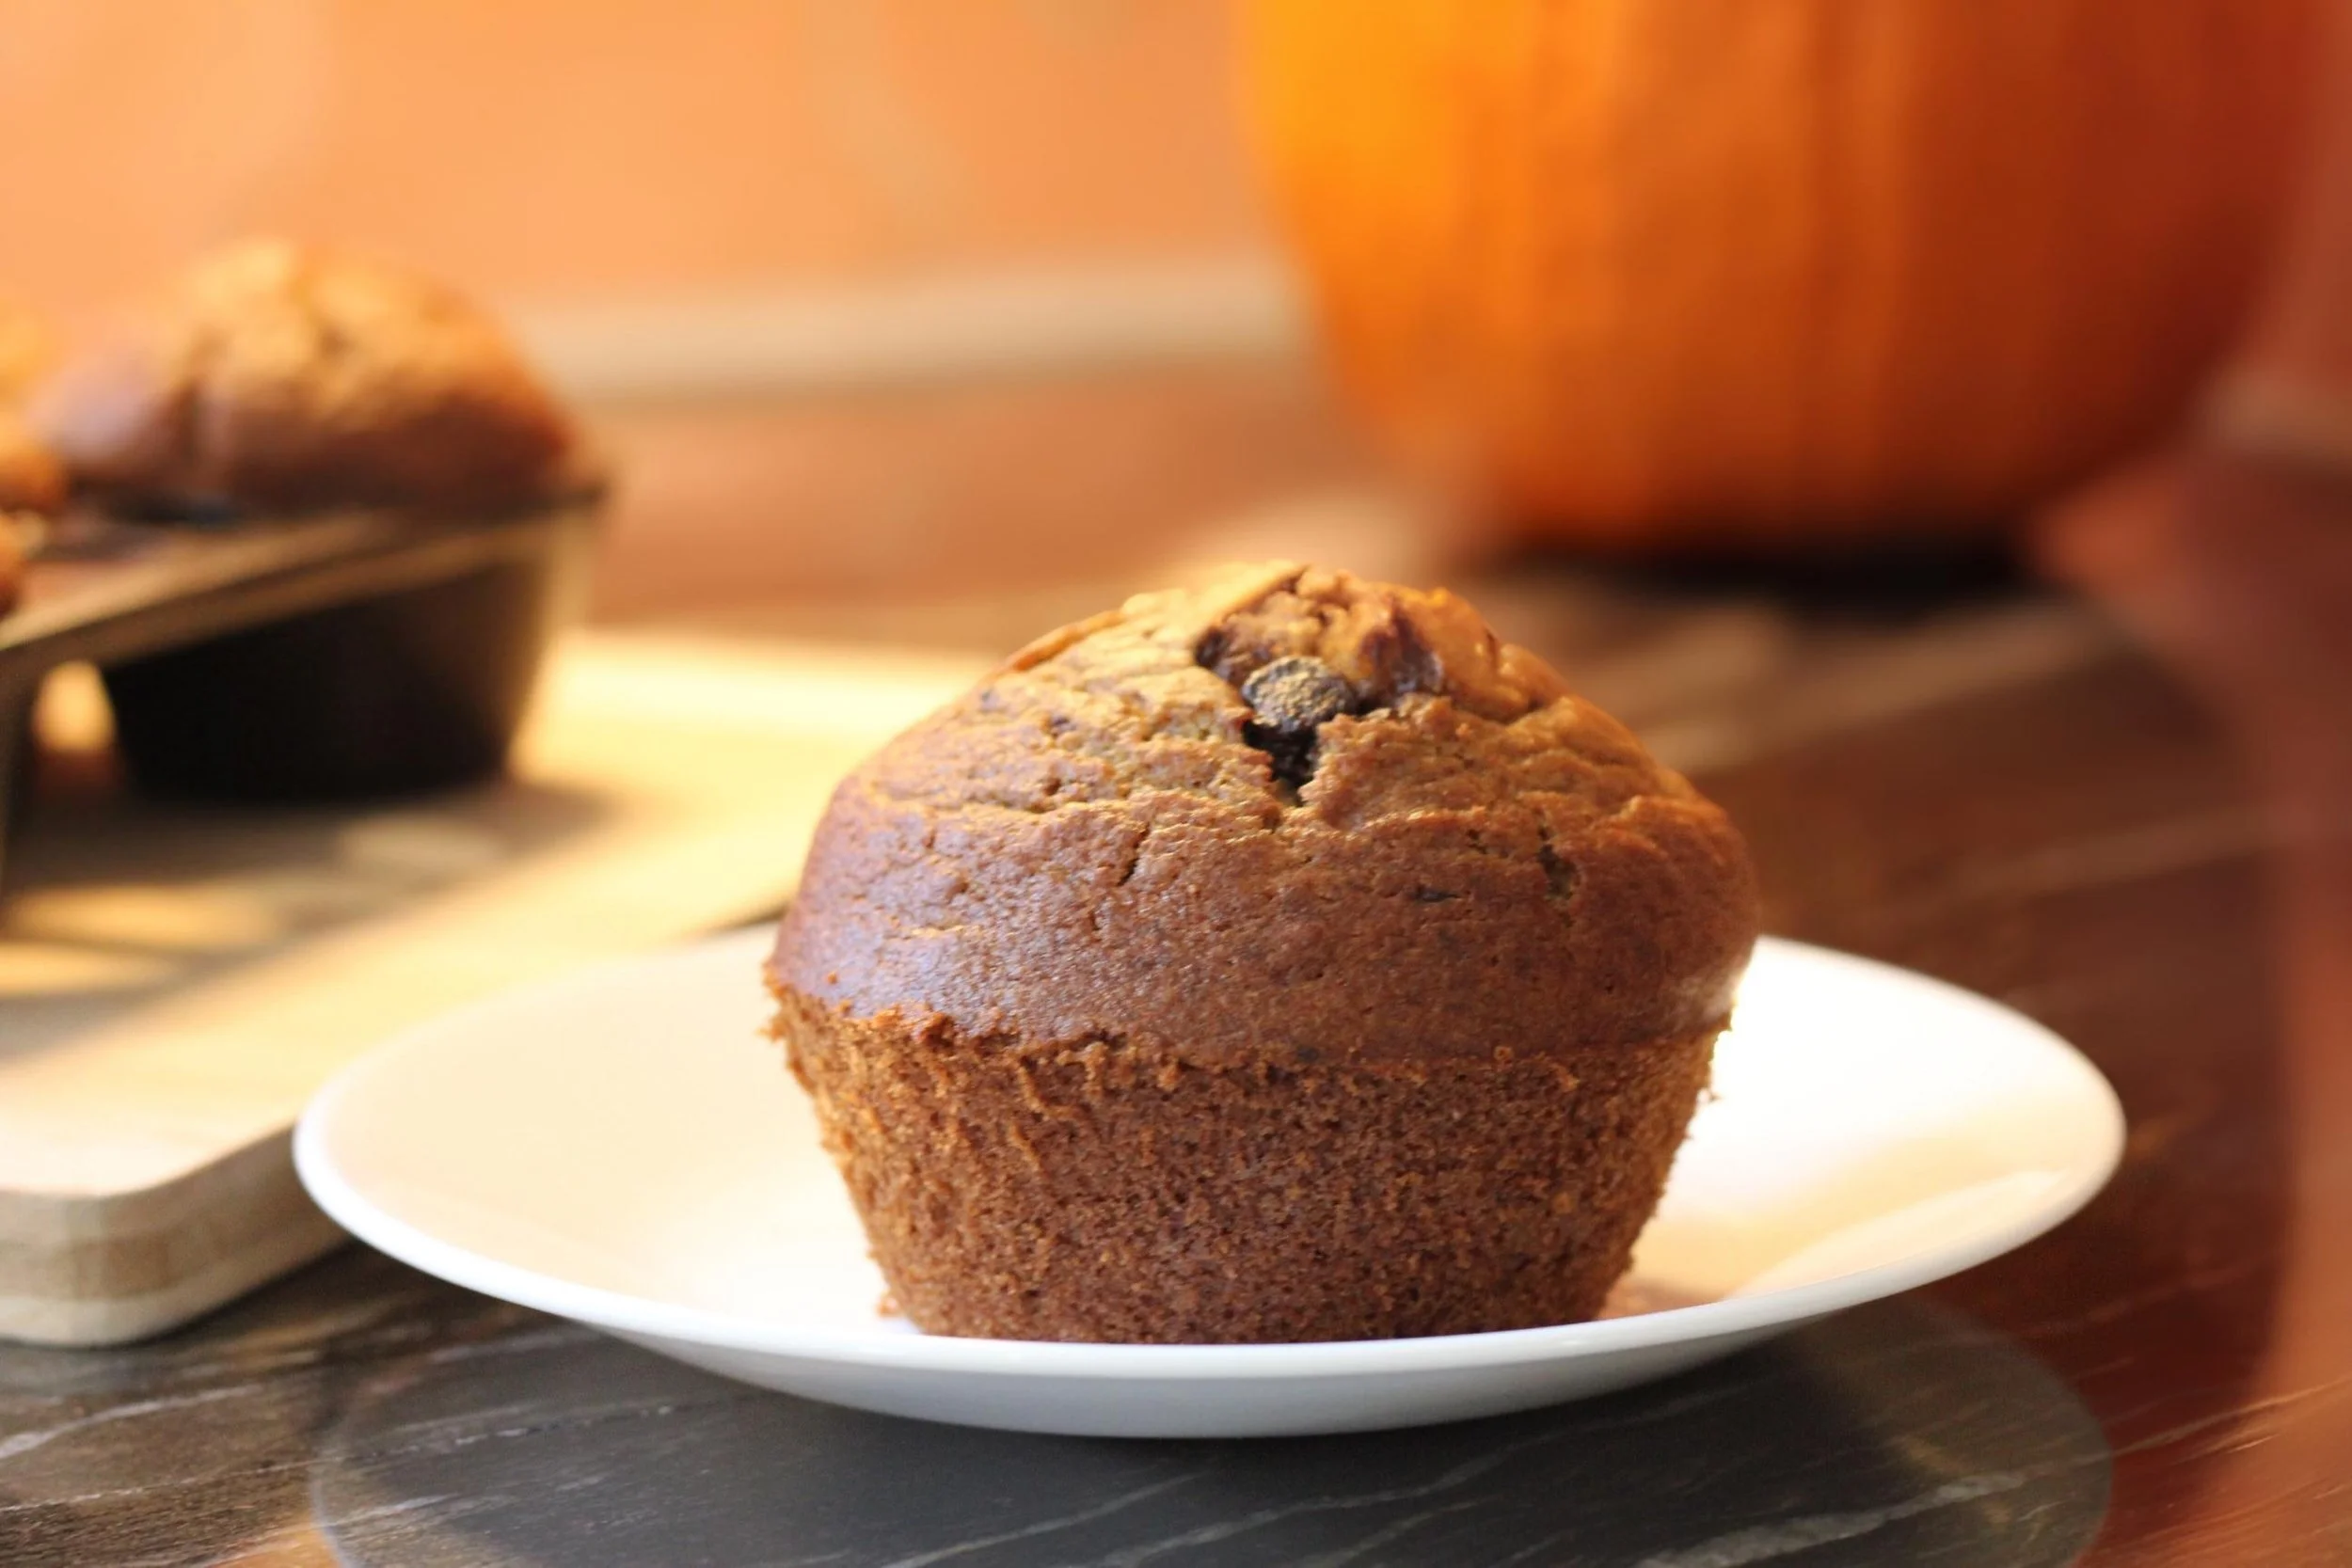
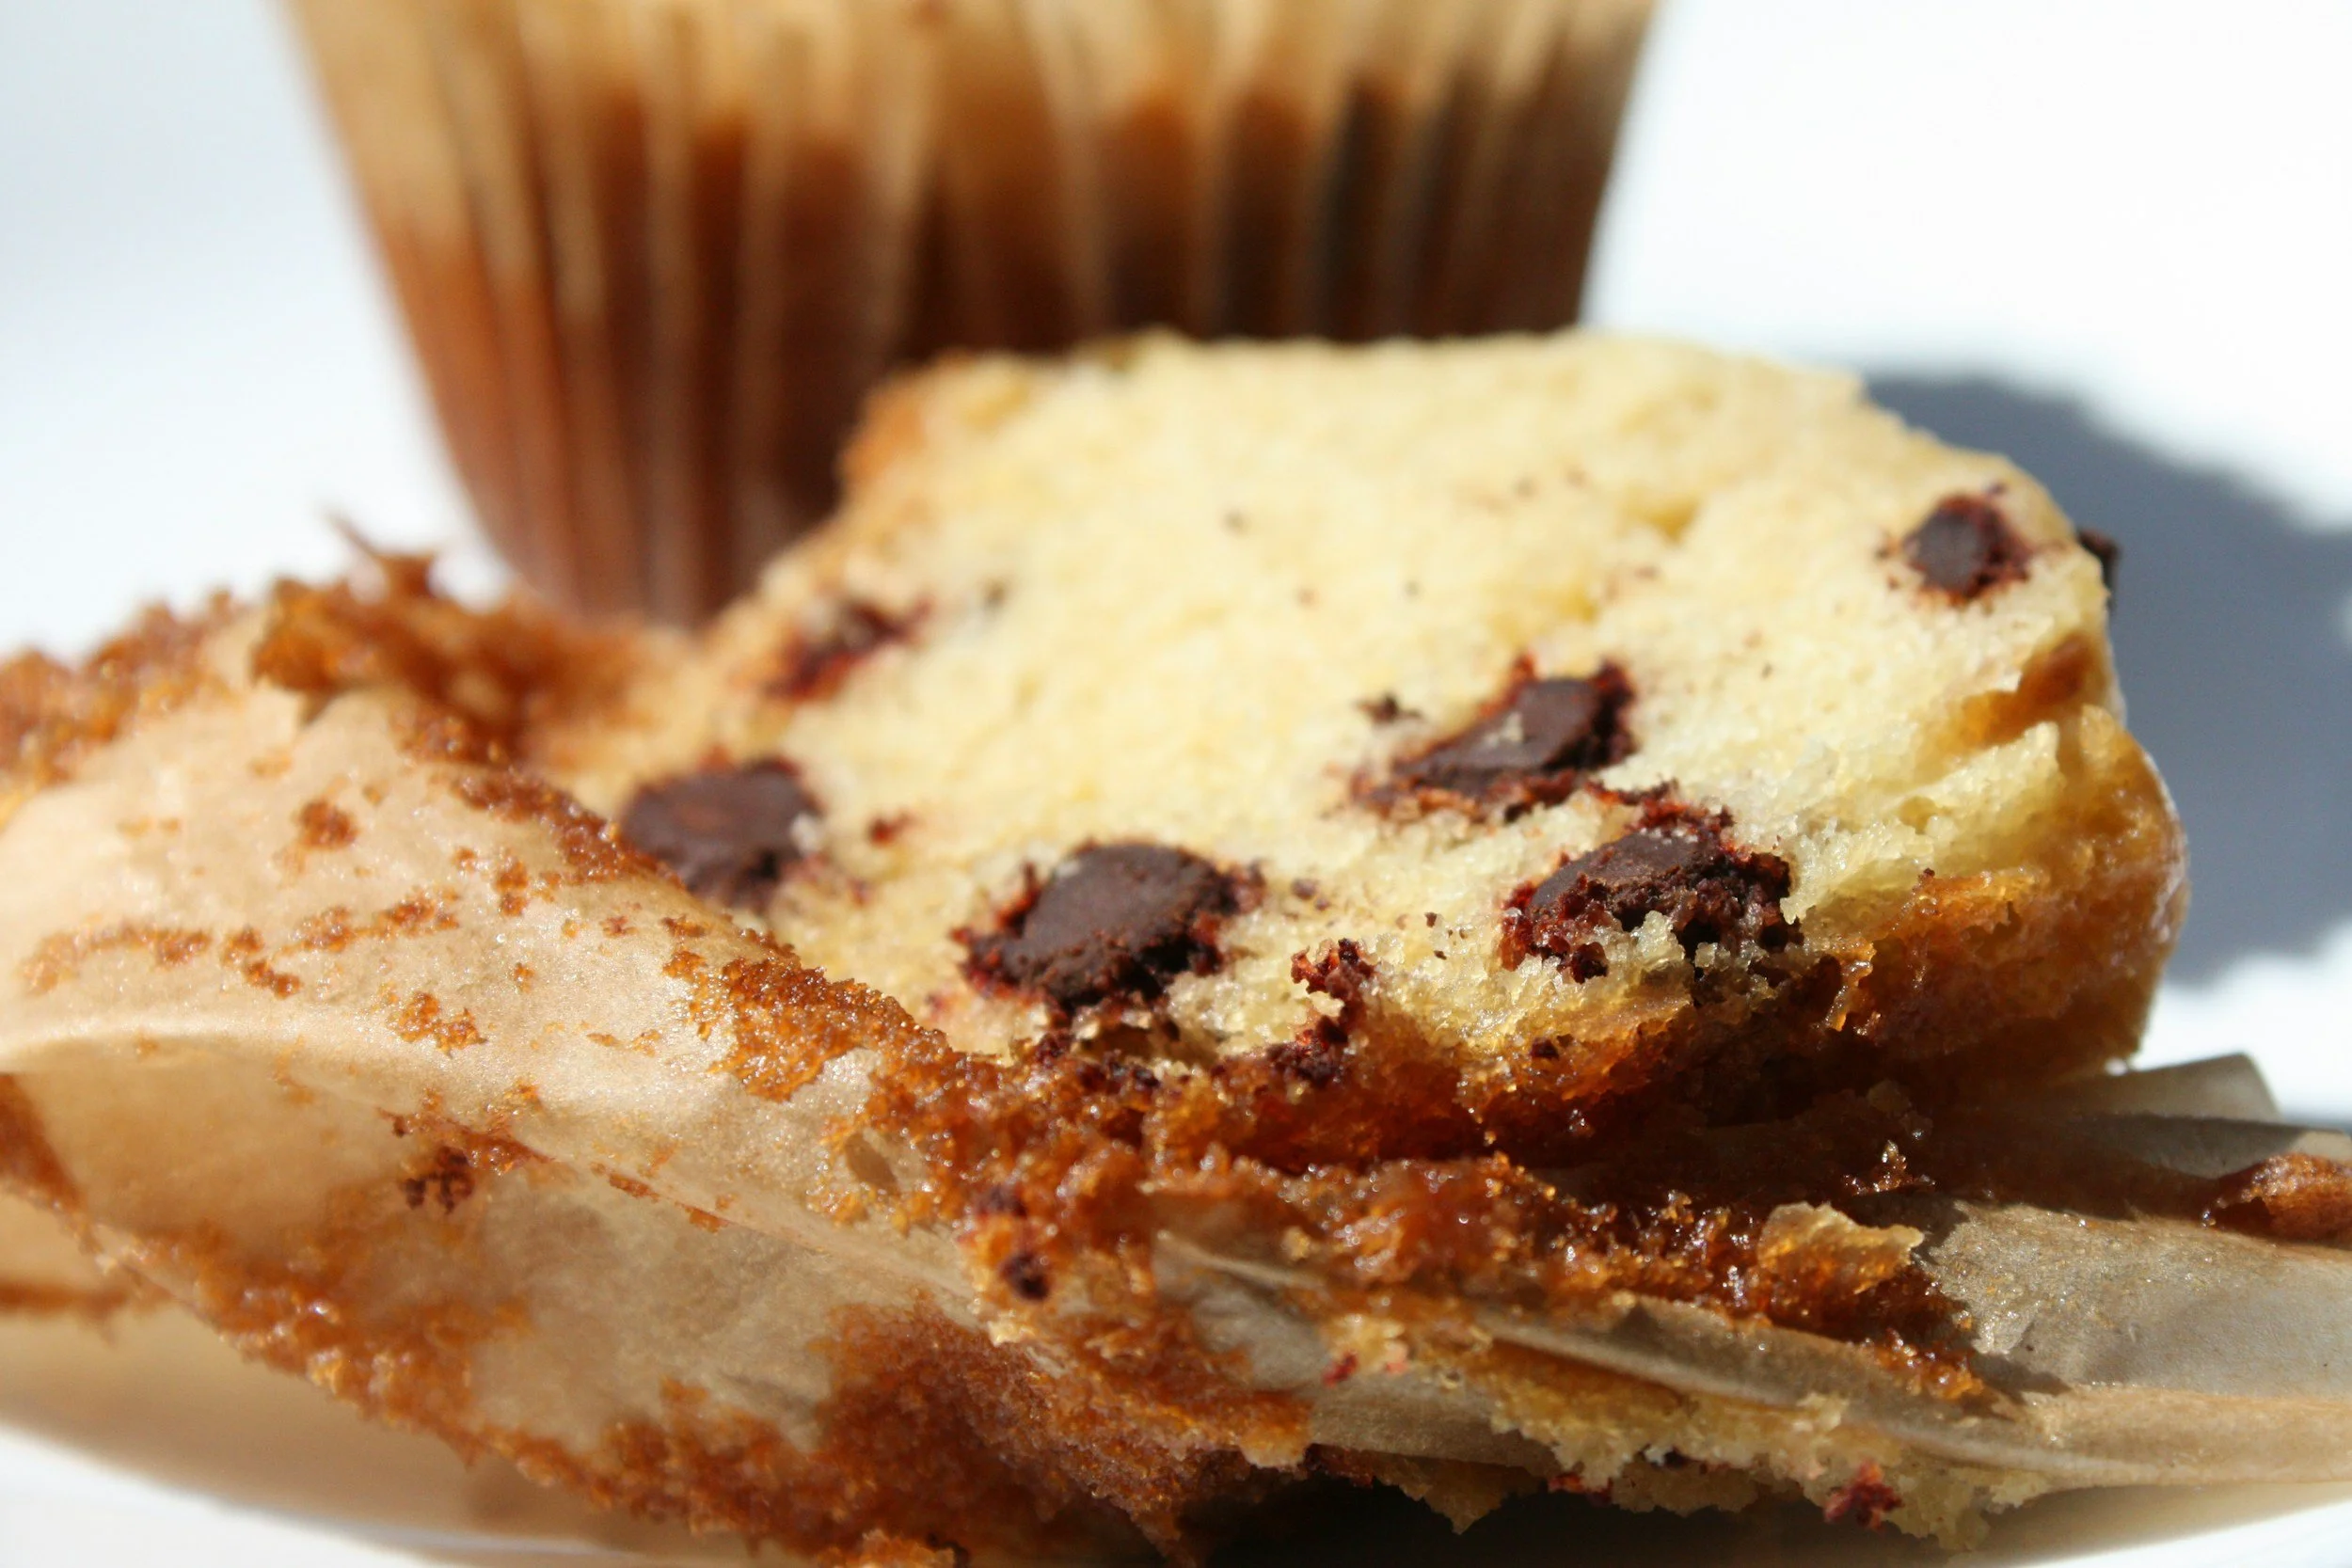
These are simply the BEST pumpkin chocolate chip muffins I have ever had!
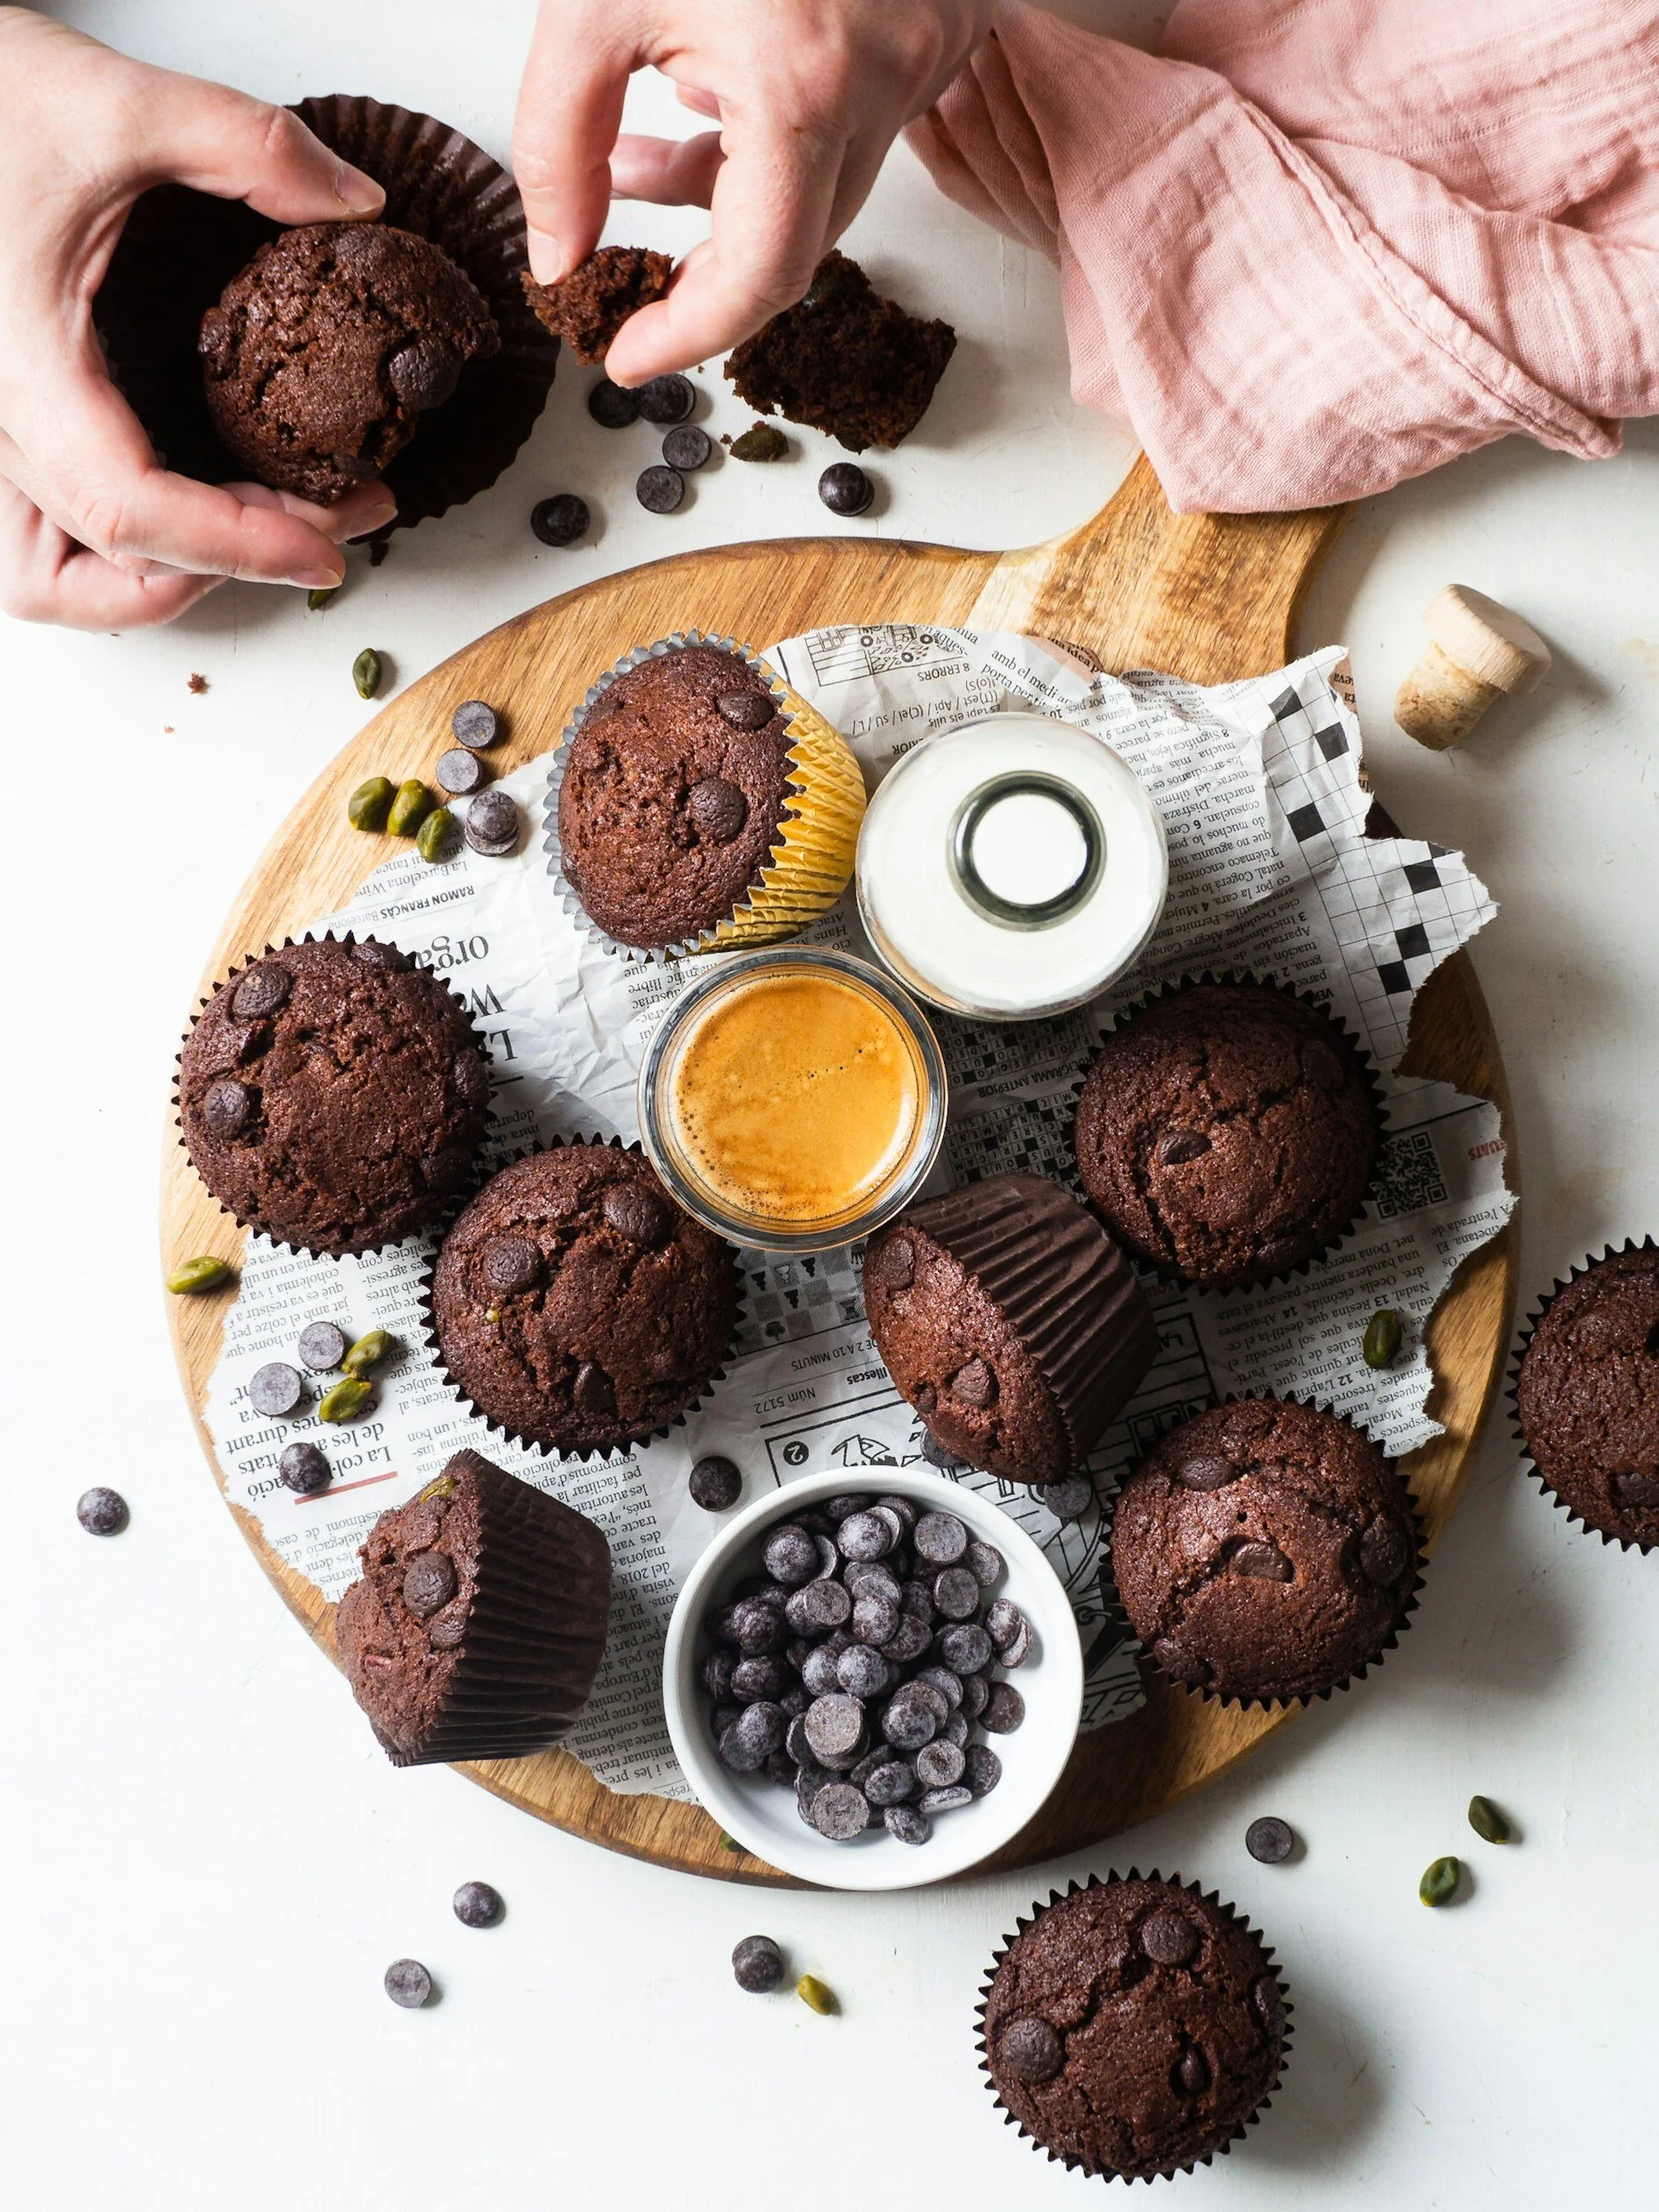
There’s nothing quite like the comforting aroma of pumpkin spice drifting through the kitchen—and these homemade pumpkin chocolate chip muffins deliver that cozy goodness in the simplest, most delicious way. Soft, tender, and dotted with melty chocolate chips, they’re the kind of muffin that feels like a warm hug on a cold day.
What makes these muffins so special is how naturally wholesome and tender they are. Pumpkin purée adds incredible moisture and brings a boost of vitamins, while warm spices like cinnamon and pumpkin spice give each bite that familiar, cozy flavour we all love. Combined with pantry staples and a sprinkle of chocolate chips for just the right amount of indulgence, these muffins come together easily—no fuss, no complicated steps, just simple ingredients you can feel good about eating.
How to Make homemade Pumpkin Chocolate Chip Muffins?
These pumpkin chocolate chip muffins are incredibly moist, perfectly spiced, and loaded with chocolate chips. Made in one bowl with simple pantry ingredients, they're ready in just 30 minutes! The combination of pumpkin puree and oil creates a tender crumb that stays soft for days, while warm spices and melty chocolate make every bite irresistible.
Perfect for: Quick breakfasts, school snacks, meal prep, fall baking
Why You'll Love These Pumpkin Chocolate Chip Muffins
✓ Super Quick: Ready in 30 minutes from start to finish
✓ One Bowl Method: Minimal cleanup, no stand mixer needed
✓ Incredibly Moist: Stay soft and tender for up to a week
✓ Not Too Sweet: Less sugar than typical muffin recipes (healthier!)
✓ Freezer-Friendly: Make ahead and grab for busy mornings
✓ Kid-Approved: Even picky eaters love these chocolate-packed muffins
✓ Perfect Spice Balance: Warm cinnamon and pumpkin pie spice without being overwhelming
✓ Loaded with Chocolate: Every bite has melty chocolate chips
There's nothing quite like the comforting aroma of pumpkin spice drifting through the kitchen—and these pumpkin chocolate chip muffins deliver that cozy goodness in the simplest, most delicious way. Soft, tender, and dotted with melty chocolate chips, they're the kind of muffin that feels like a warm hug, whether you're enjoying one on a crisp fall morning or baking a batch any time you want something nourishing and comforting.
What makes these muffins so special is how naturally wholesome and tender they are. Pumpkin purée adds incredible moisture and brings a boost of vitamins, while warm spices like cinnamon and pumpkin pie spice give each bite that familiar, cozy flavor we all love. Combined with pantry staples and plenty of chocolate chips for just the right amount of indulgence, these muffins come together easily—no fuss, no complicated steps, just simple ingredients you can feel good about eating.
They're perfect for busy families. Bake a batch on the weekend, and you'll have quick breakfasts, school snacks, or afternoon pick-me-ups ready to go all week long. They're soft enough for little ones, hearty enough to keep everyone satisfied, and sweet enough to feel like a treat without going overboard. Plus, they freeze beautifully, making them a reliable go-to whenever life gets busy.
But beyond their convenience and wholesome ingredients, these pumpkin chocolate chip muffins offer a little moment of joy—something warm and homemade to slow you down and brighten your day. Whether you're stirring the batter with kids, sharing them with friends, or enjoying one quietly with your morning coffee, these muffins bring comfort in every bite.
Ingredients for Pumpkin Chocolate Chip Muffins
Wet Ingredients:
2 large eggs (100g total), at room temperature
1 cup (245g) pumpkin puree - use 100% pure pumpkin, NOT pumpkin pie filling
1 teaspoon (5ml) vanilla extract
1/2 cup (120ml) milk - any kind works (dairy or non-dairy)
1/2 cup (120ml) neutral oil - canola, vegetable, or melted coconut oil
Dry Ingredients & Spices
1 3/4 cups (220g) all-purpose flour - spooned and leveled, not packed
1/3 cup (70g) brown sugar, packed
1/3 cup (65g) granulated sugar
1 teaspoon (4g) baking powder
1 teaspoon (6g) baking soda
1/2 teaspoon (3g) salt
2 teaspoons (4g) ground cinnamon
1 teaspoon (2g) pumpkin pie spice
optional Mix-Ins
1/3 cup (130g) semi-sweet chocolate chips - plus 2 tablespoons for topping
1/2 cup (60g) chopped walnuts or pecans
Equipment Needed
12-cup muffin tin (affiliate link)
Paper muffin liners (or cooking spray)
Large mixing bowl
Whisk
Rubber spatula (affiliate Link)
1/4 cup measuring cup or ice cream scoop
Wire cooling rack (affiliate Link)
Toothpick for testing
Ingredient Notes & Substitutions
Pumpkin Puree: Use 100% pure pumpkin, NOT pumpkin pie filling which contains added sugar and spices. You can substitute with sweet potato puree or butternut squash puree.
Eggs: Room temperature eggs mix better into the batter. Forgot to set them out? Place in a bowl of warm water for 5 minutes. For vegan option, use 2 flax eggs (2 tablespoons ground flax + 5 tablespoons water, let sit 5 minutes).
Oil: Any neutral oil works - canola, vegetable, or melted coconut oil. You can substitute melted butter (1/2 cup / 113g), but the muffins won't stay moist quite as long. An alternative is to replace half the oil with unsweetened applesauce.
Sugars: The combination of brown and granulated sugar gives the best texture. You can reduce total sugar by up to 1/4 cup if you prefer less sweet muffins.
Flour: For a healthier option, replace up to half (about 3/4 cup) with whole wheat flour. For gluten-free, use a 1:1 gluten-free baking flour blend.
Pumpkin Pie Spice: Don't have it? Check out my Pumpkin Pie Spice blog post
Chocolate Chips: Semi-sweet is standard, but milk chocolate, dark chocolate, or white chocolate chips all work. Mini chips distribute more evenly throughout the muffins.
How to Make Pumpkin Chocolate Chip Muffins (Step-by-Step)
Step 1: Preheat and Prep (2 minutes)
Preheat your oven to **350°F (177°C)**. Position the oven rack in the centre of the oven for even baking.
Line a 12-cup muffin tin with paper liners, or grease the muffin cups generously with cooking spray, lard or butter. Set aside.
Pro Tip: If using paper liners, lightly spray them with cooking spray to prevent sticking.
Step 2: Mix Wet Ingredients (3 minutes)
In a large mixing bowl, whisk together:
2 large eggs
1 cup (245g) pumpkin puree
1 teaspoon vanilla extract
1/2 cup (120ml) milk
1/2 cup (120ml) neutral oil
Whisk vigorously for 1-2 minutes until the mixture is smooth, well combined, and slightly frothy. The pumpkin should be fully incorporated with no lumps.
What it should look like: A smooth, orange-colored mixture that's slightly thickened but still pourable.
Step 3: Add Leaveners, Sugars, and Spices (2 minutes)
To the wet mixture, add:
1/3 cup (70g) brown sugar
1/3 cup (65g) granulated sugar
1 teaspoon baking powder
1 teaspoon baking soda
1/2 teaspoon salt
2 teaspoons ground cinnamon
1 teaspoon pumpkin pie spice
Whisk vigorously for about 1 minute until the sugars have dissolved and the spices are evenly distributed throughout. The mixture should be smooth and fragrant.
Why this order matters: Adding the sugars and spices before the flour ensures even distribution and helps dissolve the sugars completely.
Step 4: Fold in Flour - DON'T OVERMIX! (2 minutes)
Add 1 3/4 cups (220g) all-purpose flour to the bowl.
Using a rubber spatula, gently fold the flour into the wet mixture just until no dry flour streaks remain. Stop mixing immediately when the flour is incorporated. The batter should be thick and may have a few small lumps—this is completely normal and actually desirable!
CRITICAL: Do not overmix! Overmixing develops gluten and creates tough, dense muffins. Under-mixing is better than over-mixing.
What it should look like: A thick, pourable batter similar to pancake batter, with a smooth but slightly lumpy texture.
Step 5: Add Chocolate Chips (1 minute)
Gently fold in 3/4 cup (130g) chocolate chips using your rubber spatula. Use a folding motion to distribute them evenly throughout the batter.
Reserve 2 tablespoons of chocolate chips for sprinkling on top of the muffins before baking.
Baking Tip: For more even distribution, toss the chocolate chips with 1 tablespoon of flour before adding to prevent them from sinking during baking.
Step 6: Fill Muffin Cups (2 minutes)
Using a 1/4 cup measuring cup or ice cream scoop, fill each muffin cup about 3/4 full. The batter should be evenly distributed across all 12 cups.
Sprinkle the reserved chocolate chips on top of each muffin for a beautiful bakery-style appearance.
For mini muffins: Use a 2 tablespoon scoop and fill 24 mini muffin cups. Adjust baking time to 12-15 minutes.
Step 7: Bake (18-22 minutes)
Bake in the preheated 350°F (177°C) oven for 18-22 minutes, until the muffins are golden brown and spring back when lightly touched.
How to tell they're done:
Tops are golden brown and spring back when gently pressed
A toothpick inserted into the center comes out clean or with a few moist crumbs (NOT wet batter
Edges are just starting to pull away from the pan
Timing Guide:
Regular muffins: 18-22 minutes
Mini muffins: 12-15 minutes
Important: Every oven is different! Start checking at the minimum time and add 1-2 minutes as needed. Don't overbake—this is the #1 cause of dry muffins.
Step 8: Cool (10 minutes)
Remove the muffin tin from the oven and place on a wire cooling rack.
Let the muffins cool in the pan for 5 minutes—this allows them to set and makes them easier to remove without breaking.
After 5 minutes, carefully transfer the muffins from the tin to the wire cooling rack. Let them cool for an additional 5-10 minutes.
Serve warm or at room temperature. These muffins are delicious warm with butter, or at room temperature as a grab-and-go snack!
Tips for Perfect Pumpkin Chocolate Chip Muffins
🎃 Use Pure Pumpkin Puree: Check the label carefully! You want 100% pure pumpkin, NOT pumpkin pie filling which has added sugar and spices that will throw off your recipe. Libby's is a reliable brand.
📏 Measure Flour Correctly: This is crucial! Spoon flour into your measuring cup and level off with a knife. Don't scoop directly from the bag or you'll pack in too much flour and end up with dense, dry muffins. Even better: use a kitchen scale for 220g exact measurement.
🥚 Room Temperature Eggs: Cold eggs don't incorporate as well into the batter. Set them out 30 minutes before baking, or place in a bowl of warm water for 5 minutes to bring to room temperature quickly.
🍫 Reserve Chocolate Chips for Topping: Sprinkle extra chocolate chips on top before baking for that professional bakery look. It also ensures every muffin gets visible chocolate!
⏰ Don't Overbake: This is the most common mistake! Remove muffins when a toothpick has a few moist crumbs—NOT when it's completely clean. Muffins continue cooking from residual heat as they cool.
🌡️ Use an Oven Thermometer: Many ovens run 25°F hotter or cooler than the dial indicates. An oven thermometer ensures accurate baking temperature.
🧊 Freeze the Batter: Fill muffin cups with batter, freeze until solid (2-3 hours), then transfer to a freezer bag. Bake from frozen anytime, adding just 5 minutes to the baking time!
👀 Look for Visual Cues: Properly baked muffins have golden tops, spring back when touched, and the edges just start to pull away from the pan.
❄️ Cool Completely Before Storing: Warm muffins create condensation in containers, making them soggy. Always cool to room temperature first.
Frequently Asked Questions
How many muffins does this recipe make?
This recipe makes 12 regular-sized muffins when filled 3/4 full, or 24 mini muffins when using a mini muffin tin. If you prefer to fill the cups all the way to the top for bakery-style dome tops, you'll get about 10-11 muffins.
Can I freeze pumpkin chocolate chip muffins?
Yes! These muffins freeze beautifully for up to 3 months. Here's how:
To freeze baked muffins:
Cool completely to room temperature
Wrap each muffin individually in plastic wrap
Place wrapped muffins in a freezer-safe bag, removing as much air as possible
Label with date and freeze
To thaw:
Leave at room temperature for 1 hour
Or microwave for 20-30 seconds
Or warm in a 300°F oven for 10 minutes
To freeze unbaked batter:
Transfer batter in a large freezer-safe container
Freeze until solid
Thaw in the fridge 24-48 hours before baking in muffin tray
How long do pumpkin chocolate chip muffins last?
Room temperature: 2 days in an airtight container (muffins will dry out faster at room temp)
Refrigerator: 5-7 days in an airtight container (recommended for maximum freshness)
Freezer: Up to 3 months when properly wrapped
Can I use pumpkin pie filling instead of pumpkin puree?
No! Pumpkin pie filling contains added sugar, spices, and sometimes thickeners that will completely throw off this recipe. You must use 100% pure pumpkin puree. Check the ingredients—it should only say "pumpkin."
If you accidentally bought pie filling, you can use it in smoothies or as a pancake topping, but save the baking for pure pumpkin puree!
Why are my pumpkin muffins dense?
Dense muffins are usually caused by one of these issues:
1. Overmixing the flour: Mix only until the flour is just incorporated. Overmixing develops gluten = tough, dense muffins.
2. Too much flour: If you scooped flour directly from the bag, you likely packed in too much. Always spoon and level, or use a kitchen scale (220g).
3. Old leavening agents: Test your baking powder and baking soda by adding to water—they should fizz actively. If not, they're expired and won't make your muffins rise.
4. Overbaking: Dense texture can also come from baking too long, which dries out the muffins.
Can I make these muffins healthier?
Absolutely! Here are several healthy swaps:
Reduce oil: Replace half the oil (1/4 cup) with unsweetened applesauce
Reduce white sugar: Cut total white sugar, and 1/4 cup instead of 1/3 cup (muffins will be less sweet but still delicious). Caution! Do not reduce brown sugar. Reducing brown sugar will result in stiffer muffins. Brown sugar help give these muffins their cake-like texture.
Add whole grains: Replace half the all-purpose flour (about 3/4 cup) with whole wheat flour. The muffins will be much heavier, not as airy.
Use dark chocolate: Dark chocolate chips have less sugar than semi-sweet chocolate chips
Add ground flaxseed: Stir in 2 tablespoons ground flaxseed for extra fiber and omega-3s
Add Greek yogurt: Replace 1/4 cup oil with 1/4 cup Greek yogurt for extra protein
What can I substitute for eggs?
For vegan/egg-free muffins:
Best option: 2 flax eggs
Mix 2 tablespoons ground flaxseed with 5 tablespoons water
Let sit for 5 minutes until thick and gel-like
Use in place of eggs
Note: Texture and colour may be slightly different than using eggs, but muffins will still be delicious!
How do I know when pumpkin muffins are done baking?
Use all three tests:
1. Visual test: Tops are golden brown and spring back when lightly touched
2. Toothpick test: Insert a toothpick in the center—it should come out clean or with a few moist crumbs (NOT wet batter)
3. Temperature test:** Internal temperature should be 200-210°F (93-99°C) on an instant-read thermometer
Tip: It's better to slightly underbake than overbake. Muffins continue cooking from residual heat as they cool.
Can I make these muffins without a muffin tin?
You have a few options:
1. Silicone muffin cups: Place on a baking sheet and fill as normal
2. Ramekins: 4-6 ounce ramekins work well (makes 8-10 larger muffins)
3. Loaf pan: Make pumpkin chocolate chip bread instead (bake 50-60 minutes at 315°F)
4. Cake pan: Pour into greased 8x8 or 9x9 pan for pumpkin chocolate chip cake (bake at 325 for 25-30 minutes)
What size eggs should I use?
Use large eggs (about 50g each in the shell, 100g total). This is the standard size for baking recipes.
If you only have medium eggs, use 3 medium eggs instead of 2 large.
If you only have extra-large, stick with 2 but the batter may be slightly thinner.
Can I make these muffins dairy-free?
Yes! This recipe is easily dairy-free:
Use any non-dairy milk: almond, oat, soy, coconut, etc.
Use neutral oil (not butter)
Check that your chocolate chips are dairy-free (many dark chocolate and semi-sweet varieties are)
The recipe doesn't use butter or other dairy, so it's naturally almost dairy-free already!
Why did my muffins sink in the middle?
Sunken muffins are usually caused by:
Oven temperature too low: Use an oven thermometer to verify 350°F
Opening oven door too early: Don't open the oven until at least 15 minutes of baking
Too much leavening: Measure baking powder and soda carefully with measuring spoons
Underbaking: Muffins weren't baked long enough to set the structure
Can I add nuts to these muffins?
Absolutely! Fold in 1/2 cup (60g) chopped walnuts or pecans along with (or instead of) the chocolate chips. For best results:
Toast nuts first for 5 minutes at 350°F for enhanced flavor
Chop into small pieces so they distribute evenly
Can mix nuts and chocolate chips (use 1/2 cup each)
Can I use melted butter instead of oil?
Yes! Use 1/2 cup (113g or 1 stick) melted butter, cooled slightly.
Pros: Richer flavour
Cons: Muffins won't stay moist quite as long (oil keeps them softer for more days)
If using butter, store muffins in the refrigerator to extend freshness.
What's the difference between pumpkin puree and pumpkin pie filling?
Pumpkin Puree:
100% pure pumpkin
No added ingredients
Ingredients: Pumpkin
Use for: Baking from scratch
Pumpkin Pie Filling:
Pumpkin + sugar + spices + thickeners
Pre-sweetened and spiced
Ingredients: different brands have different ingredients, but generally, they’re a mix of pumpkin, sugar, corn syrup, spices, etc.
Use for: Quick pies (not for recipes that already have sugar and spices)
Always use pure pumpkin puree for this recipe!
Can I make mini muffins with this recipe?
Yes! This recipe makes 24 mini muffins.
Adjustments:
Use a mini muffin tin (24 cups)
Fill each cup about 3/4 full using a 2-tablespoon scoop
Bake at 350°F for 12-15 minutes (shorter than regular muffins)
Check for doneness at 12 minutes
Mini muffins are perfect for toddlers, lunch boxes, and portion control!
Do pumpkin muffins need to be refrigerated?
My personal recommendation is to ALWAYS refrigerate baked goods.
Can I double this recipe?
Yes! This recipe doubles beautifully. You'll make 24 regular muffins or 48 mini muffins.
Tips for doubling:
Mix in your largest bowl (batter will be thick)
Or make two separate batches if your bowl isn't big enough
Bake in batches if you don't have enough muffin tins
Batter can sit at room temp for up to 30 minutes while first batch bakes
What's the best way to reheat pumpkin muffins?
Microwave (fastest):
5-10 seconds for room temp muffins
25-30 seconds for frozen muffins
Place on a paper towel to absorb moisture
Can I use whole wheat flour?
Yes! You can substitute whole wheat flour for up to half of the all-purpose flour (about 3/4 cup or 90g).
Tips:
- Add 1-2 tablespoons extra milk if batter seems too thick
- Muffins will be denser and more hearty
- Nutritional value will be higher (more fiber)
Don't substitute 100% whole wheat or muffins will be very dense and heavy.
Recipe Variations
Pumpkin Cream Cheese Muffins
Add a cream cheese filling for an extra special treat:
Mix 4 oz softened cream cheese + 2 tbsp sugar + 1/2 tsp vanilla
Fill muffin cups 1/3 full with batter
Add 1 tablespoon cream cheese mixture
Top with remaining batter
Bake as directed
Note: These MUST be refrigerated and will only last 3-4 days.
Streusel-Topped Pumpkin Muffins
Make a cinnamon streusel topping:
Mix 1/4 cup flour + 1/4 cup brown sugar + 1/2 tsp cinnamon
Cut in 2 tablespoons cold butter until crumbly
Sprinkle over muffin batter before baking
Bake as directed (may need 2-3 extra minutes)
Pumpkin Walnut Muffins (No Chocolate)
For a classic pumpkin muffin without chocolate:
Omit chocolate chips
Add 3/4 cup chopped toasted walnuts
Optional: Add 1/4 cup raisins or dried cranberries
Bake as directed
Pumpkin Banana Chocolate Chip Muffins
Combine two favorite flavors:
Reduce pumpkin to 1/2 cup (120g)
Add 1/2 cup (120g) mashed ripe banana
Don’t add Pumpkin Pie Spice mix, but keep the cinnamon
Proceed with recipe as written
Slight banana flavor complements the pumpkin!
Vegan Pumpkin Chocolate Chip Muffins
Make these completely plant-based:
Replace eggs with 2 flax eggs (2 tbsp ground flax + 5 tbsp water, let sit 5 min)
Use non-dairy milk (almond, oat, soy)
Use dairy-free chocolate chips
Bake as directed (may need 2-3 extra minutes)
Pumpkin Chocolate Chip Bread
Turn this into a loaf:
Grease a 9x5-inch loaf pan
Pour all batter into the pan
Bake at 325°F for 50-60 minutes
Cover with foil after 30 minutes to prevent over-browning
Cool 15 minutes before removing from pan
Storage Instructions
Refrigerator Storage (Recommended)
Store in an airtight container in the refrigerator for 5-7 days. This is the best method for maximum freshness.
How to store:
Cool muffins completely to room temperature
Place in an airtight container or resealable plastic bag
Store in the refrigerator
Optional: Bring to room temp before eating, or warm briefly
Freezer Storage
Freeze for up to 3 months for long-term storage.
Method 1: Individual Wrapping (Best)
Cool muffins completely
Wrap each muffin individually in plastic wrap
Place wrapped muffins in a freezer-safe bag
Remove as much air as possible
Label with date
Freeze
Method 2: Bulk Freezing
1. Cool muffins completely
2. Place in a single layer in freezer-safe container
3. Separate layers with parchment paper
4. Seal tightly and freeze
To Thaw:
Room temperature: 1-2 hours
Microwave: 30 seconds
Troubleshooting Common Problems
Problem: My muffins are dense and heavy
Causes & Solutions:
Overmixed flour: Mix only until just combined, a few lumps are okay
Too much flour: Spoon and level flour, don't pack it (or use scale: 220g)
Old leavening agents: Test baking powder/soda in water—should fizz actively
Eggs too cold: Use room temperature eggs
Problem: My muffins are dry
Causes & Solutions:
Overbaked: Reduce bake time, remove when toothpick has moist crumbs
Too much flour: Use proper measuring technique or scale
Reduced fat/sugar too much: Some fat and sugar is needed for moisture
Old eggs: Use fresh eggs for best results
Problem: My muffins sank in the middle
Causes & Solutions:
Oven temp too low: Use oven thermometer to verify 350°F
Opened oven too early: Wait at least 15 minutes before opening door
Overmixed batter: Mix only until combined
Too much leavening: Measure carefully with proper measuring spoons
Underbaked: Bake until toothpick comes out clean
Problem: My muffins stuck to the pan/liners
Causes & Solutions:
Pan not greased: Spray liners lightly with cooking spray
Removed too soon: Let cool 5 minutes in pan before removing
Low-quality liners: Use parchment paper liners or grease the pan directly
Overfilled cups:Fill only 3/4 full to prevent overflow and sticking
Problem: My chocolate chips all sank to the bottom
Causes & Solutions:
Batter too thin: Make sure measurements are accurate
Chips too large: Use standard-size or mini chocolate chips
Didn't toss in flour: Coat chips in 1 tbsp flour before adding to batter
Problem: My muffin tops are flat, not domed
Causes & Solutions:
Oven temp too low: Increase to 375°F, or start at 425°F for 5 min then reduce
Old leavening agents: Replace baking powder/soda every 6 months
Batter too thin: Check measurements, especially flour
Not filled enough: Fill cups to the top for bakery-style domes
Problem: My muffins are too sweet
Solutions:
- Reduce granulated sugar to 1/4 cup (50g) next time
- Use dark chocolate chips instead of semi-sweet
- Add a pinch more salt to balance sweetness
The Science Behind the Perfect Muffin:
Oil + Pumpkin = Maximum Moisture: Unlike butter which solidifies when cold, oil stays liquid at all temperatures. Combined with water-rich pumpkin puree, this creates incredibly moist muffins that stay tender for days.
One-Bowl Method = Tender Crumb: Mixing everything in one bowl minimizes gluten development. Less gluten = softer, more tender muffins (not tough and chewy).
Lower Sugar = Healthier & Less Sweet: With only 2/3 cup total sugar (compared to 1-1.5 cups in most recipes), these muffins are sweet enough to enjoy as a treat without being dessert-level sweet.
Baking Powder + Baking Soda = Better Rise: Using both leavening agents creates the perfect rise and crumb texture. Baking soda reacts with the acidity in pumpkin for immediate lift, while baking powder provides sustained rise throughout baking.
Room Temperature Eggs = Better Emulsion: Room temp eggs blend more easily into the batter, creating a smoother texture and better rise.
350°F = Perfect Balance: This moderate temperature bakes the muffins through without over-browning the tops. Higher temps would brown too fast; lower temps would create dense muffins.

The ultimate pumpkin chocolate chip muffins!

Recipe Card
Ingredients:
2 eggs
1 cup pumpkin puree
1 tsp vanilla extract
1/2 cup milk
1/2 cup neutral oil (I like using canola or vegetable oil)
1 tsp baking powder
1 tsp baking soda
1/2 tsp table salt
2 tsp ground cinnamon
1 tsp pumpkin pie spice
1/3 cup brown sugar
1/3 cup granulated sugar
1 3/4 cups all purpose flour
1/3 cup choc chips
Instructions:
Pre-heat the oven to 350F.
In a mixing bowl, or a stand mixer, add the eggs, vanilla, pumpkin purée, milk and oil. Mix well.
Add in the baking soda, baking powder, brown sugar, granular sugar, salt, cinnamon, pumpkin spice mixture. Mix well.
Be attentive in this next step, where the flour is added. It’s important not to over mix the flour in order for the muffins to have a good texture. Add in the flour, and mix until the flour has just about mixed in, but stop as soon as its completely mixed in.
Fold in the chocolate chips. That’s it, the batter is done!
If using a regular muffin pan, use a 1/4 cup to scoop the batter over muffin. If using a mini muffin tray, use a 2 tbsp measuring spoon to fill your muffin tray.
Bake for 18-22 minutes, until a toothpick inserted comes out clean, and remove from oven. Let rest for a few minutes before serving.
Once cooled, muffins should be kept in the fridge for less than one week.
The muffins can also be frozen.
Ive also had success doubling this recipe and freezing the batter.
Enjoy!
Did you make this recipe? I Want to see it!
Leave a photo and a ⭐ star rating and comment below to let us know how your muffins turned out. Did you make any substitutions or additions? Share your tips and photos with us!
Share this recipe: Help others discover this delicious recipe by sharing it on Pinterest, Facebook, or Instagram. Tag us @Sageandsimplicity so we can see your beautiful creations!
📌 Pin it for later: Save this recipe to your Pinterest boards for easy access.
You might also like:
Easy Three Bean Vegetarian Chili Recipe (One Pot, Under $15)
This easy three-bean vegetarian chili recipe uses pantry staples and takes just 5 minutes prep. Hearty, healthy, and perfect for meal prep. Vegan-friendly!
📖 Jump to Recipe | 💬 Jump to FAQs | 🖨️ Print Recipe
Prep Time: 10 minutes | Cook Time: 1 hour | Total Time: 1 hour 10 minutes | Servings: 8-10 servings
Looking for an easy, budget-friendly vegetarian chili recipe? This hearty three-bean chili is made with simple pantry ingredients, requires zero chopping, and delivers maximum flavour with minimal effort. Perfect for meal prep, freezer meals, or feeding a crowd on busy weeknights!
Why this recipe works: Just dump everything in one pot and let it simmer. The frozen vegetables mean no prep work, and the three types of beans provide lots of plant-based protein per serving. Plus, it tastes even better the next day!
What is Three Bean Vegetarian Chili?
This three-bean vegetarian chili is a hearty, meatless chili made with three varieties of beans — black beans, kidney beans, and chickpeas—simmered with tomatoes, vegetables, and warming spices like chili powder and garlic. This protein-packed dish is a staple in vegetarian and vegan cooking.
Unlike traditional beef chili, vegetarian bean chili relies on beans as the primary protein source, making it naturally high in fiber, vitamins, and minerals. It's also naturally gluten-free and can easily be made vegan.
Why You'll Love This Vegetarian Chili Recipe
✓ Incredibly Easy: No chopping required! Just dump and simmer
✓ Budget-Friendly: Costs under $15 to make a huge batch
✓ High Protein: 15g of plant-based protein per serving
✓ Meal Prep Friendly: Freezes beautifully for up to 3 months
✓ Crowd-Pleaser: Even meat-eaters love this hearty chili
✓ Hands-Off Cooking: Set it and forget it for an hour
✓ Pantry Staples: Uses ingredients you probably already have
✓ Vegan-Adaptable: Skip the dairy toppings for a vegan meal
Ingredients for Three Bean Chili
What You'll Need:
1 can (16 oz) black beans, drained and rinsed
1 can (16oz) chickpeas, drained and rinsed
1 can (16 oz) red kidney beans, drained and rinsed
3 cans (28 oz each) diced tomatoes, with juice (fire-roasted for extra flavour!)
1 tablespoon garlic powder
1 tablespoon chili powder (use hot chili powder for extra heat)
1 bag frozen spaghetti mix vegetables (diced bell peppers, carrots, onions, celery)
Optional: ½ cup pumpkin puree (adds creaminess and nutrition)
Salt and black pepper, to taste
Ingredient Notes & Substitutions
Can I use dried beans instead of canned beans?
Yes! Use about 4-5 cups of cooked beans total (approximately 1½ cups dried beans). Soak overnight and cook until tender before using.
What are spaghetti mix vegetables?
This frozen vegetable blend that contains diced bell peppers, onions, carrots, and celery. Find it in the frozen vegetable section of the grocery store. Can't find it? Dice and use 2 celery, 2 large carottes, 1 medium onion, and 2 bell peppers.
Why add pumpkin puree to vegetarian chili?
Pumpkin puree adds body, creaminess, and a subtle sweetness that balances the tomato acidity. It's a secret ingredient that boosts nutrition (vitamin A, fiber) without changing the flavour. You can also use butternut squash puree.
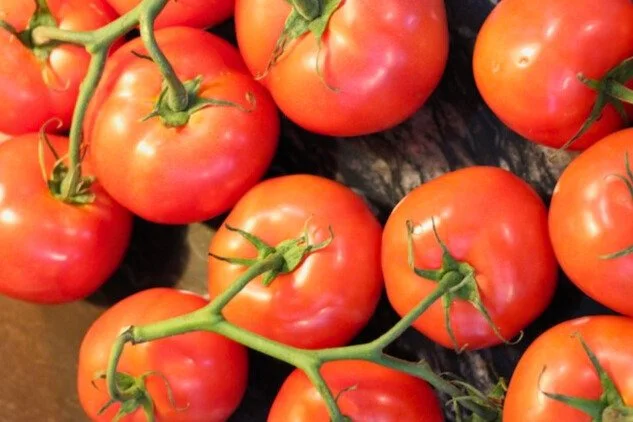
Can I use fresh tomatoes?
Yes! Use about 10 cups of diced large fresh tomatoes. However, canned tomatoes are more consistent and often taste better in chili since they're picked at peak ripeness.
How to Make Three Bean Vegetarian Chili
Step 1: Combine All Ingredients
Add all ingredients to a large stockpot or Dutch oven—frozen vegetables, diced tomatoes (with their juice), drained and rinsed black beans, kidney beans, chickpeas, and spices, garlic powder, chili powder and salt and pepper to taste. If using pumpkin puree, add it now as well. No need to thaw the vegetables first!
Step 2: Simmer Low and Slow
Place the pot over medium-low heat and bring to a gentle simmer. Let the chili cook for 55-60 minutes, stirring occasionally (every 10 minutes or so). The long simmer time allows the flavors to meld beautifully and the vegetables to become tender.
Pro tip: If the chili seems too thick, add ½ cup of water or vegetable broth. If it's too thin, let it simmer uncovered to reduce.
Step 3: Taste and Adjust Seasonings
Season with salt and black pepper to taste. Start with ½ teaspoon salt and add more as needed. Want more heat? Add more chili powder, cayenne pepper, to the pot or hot sauce to individual bowls.
Step 4: Serve and Enjoy!
Ladle into bowls and top with your favorite chili toppings. This chili tastes even better the next day as the flavors continue to develop!
Expert Tips for the Best Vegetarian Chili
Drain and rinse your beans: This removes excess sodium and prevents a gummy texture
Don't skip the simmer time: Low and slow = maximum flavour development
Taste before serving: Chili needs proper seasoning — don't be shy with salt!
Add acidity if needed: A splash of apple cider vinegar or lime juice brightens flavours
Make it smoky: Add 1 tsp smoked paprika, a chipotle pepper in adobo or liquid smoke to the pot
Thicken it up: Mash some of the beans against the pot or remove 3-4 cups and blend well before stirring it back into the pot
Let it rest: Chili tastes better after sitting for 10-15 minutes off the heat
How Long Does Vegetarian Chili Take to Cook?
This three bean chili takes approximately 1 hour and 10 minutes total — 10 minutes hands-on prep time and 60 minutes of mostly hands-off cooking time. The slow simmer develops rich, deep flavors that make this chili taste like it's been cooking all day.
Active time: 10 minutes (just dump and stir!)
Passive time: 60 minutes (while it simmers)
What to Serve with Three Bean Chili
This vegetarian chili is a complete meal on its own, but here are some delicious sides and toppings:
Toppings:
Shredded cheddar cheese or vegan cheese
Sour cream or plain Greek yogurt (or vegan alternatives)
Diced avocado or guacamole
Sliced green onions or chives
Fresh cilantro
Pickled jalapeños
Crushed tortilla chips
Hot sauce or sriracha
Lime wedges
Side Dishes:
Cornbread or jalapeño cornbread
Rice (white rice, brown rice, or cilantro-lime rice)
Tortilla Chips with salsa
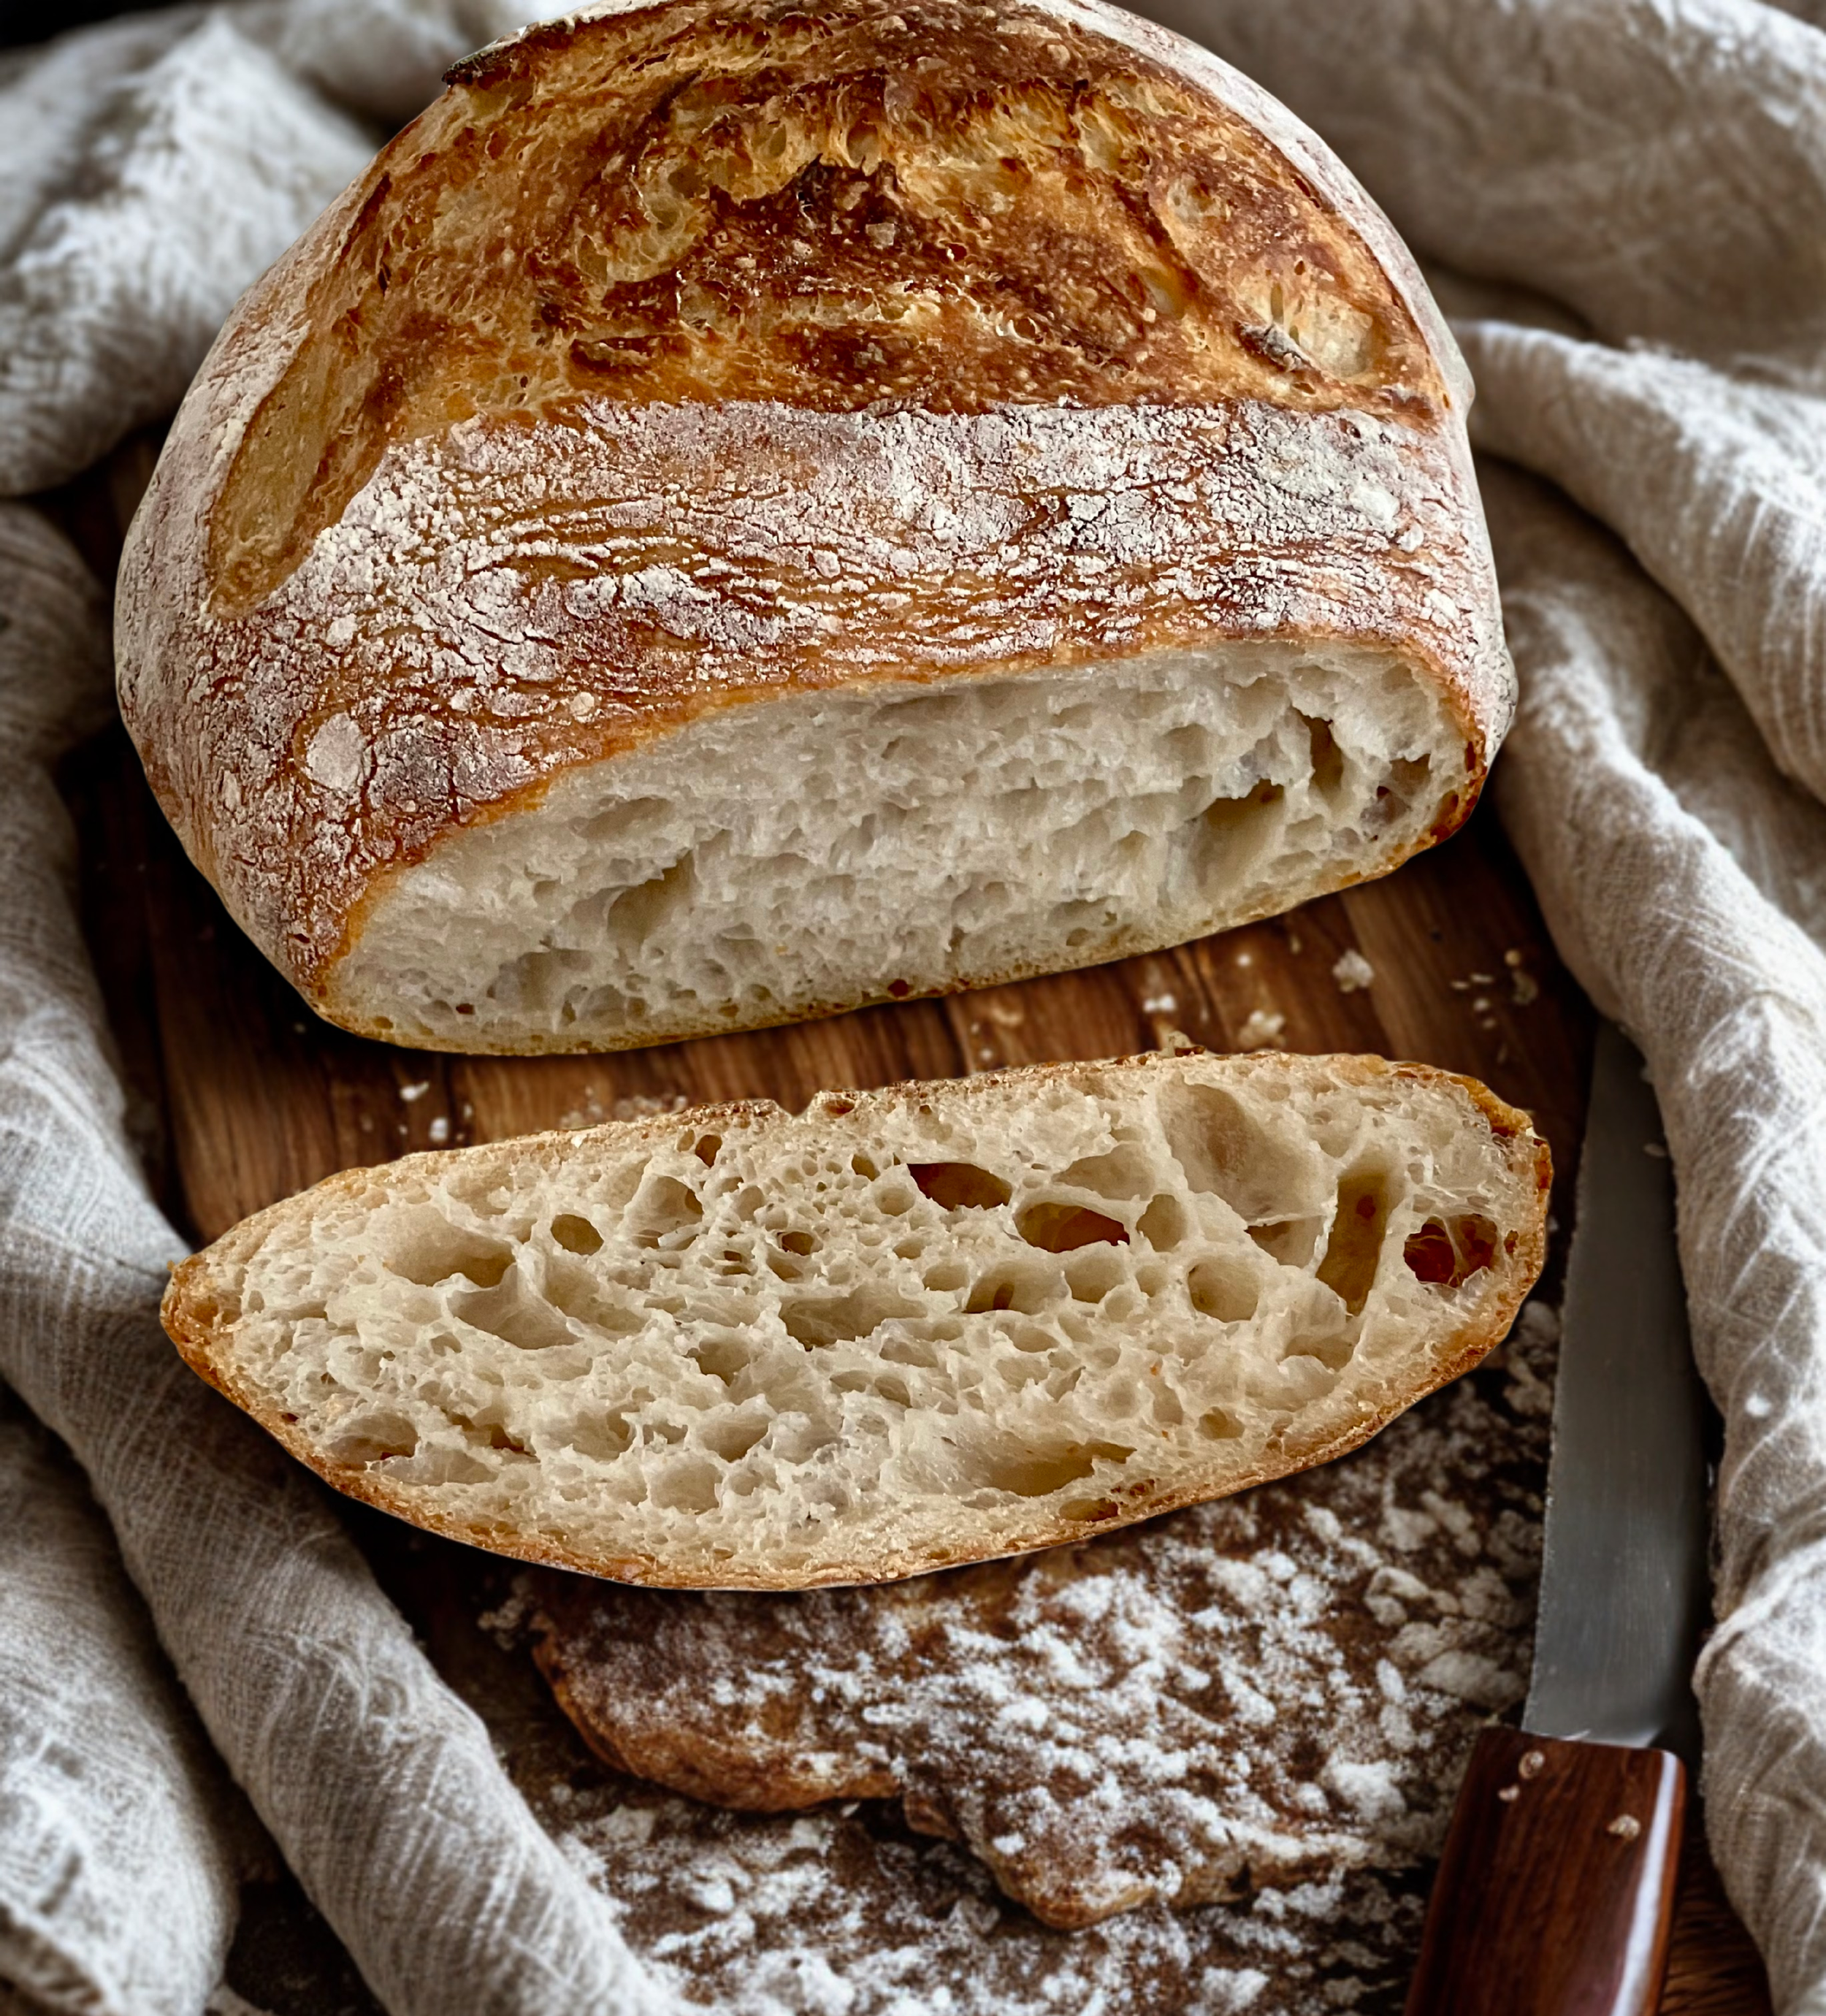
Sourdough Bread for dipping
Baked Sweet Potato topped with chili
Fresh Green Salad, with lime vinaigrette
Serving Ideas:
Chili bar: Set up a toppings bar and let everyone customize
Chili dogs: Serve over your favourite hot dogs
Chili nachos: Layer over tortilla chips with cheese
Chili mac: Mix with cooked elbow macaroni
Stuffed peppers: Use as filling for bell peppers
Baked potatoes: Load onto baked russet potatoes
How to Store and Reheat Three-Bean Chili
Refrigerator Storage:
Store cooled chili in an airtight container in the refrigerator for up to 5 days. The flavors actually improve after a day or two, making this perfect for meal prep!
Freezer Storage:
This chili freezes beautifully! Freeze in portion-sized containers or freezer bags for up to 3 months.
Freezing tips:
Let chili cool completely before freezing
Leave 1 inch of headspace in containers (chili expands when frozen)
Label with date and contents
Freeze flat in ziplock bags for easy stacking
Reheating Instructions:
Stovetop: Warm over medium-low heat, stirring occasionally, until heated through (about 10 minutes)
Microwave: Heat in 1-2 minute intervals, stirring between, until hot
From frozen: Thaw overnight in refrigerator, then reheat according to the above instructions.
Slow cooker: Reheat on low for 2-3 hours (great for potlucks!)
Is Three Bean Chili Healthy?
Yes! This vegetarian chili is incredibly nutritious and makes a healthy, balanced meal.
Health Benefits:
✓ High in plant-based protein from three types of beans
✓ Excellent source of fiber for digestive health
✓ Low in fat and naturally cholesterol-free
✓ Rich in antioxidants from tomatoes and beans
✓ Packed with vitamins and minerals (iron, potassium, folate)
✓ Heart-healthy and diabetes-friendly
✓ Naturally gluten-free (no wheat, barley, or rye)
✓ Can be made vegan by using vegan toppings
Recipe Card
Equipment Needed
Large Stock Pot or Dutch Oven
Long Wooden Spoon
Optional: Freezer Safe Storage Containers
Optional: Blender or hand blender
Ingredients:
1 can (16 oz) black beans, drained and rinsed
1 can (16 oz) red kidney beans, drained and rinsed
1 can (16oz) chickpeas, drained and rinsed
3 cans (28 oz each) diced tomatoes, with juice
1 tablespoon garlic powder
1 tablespoon chili powder
1 bag frozen spaghetti mix vegetables (bell peppers, onions, carrots, celery)
½ cup pumpkin puree (optional, but recommended)
Salt and black pepper to taste
Instructions:
Combine all ingredients in a large stockpot or Dutch oven. Add frozen vegetables (no need to thaw), diced tomatoes with juice, black beans, kidney beans, garlic powder, chili powder, and pumpkin puree if using.
Place over medium-low heat and bring to a gentle simmer.
Simmer for 55-60 minutes, stirring occasionally every 15 minutes to prevent sticking. The chili will thicken and the vegetables will become tender.
Season to taste with salt and black pepper. Start with ½ teaspoon of kosher salt and adjust as needed.
Serve hot with your favorite toppings like shredded cheese, sour cream, avocado, green onions, cilantro, and tortilla chips.
Notes:
Storage: Refrigerate up to 5 days or freeze up to 3 months
Meal prep friendly: Freezes beautifully in portion-sized containers
Naturally gluten-free and easily made vegan
Budget-friendly: Costs under $15 to make
Tastes better the next day as flavours continue to develop
Slow cooker option: Cook on low 4-6 hours or high 2-3 hours
Make it spicier: Add cayenne, jalapeños, or hot chili powder
Thicken if needed: Blend 3-4 cups of the chili and stir it back in
Variations and Customizations
Protein Additions:
Plant-based ground meat (Beyond, Impossible)
Cooked lentils (brown or green)
Quinoa (adds protein and texture)
TVP (textured vegetable protein)
Tempeh crumbled and sautéed
Spice Variations:
Smoky chili: Add 1 tsp smoked paprika + 1 chipotle in adobo
Cumin: Add 1-2 tsp ground cumin
Smokey: Add 1-2 tsp of liquid smoke
Fall spice: Add ½ tsp cinnamon + ¼ tsp nutmeg
Indian-inspired: Add 1 tsp garam masala + ½ tsp turmeric
Vegetable Boost:
Corn (1-2 cups fresh, frozen or canned)
Diced zucchini or yellow squash
Mushrooms (chopped, for meaty texture)
Sweet potato (diced, adds sweetness)
Butternut squash (cubed)
Spinach or kale (stir in at the end, once the heat has been turned off)
Make It Creamy:
Add ½ cup pumpkin puree (as suggested)
Blend 1-2 cups of chili and stir back in
Top with sour cream or Greek yogurt
Meal Prep and Batch Cooking
This three-bean chili is ideal for meal prep! Here's how to maximize your batch:
Meal Prep Strategy:
Make chili on Sunday for easy weeknight dinners
Portion into individual containers for grab-and-go lunches
Freeze half for quick future meals
Baked Russet potatoes or Sourdough Bread to serve alongside
Batch Cooking Tips:
Triple the recipe if you have one (or several) large stockpot
Use a slow cooker for hands-off cooking while you prep other meals
Label everything with date and reheating instructions
Frequently Asked Questions (FAQ)
Can I make this three bean chili in a slow cooker or Crock Pot?
Yes! This recipe is perfect for the slow cooker. Add all ingredients to your slow cooker and cook on low for 4-6 hours or high for 2-3 hours. No need to sauté anything first!
How can I make this chili spicier?
Add any of these: cayenne pepper (start with ¼ tsp), diced jalapeños, hot chili powder, chipotle peppers in adobo, red pepper flakes, straight into the pot. Another option is to add your favorite hot sauce to individual bowls. Taste and adjust as you go!
Can I make this chili less spicy for kids?
Use mild chili powder or reduce it to 1-2 teaspoons. You can also serve plain bowls for kids and let adults add hot sauce at the table.
What beans are best for vegetarian chili?
Black beans, kidney beans, and pinto beans are the classic trio, but you can use any combination. Try white beans (Great Northern, cannellini), chickpeas, or navy beans for variety.
Do I need to drain and rinse canned beans?
Yes, always! Draining and rinsing removes excess sodium and the thick liquid that can make chili gummy. Rinse under cold water until the water runs clear.
Can I use fresh vegetables instead of frozen?
Yes! Dice 1 large onion, 2 bell peppers, 2 carrots, and 2 celery stalks. Sauté in 1 tablespoon of oil for 5-7 minutes before adding the other ingredients.
Why is my chili watery?
Let it simmer longer uncovered to evaporate excess liquid. You can also mash some beans against the pot to naturally thicken it, or add a tablespoon of tomato paste or cornmeal.
Why is my chili bland?
Chili needs proper seasoning! Add more salt (chili typically needs 1-2 teaspoons total), chili powder, garlic powder, or cumin. A splash of vinegar or lime juice can also brighten flavors.
Can I double this recipe?
Absolutely! This recipe doubles or triples easily. Just use a larger pot and you may need to extend the simmer time by 10-15 minutes.
Is this chili vegan?
The base chili is vegan! Just use vegan toppings like dairy-free sour cream, vegan cheese, and avocado instead of dairy products.
Can I add meat to this recipe?
Yes, though it would no longer be vegetarian. Brown 1 pound of ground beef, ground chicken or turkey and add it with the other ingredients. You can also add cooked sausage.
What's the best pot for making chili?
A heavy-bottomed stockpot, Dutch oven, or large saucepan works best. The heavy bottom prevents scorching during the long simmer time.
Did You Make This Recipe? I want to see it!
Leave a ⭐ star rating and comment below to let us know how your three-bean chili turned out. Did you make any substitutions or additions? Share your tips and photos with us!
Share this recipe: Help others discover this delicious recipe by sharing it on Pinterest, Facebook, or Instagram. Tag us @Sageandsimplicity so we can see your beautiful creations!
📌 Pin it for later: Save this recipe to your Pinterest boards for easy access.
you might also like:
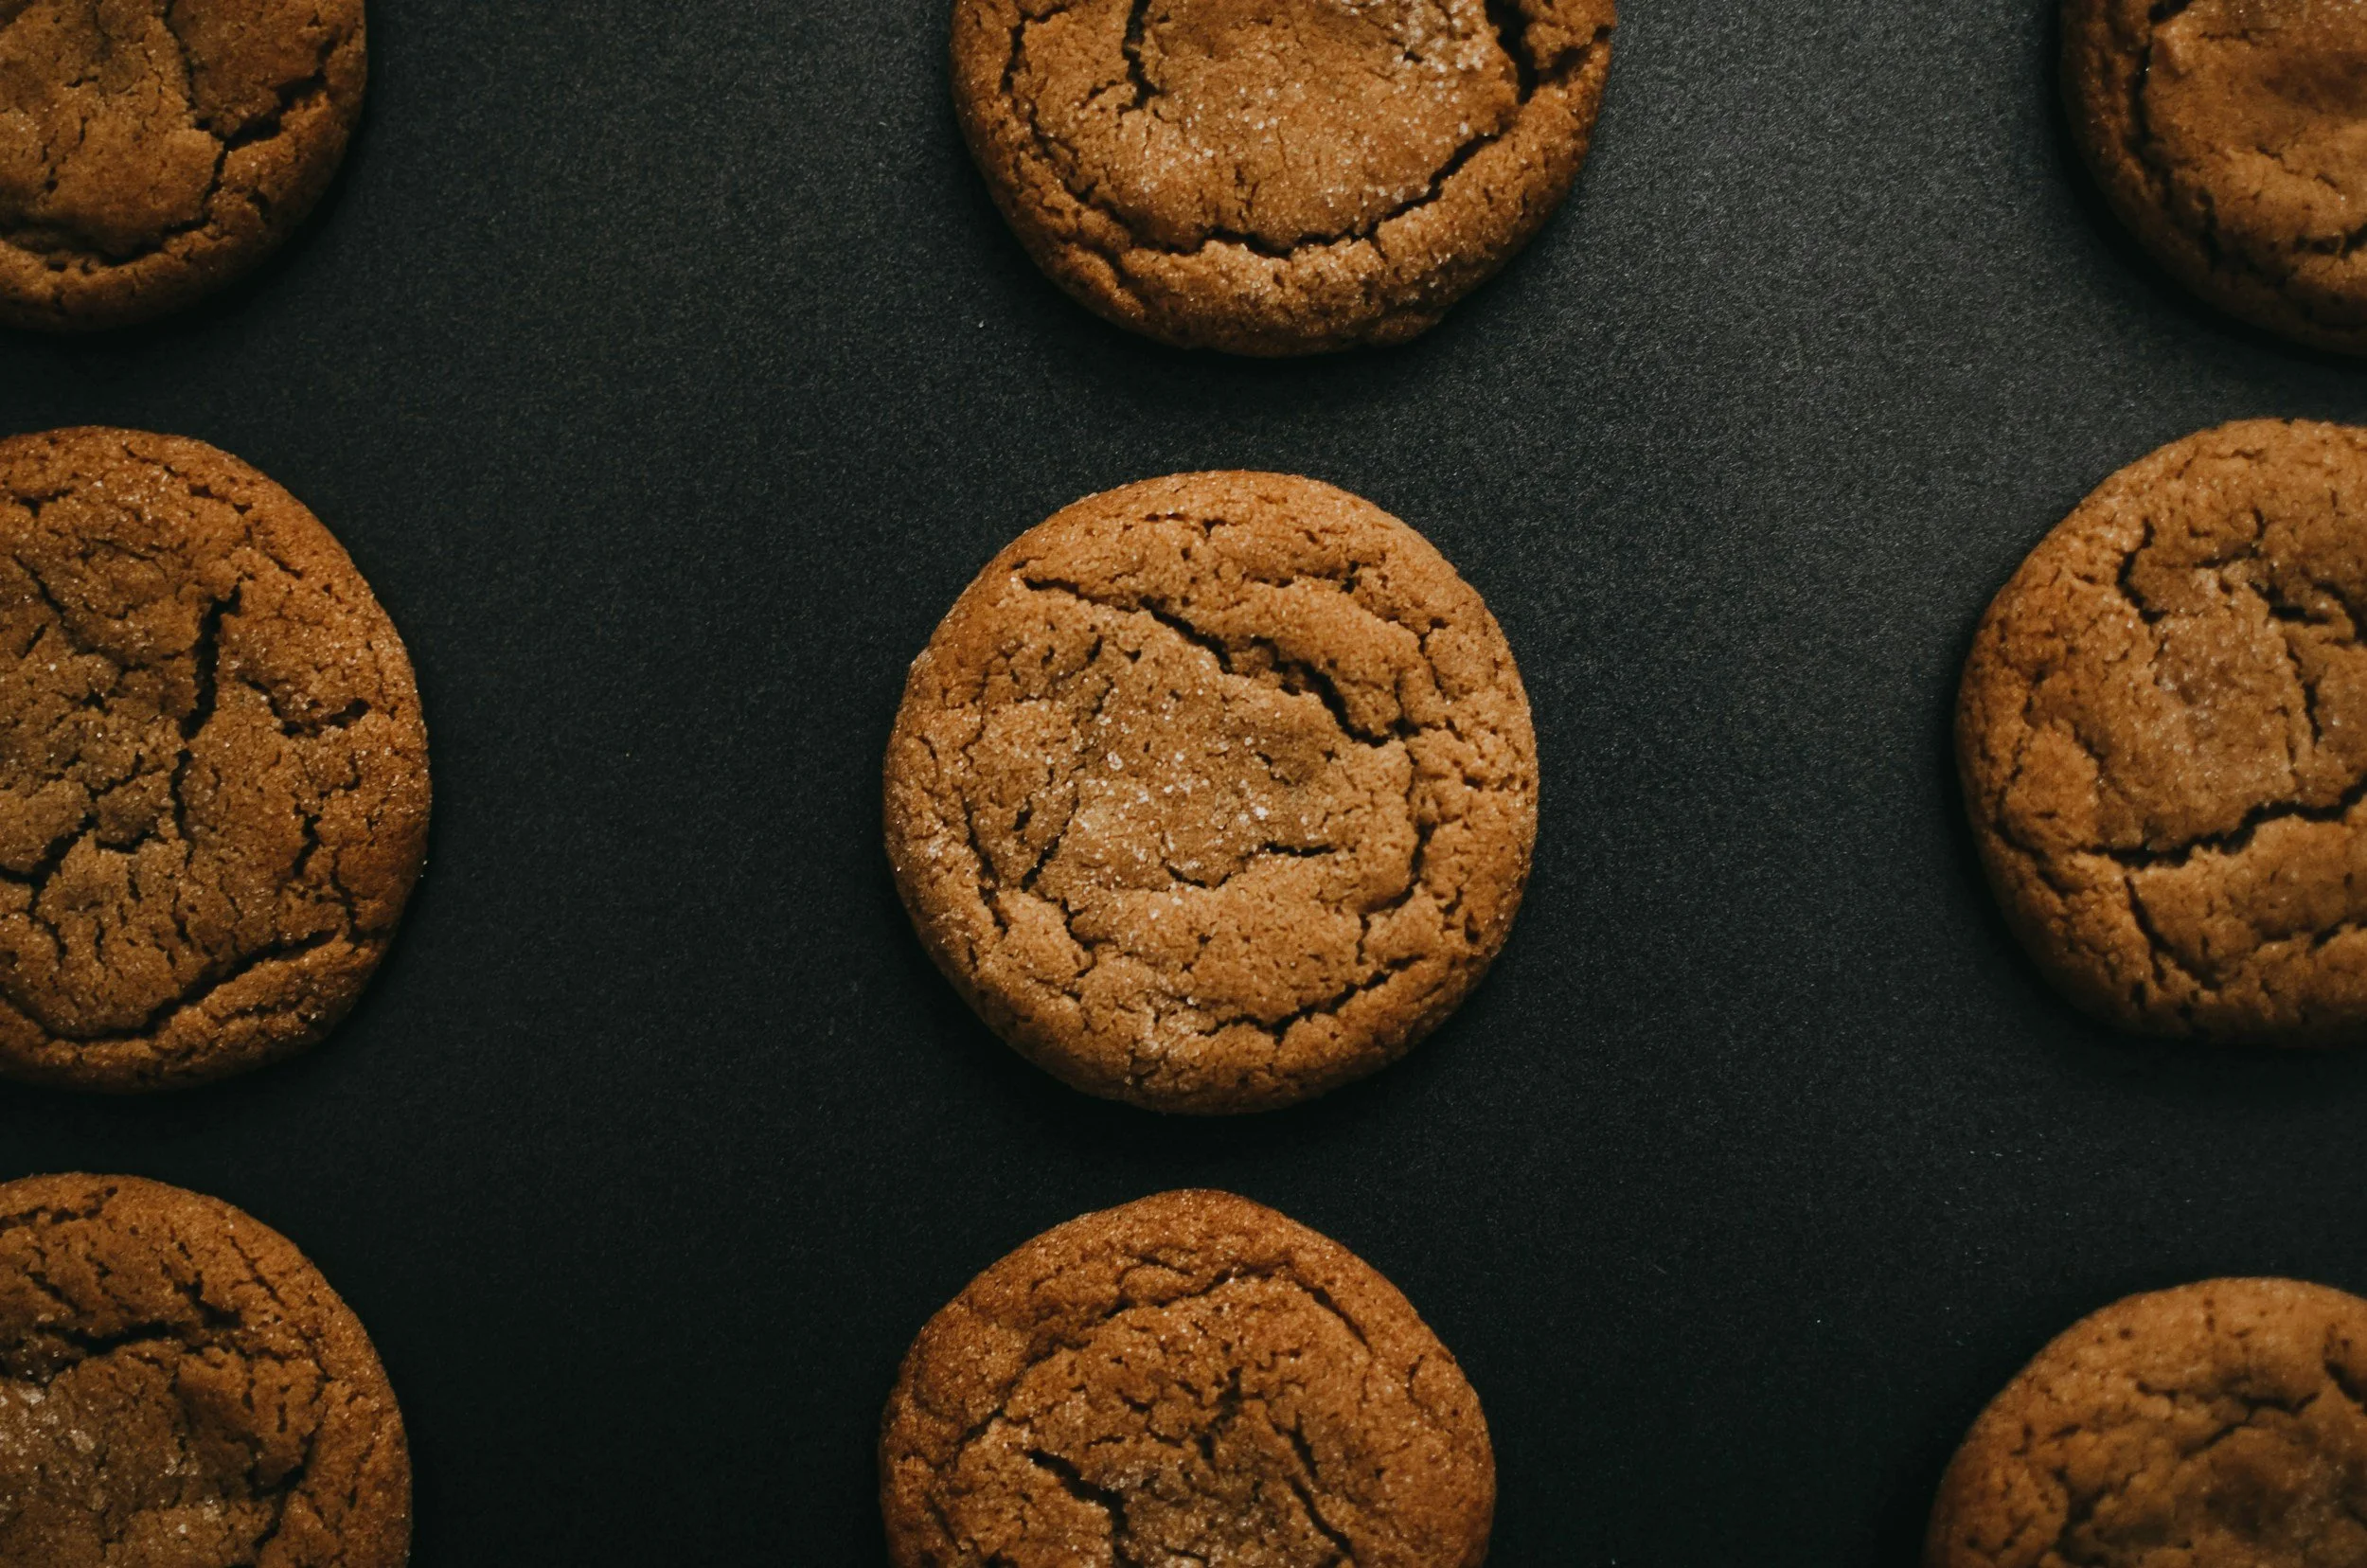
Easy Soft Gingerbread Cookies (with Fresh Ginger!)
These soft gingerbread cookies are made with ¾ cup of fresh ginger root — not powdered spice. The secret? A garlic press extracts all the flavorful juice without the fibrous texture. The dough rests for 24-72 hours, allowing the fresh ginger to infuse and the molasses flavor to deepen. The result is a chewy cookie with complex, warming spice that tastes nothing like store-bought. My kids request these several times a year, especially during fall and winter. With just 7 simple ingredients and a make-ahead method, these are the easiest holiday cookies you'll ever make.
As an Amazon Associate I earn from qualifying purchases.
⭐⭐⭐⭐⭐ (4.9/5 based on reader reviews)
📖 Jump to Recipe | 💬 Jump to FAQs | 🖨️ Print Recipe
Prep Time: 20 minutes | Chill Time: 24-72 hours | Total Time: 24+ hours | Yield: 20 cookies | Serving Size: 1 cookie | Difficulty: Easy

Easy Soft Gingerbread Cookies
Introduction
Once you taste cookies made with real ginger, there's no going back to powdered spices. These soft gingerbread cookies get their incredible flavour from fresh ginger root—¾ cup of it— pressed directly into the dough for intense, warming spice that can't be replicated with anything from a jar.
The secret to these cookies? Patience. Let that dough rest for at least 24 hours in the fridge. This slow cold fermentation deepens the molasses flavour and allows the fresh ginger to fully infuse the dough. The result is a cookie with complex, layered flavour that tastes like you spent hours in the kitchen—even though the actual hands-on time is minimal.
These are soft, chewy galettes that spread naturally as they bake, creating cookies with tender centers and slightly crisp edges. They're nothing like traditional gingerbread men (they’re far too soft for cookie cutters), but that's exactly what makes them special. These are the gingerbread cookies you want with your morning coffee or afternoon tea.
My kids—and their friends—ask me to make these several times a year, especially in the fall and winter when that warm ginger spice feels just right. They've also become a staple during the holidays in our house, filling the kitchen with the most incredible aroma as they bake.
Why You'll Love This Recipe
Fresh Ginger Makes All the Difference: Real ginger root delivers bright, zesty flavour that ground ginger simply can't match. The garlic press method extracts all the spicy juice without the fibrous texture.
Make-Ahead Friendly: Mix the dough today, bake anytime in the next three days. Perfect for holiday prep or when you want fresh-baked cookies without day-of stress.
Simple Ingredient List: Just seven real ingredients you probably have in your pantry. No specialty items required.
Minimal Cleanup: The garlic press trick means no grater to wash, no ginger bits all over your cutting board.
Kid-Approved: These have been tested and loved by multiple rounds of kids and their friends. That's the real stamp of approval.
Equipment Needed
Mixing bowl (affiliate link)
Electric mixer or stand mixer with paddle attachment (optional, can mix by hand)
Garlic press (essential for this recipe)
Measuring cups and spoons
Sifter or fine-mesh strainer
Parchment paper
Plastic wrap or airtight container
Sharp knife
Baking sheet (affiliate link)
Wire cooling rack (affiliate link)
Ingredients
½ cup salted butter, softened
¼ cup brown sugar, packed
1 large egg
¾ cup fresh ginger, peeled and cubed (about 4-5 inches of ginger root)
¾ cup molasses (not blackstrap)
1 tsp baking soda
2 cups all-purpose flour, sifted
Instructions
Step 1: In a mixing bowl, cream together the softened butter and brown sugar until light and fluffy, about 2 minutes. Add the egg and mix until fully combined.
Step 2: Using a garlic press, press the ginger cubes, one at a time, directly into the butter mixture, squeezing out all the juice and pulp. Small ginger pieces will fall into the dough—this is fine and adds texture. Continue until all ginger has been pressed. Discard the leftover ginger fibres once pressed.
Step 3: Add the molasses and baking soda. Mix until everything is fully incorporated and the mixture is smooth and glossy.
Step 4: Add the sifted flour and gently fold in with a spatula or wooden spoon until just combined. The dough will be soft and slightly sticky. Don't overmix or the cookies will be tough.
Step 5: Transfer the dough onto a large sheet of parchment paper. Shape it into a log about 2-3 inches in diameter. Wrap tightly in the parchment, then wrap again in plastic wrap or place in a sealed container. Refrigerate for 24-72 hours.
Step 6: When ready to bake, preheat your oven to 350°F (175°C). Line a baking sheet with parchment paper.
Step 7: Remove the dough log from the fridge. While the dough is still cold and firm, use a sharp knife to slice into 1-inch thick rounds. Work quickly—the dough becomes sticky as it warms up. If it starts getting soft, return to the fridge for 15 minutes.
Step 8: Place cookie rounds on the prepared baking sheet, spacing them about 2 inches apart. They will spread during baking.
Step 9: Bake for 10-12 minutes. The cookies will look slightly underdone in the center with set edges—this is what you want. They will continue to cook as they cool.
Step 10: Let the cookies cool on the baking sheet for 5 minutes to set, then carefully transfer to a wire rack to cool completely. They'll be very soft when warm but will firm up as they cool.
Recipe Notes & Tips
About the Fresh Ginger: Don't skip this or substitute ground ginger. The fresh ginger is what makes these cookies special. Look for ginger root that has smooth, tight skin and no wrinkles. Young ginger is less fibrous and easier to press.
The Garlic Press Method: This is a game-changer for working with fresh ginger. It extracts all the flavourful juice and leaves behind the tough fibers. If you don't have a garlic press, finely grate the ginger and squeeze it through cheesecloth to extract the juice.
Why the Long Chill? The 24-72 hour rest isn't just about easier slicing. The flavours meld and deepen during this time. The molasses becomes less sharp, the ginger infuses throughout, and the cookies develop a more complex taste. Cookies baked after 24 hours taste good. Cookies baked after 48-72 hours taste incredible.
Slice While Cold: This is critical. If the dough warms up, it becomes very sticky and difficult to slice cleanly. The butter softens and the dough will stick to your knife and hands. If it starts getting soft, pop it back in the fridge for 15 minutes.
Don't Overbake: These cookies will look slightly underdone when you pull them from the oven. That's correct. They firm up as they cool. Overbaking will give you dry, hard cookies instead of the soft, chewy texture you want. The edges should be set and slightly darker, but centers should still look soft.
Do Not Use Cookie Cutters: These are galettes (rustic, free-form cookies), not structural gingerbread. The high butter content makes them too soft to roll and cut into shapes. They spread naturally as they bake. Embrace the simple, rustic look.
Butter Temperature Matters: Softened butter should be room temperature—it should leave a slight indent when pressed but not be greasy or melted. If your butter is too soft, the cookies will spread too much.
Storage & Freezing
Refrigerator: Store cooled cookies in an airtight container in the fridge for up to 5 days. They actually get better on day 2-3 as the flavours continue to develop. Place parchment paper between layers if stacking.
Freezing Baked Cookies: Freeze baked cookies in a freezer-safe container or zip-top bag for up to 3 months. Layer with parchment paper to prevent sticking. Thaw at room temperature for 30 minutes before serving.
Freezing Unbaked Dough: You can freeze the unbaked dough log (wrapped tightly in plastic wrap and then aluminum foil) for up to 3 months. Slice and bake directly from frozen, adding 1-2 minutes to the baking time. No need to thaw.
Variations & Additions
Crystallized Ginger: Fold in ¼ cup of finely chopped crystallized ginger after adding the flour for extra ginger punch and chewy texture.
Maple Ginger Cookies: Replace half the molasses with pure maple syrup for a lighter, slightly less intense flavour with maple undertones.
Lemon Ginger Cookies: Add 1 tsp of fresh lemon zest with the ginger for bright, citrusy notes that cut through the richness.
Dark Chocolate Ginger: Fold in ½ cup of dark chocolate chips after adding the flour. The bittersweet chocolate pairs beautifully with fresh ginger and molasses.
Ginger Spice Cookies: Add ½ tsp cinnamon and ¼ tsp ground cloves for a more traditional spiced cookie flavour alongside the fresh ginger.
Serving Suggestions
These soft gingerbread cookies pair perfectly with:
Hot coffee or espresso (the bitterness balances the sweetness)
Hot black tea, such as Orange Pekoe or English Breakfast
Chai tea or spiced tea
Cold milk (classic combination)
Vanilla ice cream (make ice cream sandwiches!)
Hot apple cider
Whipped cream or cream cheese frosting for special occasions
Frequently Asked Questions
Can I use ground ginger instead of fresh?
You can, but the flavour won't be the same. Fresh ginger has a bright, zesty, almost citrusy quality that ground ginger lacks. If you must substitute, use 2 tablespoons of ground ginger. The cookies will taste more like traditional gingerbread and less vibrant.
What does fresh ginger taste like in cookies?
Fresh ginger has a warm, spicy flavour with a slight sweetness and bright, peppery notes. It's more complex than ground ginger—less dusty, more alive. The juice extracted from fresh ginger distributes evenly throughout the dough, giving every bite that warming spice.
Why do I need to wait 24-72 hours?
The long chill time allows the fresh ginger to infuse the dough and lets all the flavours develop and meld together. The molasses mellows, the spices bloom, and the texture improves. It also makes the dough much easier to slice. You can technically bake after just a few hours of chilling, but the flavour won't be as deep and complex.
My dough is too sticky to slice. Where did I do wrong?
You didn't do anything wrong—the dough just warmed up. This happens because of the high butter content. Put it back in the fridge for 15-20 minutes and try again. Always slice while the dough is very cold. Work quickly and clean your knife between cuts if needed.
Can I make these into gingerbread men?
No, these cookies are too soft to hold a cut shape. They spread as they bake because of the high butter content, which is what gives them their soft, chewy texture. If you want cut-out gingerbread cookies, you'll need a different recipe with less butter and more flour for structure.
How do I know when they're done baking?
The edges will be set and slightly darker brown, but the centers will still look soft and shiny—almost underdone. They should not be brown all over or firm to the touch. Remember, they continue cooking as they cool on the pan. When in doubt, underbake rather than overbake.
Can I double this recipe?
Absolutely. Make two separate logs and store them in the fridge. You can bake one now and save one for later, or bake both at once using extra baking sheets. The dough freezes beautifully, so feel free to make a double batch.
Do I need to use salted or unsalted butter?
This recipe calls for salted butter, which adds a subtle savoury note that balances the sweetness of the molasses and brown sugar. If you only have unsalted butter, add ¼ tsp of salt to the dough when you add the flour.
Why use a garlic press for ginger?
A garlic press extracts the flavourful juice and soft pulp from fresh ginger while leaving behind the tough, fibrous strings that can be unpleasant in baked goods. It's faster than grating, more efficient than mincing, and means no stringy bits in your cookies. Plus, cleanup is much easier than washing a grater.
My cookies spread too much. What happened?
Make sure your butter is softened but not melted or greasy when you start. Also, the dough must be cold when it goes into the oven. If the dough warmed up while you were slicing, pop the cut cookies in the fridge for 10 minutes before baking. Finally, make sure you're measuring flour correctly (spoon and level, don't pack).
Can I add chocolate chips?
You can fold in ½ cup of dark chocolate chips after adding the flour. Dark chocolate (60-70% cacao) pairs beautifully with fresh ginger and molasses. Milk chocolate will be too sweet.
Are these ginger galettes healthy?
No. These are a treat, not a health food. However, they do contain fresh ginger (which has anti-inflammatory properties) and molasses (which contains iron and calcium). They're made with real ingredients and no artificial flavours or preservatives. Enjoy them in moderation as part of a balanced diet.
What's the difference between gingerbread cookies and molasses cookies?
Molasses cookies typically use ground ginger (if any ginger at all) and focus on the deep, sweet molasses flavour. Gingerbread cookies have a stronger ginger presence and more warming spices. These cookies bridge both—they have robust molasses flavour but the fresh ginger makes them distinctly "gingerbread."
Why are my cookies hard instead of soft?
Most likely, they were overbaked. These cookies should look slightly underdone when you remove them from the oven. They firm up as they cool but should remain soft and chewy. Overbaking by even 2-3 minutes can make them hard. Try reducing baking time by 1-2 minutes next time.
Final Thoughts
These soft gingerbread cookies prove that simple ingredients can create extraordinary flavour. The fresh ginger makes all the difference, and the make-ahead nature means you can enjoy warm cookies without the stress of last-minute baking.
Whether you're baking for your family, holiday gatherings, or just because you're craving that warming ginger spice, this recipe delivers every time. The garlic press trick will change how you use fresh ginger in all your baking.
Did You Make This Recipe? I want to see it!
Leave a ⭐ star rating and comment below to let us know how your ginger galettes turned out. Did you make any substitutions or additions? Share your tips and photos with us!
Share this recipe: Help others discover this delicious recipe by sharing it on Pinterest, Facebook, or Instagram. Tag us @Sageandsimplicity so we can see your beautiful creations!
📌 Pin it for later: Save this recipe to your Pinterest boards for easy access.
You Might also like:
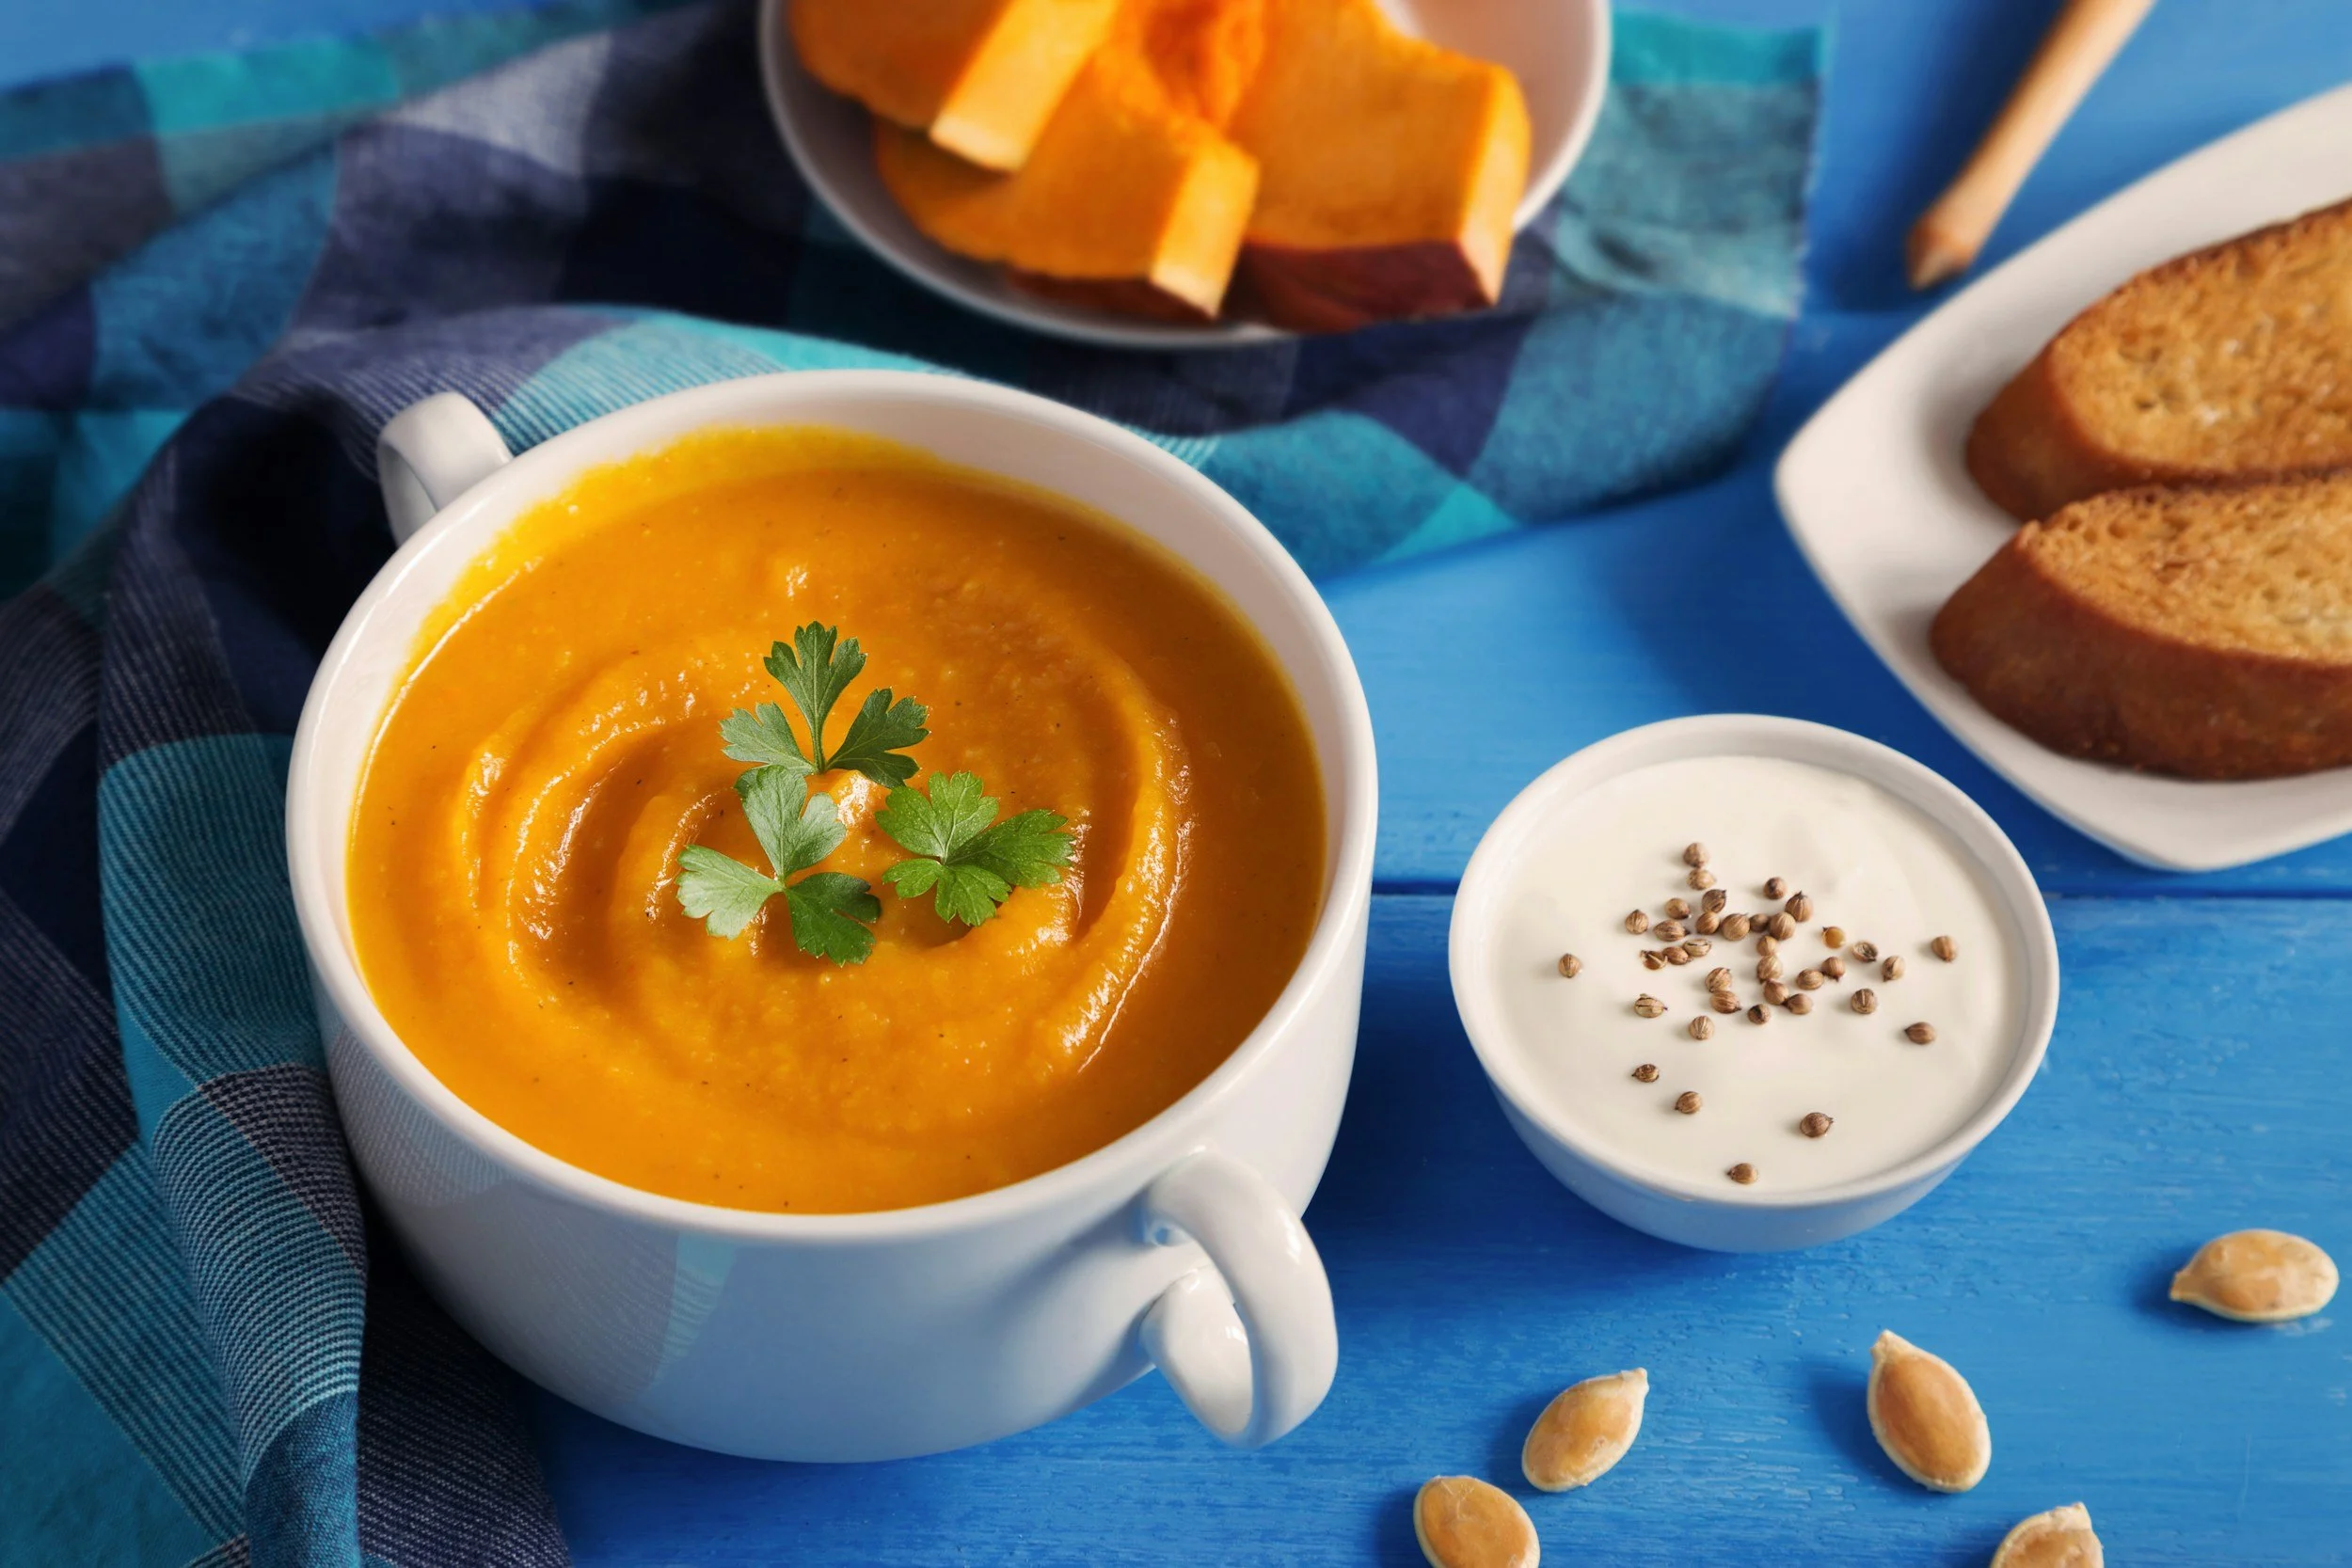
Carrot Ginger Soup: A Budget-Friendly Family Favorite Kids Truly Love
This creamy carrot ginger soup is the perfect blend of naturally sweet carrots and warming fresh ginger. Made with simple, wholesome ingredients, it's an easy recipe that's both comforting and nutritious but doesn’t break the bank!
The fresh ginger adds a subtle spicy kick that balances the sweetness of the carrots beautifully. This soup is perfect for cold weather days, healthy meal prep, or whenever you need a cozy, satisfying bowl of comfort.
Ready to make this delicious carrot ginger soup? Let's get started!
There’s something incredibly comforting about a pot of homemade soup simmering on the stove, especially when it’s simple, nourishing, and made with ingredients you likely already have on hand. This Carrot Ginger Soup recipe is one of those rare meals that checks every box: budget friendly, pantry-staple simple, and genuinely loved by kids. It’s smooth, mildly sweet, and warming without being spicy—making it a reliable go-to for busy weeknights and cozy lunches alike.
What makes this carrot ginger soup especially appealing is how accessible it is. With just a handful of vegetables, dried lentils, and broth, this recipe comes together without any fancy ingredients or complicated steps. Carrots and lentils are among the most affordable staples at the grocery store, yet they deliver incredible flavour and nutrition. If you’re looking for an inexpensive, healthy soup recipe that doesn’t feel like a compromise, this one is it.
Parents often ask for meals that work double duty, and this soup truly does. It’s thick, filling, and smooth—perfect for kids’ lunches, whether packed in a thermos for school or reheated at home. The natural sweetness of carrots combined with the warmth of ginger makes this soup especially appealing to younger palates. Best of all, many parents report the same happy surprise: kids don’t just tolerate this soup, they actually ask for it.
From a practical standpoint, this soup is forgiving and flexible. It doesn’t require precise chopping, exact timing, or constant attention. The red lentils dissolve naturally as they cook, creating a creamy texture without the need for dairy. Blending the soup and adding freshly pressed ginger at the end keeps the flavour bright and balanced, without overwhelming heat—another reason kids love it.
Served with toasted sourdough or warm, garlicky naan, this carrot ginger soup becomes a complete, satisfying meal that feels far more special than its cost suggests. Whether you’re cooking on a tight budget, planning school lunches, or simply looking for a family-friendly soup recipe, this is one you’ll come back to again and again.
Carrot Ginger Soup Recipe (Budget-Friendly & Kid-Approved)
Why You’ll Love This Soup
Affordable, pantry-staple ingredients
Naturally creamy, without the dairy
Perfect for kids’ lunches and family dinners
Mild, comforting flavour that kids genuinely enjoy
Freezer-friendly and easy to reheat
REcipe Card
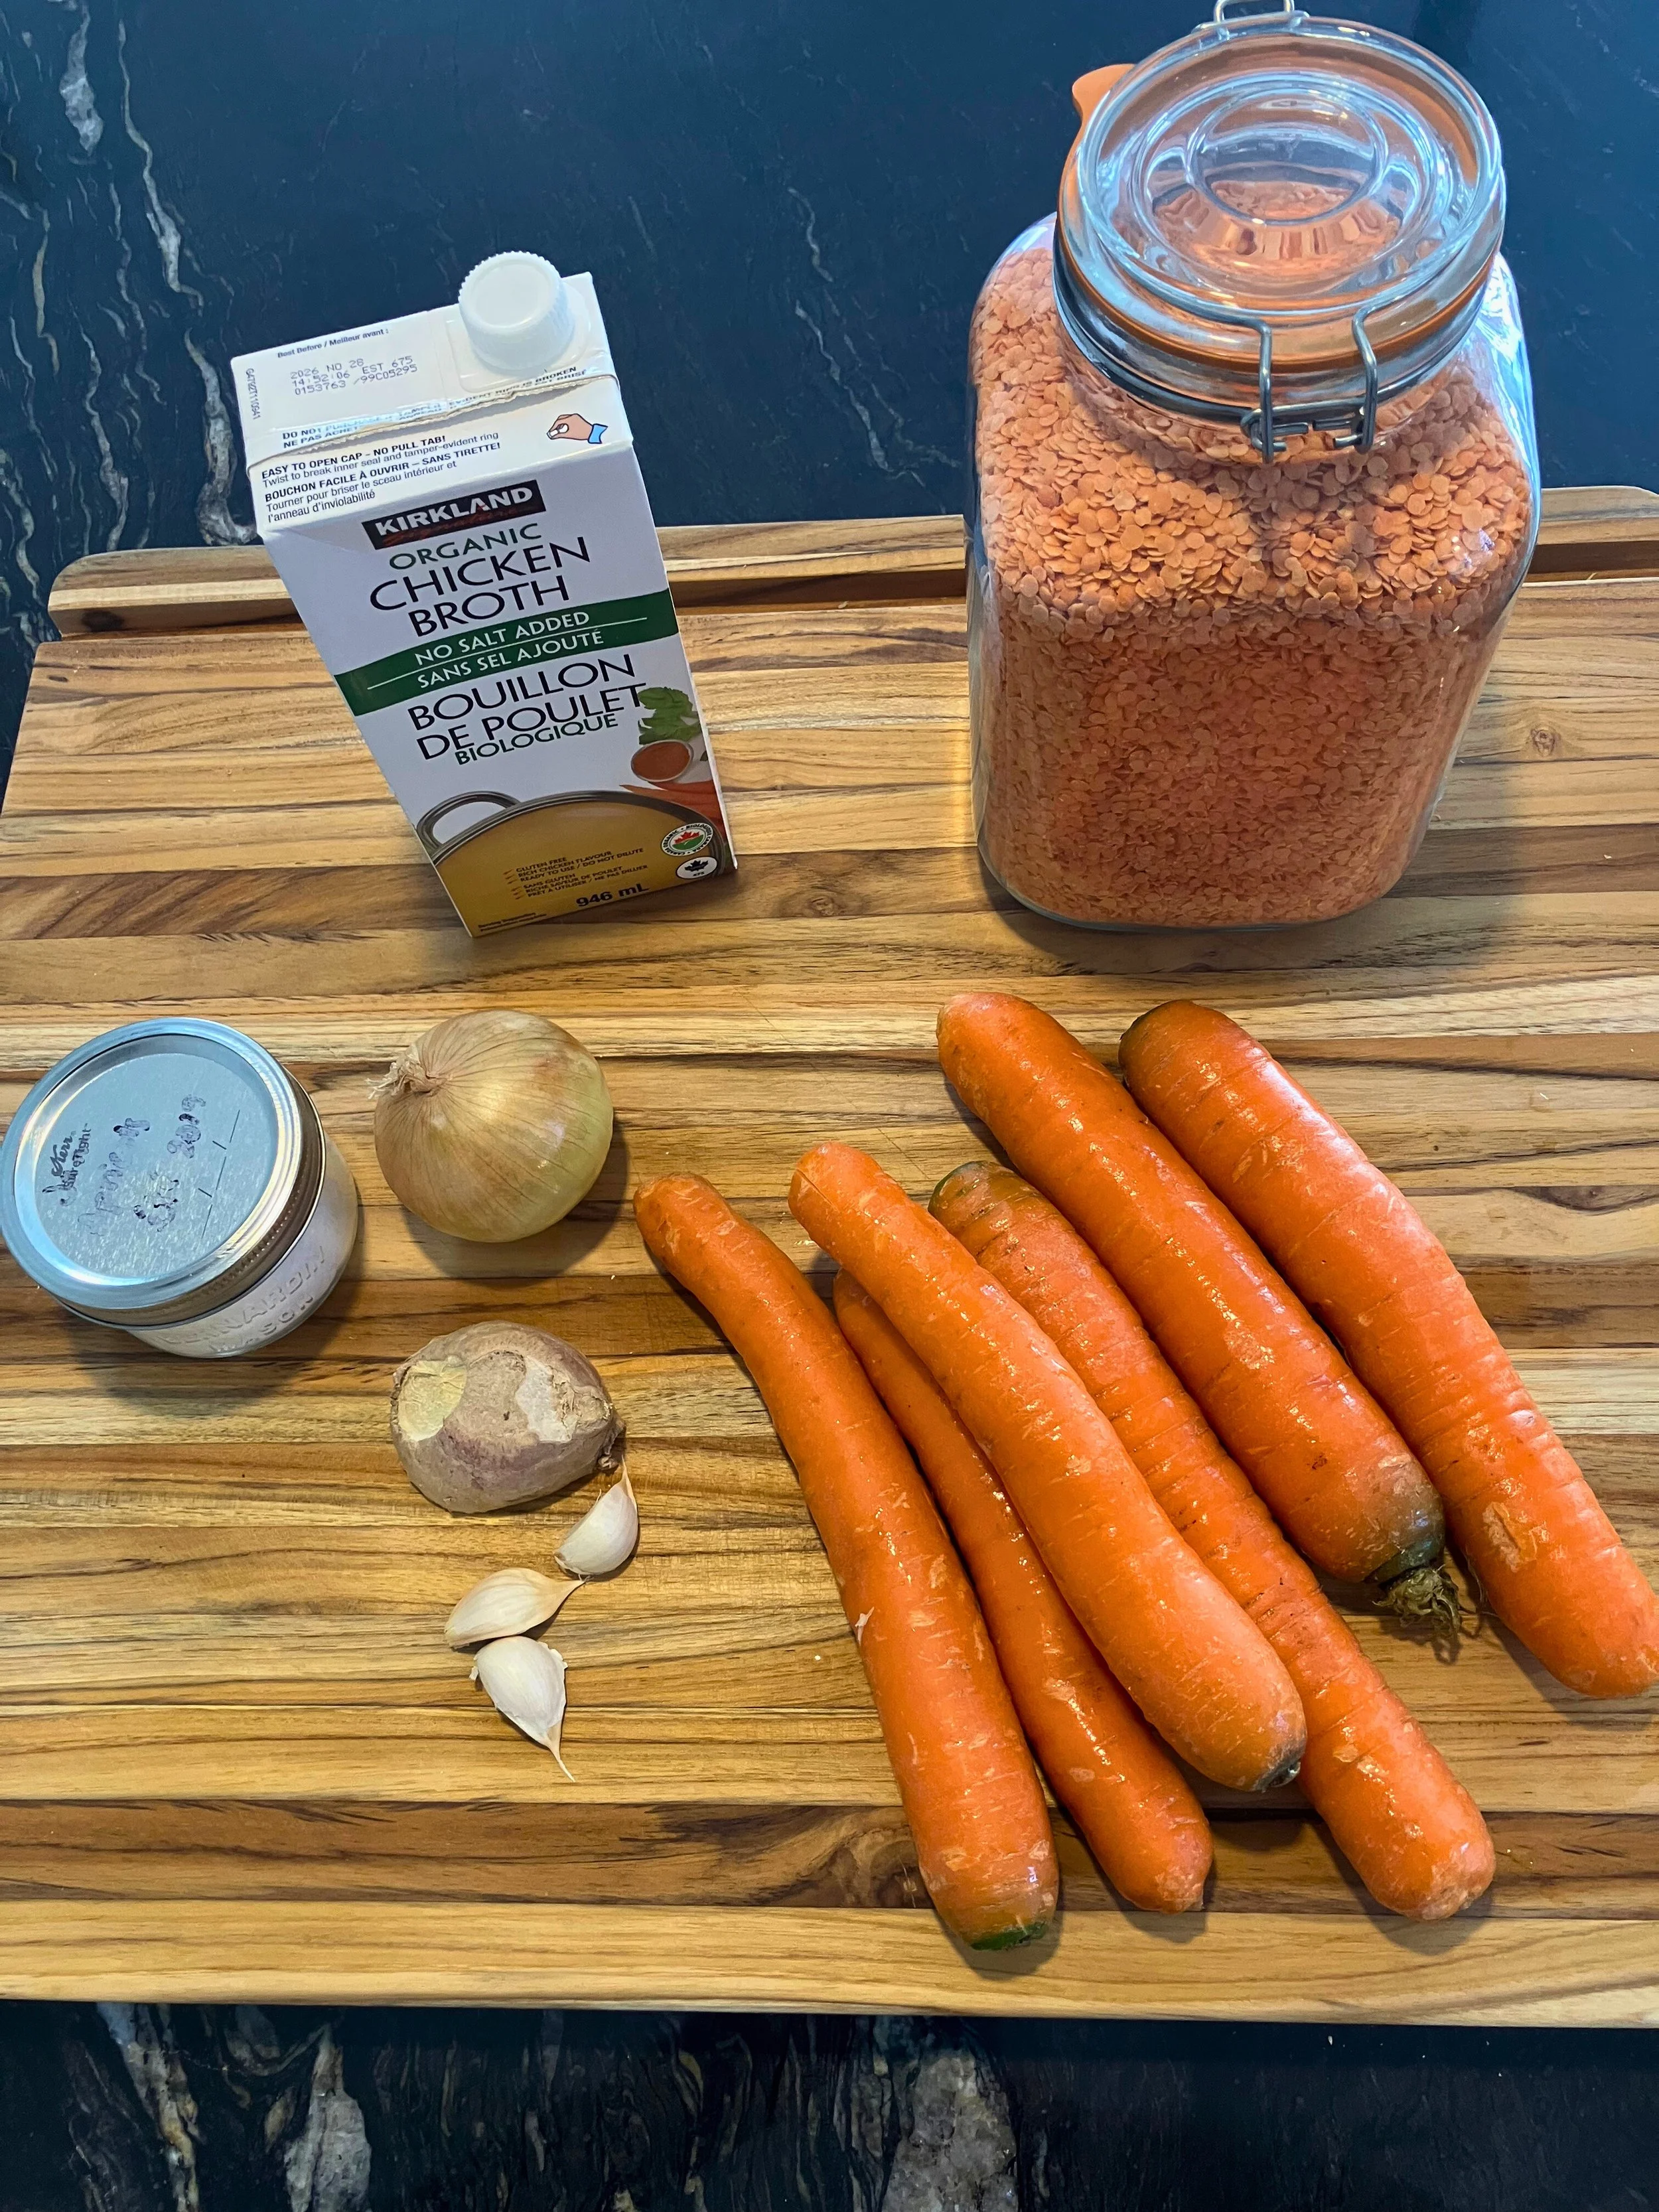
Ingredients
5 medium carrots, diced
1 onion, diced
3 garlic cloves, diced
1 tbsp neutral oil (canola oil works well)
2 L chicken broth
1 cups red lentils
Salt, to taste
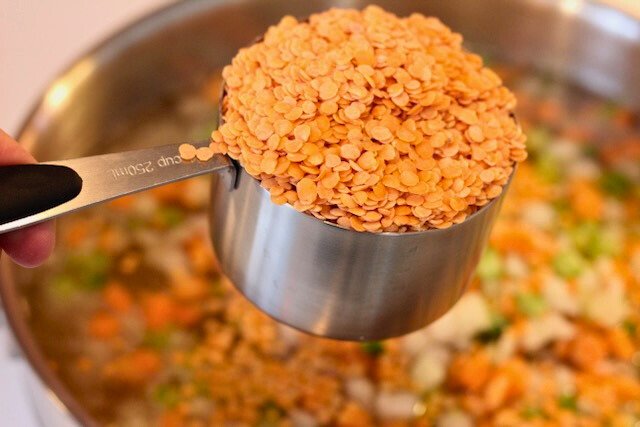
½ cup fresh ginger, peeled and cut into 1 cm cubes
Instructions
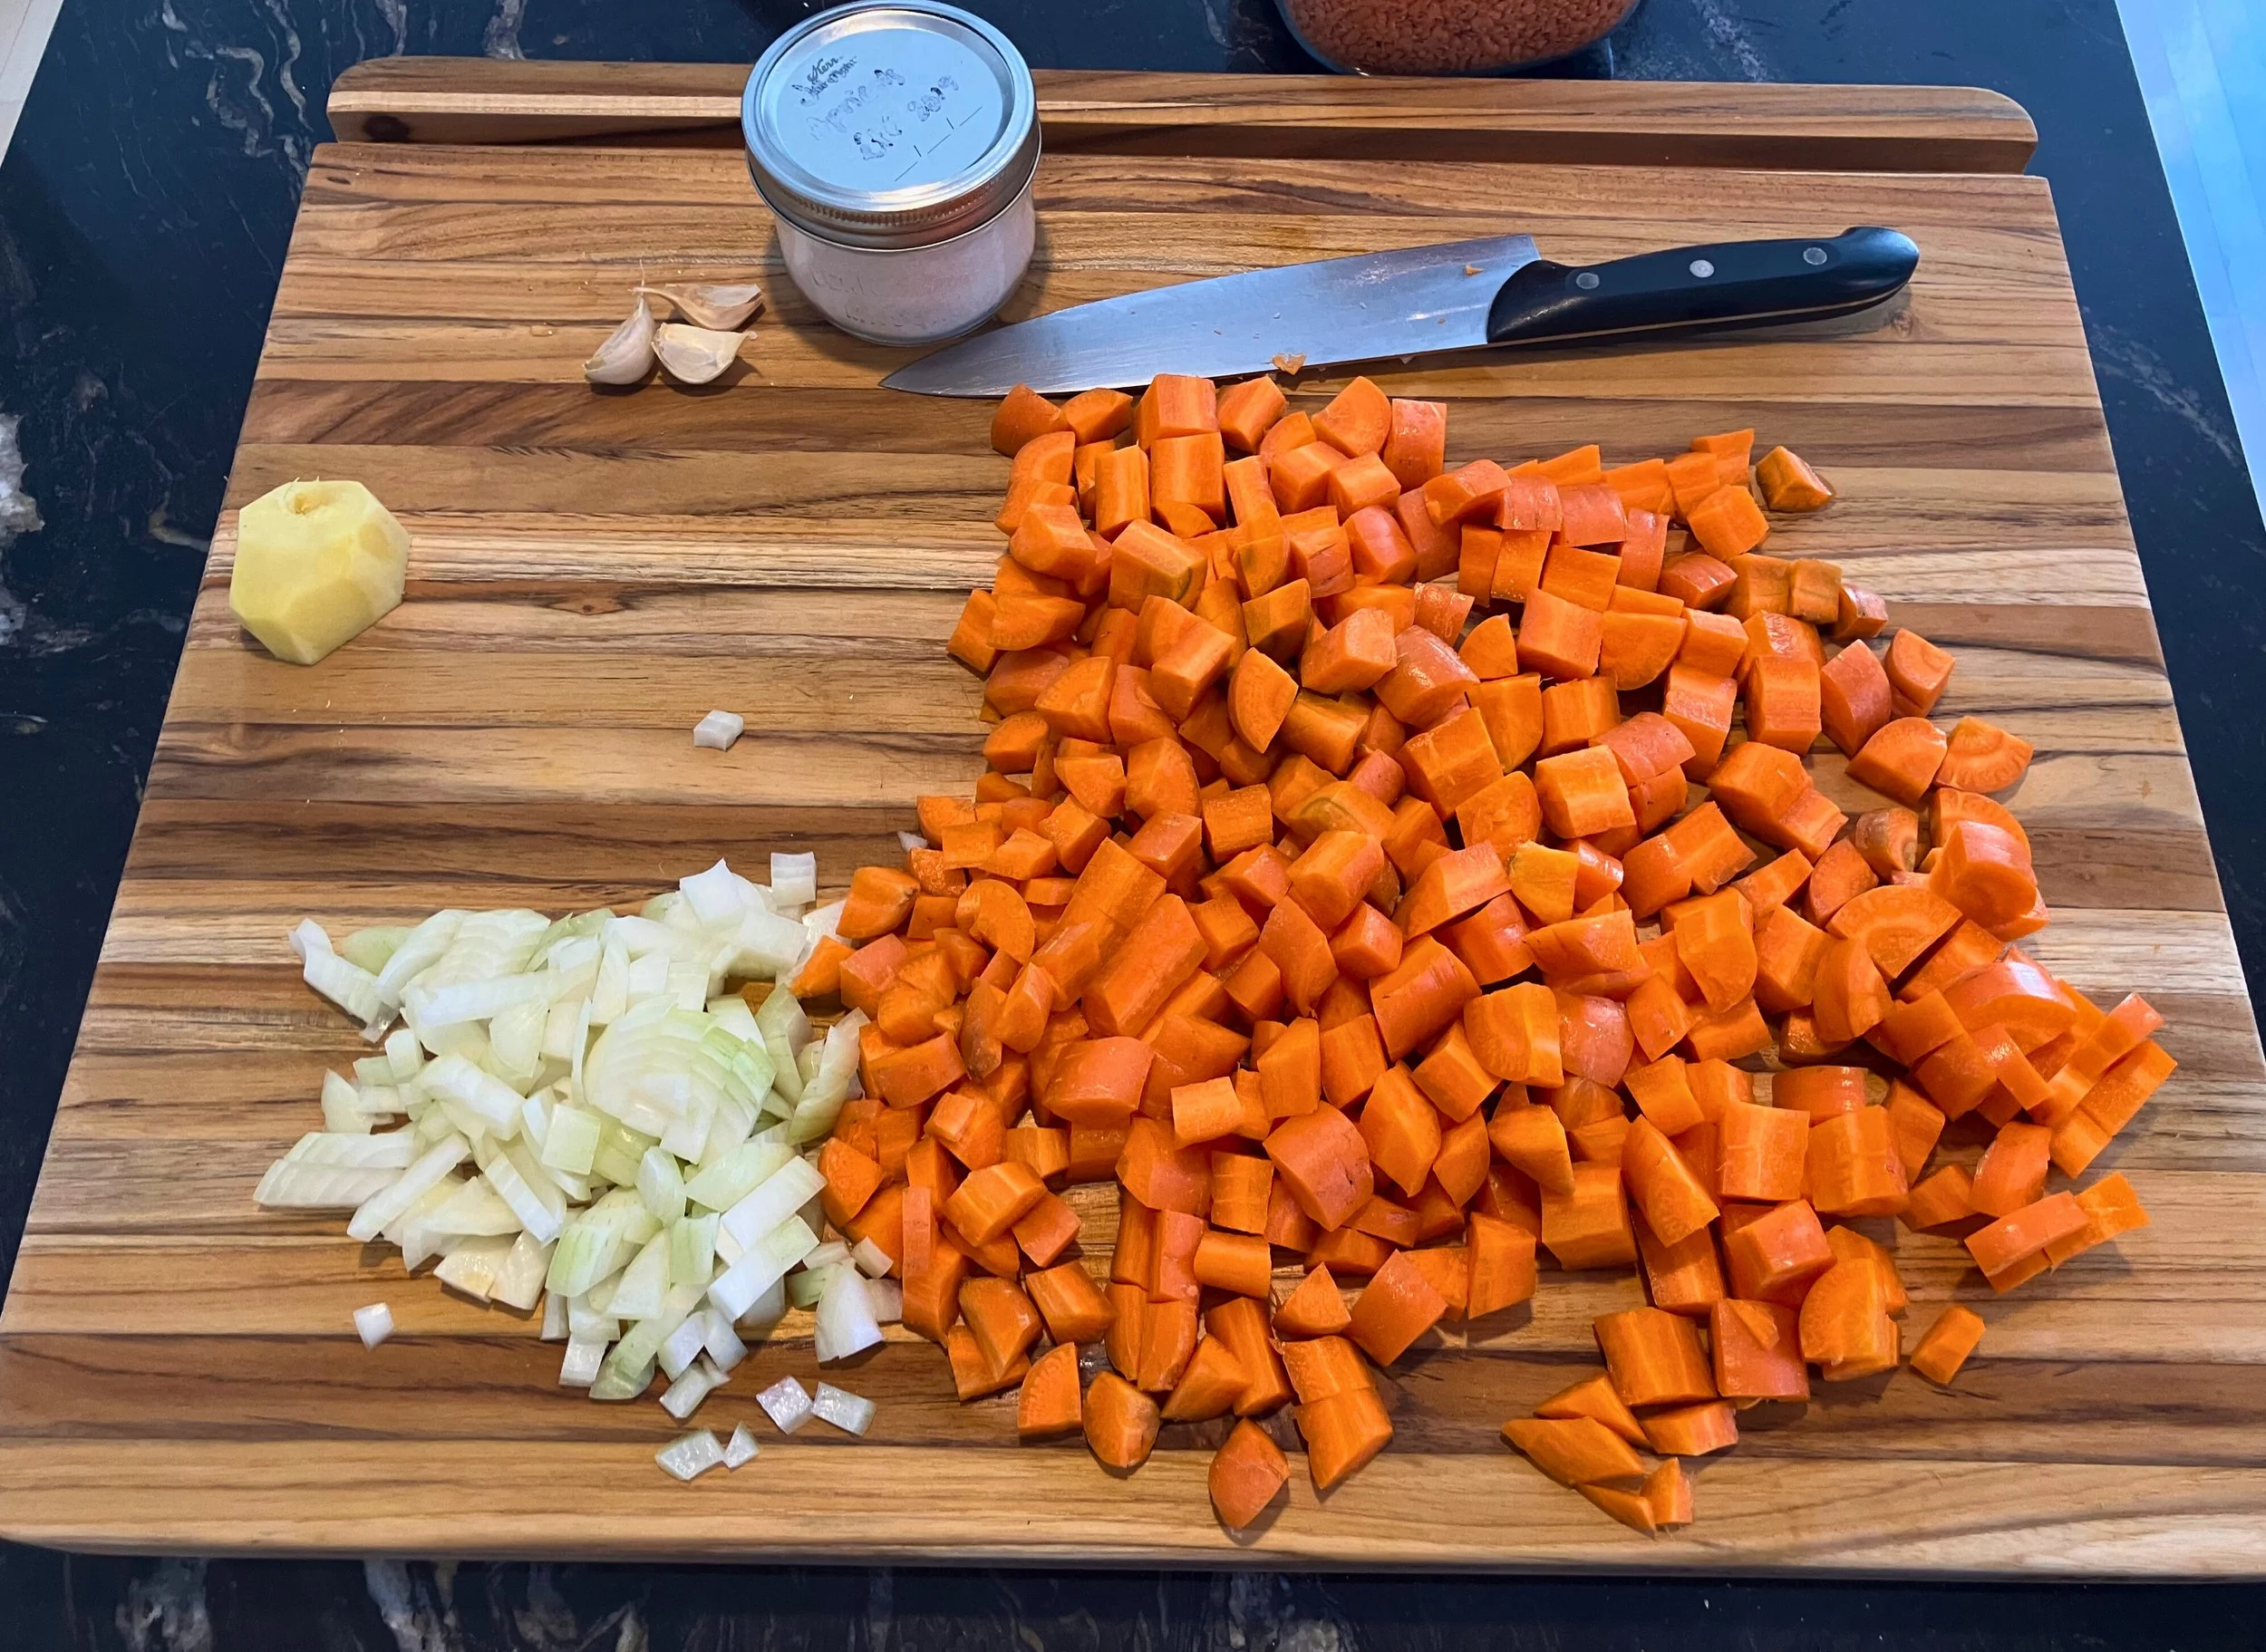
Dice the carrots, onion, and garlic.
In a large stock pot over medium-low heat, allow the pot to warm, then add the oil. Let the oil heat for about 2 minutes.
Add the carrots, onion, and garlic. Cook until the carrots are tender, about 7–10 minutes, stirring occasionally.
Add the red lentils and chicken broth. Season with salt to taste.
Cover and bring the soup to a boil.
Reduce heat and simmer, stirring occasionally, until the lentils have dissolved and the soup thickens.
Blend the soup using an immersion blender until smooth.
Using a garlic press, press the ginger directly into the soup, allowing the juice to mix in. Discard the remaining fibrous ginger.
Stir well and serve warm.
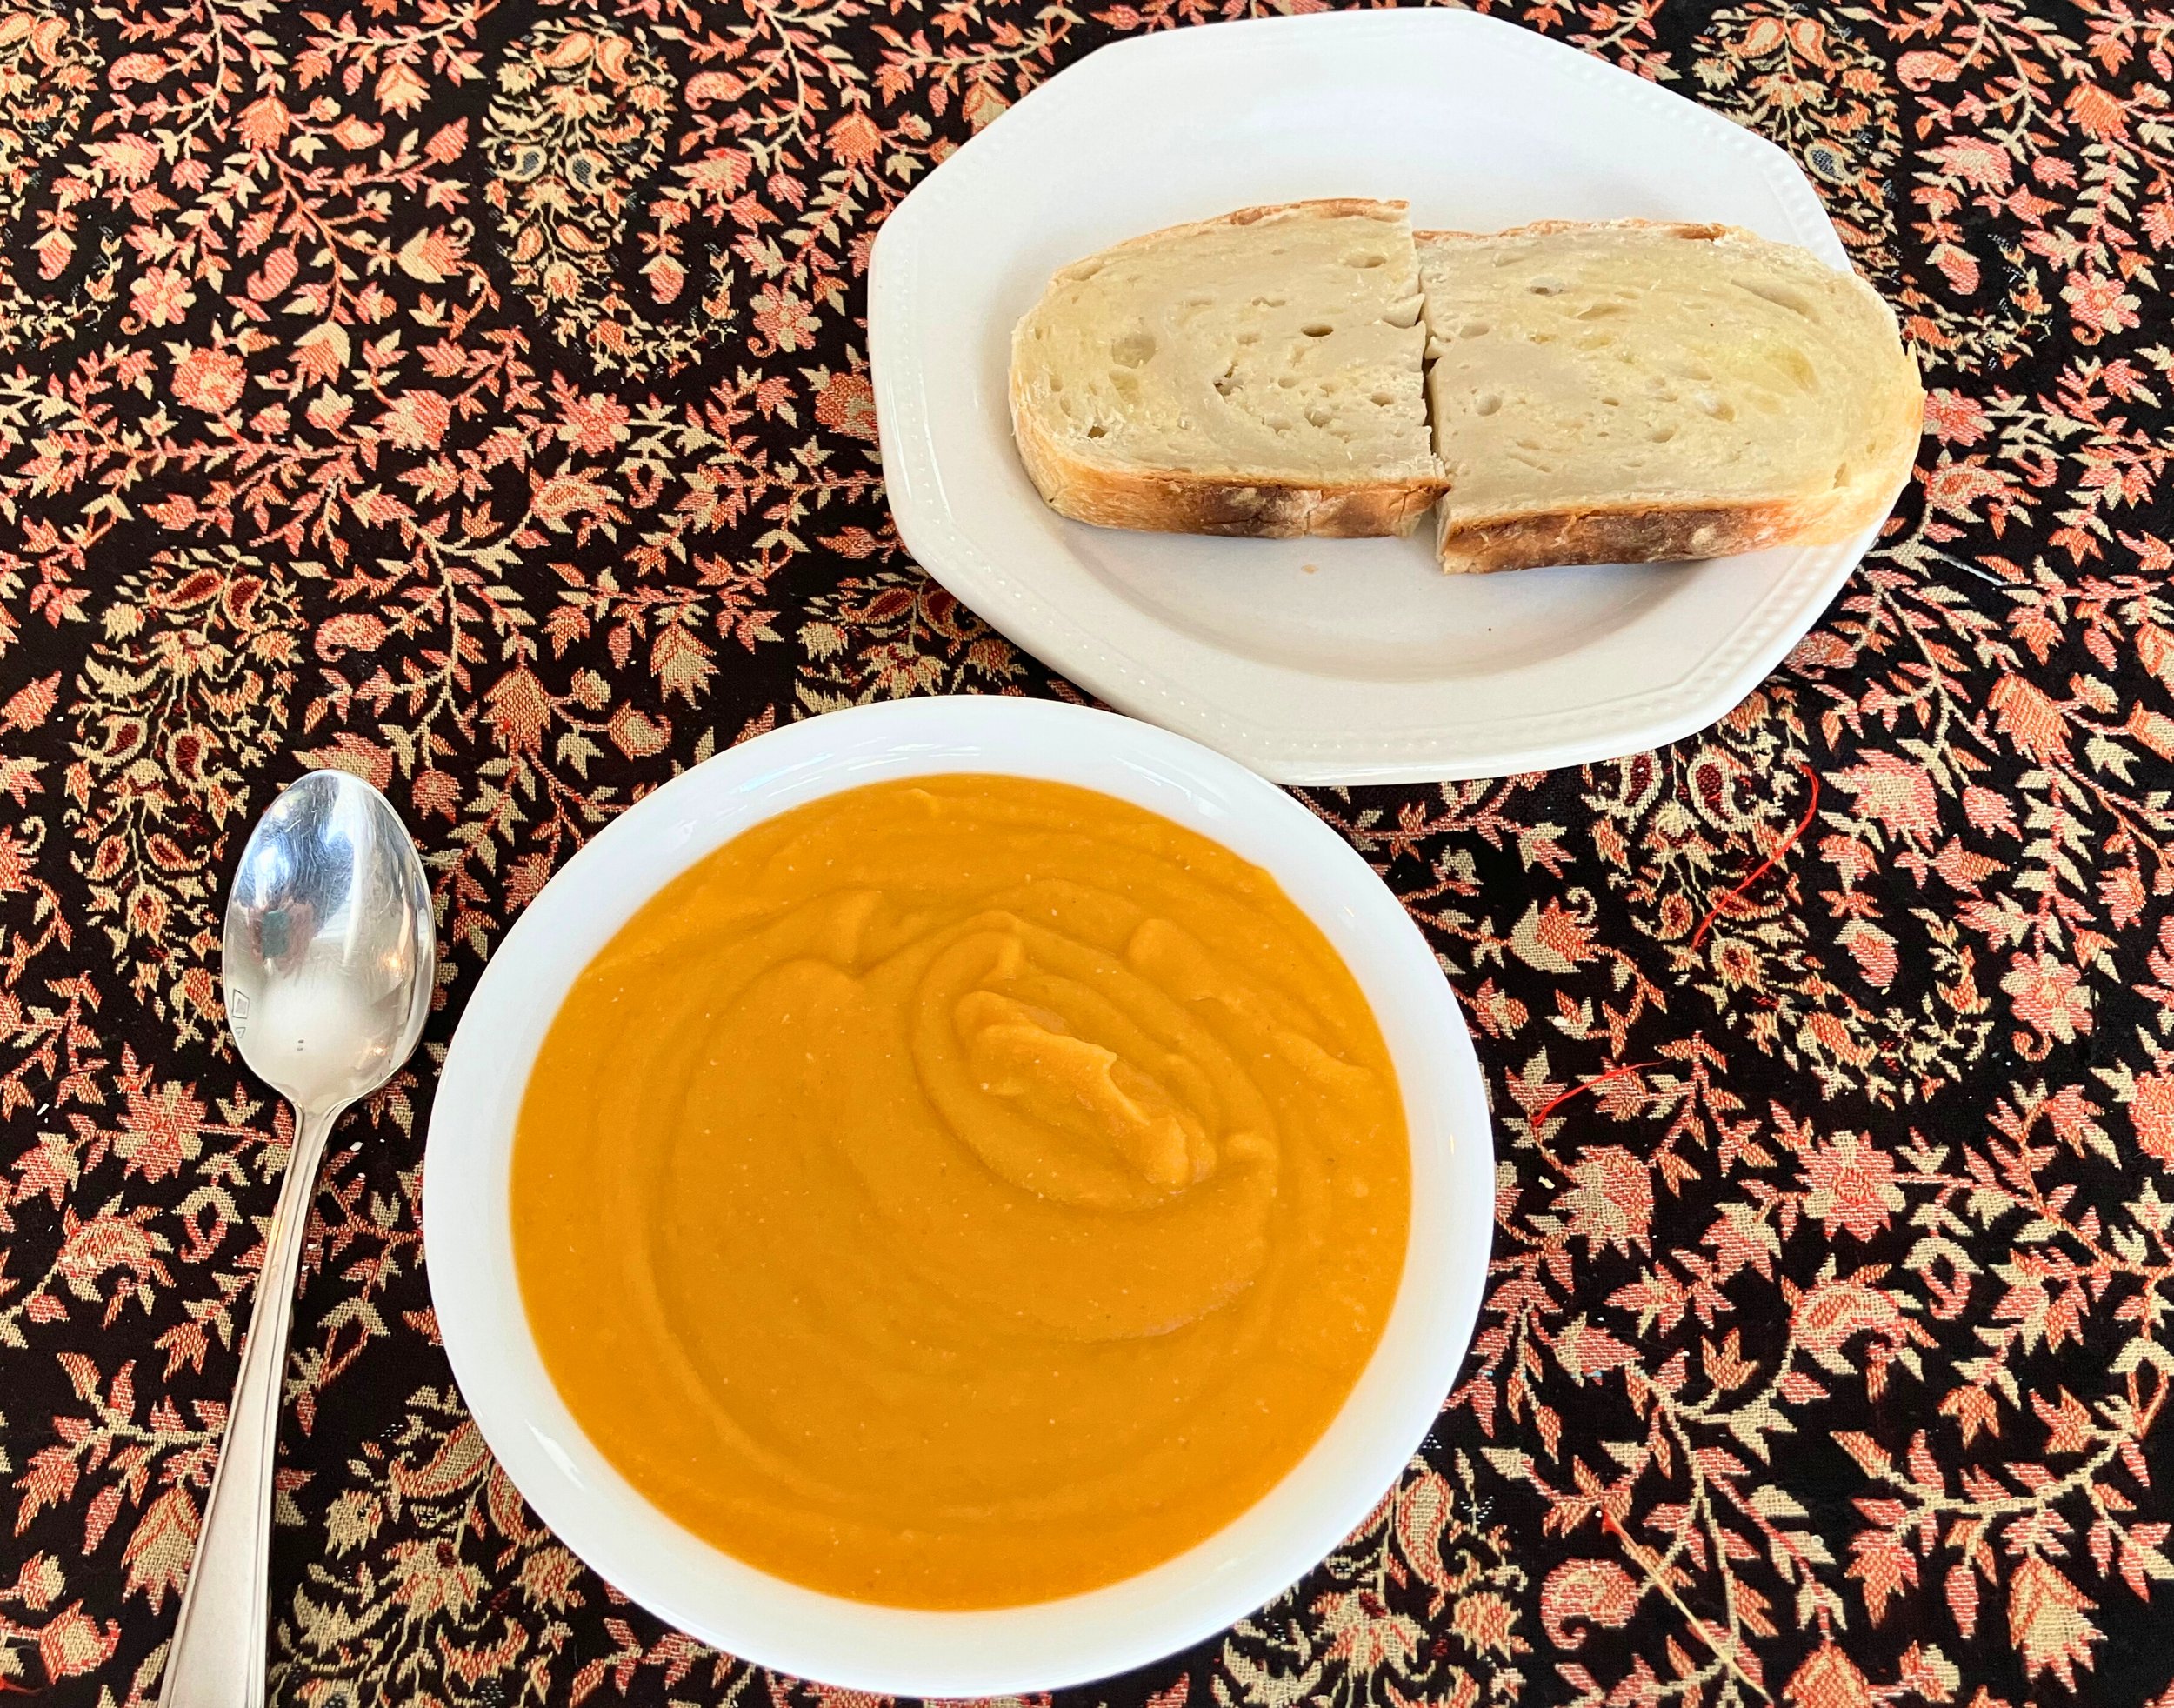
Serving Suggestions
This soup pairs beautifully with freshly toasted sourdough breador garlicky naan for dipping. For kids’ lunches, pack it hot in a thermos—it stays warm and comforting for hours.
Storage & Lunchbox Tips
Store leftovers in the fridge for up to 4 days
Freeze in individual portions for quick meals
Ideal for school lunches due to its smooth, mess-free texture
How Do I Make Carrot Ginger Soup? Step-by-step guide
Step 1:
To make carrot ginger soup, start by dicing five medium carrots, one onion, and three cloves of garlic. Heat one tablespoon of neutral oil, such as canola oil, in a large stock pot over medium-low heat. Once the oil is warm, add the carrots, onion, and garlic. Cook for seven to ten minutes, stirring occasionally, until the carrots are tender.
Step 2:
Next, add two cups of red lentils and four liters of chicken broth to the pot. Season with salt to taste. Cover the pot and bring the soup to a boil. Once it starts boiling, reduce the heat and let it simmer. Stir occasionally and cook until the lentils dissolve and the soup thickens.
Step 3:
When the soup is fully cooked, blend it directly in the pot using an immersion blender until smooth and creamy. This creates a naturally thick soup without using cream or dairy.
Step 4:
To finish the soup, press fresh ginger into the pot using a garlic press. Use about half a cup of peeled ginger pieces. This step adds flavour without leaving fibrous bits in the soup. Discard the remaining ginger pulp, stir well, and serve.
Final thoughts:
Carrot ginger soup is budget friendly, easy to make with pantry staples, and kid-approved. It pairs well with toasted sourdough or naan and works perfectly for kids’ lunches or simple family dinners.
frequently asked questions
Is carrot ginger soup healthy?
Yes. Carrot ginger soup is healthy. It’s made with carrots, red lentils, garlic, and ginger, which provide fiber, protein, and natural vitamins. This soup is naturally dairy-free and filling, making it a nourishing option for family meals.
Is carrot ginger soup good for kids?
Yes. Carrot ginger soup is great for kids. It has a smooth texture and a naturally sweet flavour from carrots. The ginger adds warmth without being spicy, which is why many kids enjoy it and happily eat it for lunch or dinner.
Can I make carrot ginger soup ahead of time?
Yes, carrot ginger soup is perfect for making ahead. It stores well in the fridge for up to four days and freezes easily. This makes it ideal for meal prep, school lunches, and busy weeknights.
How do I store carrot ginger soup?
Store carrot ginger soup in an airtight container in the refrigerator for up to four days. For longer storage, freeze individual portions and reheat as needed.
Can carrot ginger soup be frozen?
Yes. carrot ginger soup freezes very well. Let it cool completely, then freeze in freezer-safe containers for up to three months. Thaw overnight in the fridge or reheat directly from frozen.
Is carrot ginger soup budget friendly?
Yes. carrot ginger soup is very budget friendly. It uses inexpensive pantry staples like carrots, lentils, onion, and broth, making it an affordable meal for families.
Does carrot ginger soup need cream?
No, carrot ginger soup does not need cream. The red lentils dissolve as they cook, creating a naturally creamy texture without dairy.
What goes well with carrot ginger soup?
Carrot ginger soup pairs well with toasted sourdough bread, naan, grilled cheese, or simple crackers. These sides make it a filling and kid-friendly meal.
Can I use an immersion blender for carrot ginger soup?
Yes. an immersion blender works best for carrot ginger soup. It blends the soup directly in the pot, making it smooth and easy with minimal cleanup.
final thoughts
This soup is amazing!
did you make this recipe? I want to see it!
Leave a picture and a ⭐ star rating and comment below to let us know how your muffins turned out. Did you make any substitutions or additions? Share your tips and photos with us!
Share this recipe: Help others discover this delicious recipe by sharing it on Pinterest, Facebook, or Instagram. Tag us @Sageandsimplicity so we can see your beautiful creations!
📌 Pin it for later: Save this recipe to your Pinterest boards for easy access.


a step-by-step guide to making Homemade Pumpkin Purée
Let me show you how to make pumpkin puree for pennies on the dollar! Click here to learn how.
As an Amazon Associate I earn from qualifying purchases.
📖 Jump to Recipe | 💬 Jump to FAQs | 🖨️Print Recipe
Total Time: 1 hour | Difficulty: Easy

Why I love pumpkin purée!
When fall rolls in and the pumpkin-spice cravings hit, there’s nothing more satisfying—or more budget-friendly—than making your own pumpkin purée at home. If you’ve only ever bought the canned version, you’re in for a delightful surprise! Homemade pumpkin purée is incredibly easy to prepare, tastes fresher than anything on the shelf, and costs just pennies on the dollar. Once you try it, you may never go back to store-bought again.
The beauty of this simple kitchen project is that it requires just one ingredient: pumpkin, and sometimes a little bit of water. That’s it! No additives, no preservatives, nothing extra. With a single sugar pumpkin (aka pie pumpkin)—and sometimes even a discounted clearance pumpkin after Halloween—you can batch-make enough purée to power countless fall recipes. Whether you’re baking a classic pumpkin pie, stirring up pumpkin pancakes, or whipping together a creamy autumn soup, fresh purée brings a richness and depth that are more affordable than the canned version.
Making your own pumpkin purée is surprisingly hands-off. Slice the pumpkin in half, scoop out the seeds (save them for roasting!), and let the oven do all the heavy lifting. As it bakes, your home fills with that cozy, earthy fall aroma that instantly puts you in the mood for soft sweaters and warm drinks. Once the pumpkin is fork-tender, you simply scoop out the flesh and blend until smooth. You’re left with a velvety purée that looks and tastes like pure autumn comfort.
One of the best perks? Homemade pumpkin purée freezes beautifully. Make a big batch now and portion it into bags or jars to freeze for the entire season. You’ll always have the star ingredient ready for whatever fall recipe inspiration strikes—pumpkin bread, lattes, muffins, overnight oats, you name it. With a freezer stash at the ready, you’re essentially giving your future self a cozy seasonal gift.
So this year, skip the canned aisle and go straight for the whole pumpkin. It’s easier than you think, far cheaper than buying ready-made, and the flavour payoff is absolutely worth it. Homemade pumpkin purée opens the door to all the pumpkin-spice magic fall has to offer—comforting, aromatic, and deliciously affordable.

What do I need to make Homemade Pumpkin Purée?
Ingredients:
Sugar Pumpkin
A little bit of water, roughly 1 cup
Equipment:
Baking sheet (affiliate link)
Spatula (affiliate link)
Blender (affiliate link) or Food Processor (affiliate link)
Cooling Rack (affiliate link)
a step-by-step guide to making pumpkin purée
step 1: prep the oven
Pre-heat the oven to 350F.
step 2: rinse the pumpkin
Rinse the pumpkin under cool water, rubbing off any dirt or mud that can be found on the skin. Pat dry. Cut the bottom of the pumpkin to make it stable.
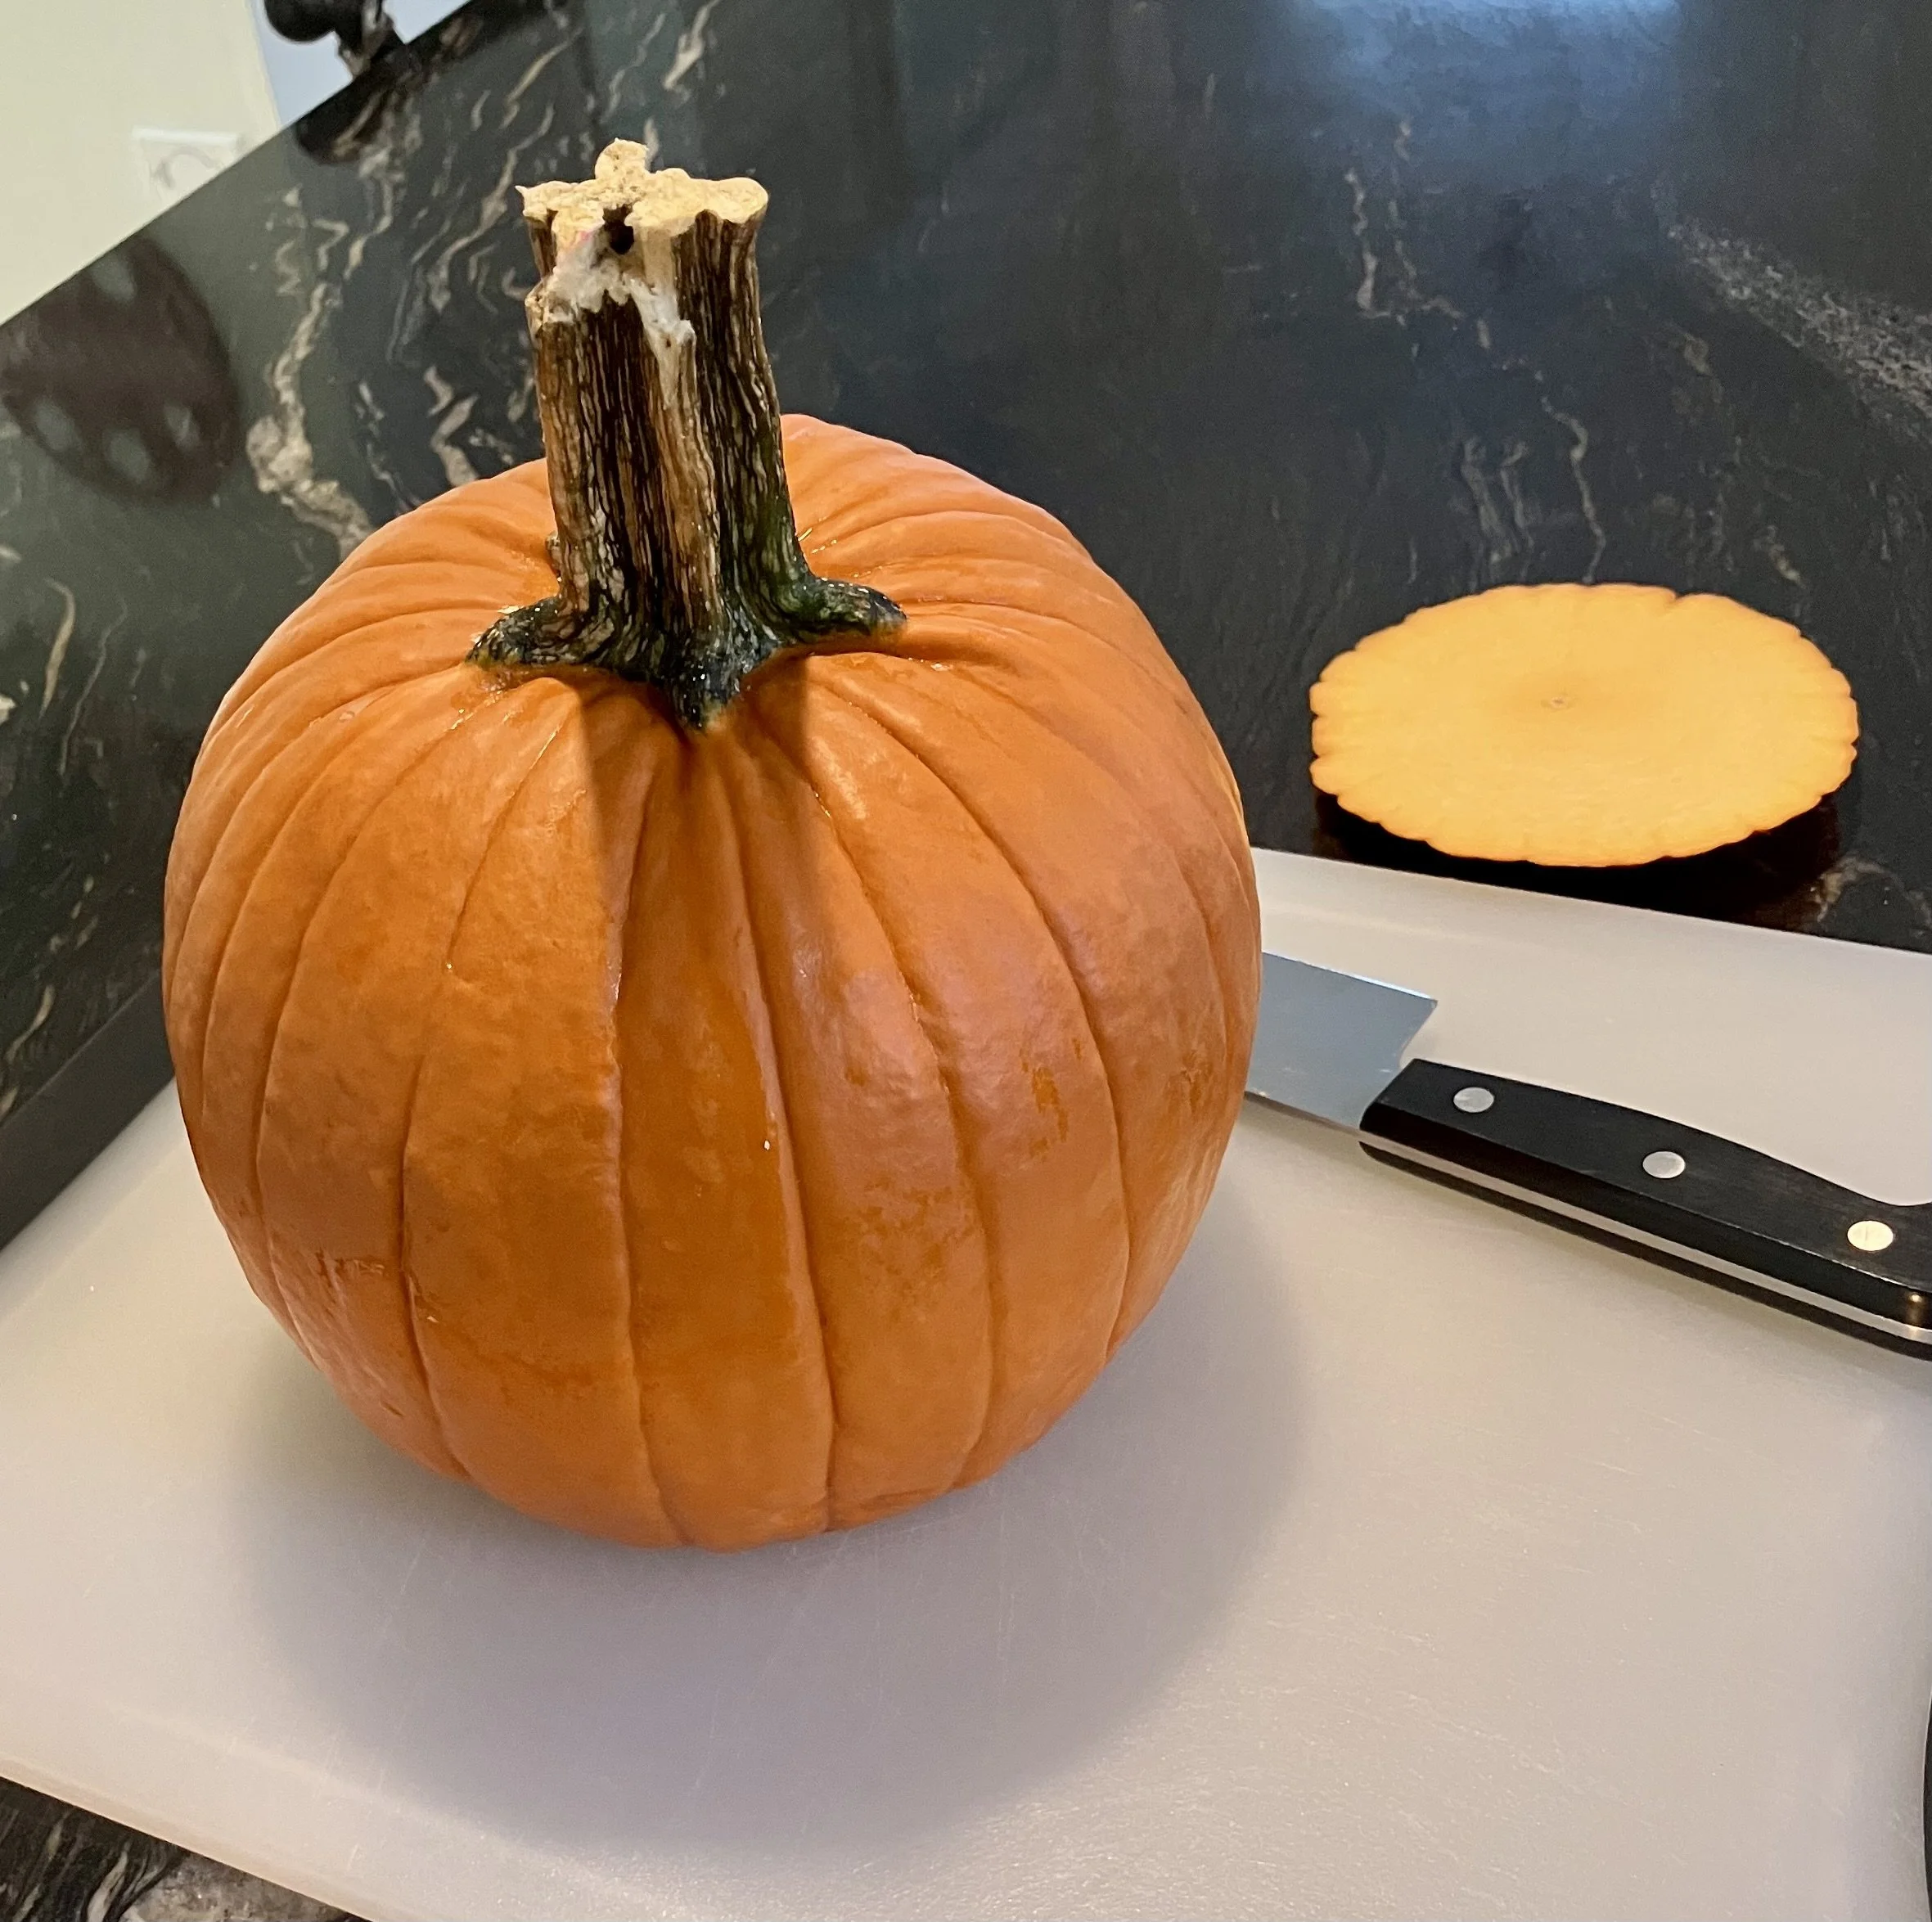
step 3: cut the pumpkin in half, scoop out the seeds
Using a knife, cut the pumpkin in half. Using a soup spoon, scoop out the seeds. Set aside to make Roasted Pumpin Seeds, if desired.
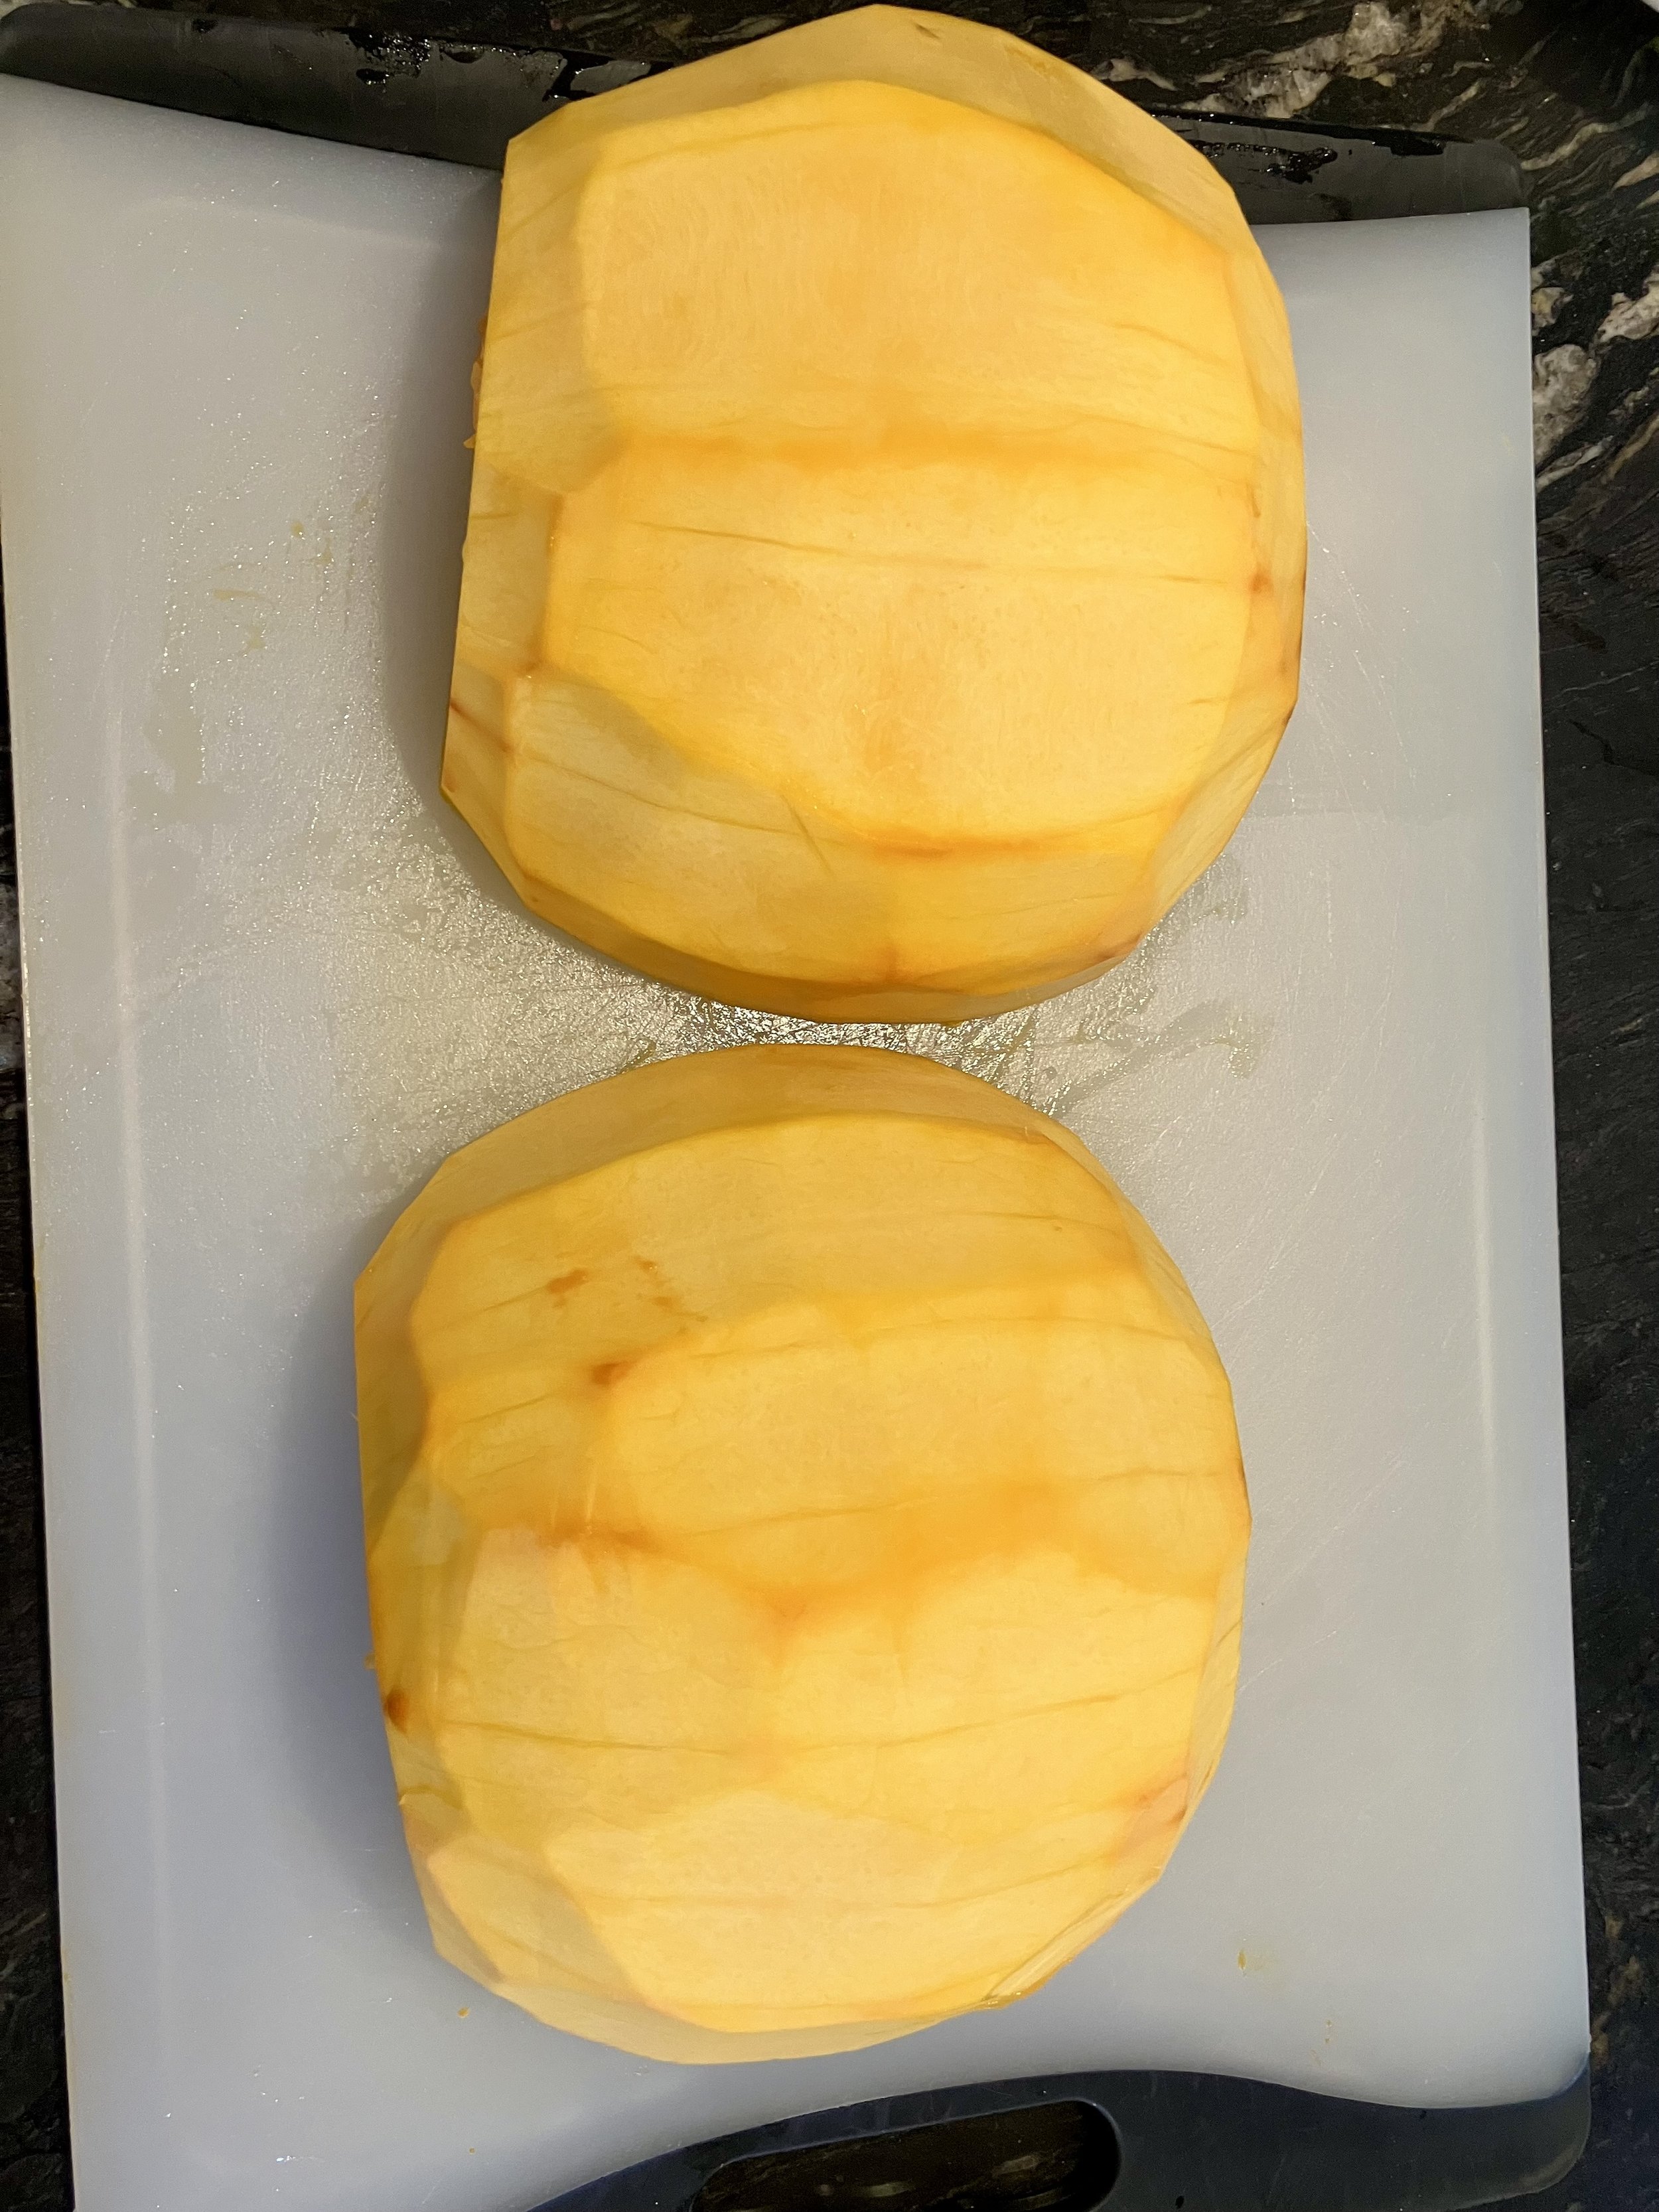
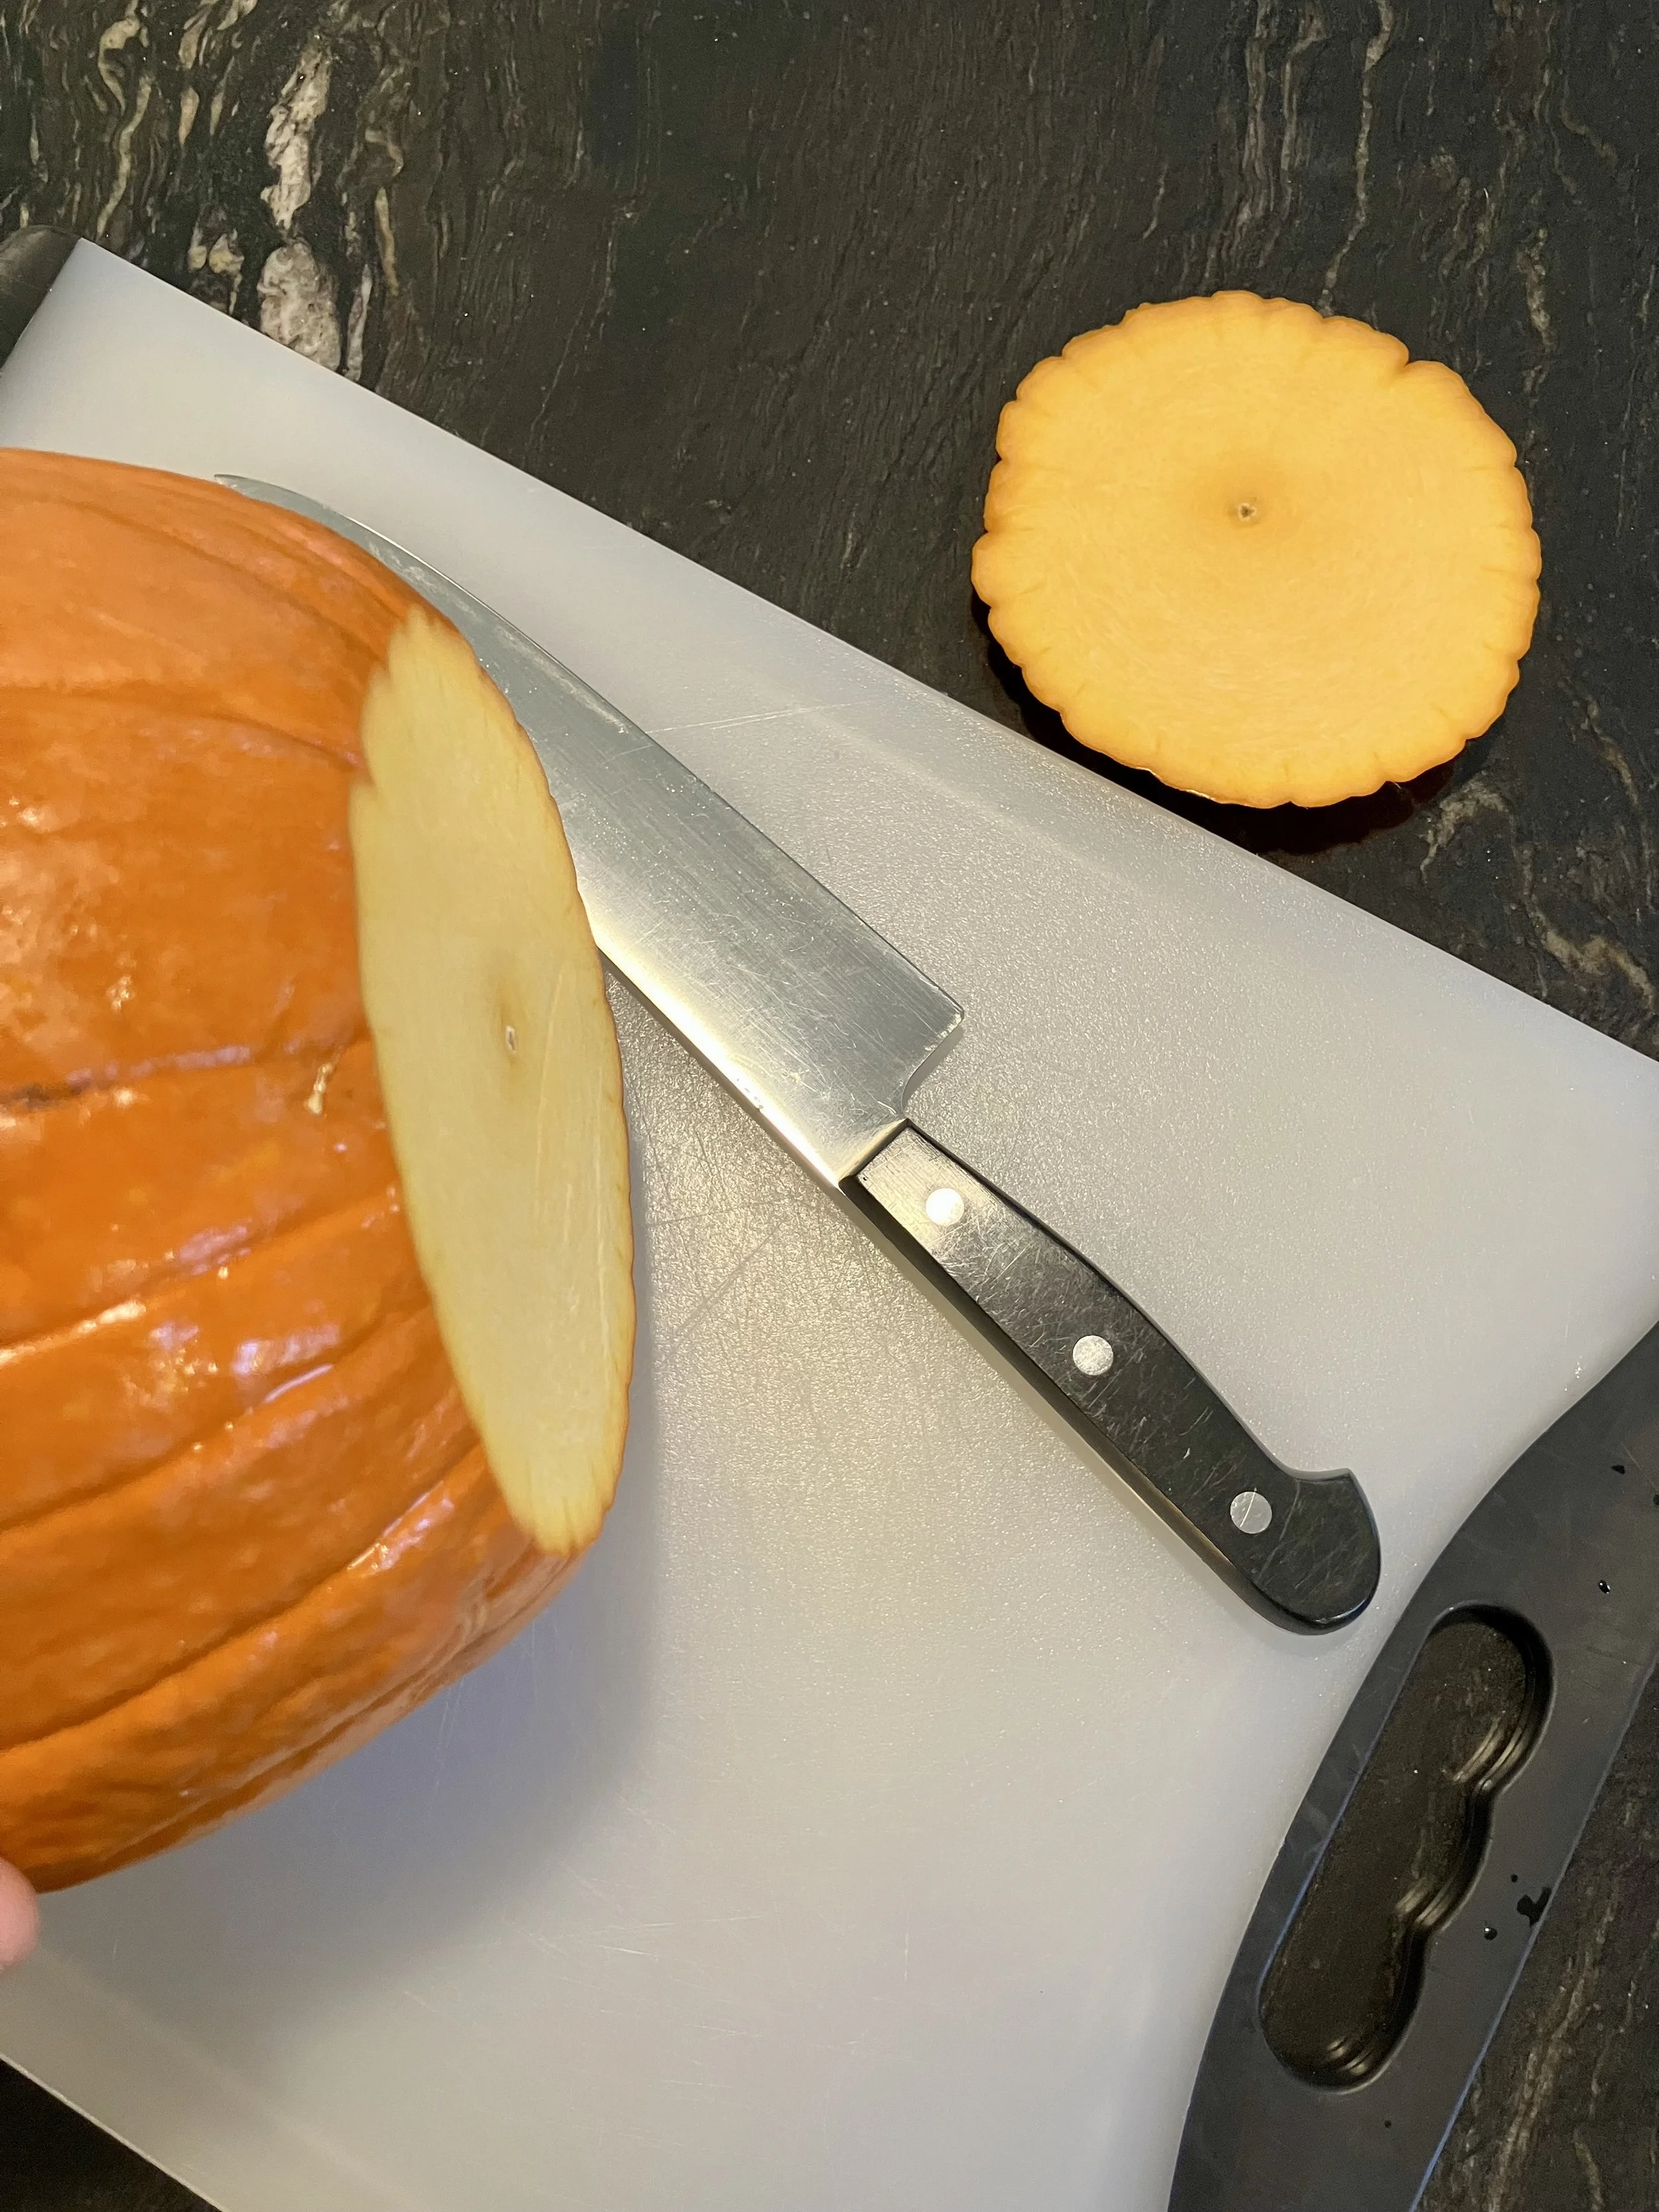
step 4: peel the skin
Place the pumpkin flat side down. Using a knife ( I recommend a chefs knife), remove the skin on both halves of the pumpkin.
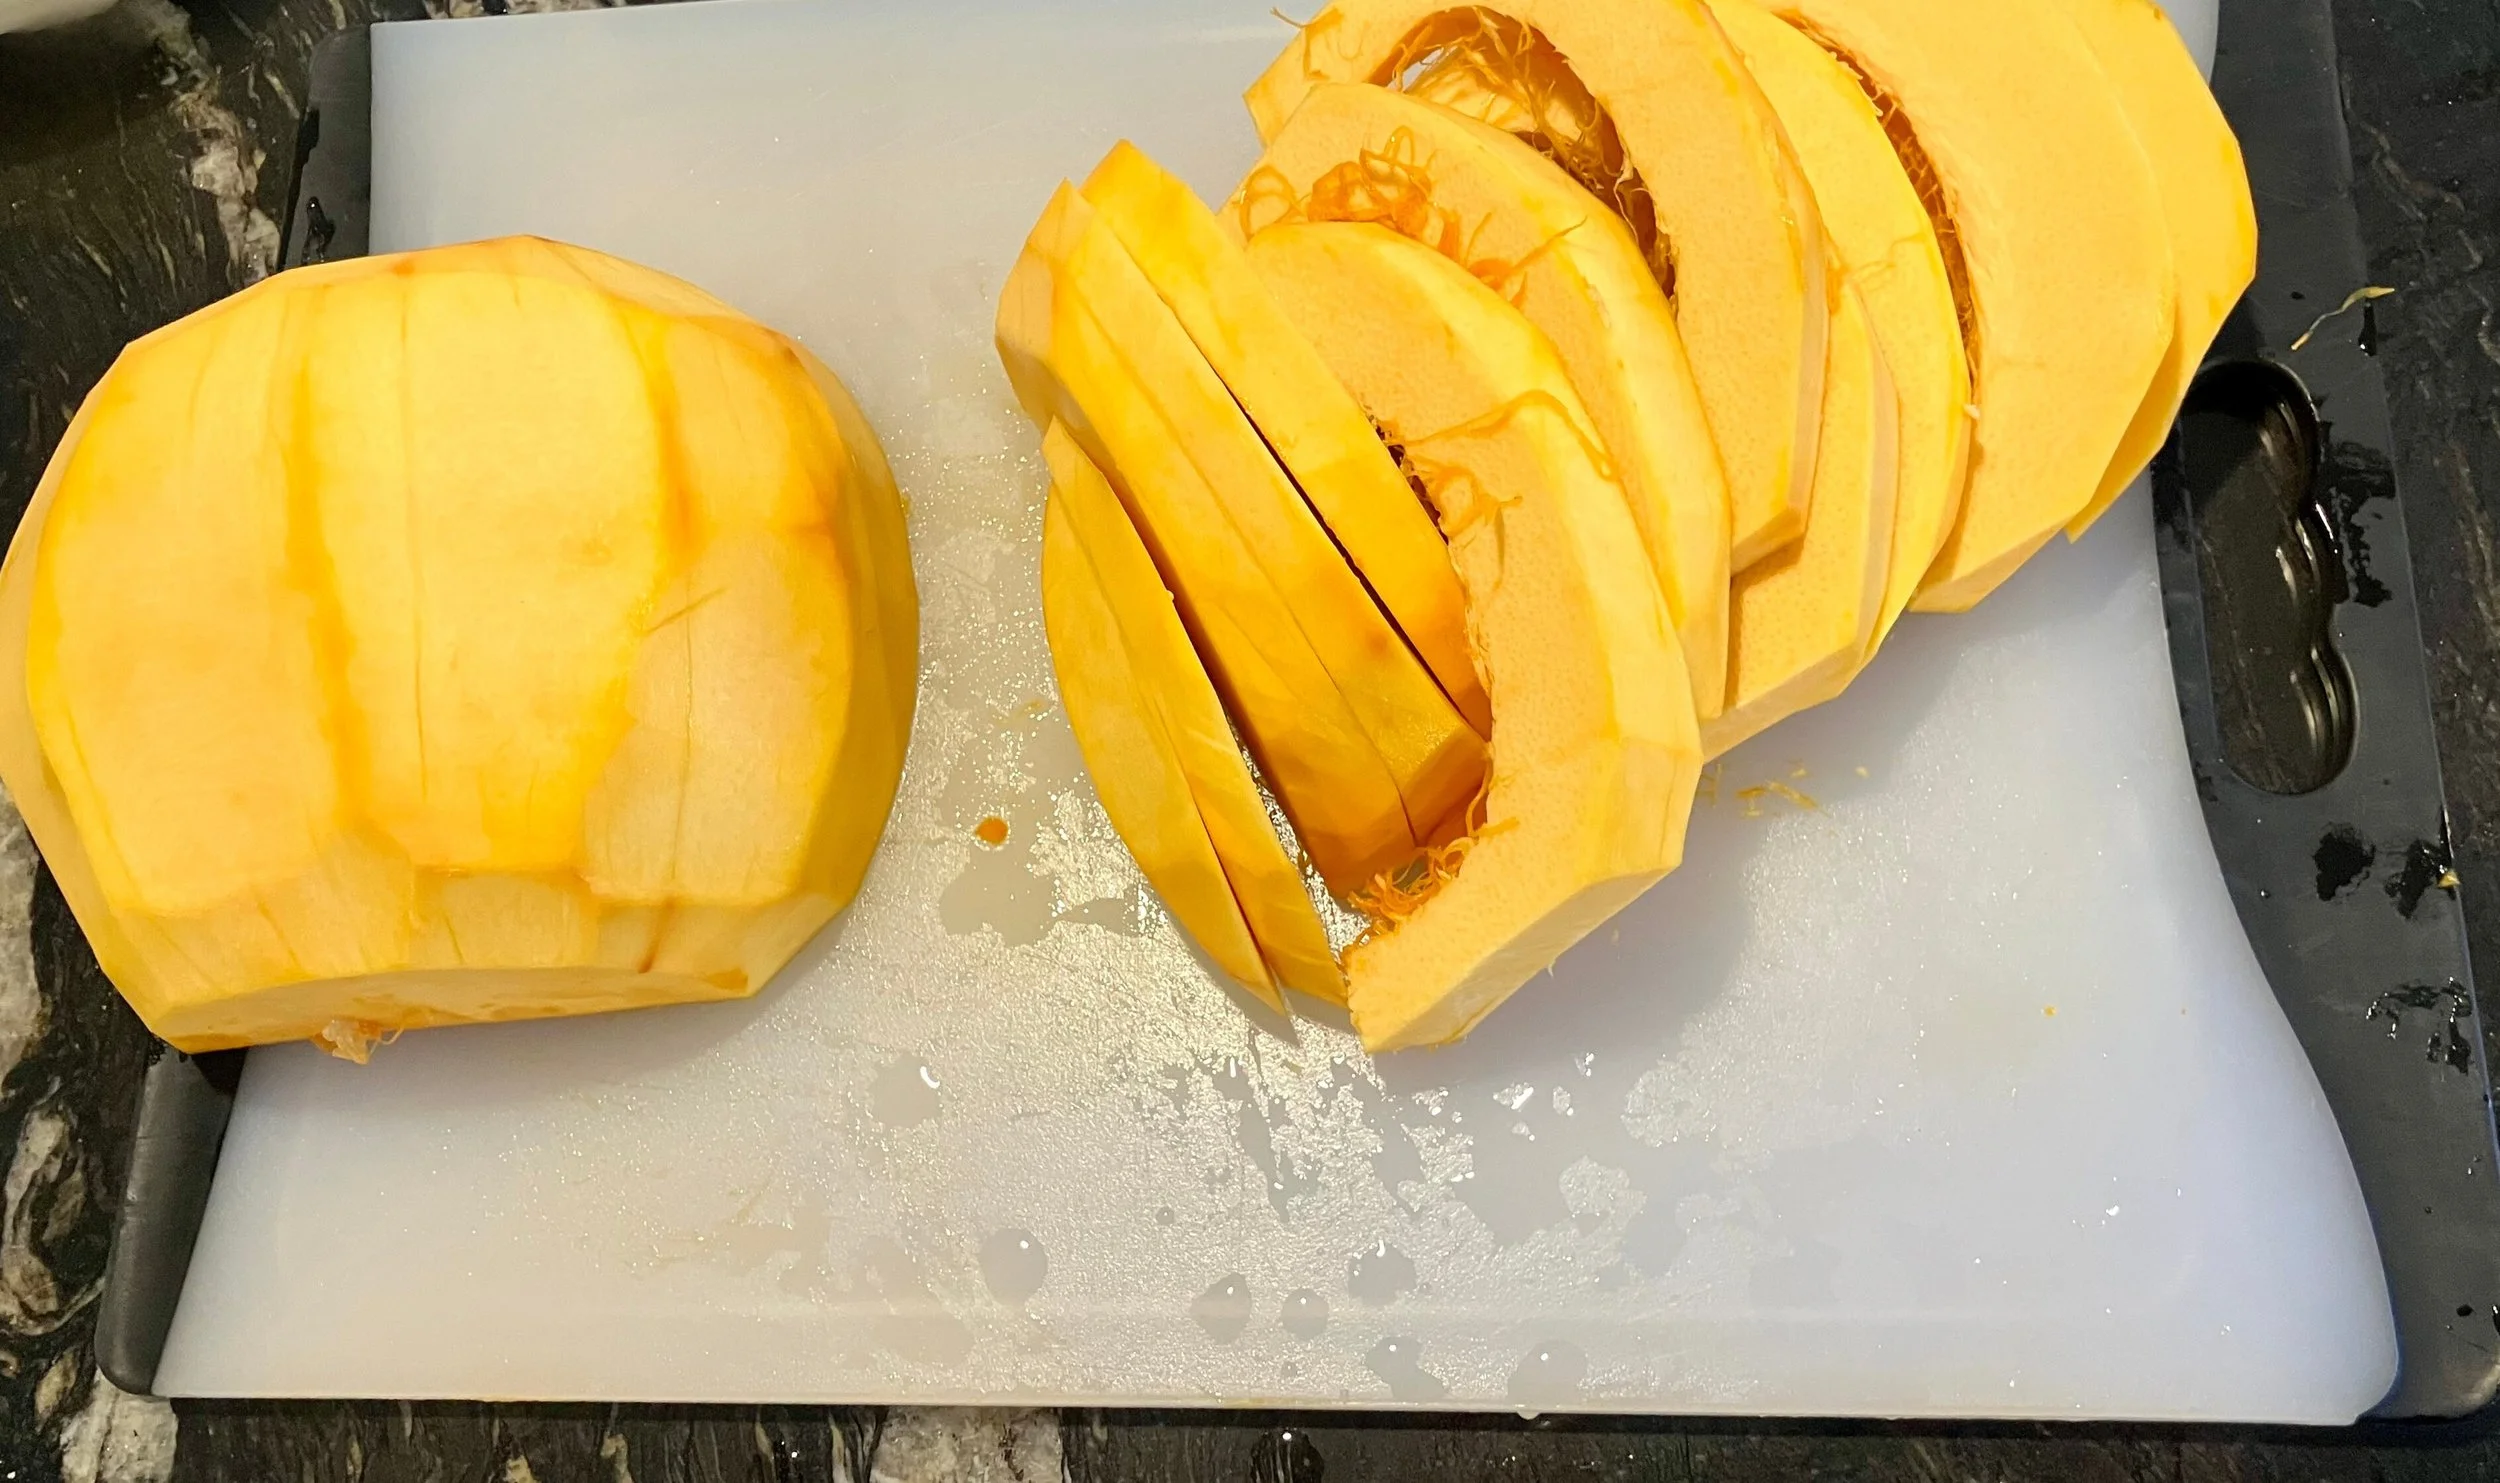
step 5: cut the pumpin into strips, then cubes
Cut the pumpkin into 2 inch (4.5 cm) strips, then cubes.
The ultimate budget friendly way to enjoy all of your favourite fall recipes!
step 6: add to a baking sheet with water
Add the raw pumpkin cubes to the baking sheet, and add 1 cup of water to the bottom of the pan. The water will steam the pumpkin cubes when baking in the oven.
step 7: bake
Place in the oven and bake for approx 30-45 minutes. Checking periodically to make sure that there still water at the bottom of the pan. Add a bit more, if it evaporates.
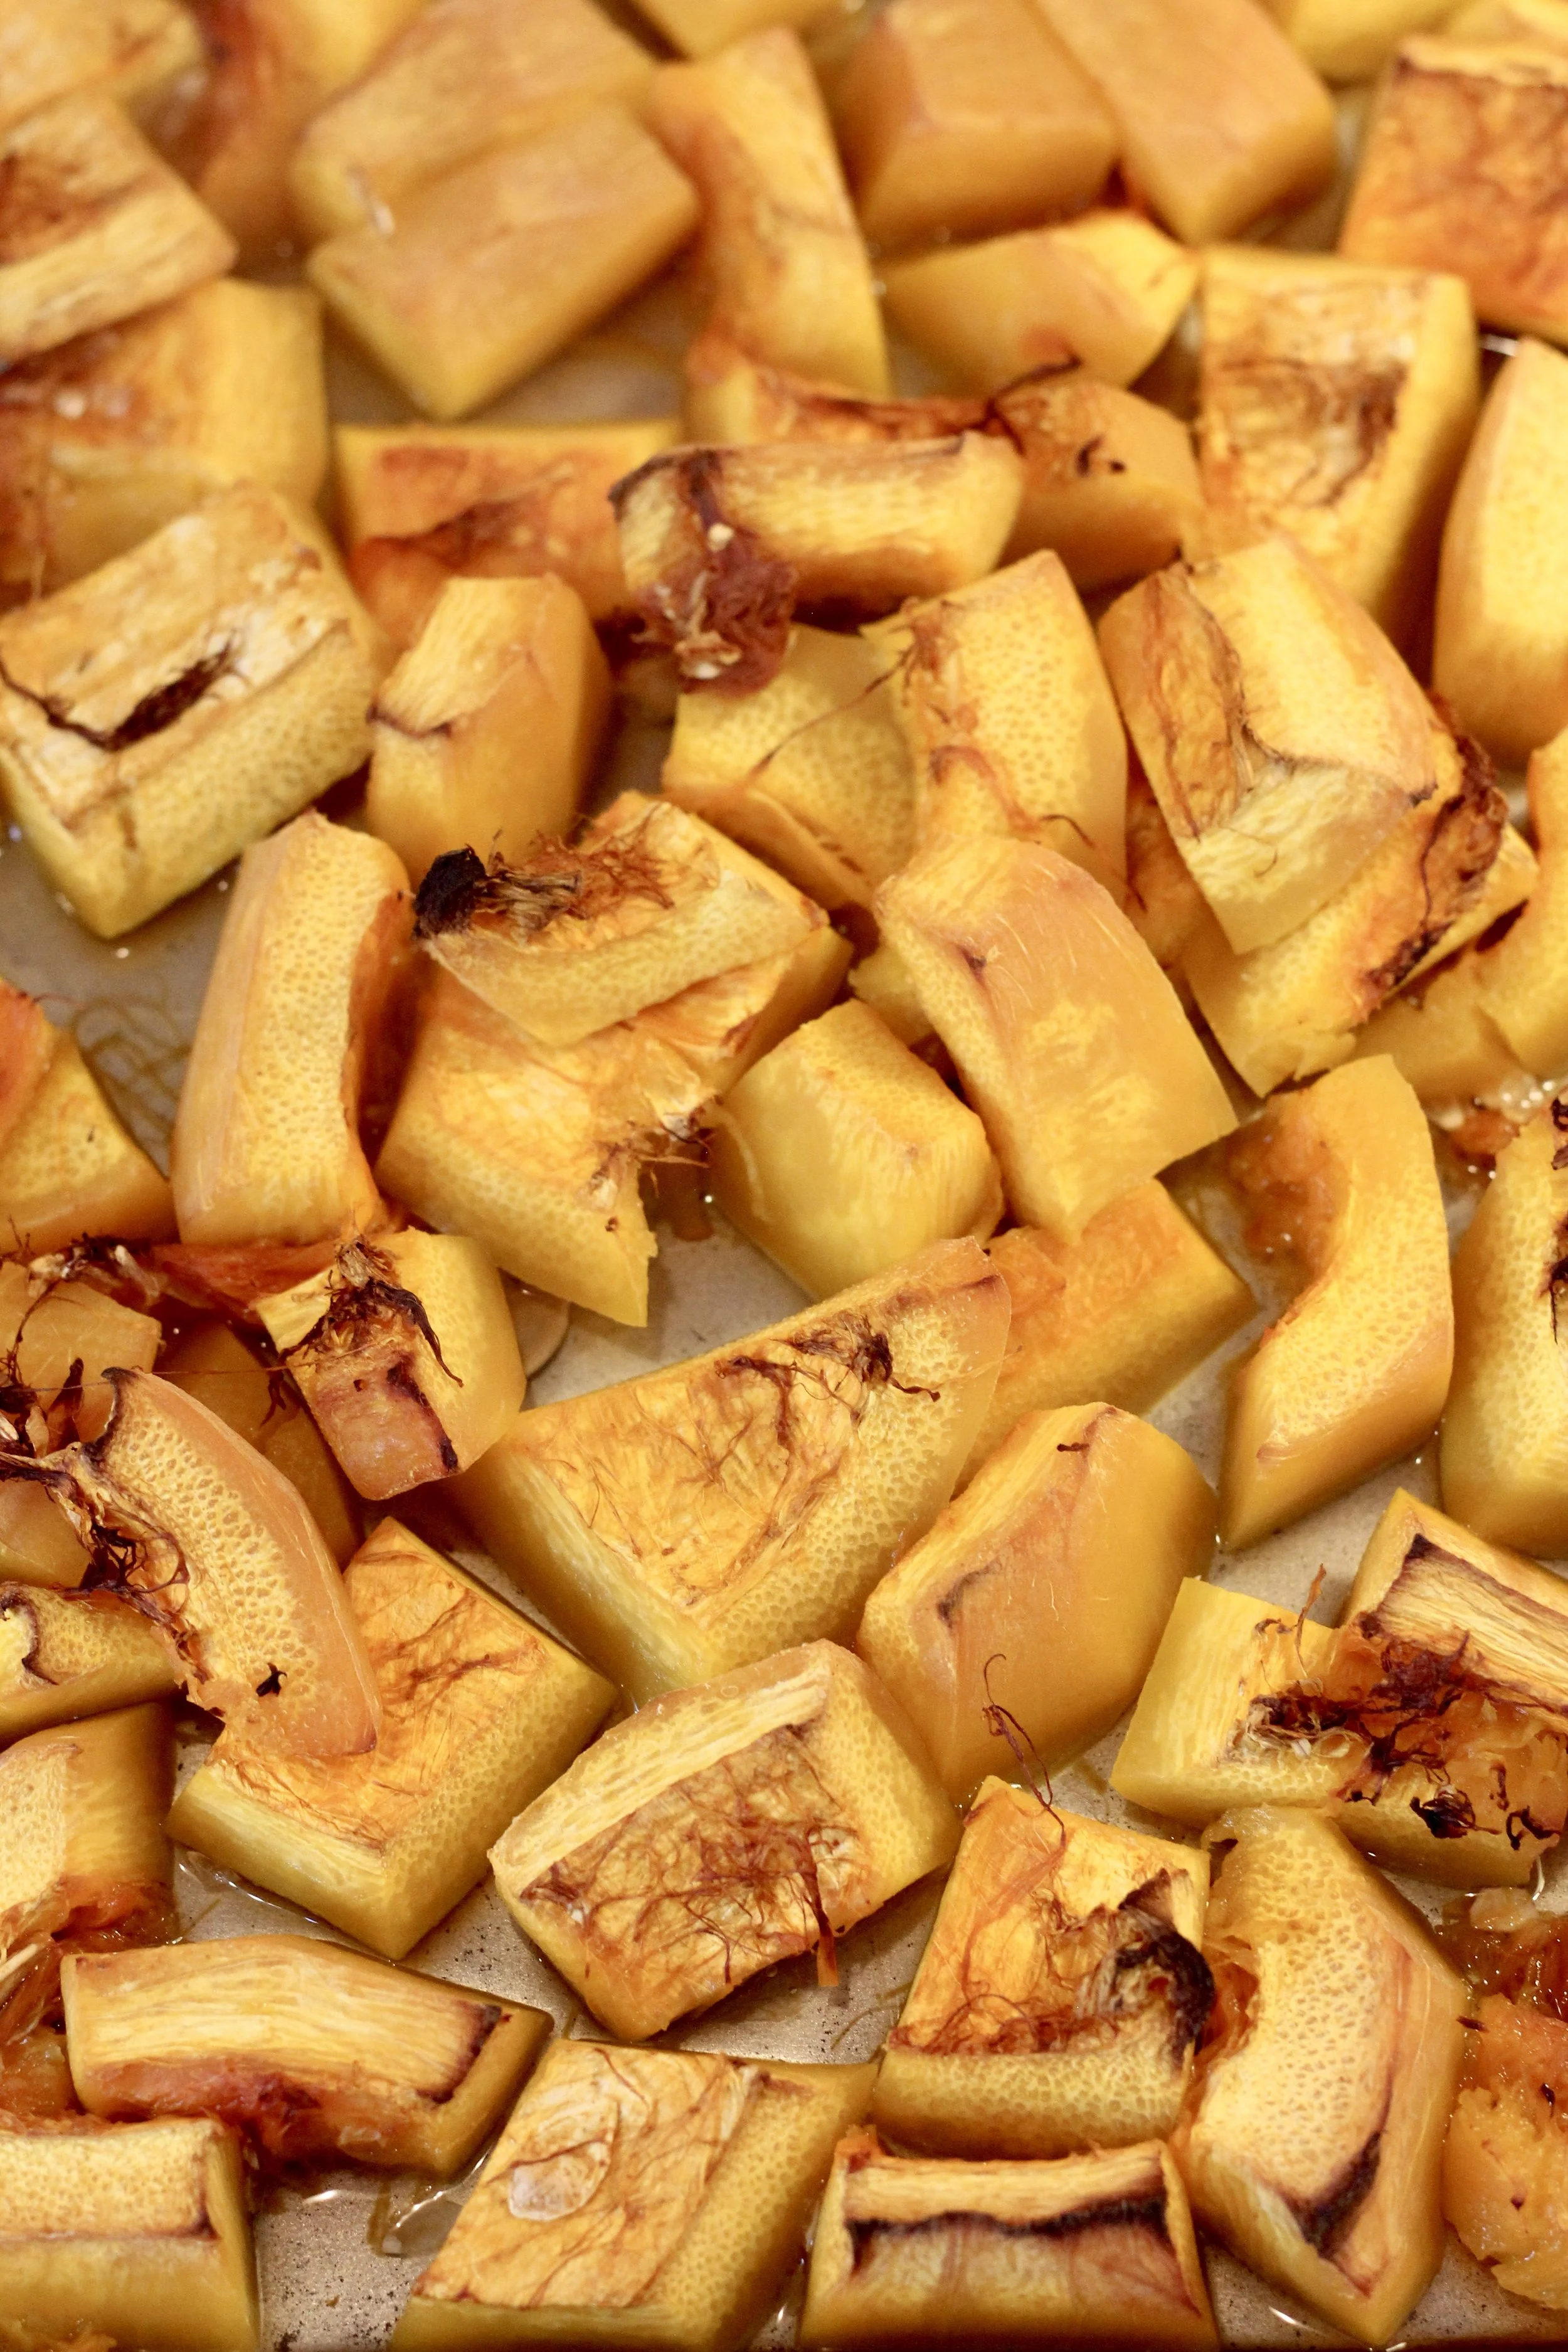
step 8: cool
The pumpkin cubes will be cooked when the pumpkin becomes a deep orange colour and edges become golden. To test, you should be to put a fork through them. Remove from the oven and let cool on a cooling rack (affiliate link) for at least 20 minutes.
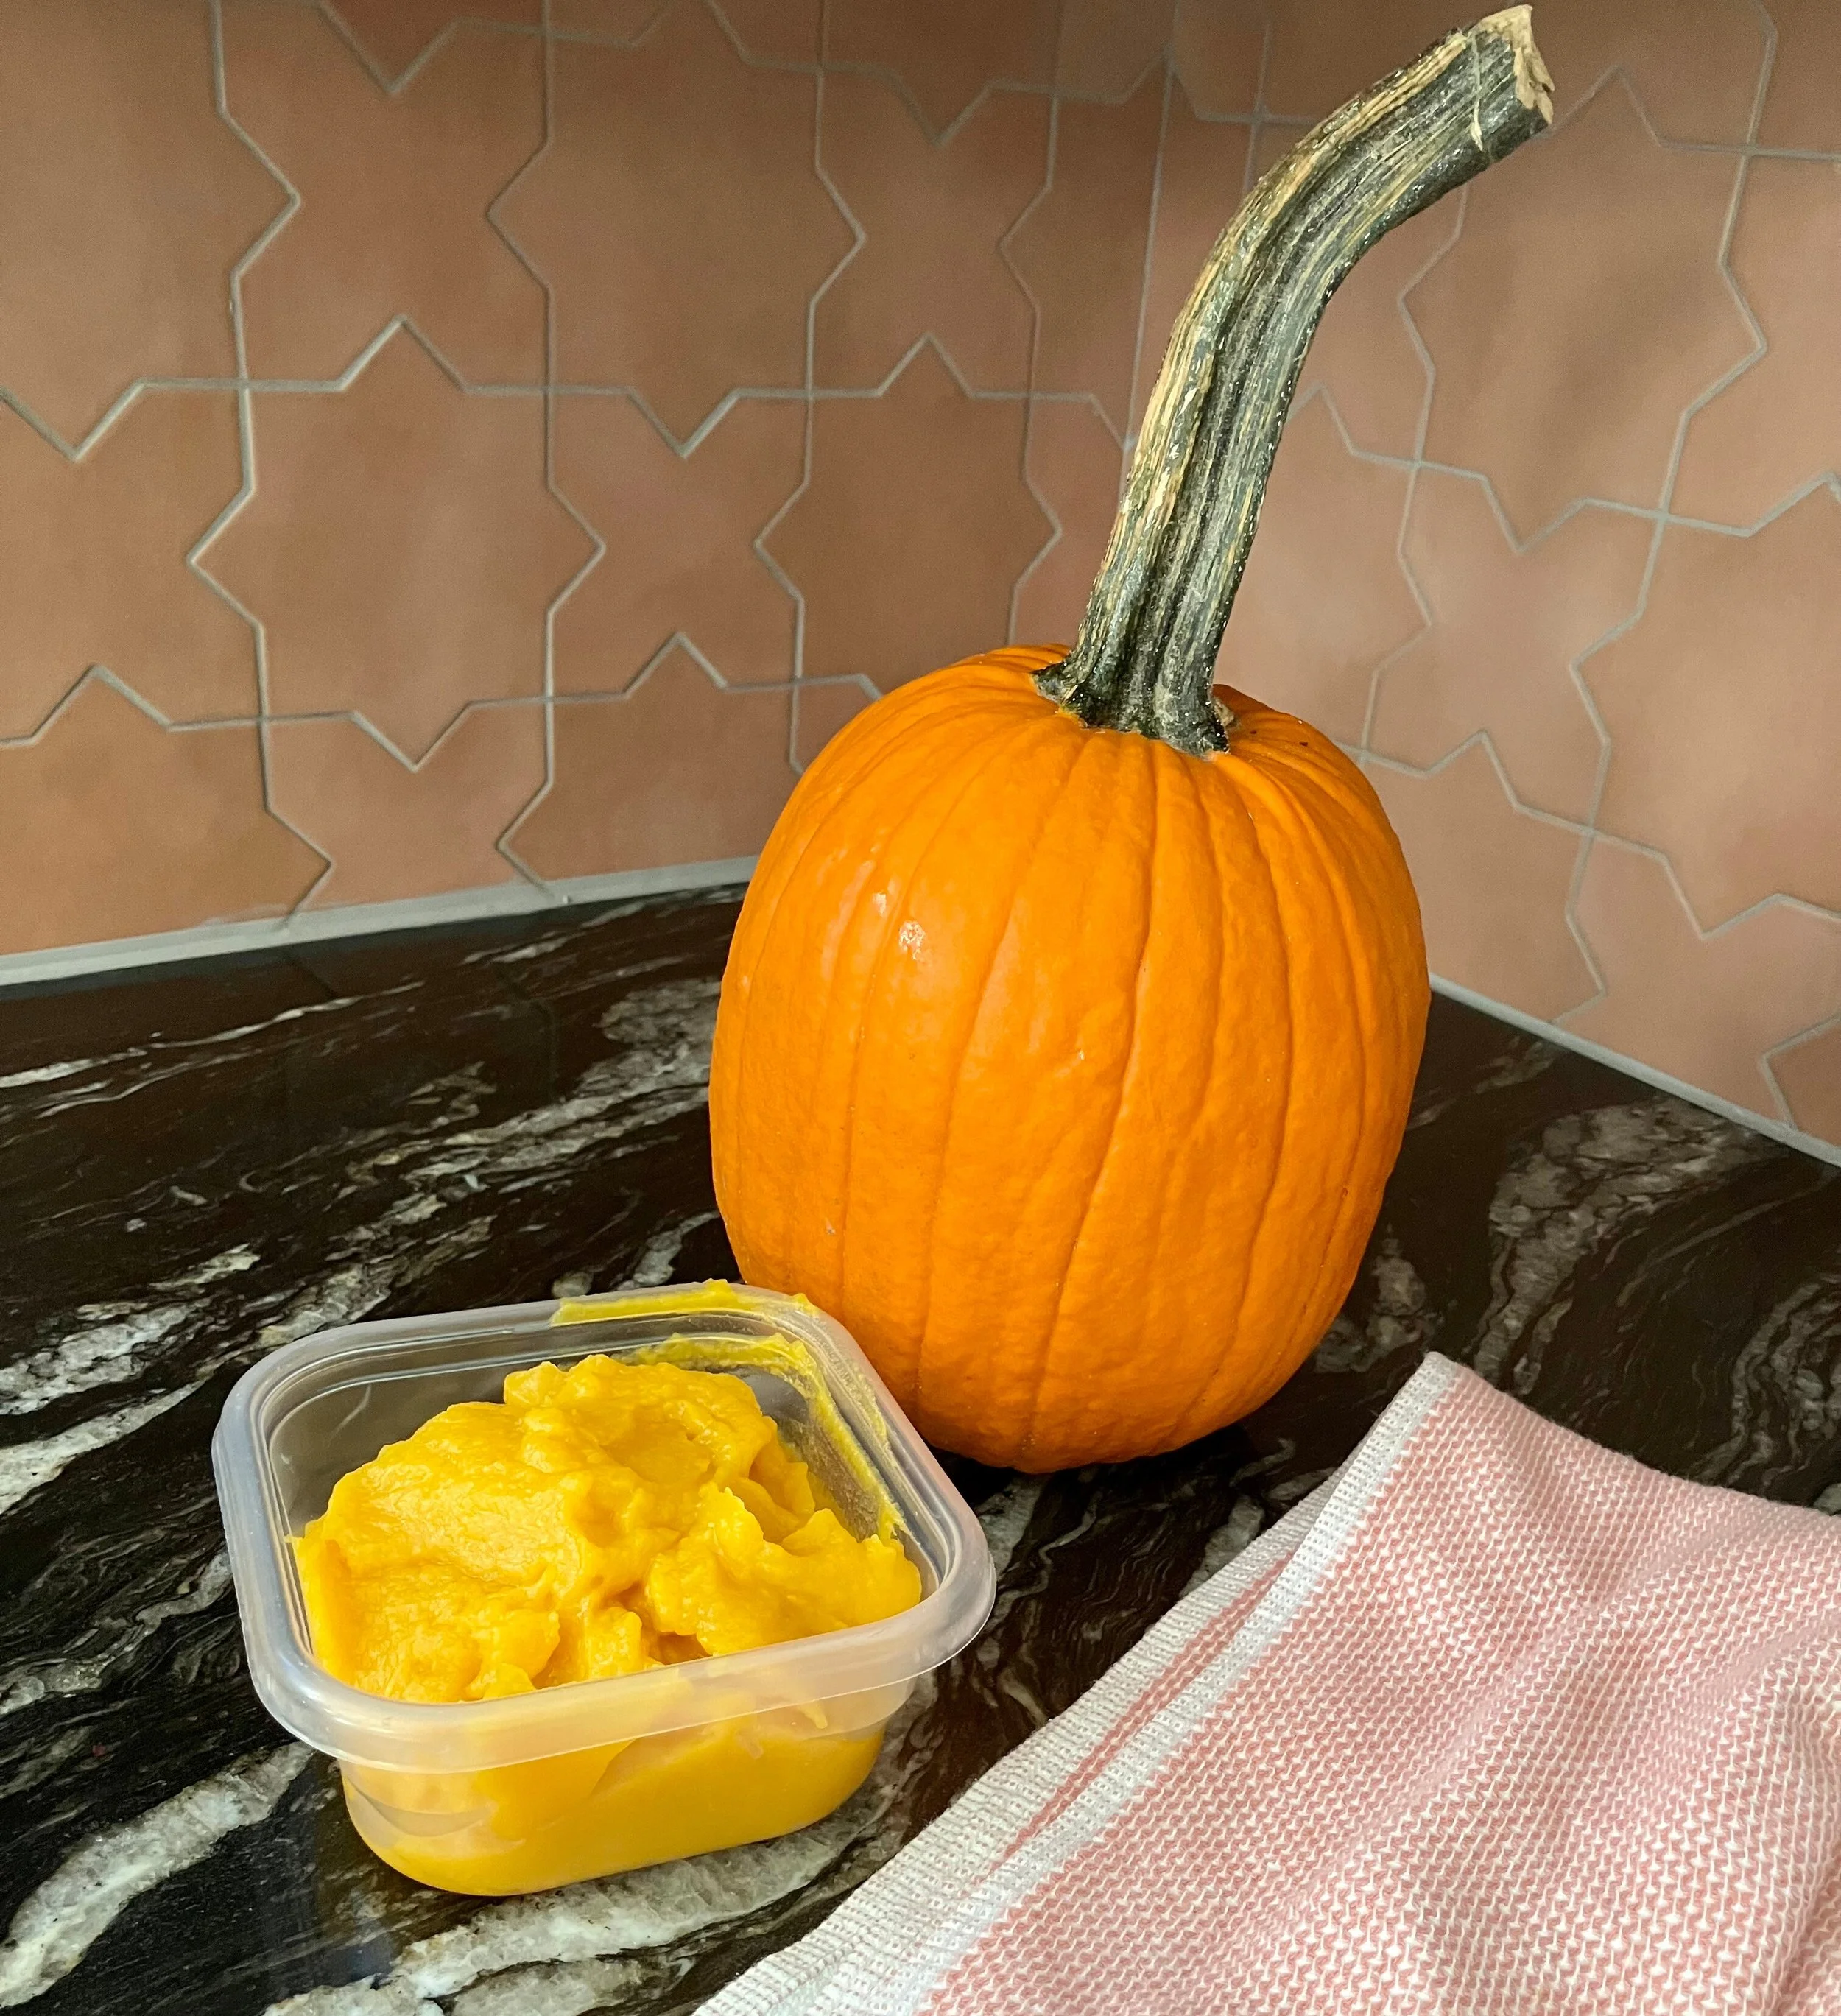
step 9: blend
Once the pumpkin has cooled, add the cooked pumpkin to a blender or food processor and blend until smooth.

It’s so easy!
Storage
fridge:
keep this pumpkin puree in the fridge for up to 4 days.
Freezer:
Freeze in a freezer-safe bag or container for up to 3 months. I highly recommend pre-portion in 1 cup portions before freezing.
Frequently Asked Questions
can I use a carving pumpkin instead of a sugar pumpkin?
Yes! I’ve used this same technique for carving pumpkins as sugar pumpkins and got a similar result. The carving pumpkin is much larger than a sugar pumpkin so it will produce more puree. you might need to add a bit more water to the bottom of the pan when baking.
Pro Tip: Be sure to check you have enough baking sheets, storage bags or containers and storage room if using a carving pumpkin.
how much time does it take to make pumpkin purée?
Start to finish, the process takes 1-2 hours. I usually chose to make mine during a rainy, grey fall afternoon, when I know we will be home, and take advantage of that time to prepare a few fall snacks and meals at the time.
Can I freeze homemade pumpkin purée?
Yes! Pumpkin puree freezes really well, and can be frozen for up to 3 months. I usually pre-portion my pumpkin purée in 1 cup portions in freezer safe bags so I can easily pull out and thaw based on the amount I need for my recipes.
How do I thaw out pumpkin purée?
I recommend to pull it out of the freezer and put it in the fridge the night before you need it. If it’s still frozen the next day, submerge the bag in cold water, and use once thawed.
How long does homemade pumpkin purée last in the fridge?
Store it in the fridge for up to 4 days. This pumpkin puree doesn’t contain preservatives, so I recommend you use them sooner than later.
Pumpkin puree, perfect for all your pumpkin recipes!
other pumpkin recipes:

Recipe Card
Ingredients:
1 pumpkin, I like using a sugar pumpkin
A little bit of water at the bottom of the pan
Instructions:
Pre-heat the oven to 350F.
Cut the pumpkin, and remove the skin.
Put the raw pumpkin on a baking sheet. Add water to the bottom of the pan so the entire bottom of the pan is filled with water.
Put it in the oven for 30-45 minutes until golden brown
Let cool and blend until puree.
Enjoy!
Did you make this recipe? I want to see it!
Leave a picture and a ⭐ star rating and comment below to let us know how your muffins turned out. Did you make any substitutions or additions? Share your tips and photos with us!
Share this recipe: Help others discover this delicious recipe by sharing it on Pinterest, Facebook, or Instagram. Tag us @Sageandsimplicity so we can see your beautiful creations!
📌 Pin it for later: Save this recipe to your Pinterest boards for easy access.