
Split Pea Soup: The Ultimate Comfort Bowl for Cold Winter Days
Don't throw away that pork shoulder bone! This hearty split pea soup is my favorite way to use leftover pork drippings and bone broth. Whenever I roast a pork shoulder, I save the bone and drippings to make this rich, flavorful soup that's both wholesome and budget-friendly.
The secret is in the pork broth—boiling the bone creates a deep, savory base that store-bought broth just can't match. Combined with split peas, and simple vegetables. This soup is the ultimate cold-weather comfort food.
This recipe is perfect for busy families looking to stretch their grocery budget and reduce food waste. The soup freezes beautifully, so I often make a big batch and save portions for quick weeknight dinners. It's nutritious, satisfying, and uses ingredients you likely already have in your pantry.
Ready to transform your leftover pork into something delicious? Let's make split pea soup!
📖 Jump to Recipe | 💬 Jump to FAQs | 🖨️ Print Recipe
Prep Time: 10 minutes | Cook Time: 20 minutes | Total Time: 30 minutes

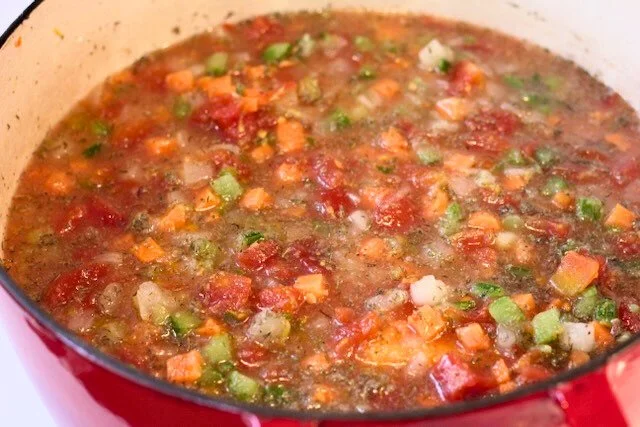
When winter settles in and the days feel a little longer and colder, this simple split pea soup becomes the kind of meal you crave on repeat. It’s warm, hearty, and deeply comforting in a way that feels familiar and reassuring. Made with humble ingredients and pantry staples, this soup is proof that comfort food doesn’t need to be complicated—or expensive—to be deeply satisfying.

One of the best things about this split pea soup recipe is how budget-friendly and flexible it is. Leftover pork drippings or pork broth bring rich, savoury depth, making this a smart and delicious way to stretch ingredients you already have. If you’re short on pork broth, there’s no stress here—just top it up with chicken broth or water. I would highly recommend adding bacon bits, if you have them on hand. This forgiving approach makes the recipe accessible, practical, and perfect for everyday cooking.
This soup also comes together effortlessly. Everything goes into one pot, simmers gently, and transforms with very little hands-on time. Frozen mirepoix does the heavy lifting, while split peas slowly soften and thicken the broth into a cozy, spoon-clinging texture. It’s the kind of recipe that fits beautifully into busy winter routines, whether you’re cooking after school or prepping meals ahead of time.

Parents especially love this recipe because it’s great for kids’ lunches—filling, nourishing, and easy to reheat. And the real win? Kids genuinely love it. The mild flavours, soft texture, and comforting warmth make this soup approachable even for picky eaters. Pair it with freshly toasted sourdough bread, and you’ve got a lunch or dinner that feels special without any extra effort.
If you’re looking for the ultimate winter comfort soup, this split pea soup checks every box: affordable, simple, cozy, and family-approved. It’s the kind of recipe you’ll return to all season long, especially on those cold days when you want something warm, familiar, and deeply satisfying simmering on the stove.

Why You’ll Love This Soup
Ultimate comfort food for cold winter months
Budget-friendly and made with pantry staples, and leftover porc drippings or broth
A great way to use leftover pork drippings or pork broth
One-pot, low-effort recipe
Kid-approved and perfect for school lunches
How to Make Split Pea Soup
ingredients:
½ bag frozen mirepoix
1 teaspoon granular garlic
1 tablespoon neutral oil (canola oil works well)
2 liters pork drippings or pork broth
If needed, supplement with chicken broth or water
½ cup split peas
Salt, to taste
Equipment needed:
Blender or food processor
large pot
wooden spoon
Step-by-Step guide to making split pea soup
step 1:
Add all ingredients to a large stock pot over medium-low heat.
step 2:
Cover the pot and bring the mixture to a gentle boil.
step 3:
Once boiling, reduce heat to a simmer, keeping the pot covered.
step 4:
Let simmer, stirring occasionally. Add broth or water if the soup becomes too thick.
Step 5:
Simmer for about 40 minutes, until the split peas are soft and tender.
Step 6:
Remove half the soup. Blend it, and pour it back in the soup. Stir, and serve warm.
Frequently asked questions
Can I make split pea soup without pork broth?
Yes. Use whatever pork drippings or broth you have and substitute the rest with chicken broth or water.
Pro tip: Add a handful of bacon bits, if you have them on hand. :)
Is split pea soup good for kids?
Absolutely! This mild, comforting soup is soft, filling, and kid-approved.
Is this soup freezer-friendly?
Yes. Let it cool completely, then freeze in airtight containers for up to 3 months.
Storage & Lunchbox Tips
Stores well in the fridge for up to 4 days
Thickens as it sits—add a splash of water when reheating
Perfect for thermos lunches on cold school days
REcipe CArd
Ingredients
½ bag frozen mirepoix
1 teaspoon granular garlic
1 tablespoon neutral oil (canola oil works well)
2 liters pork drippings or pork broth
If needed, supplement with chicken broth or water
½ cup split peas
Salt, to taste
How to Make Split Pea Soup
Add all ingredients to a large stock pot over medium-low heat.
Cover the pot and bring the mixture to a gentle boil.
Once boiling, reduce heat to a simmer, keeping the pot covered.
Stir occasionally and add water if the soup becomes too thick.
Simmer for about 40 minutes, until the split peas are soft and tender.
Let cool slightly, season with salt to taste.
Remove half the soup. Blend it, and pour it back in the soup. Stir, and serve warm.
Serving Suggestions
This split pea soup pairs beautifully with freshly toasted sourdough bread, making it a cozy, complete meal the whole family will enjoy.
Did you make this recipe? I want to see it!
Leave a picture and a ⭐ star rating and comment below to let us know how your muffins turned out. Did you make any substitutions or additions? Share your tips and photos with us!
Share this recipe: Help others discover this delicious recipe by sharing it on Pinterest, Facebook, or Instagram. Tag us @Sageandsimplicity so we can see your beautiful creations!
📌 Pin it for later: Save this recipe to your Pinterest boards for easy access.
You might also like:


Easy Lemony Red Lentil Soup Recipe | One-Pot Vegetable Soup
It all begins with an idea.
Last edited: 19 March, 2026
📖 Jump to Recipe | 💬 Jump to FAQs | 🖨️ Print Recipe
Prep Time: 5 minutes | Cook Time: 55 minutes | Total Time: 1 hour | Yield: 6-8 portions | Difficulty: Easy

Description
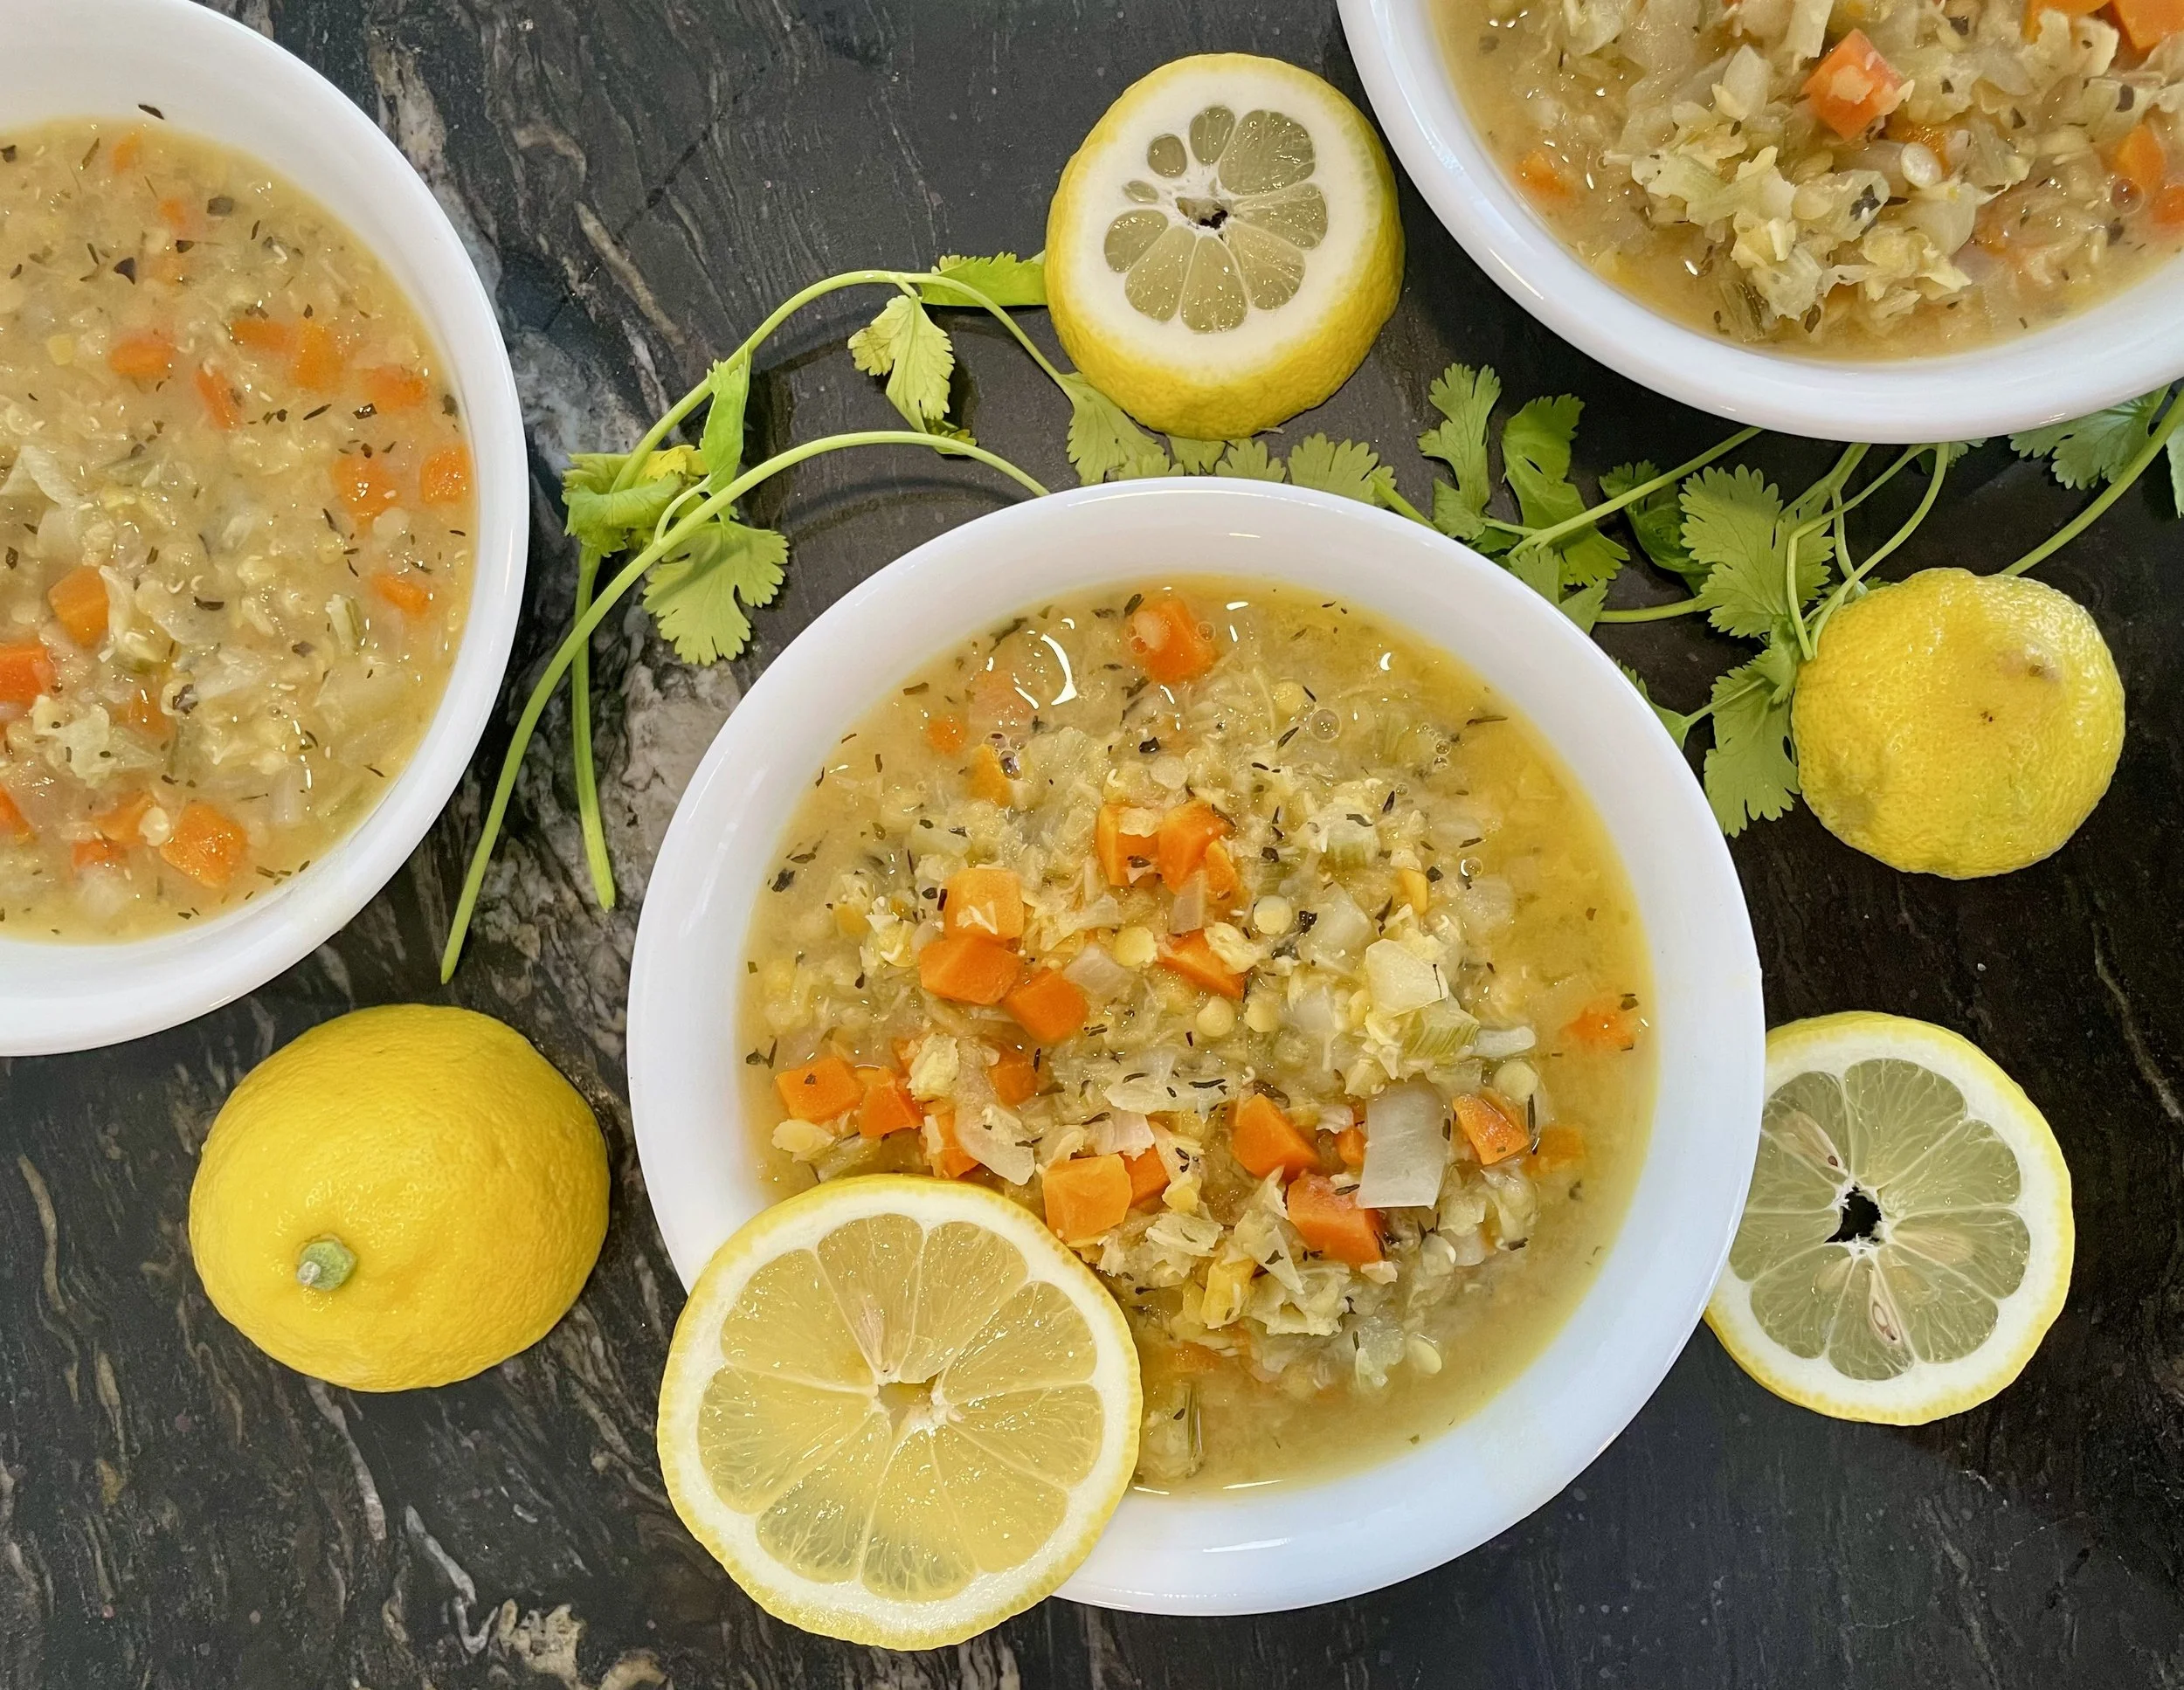
This easy one-pot red lentil soup is naturally creamy, packed with vegetables, and brightened with fresh lemon. Made with simple pantry staples and frozen vegetables, this healthy vegetable lentil soup is perfect for busy weeknights and meal prep. The red lentils break down during cooking to create a thick, velvety texture without any cream or blending required.
table of content:
Why You’ll Love This Recipe
What You’ll Need
How To Make: Step-by-Step Guide
Tips for Best Results
Suggestions & Variations
FAQs
Recipe Card
Final Thoughts
Why You'll Love This Red Lentil Soup Recipe
Simple & Convenient
One-pot recipe with minimal cleanup
Uses freezer and pantry staples
Hands-off cooking—just simmer and stir occasionally
No chopping required with frozen mirepoix (mixture of carrots, onions, and celery)
Healthy & Nutritious
High in plant-based protein from red lentils
Packed with vegetables and fiber
Naturally gluten-free
Low-fat and heart-healthy
Delicious Flavour
Naturally thick and creamy without dairy
Bright, fresh lemon flavour
Savoury vegetable base with hint of sweetness from squash
Comforting yet light and refreshing
Meal Prep Friendly
Makes 6-8 generous servings
Freezes beautifully for up to 3 months
Reheats well without losing flavour or texture
Tastes even better the next day

What you’ll need
Main Ingredients
750 g (1 bag) frozen mirepoix (onions, carrots, celery)
½ package frozen butternut squash purée (about 250g)
1 teaspoon dried thyme
1 teaspoon granulated garlic (or garlic powder)
1 can (28 fl oz / 796 ml) diced tomatoes
1 litre (4 cups) chicken broth or vegetable broth
1 litre (4 cups) water
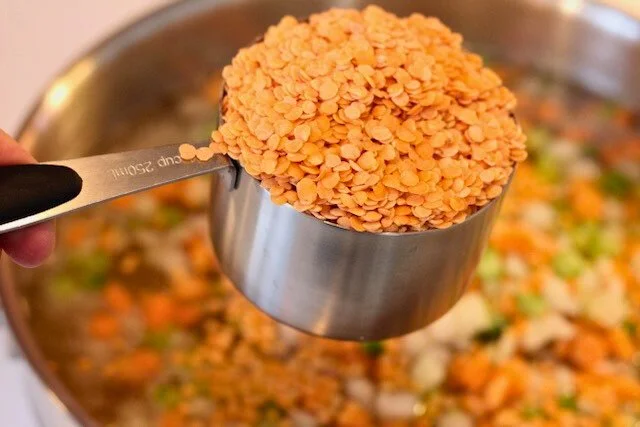
2 cups (400g) red lentils, rinsed
Salt, to taste
Rind of 1 lemon (zested or peeled in strips)
Optional Toppings & Serving Suggestions
Freshly grated Parmesan cheese
Fresh cilantro or parsley, chopped
Toasted sourdough bread
Warm garlic naan bread
Drizzle of olive oil
Red pepper flakes for heat
Plain Greek yogurt or sour cream
equipement list:
Large stock pot
wooden spoon
How to Make Lemony Red Lentil Soup: Step-by-step guide
Step 1: Combine Ingredients
Add frozen mirepoix, butternut squash purée, dried thyme, granulated garlic, diced tomatoes (with juices), chicken broth, water, and red lentils to a large stock pot or Dutch oven. Stir to combine. Reserve the lemon rind for later.
Step 2: Bring to a Boil
Place the pot over medium heat and bring the soup to a light boil. This takes about 10 minutes.
Step 3: Simmer the Soup
Once boiling, reduce heat to low. Let the soup simmer uncovered for 45-60 minutes, stirring occasionally every 10-15 minutes.
What happens during simmering:
The red lentils will completely break down and dissolve
The soup will naturally thicken to a creamy consistency
The flavours will meld together beautifully
The vegetables will become tender
Step 4: Add Lemon and Season
After simmering, stir in the lemon rind. Taste and add salt as needed (start with ½ teaspoon and adjust). Let the soup rest for 5 minutes to allow the lemon flavour to infuse.
Step 5: Serve
Ladle the hot soup into bowls and garnish with your favorite toppings. Serve with crusty bread for dipping.
Why Add Lemon Rind at the End?
Adding lemon rind at the end of cooking (rather than at the beginning) preserves its bright, fresh citrus aroma and essential oils. When lemon rind is cooked for too long, it can become bitter and lose its vibrant flavour. This technique infuses the soup with a gentle lemon essence that lifts all the other flavours without adding harsh acidity or overpowering the vegetables and lentils.
Pro Tip: Use a vegetable peeler to remove wide strips of lemon rind, avoiding the white pith. You can remove the strips before serving, or leave them in for a stronger lemon flavour.

Recipe Tips for the Best Lentil Soup
Choosing Your Lentils
Why red lentils? Red lentils (also called pink or orange lentils) cook quickly and break down completely, creating a naturally creamy texture. They're perfect for smooth, thick soups.

Can you use other lentils? Green or brown lentils will work but won't create the same creamy texture. They'll stay intact and give you a chunkier, more textured soup. If using green or brown lentils, you may want to blend part of the soup (I recommend half) for creaminess.
Making It Vegetarian/Vegan
Replace chicken broth with vegetable broth for a completely vegetarian and vegan-friendly soup. The flavour will be just as delicious.
Adjusting Consistency
Too thick? Add more broth or water, ¼ cup at a time, until you reach desired consistency
Too thin? Simmer uncovered for 10-15 more minutes to reduce and thicken, or add ¼ cup more red lentils and cook for 15 minutes
Storage & Meal Prep
Refrigerator: Store in an airtight container for up to 4-5 days. The soup will thicken as it sits—add a splash of water or broth when reheating.
Freezer: Freeze in portions for up to 3 months. Use freezer-safe containers or bags. Thaw overnight in the refrigerator and reheat on the stovetop.
Reheating:
Option 1: Warm on the stovetop over medium-low heat, stirring occasionally. Add liquid if needed.
Option 2: Microwave individual portions for 2-3 minutes, stirring halfway through.
What to Serve with Red Lentil Soup
This lemony lentil soup pairs beautifully with:
Breads & Grains
Crusty sourdough bread or baguette
Warm pita bread or garlic naan
Cornbread or focaccia
Buttery dinner rolls
Salads
Simple green salad with vinaigrette
Mediterranean chickpea salad
Cucumber and tomato salad
Arugula salad with lemon dressing
Proteins (if serving as a side)
Grilled chicken
Italian sausage
Some sort of white fish
Falafel

Nutritional Benefits of Red Lentil Soup
Red lentils are a nutritional powerhouse:
High in protein: About 18g protein per cup of cooked lentils
Rich in fiber: Supports digestive health and keeps you full
Packed with iron: Important for energy and blood health
Good source of folate: Essential B vitamin
Low in fat and calories: Perfect for healthy eating goals
This soup is naturally low in fat, high in fiber, and provides a complete nutritious meal when served with whole grain bread.
Recipe Variations & Substitutions
Spice It Up
Add ½ teaspoon cumin, ½ teaspoon coriander, ½ reed pepper flakes or ¼ teaspoon cayenne pepper for a warming, spiced version.
Add Greens
Stir in 2-3 cups fresh spinach or kale during the last 5 minutes of cooking for extra nutrients.
Make It Heartier
Add 1-2 diced potatoes or sweet potatoes at the beginning for a more filling soup.
Different Vegetables
No butternut squash? Use frozen sweet potato cubes, pumpkin purée, or skip it entirely—the soup will still be delicious.
Fresh Mirepoix
If you don't have frozen mirepoix, chop 1 large onion, 2 carrots, and 2 celery stalks.
Frequently Asked Questions (FAQ)
What is mirepoix and what if I don't have frozen mirepoix?
Mirepoix is a classic French combination of diced onions, carrots, and celery used as an aromatic base for soups, stews, and sauces. It's typically mixed in a 2:1:1 ratio (onions to carrots to celery). If you don't have frozen mirepoix, simply chop your own fresh vegetables: use 1 large onion (diced), 2 medium carrots (diced), and 2 celery stalks (diced). This equals about 3 cups total or approximately 400-450g. Sauté the fresh vegetables in 1 tablespoon olive oil, and 1/2 tsp of kosher salt for 3-5 minutes before adding the other ingredients for even better flavour.
Can I use fresh garlic instead of granular garlic?
Absolutely! You can substitute 3-4 cloves of fresh minced garlic for the 1 teaspoon of granular garlic. If using fresh garlic, add it at the beginning with the other vegetables when sautéing —just be careful not to burn it. Fresh garlic will give you a more pungent, vibrant garlic flavour, while granular garlic provides a milder, evenly distributed taste throughout the soup. I recommend granular, and only use fresh garlic if I don’t have granular garlic on hand.
Can I freeze lentil soup?
Yes! This red lentil soup freezes beautifully. Let it cool completely, then transfer to freezer-safe containers or bags. Freeze for up to 3 months. Thaw in the refrigerator overnight and reheat on the stovetop, adding a splash of water or broth if needed to thin it out.
Can I use green lentils instead of red lentils?
You can, but the texture will be different. Green or brown lentils hold their shape and won't break down like red lentils, so your soup will be chunkier rather than creamy. If you prefer a smooth soup with green lentils, blend half the soup after cooking. Green lentils also take longer to cook (45-60 minutes versus 20-30 for red).
Is this lentil soup vegan?
This recipe uses chicken broth, so it's not vegan. To make it vegan, simply substitute vegetable broth for the chicken broth. The flavour will be just as delicious, and you can boost the umami by adding 1 tablespoon soy sauce or miso paste.
How long does lentil soup last in the fridge?
Stored in an airtight container, this soup will keep for 4-5 days in the refrigerator. The soup thickens as it sits, so you may need to add a little water or broth when reheating. Always smell and visually inspect before eating refrigerated soup.
Why is my lentil soup bitter?
Bitterness in lentil soup can come from: (1) cooking lemon rind too long—add it at the end as instructed, (2) burned garlic or vegetables—make sure to use medium-low heat when simmering, or (3) old or rancid lentils—always use fresh lentils and store them in an airtight container. If your soup tastes bitter, try adding a pinch of sugar or a splash of lemon juice to balance it.
Do I need to soak red lentils before cooking?
No! Unlike beans, red lentils don't need to be soaked before cooking. Simply rinse them in a fine-mesh strainer to remove any debris, then add them directly to the pot. They cook quickly (20-30 minutes) and will dissolve into the soup, creating a creamy texture.
Can I make this soup in a slow cooker or Instant Pot?
Slow Cooker: Add all ingredients except lemon rind to your slow cooker. Cook on low for 6-8 hours or high for 3-4 hours. Stir in lemon rind before serving.
Instant Pot: Use the sauté function to warm the ingredients if desired, then add everything except lemon rind. Cook on high pressure for 15 minutes, then natural release for 10 minutes. Stir in lemon rind and season with salt.
How do I make this soup thicker?
This soup naturally thickens as it cooks because red lentils break down. If its been simmering for 1 hour and you want it even thicker: (1) simmer longer uncovered to evaporate more liquid, (2) add another ¼-½ cup red lentils and cook for 15 more minutes, (3) use an immersion blender to partially blend the soup, or (4) mash some of the soup against the side of the pot with a spoon.
How do I make this soup thinner?
If your soup is too thick, simply add more liquid. Stir in chicken broth, vegetable broth, or water ¼ cup at a time until you reach your desired consistency. The soup thickens significantly as it sits and cools, so you may need to thin it when reheating leftovers.
Can I add meat to this soup?
Absolutely! For a heartier soup, add: cooked shredded chicken in the last 10 minutes, browned Italian sausage at the beginning, or cooked bacon crumbled on top at the very end. If adding raw meat, brown it first in the pot before adding other ingredients.
What's the difference between lemon rind and lemon zest?
Lemon rind refers to strips of the yellow outer peel (removed with a vegetable peeler or knife), while lemon zest is the finely grated yellow peel. For this recipe, either works! Strips are easier to remove before serving, while zest disperses throughout the soup for more even flavour.
Is this soup gluten-free?
Yes! All the ingredients in this recipe are naturally gluten-free. Just make sure that ingredients havent come in cross-contact with grains during farming, harvesting and storage. Choosing brands that are labeled “gluten-free”, or “certified gluten-free” is the safest option to avoid contamination. Also make sure your broth is certified gluten-free (some brands add wheat-based additives). Serve with gluten-free bread, if needed.
Can I use fresh tomatoes instead of canned?
Yes, you can substitute 3-4 cups of diced fresh tomatoes for the canned tomatoes. However, canned tomatoes provide more concentrated flavour and consistent results. If using fresh, you may want to add 1 tablespoon tomato paste for extra depth.
Why is my soup foaming?
Lentils naturally produce some foam when cooking, especially at the beginning of boiling. This is normal and harmless—it's just starch and protein rising to the surface. Simply skim off the foam with a spoon if you'd like, or ignore it and stir it back in.
Recipe Card
Prep Time: 5 minutes | Cook Time: 55 minutes | Total Time: 60 minutes
Servings: 6-8 | Cuisine: Mediterranean-Inspired | Diet: Vegetarian, Gluten-Free
Ingredients:
750g frozen mirepoix
½ package frozen butternut squash purée
1 tsp dried thyme
1 tsp granulated garlic
1 can (28 oz) diced tomatoes
1 litre chicken or vegetable broth
1 litre water
2 cups red lentils, rinsed
Rind of 1 lemon
Salt, to taste
Instructions:
Add all ingredients except lemon rind to a large pot over medium heat
Bring to a light boil (about 5-10 minutes)
Reduce heat to low and simmer for 45-60 minutes, stirring occasionally. The soup will thicken and lentils will dissolve.
Stir in lemon rind and season with salt
Serve hot with bread or toppings of choice
Storage: Refrigerate up to 4-5 days or freeze up to 3 months.
Final Thoughts
This Easy Lemony Red Lentil Soup is the perfect recipe for anyone looking for a healthy, comforting, and flavourful meal that doesn't require hours in the kitchen. With just one pot, simple ingredients, and minimal effort, you can create a restaurant-quality soup that's perfect for meal prep, weeknight dinners, or feeding a crowd.
The combination of red lentils, vegetables, and fresh lemon creates a soup that's both nourishing and satisfying—creamy without cream, filling without being heavy, and bright without being acidic. Whether you're new to cooking with lentils or a seasoned soup maker, this recipe delivers warmth, balance, and ease in every bowl.

Did you make this recipe? I want to see it!
Leave a picture and a ⭐ star rating and comment below to let us know how your muffins turned out. Did you make any substitutions or additions? Share your tips and photos with us!
Share this recipe: Help others discover this delicious recipe by sharing it on Pinterest, Facebook, or Instagram. Tag us @Sageandsimplicity so we can see your beautiful creations!
📌 Pin it for later: Save this recipe to your Pinterest boards for easy access.
You might also like these recipes:


Gingery Lentil Cabbage Bowl
It all begins with an idea.
When winter temperatures drop, a warm, nourishing bowl meal can make all the difference. This Gingery Lentil Cabbage Bowl is a cozy, budget-friendly winter recipe made with simple ingredients like lentils, cabbage, carrots, and fresh ginger. It’s a one-pot dish that delivers comfort, flavour, and nutrition—perfect for anyone searching for an easy winter dinner idea that feels both hearty and wholesome.

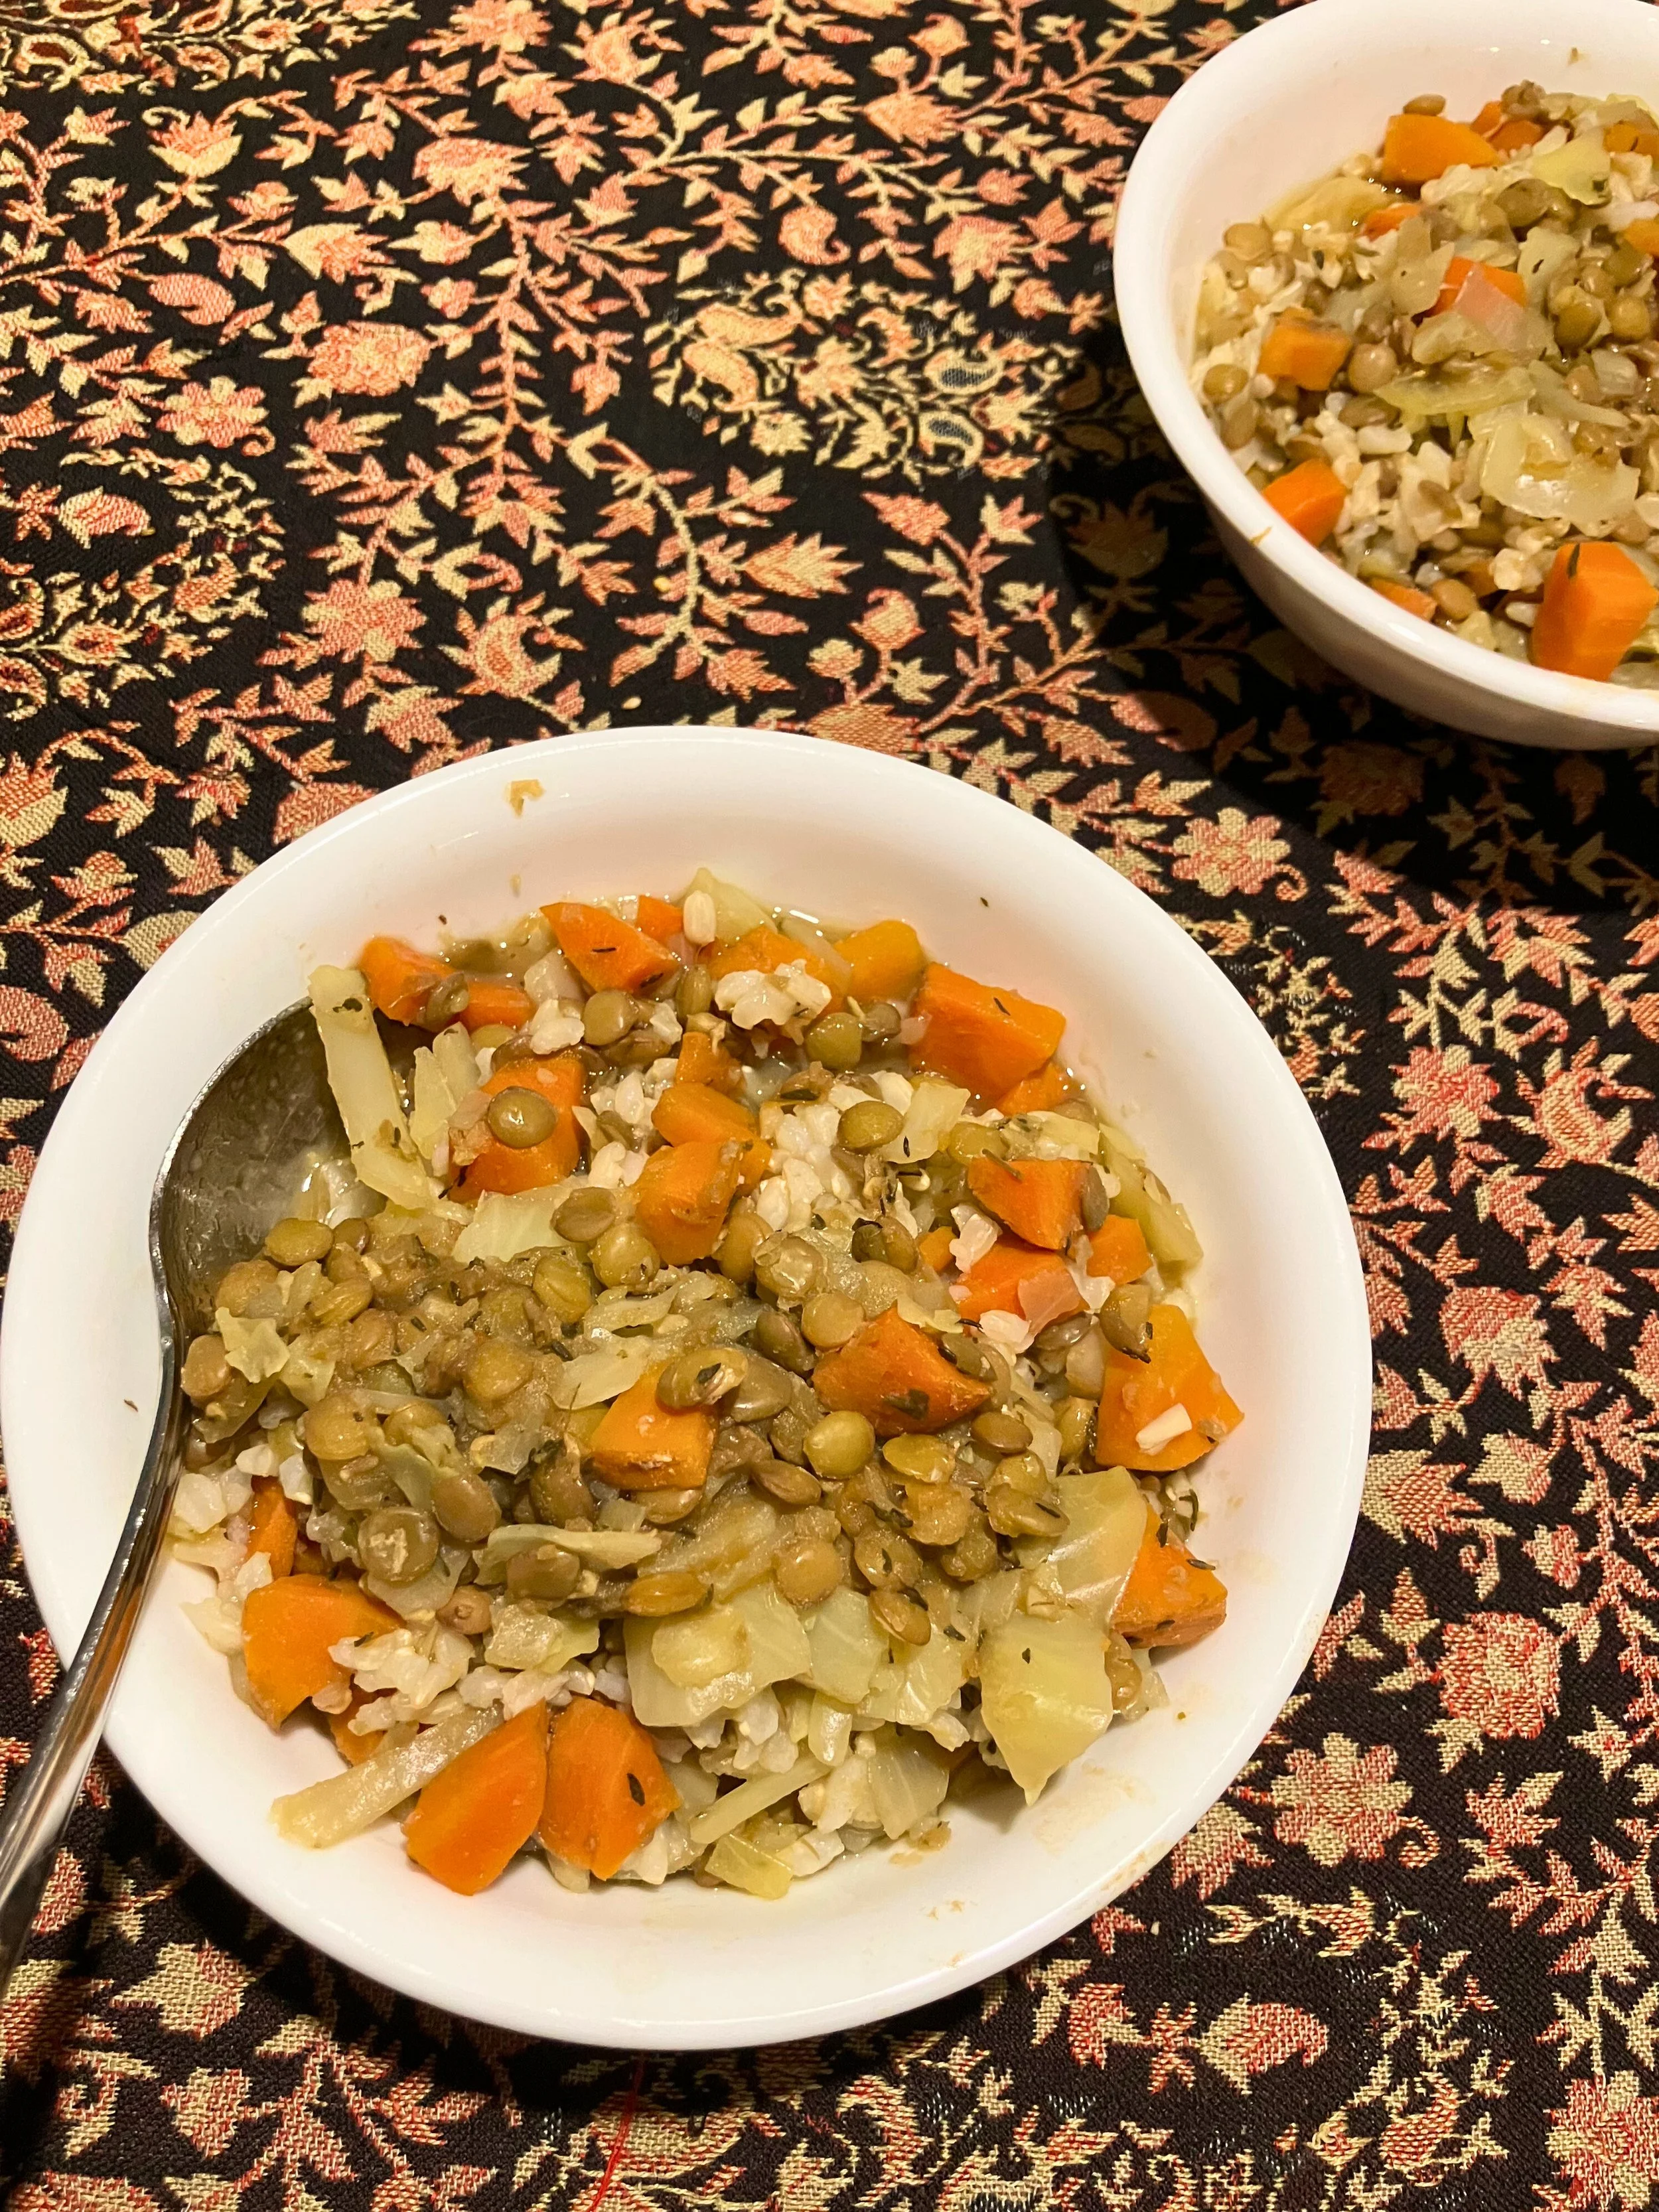
This lentil cabbage bowl starts with diced carrots, cabbage, onion, and garlic simmered gently with green lentils, dried thyme, and beef broth. As everything cooks together, the lentils become tender while the vegetables soften and absorb the savoury broth. The result is a thick, spoonable mixture that’s deeply satisfying and naturally filling, making it an excellent option for cold-weather meals or make-ahead lunches.
Fresh ginger is what truly elevates this recipe. Added at the very end by pressing it directly into the cooked lentils, the ginger releases its bright, warming juice without leaving fibrous pieces behind. This simple step gives the dish a subtle zing and depth that balances the earthiness of the lentils and the sweetness of the carrots, creating a flavour profile that feels comforting yet vibrant.
This gingery lentil cabbage bowl is incredibly versatile and pairs well with a variety of grains and breads. Serve it over rice for a classic, cozy bowl, or try it with barley for a heartier, nutty texture. It’s also delicious alongside sourdough bread or garlic naan bread, which are perfect for soaking up the flavourful broth. These serving options make it easy to customize based on what you have on hand.
If you’re looking for an easy winter lentil recipe that’s nourishing, affordable, and family-friendly, this dish is a reliable favorite. It comes together in about 30 minutes, reheats beautifully, and uses pantry staples you likely already have. Whether you’re searching for a comforting cabbage and lentil meal or a warming ginger-forward bowl for winter, this recipe is one you’ll want to keep in regular rotation.
Gingery Lentil Cabbage Bowl (Easy One-Pot Winter Recipe)
When winter settles in, simple, nourishing meals become essential. This Gingery Lentil Cabbage Bowl is a cozy, one-pot winter recipe made with green lentils, cabbage, carrots, and fresh ginger. It’s budget-friendly, deeply comforting, and perfect for cold evenings when you want something warm without a lot of effort.
This recipe doubles as an easy weeknight dinner and a make-ahead meal. Everything simmers together in one skillet, creating rich flavour with minimal prep. Serve it over rice or barley, or enjoy it with sourdough or garlic naan for a satisfying winter bowl.
Why You’ll Love This Lentil Cabbage Bowl
Made in one pot with simple ingredients
Naturally filling and protein-rich from lentils
Cozy, warming flavours perfect for winter
Flexible serving options with grains or bread
Reheats well for leftovers
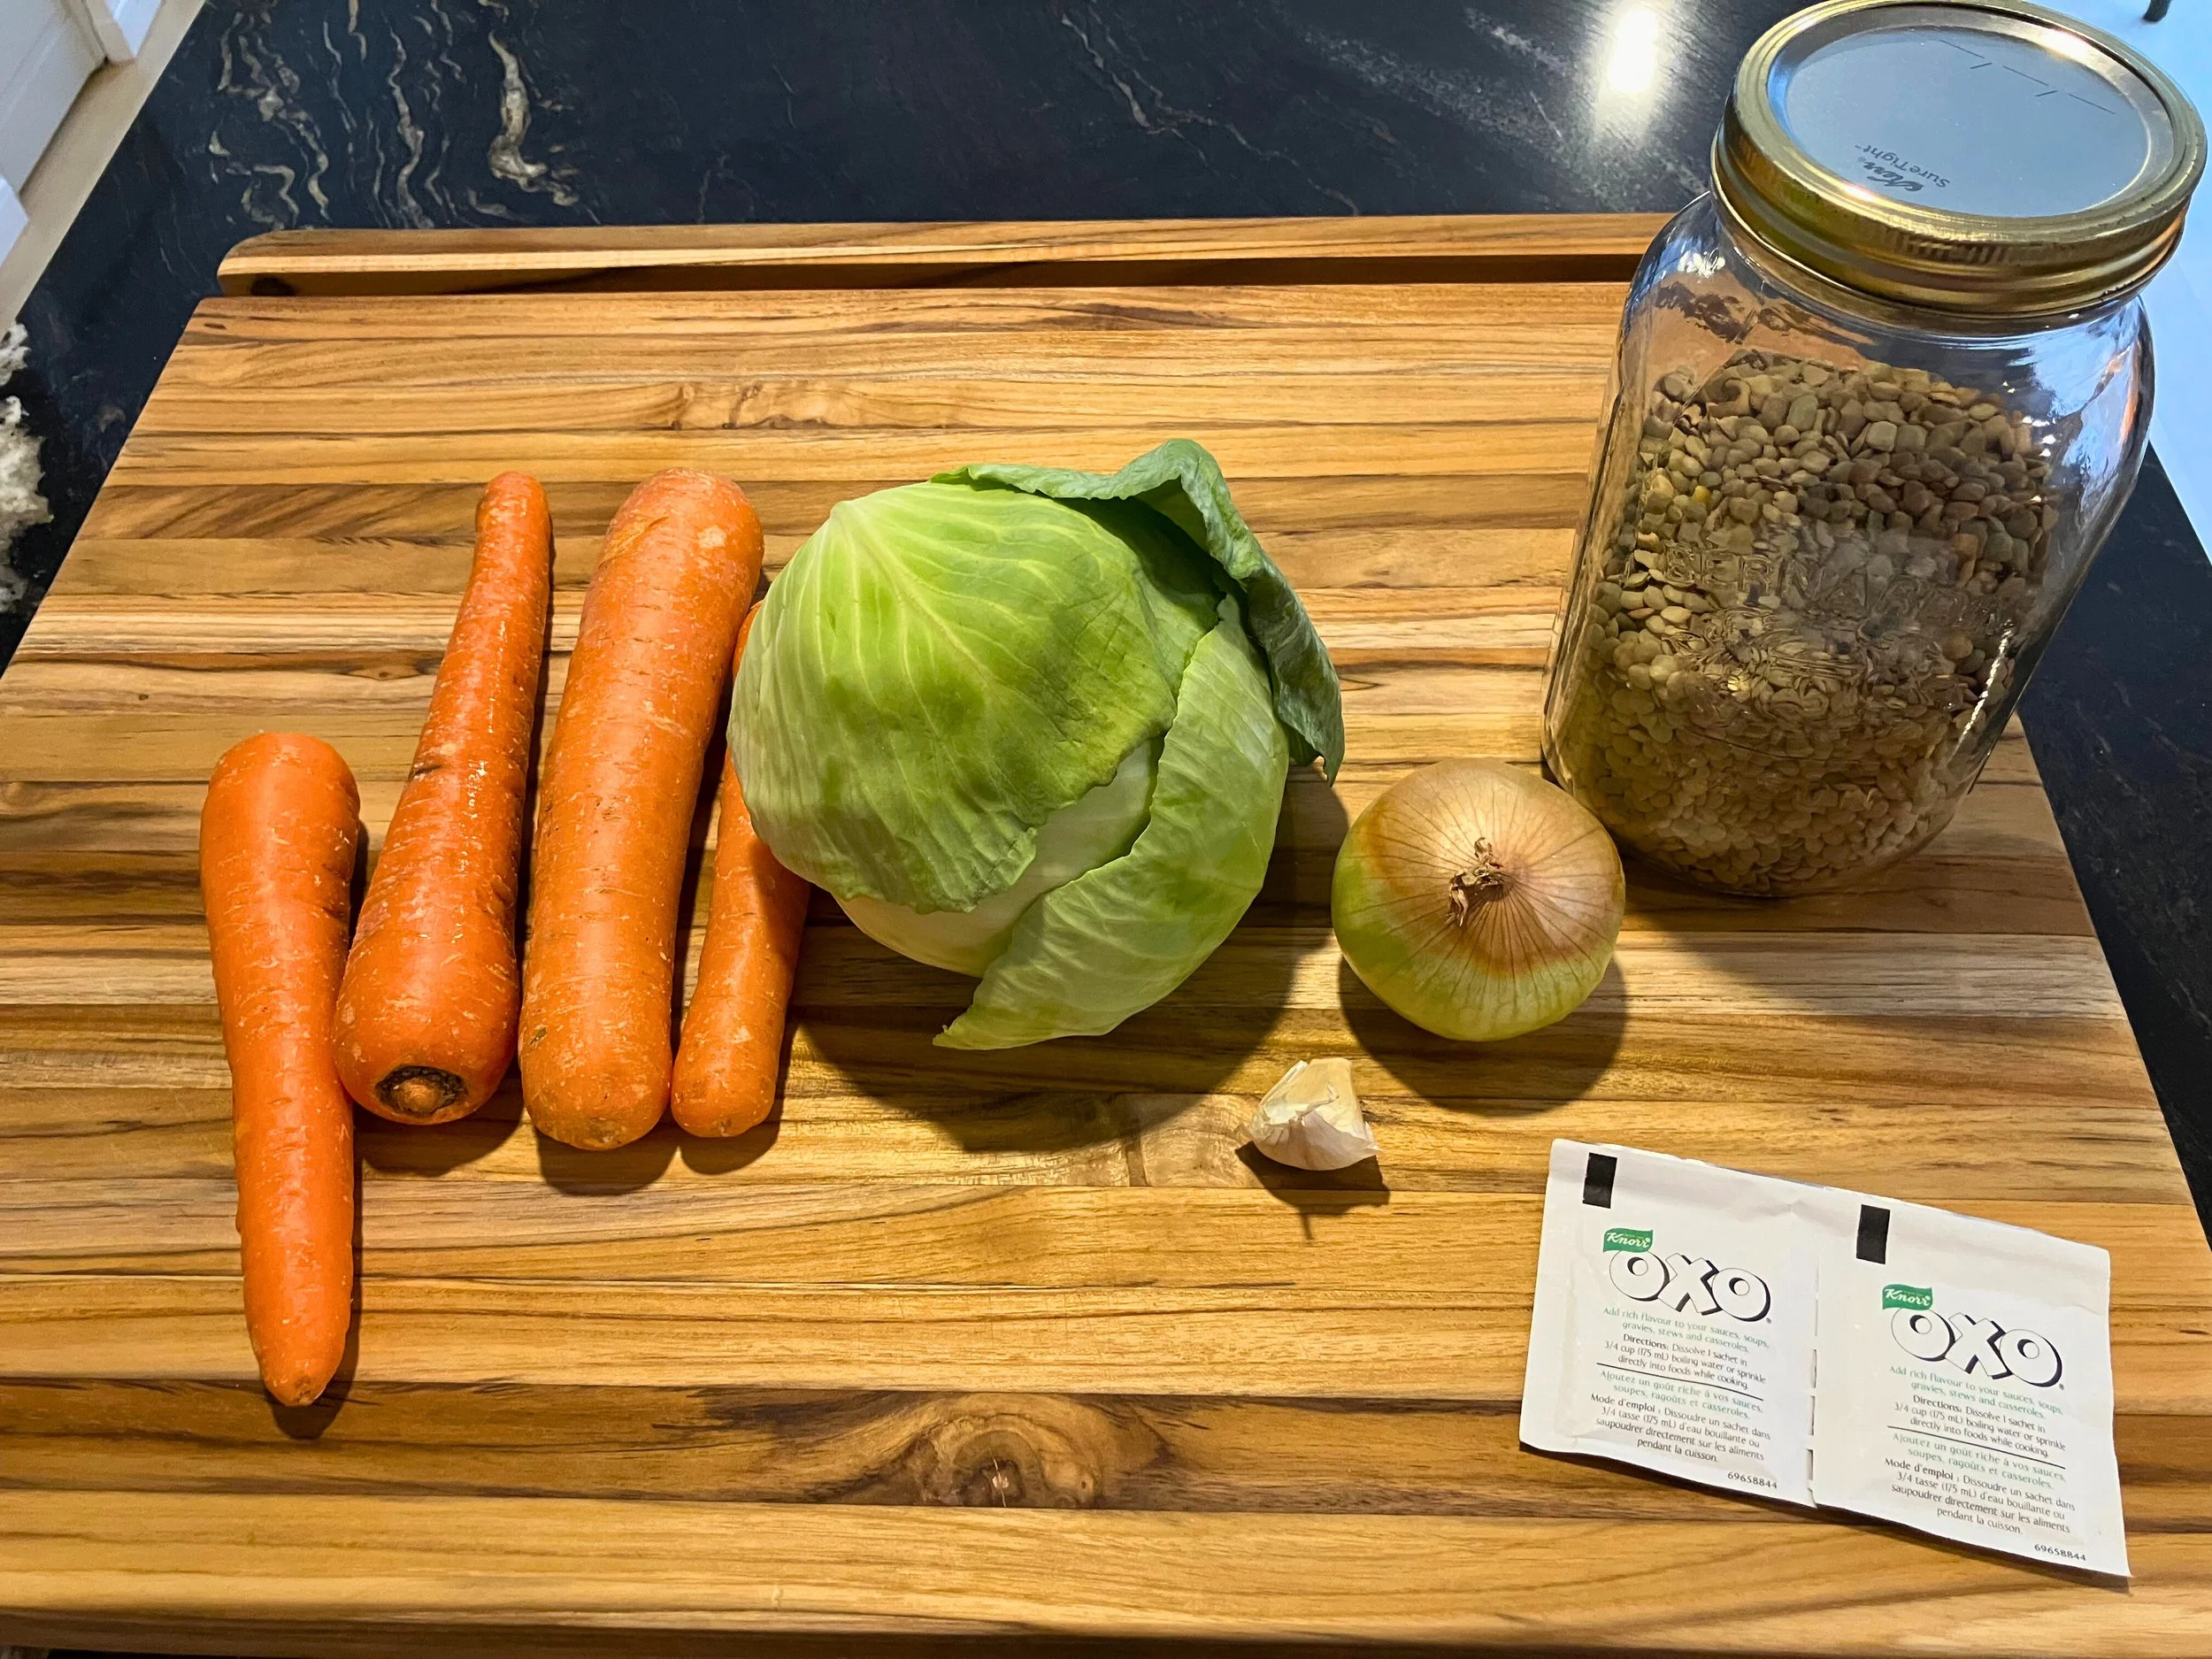
Ingredients for Gingery Lentil Cabbage Bowl:
4 carrots, diced (about 4 cups)
½ small cabbage, diced (about 4 cups)
½ medium onion, diced (about ½ cup)
2 cloves garlic, diced
1 cup dried green lentils
2 teaspoons dried thyme
1 teaspoon kosher salt
1 litre beef broth
1 tablespoon fresh ginger, peeled and cut into 1 cm pieces
equipment
large pot for the stovetop
wooden spoon
measuring cups and spoons
How Do You Make a Gingery Lentil Cabbage Bowl?
Step-by-Step Instructions
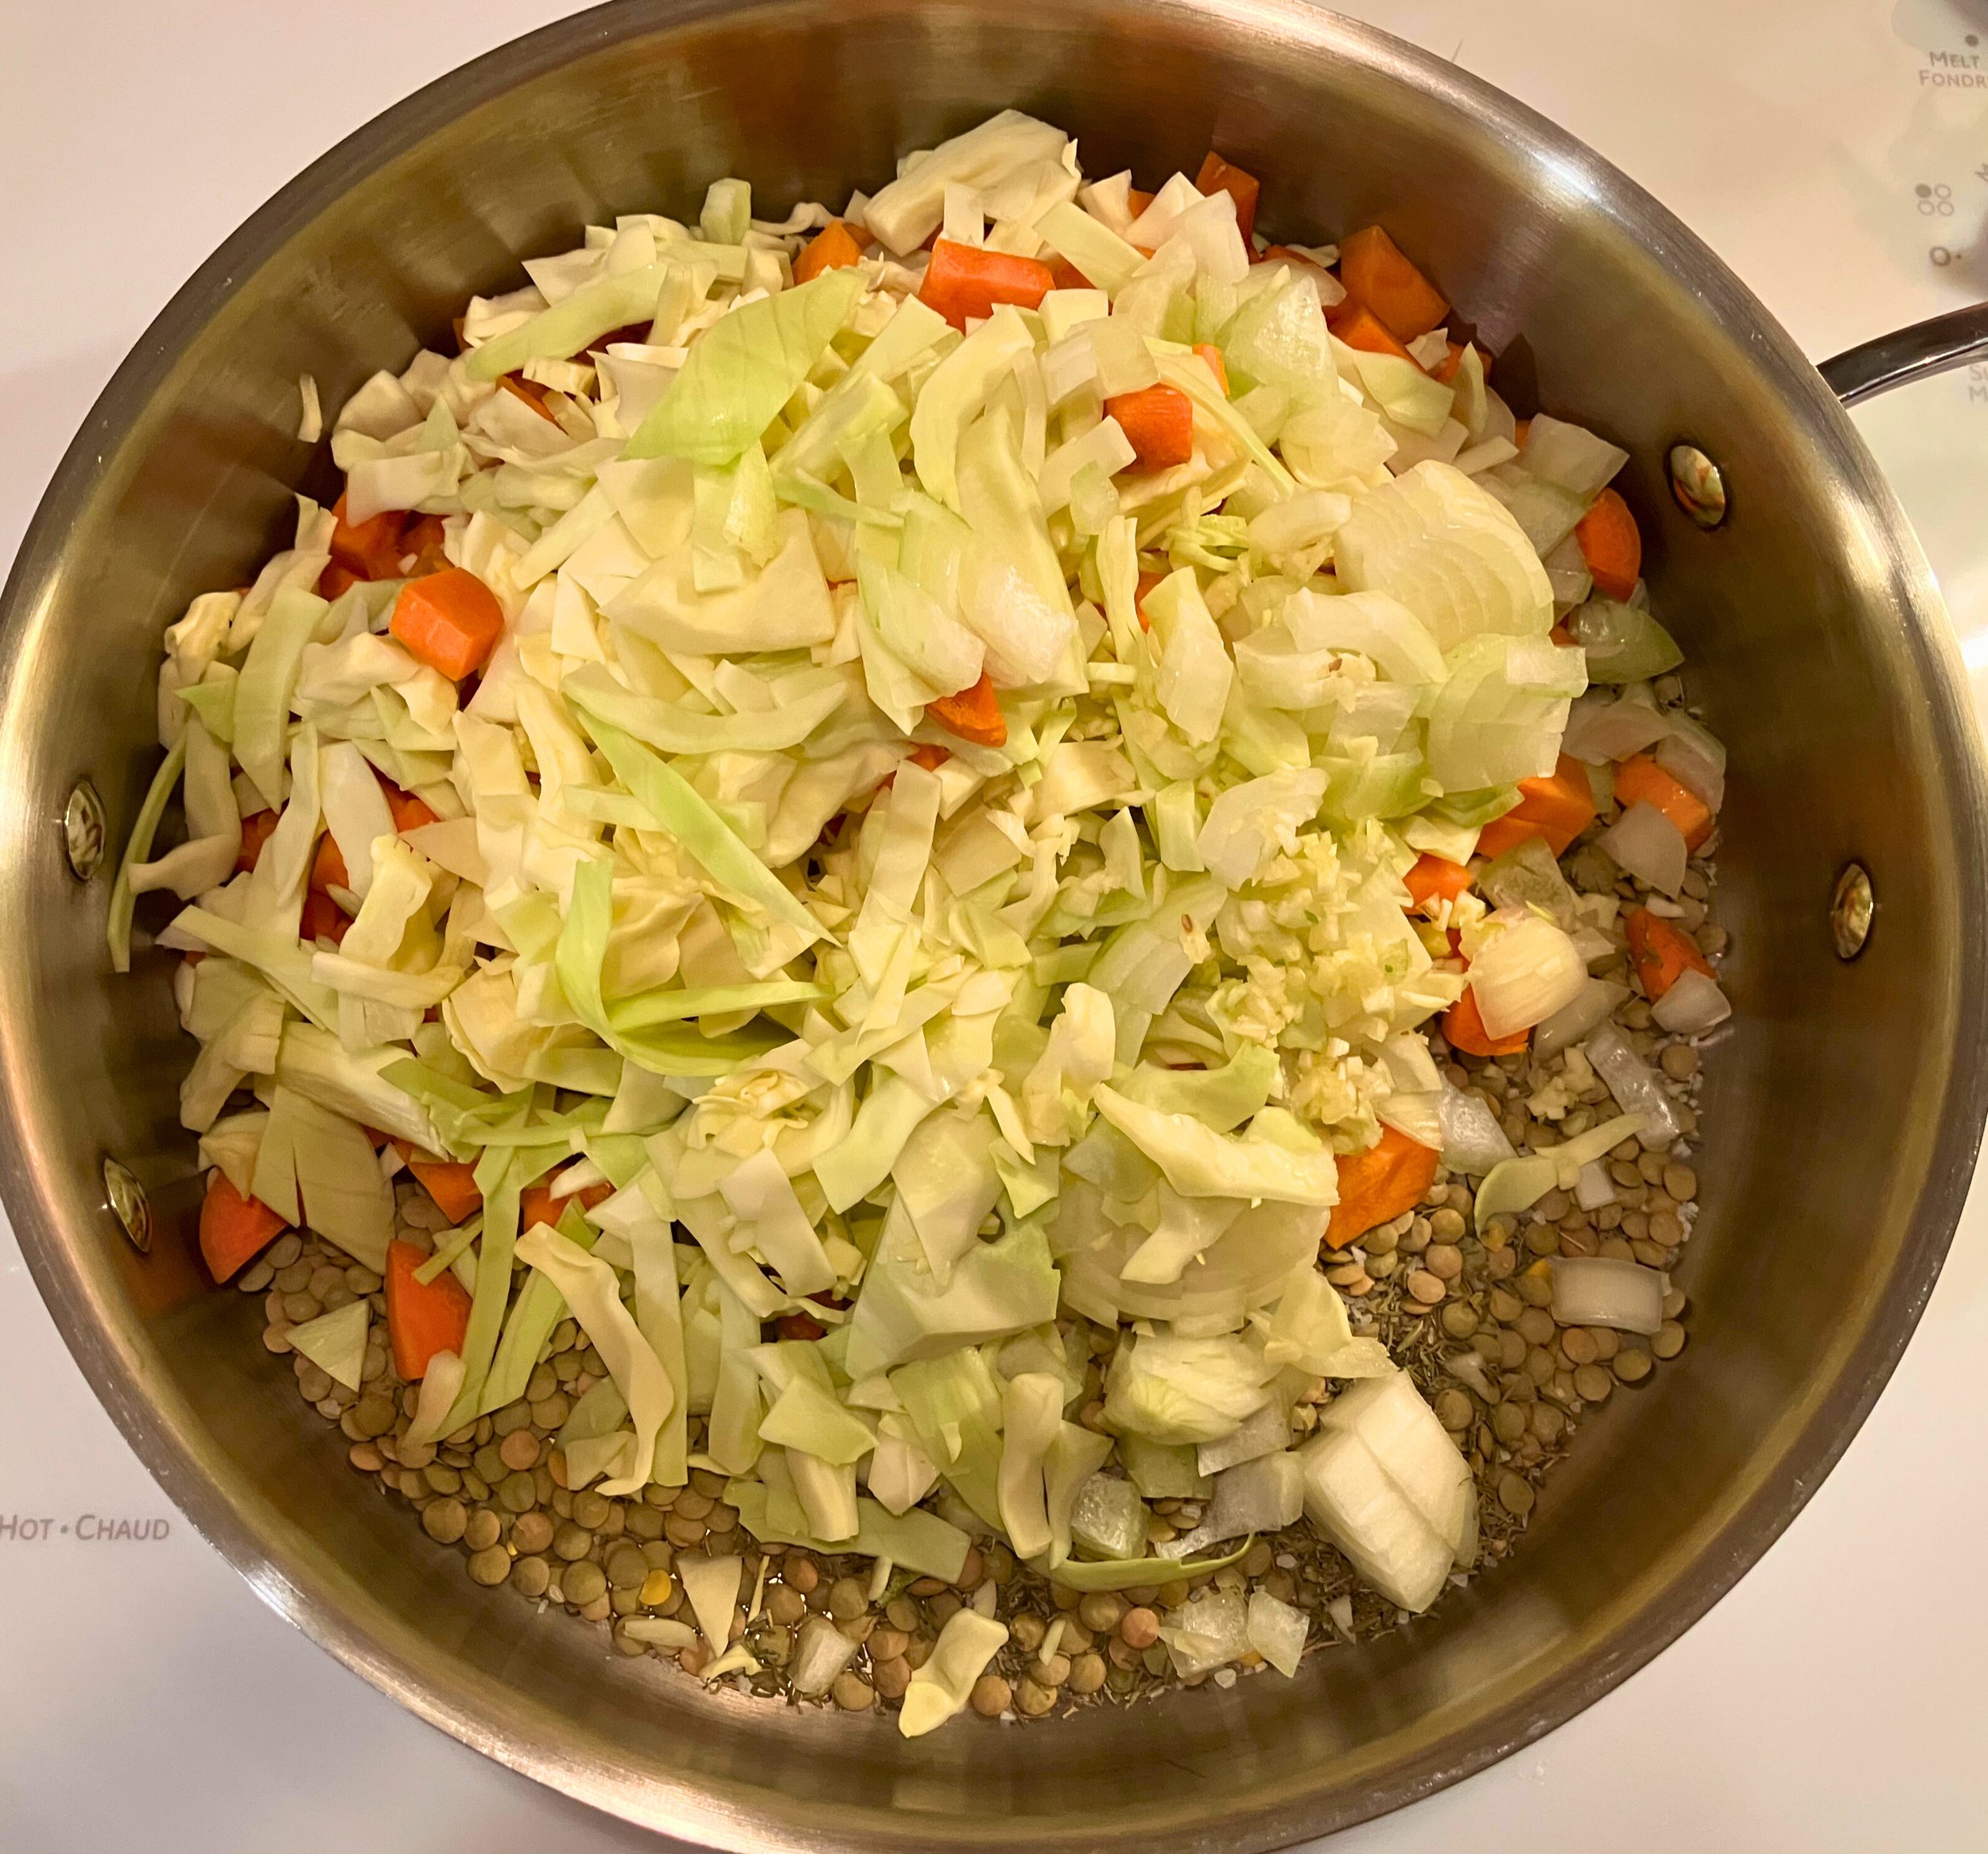
Chop the carrots, cabbage, onion, and garlic.
In a large skillet, combine the diced vegetables, lentils, garlic, thyme, salt, and beef broth.
Cover and cook over medium heat until the broth reaches a light boil.
Reduce heat to low, keep covered, and simmer for about 25 minutes, stirring occasionally.
The lentils should be tender
The carrots and cabbage will soften
The onions will become translucent
Turn off the heat. Using a garlic press, press the ginger directly into the mixture, allowing the juice to fall in. Discard the remaining ginger fibers.
Stir and serve warm.
Frequently Asked Questions (FAQs)
Why Add Ginger at the End?
Fresh ginger is pressed into the dish after cooking to preserve its bright, warming flavour. Adding ginger at the end prevents bitterness and avoids fibrous pieces while giving the lentils that signature cozy, gingery warmth that makes this bowl stand out.
What Goes Well With a Lentil Cabbage Bowl?
Best Serving Ideas
This gingery lentil cabbage bowl pairs beautifully with:
Rice for a classic, comforting bowl
Barley for a hearty, nutty texture
Sourdough bread to soak up the broth
Garlic naan bread for easy scooping
These options make it easy to adapt the meal based on what you already have at home.
How Long Does This Recipe Take?
From start to finish, this recipe takes about 30 minutes, making it ideal for busy winter evenings or simple meal prep.
Is This a Good Winter Meal?
Yes—this is an ideal winter lentil recipe. It’s warm, filling, and nourishing without being heavy. The combination of lentils, vegetables, and ginger makes it both comforting and energizing, perfect for cold-weather cooking.
Storage suggestions
Store leftovers in an airtight container in the refrigerator for up to 4 days
Reheat gently on the stove or in the microwave
Add a splash of broth or water if it thickens
Final Thoughts
This Gingery Lentil Cabbage Bowl is proof that simple ingredients can create deeply satisfying meals. It’s easy, affordable, and comforting—exactly what winter cooking should be. Whether you serve it over grains or with warm bread, it’s a recipe worth keeping in regular rotation.
Recipe card
Here’s the recipe!
Ingredients:
4 carrots, about 4 cups diced
½ small cabbage, about 4 cups, diced
½ medium onion, about ½ cup, diced
2 cloves of garlic, diced
1 cup of green lentils, dried
2 tsp thyme, dried
1 tsp kosher salt
1 L beef broth
1 tbsp fresh ginger, peeled and cut into 1 cm pieces
Instructions:
Chop carrots, cabbage, onion and garlic.
In a large skillet, combine all of the diced vegetables, lentils, garlic, thyme, salt, and broth. Cover and let the mixture cook over medium heat until the broth comes to a light boil.
Reduce heat to low and let the mixture simmer, stirring occasionally. Ensure that the mixture is covered, during this phase of the cooking. Cook until the lentils become tender, about 25 minutes. The carrots and cabbage will become tender while the onions will become transparent as the flavours mix.
Turn the heat off. Using a garlic press, press the ginger into the mixture, discarding the ginger afterwards. Here, the aim is to have the juices fall into the mixture. It will provide that that amazing gingery taste we’ve all come to love.
Stir and serve over rice, barley, a slice of sourdough bread or along side garlic naan bread.
Enjoy!
DID YOU MAKE THIS RECIPE? I WANT TO SEE IT!
Leave a picture and a ⭐ star rating and comment below to let us know how your muffins turned out. Did you make any substitutions or additions? Share your tips and photos with us!
Share this recipe: Help others discover this delicious recipe by sharing it on Pinterest, Facebook, or Instagram. Tag us @Sageandsimplicity so we can see your beautiful creations!
📌 Pin it for later: Save this recipe to your Pinterest boards for easy access.
You might also like these recipes:


Butternut Squash Soup Recipe (Roasted, Creamy & Ready in 1.5 Hour)
📖 Jump to Recipe | 💬 Jump to FAQs | 🖨️ Print Recipe
Prep Time: 15 minutes | Cook Time: 65 minutes | Total Time: 1 hour 20 minutes | Yield: 6-8 servings | Difficulty: Easy

Published: January 30, 2026
Why This Butternut Squash Soup Recipe Works
This roasted butternut squash soup delivers restaurant-quality results with minimal effort. By roasting the vegetables first instead of just boiling them, you unlock deep caramelized flavours that transform a simple soup into something extraordinary. The golden edges bring natural sweetness, while the aromatic vegetables create a velvety, comforting bowl perfect for cold weather.
Whether you're meal prepping for the week or need an impressive dinner party starter, this healthy butternut squash soup comes together with just a handful of pantry ingredients.

Ingredients You'll Need:
Main Ingredients:
1 butternut squash, diced (3-4 pounds, about 6 cups diced)
1 medium onion, diced - yellow or white onion works best
1 carrot, large, diced
1 stalk of celery, diced
1 liter (about 4 cups) broth - chicken or vegetable broth
2 teaspoons kosher salt - divided
2 teaspoons garlic powder
2-3 tablespoons oil - olive oil, canola oil or vegetable oil for roasting
Optional: ½ teaspoon turmeric powder** - adds anti-inflammatory benefits and golden colour
Kitchen Equipment
Large baking sheet
Sharp knife and cutting board
Large stockpot (at least 2 quarts)
Immersion blender or regular blender
Peeler
Wooden spoon
Ladle
How to Make Butternut Squash Soup: Step-by-Step Instructions:
Step 1: Prepare Your Oven and Vegetables
Preheat your oven to 350°F (175-180°C). While the oven heats, peel the butternut squash using a sturdy vegetable peeler. Cut the squash, onion, carrot and celery into uniform 1-inch (2cm) pieces. Consistent sizing ensures even roasting.
Step 2: Season and Roast
Spread all the diced vegetables on a large baking sheet in a single layer. Drizzle with oil and toss to coat evenly. Sprinkle with 1 teaspoon of salt and the garlic powder. Roast for approximately 35 minutes, or until the edges turn golden brown and caramelized. This roasting step is key to developing rich, deep flavour.
Step 3: Simmer the Soup
Transfer all roasted vegetables to your large stockpot. Add the remaining 1 teaspoon of salt, turmeric powder (if using), and pour in the broth until vegetables are covered. Place the pot over medium heat and bring to a gentle simmer. Let the soup simmer for 30 minutes to allow the flavours to meld together.
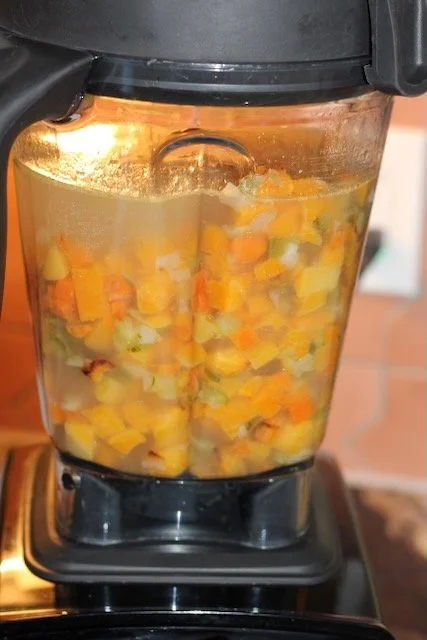
Step 4: Blend Until Smooth
Remove the pot from heat. Use an immersion blender directly in the pot to puree the soup until completely smooth and creamy. Alternatively, carefully transfer the soup in batches to a countertop blender, being cautious with the hot liquid. Blend until you achieve a silky, velvety texture.
Step 5: Serve and Enjoy
Ladle the hot soup into bowls. Optional garnishes include: a drizzle of cream, toasted pumpkin seeds, fresh herbs like cilantro, or a swirl of olive oil. Serve immediately with crusty bread.

Pro Tips for the Best Butternut Squash Soup
Choose the right squash: Look for butternut squash with a long neck and small bulb. The neck has more flesh and fewer seeds, giving you more usable squash.
Don't skip the roasting: This step makes all the difference. The caramelization adds natural sweetness and complexity you won't get from simply boiling.
Make it creamier: For an extra luxurious texture, add ½ cup of heavy cream, coconut milk, or cashew cream before serving.
Adjust consistency: If your soup is too thick, thin it with additional broth. If it's too thin, simmer uncovered for 10-15 minutes to reduce.
Season to taste: Always taste before serving and adjust salt, pepper, or add a squeeze of lemon juice to brighten the flavours.
Save Time: Frozen pre-cut squash and mirepoix (mix of pre-cut onions, celery and carrots) are often available in your grocery store freezer isle. Feel free to swap frozen pre-cut veggies, instead of fresh, saving time and sometimes money in the process.
Storage and Make-Ahead Instructions
Refrigerator: Store leftover butternut squash soup in an airtight container for up to 5 days. Reheat gently on the stovetop or in the microwave.
Freezer: This soup freezes beautifully for up to 3 months. Cool completely before freezing in portion-sized containers. Thaw overnight in the refrigerator and reheat on the stovetop or microwave oven.
Make-Ahead: You can roast the vegetables up to 2 days in advance. Store in the refrigerator and complete the remaining steps when ready to serve.
Variations and Substitutions
Instant Pot Method: Sauté diced vegetables in the Instant Pot using the sauté function, add broth, seal, and pressure cook on high for 10 minutes. Natural release for 10 minutes, then blend.
Slow Cooker: Place roasted vegetables and broth in slow cooker. Cook on low for 4-6 hours or high for 2-3 hours. Blend before serving.
Vegan Option: Use vegetable broth and coconut milk instead of cream. The soup is naturally vegan-friendly.
Spicy Version: Add ½ teaspoon cayenne pepper or red pepper flakes to the roasting vegetables, or garnish with hot sauce.
Thai-Inspired: Swap turmeric for curry powder and finish with coconut milk and fresh cilantro.
Apple Addition: Add one peeled, diced apple during roasting for extra sweetness.
Nutritional Benefits
Butternut squash is packed with vitamin A, vitamin C, potassium, and fiber. One serving provides over 100% of your daily vitamin A needs. The addition of turmeric adds anti-inflammatory properties, while keeping the recipe low in calories and naturally gluten-free.
What to Serve with Butternut Squash Soup
This creamy soup pairs beautifully with crusty bread, grilled cheese sandwiches, fresh salad, or roasted chicken. It also makes an elegant first course for holiday dinners like Thanksgiving or Christmas.
Frequently Asked Questions (FAQs)
Can I make butternut squash soup without roasting the vegetables?
Yes, you can skip the roasting step and simmer raw vegetables in broth for 30-40 minutes until tender, then blend. However, roasting develops deeper, caramelized flavours that give the soup a richer, more complex taste. The roasting step is highly recommended for the best results.
How do I easily peel and cut a butternut squash?
First, cut off both ends of the squash. Then, cut the squash right above the bulb. Stand each piece upright on the flat end and carefully slice down the sides with a sharp knife to remove the skin. Alternatively, poke holes in the squash, microwave for 2-3 minutes to soften the skin, which makes peeling much easier. Then cut in half lengthwise, scoop out seeds, and dice the flesh.
What type of broth works best for butternut squash soup?
Both chicken broth and vegetable broth work excellently. Chicken broth adds more depth and richness, while vegetable broth keeps the recipe vegetarian and vegan-friendly. You can also use bone broth for added nutrients or low-sodium broth if you want to control the salt content.
Can I freeze butternut squash soup?
Absolutely! Butternut squash soup freezes very well for up to 3 months. Let the soup cool completely, then transfer to freezer-safe containers leaving 1 inch (2cm) of space at the top for expansion. Thaw overnight in the refrigerator and reheat gently on the stovetop, adding a splash of broth if needed to adjust consistency.
How can I make this soup creamier?
To make the soup extra creamy, add ½ to 1 cup of heavy cream, half-and-half, coconut milk, or cashew cream just before serving. Alternatively, add a dollop of sour cream or Greek yogurt to each bowl. Blending the soup thoroughly until completely smooth also enhances the creamy texture.
Why is my butternut squash soup bitter?
Bitterness can come from overcooking the vegetables until they burn, using old or spoiled squash, or not adding enough salt to balance the flavours. Make sure to roast only until golden (not dark brown or black), use fresh squash, and season properly with salt. Adding a pinch of sugar can also balance the bitterness.
Can I add other vegetables to this recipe?
Yes! Carrots, sweet potatoes, parsnips, or regular potatoes work wonderfully in this soup. Keep the total vegetable quantity roughly the same to maintain the proper soup consistency.
How long does butternut squash soup last in the fridge?
Properly stored in an airtight container, butternut squash soup will last 4-5 days in the refrigerator. Reheat only the amount you plan to eat to maximize freshness.
What's the difference between butternut squash soup and pumpkin soup?
While both are winter squash soups, butternut squash has a sweeter, nuttier flavour and creamier texture compared to pumpkin. Butternut squash also has firmer flesh that's easier to peel and cut. The recipes are largely interchangeable, though cooking times may vary slightly.
Can I make this soup in an Instant Pot or slow cooker?
Yes! For Instant Pot: Sauté the vegetables (skip roasting), add broth, pressure cook on high for 10 minutes, natural release for 10 minutes, then blend. For slow cooker: Add all roasted vegetables and broth, cook on low for 4-6 hours, then blend. Both methods work well, though stovetop after roasting provides the deepest flavour.
Is butternut squash soup healthy?
Yes! Butternut squash soup is naturally low in calories, high in fiber, and packed with vitamins A and C, potassium, and antioxidants. It's naturally gluten-free and can easily be made vegan. One serving typically contains around 100-150 calories (without cream), making it an excellent choice for healthy eating.
What garnishes go well with butternut squash soup?
Popular garnishes include toasted pumpkin seeds (pepitas), a drizzle of cream or coconut milk, fresh herbs like cilantro, crispy bacon bits, croutons, a swirl of olive oil, roasted chickpeas, or a sprinkle of nutmeg or cinnamon. These add both visual appeal and complementary flavours.


Did you make this recipe? I want to see it!
Leave a picture and a ⭐ star rating and comment below to let us know how your muffins turned out. Did you make any substitutions or additions? Share your tips and photos with us!
Share this recipe: Help others discover this delicious recipe by sharing it on Pinterest, Facebook, or Instagram. Tag us @Sageandsimplicity so we can see your beautiful creations!
📌 Pin it for later: Save this recipe to your Pinterest boards for easy access.
you might also like:


Roasted Tomato & basil soup
tomato basil soup
📖 Jump to Recipe | 💬 Jump to FAQs | 🖨️ Print Recipe
Prep Time: 15 minutes | Cook Time: 65 minutes | Total Time: 1 hour 20 minutes | Yield: 6-8 servings | Difficulty: Easy

Homemade roasted tomato basil soup is one of the easiest and most comforting meals to make during the colder months. This is a family-favourite recipe in our home, loved for its rich flavour, simple ingredients, and cozy, homemade feel. It’s the kind of soup that warms you up while still being easy and budget friendly.
Roasting the tomatoes is what gives this soup its deep, slightly sweet flavour. The oven caramelizes the tomatoes while roasted garlic becomes soft and mellow, adding richness without overpowering the dish. This simple roasting step creates a depth of flavour that makes this soup taste slow-cooked, even though it’s surprisingly easy to make.
Fresh basil brings brightness and balance, creating that classic roasted tomato basil soup flavour everyone recognizes and loves. With the seasoning perfectly salted, this soup needs very little else. It’s smooth, savoury, and satisfying, whether served on its own or paired with grilled cheese, crusty sourdough bread, or a simple salad.
This easy roasted tomato basil soup is also a budget-friendly meal that works well for families. It’s made with affordable pantry and produce ingredients, stretches easily to feed a crowd, and reheats beautifully. That makes it ideal for leftovers, meal prep, and quick lunches during busy weeks.
This soup has become a cold-weather staple in our home because it’s simple, comforting, and consistently loved by everyone at the table. It proves that family-friendly comfort food doesn’t have to be complicated—and that homemade soup can be both economical and deeply satisfying.

table of content
What do I need to make this soup?
Ingredients:
10-12 Roma tomatoes, diced
5-6 garlic cloves
Extra virgin olive oil, 2 TBSP
1 tsp salt, I use kosher salt
Fresh basil
1 L chicken broth
Optional topping:
Sharp cheddar or fresh parmesan
salt and pepper, to taste
How do make this soup? A step-by-step guide
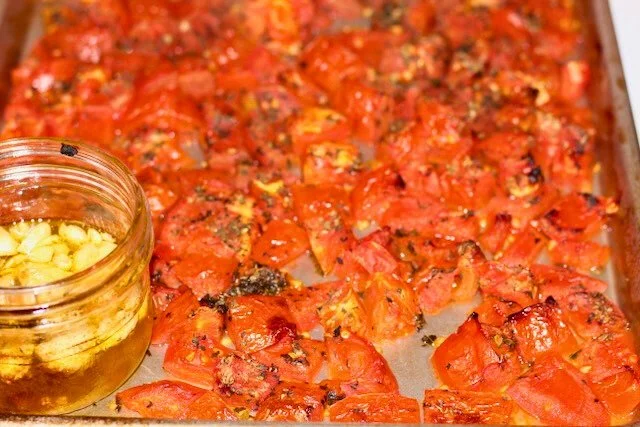
Preheat over to 350F. Put garlic cloves in ramekin and add the extra virgin olive oil to cover 3/4 coves.
Cut tomatoes into 8 pieces. Put on a baking sheet and coat with oil. Sprinkle salt. Put the garlic filled ramekin on a the baking sheet.
Roast tomatoes and garlic until edges become golden. Be sure to watch the garlic. It might need to be removed before the rest of the tomatoes.
Remove the veggies from the oven and let cool.
Add chicken broth, roasted veggies, garlic and oil, fresh basil in a blender. Blend until smooth.
Add cheese, pepper, fresh basil to taste. Serve. This pairs well with homemade sourdough bread, salads and sandwiches.
Enjoy!

other soup recipes:
Recipe Card
Ingredients:
10-12 Roma tomatoes, diced
5-6 garlic cloves
Extra virgin olive oil, 2 TBSP
1 tsp salt, I use kosher salt
Fresh basil
1 L chicken broth
Optional topping:
Sharp cheddar or fresh parmesan
salt and pepper, to taste
Instructions:
Preheat over to 350F. Put garlic cloves in ramekin and add the extra virgin olive oil to cover 3/4 coves.
Cut tomatoes into 8 pieces. Put on a baking sheet and coat with oil. Sprinkle salt. Put the garlic filled ramekin on a the baking sheet.
Roast tomatoes and garlic until edges become golden. Be sure to watch the garlic. It might need to be removed before the rest of the tomatoes.
Remove the veggies from the oven and let cool.
Add chicken broth, roasted veggies, garlic and oil, fresh basil in a blender. Blend until smooth.
Add cheese, pepper, fresh basil to taste. Serve. This pairs well with homemade sourdough bread, salads and sandwiches.
Enjoy!
did you make this recipe? I want to see it!
Leave a picture and a ⭐ star rating and comment below to let us know how your muffins turned out. Did you make any substitutions or additions? Share your tips and photos with us!
Share this recipe: Help others discover this delicious recipe by sharing it on Pinterest, Facebook, or Instagram. Tag us @Sageandsimplicity so we can see your beautiful creations!
📌 Pin it for later: Save this recipe to your Pinterest boards for easy access.
you might also like:


Roasted Tomato, Garlic & Thyme soup
thyme and roasted tomatoes soup
📖 Jump to Recipe | 💬 Jump to FAQs | 🖨️ Print Recipe
Prep Time: 15 minutes | Cook Time: 65 minutes | Total Time: 1 hour 20 minutes | Yield: 6-8 servings | Difficulty: Easy

Why I Love This Soup
Homemade roasted tomato, garlic and thyme soup is one of the easiest and most comforting meals to make during the colder months. This is a family-favourite recipe in our home, loved for its rich flavour, simple ingredients, and cozy, homemade feel. It’s the kind of soup that warms you up while still being easy and budget friendly.
Roasting the tomatoes is what gives this soup its deep, slightly sweet flavour. The oven caramelizes the tomatoes while roasted garlic becomes soft and mellow, adding richness without overpowering the dish. This simple roasting step creates a depth of flavour that makes this soup taste slow-cooked, even though it’s surprisingly easy to make.
The roasted garlic and thyme combination is a classic culinary combination that has an irresistible flavour profile. This satisfying soup can be served on its own or paired with grilled cheese, crusty sourdough bread, or a simple salad.
This easy, budget-friendly, roasted tomato basil soup that works well for families. It’s made with affordable pantry and produce ingredients, stretches easily to feed a crowd, freezes beautifully, which can be an easy hands-off meal. That makes it ideal for leftovers, meal prep, and quick lunches during busy weeks.
This soup has become a cold-weather staple in our home because it’s simple, comforting, and consistently loved by everyone at the table. It proves that family-friendly comfort food doesn’t have to be complicated—and that homemade soup can be both economical and deeply satisfying.
Bon appétit!

What do I need to make this soup
ingredients:
10-12 Roma tomatoes, diced
5-6 garlic cloves
Extra virgin olive oil, 2 TBSP
1 tsp salt, I use kosher salt
Fresh thyme
1 L chicken broth
Optional topping:
Sharp cheddar or fresh parmesan
salt and pepper, to taste
instructions:
Preheat over to 350F. Put garlic cloves in ramekin and add the extra virgin olive oil to cover 3/4 coves.
Cut tomatoes into 8 pieces. Put on a baking sheet and coat with extra virgin olive oil, and the springs of fresh thyme. Sprinkle salt. Put the garlic filled ramekin on a the baking sheet.
Roast tomatoes and garlic until edges become golden, about 25 minutes. Be sure to watch the garlic. It might need to be removed before the rest of the tomatoes.
Remove the veggies from the oven and let cool.
Add chicken broth, roasted veggies, garlic and oil mixture in a blender. Blend until smooth.
Add cheese, pepper, thyme to taste. Serve. This pairs well with homemade sourdough bread, salads and sandwiches.
Enjoy!

how to make Roasted Tomato, Garlic & Thyme Soup
a step-by-step guide
step 1: preheat your oven
Preheat over to 350F. Put garlic cloves in ramekin and add the extra virgin olive oil to cover 3/4 coves.
step 2: Wash, Cut and prep the vegetables for roasting
Cut tomatoes into 8 pieces. Put on a baking sheet and coat with extra virgin olive oil, and the springs of fresh thyme. Sprinkle salt. Put the garlic filled ramekin on a the baking sheet.
Step 3: roasting the vegetables
Roast tomatoes and garlic until edges become golden, about 25 minutes. Be sure to watch the garlic. It might need to be removed before the rest of the tomatoes.
Step 4: let the vegetables cool
Remove the veggies from the oven and let cool.
step 5: blend the ingredients
Add chicken broth, roasted veggies, garlic and oil mixture in a blender. Blend until smooth.
Step 6: add the toppings
Add cheese, pepper, thyme to taste. Serve. This pairs well with homemade sourdough bread, salads and sandwiches.
Enjoy!
Recipe Card
Ingredients:
10-12 Roma tomatoes, diced
5-6 garlic cloves
Extra virgin olive oil, 2 TBSP
1 tsp salt, I use kosher salt
Fresh thyme
1 L chicken broth
Optional topping:
Sharp cheddar or fresh parmesan
salt and pepper, to taste
Instructions:
Preheat over to 350F. Put garlic cloves in ramekin and add the extra virgin olive oil to cover 3/4 coves.
Cut tomatoes into 8 pieces. Put on a baking sheet and coat with extra virgin olive oil, and the springs of fresh thyme. Sprinkle salt. Put the garlic filled ramekin on a the baking sheet.
Roast tomatoes and garlic until edges become golden, about 25 minutes. Be sure to watch the garlic. It might need to be removed before the rest of the tomatoes.
Remove the veggies from the oven and let cool.
Add chicken broth, roasted veggies, garlic and oil mixture in a blender. Blend until smooth.
Add cheese, pepper, thyme to taste. Serve. This pairs well with homemade sourdough bread, salads and sandwiches.
Enjoy!
did you make this recipe? I want to see it!
Leave a picture and a ⭐ star rating and comment below to let us know how your muffins turned out. Did you make any substitutions or additions? Share your tips and photos with us!
Share this recipe: Help others discover this delicious recipe by sharing it on Pinterest, Facebook, or Instagram. Tag us @Sageandsimplicity so we can see your beautiful creations!
📌 Pin it for later: Save this recipe to your Pinterest boards for easy access.
You might also like:

Turkey & Wild Rice Soup
turkey wild rice soup
📖 Jump to Recipe | 💬 Jump to FAQs | 🖨️Print Recipe
Total Time: 55 minutes | Difficulty: Easy
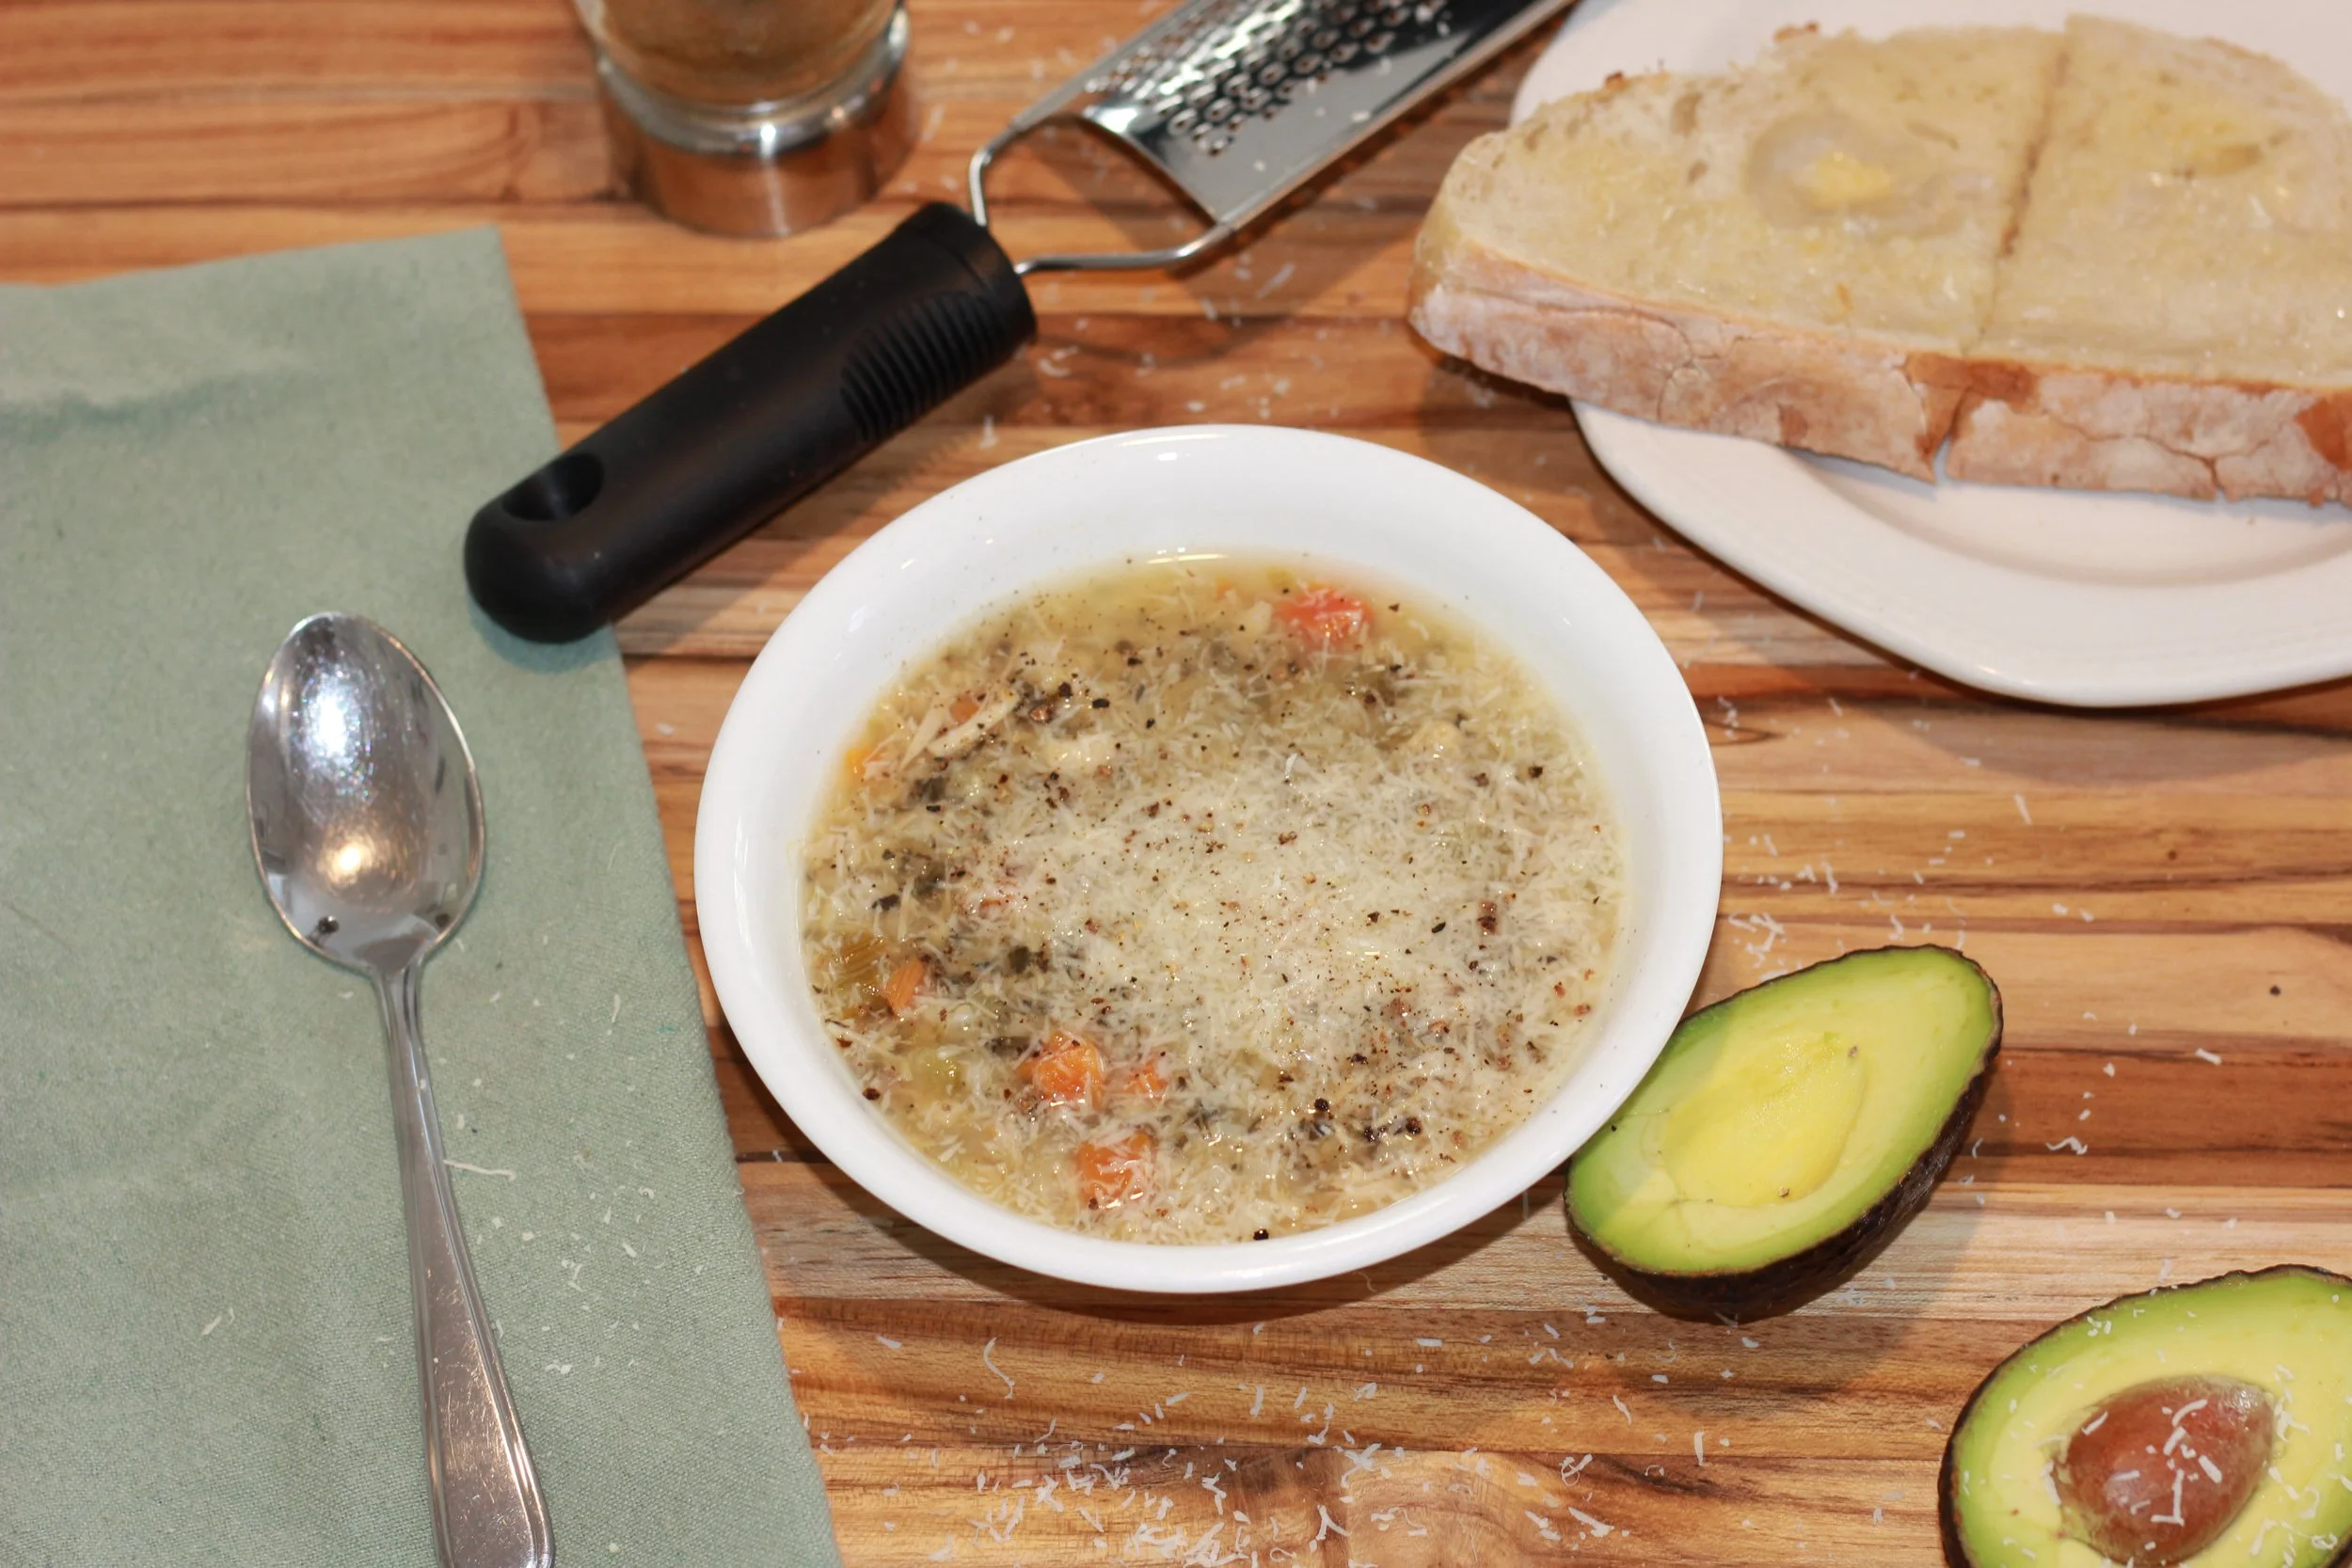
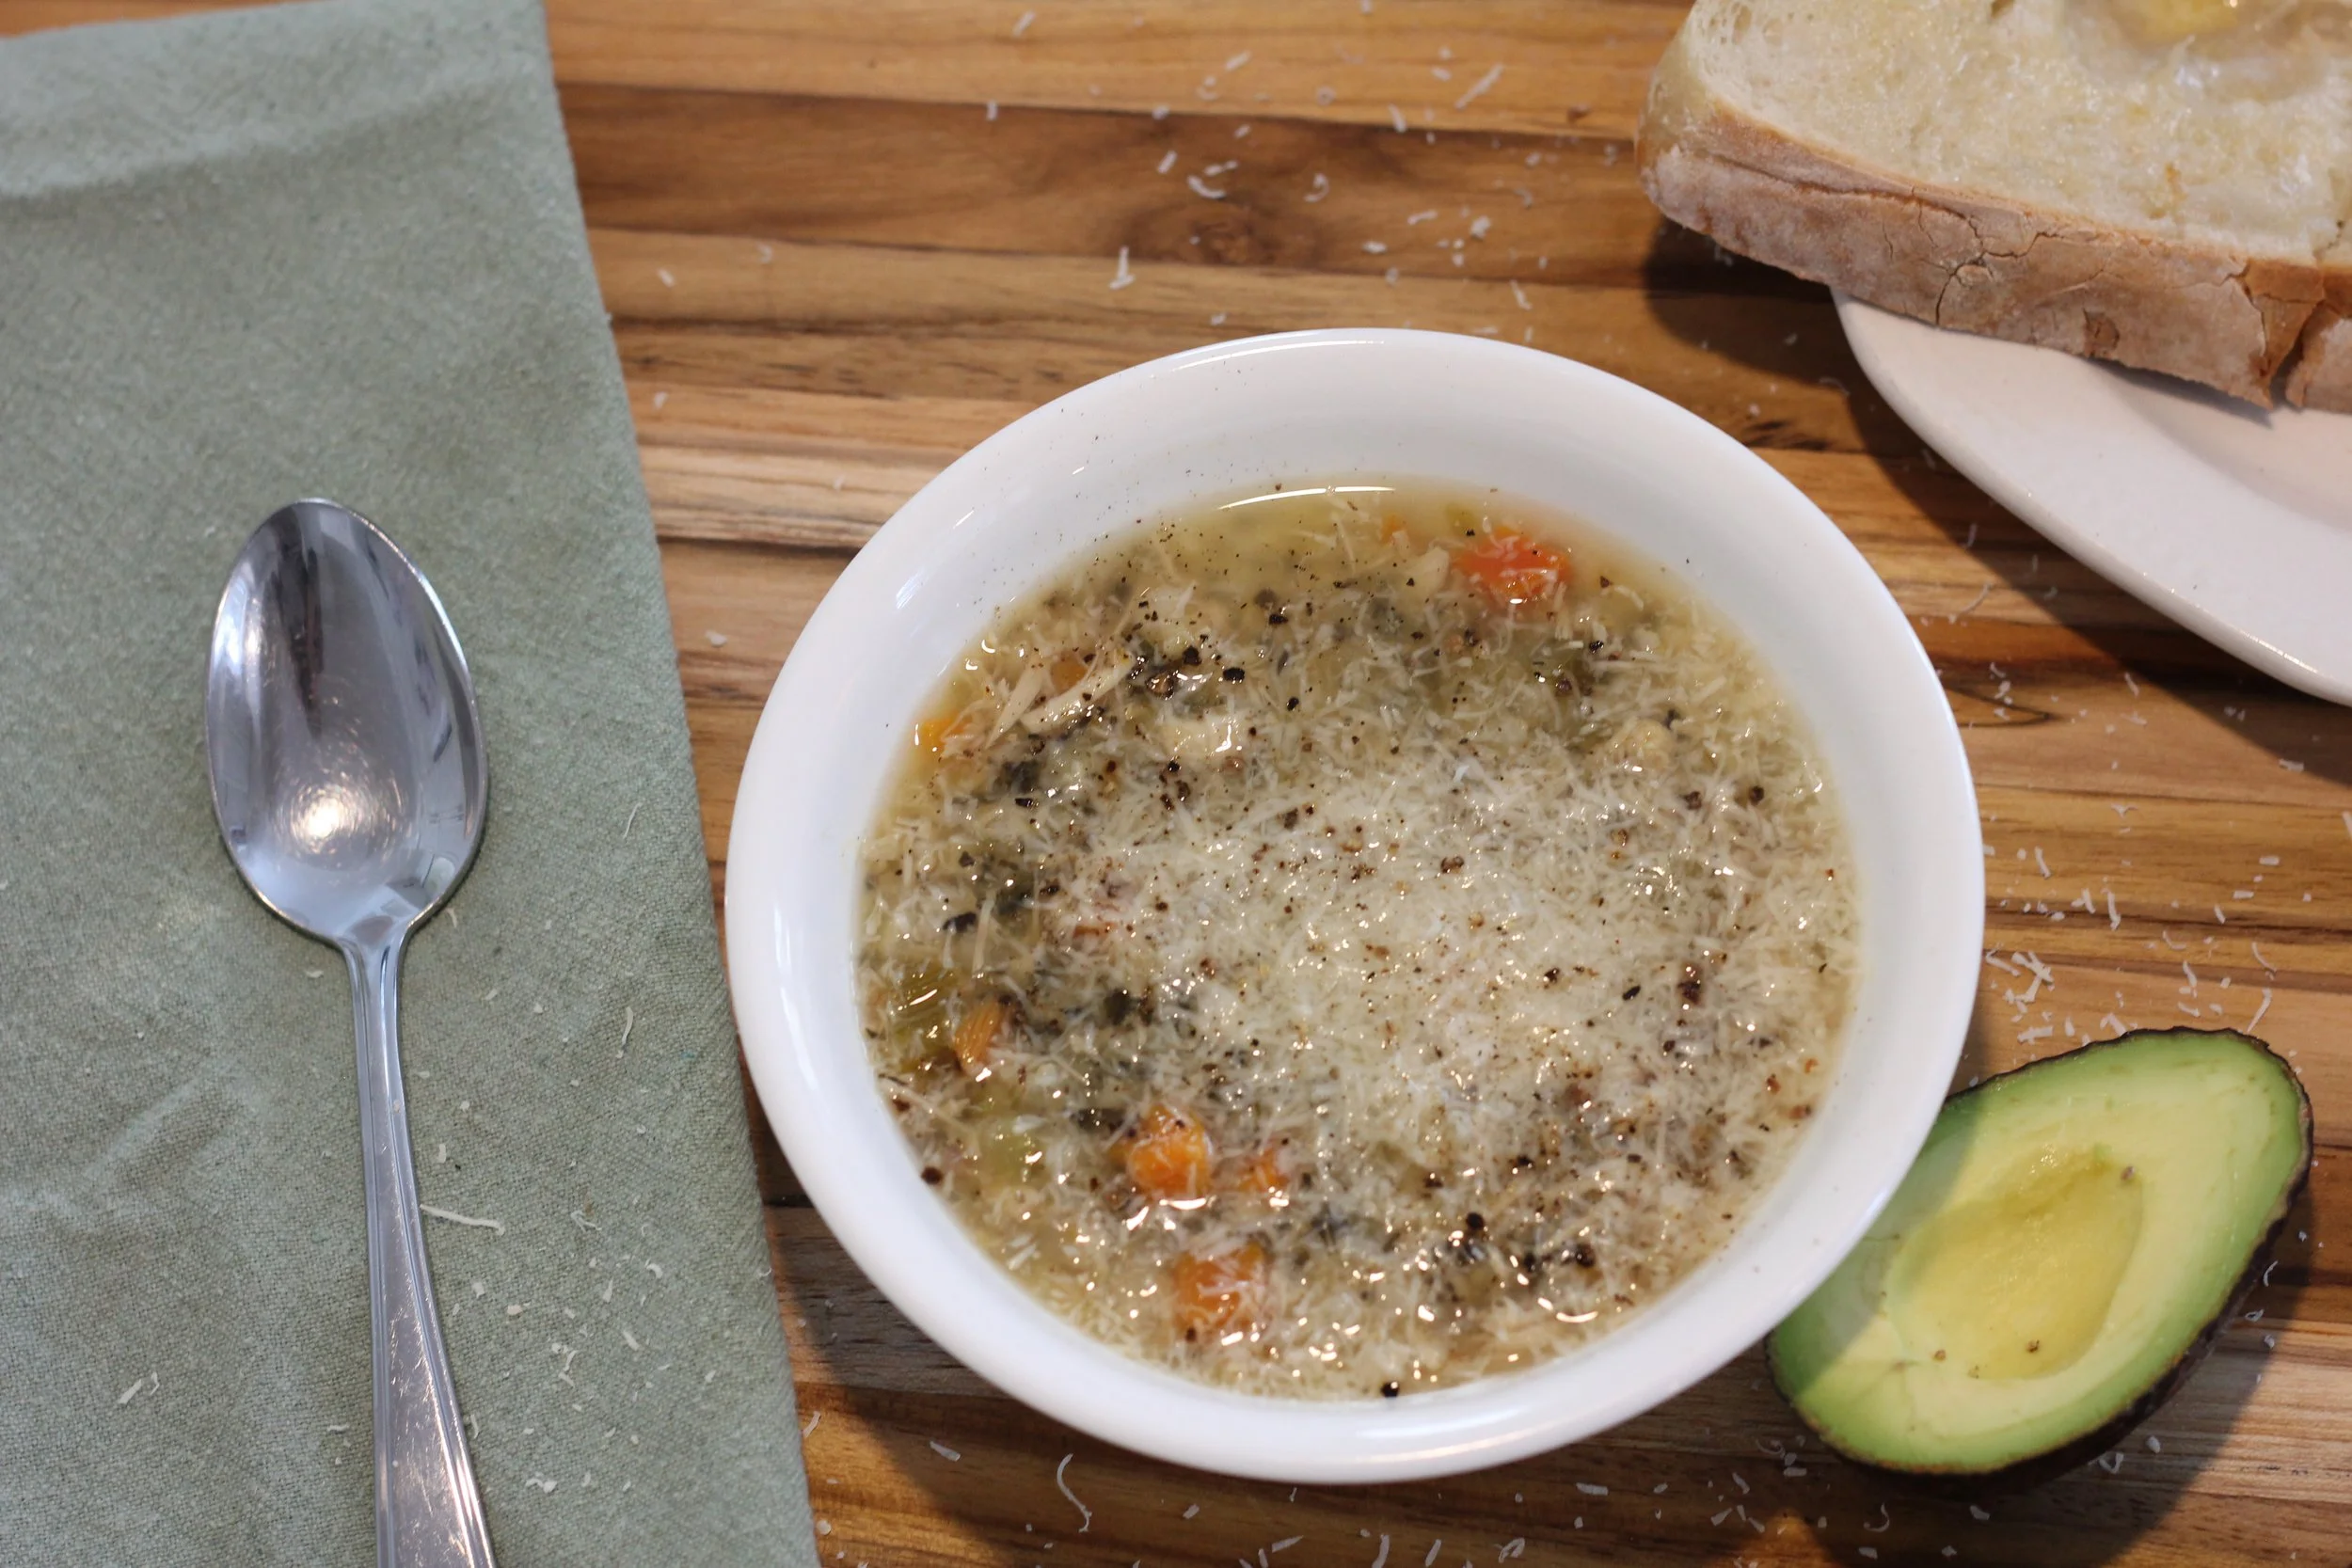
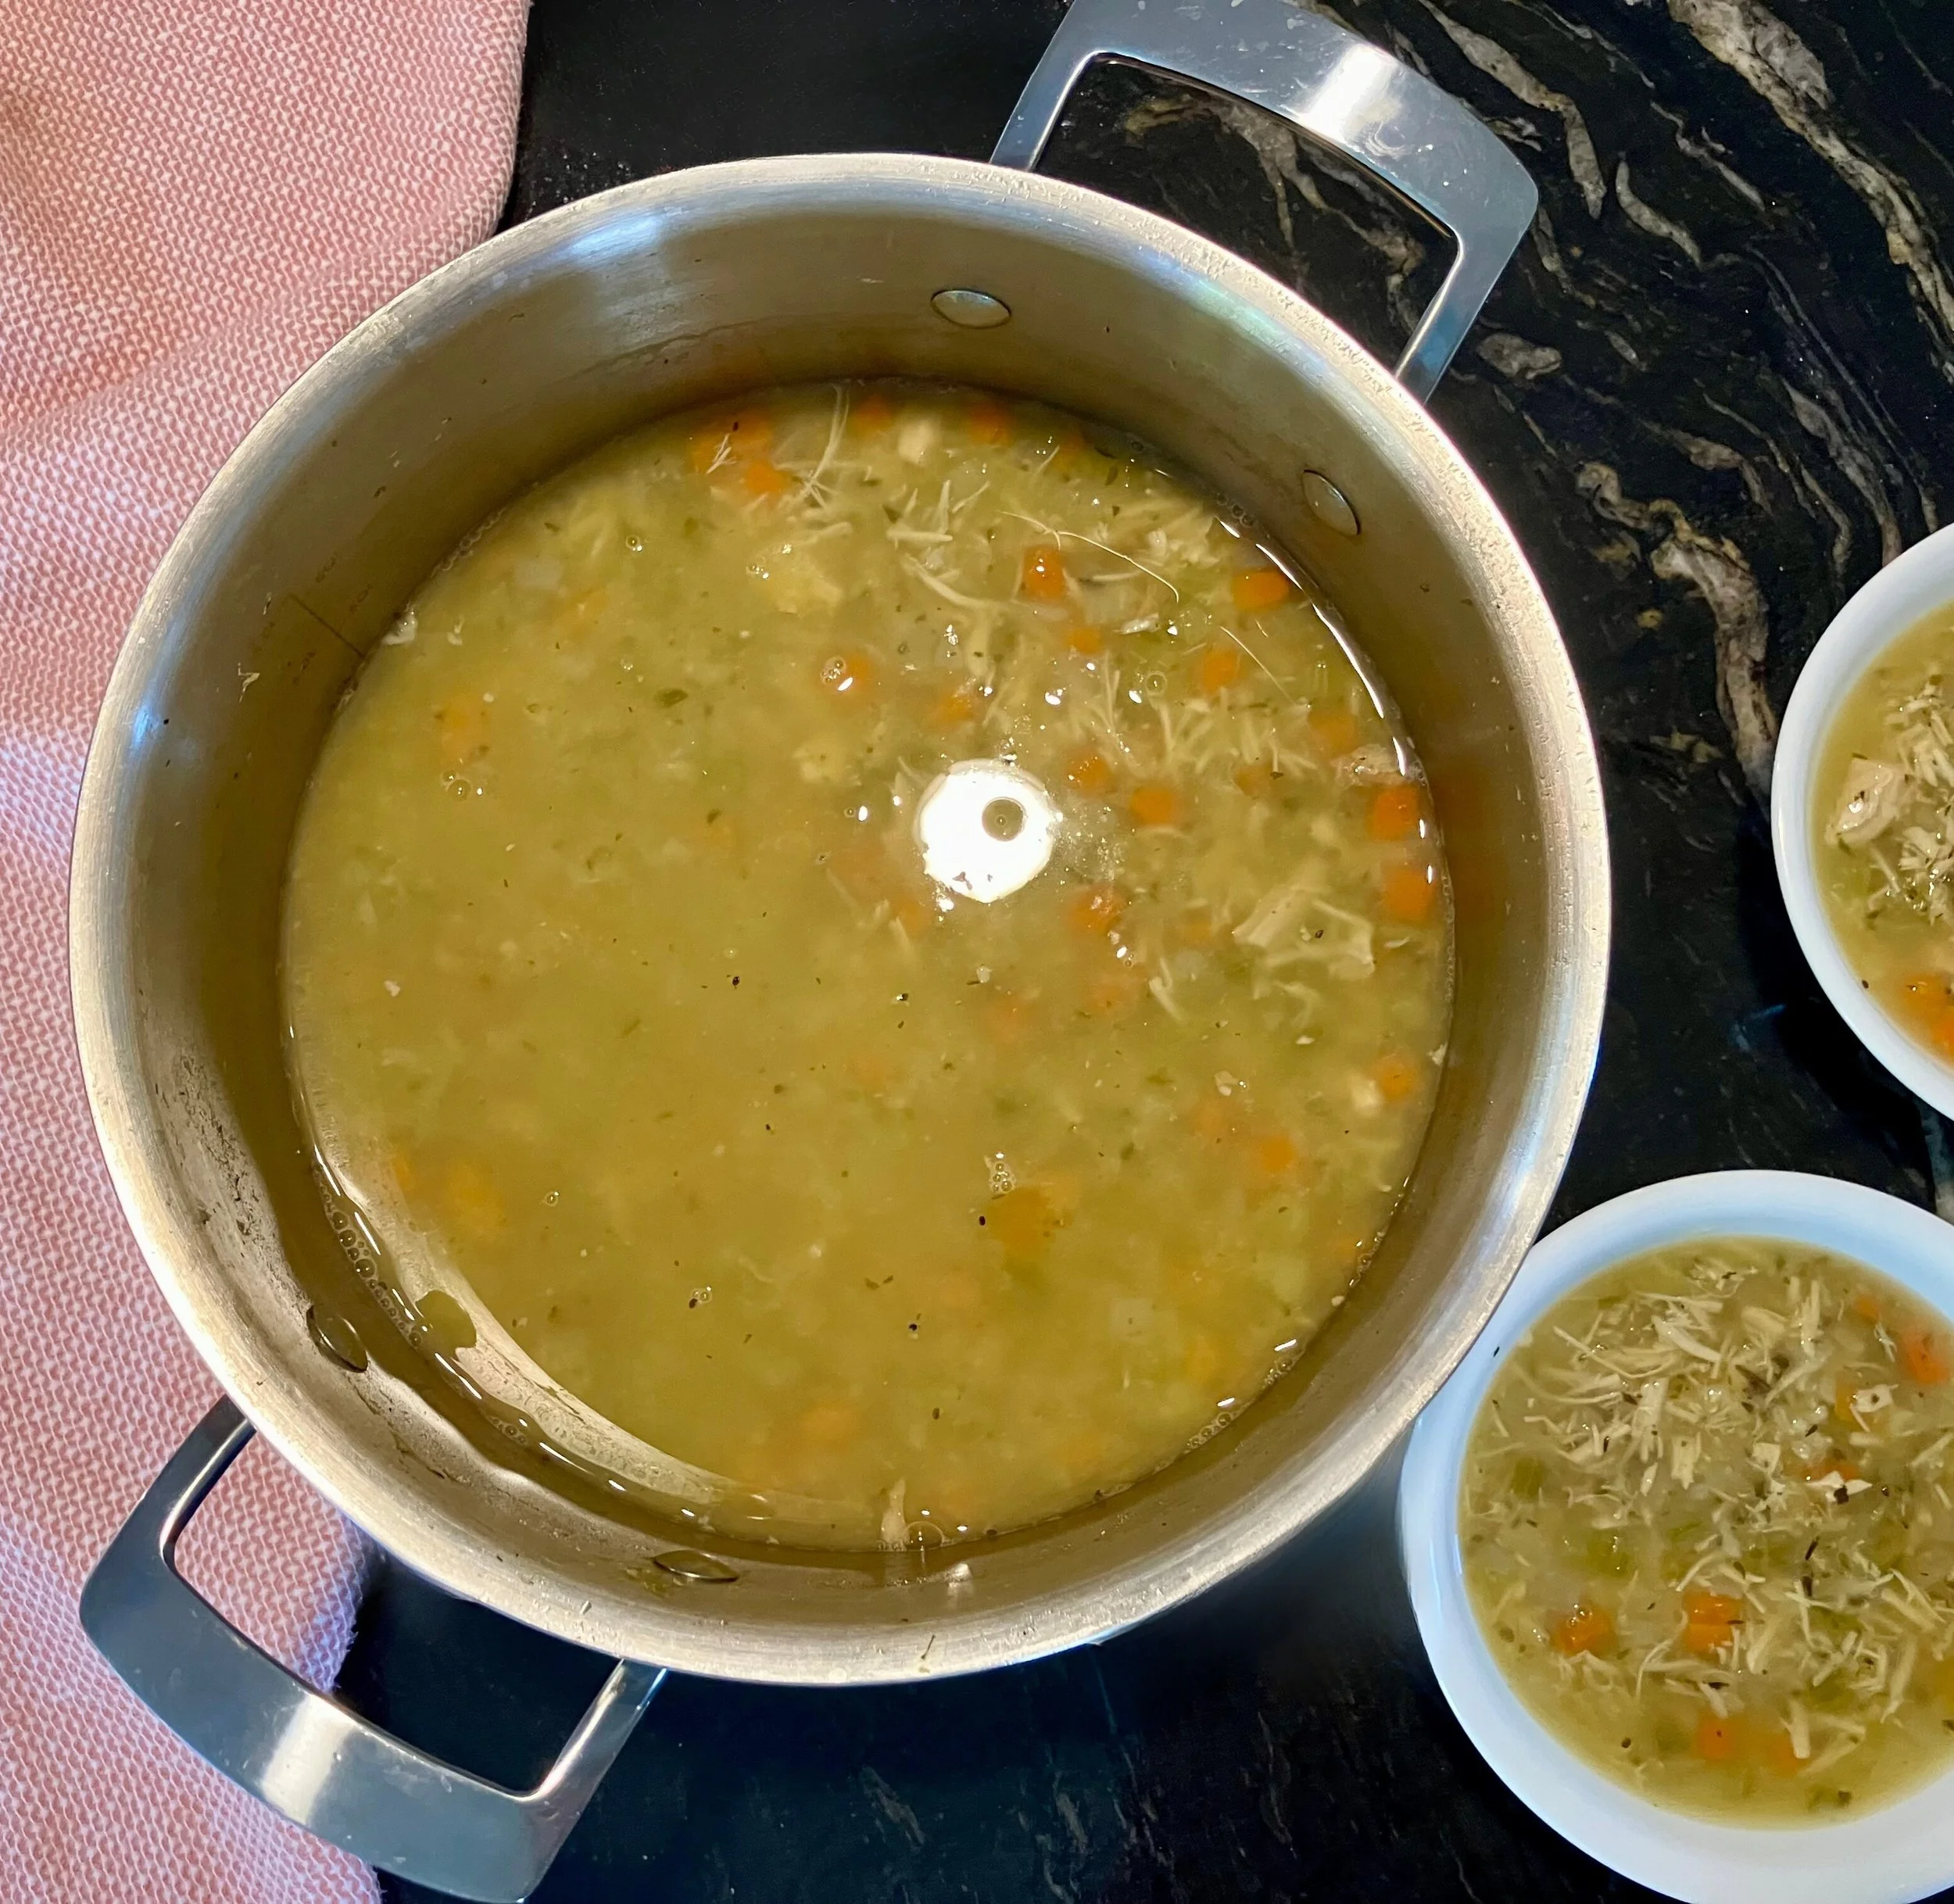
There’s nothing quite like a warm, comforting bowl of turkey wild rice soup to carry you through the coldest months of the year. This hearty, budget-friendly meal comes together with minimal effort and ingredients you likely already have on hand—making it a true winter staple. Whether you're looking to use up leftover holiday turkey or simply craving something cozy, this soup delivers all the savoury goodness you could want in a single pot.

One of the best time-saving and money saving tips for this recipe is using frozen mirepoix. With diced carrots, celery, and onions already prepped and ready to go, you shave tones of time off of cleaning and chopping vegetables, making this a perfect weeknight dinner solution. The mirepoix simmers gently with the rice to create a thick, hearty base that’s naturally creamy without needing much added richness.
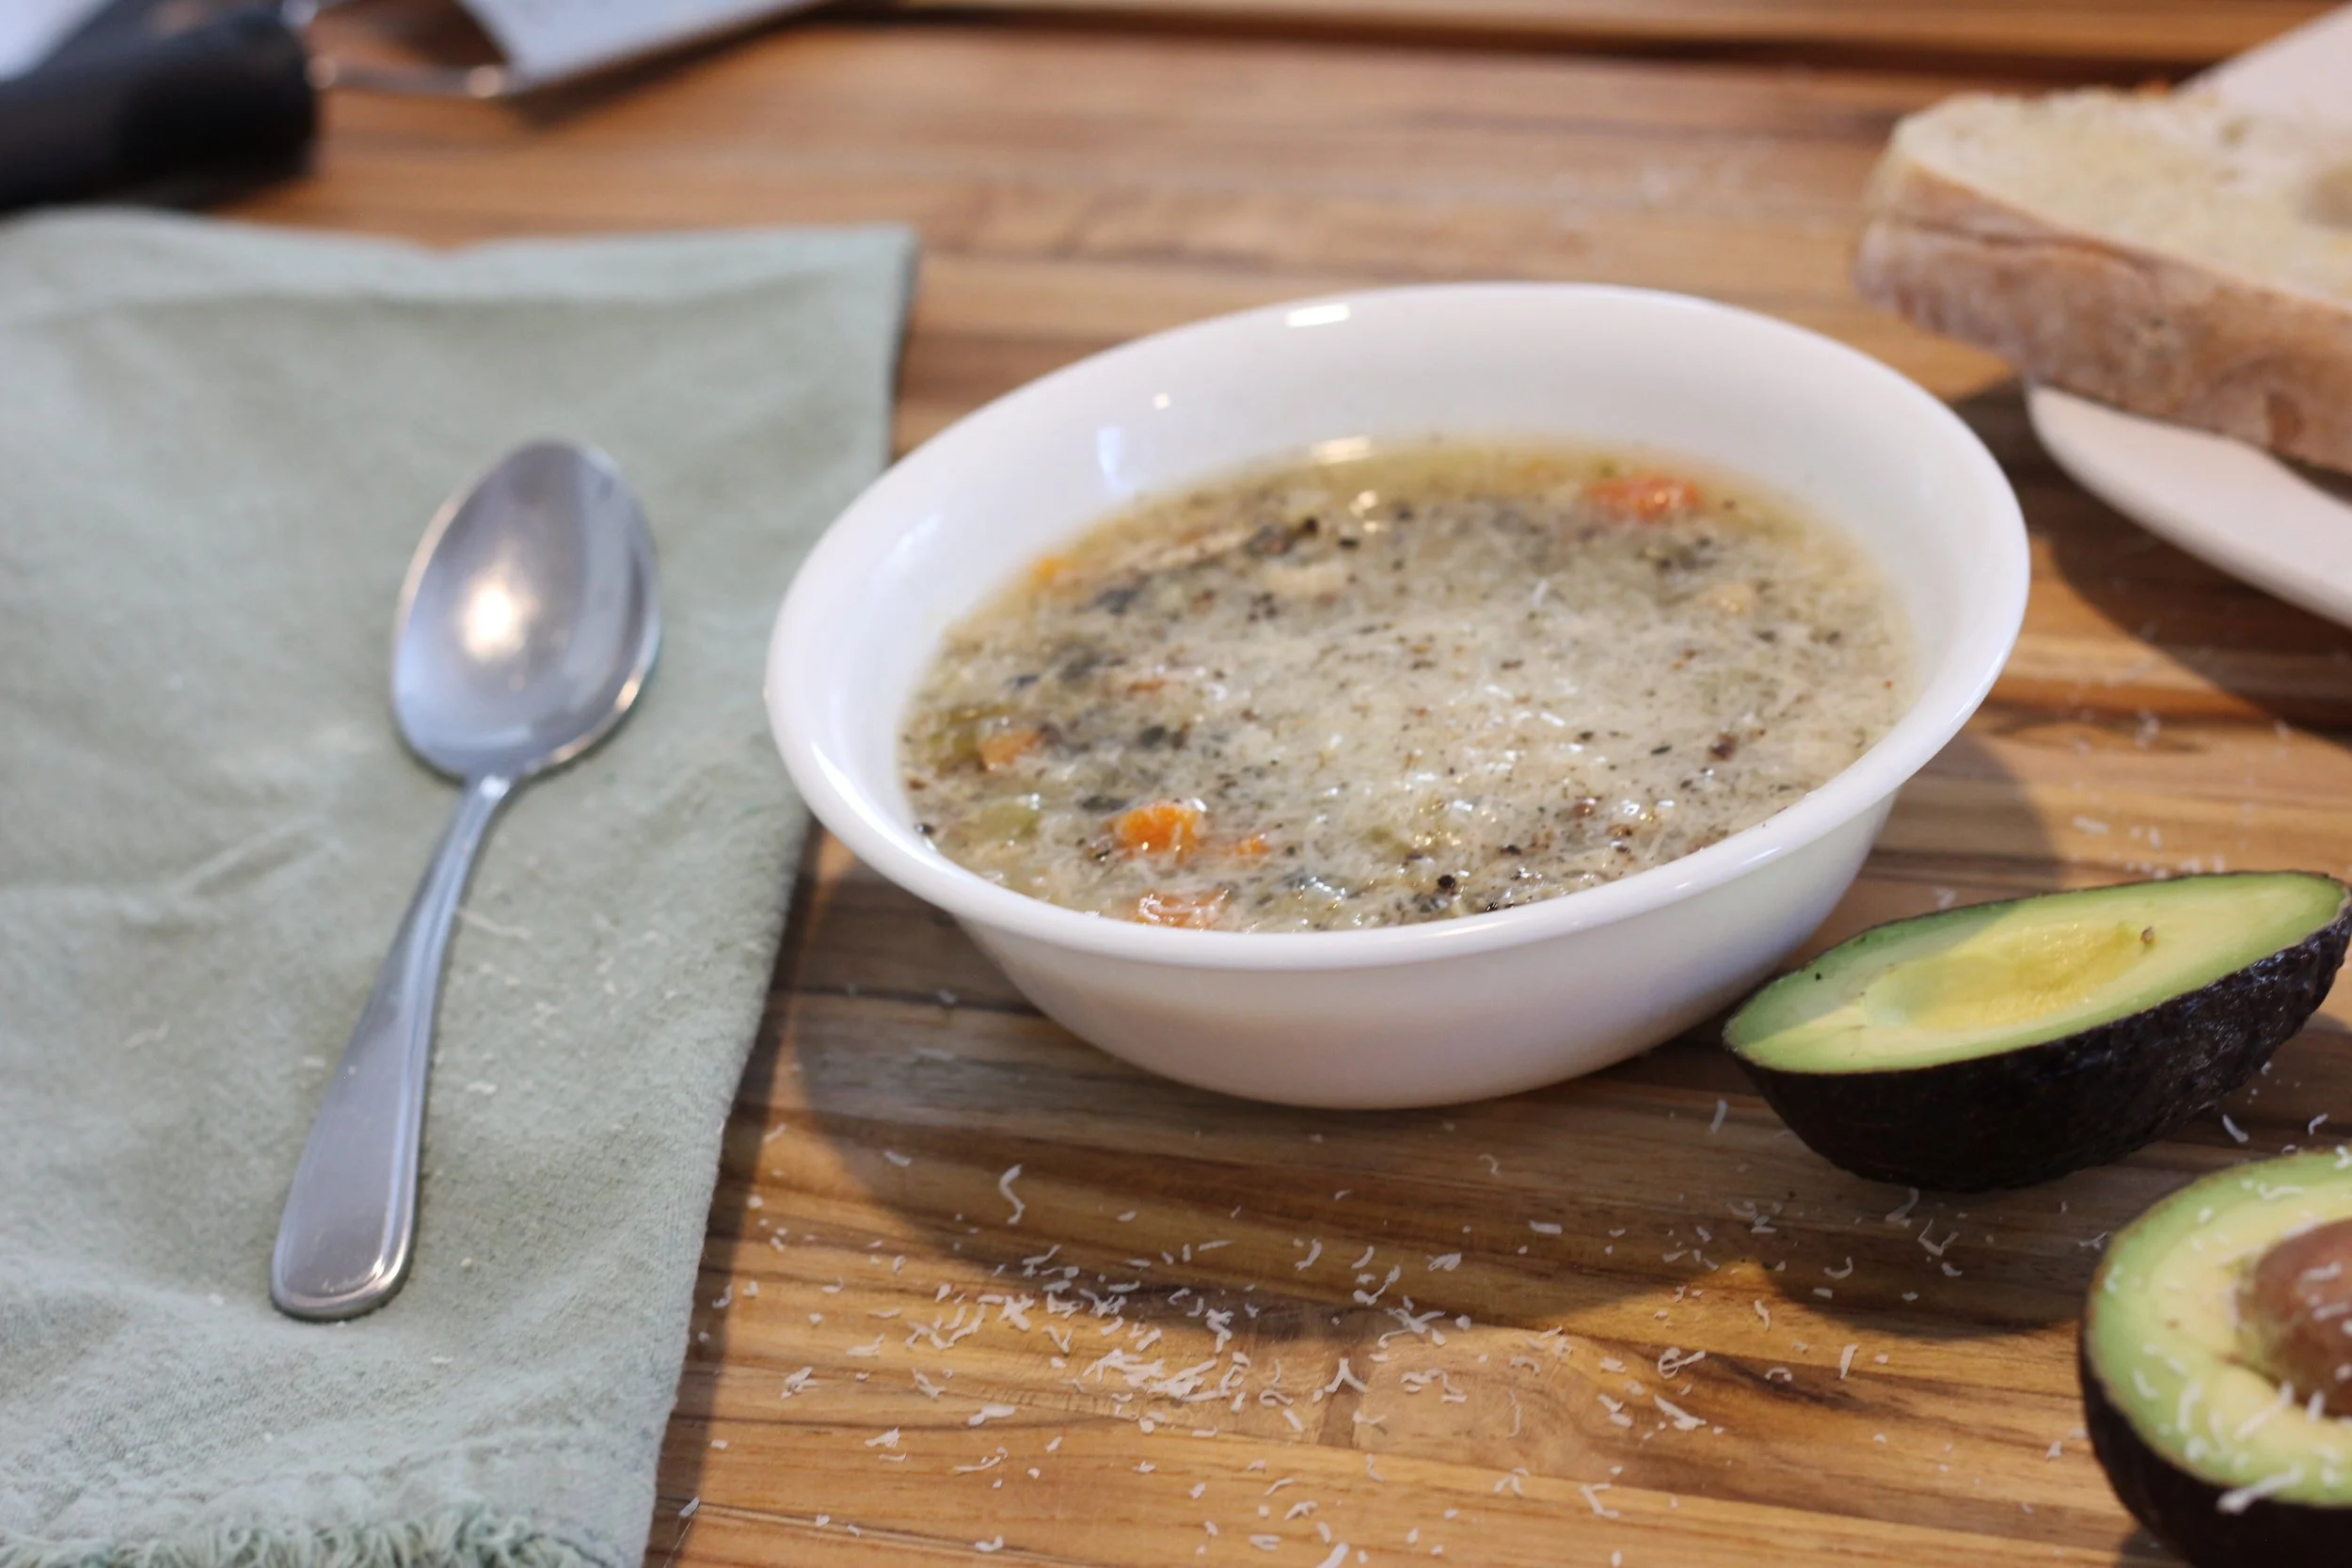
Leftover turkey finds new life here, turning into tender bites that pair perfectly with the earthy flavour of wild rice. A blend of basil, thyme, and garlic powder keeps the seasoning simple but deeply flavourful, allowing the natural savouriness of the turkey and vegetables to shine through. A little salt and pepper to taste brings everything together in a well-balanced, comforting bowl that feels both wholesome and satisfying.
What makes this recipe especially appealing is how inexpensive it is to prepare. With just a handful of pantry staples and freezer items, you can make a big batch that feeds the family—or future you. The mix of rice not only gives the soup wonderful texture but also stretches it farther, making it a great option for meal prepping on a budget.
And the best part? This soup freezes beautifully. Portion it into containers, pop them in the freezer, and you’ve got ready-to-reheat lunches and dinners for weeks to come. When the temperatures drop and you’re craving something warm, hearty, and homemade, this turkey wild rice soup will be waiting for you—simple, cozy, nourishing comfort in every spoonful.
other turkey recipes:
Recipe Card
Here’s the recipe!
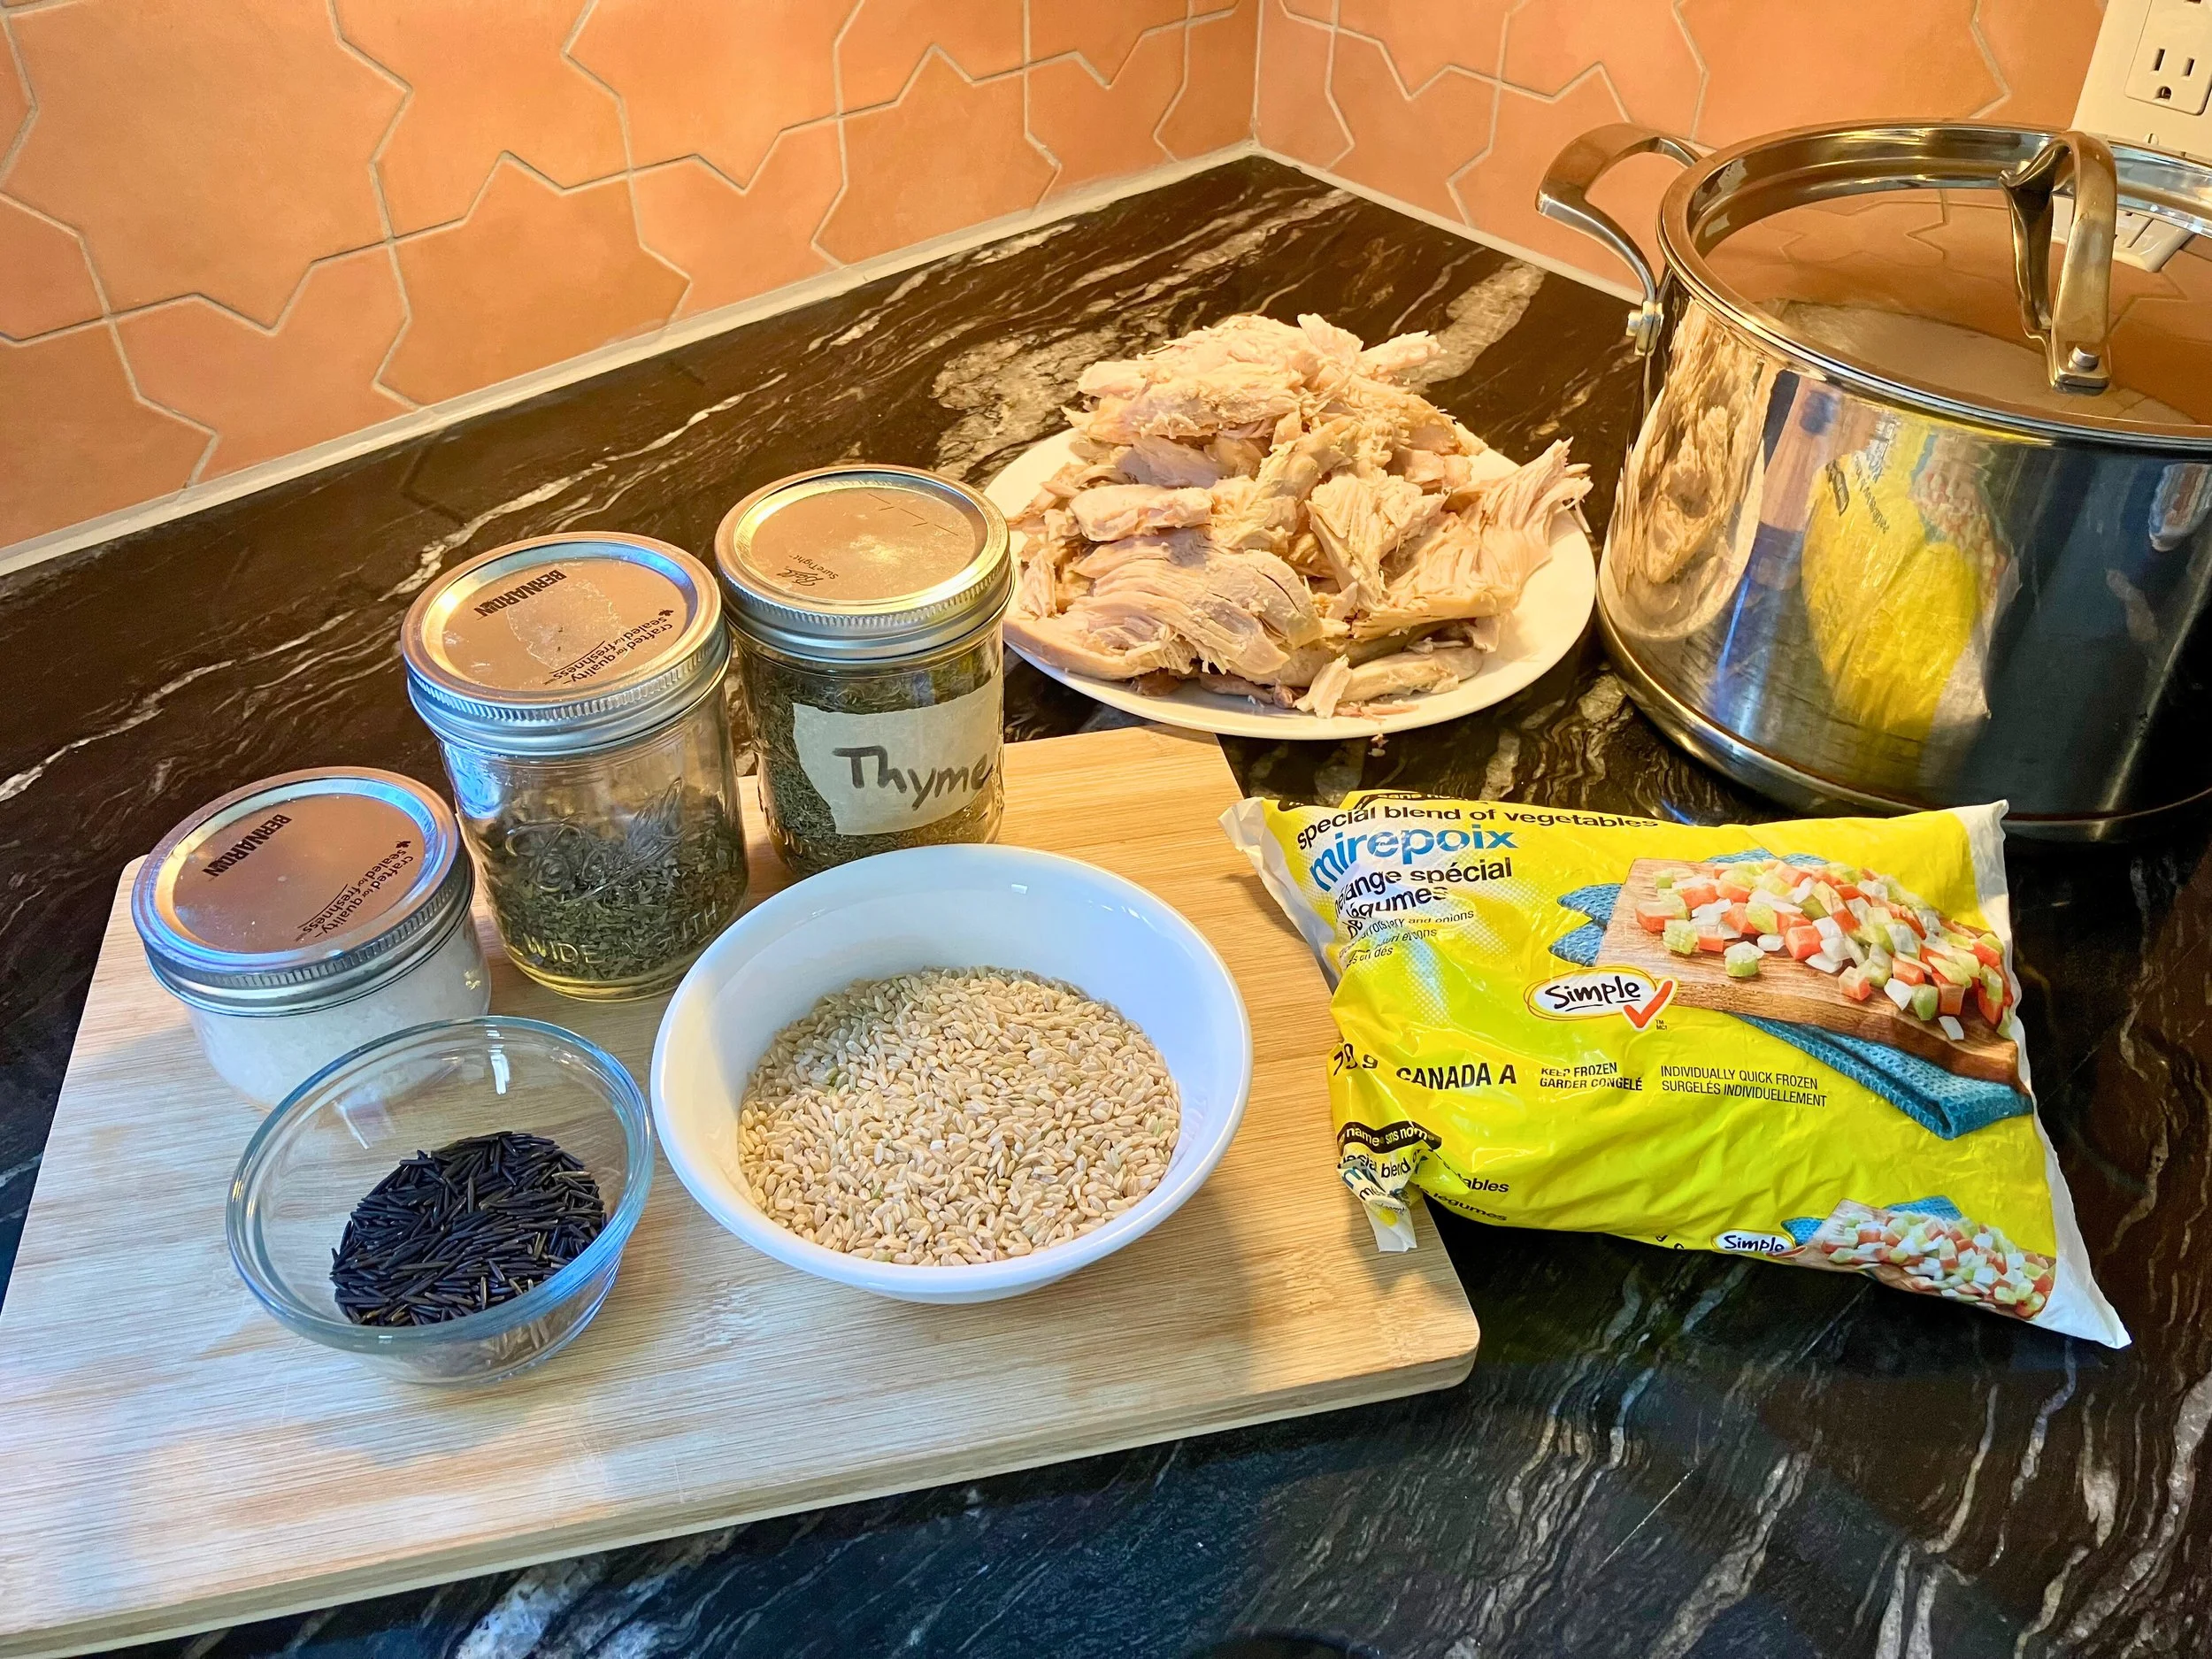
Ingredients:
1 bag frozen Mirepoix diced vegetables (there should only have carrots, celery, onions)
1 cup rice, I like using brown rice
1 dinner plate full of leftover turnkey meat, cut up into bite-sized pieces
4L of turkey broth
1/4 cup dried basil
3 tbsp dried thyme
2 tbsp garlic powder
2 tsp salt, I like using kosher salt
1/2 cup wild rice, added 20 minutes before serving
Optional: 1 cup pumpkin purée
Instructions:
In a large stockpot, add in all ingredients, minus the wild rice. Cook on stovetop over medium heat until all the ingredients are gently boiling. Reduce the heat and allow the soup to simmer for about 20-30 minutes.
Add wild rice 20 minutes before serving.
season to taste.
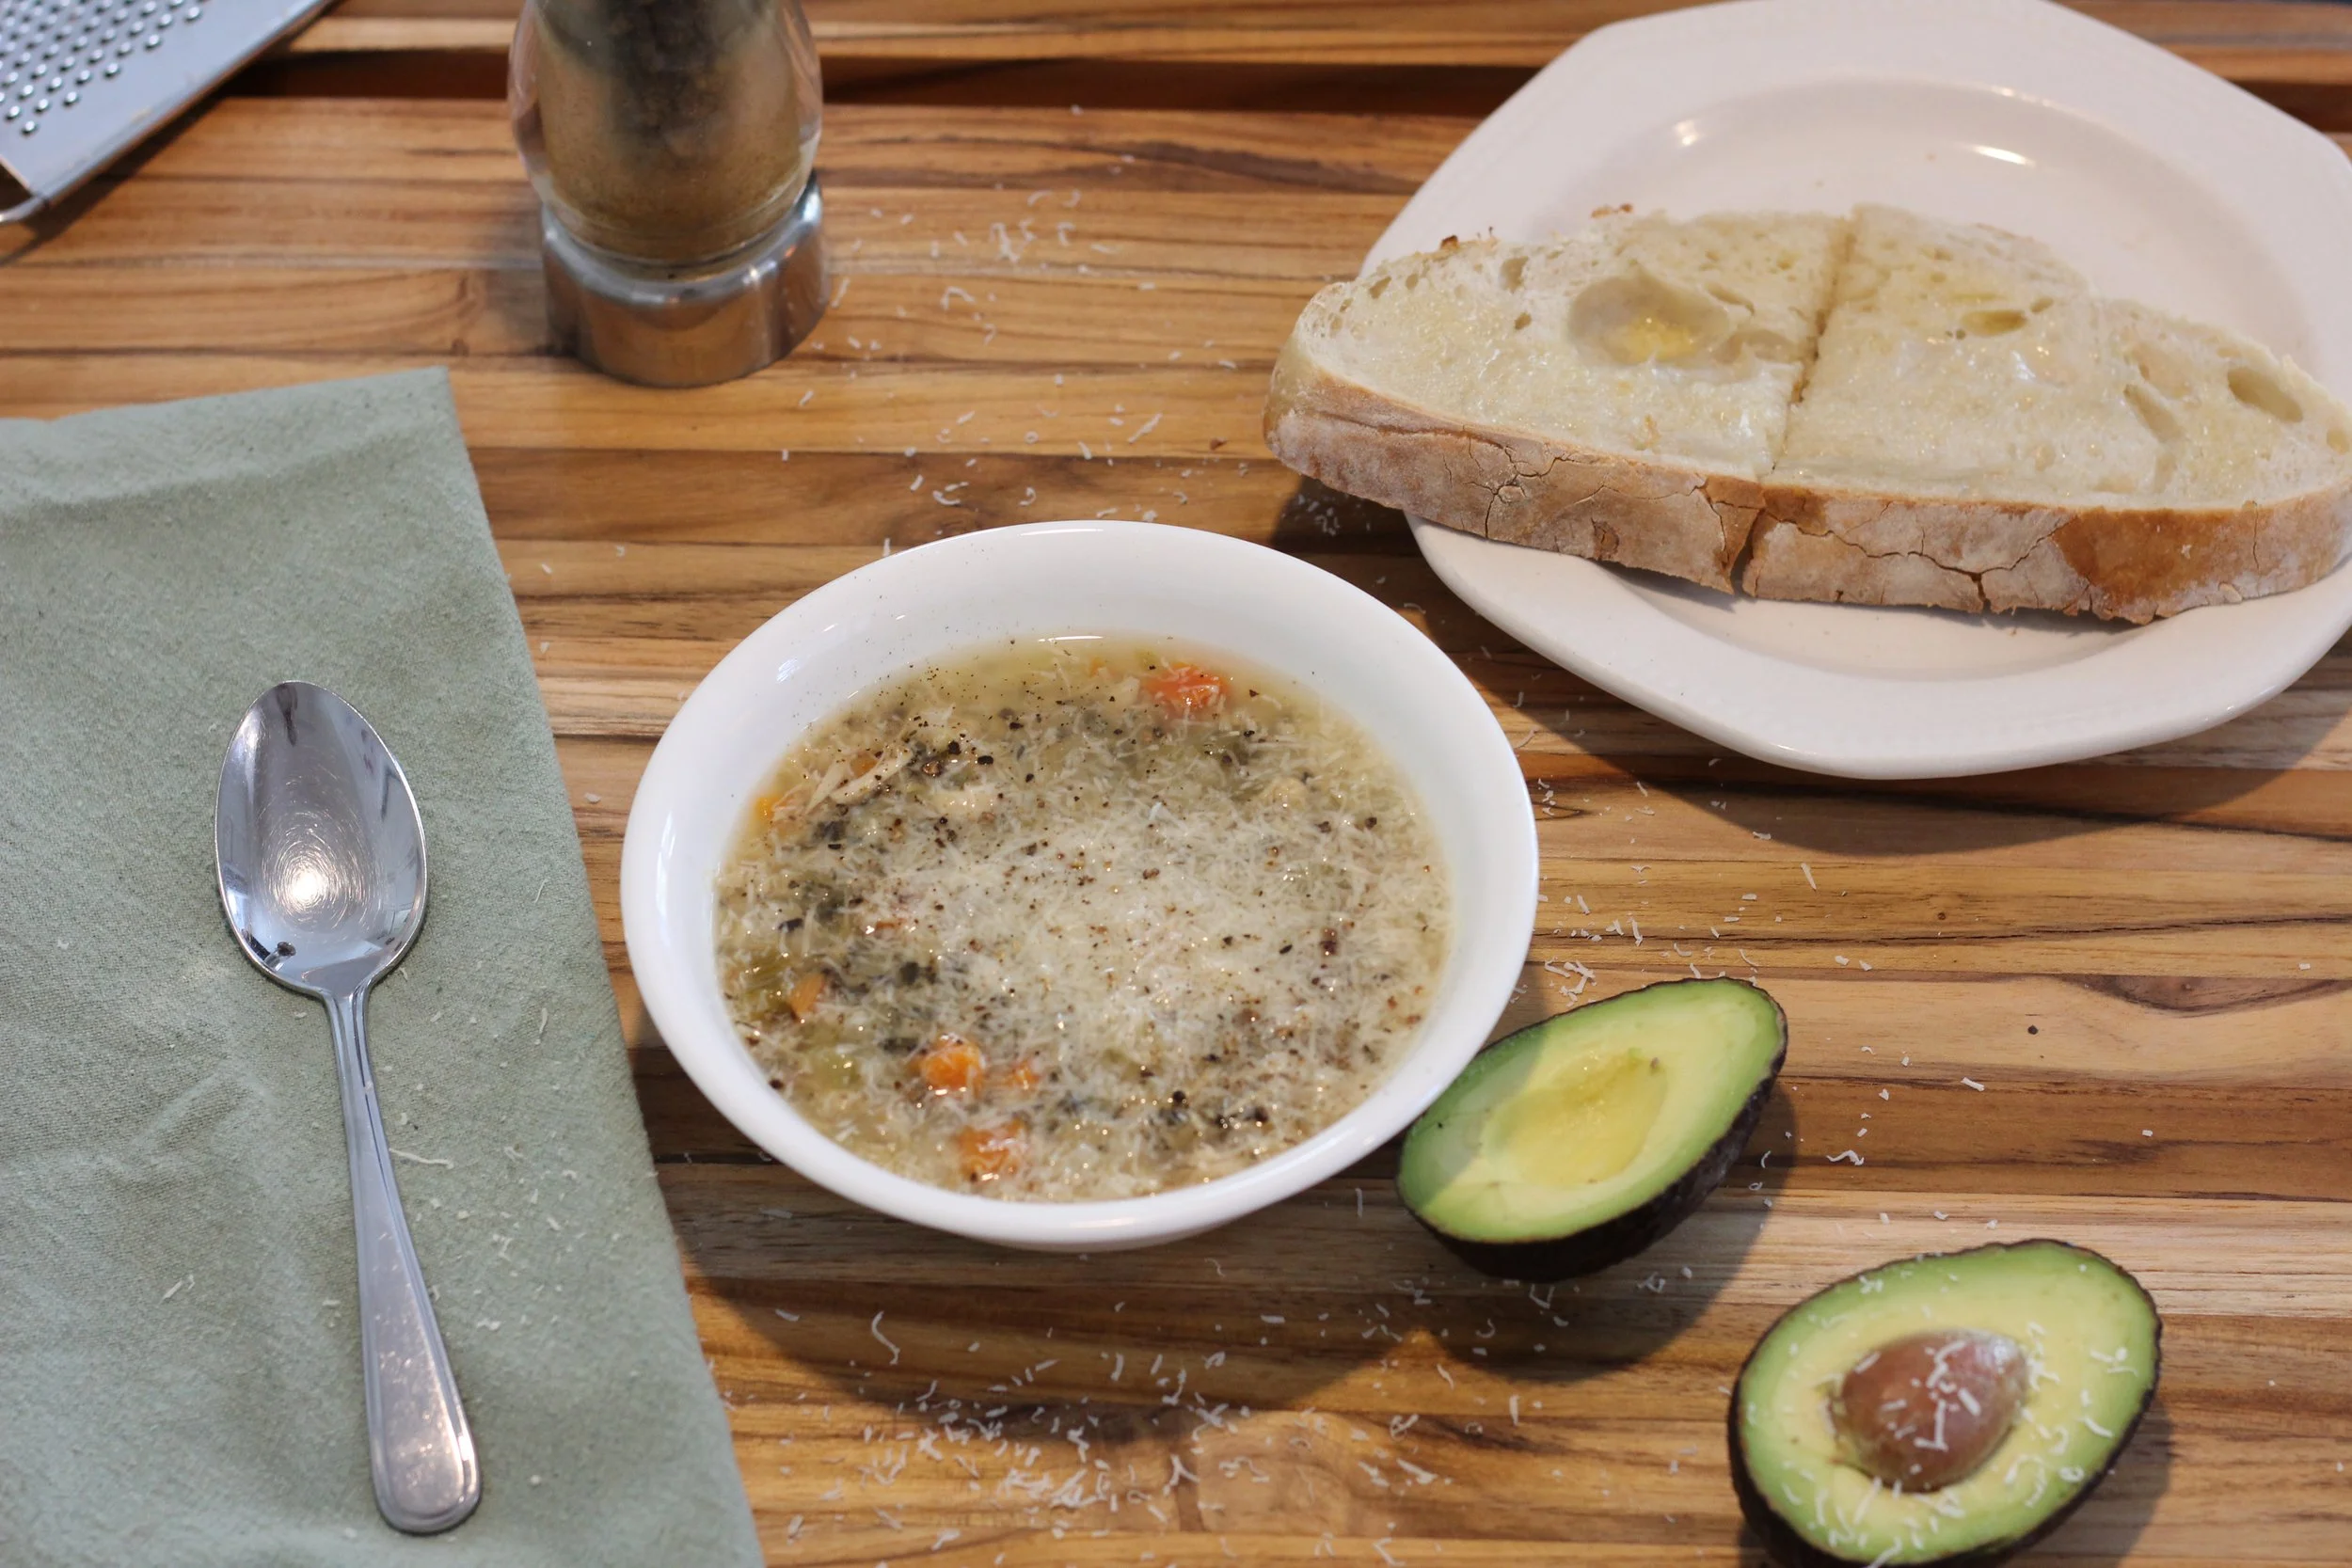
Pairs nicely with fresh sourdough bread, and topped with freshly grated parmesan, fresh ground pepper and avocado.
Enjoy!
Did you make this recipe? I want to see it!
Leave a picture and a ⭐ star rating and comment below to let us know how your muffins turned out. Did you make any substitutions or additions? Share your tips and photos with us!
Share this recipe: Help others discover this delicious recipe by sharing it on Pinterest, Facebook, or Instagram. Tag us @Sageandsimplicity so we can see your beautiful creations!
📌 Pin it for later: Save this recipe to your Pinterest boards for easy access.