Easy French Crepes Recipe: No Added Sugar (Sweet or Savoury!)
Classic French Crepes Recipe (No Added Sugar)
Learn how to make authentic French crepes at home with this simple, no sugar added recipe. These thin, delicate crepes are naturally lightly sweet and incredibly versatile – perfect for breakfast, brunch, or dessert.
What are French crepes?
French crepes are ultra-thin pancakes with delicate, lacy edges and a soft, pliable texture. Unlike thick American pancakes, crepes are meant to be thin and can be filled with both sweet and savory ingredients. This traditional recipe uses just basic pantry staples: flour, eggs, milk.
Why this No Added Sugar crepe recipe works
This recipe skips refined sugar entirely, letting the natural sweetness of milk and your chosen toppings shine through. The result is a lighter, more versatile crepe that works beautifully with fresh fruit, honey, jam, or savory fillings like ham and cheese. You can easily customize the sweetness level based on what you're serving them with.
How long does it take to make crepes?
You can make a batch of homemade French crepes in about 30 minutes from start to finish. The batter comes together in just 5 minutes, and each crepe cooks in under 2 minutes. This recipe makes approximately 12-15 thin crepes, perfect for feeding a family or meal prepping for the week.
Tips for perfect crepes every time
The key to restaurant-quality crepes at home is getting the right batter consistency (it should coat the back of a spoon), letting the batter rest for at least 15 minutes, and using a properly heated non-stick pan or crepe pan. With a little practice, you'll be flipping crepes like a pro.
As an Amazon Associate I earn from qualifying purchases.
⭐⭐⭐⭐⭐ (4.9/5 based on reader reviews)
📖 Jump to Recipe | 💬 Jump to FAQs | 🖨️ Print Recipe
Prep Time: 5 minutes | Cook Time: 15-20 minutes | Total Time: 20-25 minutes | Yield: 8-10 crepes

Easy French Crepes Recipe: No Added Sugar (Sweet or Savoury!)
Learn how to make authentic French crepes without added sugar—perfect for sweet or savoury fillings. This simple recipe creates delicate, golden crepes every time!
Why You'll Love This No-Sugar French Crepe Recipe
Weekend mornings deserve something special, and these French crepes without added sugar deliver exactly that. This versatile recipe creates thin, delicate crepes that work beautifully for both sweet breakfast treats and savoury brunch dishes.
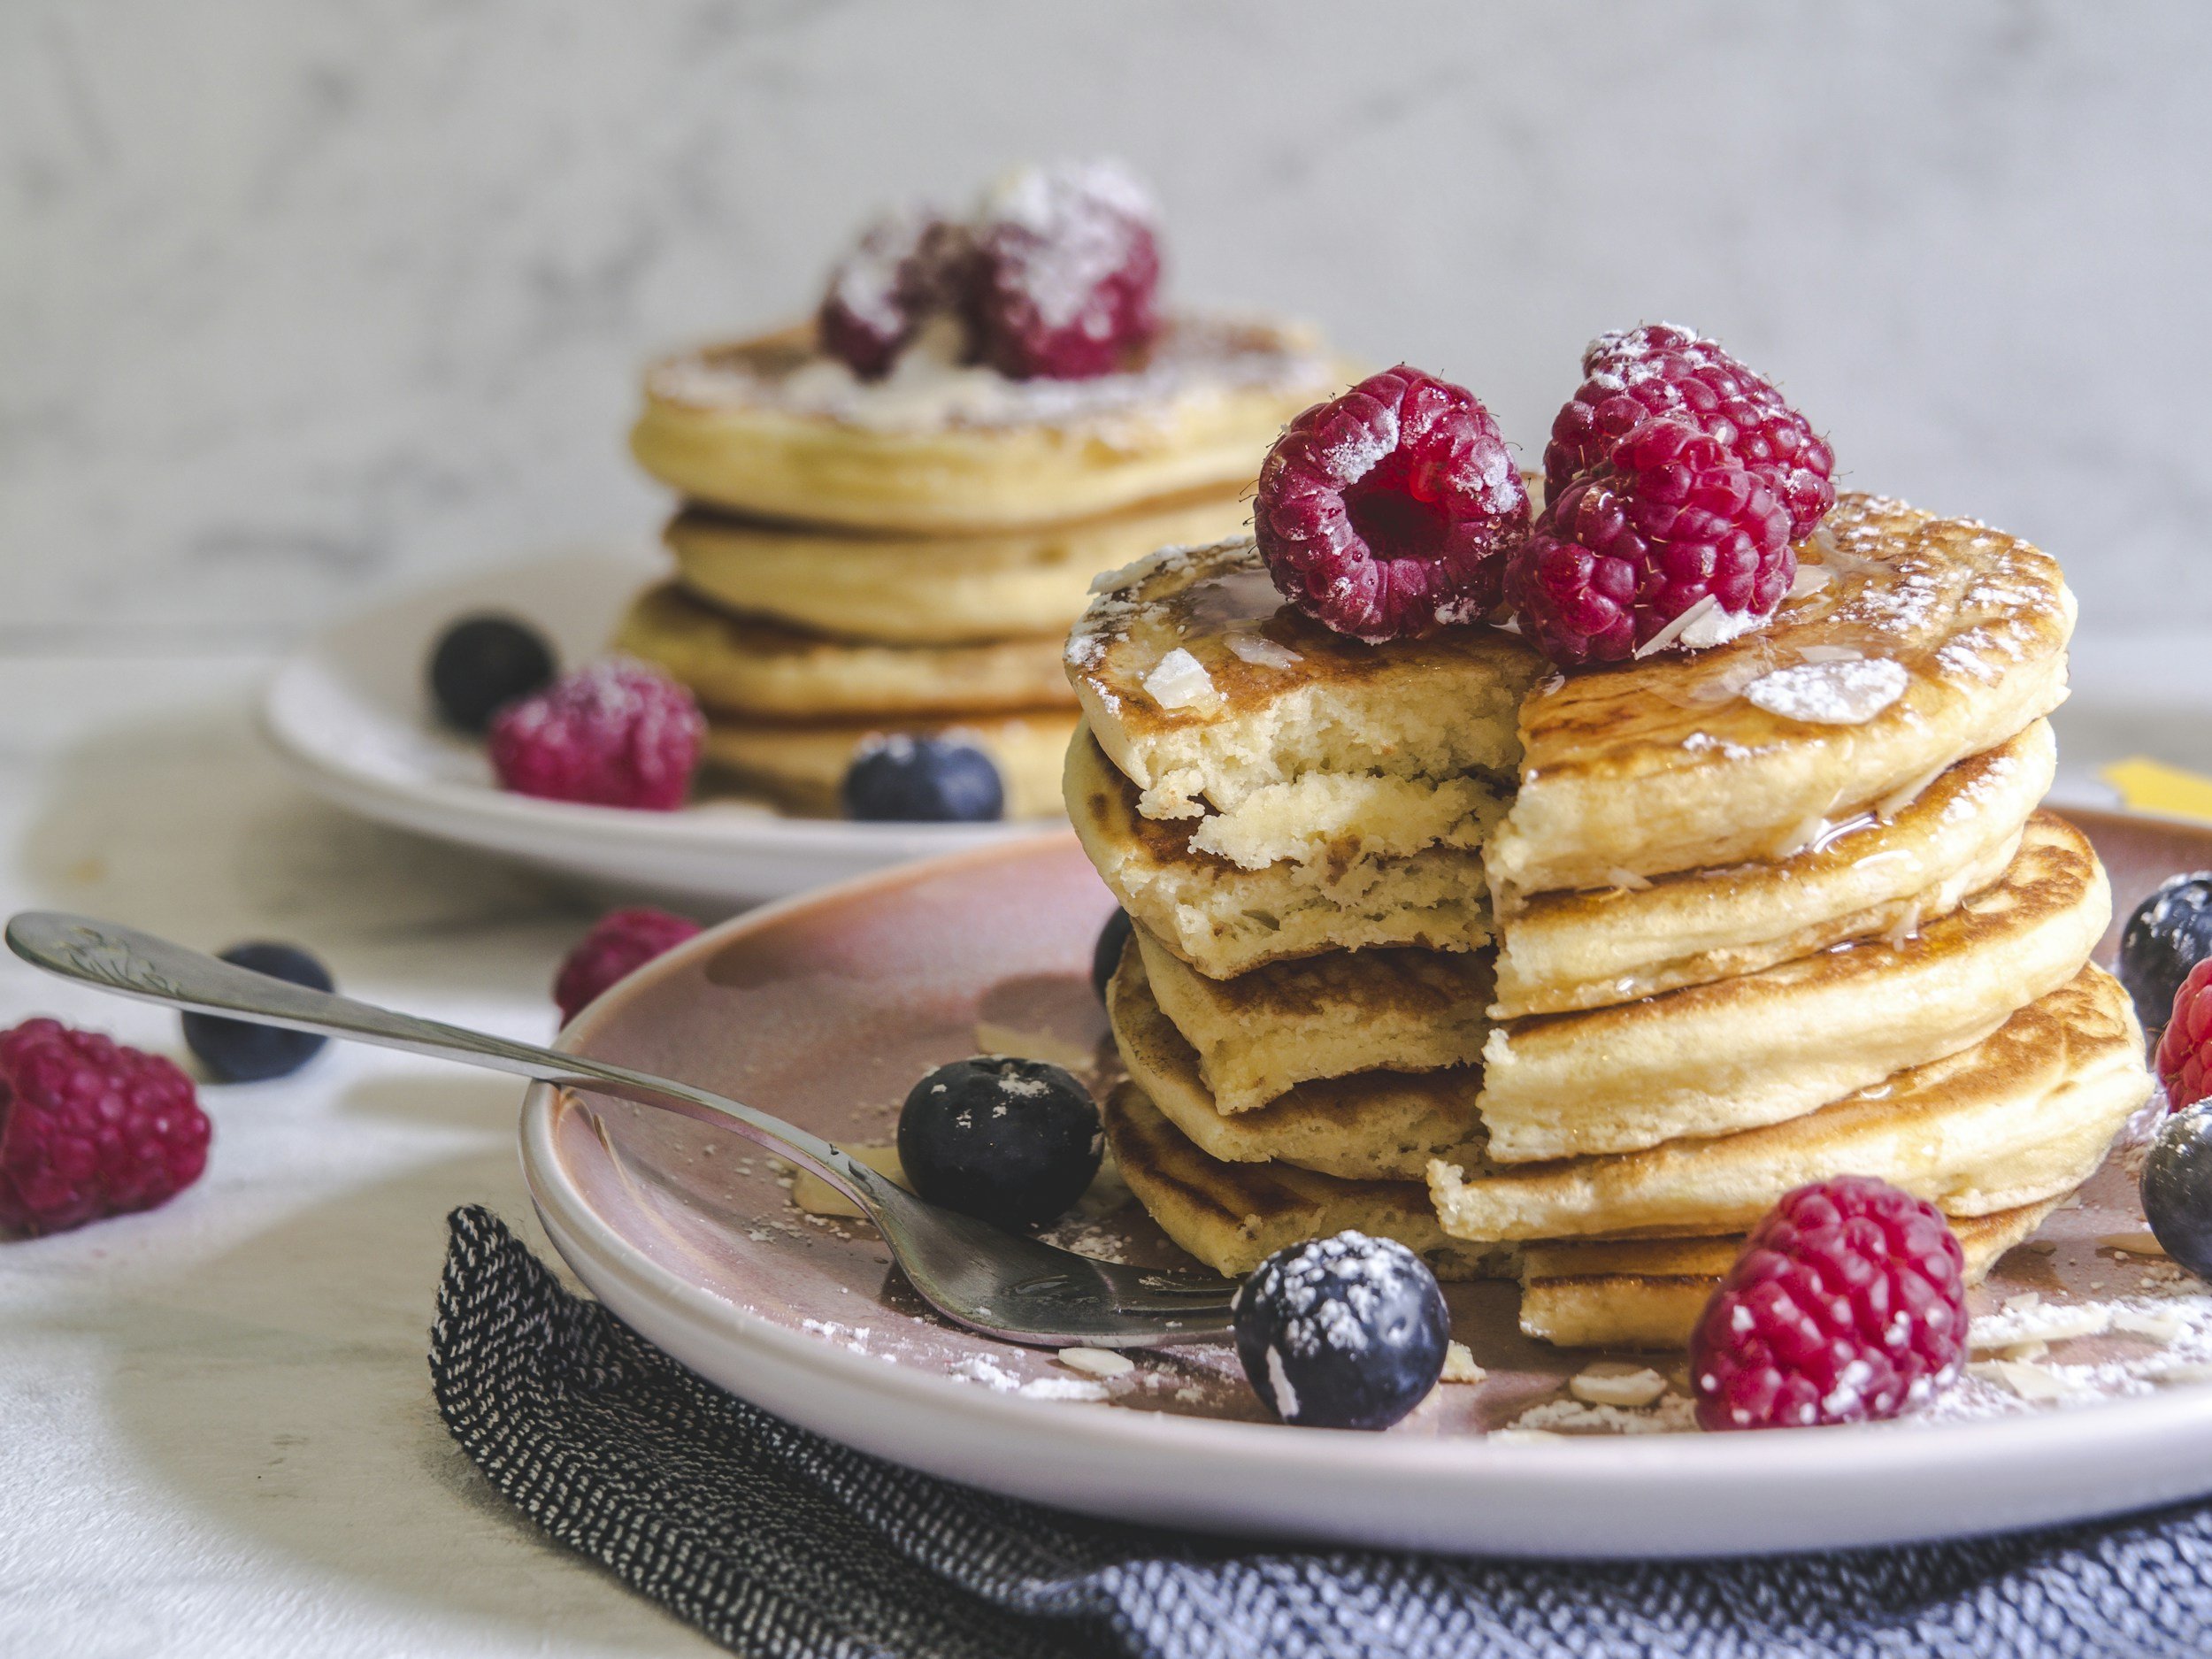
The beauty of this no-added-sugar approach? You control the flavour. The batter's subtle vanilla and cinnamon create a warm base without committing you to sweet or savoury. Want a dessert crepe? Add fresh berries and maple syrup. Craving something hearty? Skip the vanilla and cinnamon, then fill with ham, cheese, and vegetables.
Ready to master French crepes? This straightforward recipe proves that restaurant-quality results are absolutely achievable at home.
French Crepes Recipe (No Added Sugar)
Prep Time: 5 minutes
Cook Time: 15-20 minutes
Total Time: 20-25 minutes
Yield: 8-10 crepes
Difficulty: Easy (Beginner-friendly)
Equipment:
Large mixing bowl (affiliate link), or standmixer with paddle attachment
crepe pan (affiliate link)
spatula (affiliate link)
Ingredients
2 large eggs
2 cups all-purpose flour
2 ½ cups milk, 2%
2 tbsp vanilla extract (optional, omit for savoury crepes)
½ tsp cinnamon, to taste (optional, omit for savoury crepes)
Butter, oil, or lard for greasing the pan
Directions
Make the batter: Whisk eggs, flour, and milk together until completely smooth with no lumps.
Add flavourings: Add vanilla and cinnamon (if using). Whisk until well incorporated. The batter should coat the whisk but flow smoothly off it.
Adjust consistency: If too thick, add milk one tablespoon at a time. If too thin, add flour one teaspoon at a time.
Heat your pan: Preheat a 10-inch skillet over medium-low heat. This temperature is key—too hot and crepes burn, too cool and they stick.
Grease lightly: Lightly grease the pan with butter, oil, or lard (lard works especially well with cast iron skillets). Use just enough to coat—excess causes crepes to slide around.
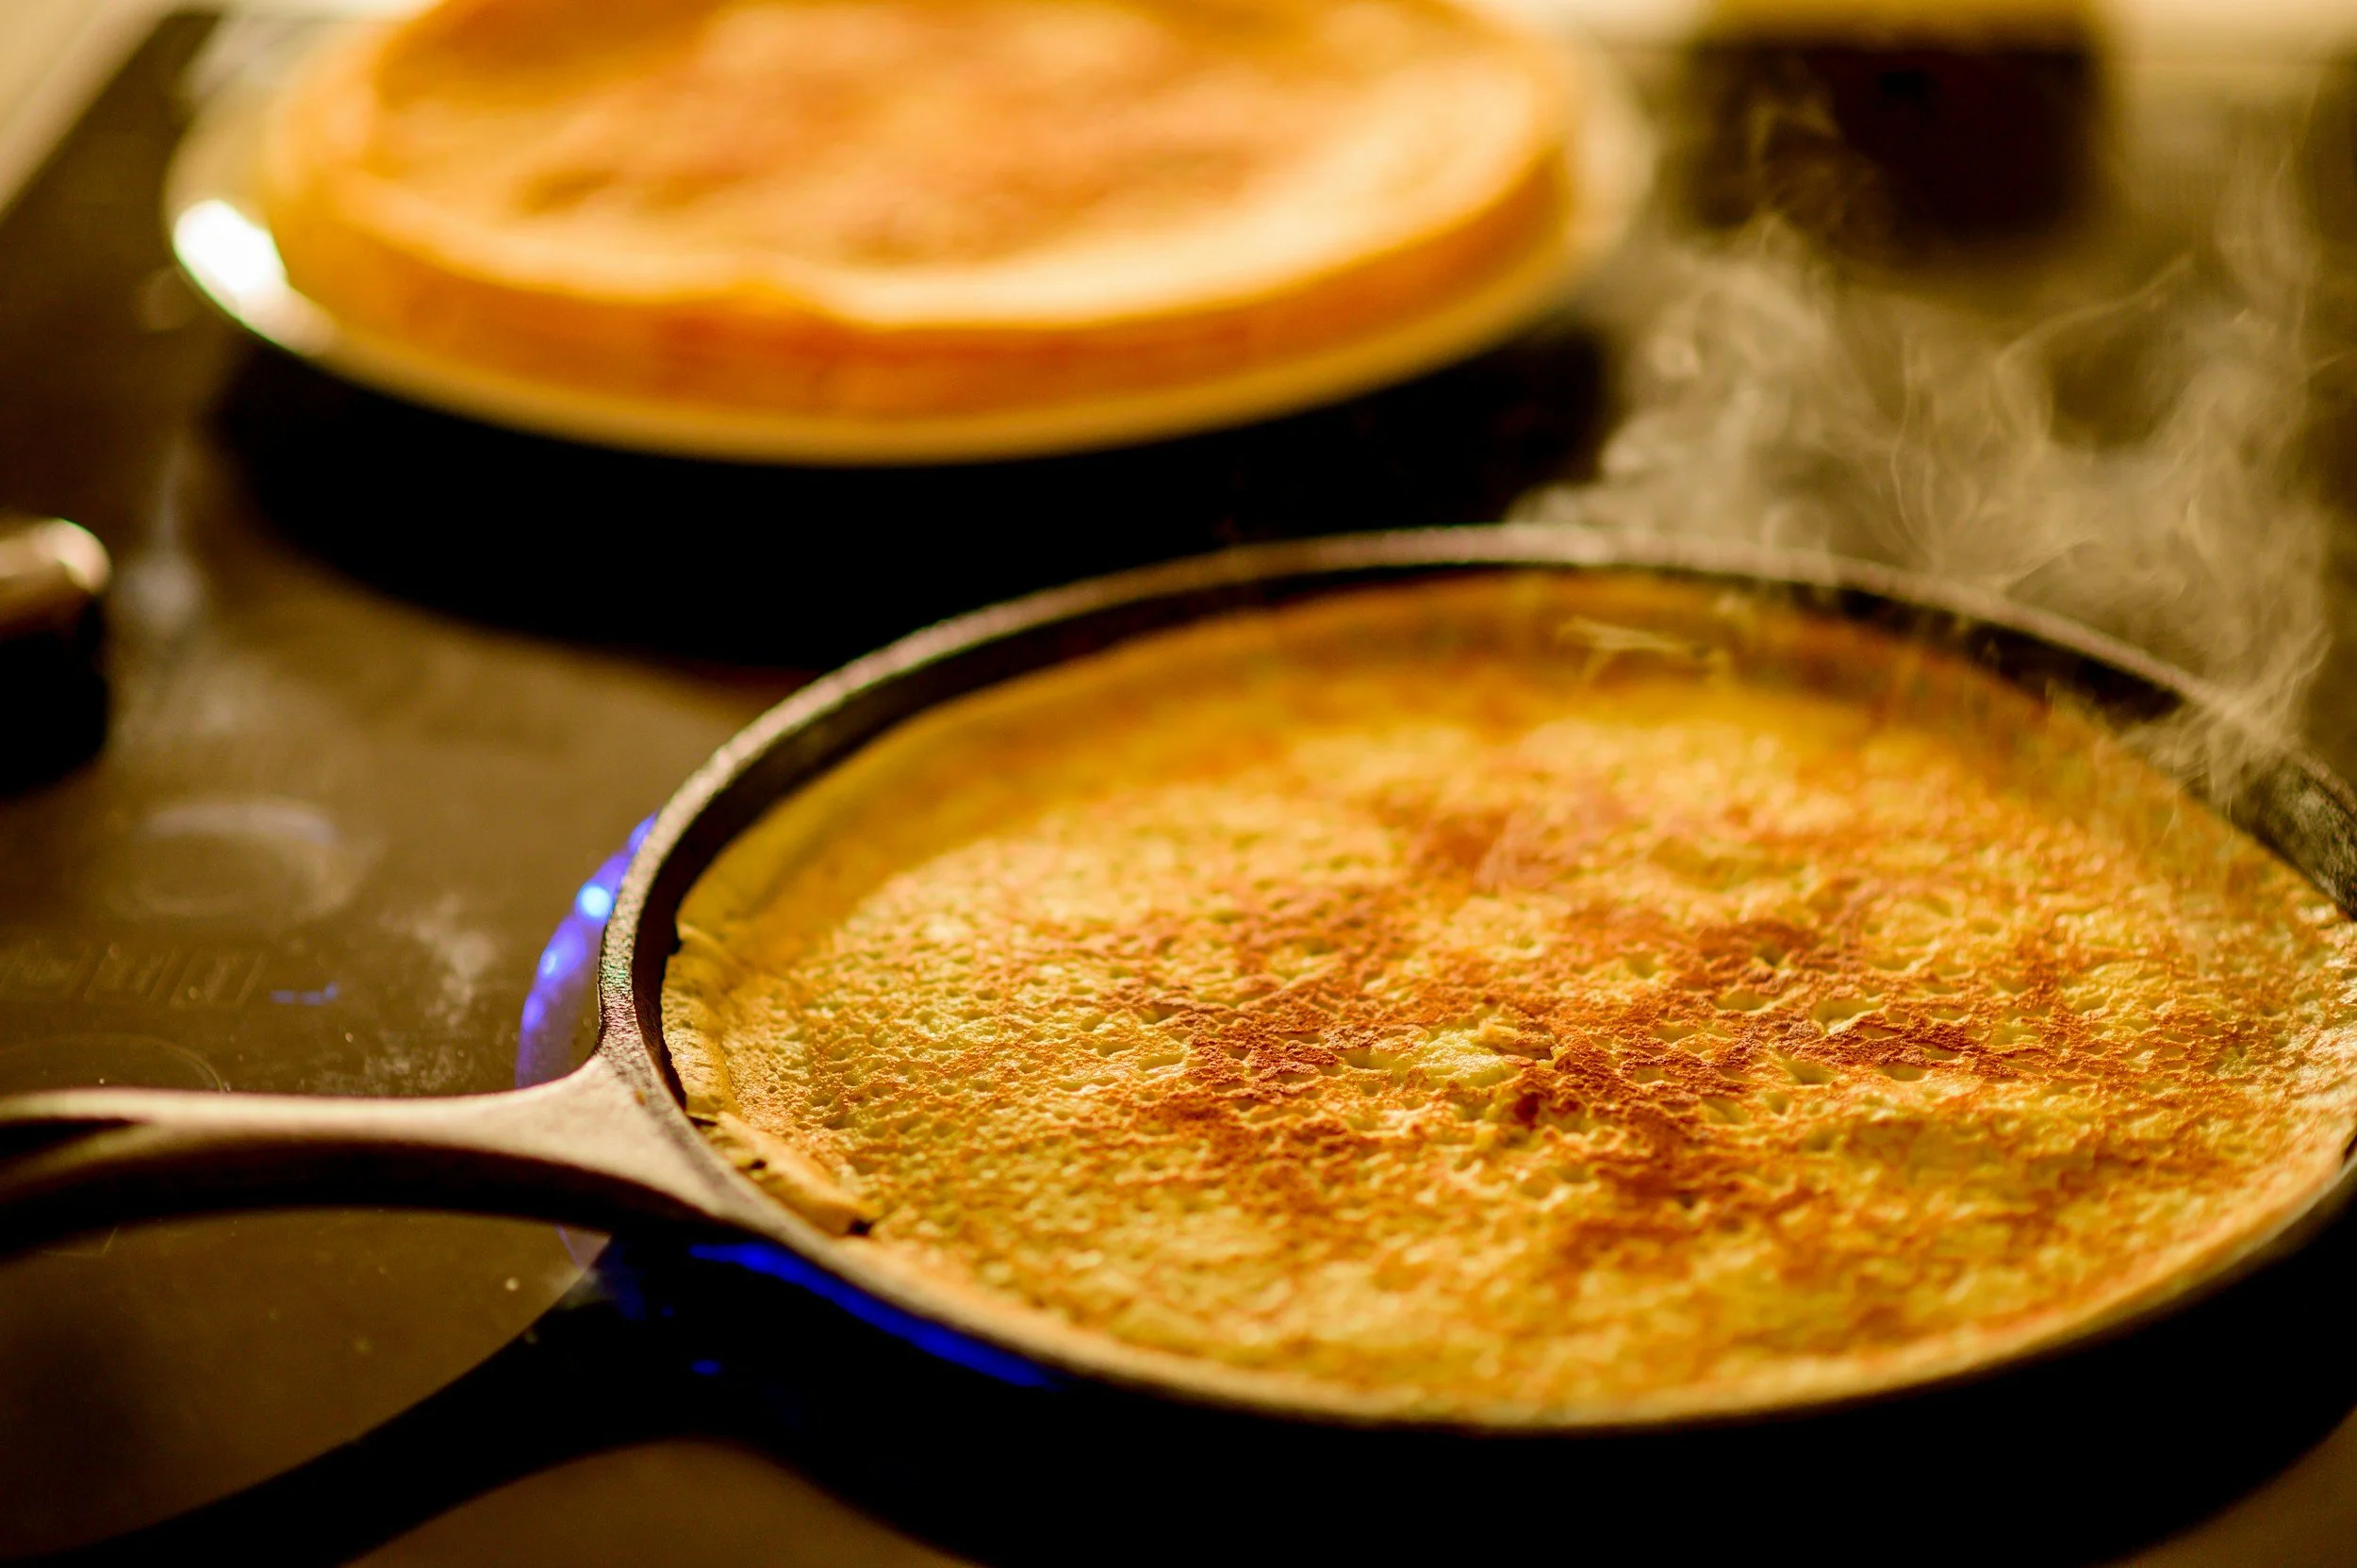
Pour and swirl: Ladle one scoop of batter into the center of the pan. Immediately tilt and swirl the pan in a circular motion to spread batter into a thin, even circle.
Cook first side: Let cook undisturbed until the crepe naturally releases from the pan, about 1-2 minutes. The underside should be golden brown.
Flip and finish: Flip carefully and cook the second side until golden, about 1 minute more.
Repeat: Continue with remaining batter, stacking finished crepes on a plate.
Pro Tips from Our Kitchen
No resting needed: Unlike some recipes, this batter works perfectly without a 30-minute rest period.
Best greasing fat: Through trial and error, lard works exceptionally well for greasing a cast iron skillet.
First crepe syndrome: Your first crepe might not be perfect—that's completely normal! It helps season the pan.
Keep crepes warm: Stack finished crepes on a plate and cover with a clean kitchen towel.
Sweet vs. Savoury: Endless Filling Ideas
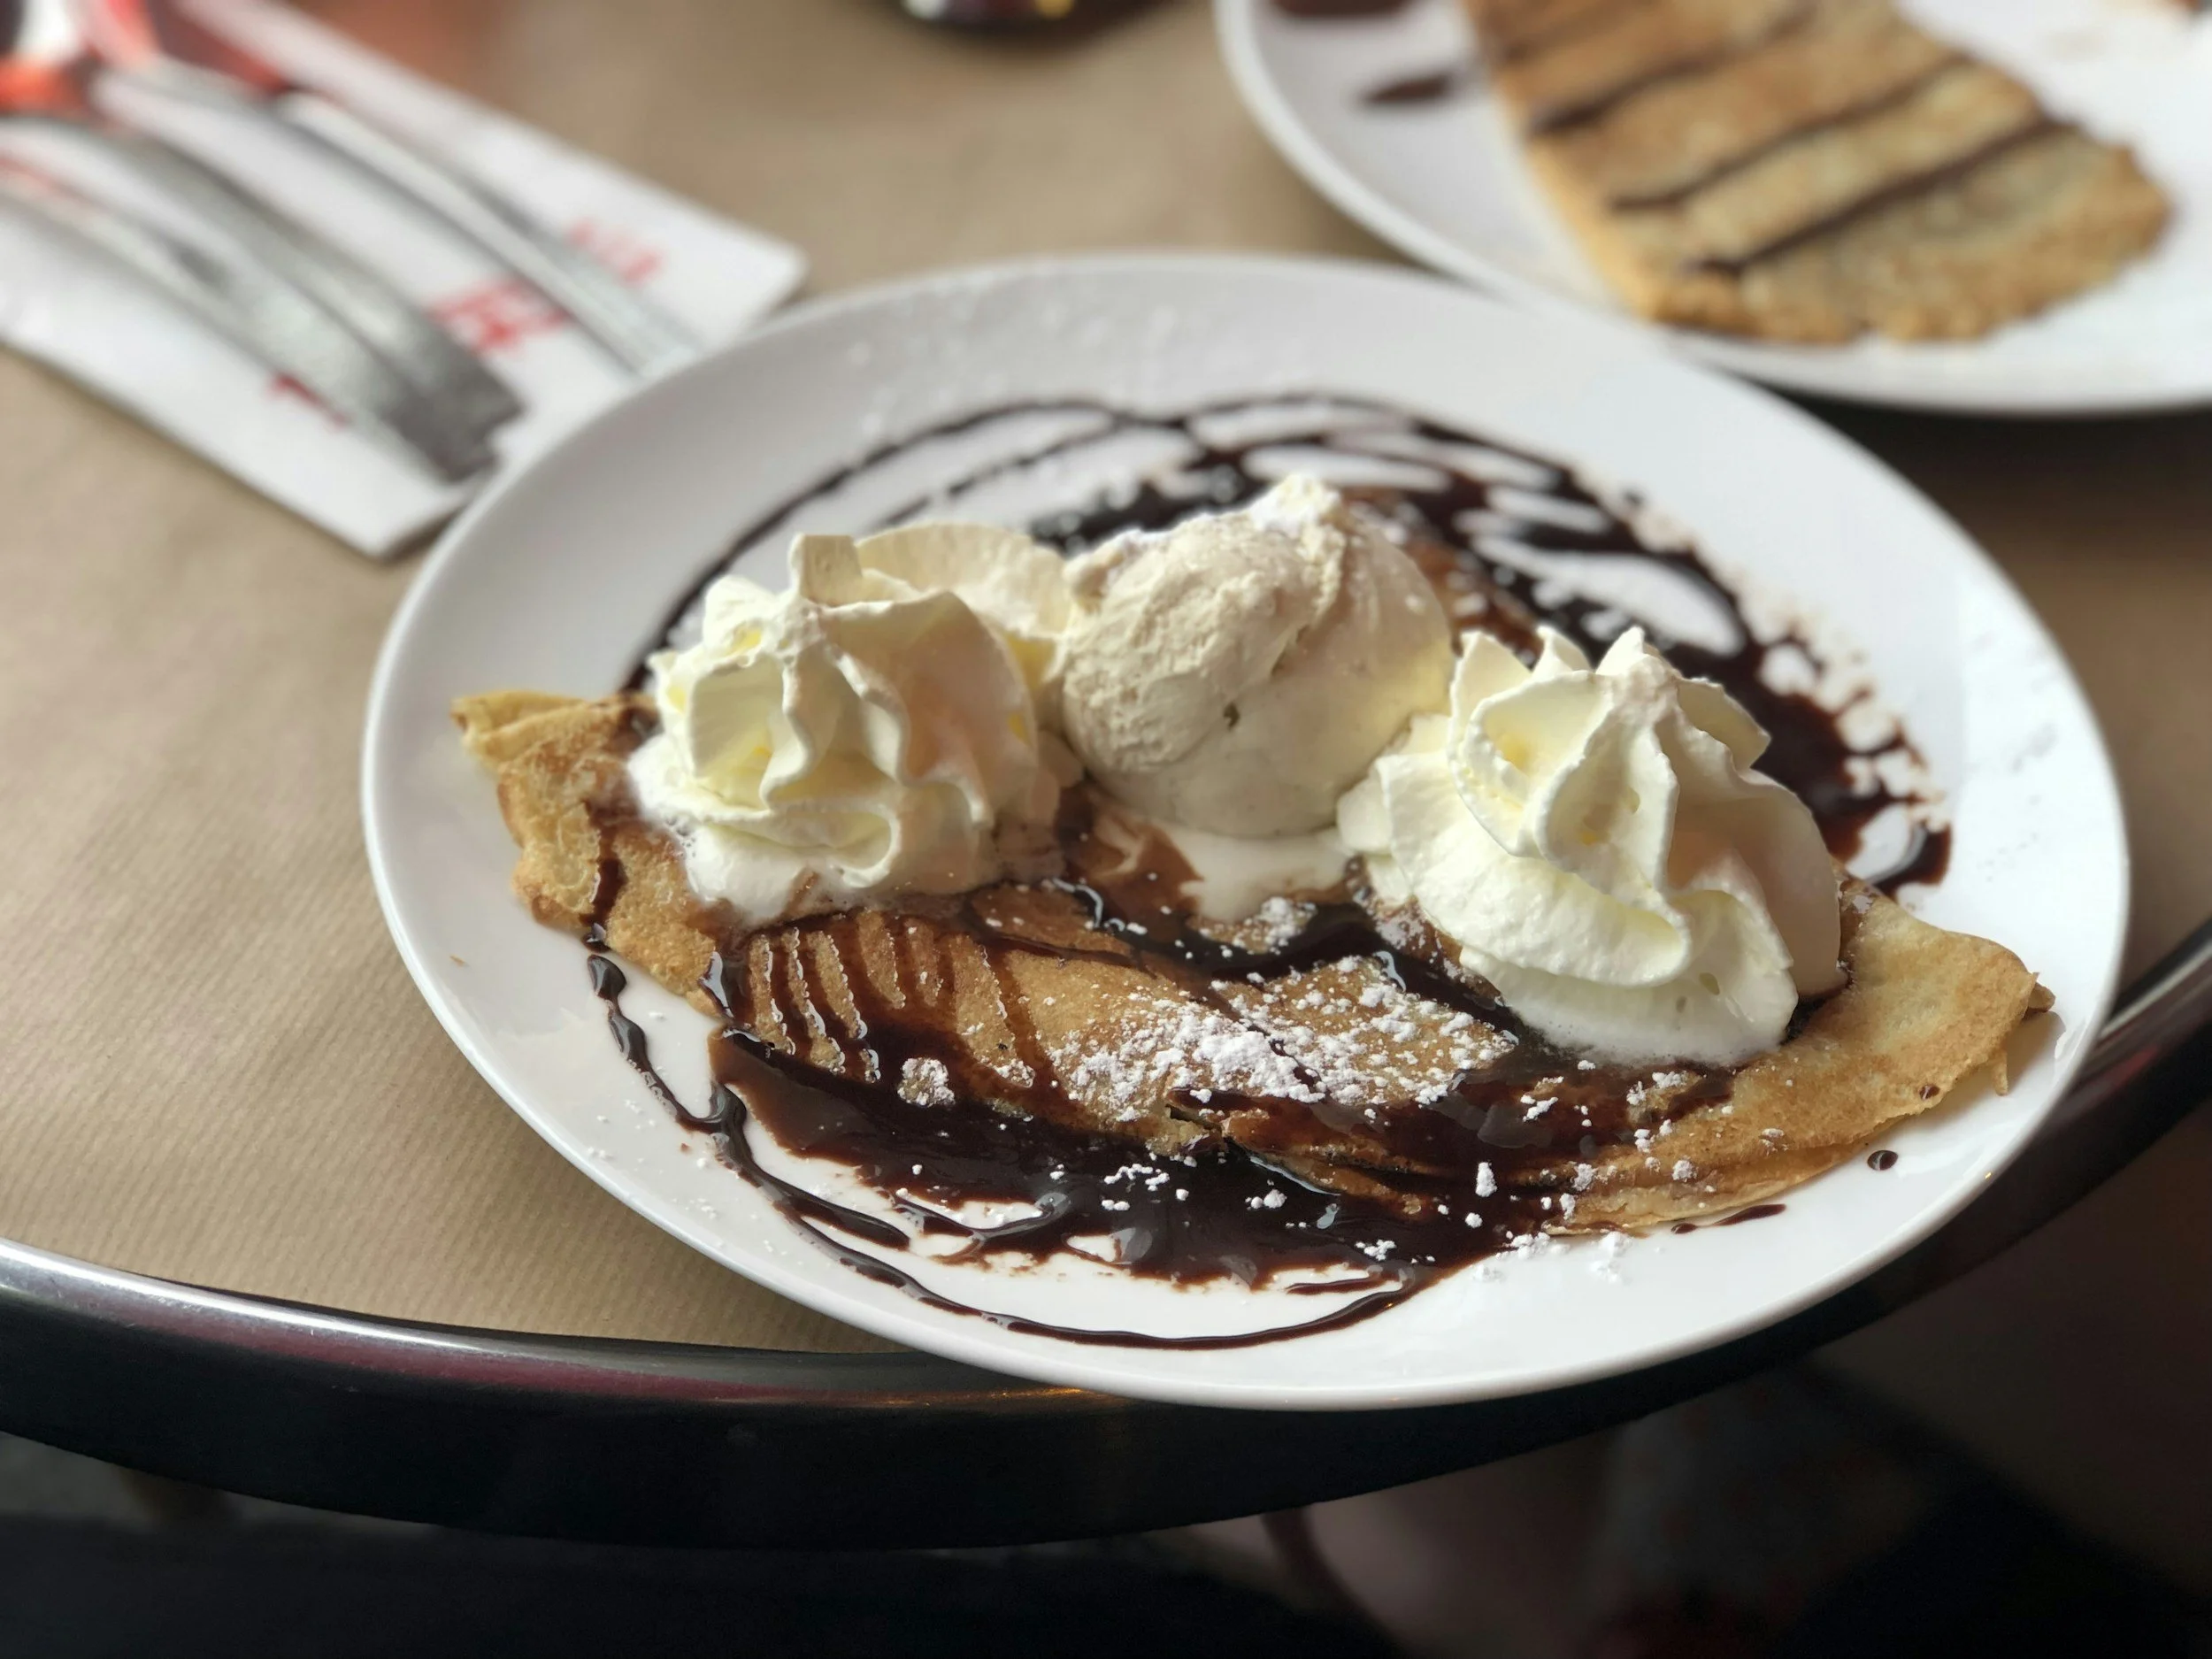
Sweet Crepe Fillings
Fresh berries with whipped cream
Sliced bananas with Nutella
Maple syrup
Greek yogurt with honey and fruit
Peanut butter and sliced strawberries
Lemon juice and powdered sugar (classic!)
Savoury Crepe Fillings
Thinly sliced ham, asparagus, and shredded Gruyère cheese
Sautéed mushrooms with goat cheese and fresh thyme
Scrambled eggs, bacon, and cheddar
Smoked salmon, cream cheese, and dill
Spinach, feta, and sun-dried tomatoes
Remember: For savoury crepes, omit the vanilla and cinnamon from the batter.
Frequently Asked Questions
What makes this a no-added-sugar crepe recipe?
This recipe contains no added sugar in the batter—neither refined nor natural sweeteners. Any subtle sweetness comes naturally from the milk and optional vanilla extract. This gives you complete control over sweetness through your chosen toppings and fillings.
Do I need a special crepe pan to make French crepes?
No! A regular 10-inch skillet works perfectly. Cast iron skillets are excellent because they retain heat evenly, but any non-stick or well-seasoned pan will do. The key is even heat distribution, not specialized equipment.
Why is my crepe batter too thick or too thin?
Crepe batter should coat a whisk but flow smoothly. If too thick (doesn't spread easily in the pan), add milk, one tablespoon at a time. If too thin (spreads too much and the batter runs), whisk in flour, one teaspoon at a time until you reach the right consistency.
Can I make crepe batter ahead of time?
Yes! Crepe batter stores well in the refrigerator for up to 2 days. Whisk it briefly before using, as ingredients may separate. You can also freeze cooked crepes for up to 2 months—separate them with parchment paper and store in an airtight container.
How do I know when to flip a crepe?
The crepe is ready to flip when it naturally releases from the pan—you should be able to gently shake the pan and see the crepe move freely. The edges will look slightly dry, and the underside should be golden brown (peek gently with a spatula to check).
Why do my crepes stick to the pan?
Sticking usually happens when: (1) the pan isn't hot enough, (2) there's not enough grease, or (3) you're trying to flip too early. Make sure your pan is properly preheated, lightly greased, and wait until the crepe releases naturally before flipping.
What's the best way to grease a crepe pan?
Use a small amount of butter, oil, or lard on a paper towel to lightly coat the pan between crepes. Lard works especially well with cast iron. You want just enough to prevent sticking—excess grease makes crepes slide around.
How do I store leftover crepes?
Stack cooled crepes with parchment paper between each one, place in an airtight container, and refrigerate for up to 3 days. Reheat gently in a dry pan over low heat or in the microwave for 15-20 seconds.
Can I make these crepes dairy-free or gluten-free?
For dairy-free crepes, substitute the milk with unsweetened almond milk, oat milk, or another plant-based milk. For gluten-free, use a 1:1 gluten-free flour blend. Note that gluten-free crepes may be slightly more delicate when flipping.
What's the difference between crepes and pancakes?
Crepes are much thinner than pancakes and contain no leavening agents (no baking powder or baking soda). The batter is more liquid and spreads into a thin, delicate layer when swirled in the pan, while pancake batter is thicker and rises as it cooks.
Why This Recipe Works
This best easy French crepe recipe without sugar has become a weekend staple because it's:
✓ Simple: Just 5 basic ingredients (3 core + 2 optional flavourings)
✓ Versatile: Works for sweet breakfasts or savoury brunches
✓ Quick: No resting time required—mix and cook immediately
✓ Healthier: No added sugar means you control sweetness
✓ Crowd-pleasing: Everyone can customize their own crepes
Whether you're making a quiet Saturday morning breakfast or hosting a full brunch spread, these crepes bring people together around the table. The first few might be practice rounds (and that's perfectly okay!), but once you find your rhythm, you'll be flipping golden crepes like a pro.
Did You Make This Recipe? I want to see it!
Leave a picture and a ⭐ star rating and comment below to let us know how your muffins turned out. Did you make any substitutions or additions? Share your tips and photos with us!
Share this recipe: Help others discover this delicious recipe by sharing it on Pinterest, Facebook, or Instagram. Tag us @Sageandsimplicity so we can see your beautiful creations!
📌 Pin it for later: Save this recipe to your Pinterest boards for easy access.
You might also like:
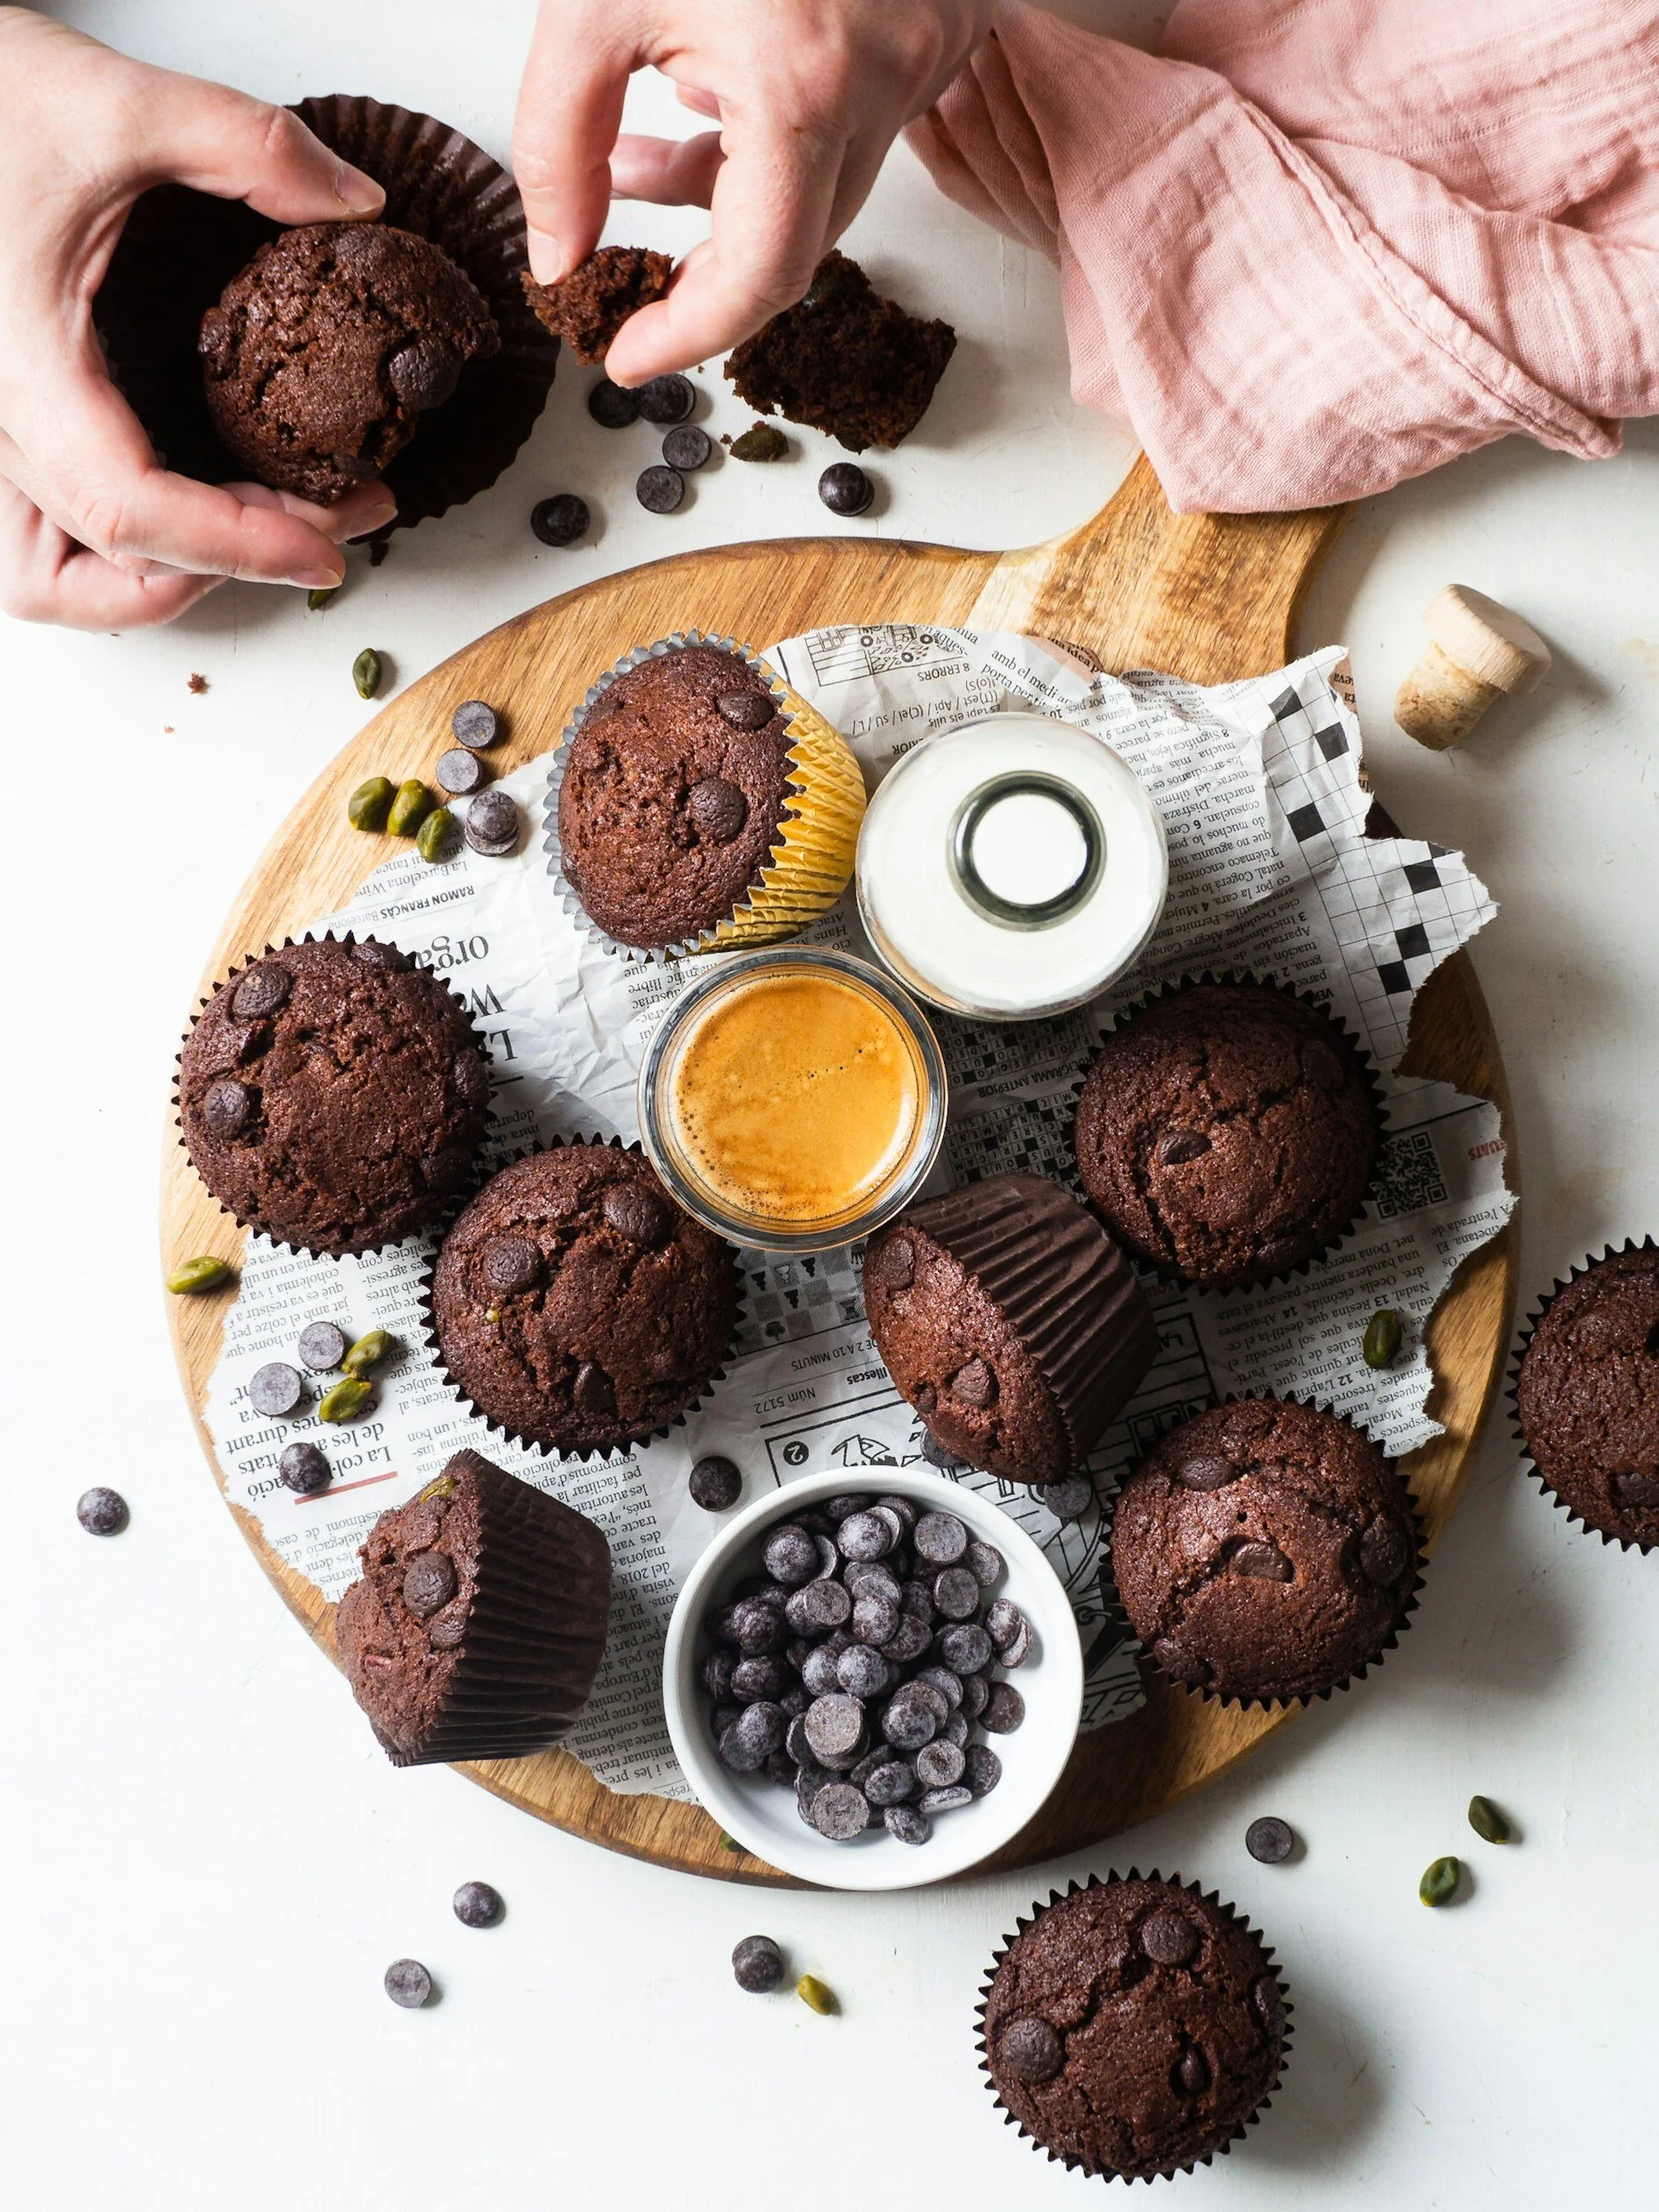
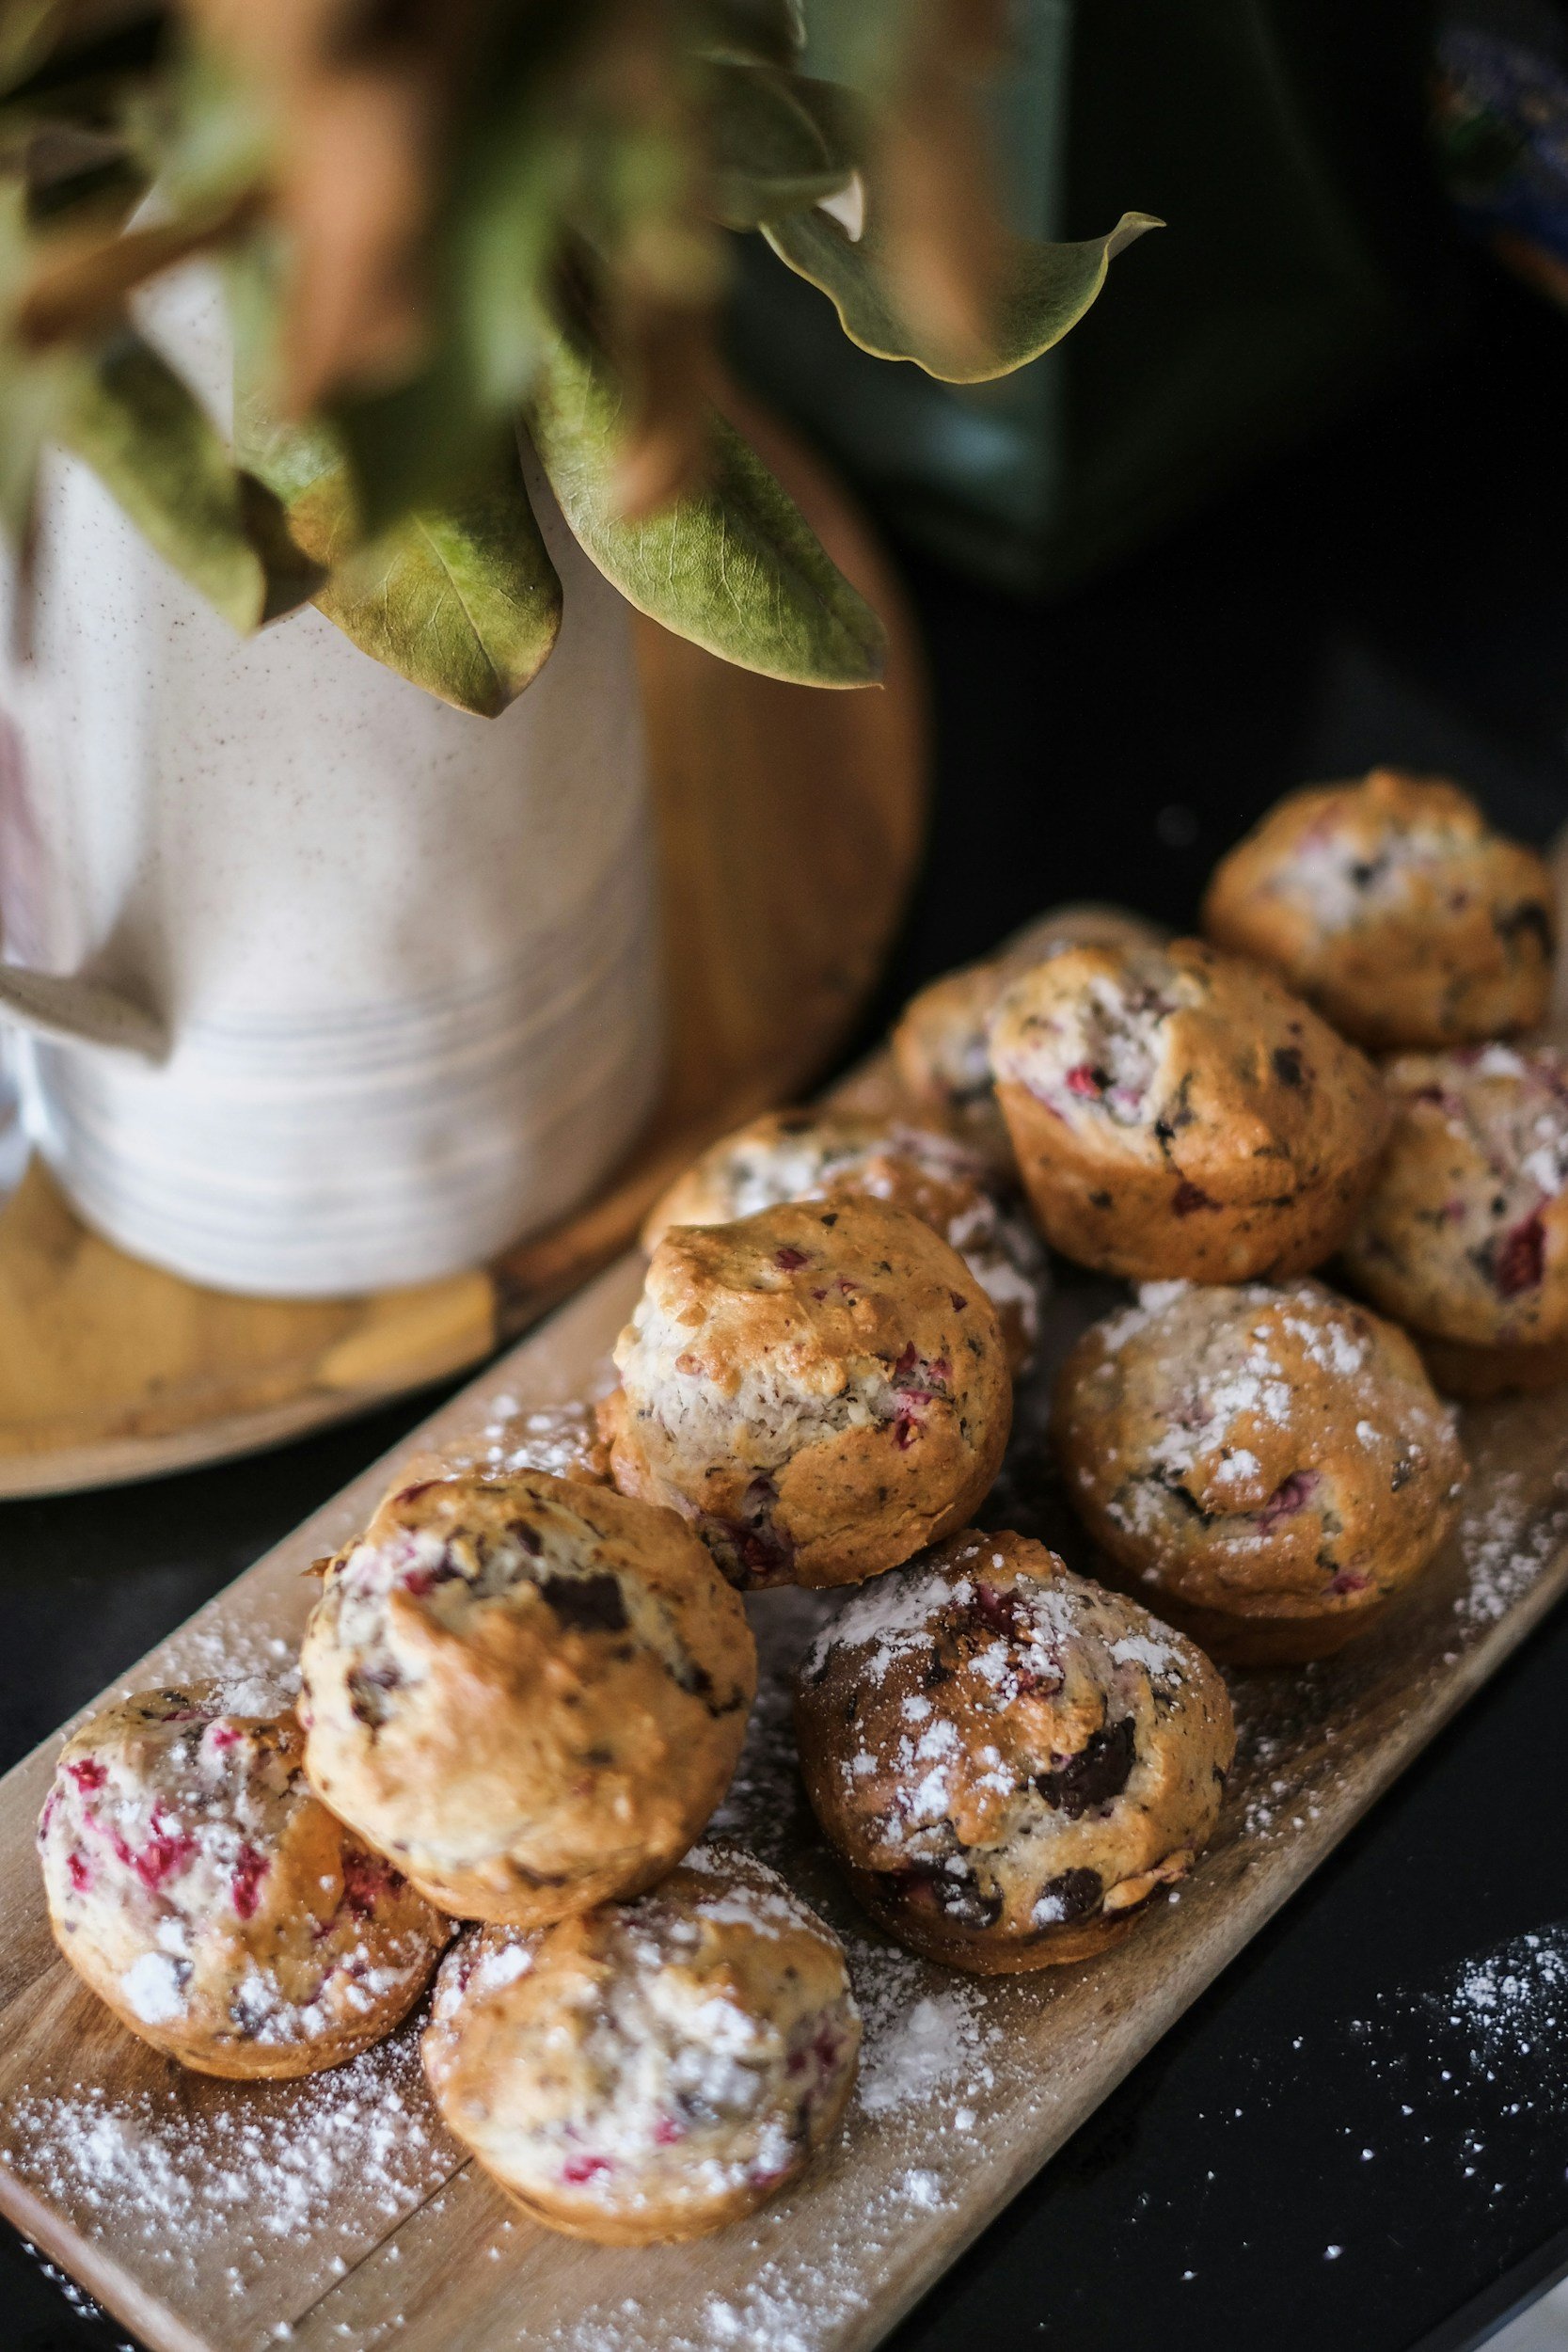
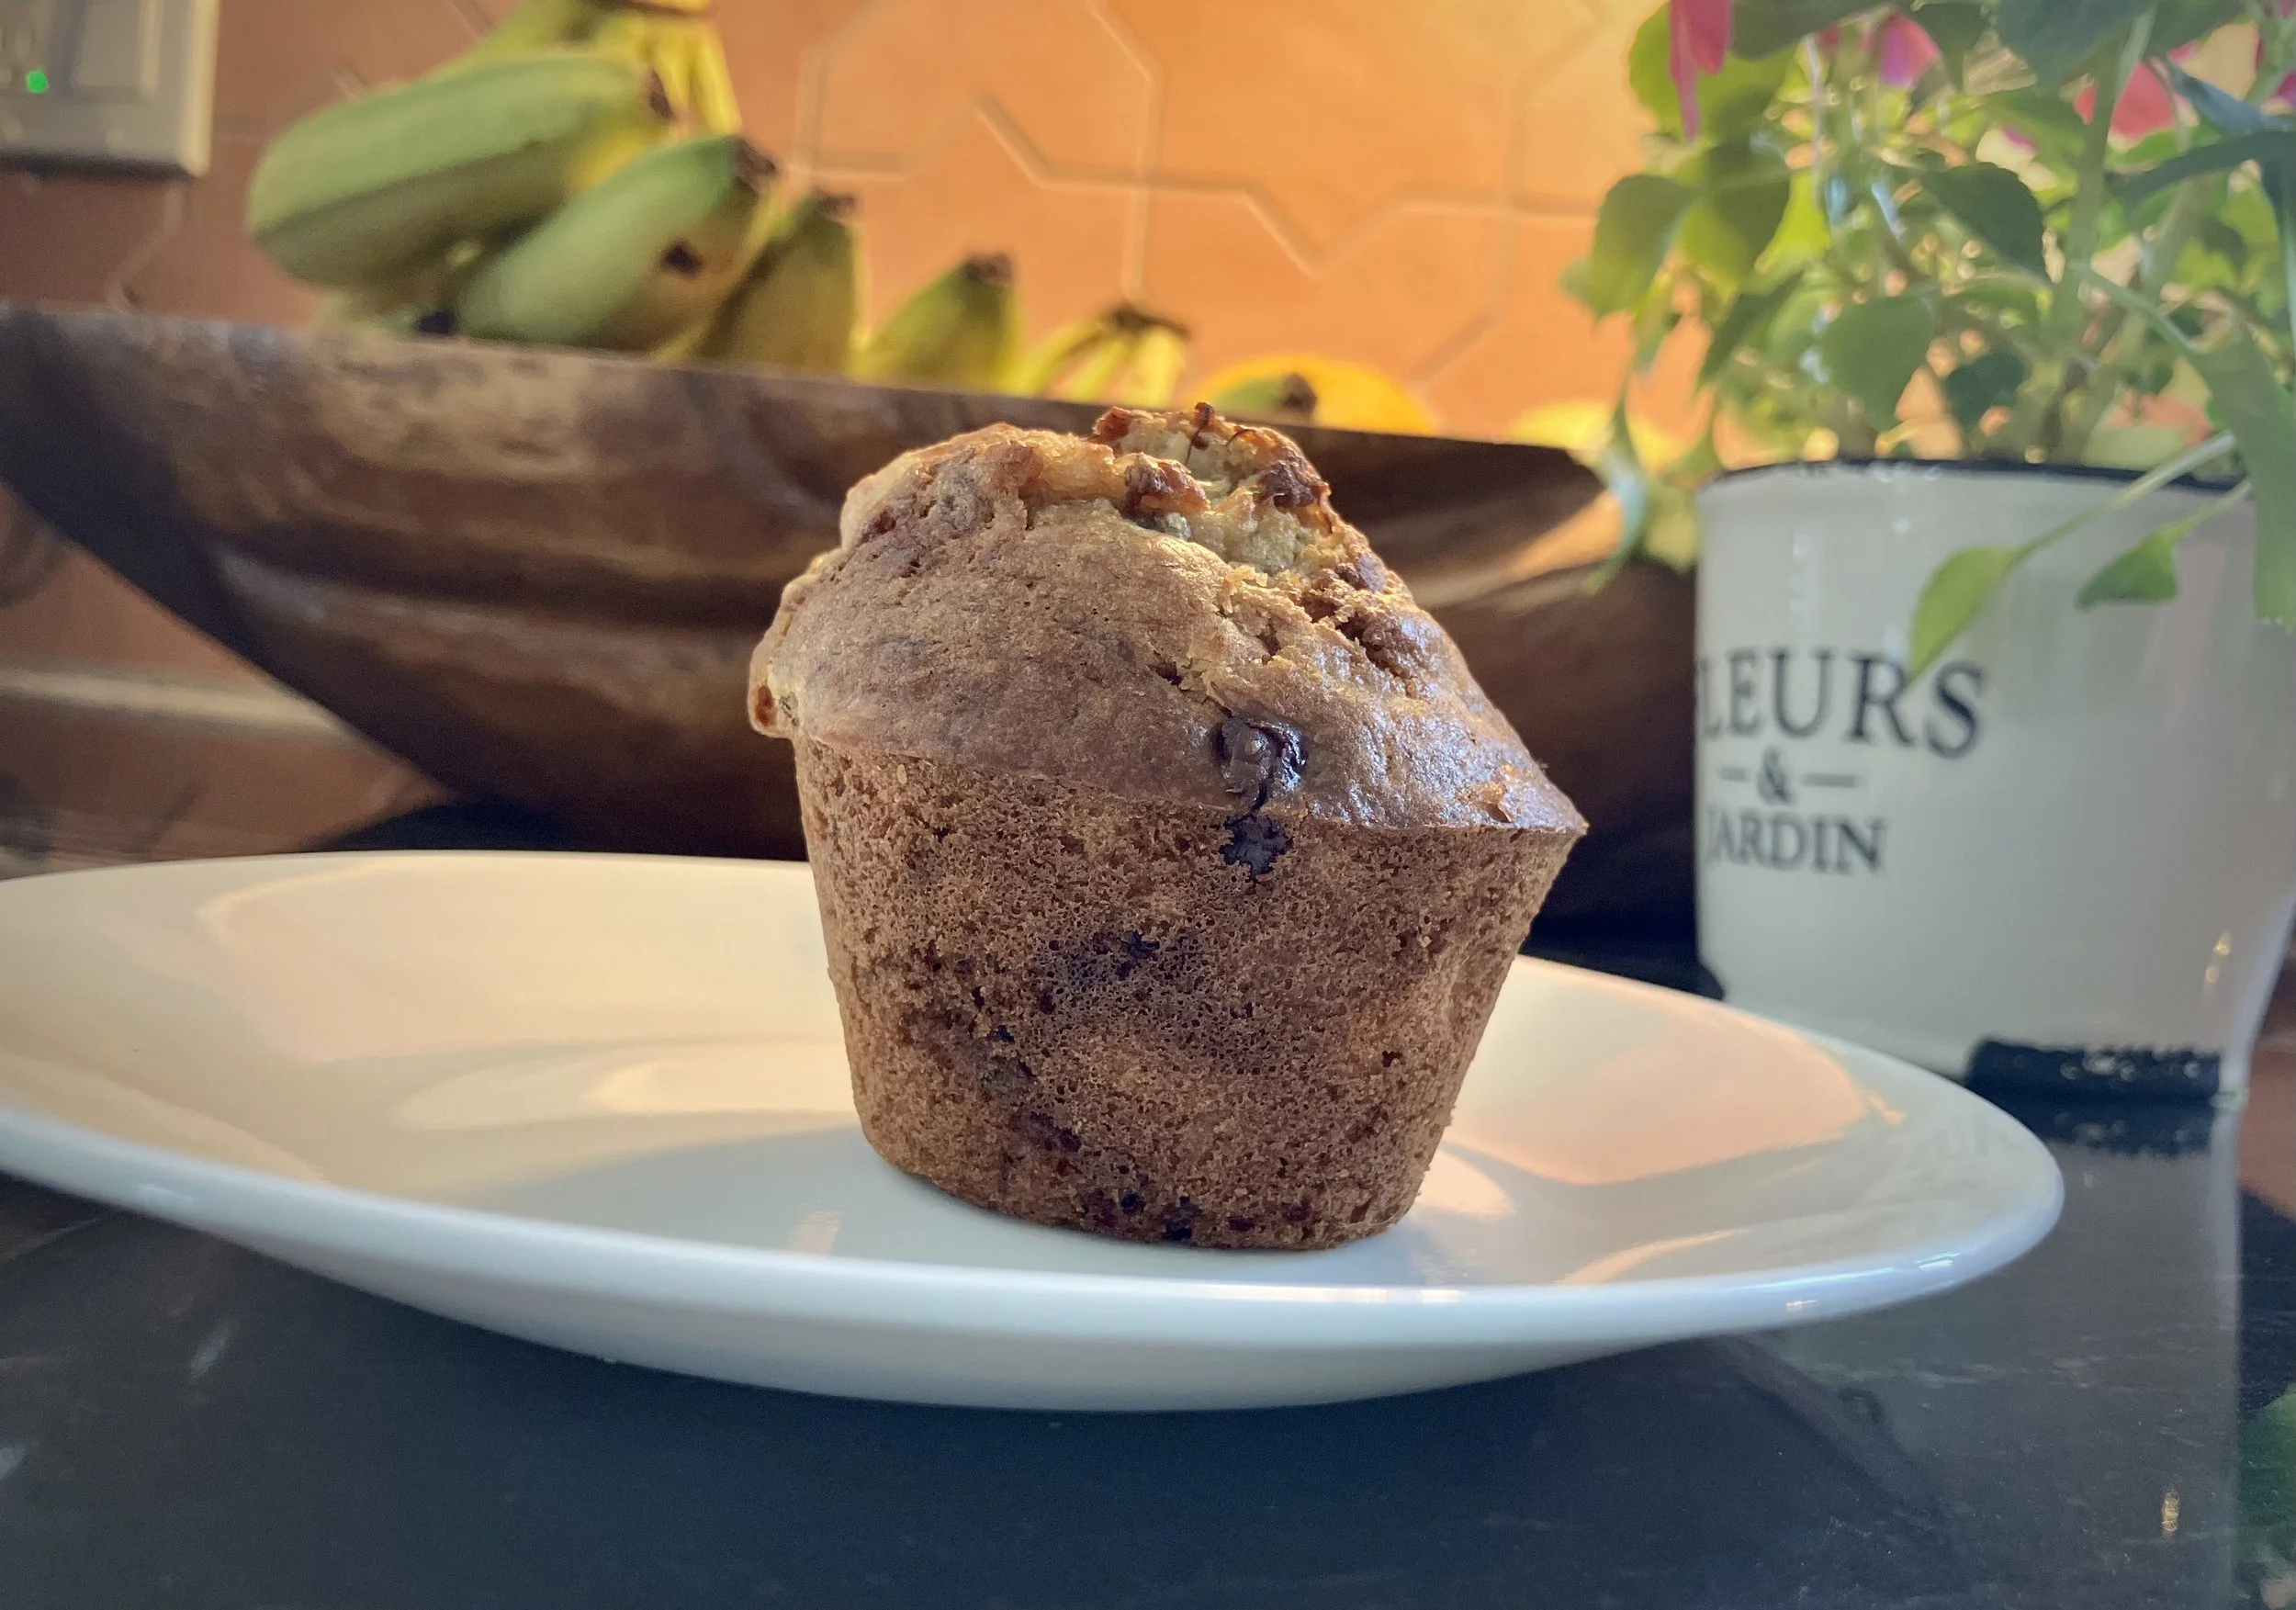
Easy Banana Chocolate Chip Muffins Recipe (Moist & Delicious)
Easy and Moist Homemade Banana Chocolate Chip Muffins
As an Amazon Associate I earn from qualifying purchases.
Last edited: 19 March 2026
⭐⭐⭐⭐⭐ (4.9/5 based on reader reviews)
📖 Jump to Recipe | 💬 Jump to FAQs | 🖨️ Print Recipe
Prep Time: 10 minutes | Cook Time: 18-22 minutes | Total Time: 28-32 minutes | Yield: 12 muffins
The Perfect Way to Use Overripe Bananas
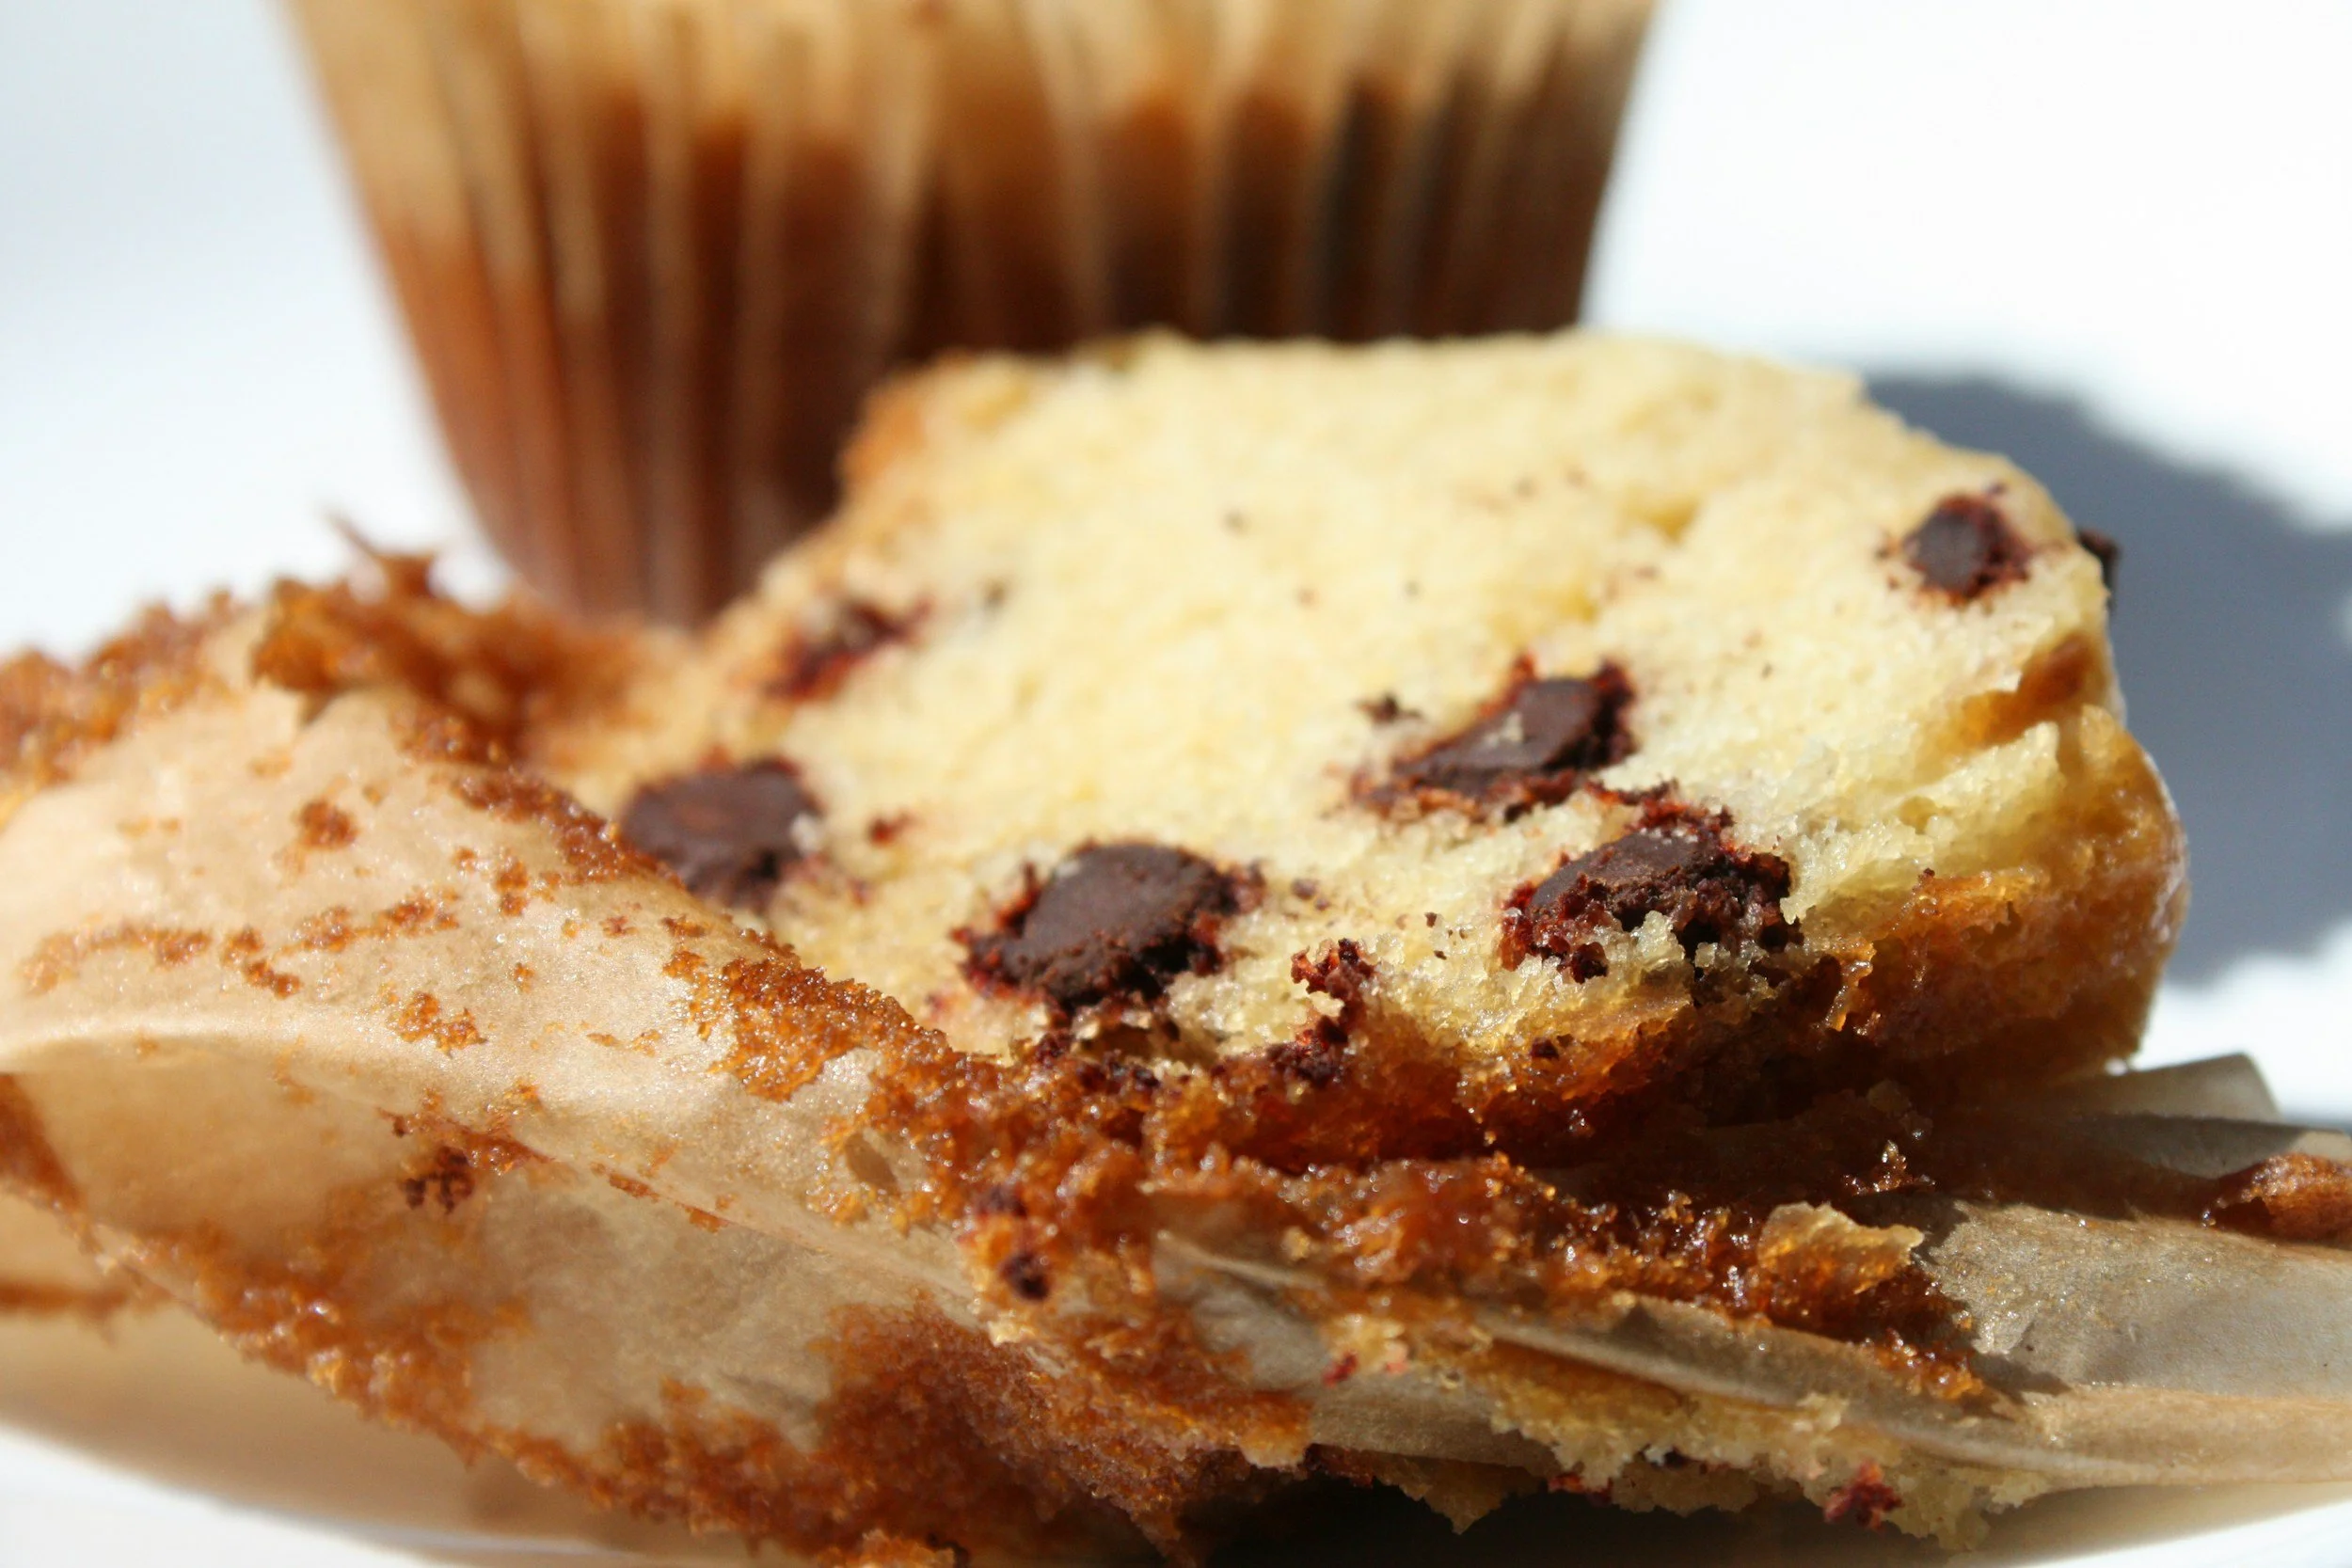
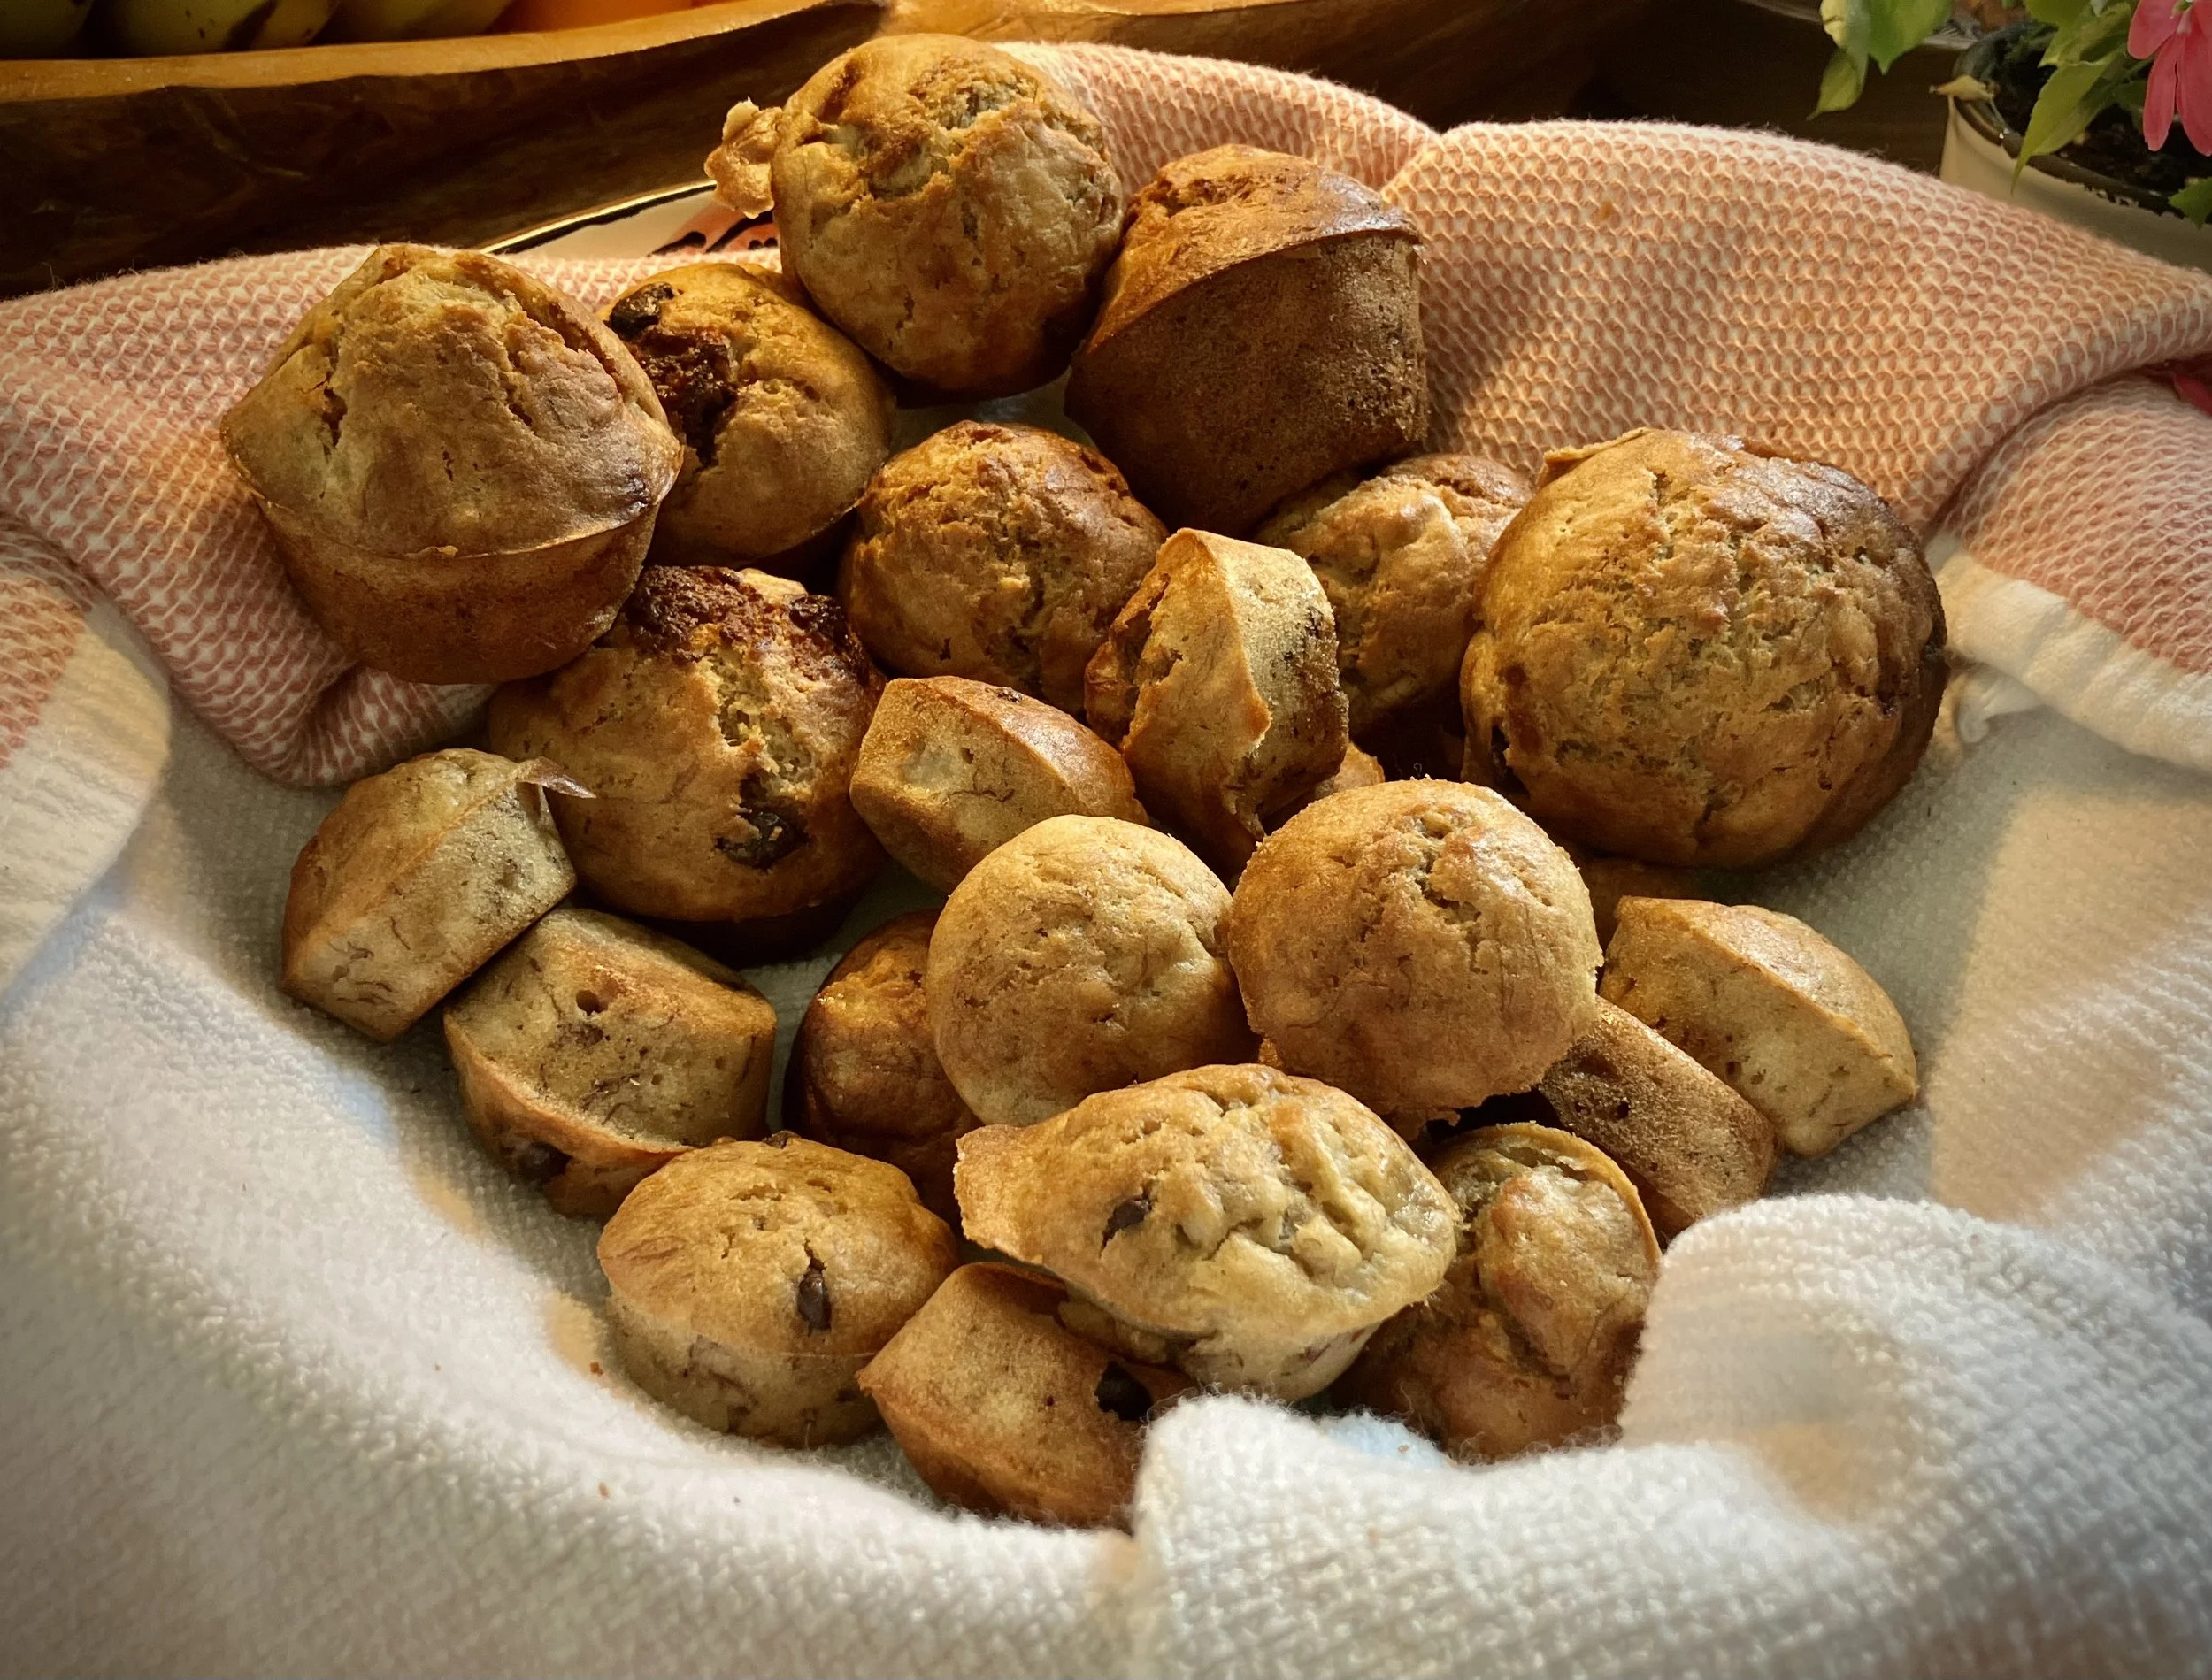
There's something magical about the aroma of freshly baked banana chocolate chip muffins filling your kitchen. These moist, tender muffins combine the natural sweetness of ripe bananas with indulgent chocolate chips for a treat that's both wholesome and satisfying.
Whether you need a quick breakfast, a lunchbox snack, or an afternoon pick-me-up, this easy one-bowl banana chocolate chip muffin recipe delivers homemade comfort without all the dishes!
Why You'll Love This Banana Chocolate Chip Muffin Recipe
Naturally Sweet & Moist: Overripe bananas provide natural sweetness and moisture, meaning less added sugar and incredibly tender muffins.
Simple Ingredients: Made with everyday pantry staples—no special ingredients required.
Versatile & Convenient: Perfect for busy mornings, after-school snacks, or meal prep. These muffins freeze beautifully and taste freshly baked when warmed.
Family-Friendly: Easy enough for kids to help make, and a treat everyone will love.
Minimal Waste: The perfect solution for those speckled bananas sitting on your counter.
Banana Chocolate Chip Muffins
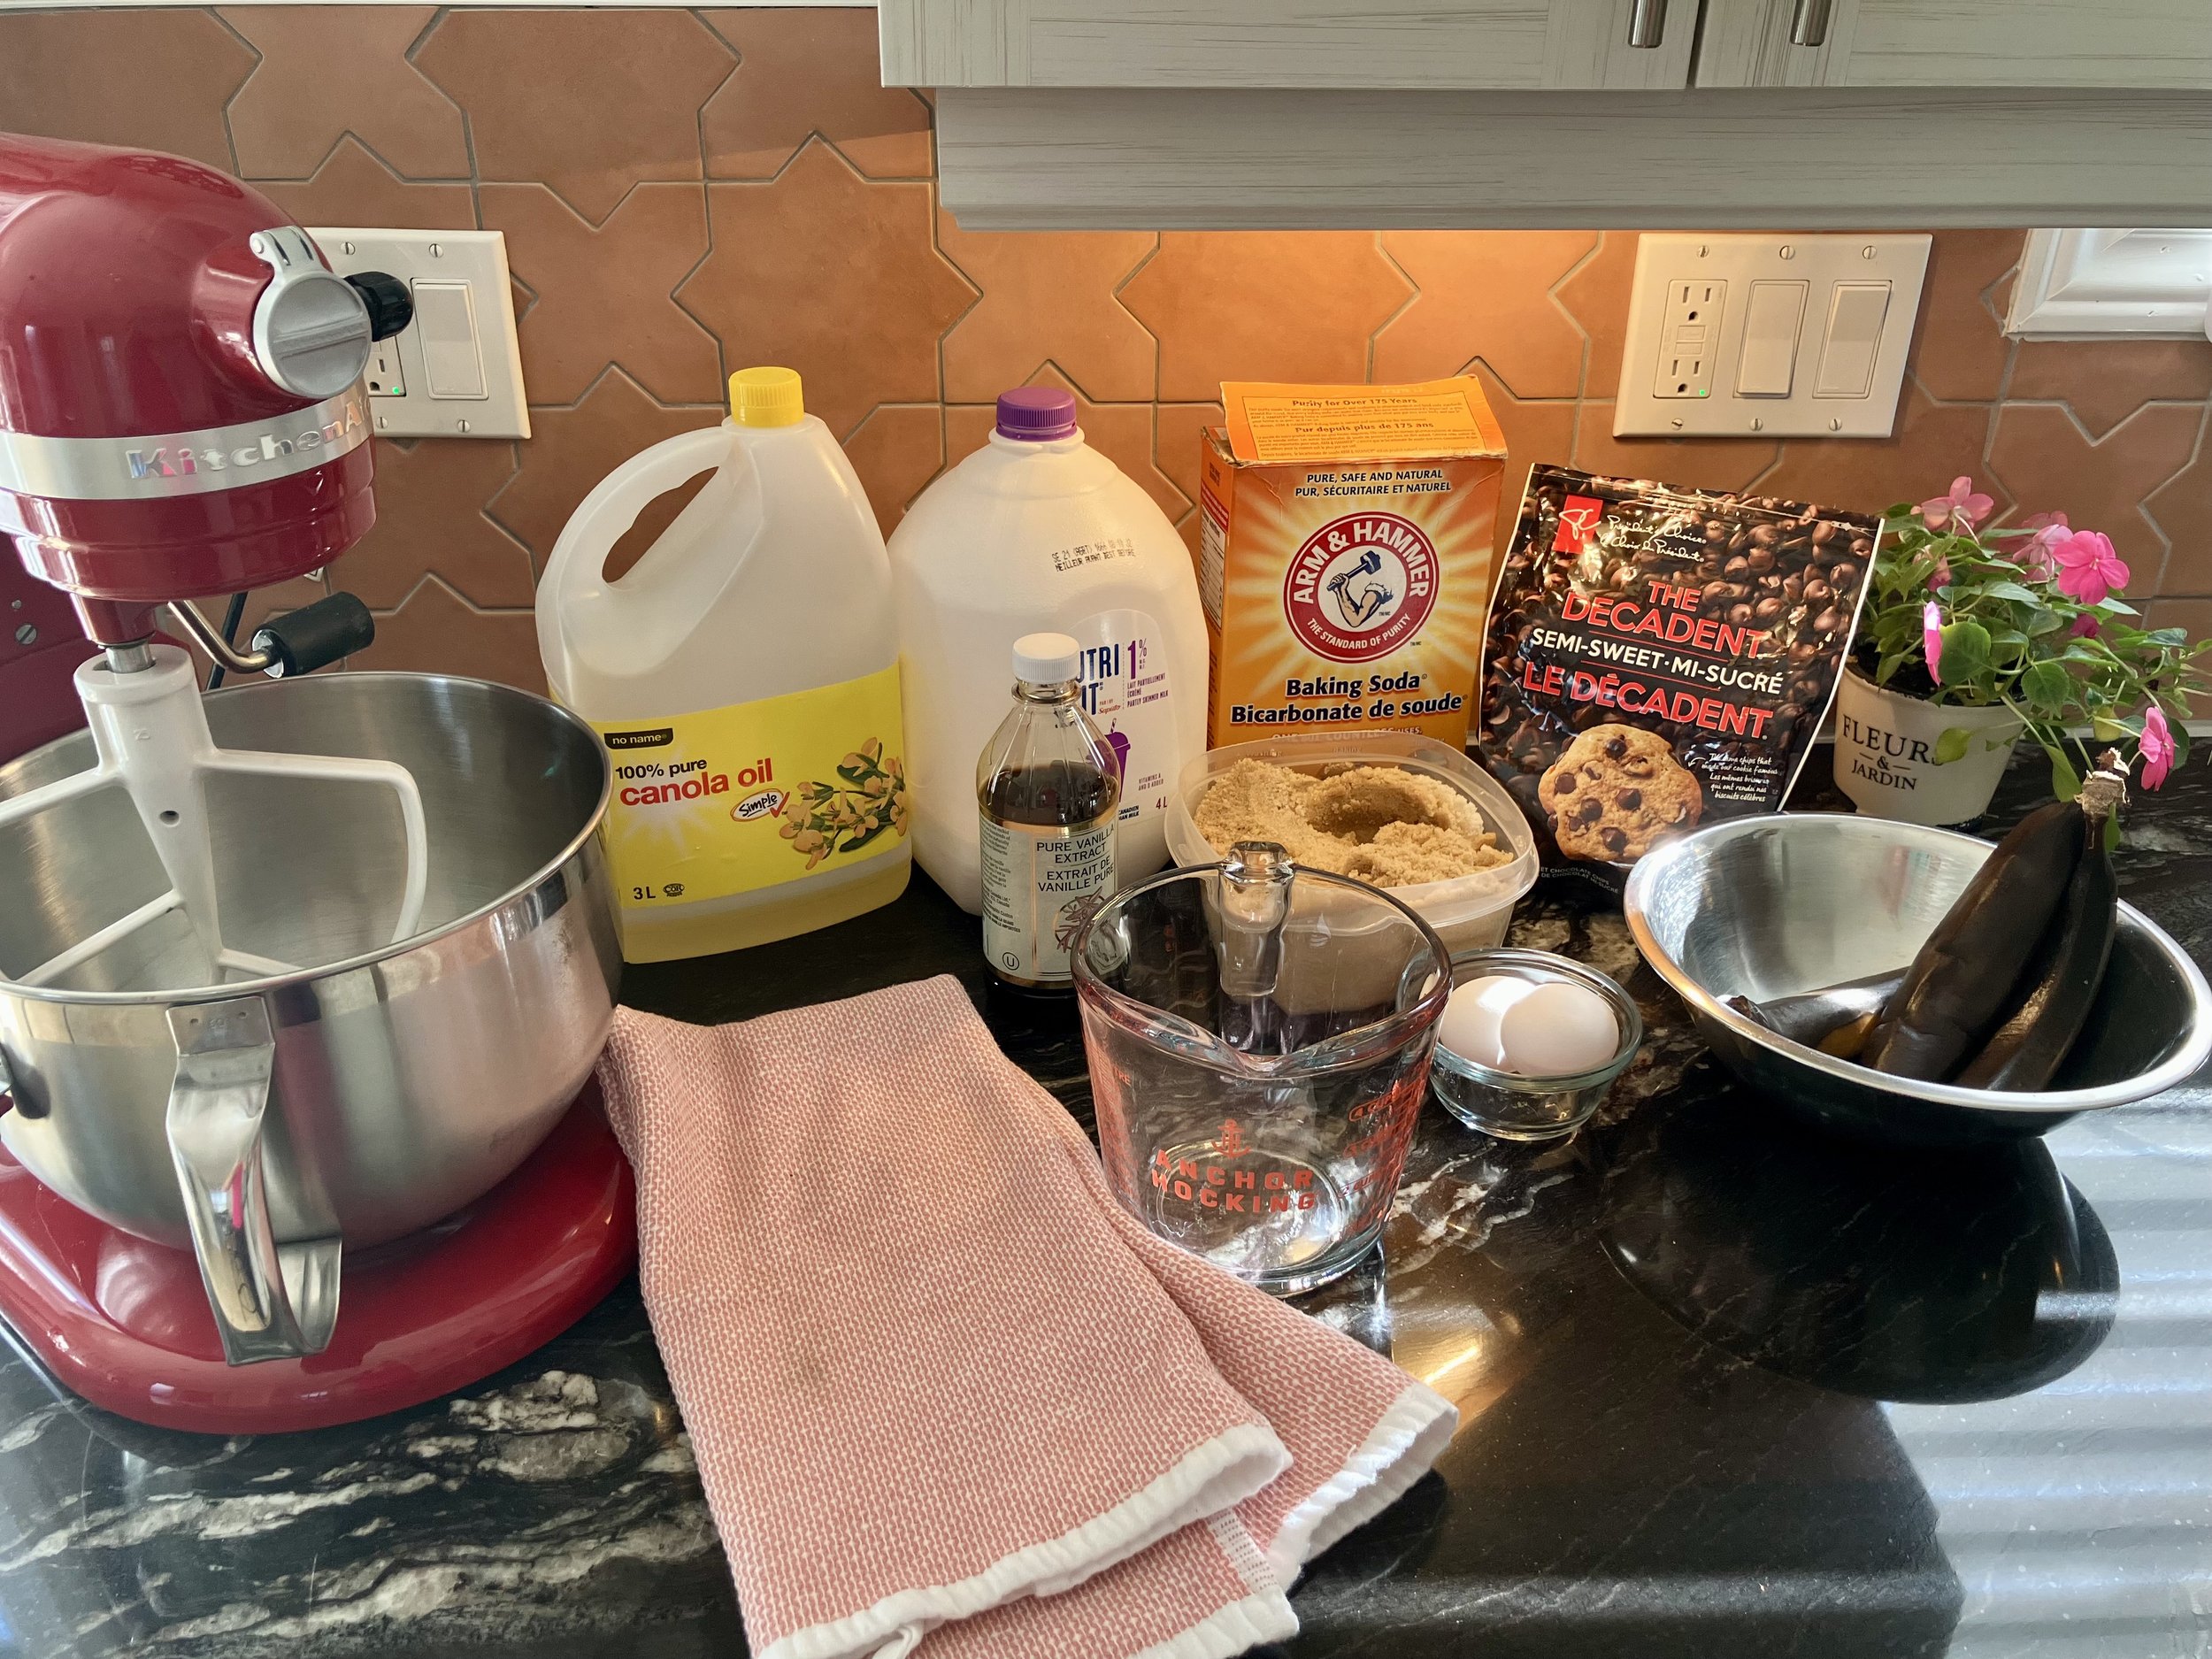
Ingredients
1 cup milk (whole, 2%, or your preferred dairy/non-dairy milk) / 240ml
1/2 cup oil (canola or vegetable oil recommended) / 120ml
1 teaspoon vanilla extract / 5ml
2 large eggs / ~100g
3 ripe bananas (preferably overripe with brown spots; previously frozen bananas work great) / ~300g
1/2 cup brown sugar (packed) / 100g
1 teaspoon baking soda / 5g
1/4 teaspoon salt (optional but recommended for flavor balance) / 1.5g
2 cups all-purpose flour / 250g
1/3 cup chocolate chips (semi-sweet or milk chocolate) / 60g
Ingredient Notes:
Bananas: The riper, the better! Brown, speckled bananas are sweeter and easier to mash. Frozen and thawed bananas work exceptionally well.
Oil: Keeps muffins moist. Canola, vegetable, or melted coconut oil all work.
Salt: While optional, a small amount of salt enhances the overall flavor and balances the sweetness.
Flour: Don't over-mix once flour is added to maintain a tender texture.
Equipnment NEeded:
large mixing bowl (affiliate link), or standmixer with paddle attachment
spatula (affiliate link)
measuring cups and spoons (affiliate link)
muffins pan (affiliate link)
muffin liners (affiliate link)
storage container or freezer safe bags
How to Make Banana Chocolate Chip Muffins: Step-by-Step Instructions
Prep Time: 10 minutes | Cook Time: 18-22 minutes | Total Time: 28-32 minutes | Yield: 12 regular muffins or 24 mini muffins | Servings: 12
Instructions:
Step 1: Preheat Your Oven Preheat oven to 350°F (175°C). Line a 12-cup muffin pan with paper liners or grease wells with cooking spray.
Step 2: Mash the Bananas In a large mixing bowl or stand mixer with the paddle attachement, add the 3 bananas (including any juices if using thawed frozen bananas). Mix or mash until the bananas are completely pureed and smooth.
Step 3: Add Eggs Add the 2 eggs to the mashed bananas and mix well until fully combined.
Step 4: Mix Wet Ingredients Add the vanilla extract, oil, and milk to the banana-egg mixture. Mix until all wet ingredients are well incorporated.
Step 5: Add Leavening and Sugar Add the baking soda, salt (if using), and brown sugar to the wet mixture. Mix thoroughly until the sugar is dissolved and everything is well combined.
Step 6: Incorporate Flour (Don't Over-Mix!) Add the 2 cups of all-purpose flour to the wet ingredients. Important: Mix gently until the flour is just incorporated. Small lumps are okay—over-mixing will result in tough, dense muffins. Stop mixing when you can still see a few streaks of flour.
Step 7: Fold in Chocolate Chips Gently fold the chocolate chips into the batter using a spatula. Use a light folding motion to distribute evenly without over-mixing.
Step 8: Fill Muffin Cups
For regular muffins: Use a 1/4 cup measuring cup or ice cream scoop to fill each muffin cup about 2/3 full.
For mini muffins: Use a 2 tablespoon measuring spoon to fill mini muffin cups.
Step 9: Bake Bake for 18-22 minutes for regular muffins (12-15 minutes for mini muffins), or until a toothpick inserted into the center comes out clean or with just a few moist crumbs. The tops should be golden brown and spring back when lightly touched.
Step 10: Cool Remove from oven and let muffins rest in the pan for 5 minutes, then transfer to a wire cooling rack. Serve warm or at room temperature.
Storage Instructions
Refrigerator: Store cooled muffins in an airtight container in the refrigerator for up to 5-7 days.
Freezer: Freeze muffins in a freezer-safe bag or container for up to 3 months. Thaw in the fridge or warm in the microwave for 15-20 seconds.
Freezing Batter: This recipe doubles well, and you can freeze the batter. Be sure to thaw out the batter in the fridge 1-2 days before using it. Baking as indicated in the above recipe.
Tips for the Best Banana Chocolate Chip Muffins
Use very ripe bananas: The browner and more speckled, the better. They're sweeter and easier to mash.
Don't over-mix: Once you add the flour, mix just until combined. Over-mixing develops gluten and creates tough, dense muffins.
Room temperature eggs: Let eggs come to room temperature for better mixing.
Customize your add-ins: Try adding 1/2 cup chopped walnuts, pecans, or a pinch of cinnamon for variety.
Test for doneness: Insert a toothpick into the center of a muffin. It should come out clean or with a few moist crumbs (not wet batter).
Fill cups consistently: Use a scoop or measuring cup for evenly sized muffins that bake uniformly.
Recipe Variations
Healthier version: Substitute half the all-purpose flour with whole wheat flour or oat flour
Extra moist: Add 1/4 cup Greek yogurt or sour cream
Vegan: Use flax eggs (2 tablespoons ground flaxseed + 6 tablespoons water) and non-dairy milk
Nut-free: Ensure chocolate chips are produced in a nut-free facility
Extra chocolate: There are two options here: Option 1: Increase chocolate chips to 1/2 cup. Option 2: Mix 2 tablespoons cocoa powder and coffee together. Add the cocoa and coffee mixture to the batter for a deep fudge taste we all know and love.
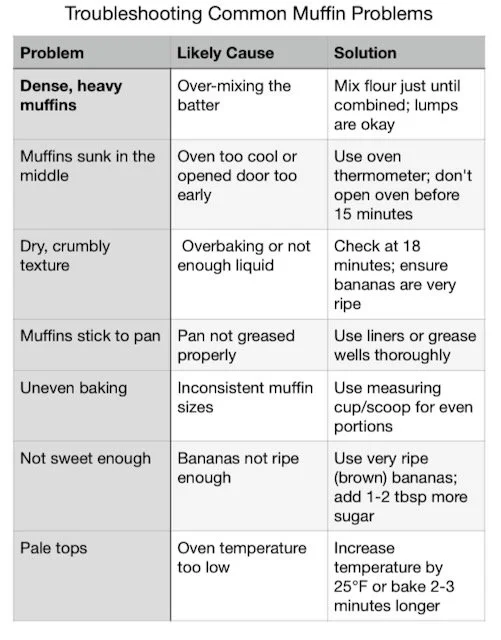
Troubleshooting Common Banana Muffin Problems
Frequently Asked Questions (FAQs)
Can I use frozen bananas for banana chocolate chip muffins?
Yes! Frozen bananas work excellently for this recipe. Thaw them completely and use all the liquid that accumulates—it adds extra moisture and flavor. The bananas will be very soft and easy to mash after thawing.
Why are my banana muffins dense and not fluffy?
The most common cause is over-mixing the batter after adding the flour. Mix only until the flour is just incorporated—a few lumps are fine. Over-mixing develops gluten, which makes muffins tough and dense instead of light and tender.
How ripe should bananas be for muffins?
The riper, the better! Look for bananas with lots of brown spots or even completely brown peels. Very ripe bananas are sweeter, easier to mash, and provide more banana flavor. If your bananas aren't ripe enough, you can speed up the process by placing them in a paper bag for 1-2 days.
Can I make banana chocolate chip muffins without eggs?
Yes, you can make egg-free banana muffins. Replace each egg with one of these options:
Option 1: 1 flax egg (1 tablespoon ground flaxseed + 3 tablespoons water, let sit 5 minutes)
Option 2: 1/4 cup unsweetened applesauce
Option 3: 1/4 cup mashed banana (in addition to the 3 bananas in the recipe)
How do I store banana muffins to keep them moist?
Store completely cooled muffins in an airtight container. Keep them in the refrigerator for 5- 7 days. For longer storage, freeze muffins in a freezer-safe bag for up to 3 months. To maintain moisture, you can place a paper towel in the container to absorb excess condensation.
Can I freeze banana chocolate chip muffins?
Absolutely! These muffins freeze beautifully. Cool completely, then place in a freezer-safe bag or container with parchment paper between layers. Freeze for up to 3 months. Thaw in the fridge the day before or microwave for 20-30 seconds for a warm, freshly-baked taste.
How long do banana chocolate chip muffins last?
At room temperature in an airtight container: 2-3 days.
In the refrigerator: 5-7 days.
In the freezer: up to 3 months.
Can I double this banana muffin recipe?
Yes! This recipe doubles easily. You can either bake all the muffins at once (using multiple pans) or freeze half the batter for later. Frozen batter can be baked directly from frozen—just add 3-5 extra minutes to the baking time.
What can I substitute for oil in banana muffins?
You can replace oil with:
Melted butter (for richer flavor)
Unsweetened applesauce (for a lower-fat option, though muffins will be slightly less moist)
Greek yogurt (reduces fat and adds protein)
Melted coconut oil
Why did my muffins sink in the middle?
Muffins can sink for several reasons:
Oven temperature too low (use an oven thermometer to verify)
Opening the oven door too early (wait at least 15 minutes)
Over-mixing the batter
Too much leavening (baking soda)
Underbaking
Can I make these muffins healthier?
Yes! Try these healthier swaps:
Replace half the all-purpose flour with whole wheat or oat flour
Reduce brown sugar to 1/3 cup
Add 1/4 cup Greek yogurt for protein
Use dark chocolate chips (higher in antioxidants)
Add ground flaxseed or chia seeds (1-2 tablespoons)
What size muffins does this recipe make?
This recipe yields:
12 regular-sized muffins (using a standard 12-cup muffin pan)
About 24 mini muffins (using a mini muffin pan)
About 6 jumbo muffins (bake for 25-30 minutes)
Can I add nuts to banana chocolate chip muffins?
Definitely! Chopped walnuts or pecans (1/2 to 3/4 cup) pair beautifully with banana and chocolate. Fold them in along with the chocolate chips. For nut allergies, these muffins are naturally nut-free without additions.
How do I know when banana muffins are done baking?
Muffins are done when:
A toothpick inserted in the center comes out clean or with a few moist crumbs
The tops are golden brown and spring back when gently pressed
They've baked for 18-22 minutes at 350°F
The edges are just starting to pull away from the pan
Can I use whole wheat flour instead of all-purpose flour?
Yes, but with adjustments. For best results, replace only half the all-purpose flour with whole wheat flour (1 cup of each). Using 100% whole wheat flour will make the muffins denser and heartier. You may also want to add an extra tablespoon of milk to compensate for whole wheat's higher absorption.
Why These Muffins Are More Than Just a Recipe
Banana chocolate chip muffins are about more than satisfying a sweet craving—they're about creating small moments of joy. They're simple enough for children to help stir together, quick enough for last-minute baking, and delicious enough to become a beloved family favorite.
The next time you spot those speckled bananas on your counter, don't let them go to waste! Transform them into something warm, delicious, and wholesome.
Happy baking!
Did You Make This Recipe? I want to see it!
Leave a picture and a ⭐ star rating and comment below to let us know how your muffins turned out. Did you make any substitutions or additions? Share your tips and photos with us!
Share this recipe: Help others discover this delicious recipe by sharing it on Pinterest, Facebook, or Instagram. Tag us @Sageandsimplicity so we can see your beautiful creations!
📌 Pin it for later: Save this recipe to your Pinterest boards for easy access when those overripe bananas appear on your counter.
Recipe Category: Breakfast, Snack, Dessert
Cuisine: American
Diet: Vegetarian
Skill Level: Beginner
Equipment Needed: Mixing bowl, muffin pan, measuring cups and spoons, fork, stand mixer (optional) or electric mixer (optional)
Related Searches: banana bread recipe, chocolate chip muffins, healthy breakfast muffins, banana oat muffins, easy muffin recipes, banana recipes, freezer breakfast ideas